#Ghirardelli Cocoa Powder
Explore tagged Tumblr posts
Visit Tumblr Blog
Explore Tumblr blogs with no restrictions, modern design and the best experience.
Last Seen Tumblr Blogs


Fun Fact
Kazakhstan’s Minister of Communications and Informatics has blocked the Tumblr site because it contained 60 sites of terrorism, extremism, and pornography in 2015.
Text
Delicious 4-Ingredient Flourless Protein Brownies – A Guilt-Free Chocolate Treat!
Craving a chocolate treat but want to keep it healthy? These 4-ingredient flourless protein brownies are the perfect solution!
Moist and delicious Protein Brownies. Craving a chocolate treat but want to keep it healthy? These 4-ingredient flourless protein brownies are the perfect solution! Packed with protein and natural sweetness from bananas, they’re ideal for a quick, guilt-free snack or dessert. Plus, they’re incredibly easy to make with just a few simple ingredients: bananas, protein powder, cocoa powder, and nut…

View On WordPress
#Bananas#Flourless#Ghirardelli Cocoa Powder#Gluten-Free#Healthy Snack#Orgain Organic Plant Based Protein Powder#Protein Brownies
0 notes
Text
For no particular reason: Lola's homemade chocolate
Today is Lola the Corgi's presumed birthday. We chose it approximately, while at the vet's, because Lola's story is nothing short of a canine miracle. She jumped in my cab, somewhere in the humble outskirts of Bucharest, on Saint Nicholas' Day. The driver asked, absurdly, if that was 'my dog' and I simply answered 'well, now it is'.

Little did we know the shaking, stone cold and scared to death puppy was a very rare Cardigan Corgi - this came later, when a British friend was amazed at the recovery and pointed it out adamantly. She could have been stolen or simply lost, but we will never know and we never looked back.
All our dogs had Spanish names (except for cats, always boys and always Pasha, namesakes of a beloved Shipper Mom's childhood pet), simply because they are easy to learn and remember. In her case, Lola is for...

for well... for obvious locomotion reasons 🤣 #LolaFlores. Twelve years with a supremely intelligent and empathic friend deserved a batch of my homemade chocolate, don't you think?
Too bad she can't try it. But enough babbling, here goes.
You will need: 2 cups/ 250 grams milk powder - I recommend Nestlé's Carnation, if you can't get hold of Rarăul, the obscure, Communist local brand (so damn good); 2 sticks/200 grams full fat butter (I recommend Irish butter, always with excellent results), at room temperature, cubed; 7 Tablespoons/50 grams cocoa (Dutch, if you can, but I prefer either Ghirardelli or the Greek Ion brand, which I think are the best on this planet); 2½ cups/ 500 grams Demerara sugar (or caster sugar). A dash of instant coffee, for decorating. You can replace sugar by stevia sweetener (measure accordingly - I used this, because I was also cooking for a severe diabetic who can't control herself), with very good results. Optional: crushed tea biscuits or cookies in the US/chopped hazelnuts/pine nuts/walnuts/peanut butter (in swirls) - sky is the limit. For the adult version, feel free to add a hefty swig of brandy/rhum/whisky/bourbon/vodka/limoncello or hey, let's be totally dirty (sssh!), Bailey's.
In a nonstick pan, gently simmer 3/4 cup or 170 ml cold water with ALL the sugar. Stir nonstop (only with wooden spoon or silicone spatula, never metal - it lends a foul taste!) until you get a sort of thin syrup - basically the sugar should dissolve, nothing more. 2 to 3 minutes should be enough.
Add the cubed butter, stir gently until it melts and incorporates completely. 10 minutes max, but never stop stirring!
Take the pan off the heat. Gently pour dry milk in small batches, stirring and incorporating continuously. It should immediately thicken, sticky fudge consistency.
Gently mix the cocoa, with slow, ample bottom/top movements (you don't want it anywhere else but in that pan, for sure). Right consistency should be a thick ribbon, pouring from the spoon.
Back to the heat for about 30 to 45 seconds, stirring all the time. I have no idea why, but my grandma always insisted it was very important, go figure. Take off the heat and immediately add the nuts and (if you choose) the alcohol, mixing vigorously.
Pour into a well buttered loaf tin. Dust with instant coffee. Let cool, put into fridge for 6 hours minimum (overnight is better). Only cut with a wet knife. Devour and don't think about the damn calories.
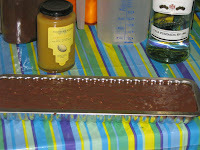
I am sorry for the very, very old pic (2010, I think). Tonight, it was impossible to take a proper one 😱.
This is what we do call 'homemade chocolate' all over Eastern Europe, but to be honest, it's rather some very, very good fudge. The dry milk is a dead giveaway of the real age of the recipe, which is around 1945 - postwar rationing, of course.
You are welcome. You won't regret the 45 minutes you're likely to spend making it.
53 notes
·
View notes
Photo

After years of testing, we have finally perfected the ultimate chocolate cake recipe. Our recipe has been tried and loved by tens of thousands of people worldwide, all of whom agree that it is the most amazing chocolate cake ever. We promise, once you try this recipe, you won’t go back to the others. For more delicious cake, try our Most Amazing Texas Sheet Cake. Why Our Recipe It’s Moist! — One of the key measures of a chocolate cake is whether or not it is moist. This one checks every box! One Bowl —The batter is made in just one bowl, so no combining wet and dry ingredients separately. Rich Chocolate Flavor — This cake is rich and fudgy, making it a true indulgence for any chocolate cake lover. This fudgy chocolate cake is so decadent, it has gained the nickname “The Matilda Cake” because it looks just like the cake eaten by Bruce Bogtrotter in the movie Matilda. And I’ll take that as a compliment! This cake really is the chocolate cake of my dreams. Ingredient Notes All-Purpose Flour:The main structural component. It provides the cake’s texture and body. Unsweetened Cocoa Powder: We recommend Hershey’s cocoa powder as it’s widely available. You can also use higher-quality options like Ghirardelli or those from specialty chocolatiers, though they may be more expensive. Baking Soda & Powder: Check the expiration date to ensure proper leavening. Granulated Sugar: Stick with standard granulated sugar for best results. Buttermilk: Adds moisture and a slight tang to balance the sweetness. Warm it in the microwave for 20-30 seconds to bring it to room temperature quickly. Eggs: Room-temperature eggs make for a fluffier cake. To warm eggs quickly, submerge them in a bowl of warm water for 5 minutes. Vegetable Oil: Provides essential moisture for the softest cake texture. Vanilla Extract: Use a full tablespoon to bring out the bold vanilla flavor. Opt for pure vanilla extract if possible for the best results. Types of Cocoa Powder Cocoa powder is an important ingredient in many baked goods and can affect the flavor and texture of the final product. It is important to use the type of cocoa powder specified in a recipe, as using the wrong type can alter the balance of flavors and sweetness. There are several types of cocoa powder available, each with its own distinct flavor and properties. Unsweetened cocoa powder, specifically Hershey’s brand, was used in this cake recipe as it is the most widely available. You can also use higher-quality cocoa powders such as Ghirardelli or those from specialty chocolatier shops, but they can be expensive. It is recommended to avoid using inexpensive store brands as they tend to not produce the best results. Dutch-process cocoa powder is a type of cocoa that has been treated with an alkali to neutralize its acidity. It has a milder flavor and darker color than natural cocoa powder, and is also easier to dissolve in liquids. When using dutch-process cocoa powder in place of unsweetened cocoa powder in a recipe, it is important to consider that it may behave differently due to its lower acidity. However, in this recipe, dutch-process cocoa can be used without making any other modifications. *For the dark-colored frosting in these photos, Hershey’s Special Dark Unsweetened Cocoa Powder was used. Pan Size Adaptions This chocolate cake recipe yields approximately 9 cups of batter total, or 3 cups for each of the 9-inch layers. Here are some popular pan sizes and the approximate amount of batter needed for each individual pan: 9×2-inch round pan: 3 cups batter 8×2-inch round pan: 2 1/4 cups batter 13×18-inch sheet cake pan: 6 cups batter 9×13-inch pan: 6 cups batter 12 standard cupcakes: 3 cups batter 10-12 cup bundt cake pan: 8 cups batter As a general rule, cake pans should be filled 2/3rds of the way full for cake baking, unless otherwise specified in the recipe. It’s always a good idea to check for doneness by inserting a toothpick or cake tester into the center of the cake. If it comes out clean or with just a few crumbs attached, the cake is likely done. You can also gently press the center of the cake with your finger – if it springs back, it is probably ready to be removed from the oven. Frosting Options Chocolate Ganache: Only 2 ingredients—chocolate and heavy cream. It’s often used as icing or as a filling. Some chefs even use it as a dipping sauce paired with fruit like strawberries. You’ll also see it on donuts and cupcakes. It’s rich, thick, and sweet. Chocolate Fudge Icing: Icing is often used interchangeably with frosting. Frosting does tend to be a bit thicker, while icing is usually smoother and easier to spread than frosting. This cooked chocolate icing is made with buttermilk, which thickens it up and gives a slight tart taste. Buttercream Frosting: Buttercream is our go-to frosting for most cakes, and it’s pretty easy to see why once you’ve tried it. It is perfectly sweet and creamy, and tastes fantastic. We can eat this stuff by the spoonful, however, we promise it is even better on top of a cake or cupcakes. Cream Cheese Frosting: This frosting is creamy, thick, and has a slight tang. Simply add cocoa powder for a chocolate version. Pistachio Buttercream Frosting: This frosting has a smooth, buttery consistency with a slight crunch from the blended pistachio nuts. This frosting pairs so well with chocolate cake. Think Dubai chocolate bar—the combination can’t be beat. Sweetened Condensed Milk Frosting: A simple and easy way to make a creamy, sweet frosting. Whether you are making chocolate or vanilla frosting, it only takes 3 ingredients! Even Layers Like a Pro Weigh the Batter: Use a kitchen scale to divide the batter equally between the pans. Weigh the empty pans first, then weigh them again with the batter to ensure they’re evenly distributed. Level the Batter: Once the batter is in the pans, gently tap each pan on the counter to release any air bubbles and even out the surface. Trim After Baking: After the cakes are fully cooled, use a serrated knife or a cake leveler to trim any domed tops. This step ensures a flat surface for stacking. Use Baking Strips: Baking strips wrapped around the outside of the pans can help prevent doming and create more uniform layers. Storage Instructions Store the assembled cake in an airtight container or cake dome at room temperature for up to 2 days. For cream cheese or perishable frostings, store in the refrigerator for up to 4 days. Freeze Unfrosted Layers: After wrapping in plastic wrap, add a layer of aluminum foil to prevent freezer burn. Label with the date and freeze for up to 3 months. Thaw in the refrigerator overnight before decorating. Freeze Frosted Cakes: Freeze in a single layer on a baking sheet until solid, then wrap tightly in plastic wrap and aluminum foil. Store for up to 2 months. Thaw in the refrigerator overnight before serving. More decadent chocolate desserts… Source link
7 notes
·
View notes
Text
On the 2nd day of Christmas, Ant-Man gave to you:
My hot chocolate recipe! It's like the only sweet thing I can make since no baking is involved *laughs*

Ingredients:
4 cups of whatever milk you want (nice, right?)
1/4 cup of sugar (I recommend cane sugar if you've got it)
1 whole cinnamon stick
1/2 whole vanilla bean, scraped OR 2 teaspoons vanilla extract
1/4 cup cocoa powder of your choice (Hershey's or Ghirardelli would be my recommendation)
3 & 1/2 ounces semi-sweet chocolate of your choice (NOTE: if you want to use milk chocolate instead of semi-sweet, then just ignore the sugar part of the ingredients)
pinch of salt (kosher salt if you've got it)
whatever you wanna use to top your hot chocolate
Instructions:
Use a sharp knife to chop the chocolate into small pieces, the smaller the better but like it doesn't have to be super fine, ya know? just get them like chocolate chip size or smaller
Add the milk, powder, chocolate, sugar, vanilla, cinnamon stick, and salt to a medium saucepan that's on low heat
Stir regularly! That's an important tip. Use a whisk if you've got one or a spoon if you don't.
Warm and stir until the chocolate has completely melted.
Remove the cinnamon stick from the saucepan and the vanilla bean (if you didn't use extract) and just throw those away.
Divide it up into mugs, add your toppings, and enjoy!
#scott's thoughts#12days2024#christmas2024#hot chocolate#hot cocoa#recipe#hot chocolate recipe#hot cocoa recipe#is this hot cocoa or hot chocolate?#no idea#it tastes good that's all I know#christmas
10 notes
·
View notes
Photo

After years of testing, we have finally perfected the ultimate chocolate cake recipe. Our recipe has been tried and loved by tens of thousands of people worldwide, all of whom agree that it is the most amazing chocolate cake ever. We promise, once you try this recipe, you won’t go back to the others. For more delicious cake, try our Most Amazing Texas Sheet Cake. Why Our Recipe It’s Moist! — One of the key measures of a chocolate cake is whether or not it is moist. This one checks every box! One Bowl —The batter is made in just one bowl, so no combining wet and dry ingredients separately. Rich Chocolate Flavor — This cake is rich and fudgy, making it a true indulgence for any chocolate cake lover. This fudgy chocolate cake is so decadent, it has gained the nickname “The Matilda Cake” because it looks just like the cake eaten by Bruce Bogtrotter in the movie Matilda. And I’ll take that as a compliment! This cake really is the chocolate cake of my dreams. Ingredient Notes All-Purpose Flour:The main structural component. It provides the cake’s texture and body. Unsweetened Cocoa Powder: We recommend Hershey’s cocoa powder as it’s widely available. You can also use higher-quality options like Ghirardelli or those from specialty chocolatiers, though they may be more expensive. Baking Soda & Powder: Check the expiration date to ensure proper leavening. Granulated Sugar: Stick with standard granulated sugar for best results. Buttermilk: Adds moisture and a slight tang to balance the sweetness. Warm it in the microwave for 20-30 seconds to bring it to room temperature quickly. Eggs: Room-temperature eggs make for a fluffier cake. To warm eggs quickly, submerge them in a bowl of warm water for 5 minutes. Vegetable Oil: Provides essential moisture for the softest cake texture. Vanilla Extract: Use a full tablespoon to bring out the bold vanilla flavor. Opt for pure vanilla extract if possible for the best results. Types of Cocoa Powder Cocoa powder is an important ingredient in many baked goods and can affect the flavor and texture of the final product. It is important to use the type of cocoa powder specified in a recipe, as using the wrong type can alter the balance of flavors and sweetness. There are several types of cocoa powder available, each with its own distinct flavor and properties. Unsweetened cocoa powder, specifically Hershey’s brand, was used in this cake recipe as it is the most widely available. You can also use higher-quality cocoa powders such as Ghirardelli or those from specialty chocolatier shops, but they can be expensive. It is recommended to avoid using inexpensive store brands as they tend to not produce the best results. Dutch-process cocoa powder is a type of cocoa that has been treated with an alkali to neutralize its acidity. It has a milder flavor and darker color than natural cocoa powder, and is also easier to dissolve in liquids. When using dutch-process cocoa powder in place of unsweetened cocoa powder in a recipe, it is important to consider that it may behave differently due to its lower acidity. However, in this recipe, dutch-process cocoa can be used without making any other modifications. *For the dark-colored frosting in these photos, Hershey’s Special Dark Unsweetened Cocoa Powder was used. Pan Size Adaptions This chocolate cake recipe yields approximately 9 cups of batter total, or 3 cups for each of the 9-inch layers. Here are some popular pan sizes and the approximate amount of batter needed for each individual pan: 9×2-inch round pan: 3 cups batter 8×2-inch round pan: 2 1/4 cups batter 13×18-inch sheet cake pan: 6 cups batter 9×13-inch pan: 6 cups batter 12 standard cupcakes: 3 cups batter 10-12 cup bundt cake pan: 8 cups batter As a general rule, cake pans should be filled 2/3rds of the way full for cake baking, unless otherwise specified in the recipe. It’s always a good idea to check for doneness by inserting a toothpick or cake tester into the center of the cake. If it comes out clean or with just a few crumbs attached, the cake is likely done. You can also gently press the center of the cake with your finger – if it springs back, it is probably ready to be removed from the oven. Frosting Options Chocolate Ganache: Only 2 ingredients—chocolate and heavy cream. It’s often used as icing or as a filling. Some chefs even use it as a dipping sauce paired with fruit like strawberries. You’ll also see it on donuts and cupcakes. It’s rich, thick, and sweet. Chocolate Fudge Icing: Icing is often used interchangeably with frosting. Frosting does tend to be a bit thicker, while icing is usually smoother and easier to spread than frosting. This cooked chocolate icing is made with buttermilk, which thickens it up and gives a slight tart taste. Buttercream Frosting: Buttercream is our go-to frosting for most cakes, and it’s pretty easy to see why once you’ve tried it. It is perfectly sweet and creamy, and tastes fantastic. We can eat this stuff by the spoonful, however, we promise it is even better on top of a cake or cupcakes. Cream Cheese Frosting: This frosting is creamy, thick, and has a slight tang. Simply add cocoa powder for a chocolate version. Pistachio Buttercream Frosting: This frosting has a smooth, buttery consistency with a slight crunch from the blended pistachio nuts. This frosting pairs so well with chocolate cake. Think Dubai chocolate bar—the combination can’t be beat. Sweetened Condensed Milk Frosting: A simple and easy way to make a creamy, sweet frosting. Whether you are making chocolate or vanilla frosting, it only takes 3 ingredients! Even Layers Like a Pro Weigh the Batter: Use a kitchen scale to divide the batter equally between the pans. Weigh the empty pans first, then weigh them again with the batter to ensure they’re evenly distributed. Level the Batter: Once the batter is in the pans, gently tap each pan on the counter to release any air bubbles and even out the surface. Trim After Baking: After the cakes are fully cooled, use a serrated knife or a cake leveler to trim any domed tops. This step ensures a flat surface for stacking. Use Baking Strips: Baking strips wrapped around the outside of the pans can help prevent doming and create more uniform layers. Storage Instructions Store the assembled cake in an airtight container or cake dome at room temperature for up to 2 days. For cream cheese or perishable frostings, store in the refrigerator for up to 4 days. Freeze Unfrosted Layers: After wrapping in plastic wrap, add a layer of aluminum foil to prevent freezer burn. Label with the date and freeze for up to 3 months. Thaw in the refrigerator overnight before decorating. Freeze Frosted Cakes: Freeze in a single layer on a baking sheet until solid, then wrap tightly in plastic wrap and aluminum foil. Store for up to 2 months. Thaw in the refrigerator overnight before serving. More decadent chocolate desserts… Source link
3 notes
·
View notes
Note
Hey! The chili was a HUGE success, requests have been made for it to be a regular meal! So, with that triumph in mind, do you have any other Palomino recipes to share? I'd love to try something else!
Hi love! I'm so thrilled that the chili was a hit, and do I have more Palomino recipes for you! Many of the dishes that showed up in the series are my favourites, and if people are interested, I definitely have more to share 😘
Poppy’s chocolate & rum cupcakes


Darlin's birthday cake featured in Part IV Strawberry Roan is inspired by my own favourite recipe - the chocolate and rum cake. However, since the cake is super rich and heavy, I prefer to make them as cupcakes (pictured are my mini cupcakes and I pair them with fresh strawberries), but you can adapt this recipe for a cake as well.
You taste chocolate on his tongue - and dark rum, must be Poppy's secret ingredient - as it moulds around yours.
As mentioned in the fic, rum is the secret ingredient to this recipe. I've been using this recipe for about 8 years now, and it's adapted for my typical Asian palate i.e. it's not too sweet, and the dark rum gives it a deep flavour and aftertaste that goes perfectly with the chocolate.
Important: The type of cocoa powder makes all the difference. Recently, I've been using Ghirardelli and I love it, it's silky smooth and it has so much depth to the flavour. Alternatively, I used to use a blend of Valrhona and regular cocoa powder (just regular Cadbury drinking cocoa), about 3/4 Valrhona to 1/4 regular cocoa powder. I wouldn't use all Valrhona because it is too dense and it affects the texture of the cake.
Full recipe below the cut:
This is actually the first cake recipe I've ever shared, so apologies in advance if the batch numbers are not completely accurate! The recipe officially makes 36 mini cupcakes, but the output may be a bit more generous since I used to sell these, I always made a few more to take into account margin for error. This recipe should make 12 regular cupcakes.
For the cake:
The chocolate mixture
60g dark chocolate (I use 70% chocolate), chopped
0.6 cup boiling water
0.5 tablespoon espresso powder
6 teaspoon unsweetened cocoa powder (see my note above the cut)
The dry ingredients
3/4 cup all-purpose flour
1/2 teaspoon baking soda
1/4 teaspoon baking powder
1/4 teaspoon salt
Wet ingredients
118g unsalted butter, soft
1/2 cup granulated sugar
3 tablespoons brown sugar
1/2 teaspoon vanilla extract
1.5 eggs (it’s a forgiving recipe - 1 large egg will do as well)
1/4 cup buttermilk
Directions
Make the chocolate mixture first as it needs to cool down before use. Chop up the chocolate into pieces small enough to be melted by boiling water.
Mix the cocoa powder and espresso powder with boiling water, then pour over the chopped chocolate. Stir until chocolate is completely melted and let cool.
Prepare the dry ingredients by stirring everything together in a bowl.
Using a stand mixer or a hand mixer, cream together butter and both sugars until incorporated. Do not overbeat.
Mix in vanilla extract and eggs until well combined, and scrape down the sides and bottom of the mixing bowl.
Pour the cooled chocolate mixture into the wet ingredients and mix until combined. Do not overbeat, scrape down the bowl again.
Alternatively add the dry ingredients and buttermilk to the mixing bowl. Always lead with the dry ingredients, and follow with buttermilk to ensure you don't add too much liquid. The batter should be silky and smooth, but not runny i.e. when you scoop it up with a spoon, it should be the texture of very soft soft serve, but it shouldn't dribble.
It depends on your oven, but for me, this batter doesn't rise a lot, so I fill up the cupcake liners to about 3/4 full. I suggest you bake one cupcake first to test how full you should fill it, and the time it takes. For mini cupcakes, I bake at 150C and check around the 15 minute mark, and they usually take 20 minutes. For regular cupcakes, I would check around the 20 minute mark, they might take up to 30 minutes.
A cupcake is done when it springs back when you press on it and your fingertip doesn't leave a dent. Don't overbake.
Let the cupcakes cool down completely before frosting.
Edit: I forgot to add that I poke little holes in the cupcakes with a toothpick and feed each one with rum before frosting!
For the buttercream:
I always make too much buttercream, because there's nothing quite as frustrating as not having enough for your last cupcake! And trust me, this buttercream is so good you can eat it off a spoon. So put any spare in a mason jar and enjoy it!
125g unsalted butter, cubed and softened at room temperature
1.8 cups powdered sugar
0.5 cup Dutch-processed cocoa powder
0.3 cup heavy whipping cream
pinch of salt
1.6 tablespoon rum
Directions
Beat butter until it's soft and sticks to the side of the bowl in soft strips. When you scrape down with a spatula, you should meet no resistance and it should slide smoothly down the side of the bowl.
Add powdered sugar in half cups, scraping down the sides and bottoms of the bowl in between until the texture reaches the consistency of buttercream.
Alternatively mix in cocoa powder and whipping cream, always starting with the powder and ending with the cream. Add just enough cream for the the powder to incorporate into the frosting.
Add the rum bit by bit with the mixer on the slowest setting to make sure the buttercream isn't too wet - it will curdle if it does, and you want the buttercream to have enough structural integrity to pipe.
These cupcakes can be frozen frosted or unfrosted, and imho they taste even better when allowed to 'age'. Keep in freezer for up to 3 weeks, thaw in fridge overnight before eating. Pair with fresh berries, it's lovely when you have the acidity to cut through the richness! I hope this recipe makes sense and turns out well!
64 notes
·
View notes
Photo

After years of testing, we have finally perfected the ultimate chocolate cake recipe. Our recipe has been tried and loved by tens of thousands of people worldwide, all of whom agree that it is the most amazing chocolate cake ever. We promise, once you try this recipe, you won’t go back to the others. For more delicious cake, try our Most Amazing Texas Sheet Cake. Why Our Recipe It’s Moist! — One of the key measures of a chocolate cake is whether or not it is moist. This one checks every box! One Bowl —The batter is made in just one bowl, so no combining wet and dry ingredients separately. Rich Chocolate Flavor — This cake is rich and fudgy, making it a true indulgence for any chocolate cake lover. This fudgy chocolate cake is so decadent, it has gained the nickname “The Matilda Cake” because it looks just like the cake eaten by Bruce Bogtrotter in the movie Matilda. And I’ll take that as a compliment! This cake really is the chocolate cake of my dreams. Ingredient Notes All-Purpose Flour:The main structural component. It provides the cake’s texture and body. Unsweetened Cocoa Powder: We recommend Hershey’s cocoa powder as it’s widely available. You can also use higher-quality options like Ghirardelli or those from specialty chocolatiers, though they may be more expensive. Baking Soda & Powder: Check the expiration date to ensure proper leavening. Granulated Sugar: Stick with standard granulated sugar for best results. Buttermilk: Adds moisture and a slight tang to balance the sweetness. Warm it in the microwave for 20-30 seconds to bring it to room temperature quickly. Eggs: Room-temperature eggs make for a fluffier cake. To warm eggs quickly, submerge them in a bowl of warm water for 5 minutes. Vegetable Oil: Provides essential moisture for the softest cake texture. Vanilla Extract: Use a full tablespoon to bring out the bold vanilla flavor. Opt for pure vanilla extract if possible for the best results. Types of Cocoa Powder Cocoa powder is an important ingredient in many baked goods and can affect the flavor and texture of the final product. It is important to use the type of cocoa powder specified in a recipe, as using the wrong type can alter the balance of flavors and sweetness. There are several types of cocoa powder available, each with its own distinct flavor and properties. Unsweetened cocoa powder, specifically Hershey’s brand, was used in this cake recipe as it is the most widely available. You can also use higher-quality cocoa powders such as Ghirardelli or those from specialty chocolatier shops, but they can be expensive. It is recommended to avoid using inexpensive store brands as they tend to not produce the best results. Dutch-process cocoa powder is a type of cocoa that has been treated with an alkali to neutralize its acidity. It has a milder flavor and darker color than natural cocoa powder, and is also easier to dissolve in liquids. When using dutch-process cocoa powder in place of unsweetened cocoa powder in a recipe, it is important to consider that it may behave differently due to its lower acidity. However, in this recipe, dutch-process cocoa can be used without making any other modifications. *For the dark-colored frosting in these photos, Hershey’s Special Dark Unsweetened Cocoa Powder was used. Pan Size Adaptions This chocolate cake recipe yields approximately 9 cups of batter total, or 3 cups for each of the 9-inch layers. Here are some popular pan sizes and the approximate amount of batter needed for each individual pan: 9×2-inch round pan: 3 cups batter 8×2-inch round pan: 2 1/4 cups batter 13×18-inch sheet cake pan: 6 cups batter 9×13-inch pan: 6 cups batter 12 standard cupcakes: 3 cups batter 10-12 cup bundt cake pan: 8 cups batter As a general rule, cake pans should be filled 2/3rds of the way full for cake baking, unless otherwise specified in the recipe. It’s always a good idea to check for doneness by inserting a toothpick or cake tester into the center of the cake. If it comes out clean or with just a few crumbs attached, the cake is likely done. You can also gently press the center of the cake with your finger – if it springs back, it is probably ready to be removed from the oven. Frosting Options Chocolate Ganache: Only 2 ingredients—chocolate and heavy cream. It’s often used as icing or as a filling. Some chefs even use it as a dipping sauce paired with fruit like strawberries. You’ll also see it on donuts and cupcakes. It’s rich, thick, and sweet. Chocolate Fudge Icing: Icing is often used interchangeably with frosting. Frosting does tend to be a bit thicker, while icing is usually smoother and easier to spread than frosting. This cooked chocolate icing is made with buttermilk, which thickens it up and gives a slight tart taste. Buttercream Frosting: Buttercream is our go-to frosting for most cakes, and it’s pretty easy to see why once you’ve tried it. It is perfectly sweet and creamy, and tastes fantastic. We can eat this stuff by the spoonful, however, we promise it is even better on top of a cake or cupcakes. Cream Cheese Frosting: This frosting is creamy, thick, and has a slight tang. Simply add cocoa powder for a chocolate version. Pistachio Buttercream Frosting: This frosting has a smooth, buttery consistency with a slight crunch from the blended pistachio nuts. This frosting pairs so well with chocolate cake. Think Dubai chocolate bar—the combination can’t be beat. Sweetened Condensed Milk Frosting: A simple and easy way to make a creamy, sweet frosting. Whether you are making chocolate or vanilla frosting, it only takes 3 ingredients! Even Layers Like a Pro Weigh the Batter: Use a kitchen scale to divide the batter equally between the pans. Weigh the empty pans first, then weigh them again with the batter to ensure they’re evenly distributed. Level the Batter: Once the batter is in the pans, gently tap each pan on the counter to release any air bubbles and even out the surface. Trim After Baking: After the cakes are fully cooled, use a serrated knife or a cake leveler to trim any domed tops. This step ensures a flat surface for stacking. Use Baking Strips: Baking strips wrapped around the outside of the pans can help prevent doming and create more uniform layers. Storage Instructions Store the assembled cake in an airtight container or cake dome at room temperature for up to 2 days. For cream cheese or perishable frostings, store in the refrigerator for up to 4 days. Freeze Unfrosted Layers: After wrapping in plastic wrap, add a layer of aluminum foil to prevent freezer burn. Label with the date and freeze for up to 3 months. Thaw in the refrigerator overnight before decorating. Freeze Frosted Cakes: Freeze in a single layer on a baking sheet until solid, then wrap tightly in plastic wrap and aluminum foil. Store for up to 2 months. Thaw in the refrigerator overnight before serving. More decadent chocolate desserts… Source link
2 notes
·
View notes
Photo

After years of testing, we have finally perfected the ultimate chocolate cake recipe. Our recipe has been tried and loved by tens of thousands of people worldwide, all of whom agree that it is the most amazing chocolate cake ever. We promise, once you try this recipe, you won’t go back to the others. For more delicious cake, try our Most Amazing Texas Sheet Cake. Why Our Recipe It’s Moist! — One of the key measures of a chocolate cake is whether or not it is moist. This one checks every box! One Bowl —The batter is made in just one bowl, so no combining wet and dry ingredients separately. Rich Chocolate Flavor — This cake is rich and fudgy, making it a true indulgence for any chocolate cake lover. This fudgy chocolate cake is so decadent, it has gained the nickname “The Matilda Cake” because it looks just like the cake eaten by Bruce Bogtrotter in the movie Matilda. And I’ll take that as a compliment! This cake really is the chocolate cake of my dreams. Ingredient Notes All-Purpose Flour:The main structural component. It provides the cake’s texture and body. Unsweetened Cocoa Powder: We recommend Hershey’s cocoa powder as it’s widely available. You can also use higher-quality options like Ghirardelli or those from specialty chocolatiers, though they may be more expensive. Baking Soda & Powder: Check the expiration date to ensure proper leavening. Granulated Sugar: Stick with standard granulated sugar for best results. Buttermilk: Adds moisture and a slight tang to balance the sweetness. Warm it in the microwave for 20-30 seconds to bring it to room temperature quickly. Eggs: Room-temperature eggs make for a fluffier cake. To warm eggs quickly, submerge them in a bowl of warm water for 5 minutes. Vegetable Oil: Provides essential moisture for the softest cake texture. Vanilla Extract: Use a full tablespoon to bring out the bold vanilla flavor. Opt for pure vanilla extract if possible for the best results. Types of Cocoa Powder Cocoa powder is an important ingredient in many baked goods and can affect the flavor and texture of the final product. It is important to use the type of cocoa powder specified in a recipe, as using the wrong type can alter the balance of flavors and sweetness. There are several types of cocoa powder available, each with its own distinct flavor and properties. Unsweetened cocoa powder, specifically Hershey’s brand, was used in this cake recipe as it is the most widely available. You can also use higher-quality cocoa powders such as Ghirardelli or those from specialty chocolatier shops, but they can be expensive. It is recommended to avoid using inexpensive store brands as they tend to not produce the best results. Dutch-process cocoa powder is a type of cocoa that has been treated with an alkali to neutralize its acidity. It has a milder flavor and darker color than natural cocoa powder, and is also easier to dissolve in liquids. When using dutch-process cocoa powder in place of unsweetened cocoa powder in a recipe, it is important to consider that it may behave differently due to its lower acidity. However, in this recipe, dutch-process cocoa can be used without making any other modifications. *For the dark-colored frosting in these photos, Hershey’s Special Dark Unsweetened Cocoa Powder was used. Pan Size Adaptions This chocolate cake recipe yields approximately 9 cups of batter total, or 3 cups for each of the 9-inch layers. Here are some popular pan sizes and the approximate amount of batter needed for each individual pan: 9×2-inch round pan: 3 cups batter 8×2-inch round pan: 2 1/4 cups batter 13×18-inch sheet cake pan: 6 cups batter 9×13-inch pan: 6 cups batter 12 standard cupcakes: 3 cups batter 10-12 cup bundt cake pan: 8 cups batter As a general rule, cake pans should be filled 2/3rds of the way full for cake baking, unless otherwise specified in the recipe. It’s always a good idea to check for doneness by inserting a toothpick or cake tester into the center of the cake. If it comes out clean or with just a few crumbs attached, the cake is likely done. You can also gently press the center of the cake with your finger – if it springs back, it is probably ready to be removed from the oven. Frosting Options Chocolate Ganache: Only 2 ingredients—chocolate and heavy cream. It’s often used as icing or as a filling. Some chefs even use it as a dipping sauce paired with fruit like strawberries. You’ll also see it on donuts and cupcakes. It’s rich, thick, and sweet. Chocolate Fudge Icing: Icing is often used interchangeably with frosting. Frosting does tend to be a bit thicker, while icing is usually smoother and easier to spread than frosting. This cooked chocolate icing is made with buttermilk, which thickens it up and gives a slight tart taste. Buttercream Frosting: Buttercream is our go-to frosting for most cakes, and it’s pretty easy to see why once you’ve tried it. It is perfectly sweet and creamy, and tastes fantastic. We can eat this stuff by the spoonful, however, we promise it is even better on top of a cake or cupcakes. Cream Cheese Frosting: This frosting is creamy, thick, and has a slight tang. Simply add cocoa powder for a chocolate version. Pistachio Buttercream Frosting: This frosting has a smooth, buttery consistency with a slight crunch from the blended pistachio nuts. This frosting pairs so well with chocolate cake. Think Dubai chocolate bar—the combination can’t be beat. Sweetened Condensed Milk Frosting: A simple and easy way to make a creamy, sweet frosting. Whether you are making chocolate or vanilla frosting, it only takes 3 ingredients! Even Layers Like a Pro Weigh the Batter: Use a kitchen scale to divide the batter equally between the pans. Weigh the empty pans first, then weigh them again with the batter to ensure they’re evenly distributed. Level the Batter: Once the batter is in the pans, gently tap each pan on the counter to release any air bubbles and even out the surface. Trim After Baking: After the cakes are fully cooled, use a serrated knife or a cake leveler to trim any domed tops. This step ensures a flat surface for stacking. Use Baking Strips: Baking strips wrapped around the outside of the pans can help prevent doming and create more uniform layers. Storage Instructions Store the assembled cake in an airtight container or cake dome at room temperature for up to 2 days. For cream cheese or perishable frostings, store in the refrigerator for up to 4 days. Freeze Unfrosted Layers: After wrapping in plastic wrap, add a layer of aluminum foil to prevent freezer burn. Label with the date and freeze for up to 3 months. Thaw in the refrigerator overnight before decorating. Freeze Frosted Cakes: Freeze in a single layer on a baking sheet until solid, then wrap tightly in plastic wrap and aluminum foil. Store for up to 2 months. Thaw in the refrigerator overnight before serving. More decadent chocolate desserts… Source link
4 notes
·
View notes
Photo

After years of testing, we have finally perfected the ultimate chocolate cake recipe. Our recipe has been tried and loved by tens of thousands of people worldwide, all of whom agree that it is the most amazing chocolate cake ever. We promise, once you try this recipe, you won’t go back to the others. For more delicious cake, try our Most Amazing Texas Sheet Cake. Why Our Recipe It’s Moist! — One of the key measures of a chocolate cake is whether or not it is moist. This one checks every box! One Bowl —The batter is made in just one bowl, so no combining wet and dry ingredients separately. Rich Chocolate Flavor — This cake is rich and fudgy, making it a true indulgence for any chocolate cake lover. This fudgy chocolate cake is so decadent, it has gained the nickname “The Matilda Cake” because it looks just like the cake eaten by Bruce Bogtrotter in the movie Matilda. And I’ll take that as a compliment! This cake really is the chocolate cake of my dreams. Ingredient Notes All-Purpose Flour:The main structural component. It provides the cake’s texture and body. Unsweetened Cocoa Powder: We recommend Hershey’s cocoa powder as it’s widely available. You can also use higher-quality options like Ghirardelli or those from specialty chocolatiers, though they may be more expensive. Baking Soda & Powder: Check the expiration date to ensure proper leavening. Granulated Sugar: Stick with standard granulated sugar for best results. Buttermilk: Adds moisture and a slight tang to balance the sweetness. Warm it in the microwave for 20-30 seconds to bring it to room temperature quickly. Eggs: Room-temperature eggs make for a fluffier cake. To warm eggs quickly, submerge them in a bowl of warm water for 5 minutes. Vegetable Oil: Provides essential moisture for the softest cake texture. Vanilla Extract: Use a full tablespoon to bring out the bold vanilla flavor. Opt for pure vanilla extract if possible for the best results. Types of Cocoa Powder Cocoa powder is an important ingredient in many baked goods and can affect the flavor and texture of the final product. It is important to use the type of cocoa powder specified in a recipe, as using the wrong type can alter the balance of flavors and sweetness. There are several types of cocoa powder available, each with its own distinct flavor and properties. Unsweetened cocoa powder, specifically Hershey’s brand, was used in this cake recipe as it is the most widely available. You can also use higher-quality cocoa powders such as Ghirardelli or those from specialty chocolatier shops, but they can be expensive. It is recommended to avoid using inexpensive store brands as they tend to not produce the best results. Dutch-process cocoa powder is a type of cocoa that has been treated with an alkali to neutralize its acidity. It has a milder flavor and darker color than natural cocoa powder, and is also easier to dissolve in liquids. When using dutch-process cocoa powder in place of unsweetened cocoa powder in a recipe, it is important to consider that it may behave differently due to its lower acidity. However, in this recipe, dutch-process cocoa can be used without making any other modifications. *For the dark-colored frosting in these photos, Hershey’s Special Dark Unsweetened Cocoa Powder was used. Pan Size Adaptions This chocolate cake recipe yields approximately 9 cups of batter total, or 3 cups for each of the 9-inch layers. Here are some popular pan sizes and the approximate amount of batter needed for each individual pan: 9×2-inch round pan: 3 cups batter 8×2-inch round pan: 2 1/4 cups batter 13×18-inch sheet cake pan: 6 cups batter 9×13-inch pan: 6 cups batter 12 standard cupcakes: 3 cups batter 10-12 cup bundt cake pan: 8 cups batter As a general rule, cake pans should be filled 2/3rds of the way full for cake baking, unless otherwise specified in the recipe. It’s always a good idea to check for doneness by inserting a toothpick or cake tester into the center of the cake. If it comes out clean or with just a few crumbs attached, the cake is likely done. You can also gently press the center of the cake with your finger – if it springs back, it is probably ready to be removed from the oven. Frosting Options Chocolate Ganache: Only 2 ingredients—chocolate and heavy cream. It’s often used as icing or as a filling. Some chefs even use it as a dipping sauce paired with fruit like strawberries. You’ll also see it on donuts and cupcakes. It’s rich, thick, and sweet. Chocolate Fudge Icing: Icing is often used interchangeably with frosting. Frosting does tend to be a bit thicker, while icing is usually smoother and easier to spread than frosting. This cooked chocolate icing is made with buttermilk, which thickens it up and gives a slight tart taste. Buttercream Frosting: Buttercream is our go-to frosting for most cakes, and it’s pretty easy to see why once you’ve tried it. It is perfectly sweet and creamy, and tastes fantastic. We can eat this stuff by the spoonful, however, we promise it is even better on top of a cake or cupcakes. Cream Cheese Frosting: This frosting is creamy, thick, and has a slight tang. Simply add cocoa powder for a chocolate version. Pistachio Buttercream Frosting: This frosting has a smooth, buttery consistency with a slight crunch from the blended pistachio nuts. This frosting pairs so well with chocolate cake. Think Dubai chocolate bar—the combination can’t be beat. Sweetened Condensed Milk Frosting: A simple and easy way to make a creamy, sweet frosting. Whether you are making chocolate or vanilla frosting, it only takes 3 ingredients! Even Layers Like a Pro Weigh the Batter: Use a kitchen scale to divide the batter equally between the pans. Weigh the empty pans first, then weigh them again with the batter to ensure they’re evenly distributed. Level the Batter: Once the batter is in the pans, gently tap each pan on the counter to release any air bubbles and even out the surface. Trim After Baking: After the cakes are fully cooled, use a serrated knife or a cake leveler to trim any domed tops. This step ensures a flat surface for stacking. Use Baking Strips: Baking strips wrapped around the outside of the pans can help prevent doming and create more uniform layers. Storage Instructions Store the assembled cake in an airtight container or cake dome at room temperature for up to 2 days. For cream cheese or perishable frostings, store in the refrigerator for up to 4 days. Freeze Unfrosted Layers: After wrapping in plastic wrap, add a layer of aluminum foil to prevent freezer burn. Label with the date and freeze for up to 3 months. Thaw in the refrigerator overnight before decorating. Freeze Frosted Cakes: Freeze in a single layer on a baking sheet until solid, then wrap tightly in plastic wrap and aluminum foil. Store for up to 2 months. Thaw in the refrigerator overnight before serving. More decadent chocolate desserts… Source link
2 notes
·
View notes
Photo

After years of testing, we have finally perfected the ultimate chocolate cake recipe. Our recipe has been tried and loved by tens of thousands of people worldwide, all of whom agree that it is the most amazing chocolate cake ever. We promise, once you try this recipe, you won’t go back to the others. For more delicious cake, try our Most Amazing Texas Sheet Cake. Why Our Recipe It’s Moist! — One of the key measures of a chocolate cake is whether or not it is moist. This one checks every box! One Bowl —The batter is made in just one bowl, so no combining wet and dry ingredients separately. Rich Chocolate Flavor — This cake is rich and fudgy, making it a true indulgence for any chocolate cake lover. This fudgy chocolate cake is so decadent, it has gained the nickname “The Matilda Cake” because it looks just like the cake eaten by Bruce Bogtrotter in the movie Matilda. And I’ll take that as a compliment! This cake really is the chocolate cake of my dreams. Ingredient Notes All-Purpose Flour:The main structural component. It provides the cake’s texture and body. Unsweetened Cocoa Powder: We recommend Hershey’s cocoa powder as it’s widely available. You can also use higher-quality options like Ghirardelli or those from specialty chocolatiers, though they may be more expensive. Baking Soda & Powder: Check the expiration date to ensure proper leavening. Granulated Sugar: Stick with standard granulated sugar for best results. Buttermilk: Adds moisture and a slight tang to balance the sweetness. Warm it in the microwave for 20-30 seconds to bring it to room temperature quickly. Eggs: Room-temperature eggs make for a fluffier cake. To warm eggs quickly, submerge them in a bowl of warm water for 5 minutes. Vegetable Oil: Provides essential moisture for the softest cake texture. Vanilla Extract: Use a full tablespoon to bring out the bold vanilla flavor. Opt for pure vanilla extract if possible for the best results. Types of Cocoa Powder Cocoa powder is an important ingredient in many baked goods and can affect the flavor and texture of the final product. It is important to use the type of cocoa powder specified in a recipe, as using the wrong type can alter the balance of flavors and sweetness. There are several types of cocoa powder available, each with its own distinct flavor and properties. Unsweetened cocoa powder, specifically Hershey’s brand, was used in this cake recipe as it is the most widely available. You can also use higher-quality cocoa powders such as Ghirardelli or those from specialty chocolatier shops, but they can be expensive. It is recommended to avoid using inexpensive store brands as they tend to not produce the best results. Dutch-process cocoa powder is a type of cocoa that has been treated with an alkali to neutralize its acidity. It has a milder flavor and darker color than natural cocoa powder, and is also easier to dissolve in liquids. When using dutch-process cocoa powder in place of unsweetened cocoa powder in a recipe, it is important to consider that it may behave differently due to its lower acidity. However, in this recipe, dutch-process cocoa can be used without making any other modifications. *For the dark-colored frosting in these photos, Hershey’s Special Dark Unsweetened Cocoa Powder was used. Pan Size Adaptions This chocolate cake recipe yields approximately 9 cups of batter total, or 3 cups for each of the 9-inch layers. Here are some popular pan sizes and the approximate amount of batter needed for each individual pan: 9×2-inch round pan: 3 cups batter 8×2-inch round pan: 2 1/4 cups batter 13×18-inch sheet cake pan: 6 cups batter 9×13-inch pan: 6 cups batter 12 standard cupcakes: 3 cups batter 10-12 cup bundt cake pan: 8 cups batter As a general rule, cake pans should be filled 2/3rds of the way full for cake baking, unless otherwise specified in the recipe. It’s always a good idea to check for doneness by inserting a toothpick or cake tester into the center of the cake. If it comes out clean or with just a few crumbs attached, the cake is likely done. You can also gently press the center of the cake with your finger – if it springs back, it is probably ready to be removed from the oven. Frosting Options Chocolate Ganache: Only 2 ingredients—chocolate and heavy cream. It’s often used as icing or as a filling. Some chefs even use it as a dipping sauce paired with fruit like strawberries. You’ll also see it on donuts and cupcakes. It’s rich, thick, and sweet. Chocolate Fudge Icing: Icing is often used interchangeably with frosting. Frosting does tend to be a bit thicker, while icing is usually smoother and easier to spread than frosting. This cooked chocolate icing is made with buttermilk, which thickens it up and gives a slight tart taste. Buttercream Frosting: Buttercream is our go-to frosting for most cakes, and it’s pretty easy to see why once you’ve tried it. It is perfectly sweet and creamy, and tastes fantastic. We can eat this stuff by the spoonful, however, we promise it is even better on top of a cake or cupcakes. Cream Cheese Frosting: This frosting is creamy, thick, and has a slight tang. Simply add cocoa powder for a chocolate version. Pistachio Buttercream Frosting: This frosting has a smooth, buttery consistency with a slight crunch from the blended pistachio nuts. This frosting pairs so well with chocolate cake. Think Dubai chocolate bar—the combination can’t be beat. Sweetened Condensed Milk Frosting: A simple and easy way to make a creamy, sweet frosting. Whether you are making chocolate or vanilla frosting, it only takes 3 ingredients! Even Layers Like a Pro Weigh the Batter: Use a kitchen scale to divide the batter equally between the pans. Weigh the empty pans first, then weigh them again with the batter to ensure they’re evenly distributed. Level the Batter: Once the batter is in the pans, gently tap each pan on the counter to release any air bubbles and even out the surface. Trim After Baking: After the cakes are fully cooled, use a serrated knife or a cake leveler to trim any domed tops. This step ensures a flat surface for stacking. Use Baking Strips: Baking strips wrapped around the outside of the pans can help prevent doming and create more uniform layers. Storage Instructions Store the assembled cake in an airtight container or cake dome at room temperature for up to 2 days. For cream cheese or perishable frostings, store in the refrigerator for up to 4 days. Freeze Unfrosted Layers: After wrapping in plastic wrap, add a layer of aluminum foil to prevent freezer burn. Label with the date and freeze for up to 3 months. Thaw in the refrigerator overnight before decorating. Freeze Frosted Cakes: Freeze in a single layer on a baking sheet until solid, then wrap tightly in plastic wrap and aluminum foil. Store for up to 2 months. Thaw in the refrigerator overnight before serving. More decadent chocolate desserts… Source link
6 notes
·
View notes
Photo

After years of testing, we have finally perfected the ultimate chocolate cake recipe. Our recipe has been tried and loved by tens of thousands of people worldwide, all of whom agree that it is the most amazing chocolate cake ever. We promise, once you try this recipe, you won’t go back to the others. For more delicious cake, try our Most Amazing Texas Sheet Cake. Why Our Recipe It’s Moist! — One of the key measures of a chocolate cake is whether or not it is moist. This one checks every box! One Bowl —The batter is made in just one bowl, so no combining wet and dry ingredients separately. Rich Chocolate Flavor — This cake is rich and fudgy, making it a true indulgence for any chocolate cake lover. This fudgy chocolate cake is so decadent, it has gained the nickname “The Matilda Cake” because it looks just like the cake eaten by Bruce Bogtrotter in the movie Matilda. And I’ll take that as a compliment! This cake really is the chocolate cake of my dreams. Ingredient Notes All-Purpose Flour:The main structural component. It provides the cake’s texture and body. Unsweetened Cocoa Powder: We recommend Hershey’s cocoa powder as it’s widely available. You can also use higher-quality options like Ghirardelli or those from specialty chocolatiers, though they may be more expensive. Baking Soda & Powder: Check the expiration date to ensure proper leavening. Granulated Sugar: Stick with standard granulated sugar for best results. Buttermilk: Adds moisture and a slight tang to balance the sweetness. Warm it in the microwave for 20-30 seconds to bring it to room temperature quickly. Eggs: Room-temperature eggs make for a fluffier cake. To warm eggs quickly, submerge them in a bowl of warm water for 5 minutes. Vegetable Oil: Provides essential moisture for the softest cake texture. Vanilla Extract: Use a full tablespoon to bring out the bold vanilla flavor. Opt for pure vanilla extract if possible for the best results. Types of Cocoa Powder Cocoa powder is an important ingredient in many baked goods and can affect the flavor and texture of the final product. It is important to use the type of cocoa powder specified in a recipe, as using the wrong type can alter the balance of flavors and sweetness. There are several types of cocoa powder available, each with its own distinct flavor and properties. Unsweetened cocoa powder, specifically Hershey’s brand, was used in this cake recipe as it is the most widely available. You can also use higher-quality cocoa powders such as Ghirardelli or those from specialty chocolatier shops, but they can be expensive. It is recommended to avoid using inexpensive store brands as they tend to not produce the best results. Dutch-process cocoa powder is a type of cocoa that has been treated with an alkali to neutralize its acidity. It has a milder flavor and darker color than natural cocoa powder, and is also easier to dissolve in liquids. When using dutch-process cocoa powder in place of unsweetened cocoa powder in a recipe, it is important to consider that it may behave differently due to its lower acidity. However, in this recipe, dutch-process cocoa can be used without making any other modifications. *For the dark-colored frosting in these photos, Hershey’s Special Dark Unsweetened Cocoa Powder was used. Pan Size Adaptions This chocolate cake recipe yields approximately 9 cups of batter total, or 3 cups for each of the 9-inch layers. Here are some popular pan sizes and the approximate amount of batter needed for each individual pan: 9×2-inch round pan: 3 cups batter 8×2-inch round pan: 2 1/4 cups batter 13×18-inch sheet cake pan: 6 cups batter 9×13-inch pan: 6 cups batter 12 standard cupcakes: 3 cups batter 10-12 cup bundt cake pan: 8 cups batter As a general rule, cake pans should be filled 2/3rds of the way full for cake baking, unless otherwise specified in the recipe. It’s always a good idea to check for doneness by inserting a toothpick or cake tester into the center of the cake. If it comes out clean or with just a few crumbs attached, the cake is likely done. You can also gently press the center of the cake with your finger – if it springs back, it is probably ready to be removed from the oven. Frosting Options Chocolate Ganache: Only 2 ingredients—chocolate and heavy cream. It’s often used as icing or as a filling. Some chefs even use it as a dipping sauce paired with fruit like strawberries. You’ll also see it on donuts and cupcakes. It’s rich, thick, and sweet. Chocolate Fudge Icing: Icing is often used interchangeably with frosting. Frosting does tend to be a bit thicker, while icing is usually smoother and easier to spread than frosting. This cooked chocolate icing is made with buttermilk, which thickens it up and gives a slight tart taste. Buttercream Frosting: Buttercream is our go-to frosting for most cakes, and it’s pretty easy to see why once you’ve tried it. It is perfectly sweet and creamy, and tastes fantastic. We can eat this stuff by the spoonful, however, we promise it is even better on top of a cake or cupcakes. Cream Cheese Frosting: This frosting is creamy, thick, and has a slight tang. Simply add cocoa powder for a chocolate version. Pistachio Buttercream Frosting: This frosting has a smooth, buttery consistency with a slight crunch from the blended pistachio nuts. This frosting pairs so well with chocolate cake. Think Dubai chocolate bar—the combination can’t be beat. Sweetened Condensed Milk Frosting: A simple and easy way to make a creamy, sweet frosting. Whether you are making chocolate or vanilla frosting, it only takes 3 ingredients! Even Layers Like a Pro Weigh the Batter: Use a kitchen scale to divide the batter equally between the pans. Weigh the empty pans first, then weigh them again with the batter to ensure they’re evenly distributed. Level the Batter: Once the batter is in the pans, gently tap each pan on the counter to release any air bubbles and even out the surface. Trim After Baking: After the cakes are fully cooled, use a serrated knife or a cake leveler to trim any domed tops. This step ensures a flat surface for stacking. Use Baking Strips: Baking strips wrapped around the outside of the pans can help prevent doming and create more uniform layers. Storage Instructions Store the assembled cake in an airtight container or cake dome at room temperature for up to 2 days. For cream cheese or perishable frostings, store in the refrigerator for up to 4 days. Freeze Unfrosted Layers: After wrapping in plastic wrap, add a layer of aluminum foil to prevent freezer burn. Label with the date and freeze for up to 3 months. Thaw in the refrigerator overnight before decorating. Freeze Frosted Cakes: Freeze in a single layer on a baking sheet until solid, then wrap tightly in plastic wrap and aluminum foil. Store for up to 2 months. Thaw in the refrigerator overnight before serving. More decadent chocolate desserts… Source link
2 notes
·
View notes
Text
Okay, what's the most out of date food item y'all consume comfortably? Because Christmas 2022, I bought Ghirardelli mocha hot chocolate mix on sale for 99 cents a container, and I'm drinking some right now.
I'm pretty sure it's sugar, cocoa powder, and instant coffee. Which, in my head, dry ingredients don't go bad.
It's like, I have eyeshadow from 2014 I still wear. I just don't feel like powder can go bad.
4 notes
·
View notes
Text
I made cookies!


Once I made some and they didn’t flatten out for whatever reason, staying in the shape of the ice cream scoop, but I liked it. They were cute, like bon bons.


They flattened out this time and came out pretty well though. They’re nice when they’re more square too.
I wanted to make cookie sandwiches so I made buttercream frosting.


I frosted some now and I’ll frost more later when they cool in the fridge. And I’ll put the other side of the cookie up next time too. I hadn’t made cookies in a long time so it was fun!
I had used powdered sugar recently when practicing the frosting but forgot how it can pour out of the container like an avalanche.

I used the recipes on the back of the Ghirardelli chocolate chips and Ghirardelli unsweetened cocoa powder packets.
2 notes
·
View notes
Text
This low cal hot chocolate tastes sinful af, but it's like 40 calories.
- 1 tbsp Ghirardelli unsweetened dutch cocoa powder (15 kcal)
- 3/4 tsp sugarfree chocolate Coffeemate powdered nondairy creamer (10 kcal)
- Tiny bit of vanilla protein powder, optional (~15 kcal)
- Splenda (0 kcal)
Mix with water and microwave until hot.
1 note
·
View note
Text
Why didn't I know about this???
Chocolates With the Most Heavy Metals
The following products were found to contain the most heavy metals (% of MADL):1
Perugina 85% Premium Dark Chocolate: 1 oz contains 539% lead, 68% cadmium
Hershey’s Milk Chocolate Bar: 1 oz contains 67% lead, 31% cadmium
Hu Dark Chocolate Gems: 1 tbsp contains 121% lead, 20% cadmium
Droste Cacao Powder: 1 tbsp contains 324% lead, 41% cadmium
Great Value (Walmart) Milk Chocolate Flavor Hot Cocoa Mix: 3 tbsp contains 345% lead, 13% cadmium
Ghirardelli Premium Brownie Mix Double Chocolate: 1 box contains 108% lead, 37% cadmium
Bob’s Red Mill Gluten Free Chocolate Cake Mix: 1 package contains 218% lead, 77% cadmium
Heavy Metals Found in Chocolate: Study Sheds Light on Lead, Cadmium in Some Products
By Cathy Cassata
Cathy Cassata For more than 10 years, Cathy Cassata has written stories about health, mental health, medical news, and inspiring people.
HEALTH'S EDITORIAL GUIDELINES
Updated on November 14, 2023
Fact checked by
Nick Blackmer
5 notes
·
View notes