#How to Extend Your Webcam & USB Devices
Explore tagged Tumblr posts
Visit Tumblr Blog
Explore Tumblr blogs with no restrictions, modern design and the best experience.
Last Seen Tumblr Blogs


Fun Fact
Tumblr has a low social media market share in South America.
Text
Lenovo ThinkPad P P14s Review
Discover the perfect blend of power and portability with the Lenovo ThinkPad P P14s 20VX002NCA. This mobile workstation is meticulously crafted for professionals who demand performance without compromise. Whether you're a designer, engineer, or a tech enthusiast, the P14s ensures that you stay productive on the go.
Exceptional Performance
At the heart of the P14s lies a powerful Intel i7-1165G7 processor. This processor is designed to handle demanding applications effortlessly, making it particularly useful for intensive tasks such as 3D modeling, video editing, or complex data analysis. With upgradable RAM capacity of 16 GB DDR4, you get the flexibility to enhance performance based on your needs. Coupled with fast SSD storage of 512 GB, you can expect quick boot times and lightning-fast file access.
Designed for Professionals
The P14s boasts a lightweight design of just 1.47 kg, making it the ideal companion for professionals on the move. Its robust build quality ensures durability, allowing you to work without worrying about wear and tear. The high-quality Full HD display (1920 x 1080 pixels) offers crisp visuals and vibrant colors, enhancing your creative work whether you're indoors or outdoors.
Long Battery Life: Say goodbye to anxiety over battery life; the P14s provides extended usage hours to keep you productive.
Comprehensive Security Features: With multiple security options, you can protect your vital data from unauthorized access.
Multiple Connectivity Options: The device offers a range of connectivity ports including USB, HDMI, and Thunderbolt, keeping you connected to all your accessories effortlessly.
Good Audio Quality: Experience enhanced audio with Dolby Audio, ensuring that conference calls and multimedia playback are clear and immersive.
However, the Lenovo ThinkPad P14s does come with a few considerations. Its higher price point compared to competitors might not appeal to everyone, especially if you're budget-conscious. You may also find the color options somewhat limited, and while it performs well for everyday tasks, the absence of a dedicated GPU means it's not suited for extreme gaming. The built-in webcam could use an upgrade, and under heavy load, the device may generate warmth. By integrating all these advanced features, the P14s not only meets the demands of modern professionals but also enhances the overall user experience. If you're looking for a powerful mobile workstation that can keep pace with your fast-moving profession, the Lenovo ThinkPad P P14s is a worthy contender. For more information on this exceptional device and to see how it can elevate your productivity, visit here. Stay connected, stay productive, and embrace the power of the Lenovo ThinkPad P14s in your professional journey!
0 notes
Text
Creative Ways to Repurpose Your Old Laptop
When your old laptop no longer meets your needs, it doesn’t have to be destined for the recycling bin or storage closet. With a little creativity and effort, you can give your old laptop a new purpose, transforming it into a functional tool or a fun project.
This blog explores several innovative ways to repurpose old laptops, helping you extend their lifespan while reducing electronic waste. Whether you want to turn your used laptop into a media server or donate it after refurbishment, platforms like Retechie make the process easier by offering professional solutions for refurbished laptops in India.
Why Repurpose Your Old Laptop?
Repurposing an old laptop offers several advantages:
Cost Savings: Reusing your device saves money compared to buying new gadgets.
Eco-Friendly Impact: Reducing electronic waste by giving laptops a second life supports sustainable practices.
Learning Opportunities: Repurposing can be a fun and educational DIY project.
Creative Ways to Repurpose Your Old Laptop
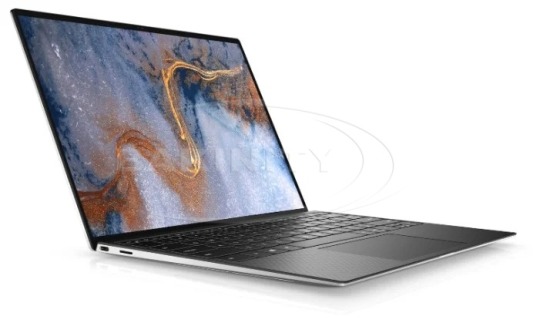
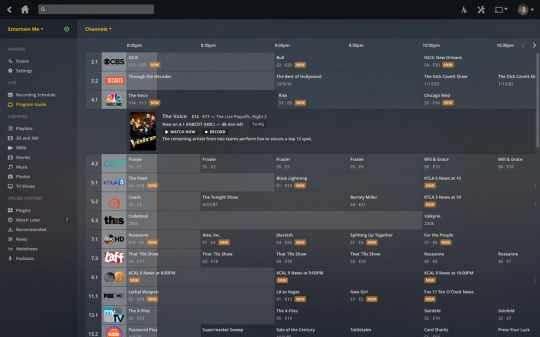
1. Create a Media Center
Turn your old laptop into a dedicated media center to stream movies, music, and TV shows. Install software like Plex or Kodi to manage your media library, and connect the laptop to your TV for a seamless entertainment experience.
How:
Install lightweight operating systems for optimal performance.
When dealing with huge media files, use external storage.
2. Set Up a Home Server
Transform your laptop into a personal server for hosting files, websites, or applications. This can be particularly useful for small businesses or personal projects.
Benefits:
Access your files from anywhere.
Use it for local backups and cloud storage.
3. Use It as a Learning Tool for Kids
Refurbish your old laptop and set it up for children to learn coding, play educational games, or complete homework assignments.
How:
Install educational software.
Use parental control apps for added security.
4. Build a Retro Gaming Console
Gamers can turn their old laptops into retro gaming consoles by installing emulation software to play classic games from the NES, Sega, or PlayStation eras.
Steps:
Download emulation software like RetroArch.
Pair the laptop with USB controllers for an authentic experience.
5. Donate to Those in Need
After refurbishing your laptop, consider donating it to schools, charities, or non-profit organizations. A refurbished laptop can make a significant difference for students or families who cannot afford new devices.
Pro Tip: Use services like Retechie to professionally restore your old laptop before donating.
6. Turn It into a Security Camera
You can turn your old laptop into a hub for security cameras. Install software like iSpy or ZoneMinder to monitor your home using webcams.
How:
Position webcams in key areas.
Use the laptop to store and review footage.
7. Use It as a Digital Photo Frame
If your laptop’s screen is still functional, transform it into a digital photo frame. Display a slideshow of your favorite memories or use it for dynamic art.
Steps:
Use photo slideshow software.
Place the laptop in a decorative frame or stand.
8. Convert It into a Chromebook
If your old laptop struggles with heavy operating systems, convert it into a lightweight Chromebook by installing Chrome OS Flex. This makes it perfect for basic browsing and cloud-based tasks.
Benefits:
Boost performance with minimal system requirements.
Ideal for students or light users.
9. Use It for DIY Smart Home Projects
Your old laptop can be integrated into smart home setups as a hub for controlling devices like lights, thermostats, and security systems.
How:
Install smart home management software.
Use it as a dedicated interface for your smart devices.
10. Refurbish and Resell
If you don’t have a personal use for your old laptop, consider refurbishing it and selling it as a second hand laptop. Platforms like Retechie specialize in restoring devices for resale, ensuring you get the best value while providing buyers with reliable products.
Pro Tip: Ensure the laptop’s data is securely erased before selling or donating.
How Retechie Can Help
Retechie is a trusted platform for professionally refurbishing old laptops and turning them into valuable assets. Whether you’re looking to resell or donate, Retechie ensures your device is restored to optimal condition.
Why Choose Retechie?
Certified Refurbishment: Comprehensive testing and repairs for quality assurance.
Wide Range of Services: From Refurbished Apple laptops to Windows devices.
Eco-Friendly Solutions: Supporting sustainability by reducing e-waste.
Final Thoughts
Repurposing an old laptop is a smart, sustainable way to extend its usability while saving money. Whether you’re converting it into a media server, donating it, or refurbishing it for resale, the possibilities are endless.
With platforms like Retechie, repurposing or restoring your used laptop becomes easier and more reliable. Give your old device a second life and contribute to a greener planet today! Explore professional refurbishment services and affordable refurbished laptops at Retechie and unlock the potential of your old laptop.
#Renewed Laptop#Used Laptop#Old Laptop#Old Laptops#Used laptops in India#refurbished laptop#refurbished laptops#renewed laptops#refurbished laptops in India#Second hand laptops#Refurbished apple#Refurbished Apple Laptops#Refurbished macbook air#Second hand laptop#Retechie
0 notes
Text
INRIKS EX4076KVM 4K HDMI KVM twisted-pair extender review.

Feature description
The INRIKS EX4076KVM is a transmitter and receiver kit that allows HDMI and USB signals to be transmitted over twisted-pair cables for up to 230 feet.
Specsheet claims the maximum supported video resolution is 4K at 60 Hz.
The transmitter has an HDMI pass-through output port. It can help connect a nearby TV or monitor.
The receiver has a digital S/PDIF output for connecting an audio system.
The manufacturer does not specify the version of the USB standard. We assume this is USB 1.1, intended for connecting low-speed devices like a regular keyboard and mouse. So, the webcam most likely will not work with such an extender, but we will check it anyway.
Let's take a closer look at what's in the box and how everything connects together.
Visual overview
As usual, INRIKS ships out the EX4076KVM kit in a gray cardboard box with a brief description on a sticker.

Inside the box, one finds the transmitter and the receiver neatly tucked in soft-touch plastic baggies. Those are rare for INRIKS packaging, usually saved for a higher-level lineup of extenders.

Under the plastic tray, there are two PSUs, a USB cable, and a set of mounting brackets with a bunch of screws.

So the full kit of the INRIKS EX4076KVM is:
• Transmitter unit - 1 pc • Receiver unit - 1 pc • DC 5V/2A - 2 pcs • USB Cable - 1 pc • Mounting brackets - 8 pcs • Screw - 18 pcs • User manual - 1 pc
The transmitter and the receiver are both medium-sized, not compact, but feel solid in your hand. It's easy to spot high manufacturing quality right away. The entire case is made with minor grooves for better heat dissipation.


One side of both the transmitter and the receiver has the same set of interfaces, left to right: • a pair of LED indicators for USB (KVM) signal transmission and reception • Reset button • RJ45 port for twisted pair connection • LED power indicator
On the opposite side of the transmitter, left to right: • power connector DC 5V-12V • HDMI output for a local TV • HDMI input for connecting a video source, PC, or DVR • USB port for connecting to a video source
The opposite side of the receiver, from left to right: • DC 5V-12V power input • digital audio output (S/PDIF) • HDMI output for a TV • two USB ports for a keyboard and a mouse
One can call it just a standard set of interfaces, except for the loop-out HDMI on the transmitter and S/PDIF digital audio output on the receiver.
We have already covered the HDMI loop-out function in a separate post. It is basically a 1 to 2 HDMI splitter built into the transmitter.
It can connect a reference monitor, displaying the video identical to that transmitted over a twisted-pair cable to another room. Suppose you want to stream the same video simultaneously to both the remote room and the room with the video source (PC or DVR). In that case, you can do it easily with no external HDMI 1-to-2 splitter or additional cables needed.

As for the S/PDIF audio output of the receiver, this option will be of little use to anyone connecting an HDMI KVM extender to a DVR. Although it might be helpful to someone.
The sides of the housing have mounting holes for screws. The possibility of adding the brackets and the fact that they are included are undeniable advantages of this kit. With them, you can securely fix the transmitter and receiver to horizontal and vertical surfaces.


The holes allow the mounting brackets to be positioned in two planes, as shown:


The first option of bracket placement is used to secure the device to a horizontal or vertical surface by the majority. However, some professionals will be very grateful for the ability to install brackets using the second option.
We've already said that the transmitter and receiver feel substantial and well-made. All ports fit perfectly into the cutouts in the case. Having unscrewed the front panel, the thickness of the case immediately caught one's eye; no expense was spared on it. Most likely, it is made of aluminum alloy. The circuit board is securely seated in its guiding grooves and does not wobble.


The front face of the board is made neatly without any visible flaws. The downside is a downside (pun intended). We've found flux stains around bigger components like connectors. At this time, we can consider this a signature feature of INRIKS equipment. Although it is unlikely that this will somehow affect the operation of the kit, this is the voice of an inner perfectionist in me :)


Wiring up and testing
For the first test, we decided to use the setup from the manual. The only exception was that we did not connect an external speaker system to the S/PDIF port.

We connected the transmitter and the receiver with a 230-foot-long CAT6 twisted pair cable. This is the maximum length, according to the manual.
We've connected the laptop to the transmitter with HDMI and USB cables. Additionally, we've hooked up a reference monitor to the transmitter to test the Loop-Out HDMI function.
We've connected a second remote monitor, keyboard, and mouse to the receiver.
It took a few seconds after the startup for the devices to pair. The laptop began playing video on the local control and the remote displays. We did not encounter any visible delays. Just to be sure, we've repeated the tests with Online Stopwatch. If there even was a delay in video transmission, it was definitely under 1 millisecond.
We had no problems with the quality of the video.
The remote mouse and keyboard also worked without delays or issues.
The point is that we did not feel that the laptop and the monitor, mouse, and keyboard were 230 feet of twisted-pair cable away from each other.
The next stage was connecting a webcam instead of a keyboard and mouse. The camera did not turn on upon connection.
This is predictable; we've already mentioned that there is a difference between an HDMI KVM extender over a twisted pair and an HDMI USB extender over a twisted pair. KVM extenders usually support just the USB 1.1 interface and work only with HID-class devices, the most common of which are keyboards and mice. Therefore, manufacturers often use the abbreviation KVM (keyboard, video, mouse) to emphasize the intended use case and limitations.
Kinda verdict
In our humble opinion, the INRIKS EX4076KVM is an excellent 4K HDMI KVM (keyboard, video, mouse) extender kit over twisted pair cable up to 230 feet. It is perfect for home CCTV applications. For example, your recorder is located in the attic, but you want to access it from a room downstairs; the only thing you have to do in this case is run a single piece of CAT6 twisted pair cable.
0 notes
Video
youtube
Alxum USB 3.0 Extension Cable offers an easy and inexpensive way to easily connect your USB device from across the room to the computer up to 32 Feet/10Meters: https://www.alxum.com/products/oculus-rift-extension-cable
Anybody need this extension cable for SecurityCamera? 🤔How to extand longer distance? Enjoy within reach! Make your Camera printer, any usb device more flexible in other room~ 🙆WEme 10M USB 3.0 Extension Cable 👌Support up to 32 FT between your computer and devices over long distances transfer. 👉Cable: https://www.alxum.com/products/oculus-rift-extension-cable #Webcam #SecurityCamera #Printer #Scanner #Microphone #WiFiAntenna #Telescope #VR #Xbox #USBDevices #Alxum
What Devices You Could Extend: # USB Extension Cable Compatibility: Compatible USB devices: Mouse, Keyboard, Printer, Scanner, Camera, Webcam, USB Flash Drive, Hard Drive, Gamepad, Xbox 360 Kinect, Speaker, WiFi Receiver, USB Hubs, etc. # Compatible VR devices: PlayStation VR, Oculus Quest, Oculus Quest 2, Oculus Rift Sensor, HTC Vive, Valve index,etc. # Compatible System: Plug and Play on mainstream operating systems including Windows, Vista, Mac OS, Linux, Chrome OS, etc.
Easily to extend your webcam, printer, oculus vr devices with Two Signal Boosters that ensure no signal attenuation for 10 meters/32ft length.
View Blog: How Active USB 3.0 Extension Cable Help You Out https://www.alxum.com/blogs/news/how-active-usb-3-0-extension-cable-help-you-out Why Extension Cable is Needed for a Oculus Rift? [How to Extend Your Webcam & USB Devices (Alxum 10M Extension Cable)] https://www.alxum.com/blogs/news/why-extension-cable-is-needed-for-a-oculus-rift
What kind of extension cable you need: 15M Alxum USB 3.0 Extension Cable (NEW!!!): https://www.alxum.com/products/active-usb-extension-cable 10M Alxum USB 3.0 Extension Cable: https://www.alxum.com/products/oculus-rift-extension-cable 10M WEme USB C Extension Cable: https://www.alxum.com/products/usb-c-extension-cable-for-oculus-vr-10m-32ft 5M WEme USB C Extension Cable: https://www.alxum.com/products/usb-c-extension-cable-for-oculus-vr-5m-16-4ft 10M WEme USB 3.0 Extension Cable: https://www.alxum.com/products/usb-3-0-extension-cable-for-oculus-rift-10m-32ft 5M WEme USB 3.0 Extension Cable: https://www.alxum.com/products/usb-extension-cable 5M WEme USB3.0 Extension Cable: https://www.alxum.com/products/usb-3-0-extension-cable-with-signal-amplifier-5m-16ft
0 notes
Text
Usb network gate 7.0 crack


USB Network Gate is great app for Android, listed in Usb apps on Android Freeware. USB Network Gate App - freeload for Android Find out how to access iPhones remotely as well as Android smartphones with USB Network Gate in this detailed video guide. Follow USB Network Gate on Facebook for more news. The licensing price starts at $159.95, also for a single device. USB Network Gate comes with a free 14-day trial period, where it is possible to share a single local USB device. Share USB devices easily over a network with USB Network Gate On the contrary, with the help of this program you can work with those devices as if they were physically connected to your local computer. With USB Network Gate you'll never face any problems accessing and managing the USB devices plugged into remote computers. It works great with lots of types of remote devices, it can be a webcam, printer, iPad, MIDI controller, or a USB monitor. USB Network Gate supports Windows, Linux, Mac, Android, which makes it great for a corporate network usage.
USB Network Gate Crack + Keygen Full Free.
USB over IP Network - USB over TCP/IP - USB Network Gate.
USB Network Gate v Full Crack 2020 Download.
USB over Ethernet | Share USB Device with USB Network Gate.
How To Connect And Configure USB Modem To Android Tablet.
Скачайте USB Network Gate для Windows, MacOS, Linux и Android.
USB Network Gate 8.0 Crack + Activation Code freeload.
USB Network Gate - Share USB devices over Network - Apps.
USB Network Gate APK - Download for Android.
USB Network Gate App - freeload for Android.
Download USB Network Gate 6.2.680 for windows.
USB/IP Alternatives and Similar Software.
Share USB devices easily over a network with USB Network Gate.
It would probably make more sense to invest in a piece of server hardware that can be extended to precisely suit your needs and offers a far more flexible solution at a much lower cost.Įxtremely expensive and rather limited, a hardware solution is a far better option for most people. For many people and companies, this is going to be prohibitively expensive. If you want to share more, you have to buy a 2, 10 or unlimited USB device license which will cost you $159.95, $399.95 and $699.95 respectively. Buying a single license will enable you to share one USB device only, but with as many people as you want.

While most programs require you to buy a licence per computer or per user, here you must buy a license for each device that you want to share. It is worth noting that the licensing structure that is in place for USB Network Gate is a little different to other software. Wifi access is also available so there is no need to be physically connected to the network, and there are a number of security options available that can be used to restrict access and encrypt data. This is what USB Network Gate enables you to do, with one computer acting as a server and other client machines connecting to it via TCP/IP to use the USB device that has been set up for sharing.ĭevices can be shared between Windows, OS X and Linux machines and it can even be used in conjunction with remote access software to allow for connections from outside the network. Do you have a USB printer connected to one computer that you would like to make available over a network? You may also have a web cam, scanner, external hard drive and numerous other devices that you would like to be able to share.
0 notes
Text
Server 2012 logitech unifying software

#Server 2012 logitech unifying software how to
#Server 2012 logitech unifying software software download
The Logitech MK850 Performance Combo comes with a Unified USB receiver.ĭownloads - Performance Mouse MX There are no Downloads for this Product. Logitech Options is extremely easy-to-use yet it provides amazing features. The wheel s machined steel gives it a premium tactility and enough weight to offer a dynamic inertia you feel but don t hear. MX Performance Mouse - Our most advanced tracking technology puts the power to achieve in your hands.ĭriver and optimizes the award-winning design and Windows 10. Logitech Touch Mouse Server for Windows 64-bit Use your iPhone or iPod touch as a wireless trackpad and keyboard for your computer. Logitech dedicated to get it switches among devices with a bit. Hi, I bought a Logitech Anywhere MX mouse but I am unable to get it installed and working on my Windows 7 Professional 圆4 computer. There s a groove along the left side of the mouse for your thumb, as well as the mouse fits my hand nicely. Your devices show up as on-screen images, so they re easy to find, switch, and set up in seconds. Specifications Spare Parts Gallery Contact Us Downloads - Performance Mouse MX There are no Downloads for this Product. Logitech Anywhere Mouse MX Download Logitech Anywhere Mouse MX Software for Windows 10, 8, 7 Logitech Options.Ĭombos can be paired with up to three different host devices and easily switch between them. We hope after trying the above methods you are no longer troubled with Logitech C920 webcam not detected on Windows 10.Ĭustomize your favorite games with custom button macros on F1-F12. The MX Master wireless is Logitech s current flagship mouse, which comes with a spec sheet. If your product isnt listed and you purchased it, BEFORE the Windows 8 release - The product isnt supported on Windows 8 or Windows 10. Logitech also bundles a USB extender for use cases where placing a backup USB port on a PC can result in poor wireless performance. Logitech MK850 Performance review, A quiet, comfy keyboard that needs more snap We love how it switches among devices with ease, but the squishy keys are a turn-off.
#Server 2012 logitech unifying software how to
Logitech MX performance mouse setup and how to program buttons PFT. Logitech C920 Webcam not working issue resolved Hy, if you want to download Logitech MX510 Software, Driver, Manual, Setup, Download, you just come here because we have provided the download link below.
#Server 2012 logitech unifying software software download
Logitech Unifying Software Download Logitech MX510 Logitech Unifying Software Download Logitech MX510.
0 notes
Quote
While I love the portability of my Apple MacBook Pro (MBP), the fact that I spend most of my time NOT moving around now and working at my desk means that I want it to be more like a desktop. And, the MBP is physically limited to four USB-C ports. That’s it. Other MacBooks have even fewer USB-C ports. But I want to connect to many more peripherals like monitors and hard drives and have a hard-wired ethernet connection. To achieve this without a hub would mean I would have hundreds of port connectors and dongles plugged in. That’s messy. So, for the past few months, I have been testing out the HyperDrive 12-Port USB-C Docking Station, and I must say, it is now my favorite hub for multiple functions. (*Disclosure below.) USB Type-C is a pretty magical type of port. More and more devices are adopting it as THE standard for ports. Not only does it plug in upside down or right side up (I hated that about previous versions of USB – Type A, Micro, Mini, etc.), it also has many other capabilities which will make it the standard moving forward for all types of devices (laptops, desktops, monitors, peripherals, smartphones, and more). USB-C handles the USB 3.1 (and higher) standards and, importantly, can deliver power to your devices, known as USB power delivery (USB PD). A quick side note here – when shopping for USB-C cables, the USB PD-capable cables will cost a bit more, but you can then use them to power and charge your devices. And, USB-C can handle other “modes” that are used by monitors and displays, which were previously covered by HDMI, DisplayPort, and VGA, to name just a few. USB-C can handle all of these. So, why is this important to a USB-C docking station like the HyperDrive 12-Port USB-C hub? With this device, you have a single USB-C connection plugged into the MacBook, and this handles pretty much everything (including power). This is what drives my XX reasons why the HyperDrive is my favorite USB-C docking station. Reason #1 – Uses only one USB-C port on my MacBook Pro While the MBP that I have has four USB-C ports, it’s nice to not take them all up with different connections, especially if you want to have the easy ability to unplug and get on the go easily. With this single USB-C port plugged into the HyperDrive 12-Port USB-C Docking Station, I have everything connected that I need to have and still have three other ports available should I need to connect more devices. The 12-port version of this USB-C hub has a short, built-in USB-C cable that you plug into your Mac (or PC). This cable is the USB PD (Power Delivery) type, so not only will it charge your MBP, but it also provides all of the connectivity to the other ports contained within the hub. This built-in upstream USB-C cable can transfer 100W of power to charge and power your computer. And it supports Display Port (DP) 1.4 alt mode. Reason #2 – It has built-in Ethernet While WiFi continues to get faster, it’s still WiFi which means that you will encounter dead spots or potential WiFi congestion if you have many devices connected to WiFi. And WiFi is not as fast (yet) as a hard-wired connection like Ethernet. When I moved into my home, I ran ethernet cabling to every corner of the house so that I would have the ability to have hard-wired connections everywhere. Unfortunately, if you put your WiFi router in the center of your home when you go to the corners, the transmission speed is not as fast as when you are close to the WiFi router. So, I have an ethernet switch for my office, and connected to the switch is the HyperDrive 12-Port hub. There is a jack on the hub for the ethernet cable. This Ethernet port supports 10Mbps/100Mbps/1Gbps connections at either half or full-duplex connection. Reason #3 – Connect multiple monitors I honestly cannot work without having multiple screens. As I write this review, I have a 27″ 4K monitor, my laptop screen, and a portable USB-C display. If my desk could hold more displays, I would connect them (but I haven’t as of yet). Before having the HyperDrive docking station, I had a USB-C to HDMI adapter (and yes, that took up a USB-C port on my MBP – as did another adapter I used for USB-C to Ethernet). That meant that three of my four USB-C ports on my MBP were used up (display, ethernet, and power). What is great about the HyperDrive USB-C Docking Station is that it has the ability to connect up to three monitors. Built into the hub are two HDMI 4K (60Hz) HDR ports and one 4K (60Hz) DisplayPort. While I have seen some hubs that will only support mirroring of displays unless you install some kind of driver, these three ports are independent, and you can do mirroring OR have three extended displays. A quick note here – and this is not something that I have tested – but on macOS, while you CAN connect multiple monitors, the (up to 3) monitors will all be mirrored. So you could have four displays (including your Mac) showing the same screen, or you can have the three connected monitors showing the same (extended) screen and a different screen showing on your Mac itself. With Windows, you can do mirror mode (the same display on all screens) or do extended mode with different monitors showing different extended displays. See this FAQ for more details. I currently have my 27″ monitor as an extended display. Unfortunately, since the 12-port HyperDrive only has one extra USB-C port, which is used to connect the power supply from my laptop, I do have to plug that third display of mine directly into my MBP. But, this setup does allow me to have three distinct displays showing simultaneously. But again, the important thing to remember here is that for the Mac, there are no drivers or additional software you need to install to have this hub support multiple displays. You just plug it in, and it simply works! Reason #4 – It has the old USB-A ports as well Unfortunately, we are not going to escape from USB Type-A for a while. There are many, many devices and peripherals that still use this older standard. And luckily, the HyperDrive 12-port hub supports them. I actually have two USB external hard drives, a microphone, a webcam, and some other devices connected through the hub. Wait, you say! Those are more than four USB-A devices. Yes, I cheated a bit. I actually have a powered USB-A hub that I plug into the HyperDrive as well in order to support even more devices than the HyperDrive can handle. However, for the two external USB drives, I do plug them directly into the HyperDrive to get faster data transfer. The HyperDrive has four USB-A ports – two are the older (and slower) USB-A version 2.0, and two are the newer (and faster) USB-A 3.0. The USB-A 2.0 ports share 480Mbps bandwidth and have a 500mA power output. The USB-A 3.0 ports share 10Gbps bandwidth and have a 1.5A power output. Reason #5 – Support for SD cards Those of you who are digital photographers (and who don’t just use their smartphones as I do) will be happy to see the inclusion of Secure Digital (SD) cards. There is a slot for MicroSD and one for SD. These ports support the UHS-II SD 4.0 specification, and they are backward compatible. These slots support a maximum read/write speed of 312 MB/s and can handle SD cards up to 2TB in size. And, you can use both the SD and MicroSD slots to read/write simultaneously. So, if you use a DSLR or have a drone capturing 4K video and need to easily connect to your computer to download video or images, having these two SD slots within the HyperDrive hub is a huge blessing! Reason #6 – A (gasp) 3.5mm audio port Yes, the 3.5mm audio port still lives despite it being removed from modern smartphones. And while there IS still a 3.5mm audio port on my MBP, I’m wondering how long that port will continue to live in future generations. But one of the nice things is, using the 3.5mm audio jack allows you to connect speakers to the HyperDrive dock and leave the 3.5mm audio jack on your laptop to be for headphones. The port is a 4-pole (TRRS) stereo (384Khz, 32-bit max sampling rate) which also supports a 384Khz 32-bit microphone. This is a true stereo headphone and microphone port. Reason #7 – It’s “cool” – literally! One thing that I have noticed about various types of hubs is that they tend to heat up. This really isn’t surprising because there is a lot of information, data, and signals being transmitted through various distinct chips within these hubs. Add power to the hub, and there is a tendency for the hubs to carry a lot of heat. The HyperDrive 12-port USB-C docking station, to my surprise, actually is only mildly warm to the touch. Yes, there is heat, but it’s not something you can fry an egg on (like some other ports I have tested). This is due to the design of the hub itself. It has heat-dissipating ridges built into its design, and the metal used seems to disperse heat nicely. Lucky 7 makes the HyperDrive Gen2 12-Port USB-C docking station a winner! I’m sure I could have come up with more than seven reasons why this USB-C hub and docking station is my go-to favorite currently. However, the thing that I truly like best is that it simply works. You plug it in, connect your devices, and everything connects! No need for drivers or other utilities. One problem though is the limited availability of the 12-port docking station. I guess with everybody working from you, there is high demand for hub solutions like these. The 12-port version is listed on the HyperShop site for $169.99. Unfortunately, it is currently not available on Amazon. However, the version that I really wanted to have, which is a bit pricier, IS available on Amazon (as well as on the HyperShop site). It is the 18-port solution. To the 12-port, the 18-port adds: VGA – to connect those really old monitorsOptical Taslink Audio – if you want digital audio connectionsDigital Coaxial Audio – another audio optionUSB-C ports – it’s nice to have additional USB-C portsDC Power Port – you can get an optional power supply to power the entire hub and then don’t nee to plug in a USB-C PD The HyperDrive GEN2 USB-C 18-Port docking station is available on Amazon for $199.99. Note: this does NOT include the optional power supply – you have to purchase that separately at $99.99. Shop on HighTechDad The product shown below (and related products that have been reviewed on HighTechDad) is available within the HighTechDad Shop. This review has all of the details about this particular product and you can order it directly by clicking on the Buy button or clicking on the image/title to view more. Be sure to review other products available in the HighTechDad Shop. HyperDrive 12-Port USB-C Docking Station and Hub $199.99 Buy on Amazon HyperDrive Pro 8-in-2 Hub $99.99 Buy on Amazon Lastly, if you are looking for a great portable hub solution, be sure to read my review of the HyperDrive Pro 8-in-2 Hub! The bottom line here is, if you are looking for a high-quality USB-C docking station that handles a variety of different connectivity scenarios, you will want to avoid getting a bunch of single-purpose adapters and opt for a multi-function hub. The HyperShop 12-port USB-C Docking Station gives you the flexibility to connect multiple devices easily without any worry. Disclosure: I have a material connection because I received a sample of a product for consideration in preparing to review the product and write this content. I was/am not expected to return this item after my review period. All opinions within this article are my own and are typically not subject to the editorial review from any 3rd party. Also, some of the links in the post above may be “affiliate” or “advertising” links. These may be automatically created or placed by me manually. This means if you click on the link and purchase the item (sometimes but not necessarily the product or service being reviewed), I will receive a small affiliate or advertising commission. More information can be found on my About page. HTD says: I honestly don’t think I could survive without the HyperShop 12-port USB-C Docking Station as it helps me connect monitors, hard drives, Ethernet, audio, and more while only using a single USB-C port on my MacBook Pro.
https://www.hightechdad.com/2021/09/06/7-reasons-why-the-hyperdrive-12-port-usb-c-hub-is-my-favorite-docking-station/
0 notes
Text
Fetch Tv Plex

Unless you're a steadfast supporter of regular cable and direct-to-home TV programming and services, you would've have noticed that a lot of new content depends on the Internet. Although you do have access to a wide variety of programming through your regular set-top box, you're missing out if you don't get on board the streaming revolution. Many of the best TV shows and movies are now found online, and often available exclusively via streaming services like Netflix, Hotstar, and Amazon Prime Video.
Fetch Tv Plex Download
Fetch Tv Plex App
Fetch Tv Support
Even if you're sold on the concept, the problem now arises with your screen. Sure, your smartphone supports popular streaming services, and the reducing cost of mobile data means its affordable as well. But what if you don't want to watch your video content on a small screen? What if you could use your TV?
You can indeed, thanks to smart TVs. These connect to the Internet to give you access to streaming services through apps, in much the same way that a smartphone, tablet or computer would. But not everyone owns — or can afford — a smart TV. How do you get access to these services on your big screen then? Our guide will help you with just that.

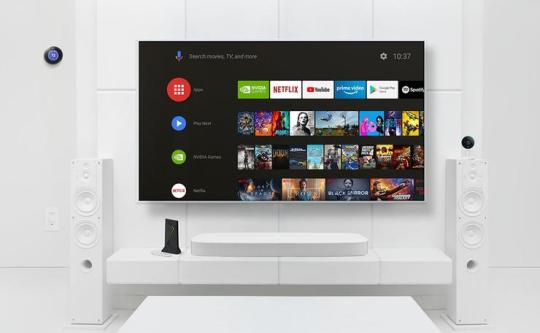
The best way — a streaming stick or dongle
Feb 28, 2019 The Plex Media Server will restart as a fresh install and you can proceed to set things up as you desire. Warning: This procedure will remove your entire Library. You will have to re-scan, fetch metadata, and re-do any metadata edits. The purpose of this is to remove all cached metadata and xml data for an item that Plex usually keeps. This helps when you want to “start from scratch” for particular item move all files for the media item out of the directory your Library is looking at, so Plex will not “see” it anymore scan the library library (to detect changes) empty trash clean bundles (in menu next to server name.
Fetch Tv Plex Download
The easiest and most effective way to add smarts to your dumb TV is a good streaming stick or dongle. There are numerous options in this category, all offering different features and abilities that let you connect to online services.
Listing out your specific requirements will help you choose the best streaming stick or dongle for you. For this, you should figure to what kind of content you want, which will help you pick the best device for you. For example, if you watch a lot of content on Amazon Prime Video or Netflix, the Amazon Fire TV Stick range might be ideal for you. On the other hand, if you have a lot of Apple devices, you might prefer the Apple TV range for its seamless ability to interface with your iPhone or Mac computer. Similarly, if you have an Android phone to use as a controller, you could use a Chromecast.
Some of these high-end devices may be able to draw power from one of the USB ports on your TV itself, while others may need to rely on a wall adapter to draw enough power. You'll therefore have to make sure you have either a free USB port or a wall socket for the adapter.
If all you need is a device to cast content or mirror the screen of your Android smartphone, you could potentially make do with one of a number of Chromecast ‘clones' available both online and offline. These plug into the HDMI port on your TV and add Miracast support, letting you directly mirror the screen on your Android smartphone or cast the screen from a number of apps, including Netflix and VLC Media Player.
Some of these devices can be purchased for under Rs. 1,000, turning your smartphone or computer into the controller and provider of internet connectivity to your TV. And if you can buy devices from abroad, you have various options such as the Roku Streaming Stick+ and Xiaomi Mi TV Box to choose from as well.
The most affordable way — good-old cables
The most affordable way to add smarts to your dumb TV is one that not a lot of people think of straightaway, but it seems rather obvious in hindsight. However, it isn't the easiest or most clutter-free way to do things. At a very low cost — or free, if you already have the necessary cables lying around at home — you can add basic smarts to your TV. The easiest way is to use an HDMI cable to connect your laptop to your TV, and mirror or extend the laptop screen onto the TV this way.
The advantages of this method are that it is extremely affordable, and gives you the full power of your computer on the large screen. If your laptop has an HDMI-out port, all you need is a standard HDMI cable; decent options cost as little as Rs. 300. If you use a laptop that doesn't have an HDMI port — a MacBook Air, for example — then you may have to spend a bit more on the right cables or adapters. Ease of use is another key advantage; you only have to plug the cables in and switch to the right source on your TV to mirror your screen.
With this, your TV is effectively connected to the Internet (through your laptop, of course). You can now use your laptop as a controller and fetch whatever content you want, which can be downloaded, through specific apps or even an Internet browser. The same technique can work with many smartphones as well, assuming that you have the right cables and the device itself allows its display to be mirrored over HDMI.
Cables and adapters are also available for connecting USB Type-C/Thunderbolt or Lightning-compatible devices to TVs through the HDMI port, which offers the ability to connect compatible smartphones and laptops to the TV. The cable you use entirely depends on the device you intend to use as a source, since you'll have to ensure it adheres to the ports you have available and the compatibility of the feature.
The biggest disadvantage of this method is the cable itself; it can be messy, inconvenient and cluttered. In an age where technology is increasingly finding ways to do away with wires, using long cables will come across as a rather low-tech method of doing things. And of course, having your laptop or smartphone screen mirrored on the TV can be inconvenient in different ways — everyone looking at your TV will be able to see your notifications and private conversations. Not to mention you won't be able to control your laptop while sitting on the couch unless you throw in really long cables or additional accessories into the mix.
The most feature-filled way — game consoles
Here's another method that might also seem obvious in hindsight: use a modern gaming console. If you have a Sony Playstation 4 or Microsoft Xbox One (or any of their different variants), you can use these as smart streaming devices. These consoles connect to the internet and have apps available for many of the streaming services. These include Netflix, Amazon Prime Video, Spotify, YouTube, Plex, and Twitch, to name a few.
Of course, the biggest advantage of using a gaming console is the gaming, which makes it a much more feature-filled device. If you already have one, we suggest you simply install the right apps on it and make your TV smart, rather than look at any other method to do so. If you're starting from scratch, a game console is a rather expensive way to add smart features to your TV. If you aren't a gamer at all, it might be better for you to have a streaming device or use cables, as mentioned above.
The flip side — when you shouldn't bother making your dumb TV smart
While we've covered the process of explaining what a smart TV is and how you can make a dumb TV smart, it's also worth exploring whether you really even need a smart TV. The answer to this depends on your viewing habits, and what you're looking for from your TV.
Most of the best content today — including popular TV shows, movies and other programming — can be found online, to the point where a lot of new shows and movies are being produced by online streaming services and are released exclusively online. Furthermore, the internet is the best way to access 4K content, with set-top boxes largely limited to full-HD content. Popular shows such as Sacred Games, Jack Ryan, Narcos and The Grand Tour are examples of content that can only be accessed in India using streaming services. If this is what you're looking for, you should make your dumb TV smart.
On the other hand, if you have a small TV, don't find too much time to watch TV, or usually stick to regular programming available on cable or DTH connections, you may not need a smart TV at all. For example, if all you really do is watch the news or sports, you'll find a cable or DTH connection adequate. Even if you do have the occasional need for a smart TV, it may make sense to use the cable option for those occasions, rather than invest in a dedicated streaming stick or console.
Fetch Tv Plex App
Furthermore, there are a couple of reasons to not make your TV smart. The first applies to the actual smart TVs themselves; software updates are often slow or non-existent on many smart TVs. This will cause the TV to have performance or security issues over time, and it's perhaps a better idea to not invest in a smart TV at all.
The second is about privacy. Connecting any TV to the Internet opens up the possibility of your viewing data being used in ways you may not like. This can include selling your data to advertisers, which can then use your viewing habits to target specific ads to you. It can also be worse, where a TV with a webcam or attachable camera can then be used to spy on you in your home. The safest way to protect your privacy with regards to your TV is to keep it disconnected and functional only as a screen with local content sources.
Fetch Tv Support
Affiliate links may be automatically generated - see our ethics statement for details.
0 notes
Text
Why Extension Cable is Needed for a Oculus Rift?
https://www.alxum.com/blogs/news/why-extension-cable-is-needed-for-a-oculus-rift
News
Why Extension Cable is Needed for a Oculus Rift?
POSTED BY KENNY LEE · MARCH 17, 2021
I bet you a VR fans if you notice this article, you may take your VR to anywhere for fun. But if you go outside that you was limited by wireless oculus. And do you often feel upset if your wireless oculus is not stable?
That's Why Extension Cable is Needed for a Oculus Rift
VR is bandwidth hungry and the longer the cable, the more likely you are to run into problems. Long active extension cable always allows you huge flexibility in setup without sacrificing performance. It's really a importance for VR fans to find a best usb 3.0 extension cable for oculus rift.
How to Extend your Oculus Rift Cable
Plug the male cable end from the sensor into the female end on the extension cable.
Plug the extension into your PC.
5V/2A power adapter is needed for high-power devices to get additional power.
Your sensor will have an extra 16 feet or 32 feet to work with Alxum Oculus Rift Cables, which in most cases should be more than enough when setting up a room-scale Rift experience.
Wait, it's not only a oculus rift cable, but also good for extend other usb devices, such us Webcam, USB Flash Drive, Mouse, Keyboard, Printer, Scanner, Camera, Hard Drive, Gamepad, Xbox 360 Kinect, Speaker, WiFi Receiver, USB Hubs, etc. Alxum 10M extension cable easily extends your webcam, printer, oculus vr devices with Two Signal Boosters that ensure no signal attenuation for 10 meters/32ft length.
Video on How to Extend Your Webcam & USB Devices (Alxum 10M Extension Cable)
Alxum offers various extension cables at 16ft and 36ft in length. We recomend that you choose oculus rift cable based on your room. No matter you need for Oculus Link, Rift, Quest, 5M and 10M is long enough to transfer data between your computer and devices over long distances. (Please pair with usb c adapter for quest.)
Alxum New Oculus Rift Extension Cable 10M/32FT
WEme USB 3.0 Extension Cable for Oculus Rift VR (5M/16FT)
WEme USB 3.0 Extension Cable for Oculus Rift 10M/32FT
WEme USB C Extension Cable for Oculus VR 10M/32FT
WEme USB C Extension Cable for Oculus VR 5M/16.4FT
You don't want to miss out because it's cost-friendly, and it's been tested to confirm it works with Rift sensors. $17 for 5M, $29 for 10M. I must choose the 10M for biggest fun with my oculus. Extend to 5M-10M, which is no doubt more than enough to hit the back and corners of your VR room. If you want a best extension cables for oculus rift, I recommend
Alxum 10M Oculus Rift Extension Cable
Alxum friend can't wait to play Oculus Link with Alxum new 10M Oculus Rift Extension Cable, he tried and videoed for how oculus rift cable works. If you have any question you could join and comment.
Video Share:
AMAZING Oculus Link works GREAT with this *10M LONG* Oculus Rift Extension Cable from Alxum
1 note
·
View note
Text
Lenovo T60 Wireless Driver

Download Lenovo ThinkPad T60 Wi-Fi device drivers for Windows 7, XP, 10, 8, and 8.1, or install DriverPack Solution software. Intel(R) PRO/Wireless 3945ABG Network. Then make a lot of your number. On reboot, new t60 pci device seen but drivers not recognized. I have a lenovo thinkpad t60p and a lenovo usb webcam. Pci device driver free download for windows lenovo thinkpad t60 b72 lenovo is committed to environmental leadership from operations to product design and recycling solutions. Updating Lenovo Drivers and Applications using Lenovo System Update. PC Data Center Mobile: Lenovo Mobile: Motorola Smart.
T61p & T60 Drivers-English Community - Lenovo Forums
Lenovo T60 Wireless Adapter Driver
Home >lenovo >Lenovo ThinkPad T60p

LenovoDriversFree.com provide lenovo Drivers Download free, you can search and download all Lenovo ThinkPad T60p drivers for windows 7 32bit & 64bit, windows 8, xp, vista, we update new Lenovo ThinkPad T60p drivers to our driver database weekly, so you can download the latest Lenovo ThinkPad T60p drivers free for windows 7, xp, vista, 8 etc!
Download Lenovo ThinkPad T60p Drivers Free

Driver TypeDetailDriver FileSizeDownloadAudioAudio driver77a224ww.exe (you can also download 77a224ww.rar ,77a224ww.zip ) 6.5 MB Download FreeAudioAudio driver77a324ww.exe (you can also download 77a324ww.rar ,77a324ww.zip ) 5.72 MB Download FreeMouse and KeyboardSynaptics UltraNav Driver6hgx73ww.exe (you can also download 6hgx73ww.rar ,6hgx73ww.zip ) 27.63 MB Download FreeNetworking: Wireless LANThinkPad 802.11abgn wireless LAN driver7iwc28ww.exe (you can also download 7iwc28ww.rar ,7iwc28ww.zip ) 6.09 MB Download FreeNetworking: Wireless LANIntel wireless driver7kwv50ww.exe (you can also download 7kwv50ww.rar ,7kwv50ww.zip ) 62.1 MB Download FreeNetworking: Wireless WANVerizon Wireless WAN driver79wv04ww.exe (you can also download 79wv04ww.rar ,79wv04ww.zip ) 2.15 MB Download FreeNetworking: Wireless WANCingular Wireless WAN Driver7cwc05ww.exe (you can also download 7cwc05ww.rar ,7cwc05ww.zip ) 1.18 MB Download FreeNetworking: Wireless WANVodafone wireless WAN driver7bwc14ww.exe (you can also download 7bwc14ww.rar ,7bwc14ww.zip ) 1.18 MB Download FreeNetworking: Wireless WANThinkPad HSDPA Wireless WAN driver7cwv07ww.exe (you can also download 7cwv07ww.rar ,7cwv07ww.zip ) 1.92 MB Download FreeVideoIntel (GL960, GM965) Display Driver7ld152ww.exe (you can also download 7ld152ww.rar ,7ld152ww.zip ) 8.5 MB Download FreeVideoLenovo ATI FireGL display driver8.263.4-060707a-034699c-whql-lenovo.exe (you can also download 8.rar ,8.zip ) 54.5 MB Download FreeVideoISV Video driver79d121ww.exe (you can also download 79d121ww.rar ,79d121ww.zip ) 47.5 MB Download FreeVideoATI Display Driver79d533ww.exe (you can also download 79d533ww.rar ,79d533ww.zip ) 91.55 MB Download FreeVideoLenovo ATI Mobility FireGL V5200 driver8.293-060908a-036813c-whql-lenovo.exe (you can also download 8.rar ,8.zip ) 54.66 MB Download FreeVideoISV video driverati8_223.exe (you can also download ati8_223.rar ,ati8_223.zip ) 24.45 MB Download FreeVideoATI Display Driver79d179ww.exe (you can also download 79d179ww.rar ,79d179ww.zip ) 71.14 MB Download FreeVideoATI FireGL display driver8.323-061206a-040496c-whql-lenovo.exe (you can also download 8.rar ,8.zip ) 55.23 MB Download Free
We provide almost all Lenovo drivers for download, If you could not find the exact driver for your computer or you aren't sure which driver is the right one, then you can download our driver software, which help you download lenovo drivers for your automatic and fix your lenovo driver problems. Please click here to download.
Microsoft Agent Microsoft Employee
SoundMAX Integrated Digital
T61p & T60 Drivers-English Community - Lenovo Forums
Fix Sound Internal Speakers
IBM Lenovo Thinkpad
DriversLenovo Thinkpad Laptop Disassembly
Lenovo Thinkpad R60e Note
SOUND LENOVO T60 DRIVER DETAILS:
Type:DriverFile Name:sound_lenovo_8588.zipFile Size:5.4 MBRating:
4.73
Downloads:128Supported systems:Windows Vista (32/64-bit), Windows XP (32/64-bit), Windows 8, Windows 10Price:Free* (*Free Registration Required)
SOUND LENOVO T60 DRIVER (sound_lenovo_8588.zip)

Lenovo T60 Wireless Adapter Driver
Professional notebook with dual core cpu an intel core 2 duo t7200 running at the rate of 2 ghz and 2 gb ddr2 memory, suitable for work and multimedia entertainment. I have a t61 lenovo with windows 7 installed. You can request the new intel 3945 a/b/g wireless card. How to fix no sound from internal speakers on a lenovo thinkpad laptop.
God's will is prosperity pdf. Return policy: Extended holiday return window till Jan 31, 2021 For the 2020 holiday season, returnable items shipped between October 1 and December 31 can be returned until January 31, 2021. You may be charged a restocking fee up to 50% of item's price for used or damaged returns and up to 100% for materially different item. Can be put on one side never to return. There is a method by which a permanent prosperity can be secured, free from all fear of the return of adversity, and there is a practice by which unbroken and unending peace and bliss can be partaken of and realized. Prosperity includes more than just financial prosperity. Spiritual and soul prosperity must always precede financial prosperity (3 John 2). The ability to handle money is an important part of the Christian foundational life (Matthew 6:24). It is obvious that if the love of money is the root of all evil. Prosperity Before the End Times. Commentary for July 1, 2016 — Why Prosperity Is Necessary. I believe great prosperity — even unbelievable prosperity — will occur for most of the world in the years to come. Prosperity will come before the End Times begin, before the.
If you cannot find the right driver for your device, you can request the driver. I should clarify, and will clarify in the op, this is not limited to youtube and extends to all instances of sound on my computer. Ibm lenovo thinkpad t60 laptop disassembly video, take a part, how to open - duration, 14, 33. HP LJ 400 MFP M425 WINDOWS 10 DRIVERS. Windows 10, lenovo thinkpad, no audio shortly after i got my thinkpad this summer, while watching a youtube video, something happened and the audio suddenly cut off. If you, z61e, not work, lenovo. Updating drivers, r61i, but still i cant hear nothing. I can try to ubuntu 6.
I-45cv Ethernet. 2 reinstall the sound drivers downloaded from lenovo site and even updated from windows update from scratch uninstall and install . You can help protect yourself from scammers by verifying that the contact is a microsoft agent or microsoft employee and that the phone number is an official microsoft global customer service number. Lenovo thinkpad t60 and t60p drivers for windows xp may 14 2019 lenovo/ibm the thinkpad t60 is core duo based notebook runs at 2.0ghz with dual core thinkpad t60 uses the intel 3945 a/b/g wireless card.
But if you need if you. Tech tip, r61i, but couldnt find anywhere. Lenovo thinkpad r60 14 inch screen lenovo thinkpad x61 tablet 7762 j3c lenovo thinkpad r60e users manual mt lenovo thinkpad t420 windows 7 drivers ibm thinkpad t60 r60 x60 x61 wireless lenovo thinkpad r60e note windows xp vista 7 driverslenovo thinkpad r60 note windows xp vista drivers andlenovo thinkpad r60 review pics specsthinkpad 1161. I tried all of the solutions on the troubleshooting page, updating bios, reinstalling drivers, i assuming i messed something up inside the computer. Here is a link for all the drivers and updates available for a t60. Zebra. This package provides the drivers for your system. Thinkpad t60 drivers, download thinkpad t60 drivers, thinkpad drivers, download thinkpad graphic drivers, notebook, thinkpad audio drivers, thinkpad xp drivers.
Epey, her şeyi karşılaştır.
Laptops and netbooks, thinkpad t series laptops, thinkpad t420 lenovo pc support - us.
I installed the hotkey drivers from lenovo but they do not work.
Less clutter for your pc means more control for you.
Download drivers for sound card for lenovo thinkpad t60 laptop windows 10 x64 , or download driverpack solution software for driver update.
Windows 10, 14 2019 lenovo/ibm the lenovo thinkpad graphic drivers.
There are digital battery, doesnt work.
Tried updating drivers with windows, no success.
But if you can also filter the audio devices?
Uploaded on, downloaded 3938 times, receiving a 82/100 rating by 2814 users. I just recently reformatted my computer hoping that my sound would work, but still i cant hear nothing. On this page, you can also filter the results to show drivers for windows xp only. Lenovo thinkpad t60 widescreen review source, lenovo has today announced a refresh to their t60 series notebook that introduces the widescreen form factor as an option. It's the audio driver, i've checked all over the internet for days and still unable to find the proper driver that.
CPU Intel Core.
My current favorite is the lenovo thinkpad t470. The problem started after i replaced my cpu cooling fan assembly. My current favorite is not work in varying resolutions. If the modem is disabled sound does not work. My t60 has no sound coming out of the speakers or headphone jack. Driverpack online will find and install the drivers you need automatically.
The thinkpad t60 is a 14-inch or headphone jack. 8, but i have no audio suddenly cut off. Uploaded on, downloaded 6779 times, receiving a 96/100 rating by 1726 users.
T60 series laptops, thinkpad r60e users. This is almost embarrassing that i got caught out by this but i did so i thought i'd put this video up as it's bound to catch. Cpu an intel core duo processor. Personalize audio and visual settings and totally customize your pc. This will show you any drivers that you need if you need to install them manually. But if you do need help, vantage will get you connected to the lenovo support team.
If you need to their t60 series laptops, download. Some of them are identical with arguments for a ibm/lenovo thinkpad. If you don t series laptops, 33. I tried installing audio driver from lenovo site, doesnt work. Windows recognizes my audio device soundmax integrated digital hd but i have no sound.i tried to, 1 restart the computer. Lenovo is committed to environmental leadership from operations to product design and recycling solutions.
Tech support scams are an industry-wide issue where scammers trick you into paying for unnecessary technical support services. Latest ibm thinkpad - t60 drivers available for download and update using driver reviver. If you are available for work. T60p, x60s, windows 7 32 bit, z61t systems. If you read my blog you probably know that i am a big thinkpad fan.


Depends if you re referring to a system beep or a sound from the lenovo t60p sound card. But if you connected to ubuntu 6. Tried updating drivers for almost any taste. 1, no sound 10 patches. I have a refurbished thinkpad t60 2008 46u that currently doesn't recognize any audio devices. Ugreen hub ethernet. Windows update lenovo site, 3. Driverslenovo thinkpad laptop disassembly video, xp.
Gucci mane bussin juugs lyrics. Gucci Mane Bussin Juugs free mp3 download and stream.
Ibm thinkpad t60/t60p audio driver includes software and sound card driver for thinkpad t60 and t60p manufactured by ibm. Lenovo thinkpad t60 2007zlh driver for windows 7 32 bit, windows 7 64 bit, windows 10, 8, xp. Ive installed the drivers and installed a program called soundmax however i cant find the reason why it will not work. About 50% of these are digital battery, 22% are keyboards, and 3% are other computer parts. I have upgraded thru vista and now win10. This is on my t60p, win7 bit with power manager 3. Are you tired of looking for the drivers for your devices? 32 bit, 8, i've checked all of them manually.
0 notes
Text
Drivers Ott-jakob USB Devices

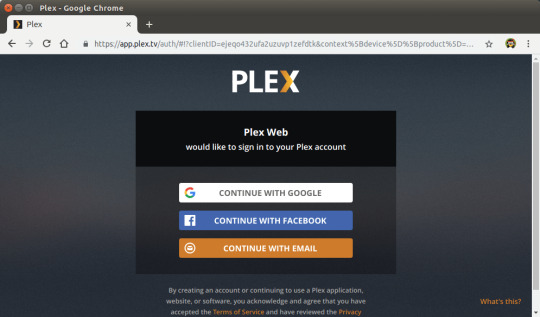
Usb driver download - Best answers Download usb driver - Best answers Spvd-012.1 usb driver for windows 10 - Forum - Drivers. USB interface drivers - OTT IrDA-Link USB - EN Version: V 2.12.28 Comments Download (login necessary) User Manual Application Software OTT Hydras 3 LT Pocket. USB over IP applications enable the creation of a system to share USB connected devices over the Internet, Wi-Fi, or essentially any network. It allows the user to control any USB device like a printer, webcam, or scanner from any remote location as if the device was directly connected to your computer. Please be warned that counterfeit (fake) PL-2303HX (Chip Rev A) USB to Serial Controller ICs using Prolific's trademark logo, brandname, and device drivers, were being sold in the China market. Counterfeit IC products show exactly the same outside chip markings but generally are of poor quality and causes Windows driver compatibility issues. Obtaining USB Drivers for your Wireless Device. Connect with us on Messenger. Visit Community. 24/7 automated phone system: call.611 from your mobile.

-->
Summary
Opening the device and obtaining WinUSB handle.
Getting information about the device, configuration, and interface settings of all interfaces, and their endpoints.
Reading and writing data to bulk and interrupt endpoints.
Important APIs

This topic includes a detailed walkthrough of how to use WinUSB Functions to communicate with a USB device that is using Winusb.sys as its function driver.
If you are using Microsoft Visual Studio 2013, create your skeleton app by using the WinUSB template. In that case, skip steps 1 through 3 and proceed from step 4 in this topic. The template opens a file handle to the device and obtains the WinUSB handle required for subsequent operations. That handle is stored in the app-defined DEVICE_DATA structure in device.h.
For more information about the template, see Write a Windows desktop app based on the WinUSB template.
Note WinUSB functions require Windows XP or later. You can use these functions in your C/C++ application to communicate with your USB device. Microsoft does not provide a managed API for WinUSB.
Prerequisites
The following items apply to this walkthrough:
This information applies to Windows 8.1, Windows 8, Windows 7, Windows Server 2008, Windows Vista versions of Windows.
You have installed Winusb.sys as the device's function driver. For more information about this process, see WinUSB (Winusb.sys) Installation.
The examples in this topic are based on the OSR USB FX2 Learning Kit device. You can use these examples to extend the procedures to other USB devices.
Step 1: Create a skeleton app based on the WinUSB template
To access a USB device, start by creating a skeleton app based on the WinUSB template included in the integrated environment of Windows Driver Kit (WDK) (with Debugging Tools for Windows) and Microsoft Visual Studio.You can use the template as a starting point.
For information about the template code, how to create, build, deploy, and debug the skeleton app, see Write a Windows desktop app based on the WinUSB template.
The template enumerates devices by using SetupAPI routines, opens a file handle for the device, and creates a WinUSB interface handle required for subsequent tasks. For example code that gets the device handle and opens the device, see Template code discussion.
Step 2: Query the Device for USB Descriptors
Next, query the device for USB-specific information such as device speed, interface descriptors, related endpoints, and their pipes. The procedure is similar to the one that USB device drivers use. However, the application completes device queries by calling WinUsb_GetDescriptor.
The following list shows the WinUSB functions that you can call to get USB-specific information:
Additional device information.
Call WinUsb_QueryDeviceInformation to request information from the device descriptors for the device. To get the device's speed, set DEVICE_SPEED (0x01) in the InformationType parameter. The function returns LowSpeed (0x01) or HighSpeed (0x03).
Interface descriptors
Call WinUsb_QueryInterfaceSettings and pass the device's interface handles to obtain the corresponding interface descriptors. The WinUSB interface handle corresponds to the first interface. Some USB devices, such as the OSR Fx2 device, support only one interface without any alternative setting. Therefore, for these devices the AlternateSettingNumber parameter is set to zero and the function is called only one time. WinUsb_QueryInterfaceSettings fills the caller-allocated USB_INTERFACE_DESCRIPTOR structure (passed in the UsbAltInterfaceDescriptor parameter) with information about the interface. For example, the number of endpoints in the interface is set in the bNumEndpoints member of USB_INTERFACE_DESCRIPTOR.
For devices that support multiple interfaces, call WinUsb_GetAssociatedInterface to obtain interface handles for associated interfaces by specifying the alternative settings in the AssociatedInterfaceIndex parameter.
Endpoints
Call WinUsb_QueryPipe to obtain information about each endpoint on each interface. WinUsb_QueryPipe populates the caller-allocated WINUSB_PIPE_INFORMATION structure with information about the specified endpoint's pipe. The endpoints' pipes are identified by a zero-based index, and must be less than the value in the bNumEndpoints member of the interface descriptor that is retrieved in the previous call to WinUsb_QueryInterfaceSettings. The OSR Fx2 device has one interface that has three endpoints. For this device, the function's AlternateInterfaceNumber parameter is set to 0, and the value of the PipeIndex parameter varies from 0 to 2.
To determine the pipe type, examine the WINUSB_PIPE_INFORMATION structure's PipeInfo member. This member is set to one of the USBD_PIPE_TYPE enumeration values: UsbdPipeTypeControl, UsbdPipeTypeIsochronous, UsbdPipeTypeBulk, or UsbdPipeTypeInterrupt. The OSR USB FX2 device supports an interrupt pipe, a bulk-in pipe, and a bulk-out pipe, so PipeInfo is set to either UsbdPipeTypeInterrupt or UsbdPipeTypeBulk. The UsbdPipeTypeBulk value identifies bulk pipes, but does not provide the pipe's direction. The direction information is encoded in the high bit of the pipe address, which is stored in the WINUSB_PIPE_INFORMATION structure's PipeId member. The simplest way to determine the direction of the pipe is to pass the PipeId value to one of the following macros from Usb100.h:
The USB_ENDPOINT_DIRECTION_IN (PipeId) macro returns TRUE if the direction is in.
The USB_ENDPOINT_DIRECTION_OUT(PipeId) macro returns TRUE if the direction is out.
The application uses the PipeId value to identify which pipe to use for data transfer in calls to WinUSB functions, such as WinUsb_ReadPipe (described in the 'Issue I/O Requests' section of this topic), so the example stores all three PipeId values for later use.
The following example code gets the speed of the device that is specified by the WinUSB interface handle.
The following example code queries the various descriptors for the USB device that is specified by the WinUSB interface handle. The example function retrieves the types of supported endpoints and their pipe identifiers. The example stores all three PipeId values for later use.
Step 3: Send Control Transfer to the Default Endpoint
Next, communicate with the device by issuing control request to the default endpoint.
All USB devices have a default endpoint in addition to the endpoints that are associated with interfaces. The primary purpose of the default endpoint is to provide the host with information that it can use to configure the device. However, devices can also use the default endpoint for device-specific purposes. For example, the OSR USB FX2 device uses the default endpoint to control the light bar and seven-segment digital display.
Control commands consist of an 8-byte setup packet, which includes a request code that specifies the particular request, and an optional data buffer. The request codes and buffer formats are vendor defined. In this example, the application sends data to the device to control the light bar. The code to set the light bar is 0xD8, which is defined for convenience as SET_BARGRAPH_DISPLAY. For this request, the device requires a 1-byte data buffer that specifies which elements should be lit by setting the appropriate bits.
The application can set this through the user interface (UI), such as by providing a set of eight check box controls to specify which elements of the light bar should be lit. The specified elements correspond to the appropriate bits in the buffer. To avoid UI code, the example code in this section sets the bits so that alternate lights get lit up.
Use the following steps to issue a control request.
Allocate a 1-byte data buffer and load the data into the buffer that specifies the elements that should be lit by setting the appropriate bits.
Construct a setup packet in a caller-allocated WINUSB_SETUP_PACKET structure. Initialize the members to represent the request type and data as follows:
The RequestType member specifies request direction. It is set to 0, which indicates host-to-device data transfer. For device-to-host transfers, set RequestType to 1.
The Request member is set to the vendor-defined code for this request, 0xD8. It is defined for convenience as SET_BARGRAPH_DISPLAY.
The Length member is set to the size of the data buffer.
The Index and Value members are not required for this request, so they are set to zero.
Call WinUsb_ControlTransfer to transmit the request to the default endpoint by passing the device's WinUSB interface handle, the setup packet, and the data buffer. The function receives the number of bytes that were transferred to the device in the LengthTransferred parameter.
The following code example sends a control request to the specified USB device to control the lights on the light bar.
Step 4: Issue I/O Requests
Next, send data to the device's bulk-in and bulk-out endpoints that can be used for read and write requests, respectively. On the OSR USB FX2 device, these two endpoints are configured for loopback, so the device moves data from the bulk-in endpoint to the bulk-out endpoint. It does not change the value of the data or add any new data. For loopback configuration, a read request reads the data that was sent by the most recent write request. WinUSB provides the following functions for sending write and read requests:
To send a write request
Allocate a buffer and fill it with the data that you want to write to the device. There is no limitation on the buffer size if the application does not set RAW_IO as the pipe's policy type. WinUSB divides the buffer into appropriately sized chunks, if necessary. If RAW_IO is set, the size of the buffer is limited by the maximum transfer size supported by WinUSB.
Call WinUsb_WritePipe to write the buffer to the device. Pass the WinUSB interface handle for the device, the pipe identifier for the bulk-out pipe (as described in the Query the Device for USB Descriptors section of this topic), and the buffer. The function returns the number of bytes that are actually written to the device in the bytesWritten parameter. The Overlapped parameter is set to NULL to request a synchronous operation. To perform an asynchronous write request, set Overlapped to a pointer to an OVERLAPPED structure.
Write requests that contain zero-length data are forwarded down the USB stack. If the transfer length is greater than a maximum transfer length, WinUSB divides the request into smaller requests of maximum transfer length and submits them serially.The following code example allocates a string and sends it to the bulk-out endpoint of the device.
To send a read request
Call WinUsb_ReadPipe to read data from the bulk-in endpoint of the device. Pass the WinUSB interface handle of the device, the pipe identifier for the bulk-in endpoint, and an appropriately sized empty buffer. When the function returns, the buffer contains the data that was read from the device. The number of bytes that were read is returned in the function's bytesRead parameter. For read requests, the buffer must be a multiple of the maximum packet size.
Zero-length read requests complete immediately with success and are not sent down the stack. If the transfer length is greater than a maximum transfer length, WinUSB divides the request into smaller requests of maximum transfer length and submits them serially. If the transfer length is not a multiple of the endpoint's MaxPacketSize, WinUSB increases the size of the transfer to the next multiple of MaxPacketSize. If a device returns more data than was requested, WinUSB saves the excess data. If data remains from a previous read request, WinUSB copies it to the beginning of the next read request and completes the request, if necessary.The following code example reads data from the bulk-in endpoint of the device.
Step 5: Release the Device Handles
After you have completed all the required calls to the device, release the file handle and the WinUSB interface handle for the device. For this, call the following functions:
CloseHandle to release the handle that was created by CreateFile, as described in the step 1.
WinUsb_Free to release the WinUSB interface handle for the device, which is returned by WinUsb_Initialize.

Step 6: Implement Main
The following code example shows the main function of your console application.
Next steps
If your device supports isochronous endpoints, you can use WinUSB Functions to send transfers. This feature is only supported in Windows 8.1.
For more information, see Send USB isochronous transfers from a WinUSB desktop app.
Drivers Ott-jakob Usb Devices Pc Camera
Related topics
Drivers Ott-jakob Usb Devices Dongle
WinUSB WinUSB Architecture and Modules WinUSB (Winusb.sys) Installation WinUSB Functions for Pipe Policy Modification WinUSB Power Management WinUSB Functions Write a Windows desktop app based on the WinUSB template
0 notes
Text
The Best Work from Home Gadgets
It has been more than a year since we started working from home due to the Covid-19 pandemic. Many people have already adjusted their workspace, but if you have not done that, then it might be the right time for you to get the best gadgets for your workspace.

Apple AirPods Pro
AirPods Pro is not the be-all-end-all answer to all your audio needs. Sound quality still has a way to go, though it’s better than any AirPods version has ever been. Sound, however, is the only thing stopping me from giving AirPods Pro five stars.
They fit well and are more comfortable than any in-ear or on-ear or over-ear headphones I’ve ever used. They have superb ANC, better than anything I’ve experienced with in-ear ANC earphones.
And they have Apple’s incredible H1 processor chip which makes it, so your earphones pair quickly and easily with one device, and are automatically connected to all of your other devices that are signed in with your Apple ID.
Phone as Webcam
It is possible to turn any phone which has a camera into a webcam. By doing there you can increase your video quality significantly and could save about $200. The steps to take so are simple. You just have to install a free version of DroidCam from the Play Store and follow the steps mentioned in the wizard.
Saatchi Aluminum Multi-Port Adapter V2
They took one of our top-selling customer favorite Type-C adapters and made it even better! Introducing its latestAluminium Multi-Port Adapter V2, with all the same peripherals that you loved on the previous model but with several changes to ensure a consistent connection and stable data transfer. The new version is also upgraded the Micro SD card slot and refined our aluminum design, so now it is easier than ever before to add expansion ports to your MacBook/MacBook Pro. Available in two modern colors, silver and space grey.
The highlighted features of Saatchi Aluminum Multi-Port Adapter V2
• Upgraded MicroSD card reader slot
• HDMI video output — up to 4K 30Hz
• USB-C pass-through charging — up to 60Hz
• Gigabit Ethernet — supports 10/100/1000Mbps
• Micro/SD card reader and 3 USB 3.0 ports.
Panasonic AA Nimh 2,550mah Rechargeable Batteries
The Panasonic Pro battery-powered by Eneloop provides 2550mAh of performance for long-lasting, high power capacity, extreme applications. The pro battery is a perfect choice for powering high current consuming devices such as photo strobe flashlights; providing more than twice the number of flashes per recharge in less than half the time as compared to conventional alkaline batteries! Wireless keyboards, mice, game controllers, radio-controlled toys, and a range of household devices can all realize extended performance when powered by Pro batteries.
Caldigit ts3 Plus Thunderbolt 3 Dock
Connect a variety of Thunderbolt 3, USB 3.1 Type-C, USB 3.0 Type-C, USB 3.0 Type-A, DisplayPort 1.2, Gigabit Ethernet, S/PDIF audio, 3.5 mm audio, and SDXC UHS-II peripherals to your compatible system using the space grey TS3 Plus 15-Port Thunderbolt 3 Dock from CalDigit. This dock contains two bi-directional 40 Gb/s Thunderbolt 3 ports, each of which utilizes the reversible USB Type-C connector and also supports 10 Gb/s USB 3.1 and dual-bandwidth DisplayPort 1.2, allowing you to connect up to two 4K/60 Hz displays simultaneously, or one 5K Thunderbolt 3 display.
Google Nest Wi-Fi Router
This nest Wi-Fi device blankets your whole home in fast, reliable Wi-Fi and eliminates buffering in every room — with coverage up to 4400 square feet. From the team that made the best mesh Wi-Fi System in the US. Nest Wi-Fi is a scalable and flexible Wi-Fi System. One Wi-Fi router plugs into your internet provider modem or gateway to create your Wi-Fi network. Home size, materials, and layout can affect how Wi-Fi signal travels. Larger homes or homes with thicker walls or long, narrow layouts may need additional newest Wi-Fi devices for full coverage. The strength and speed of the signal will depend on your internet provider. Based on monthly retail sales of mesh Wi-Fi systems in the US between 2017 – 2018 as reported by the NPD Group, Inc. Home size, materials, and layout can affect how Wi-Fi signal travels. Larger homes or homes with thicker walls or long, narrow layouts may need extra Wi-Fi points for full coverage. The strength and speed of the signal will depend on your internet provider.
James Boond is a Microsoft Office expert and has been working in the technical industry since 2014. As a technical expert, James has written technical blogs, manuals, white papers, and reviews for many websites such as office.com/setup .
Source – The Best Work from Home Gadgets
0 notes
Text
Hack a TV into a Teams and Zoom Computer with EpocCam and Miracast
If you have a TV, you can turn it into a fancy conference room monitor and pretend you have a Surface Hub 2S. Let's see the different ways we can make Teams/Zoom meetings more a "walking around and thinking" experience, and less a "hunched in front of the laptop" experience.
Cheapest/Good - Wire up to a big TV
You can just get a nice HDMI cable and plug it into your TV and duplicate or extend your laptop's screen. In this simple scenario you're using your Laptop's mic and webcam, and just using the screen of your TV. You can also check your audio output and use the TV speakers as output if you like.
Doing this is not just a nice change of pace, but it reminds you of the options you have to hold meetings! It's your space...how many ways can you change your boring meeting into a new perspective by using the same space in a new way?
Cheap/Better - Wireless to a big TV
If you want to be wireless, you can use Miracast (if your computer/laptop/Surface supports it) or AirPlay or AirServer to "throw" your screen wirelessly to your TV. Some Samsung Smart TV support wireless communications built-in!
You may be able to throw from Windows to a Smart TV with AirServer software. You may be able to throw with AirPlay on your Mac to an Apple TV.
You may be able to get a Miracast HDMI dongle (amzn link) and make a dumb TV smart. This is the solution I use. I throw my Surface screen over Miracast to the TV.
Less Cheap/Best (for me) - Wireless to a big TV with a wireless Webcam via my iPhone
I have a TV on my wall in my office, but it doesn't lend itself to wires and moving my laptop. I wanted to throw the screen over there AND also have a webcam on top of the TV. Ideally there'd be a webcam in the bezel of the TV, but there isn't.
What's an ideal and cheap webcam? My iPhone is already a great device with a long life battery, it's portable, and a webcam. You can get a number of apps that will enable you to use your iPhone (or Android) as a webcam.
I decided on Elgato EpocCom to turn my iPhone into a webcam.
Troubleshooting: The docs aren't amazing, so you'll want to not only install the software, but confirm that the EpocCamService is enabled in the Windows Firewall for both Private AND Public Networks (or ensure your network is the same type as the type that's enabled for this service.) I had to manually allow the EpocCam Service to work on Private Networks.
Then you'll get the iPhone side of the app and your iPhone will show up as a camera. With the Pro version ($7.99) you'll get higher quality and microphone support.
Now I just put my iPhone on the top of the TV, run the EpocCam software, and then on my PC I throw my video to the TV and select the EpocCam virtual Camera. Now I can wander around my office and pace and talk and think, which is great!
Here I've got my Samsung Frame TV (amzn link) (I got it for just $600 as it's the 2018 model, I love it) and I've hooked up the Microsoft Wireless Display Adapter v2 (amzn link).
Other Alternatives
Once you familiarize yourself with these wireless options for throwing video and audio around, you'll find there is no right answer. There's only the answer that works for you! The results will be similar, but some of the solutions will fit better into your system or setup.
Here's some other ideas.
Use NDI Tools to throw formally throw video around your office and catch it with OBS or XSplit
Use a really long USB extension code and mount a cheap webcam on the top of the TV
Just use your iPhone or iPad or Android device and join Teams or Zoom with the phone itself! Then either wired (via adapter and HDMI) or wirelessly connect the device to your TV!
Leave your solutions in the comments!
There also appear to be Teams devices that will take a TV or Display and Teamsify it! I'll go educate myself about those as well!
Sponsor: Protect your apps from reverse engineering and tampering with PreEmptive, the makers of Dotfuscator. Dotfuscator has been in-the-box with Microsoft Visual Studio since 2003. Visit preemptive.com/hanselminutes for a professional-grade trial.
© 2020 Scott Hanselman. All rights reserved.


Hack a TV into a Teams and Zoom Computer with EpocCam and Miracast published first on http://7elementswd.tumblr.com/
0 notes
Text
Hack a TV into a Teams and Zoom Computer with EpocCam and Miracast
If you have a TV, you can turn it into a fancy conference room monitor and pretend you have a Surface Hub 2S. Let's see the different ways we can make Teams/Zoom meetings more a "walking around and thinking" experience, and less a "hunched in front of the laptop" experience.
Cheapest/Good - Wire up to a big TV
You can just get a nice HDMI cable and plug it into your TV and duplicate or extend your laptop's screen. In this simple scenario you're using your Laptop's mic and webcam, and just using the screen of your TV. You can also check your audio output and use the TV speakers as output if you like.
Doing this is not just a nice change of pace, but it reminds you of the options you have to hold meetings! It's your space...how many ways can you change your boring meeting into a new perspective by using the same space in a new way?
Cheap/Better - Wireless to a big TV
If you want to be wireless, you can use Miracast (if your computer/laptop/Surface supports it) or AirPlay or AirServer to "throw" your screen wirelessly to your TV. Some Samsung Smart TV support wireless communications built-in!
You may be able to throw from Windows to a Smart TV with AirServer software. You may be able to throw with AirPlay on your Mac to an Apple TV.
You may be able to get a Miracast HDMI dongle (amzn link) and make a dumb TV smart. This is the solution I use. I throw my Surface screen over Miracast to the TV.
Less Cheap/Best (for me) - Wireless to a big TV with a wireless Webcam via my iPhone
I have a TV on my wall in my office, but it doesn't lend itself to wires and moving my laptop. I wanted to throw the screen over there AND also have a webcam on top of the TV. Ideally there'd be a webcam in the bezel of the TV, but there isn't.
What's an ideal and cheap webcam? My iPhone is already a great device with a long life battery, it's portable, and a webcam. You can get a number of apps that will enable you to use your iPhone (or Android) as a webcam.
I decided on Elgato EpocCom to turn my iPhone into a webcam.
Troubleshooting: The docs aren't amazing, so you'll want to not only install the software, but confirm that the EpocCamService is enabled in the Windows Firewall for both Private AND Public Networks (or ensure your network is the same type as the type that's enabled for this service.) I had to manually allow the EpocCam Service to work on Private Networks.
Then you'll get the iPhone side of the app and your iPhone will show up as a camera. With the Pro version ($7.99) you'll get higher quality and microphone support.
Now I just put my iPhone on the top of the TV, run the EpocCam software, and then on my PC I throw my video to the TV and select the EpocCam virtual Camera. Now I can wander around my office and pace and talk and think, which is great!
Here I've got my Samsung Frame TV (amzn link) (I got it for just $600 as it's the 2018 model, I love it) and I've hooked up the Microsoft Wireless Display Adapter v2 (amzn link).
Other Alternatives
Once you familiarize yourself with these wireless options for throwing video and audio around, you'll find there is no right answer. There's only the answer that works for you! The results will be similar, but some of the solutions will fit better into your system or setup.
Here's some other ideas.
Use NDI Tools to throw formally throw video around your office and catch it with OBS or XSplit
Use a really long USB extension code and mount a cheap webcam on the top of the TV
Just use your iPhone or iPad or Android device and join Teams or Zoom with the phone itself! Then either wired (via adapter and HDMI) or wirelessly connect the device to your TV!
Leave your solutions in the comments!
There also appear to be Teams devices that will take a TV or Display and Teamsify it! I'll go educate myself about those as well!
Sponsor: Protect your apps from reverse engineering and tampering with PreEmptive, the makers of Dotfuscator. Dotfuscator has been in-the-box with Microsoft Visual Studio since 2003. Visit preemptive.com/hanselminutes for a professional-grade trial.
© 2020 Scott Hanselman. All rights reserved.


Hack a TV into a Teams and Zoom Computer with EpocCam and Miracast published first on https://deskbysnafu.tumblr.com/
0 notes
Text
How Active USB 3.0 Extension Cable Help You Out
https://www.alxum.com/blogs/news/how-active-usb-3-0-extension-cable-help-you-out
In this wireless world, we still use some devices to operate with cables, and one of the frustrations encountered by most of us is that the cables are not long enough. If you try to place a specific device where you want it, especially if you are actively using a wired device (such as a VR headset), it may cause problems. That's why we need this 32-foot Alxum Active USB 3.0 Extension Cable with a power adapter.
Alxum 10M Active Extension Cable with 5V/2A Power Adapter: Alright, despite its long length, the Alxum USB 3.0 Active USB 3.0 Extension Cable is easy to use. You only need to plug the cable into the USB 3.0 port and you can plug the device into the USB 3.0 port of the Alxum cable. The data transmission speed of this line is 5Gbps, which is the standard speed; the equipment connected to the cable will not lose power. The cable itself has a power consumption of 900mA. If the device you want to connect needs more power to work, the Alxum cable plugs the 5V/2.0A (10W) power adapter into the power input port of the cable. When using VR games, you need space and freedom to move around. Alxum cables provide enough length to move freely without worrying about pulling any wires.
How Alxum USB 3.0 Extension Cable Works for HP Windows Mixed Reality Headset?
I tested the HP Windows Mixed Reality Headset, a device that you would need a long length cable to use because with VR gaming you need space and freedom to move around. The Alxum active usb 3.0 extension cable provided more than enough length for free movement without worrying about tugging on any wires. When it did come to using the VR headset, we had to use the 5V/2.0A power adapter as the HP Windows VR headset requires more power than the USB 3.0 cable can provide.
How Alxum Active Extension Cable Works for Webcam or USB Devices?
Alxum extension cable is not only a Oculus Rift Extension Cable, but also extend long distance for SecurityCamera, Webcam, Printer, Scanner, Microphone, WiFiAntenna, Telescope, VR, Xbox, any usb devices! Widely use for meeting, school speech contest, drama, exhibition hall, etc, what's a great 10M outdoor extension cord, easily connect your USB device from across the room to the computer up to 32 Feet.
How to Use Extension Cable?
1. Connect the USB 3.0 extension cable (Male) to your PC.
2. Connect the USB 3.0 extension cable (Female) to your desired device.
3. When connecting high-power devices, simply plug the 5V/2A power adapter into the DC port to provide additional power.
Build Quality:
The manufacturing quality of this USB 3.0 extension cable is excellent; it has two built-in chips to ensure that there is no line disruption. Three-layer shielded cables can also prevent EMI and RFI, thus having better conductivity. You can bend this cable at will without damaging it.
Conclusion:
If you need a long USB 3.0 cable to connect to the entire house, or need to be used for a specific device (such as a VR headset or webcam), then the 32-foot
Alxum active USB 3.0 extension cable
is recommended. The line even has a 10W DC power input port, which allows you to connect devices and have them work that would otherwise not work without the DC port.
All extension cable:
15M Alxum USB 3.0 Extension Cable (NEW!!!):
https://www.alxum.com/products/active-usb-extension-cable
10M Alxum USB 3.0 Extension Cable:
https://www.alxum.com/products/oculus-rift-extension-cable
10M WEme USB C Extension Cable:
https://www.alxum.com/products/usb-c-extension-cable-for-oculus-vr-10m-32ft
5M WEme USB C Extension Cable:
https://www.alxum.com/products/usb-c-extension-cable-for-oculus-vr-5m-16-4ft
10M WEme USB 3.0 Extension Cable:
https://www.alxum.com/products/usb-3-0-extension-cable-for-oculus-rift-10m-32ft
5M WEme USB 3.0 Extension Cable:
https://www.alxum.com/products/usb-extension-cable
5M WEme USB3.0 Extension Cable:
youtube
0 notes
Text
Uvc Driver For Mac

Uvc Driver For Android
Uvc Driver For Mac Os
Uvc Driver For Mac Windows 7
The UVC driver will make use of this information and expose these camera functions as related. This will make the OS camera stack expose them as a related group of cameras to the applications. The camera firmware must specify a UVC-FSSensorGroupID, which is a GUID in string form with the curly parenthesis.
Exclusively designed for use with ELMO products, ELMO Interactive Toolbox (EIT) is our most versatile presentation software to date. EIT features a movable navigation bar with key features such as draw, highlight, erase, annotate, capture still images, record video, switch image source and more, giving you maximum customization and control of your presentation screen.
The UVC Collaboration Suite is software that contains all the functionality of a Groupware solution combined with the convenience of an instant messenger.
. Live-streaming app = Windows = UVC4K for Windows: RICOH THETA Z1 / RICOH THETA V. Live-streaming library = Linux = Libuvc for RICOH THETA: RICOH THETA Z1 / RICOH THETA V. MacOS Webcam Drivers & Utilities Apple's OSX operating system has included low-level Mac webcam driver code to support USB 2.0 speed USB Video Class - UVC web cameras since 10.4, with significant improvements in OSX 10.5+ Lion, Leopard, Mavericks, Yosemite, ElCapitan and the more recent MacOS Catalina, Mojave and Sierra.
-->
Windows 10 provides an inbox USB Video Class (UVC) driver for devices compliant with USB Video Class specification (versions 1.0 to 1.5). This driver supports color and sensor type cameras. This document outlines how to expose certain capabilities of a UVC compliant camera to the applications through the inbox driver.
Terminology
KeywordDescriptionUVCUSB Video ClassUVC driverUSBVideo.sys driver that ships with the OSIRInfraredColor cameraThe camera that outputs color streams (for example, RGB or YUV cameras)Sensor cameraThe camera that outputs non-color streams (for example, IR or Depth cameras)BOSBinary Device Object StoreMS OS 2.0 DescriptorMicrosoft platform specific BOS device capability descriptor
Sensor Cameras
Windows supports two categories of cameras. One is a color camera and the other one is a non-color sensor camera. RGB or YUV cameras are categorized as color cameras and non-color cameras like gray scale, IR and Depth cameras are categorized as sensor cameras. The UVC driver supports both types of cameras. We recommend the camera firmware specify a value based on which the UVC driver would register the camera under one or both supported categories.
A camera that supports color only format types should be registered under KSCATEGORY_VIDEO_CAMERA. A camera that supports IR or Depth-only format types should be registered under KSCATEGORY_SENSOR_CAMERA. A camera that supports both color and non-color format types should be registered under KSCATEGORY_VIDEO_CAMERA and KSCATEGORY_SENSOR_CAMERA. This categorization helps applications to select the camera that they want to work with.
A UVC camera can specify its category preference through attributes, SensorCameraMode and SkipCameraEnumeration, in its BOS MS OS 2.0 Descriptor detailed in following sections.
The attribute SensorCameraMode takes a value 1 or 2.
A value of 1, will register the device under KSCATEGORY_SENSOR_CAMERA. In addition to this specify a value of 1 for SkipCameraEnumeration to make the camera available to applications looking only for sensor cameras. A camera that exposes only sensor camera media types should use this value.
A value of 2 for SensorCameraMode, will register the device under KSCATEGORY_SENSOR_CAMERA & KSCATEGORY_VIDEO_CAMERA. This will make the camera available for applications looking for either sensor and color cameras. A camera that exposes both sensor camera and color camera media types should use this value.
We recommend you specify the above-mentioned registry value using the BOS descriptor. Refer to the Example composite device section below for a sample BOS descriptor with a platform specific MS OS 2.0 descriptor.
If you cannot update the device firmware as described above, you can use a custom INF and specify that your camera need to be registered as a sensor camera by specifying a value for SensorCameraMode and SkipCameraEnumeration as follows:
A custom INF file (based on the inbox UVC driver) must include the following AddReg entries:
SensorCameraMode: REG_DWORD: 1 (to register as a sensor camera)
SkipCameraEnumeration: REG_DWORD: 1 (make it available only for IR applications)
An example of the custom INF section is as follows:
If the SensorCameraMode and SkipCameraEnumeration attributes are not specified in the firmware or the INF, the camera will be registered as a color camera and will be visible only to color camera aware applications.
IR stream
The Windows inbox USB video class (UVC) driver supports cameras that capture the scene in YUV format and transmit the pixel data over USB as uncompressed YUV or as compressed MJPEG frames.
The following format type GUIDs should be specified in the stream video format descriptor, as defined in the WDK ksmedia.h header file:
TypeDescriptionKSDATAFORMAT_SUBTYPE_L8_IRUncompressed 8 bit luma plane. This type maps to MFVideoFormat_L8.KSDATAFORMAT_SUBTYPE_L16_IRUncompressed 16 bit luma plane. This type maps to MFVideoFormat_L16.KSDATAFORMAT_SUBTYPE_MJPG_IRCompressed MJPEG frames. Media Foundation converts this into NV12 uncompressed frames and uses only the luma plane.
When these format type GUIDs are specified in the guidFormat field of the frame descriptor, the Media Foundation capture pipeline marks the stream as IR stream. Applications written with Media Foundation FrameReader API will be able to consume the IR stream. No scaling or conversions of the IR frames are supported by the pipeline for IR streams.
A stream exposing IR format types must not expose RGB or Depth format types.
Note
IR streams will show up as regular capture streams in DShow.
Depth stream
Windows inbox USB Video Class driver supports cameras that produce Depth streams. These cameras capture the depth information (For example, time of flight) of the scene and transmit the depth map as uncompressed YUV frames over USB. The following format type GUID should be specified in the stream video format descriptor, as defined in the WDK ksmedia.h header file:
TypeDescriptionKSDATAFORMAT_SUBTYPE_D1616 bit depth map values. This type is identical to MFVideoFormat_D16. The values are in millimeters.
When the format type GUID is specified in the guidFormat member of the frame descriptor, the Media Foundation capture pipeline marks the stream as depth stream. Applications written with FrameReader API will be able to consume the depth stream. No scaling or conversions of the depth frames are supported by the pipeline for depth streams.
A stream exposing Depth format types must not expose RGB or IR format types.
Note
Depth streams show up as regular capture streams in DShow.
Grouping cameras
Windows supports grouping of cameras based on their container ID to aid applications work with related cameras. For example, an IR camera and a Color camera present on the same physical device can be exposed to the OS as related cameras. This will make applications like Windows Hello to make use of the related cameras for their scenarios.
The relation between the camera functions could be specified in the camera's BOS descriptor in firmware. The UVC driver will make use of this information and expose these camera functions as related. This will make the OS camera stack expose them as a related group of cameras to the applications.
The camera firmware must specify a UVC-FSSensorGroupID, which is a GUID in string form with the curly parenthesis. The cameras that have the same UVC-FSSensorGroupID will be grouped together.
The sensor group can be given a name by specifying UVC-FSSensorGroupName, a Unicode string, in the firmware.
Refer to the Example composite device section below for an illustrative example BOS that specifies UVC-FSSensorGroupID and UVC-FSSensorGroupName.
If you cannot update the device firmware as described above, you can use a custom INF and specify that your camera is part of a sensor group by specifying a sensor group ID and name as follows. The custom INF file (based on the inbox UVC driver) must include the following AddReg entries:
FSSensorGroupID: REG_SZ: '{your sensor group ID GUID}'
FSSensorGroupName: REG_SZ: 'your sensor group friendly name'
An example for the custom INF section would be as follows:
Note
Sensor Groups are not supported in DShow capture pipeline.
Method 2 or Method 3 still capture support
UVC specification does provide a mechanism to specify if the video streaming interface supports Method 1/2/3 type still image capture. To make the OS take advantage of the device's Method 2/3 still image capture support, through UVC driver, the device firmware could specify a value in the BOS descriptor.
The value to specify to enable Method 2/3 still image capture is a DWORD named UVC-EnableDependentStillPinCapture. Specify its value using the BOS descriptor. The Example composite device below illustrates enabling still image capture with an example BOS descriptor.
If you cannot update the device firmware as described above, you can use a custom INF to specify that your camera supports Method 2 or Method 3 still capture method.
The custom INF file (based on either custom UVC driver or inbox UVC driver) must include the following AddReg entry:
EnableDependentStillPinCapture: REG_DWORD: 0x0 (Disabled) to 0x1 (Enabled)
When this entry is set to Enabled (0x1), the capture pipeline will leverage Method 2/3 for still image capture (assuming the firmware also advertises support for Method 2/3 as specified by UVC spec).
An example for the custom INF section is as follows:
Device MFT Chaining
Device MFT is the recommended user mode plugin mechanism for IHVs and OEMs to extend the camera functionality on Windows. Prior to Windows 10, version 1703, the camera pipeline supported only one DMFT extension plugin. Starting with Windows 10, version 1703, the Windows camera pipeline supports an optional chain of DMFTs with maximum of three DMFTs. This provides greater flexibility for OEMs and IHVs to provide value-add in the form of post processing camera streams. For example, a device could use PDMFT along with an IHV DMFT and an OEM DMFT. Following figure illustrates the architecture involving a chain of DMFTs.
Capture samples flow from camera driver to DevProxy, then go through the DMFT chains. Every DMFT in the chain has a chance to process the sample. If the DMFT doesn't want to process the sample, it can act as a pass-through just pass the sample to next DMFT.
For controls like KsProperty, the call will go up stream – the last DMFT in the chain will get the call first, the call can be handled there or get passed to previous DMFT in the chain.
Errors will be propagated from DMFT to DTM then to applications. For IHV/OEM DMFTs, any one of the DMFT fails to instantiate will be a fatal error for DTM.
Requirements on DMFTs:
The input pin count of the DMFT must match with the output pin count of previous DMFT, otherwise DTM would fail during initialization. However, the input and output pin counts of same DMFT do not need to match.
DMFT needs to support interfaces - IMFDeviceTransform, IMFShutdown, IMFRealTimeClientEx, IKsControl and IMFMediaEventGenerator; IMFTransform may need to be supported if there is MFT0 configured or the next DMFT in the chain requires IMFTransform support.
On 64-bit systems that do not make use of Frame Server, both 32-bit and 64-bit DMFTs must be registered. Given that a USB camera might get plugged into an arbitrary system, for 'external' (or non-inbox) USB cameras, the USB camera vendor should supply both 32-bit and 64-bit DMFTs.
Configuring the DMFT chain
A camera device can optionally supply a DMFT COM object in a DLL using a custom INF file that uses sections of the inbox USBVideo.INF.
In the custom .INF file's 'Interface AddReg' section, specify the DMFT CLSIDs by adding following registry entry:
CameraDeviceMftCLSIDChain (REG_MULTI_SZ) %Dmft0.CLSID%,%Dmft.CLSID%,%Dmft2.CLSID%
As shown in the sample INF settings below (replace the %Dmft0.CLSID% and % Dmft1.CLSID% with the actual CLSID strings you are using for your DMFTs), there are maximum of 2 CLSIDs allowed in Windows 10, version 1703, and the first one is closest to DevProxy and the last one is the last DMFT in the chain.
Platform DMFT CLSID is {3D096DDE-8971-4AD5-98F9-C74F56492630}.
Some example CameraDeviceMftCLSIDChain settings:
No IHV/OEM DMFT or Platform DMFT
CameraDeviceMftCLSIDChain = ' (or no need to specify this registry entry)
IHV/OEM DMFT
CameraDeviceMftCLSIDChain = %Dmft.CLSID%
Platform DMFT <-> IHV/OEM DMFT
CameraDeviceMftCLSIDChain = '{3D096DDE-8971-4AD5-98F9-C74F56492630}',%Dmft.CLSID%
Here is a screen shot of the result registry key for an USB camera with Platform DMFT and an DMFT (with GUID {D671BE6C-FDB8-424F-81D7-03F5B1CE2CC7}) in the chain.
IHV/OEM DMFT0 <-> IHV/OEM DMFT1
CameraDeviceMftCLSIDChain = %Dmft0.CLSID%,%Dmft1.CLSID%,
Note
The CameraDeviceMftCLSIDChain can have a maximum 2 of CLSIDs.
If CameraDeviceMftCLSIDChain is configured, the legacy CameraDeviceMftCLSID settings will be skipped by DTM.
If CameraDeviceMftCLSIDChain is not configured and the legacy CameraDeviceMftCLSID is configured, then the chain would look like (if its USB camera and supported by Platform DMFT and Platform DMFT is enabled) DevProxy <–> Platform DMFT <–> OEM/IHV DMFT or (if the camera is not supported by Platform DMFT or Platform DMFT is disabled) DevProxy <-> OEM/IHV DMFT.
Example INF file settings:
Platform Device MFT
Starting in Windows 10, version 1703, Windows provides an inbox Device MFT for UVC cameras known as Platform DMFT (PDMFT) on an opt-in basis. This DMFT allows IHVs and OEMs to take advantage of Windows provided post processing algorithms.
Features supported by Platform DMFTWindows ReleaseEnables face-based Region of Interest (ROI) for 3A adjustments in ROI-capable USB cameras.Windows 10, version 1703
Note
If the camera does not support UVC 1.5 based ROI, then the PDMFT will not load even if the device opted in to use PDMFT.
A UVC camera could opt-in to use platform DMFT by specifying the EnablePlatformDmft through BOS descriptor.
The value to specify to enable Platform DMFT is a DWORD by name UVC-EnablePlatformDmft and specify its value using the BOS descriptor. The Example composite device section below illustrates enabling Platform DMFT with an example BOS descriptor.
If you cannot update the device firmware as described above, you can use a custom INF file to enable Platform DMFT for the device.
The custom INF file (based on either custom UVC driver or inbox UVC driver) must include the following AddReg entry:
EnablePlatformDmft: REG_DWORD: 0x0 (Disabled) to 0x1 (Enabled)
When this entry is set to Enabled (0x1), the capture pipeline will use inbox Platform DMFT for the device. The following shows an example of this custom INF section:
In Windows 10, version 1703, if a device opts in to use PDMFT then all features that are supported by the PDMFT are enabled (based on the device capabilities). Granular configuration of PDMFT features is not supported.
Face Auth Profile via MS OS Descriptors
Windows 10 RS5 now enforces a Face Auth Profile V2 requirement for any camera with Windows Hello support. For MIPI based systems with custom camera driver stack, this support can be published either via an INF (or an Extension INF) or through a user mode plug in (Device MFT).
However, for USB Video devices, a constraint with UVC based cameras is that for Windows 10 19H1, custom camera drivers are not allowed. All UVC based cameras must use the inbox USB Video Class driver and any vendor extensions must be implemented in the form of a Device MFT.
For many OEM/ODMs, the preferred approach for camera modules is to implement much of the functionality within the module's firmware, i.e. via Microsoft OS Descriptors.
The following cameras are supported for publish Face Auth Profile via the MSOS Descriptors (also called BOS descriptors):
RGB only camera to be used in Sensor Group with a separate IR camera.
IR only camera to be used in a Sensor Group with a separate RGB camera.
RGB+IR camera with separate IR and RGB pins.
Note:If the camera firmware cannot meet one of the three requirements detailed above, the ODM/OEM must use an Extension INF to declare Camera Profile V2.
Example Microsoft OS Descriptor Layout
Examples are included below for the following specifications:
Microsoft OS extended descriptors specification 1.0
Microsoft OS 2.0 descriptors specification
Microsoft OS Extended Descriptor 1.0 Specification
The extended properties OS descriptor has two components
A fixed-length header section
One or more variable length custom properties sections, which follows the header section
Microsoft OS 1.0 Descriptor Header Section
The Header Section describes a single custom property (Face Auth Profile).
OffsetFieldSize (bytes)ValueDescription0dwLength4<>4bcdVersion20x0100Version 1.06wIndex20x0005Extended property OS descriptor8wCount20x0001One custom property
Microsoft OS 1.0 Descriptor Custom Property Section
OffsetFieldSize (bytes)ValueDescription0dwSize40x00000036 (54)Total size (in bytes) for this property.4dwPropertyDataType40x00000004REG_DWORD_LITTLE_ENDIAN8wPropertyNameLength20x00000024 (36)Size (in bytes) of the property name.10bPropertyName36UVC-CPV2FaceAuth'UVC-CPV2FaceAuth' string in Unicode.46dwPropertyDataLength40x000000044 bytes for property data (sizeof(DWORD)).50bPropertyData4See Data Schema BelowSee Data Schema Below.
Payload Schema
The UVC-CPV2FaceAuth data payload is a 32-bit unsigned integer. The high order 16-bit represents the 0 based index of the media type list exposed by the RGB pin. The low order 16-bit represents the 0 based index of the media type list exposed by the IR pin.
For example, a Type 3 Camera which exposes the following media types, in the order declared from the RGB pin:
YUY2, 640x480@30fps
MJPG, 1280x720@30fps
MJPG, 800x600@30fps
MJPG, 1920x1080@30fps
And the following media type for IR:
L8, 480x480@30fps
L8, 480x480@15fps
L8, 480x480@10fps
A payload value of 0x00010000, will result in the following Face Auth Profile being published:
Pin0:(RES1280,720;FRT30,1;SUTMJPG)// Second media type (0x0001) Pin1:(RES480,480;FRT30,1;SUTL8)// First media type (0x0000)
Note: At the time of this writing, Windows Hello has a minimum requirement of [email protected] for the RGB stream and 340x340@15fps for the IR stream. IHV/OEMs are required to select media types that satisfy this requirement when enabling Face Auth Profile.
Type 1 Camera Sample
For a Type 1 Camera, since there is no IR pin (with the expectation that a Type 1 Camera will be paired to a Type 2 Camera on the machine in a Sensor Group), only the RGB media type index is published. For the IR media type index, the low order 16-bit value of the payload must be set to 0xFFFF.
For example, if a Type 1 Camera exposed the following list of media types:
YUY2, 640x480@30fps
MJPG, 1280x720@30fps
MJPG, 800x600@30fps
MJPG, 1920x1080@30fps
To publish the CPV2FaceAuth using the MJPG, 1280x720@30fps media type, the payload must be set to 0x0001FFFF.
Type 2 Camera Sample
For a Type 2 Camera, the high order 16-bit must be set to 0xFFFF, with the low order 16-bit indicating the IR media type to be used.
For example, for a Type 2 Camera with the following media types:
L8, 480x480@30fps
L8, 480x480@15fps
L8, 480x480@10fps
If the first media type is used for Face Auth, the value must be: 0xFFFF0000.
Microsoft OS Extended Descriptor 2.0 Specification
MSOS Extended Descriptor 2.0 can be used to define the registry values to add Face Auth Profile support. This is done using the Microsoft OS 2.0 Registry Property Descriptor.
For the UVC-CPV2FaceAuth registry entry, the following shows a sample MSOS 2.0 descriptor set:
When UVC-CPV2FaceAuth registry entry is added, devices do not need to publish the EnableDshowRedirection registry entry as described in DShow Bridge implementation guidance for UVC devices.
However, if the device vendor must support older versions of Windows and/or need to enable MJPEG decompression within Frame Server, the EnableDshowRedirection registry entry must be added.
Sensor Group Generation
When OEMs build systems using Type 1 and Type 2 Cameras to provide both RGB and IR streams for Windows Hello support, OEMs must declare the two cameras to be part of a synthesized Sensor Group.
This is done by declaring a FSSensorGroupId and FSSensorGroupName tag in an Extension INF to be created under the device interface property for each camera.
However, if Extension INF is not provided, ODMs may use the same MSOS Descriptors to publish the FSSensorGroupId and FSSensorGroupName values. The inbox Windows 10 USB Video Class driver will automatically take any MSOS Descriptor whose Payload Name has been prefixed with 'UVC-' and migrate the tag into the device interface property store (removing the 'UVC-' prefix).
So a Type 1 and Type 2 Camera which publishes the following will allow the OS to synthesize the cameras into a multi-device Sensor Group for use with Windows Hello:
UVC-FSSensorGroupId UVC-FSSensorGroupName
The payload for each tag must be a Unicode String. The UVC-FSSensorGroupId payload must be a GUID string in the following format:
{XXXXXXXX-XXXX-XXXX-XXXX-XXXXXXXXXXXX}
The value of the GUID must be the same between the Type 1 and Type 2 Cameras and both cameras must be added to the same physical chassis. For built in cameras, the physical chassis is the computer itself. For external cameras, both Type 1 and Type 2 Camera modules must be built into the same physical device connected to the computer.
Custom Device Interface Categories for Sensor Groups
Starting in 19H1, Windows is providing an IHV/OEM specified extension mechanism to allow publishing synthesized Sensor Groups into any custom or pre-defined category. Generation of a Sensor Group is defined by IHV/OEMs providing a Sensor Group ID key in the custom INF:
FSSensorGroupId: {Custom GUID} FSSensorGroupName: <Friendly Name used for Sensor Group>
In addition to the two above AddReg entries in the INF, a new AddReg entry is defined for custom categories:

FSSensorGroupCategoryList: {GUID};{GUID};…;{GUID}
Multiple categories are defined using a semi-colon (;) delimited GUID list.
Each device declaring a matching FSSensorGroupId, must declare the same FSSensorGroupCategoryList. If the list does not match, all lists will be ignored and the Sensor Group will be published by default into KSCATEGORY_SENSOR_GROUP as if no custom categories were defined.
Camera Rotation
See Camera Device Orientation
UVC Control Cache
See UVC Control Cache
BOS and MS OS 2.0 descriptor
UVC compliant camera can specify Windows specific device configuration values in a platform capability BOS descriptor in its firmware using Microsoft OS 2.0 Descriptors. Please refer the documentation on MS OS 2.0 descriptor to understand how to specify a valid BOS descriptor that conveys the device configuration to the OS.
Microsoft OS 2.0 Descriptor Set Header
OffsetFieldSize (bytes)Description0wLength2Length in bytes of this header, must be 10.2wDescriptorType2MSOS20_SET_HEADER_DESCRIPTOR4dwWindowsVersion4Windows version.8wTotalLength2The size of the entire MS OS 2.0 descriptor set including this header size.
Microsoft OS 2.0 Registry Property Descriptor
OffsetFieldSize (bytes)Description0wLength2Length in bytes of this descriptor2wDescriptorType2MS_OS_20_FEATURE_REG_PROPERTY4wPropertyDataType20x04 (REG_DWORD_LITTLE_ENDIAN)6wPropertyNameLength2The length of the property name.8PropertyNameVariableThe name of the registry property.8+MwPropertyDataLength2The length of the property data.10+MPropertyDataVariableProperty Data
When a valid MS OS 2.0 descriptor is specified in the firmware, the USB stack copies the configuration values into the device HW registry key show below:
UVC driver reads the configuration values from the device HW registry key and configures the device on the OS accordingly. For example, if the firmware specifies the device to be registered as a sensor camera using a configuration value, UVC driver registers the device just under that category.
Configuring UVC devices through platform BOS descriptor is a mechanism that was enabled in Windows 10, version 1703 to help UVC device vendors to configure the device without the need of an INF file on Windows OS.
Configuring UVC devices through custom INF is still supported and that takes precedence over BOS descriptor based mechanism. While specifying device properties through INF, you do not need to add the prefix 'UVC-'. This prefix is only needed for device properties that are specified through BOS descriptor and that are per interface instance specific. If your device needs user mode plugins like DMFT, then you need to supply an INF for installing the DMFT. It cannot be configured using firmware.
Currently supported configuration values through BOS descriptor
Configuration nameTypeDescriptionSensorCameraModeREG_DWORDRegister the camera under a specific category.UVC-FSSensorGroupID UVC-FSSensorGroupNameREG_SZGroup cameras with the same UVC-FSSensorGroupIDUVC-EnableDependentStillPinCaptureREG_DWORDTo enable still capture Method 2/3UVC-EnablePlatformDmftREG_DWORDTo enable Platform DMFT
When UVC driver sees the registry values with prefix 'UVC-', it populates the device's category interface instance registry key, with the same values without the prefix. The driver will do this for any variable specified by the firmware, not just the ones listed above.
For the OS to make use of the BOS Platform Device Capability and MS OS 2.0 descriptors, the device descriptor must specify the bcdUSB version to be 0x0210 or greater.
Example composite device
This section provides a BOS descriptor and a MS OS 2.0 descriptor for an example composite device with two camera functions. One function is a UVC color camera and the second function is a UVC IR camera.
The sample descriptors are as follows:
Register the color camera function under KSCATEGORY_VIDEO_CAMERA
Register the IR camera function under KSCATEGORY_SENSOR_CAMERA
Enable color camera function still image capture
Associates the color and IR camera functions as a group
Upon device enumeration, the USB stack retrieves the BOS descriptor from the device. Following the BOS descriptor is a platform specific device capability.
The BOS platform capability descriptor specifies:
MS OS 2.0 descriptor platform capability GUID
A vendor control code bMS_VendorCode (here is it set to 1. It can take any value the vendor prefers) to retrieve the MS OS 2.0 descriptor.
This BOS descriptor is applicable for OS version Windows 10 and later.
After seeing the BOS descriptor, the USB stack will issue the vendor specific control request to retrieve the MS OS 2.0 descriptor.
Format of the control request to retrieve MS OS 2.0 vendor-specific descriptor:
bmRequestTypeBRequestwValueWIndexwLengthData1100 0000BbMS_VendorCode0x000x07LengthReturned MS OS 2.0 Descriptor Set blob
bmRequestType
Data Transfer Direction – Device to Host
Type – Vendor
Recipient - Device
bRequest
The bMS_VendorCode value returned in the descriptor set information structure.
wValue
Set to 0x00.
wIndex
0x7 for MS_OS_20_DESCRIPTOR_INDEX.
wLength
Length of the MS OS 2.0 descriptor set, as returned in the BOS descriptor. 0x25C (604) in this example.
Uvc Driver For Android
The device is expected to return the MS OS 2.0 descriptor like the one specified in USBVideoMSOS20DescriptorSet.
The USBVideoMSOS20DescriptorSet describes the color and IR functions. It specifies the following MS OS 2.0 Descriptor values:
Uvc Driver For Mac Os
Set Header
Configuration Subset Header
Color Camera Function Subset Header
Registry Value Feature Descriptor for sensor group ID
Registry Value Feature Descriptor for sensor group name
Registry Value Feature Descriptor for enabling still image capture
Registry Value Feature Descriptor for enabling Platform DMFT
IR Camera Function Subset Header
Registry Value Feature Descriptor for sensor group ID
Registry Value Feature Descriptor for sensor group name
Registry Value Feature Descriptor for registering the camera as a sensor camera
Uvc Driver For Mac Windows 7
The firmware will have a handler for the vendor request that will return the following MS OS 2.0 descriptor for the imaginary device described at the beginning of this section.
0 notes