#Identifying The Differences between 2 WordPress site builder
Explore tagged Tumblr posts
Visit Tumblr Blog
Explore Tumblr blogs with no restrictions, modern design and the best experience.
Last Seen Tumblr Blogs


Fun Fact
The KCSC sent more than 20K requests to delete posts related to prostitution and porn to Tumblr from January to June 2017.
Text
WordPress.com vs WordPress.org: Which Is Better For Startups?
Do you want to learn the differences between WordPress.com and WordPress.org? Yeah. Continue reading. Nah. Jump the queue and read ‘How to Get the Most Out of the Free WordPress App on the App Store’ WordPress.com and WordPress.org are actually two different platforms. So, here’s what you need to know as a start up enterprise if you are starting up an online business website with…

View On WordPress
#comparing wordpress.org and wordpress.com#Identifying The Differences between 2 WordPress site builder#summary of wordpress.org and wordpress.com#understanding wordpress.org and wordpress.com as a startup#wordpress hosting#wordpress.com prod and cons#wordpress.org cons & pros
2 notes
·
View notes
Text
Build Internal Links
How to Build Internal Links That Drive Traffic and Improve Page Authority
Are you looking to build internal links to drive website traffic and enhance page authority? Internal linking is one of the most powerful and often overlooked SEO strategies for boosting your website's visibility and helping search engines understand your content structure.

When done correctly, it improves the user experience and elevates your search engine rankings.
In this blog, we will guide you through the essential steps to effectively build internal links, which will drive traffic and strengthen your page authority.
1. Understand the Importance of Internal Links
Before diving into the how-to, it's important to understand why internal links are essential for SEO and website performance. Internal links are hyperlinks that link one page of your website to another.
These links help search engines like Google crawl your website more efficiently, discover new content, and establish your site's hierarchy.
Additionally, internal links distribute "link equity" or page authority across your site, helping less popular pages rank higher in search engine results.
2. Identify Key Pages for Internal Links
The first step in building internal links is identifying the most important pages on your website. These pages, such as product pages, blog posts, or services, often generate the most value for your business.
Once pinpointing these essential pages, ensure they are linked to other relevant pages to pass on their authority. You can use an internal link builder to link these pages. Linking less-visited or newly created pages to high-traffic pages can also increase their visibility.
For instance, if you have a popular blog post, link to related articles or service pages to encourage users to explore further and increase page authority.
3. Use Descriptive Anchor Text
Anchor text is the clickable hyperlink that directs users and search engines to a different page.
It's essential to use descriptive, keyword-rich anchor text rather than generic phrases like "click here" or "read more."
The anchor text should reflect the content of the page being linked to, providing context for both users and search engines.
4. Create a Logical Linking Structure
When building internal links, you need to ensure that your website has a logical and user-friendly linking structure.
One common mistake is creating a scattered or disorganized structure, which makes it difficult for users and search engines to navigate. A clear hierarchy helps visitors, and search engine crawlers move smoothly through your site.
Start by linking from your homepage to important categories and pages using Auto internal link, then create links between related posts or products.
5. Link to Deep Content
One key strategy for improving page authority is linking to deep content within your site. This refers to older or less popular pages that might have less visibility.
For example, if you have older blog posts with valuable information, don't let them sit idle. Link back to them from newer, popular posts to boost their authority and keep users engaged with your content.
Conclusion
Building internal links that drive traffic and improve page authority is an essential SEO tactic for any website owner.
By understanding the importance of internal links, identifying key pages, using descriptive anchor text, and creating a logical linking structure, you can improve your site's user experience and search engine rankings.
You can also use WordPress internal link plugins like CrawlSpiderto to automate the process, ensuring efficient link building, saving time, and optimizing your site's internal linking strategy for long-term SEO success!
0 notes
Text
Blogs
A Blog is a regularly updated page that explores ideas around a topic, discipline, subject/subject matter, or interest and is written to create or contribute to a conversation around that idea.
How I Arrived @ My Definition During the process of creating this blog, I experimented with four different site builder/blog hosting sites: Wix, WordPress, Blogger.com, and Tumblr. Each of these sites allow users to create and edit pages with posts that include picture, video, text, links, and audio. Users are given a unique address that they can share, and other users are able to comment, share, and like the page. Now blogs differ from glogs (which primarily use graphics & visitors interact with the digital poster), vlogs (which use video to express ideas or experiences), discussion boards (which typically pose a question or problem for users to respond to) and web pages (which are primarily used to display information or ac as a landing platform for users to find resources) because blogs are usually focused on the creator’s exploration of an idea or topic. The modality of exploration is primarily written, but the creator can, and often does, use audio, video, and outside sources to supplement their exploration.
The blog platform affords itself to sharing. Whether the creator is sharing recipes or photos of a trip to Italy, blogs allow people to show others what they think and what they care about. The conversational nature of a blog also affords itself to response. Users can like a blog post or comment about a similar experience. The whole point of us telling stories or sharing ideas is to make connections over shared experiences. In this sense, a blog is creating a digital community where we can share ideas and work out problems. Users are able to gather outside feedback that they may be unaware of based on their limited personal experiences. The threading of that conversation helps users follow an idea through the collaborative brainstorming process, and hopefully come to a new understanding based on the input received from other contributors.
Other technology such as word processors, websites, and even notebooks allow users to record ideas and explore their own thinking along with others; however, these types of technology synchronous engagement. Google docs is trying to bridge that gap with collaboration features, but those features are not as visible within the program. The beauty of blogging is its ability to create conversation in an asynchronous setting. As new information or ideas are found the conversation continues without having to go back and revise the original post. The other types of technology lend themselves to a feeling of finality, but blogs act as a living record of an expanding thought. Even if the information added to a thread existed at the time of the original blog post, it’s addition doesn’t necessarily negate the original idea, but instead enhances it. In this sense, a blog isn’t about being right or wrong but playing with and exploring an idea.
Examples of Blog Implementation
As an instructional technology specialist, I have recently focused my approach to include Jim Knight’s Impact Cycle for instructional coaching, so both of the examples that follow are ways that I could integrate blogs into this process.
1. Blended Learning Instructional Strategies Blog: This blog will be utilized during professional development sessions, and it contains research and discussions that focus on instructional practice in a blended learning setting. The blog would substitute for the traditional slideshow presentation that poses open-ended questions or a polling type program (ie. kahoot or nearpod) that you see so often in educational settings. Teachers would be directed to respond to a particular thread and asked to think of a way to tweak or apply an instructional practice and post successes and failures from strategies they have implemented. The thread supplies a scaffolding bringing educators up to speed on the conversation by reading the post and subsequent replies. This scaffolding takes the integration of technology to the level of augmentation, because it allows for asynchronous collaboration in a more authentic environment.
Content
Learning Objectives
Teachers use high-yield instructional strategies to create lessons that maximize their effect size on student learning.
Teachers evaluate their own instruction and identify successes and challenges.
Bloom’s Levels = Create, Evaluate
Pedagogy
This approach stresses collaboration and interaction based on the research and meta-data collected by John Hattie referred to as visible learning. This research attributes student growth, measured by effect size, to a number of factors including instructional strategies. Consistently, collaborative activities score a higher than average effect size, and are therefore a more efficient way of teaching, especially when dealing with adults.
Technology
The ease of reply for the audience and frequency of updates by the creator gives a blog a certain pace. A blog affords itself to quick responses that have an off-the-cuff nature to them. Related sources of text, video, or audio can simply be dropped in the thread and give the topic a fresh dynamic. This keeps the conversation fresh and enables the audience to create relevance.
2. Impact Cycle PLC Blog (Redefinition): I currently work at Del Valle High School, in Del Valle, Texas and our content areas work within professional learning communities (PLCs). I work with these groups to improve instruction and technology integration. I have begun to implement a coaching cycle based on the Impact Cycle by Jim Knight. This cycle involves making goals, collecting data, implementing an instructional strategy, and then evaluating the strategy’s effectiveness (this is just a broad generalization for my purposes, the steps are far more detailed and nuanced). The blog assignment is used as a collaborative project that documents the different steps of the process. Myself and the PLC members are contributors to the blog, and as we progress, we post recordings of lessons, data, revised goals, successes and failures, etc. The blog is also used to guide the conversations we have when I meet with the PLC. As far as SAMR goes, this type of technology integration redefines the activity of meeting and working through a set of questions for each step in the coaching cycle. Instead, teachers have a space to use as a workbench to collect and refer to. The blog acts as a touchstone when so often goals and progress get lost in the immediacy of grading papers and standardized testing.
Content
Teachers use data to evaluate their own instruction and identify successes and challenges.
Teachers create lessons and implement instructional strategies that maximize student achievement and address the challenges they identified.
Pedagogy
Jim Knight’s Impact Cycle for instructional coaching stresses questioning, self-reflection, and ownership of creative ideas. This last part, ownership of ideas, refers to the likelihood of a teacher to try a practice if they feel like it was their idea. A blog is a very unassuming way to present strategies and ask teachers to make it their own; personalize it, rather than forcing teachers to implement a strategy with the implication that they are doing something wrong.
Technology
The asynchronous nature of blog posting and response affords itself to the busy nature of a teacher’s schedule. The coaching cycle drives a hard line between taking time to ask the right questions and respecting the time of professional educators who deserve to get the most out of their PLC time. The blog format allows teachers to prepare for and participate in discussion of pedagogy when they are able to. Growth needs to be able to happen whenever they need it to, and the blog format allows teachers that possibility even if they had an ARD or any number of responsibilities pop up during our planned meeting.
Obstacles
A blog’s rapid response nature does mean that ideally you will get a large number of responses, and of those responses, many will express similar ideas. A source can be overwhelming if it presents too much information. Students can become disengaged when a resource contains multiple redundancies. However, I would argue that the benefits of engaging in a conversation and the ease of which contributors can mix mediums outweighs any detriment concerning over-saturation.
1 note
·
View note
Photo

Graphic Design Portfolio Sites
Key things to remember when creating a portfolio website Main Writer: @allydsgn | Allyson Arrogante
Welcome to the Spring Semester, when most design students have either started looking into jobs or even started interviewing for them. Design conferences are holding job fairs and design communities are hosting reviews. Portfolio, business cards, and business-casual outfits either ready to go or in progress, students are trying to make sure they check off every box for what they need to be the best candidate graduating in town this semester.
Studioblr Collective is here to help you check one of those boxes off, and that’s your Portfolio website. Some students use their portfolio website as their portfolio book as well, bringing iPads and laptops to interviews and conferences to click through, so we found this topic to be a big necessity to write at this time of year.
What are we covering?
Why should you have a portfolio site
What should be on your site
How to format what’s in it
How and where to build your site
Disclaimer: you will hear different advice from different people, so please, as always, when you hear advice take what you think applies to you and leave behind what you think does not work. Be responsible for your decisions and believe in them, don’t do something just because someone else told you to.
1. Why Should I Have a Portfolio Site?
To those that do not have a lot of time or experience building a website, building an online portfolio that is supposed to encompass and showcase work in its best light may seem daunting. Some may find reasons to not put the time and effort into one, but it can be through Behance, Dribbble, or your own site. Whatever you choose, you should have an online portfolio that’s easily accessible and identifying to you and your work.
The first, and probably most obvious, reason that you’ll want your work to be 24/7 accessible and easy to find is for potential employers. If they put your name into Google, or stumble across you on LinkedIn and other social platforms, they should be able to find your website: the reliable go-to place to see what you think is your best work and links to all of your other profiles that they are probably interested in seeing. With this said, make sure that whatever you hand out or send to people has your website’s URL on it.
It’s not only a great gallery and showing your best work, but it is also a reliable way to get a hold of you. When you hand out a business card or tell someone your name, an impulse for those interested in you is to look you up later. This could be potential employers or other designers that just want to connect, which could lead to opportunities later. Hook up your professional email to your site to make sure you’re separating your junk mail and spam from the emails you actually want to read. Being timely in your responses also helps you look reliable, professional, and interested.
2. What Should Be On My Site?
Some common mistakes are to include too much or too little information about you and your work. Here’s a list of necessities to make sure you check off:
Your work should be in the spotlight
Context for you and your projects
Resume
A Little About You
Your Brand
Your Contact Information and Other Profiles
Some of these seem obvious or vague, so let’s jump into the details.
3. How to Format Your Website
Overall, your website should be treated as a portfolio piece in itself. Typography, color, hierarchy, brand system, and so on should be considered when building this site. Just like a website you’d make for a school project, you should be sure that your website experience is consistent, meaningful, and intentional. Your site should be responsive and it should be easy to find the things we listed above. Now, let’s talk about how to format and what to remember about the specific parts of your site:
Your Work:
Only your best work should be featured. Your “average” work will distract from your “wow” work.
“If your portfolio looks and feels bare, that’s because it is”
List projects as campaigns if they have multiple parts, not separated, so viewers can see the system that you built. This format will help you tell the story of the campaign. Your pieces speak louder when together.
Use mockups that are clear, show your work in context, and in its best light
Your work (logos specifically) should be clear to see and analyze with appropriate clearing space.
The process is beneficial to show your thinking/ideation process
Walk through your process per project and pace out your work for easy digestion
Make it clear what people are looking at and what to expect
Context:
As we said above, you should walk through your work, to provide context as to what helped you make certain decisions.
Some things to include per project should be who it was for, the challenges you faced, and how you felt you solved their problems.
If it was a team project, you must say so and list who else you worked with. It is not right to claim a whole project for yourself if you only did a part of it.
Keep descriptions simple, clear, and straightforward. You can add some flavor words for the sake of branding, but don’t get convoluted.
Put relevant text by relevant pictures to help drive your points mentioned.
Resume:
Make a link or button that clearly leads to this as it’s a heavily sought after link when recruiting.
It should be a PDF so that it’s easy to print out if a physical copy is needed for files. A typed and coded page is optional, just be sure it’s formatted well so that it is easy to read and matches your branding.
Use the version of your resume that enforces the kind of work you want to do. Some people have different resumes pertaining to certain types of jobs, so the one that everyone can see at all times should be for the job that you are looking for the most.
This could also be a good place to link to side projects or other online endeavors you’re a part of to show your involvement and what kind of projects interest you.
A Little About You:
A short, sweet, and catchy couple of sentences will do when it comes to personal interests.
Also, use this moment to talk about what kind of work you like and what you want to do. Recruiters will be able to see if you’re the right fit for their position or not.
A picture of you, or some sort of image you resonate with, helps give a visual aid to remember you by.
Your Brand:
This is used to keep everything consistent, not to overpower your work.
Your logo or name should be clearly visible on most, if not all, of your pages. The more your viewers are exposed to it and stays consistent, the easier it’ll be for them to recall you when they see your branding elsewhere.
How you talk in your text and how you display your work also follows your brand. Be aware of what you’re trying to say, how you want to say it, and the tone you want to use to express yourself.
Your Contact Information and Other Profiles:
Make sure a way to contact you is clear on the home page or in your navigation (this can be your email actually listed near the top of the page or a “contact” page that people know to click on.
On this page, it’s up to you to use a contact form or not, but either way, your main form of contact (most likely email) should be clearly listed on this page.
This is where you would put your other profiles for people to check out as well, such as LinkedIn, Instagram, Dribbble, Behance, and so on.
4. Where to Host and Build your Website
Here’s the fun part: development.
As a designer and not a developer, you are obviously not expected to code your site from the ground up. However, if you’re looking into becoming a web designer or partly get into development, it could be a great project to show off those skills. No matter how you choose to build, just remember that you need a domain name and a hosting plan. How you decide to build your site, and what functions you’re planning to have within it, will change if there is a variable third cost: the website builder’s subscription to use their service.
Let’s walk through the options:
Code Your Own Website
If you’re a web developer, this would be a great showcase of that ability on a smaller scale by your own rules
Full control comes with full responsibility. You have to figure out how to do everything on your site or at least hook up to it.
No subscription cost if you know how to develop without a builder and you update files through an FTP server.
Development will take longer.
WordPress/CMS
Good experience to work with WordPress since a lot of sites with bigger databases use this.
More “quick” functionality with the plugin library, but can also get more complicated as you deal with other people’s code and functionality to get things to work how you want them to.
WordPress has the option to upload a custom theme with custom post types if you want to do more than just display your portfolio. Another reason why a developer may want to use this instead.
There are some costs associated with WordPress if you’re using their themes. They also have plans with varying amounts of features where you can choose what’s best for you.
Evolving In-Betweens
Want a CMS with some advanced styling but don’t want to code? Sites like Webflow and Bubble are pushing the boundaries on drag and drop builders by giving you advanced customization.
These sites take more styling attention versus something like Squarespace with a starting template but offer more customization per element.
Some basic front-end styling knowledge would help when making decisions considering formatting and layout.
Subscriptions are not avoidable and should be reviewed for what features you want or need.
Squarespace and Other Site Builders
Most site builders are very intuitive and have great user experience as they are built specifically for those that don’t want to code.
Themes are somewhat customizable with styles, google fonts, and Adobe fonts options. They also will usually include custom CSS and code injection for those specific custom pieces.
Be aware of all functions you want and what functions are available at which subscription plan price. (example: if you want to sell products on your site as well that costs extra per month to host on Squarespace, and other similar website building sites)
There is usually no way around the subscription cost.
Adobe Portfolio (that hooks to Behance)
Very intuitive and easy user experience
If you’re already using Behance then you can easily and quickly sync up, which is great. You can also hide certain projects from your Adobe Portfolio while having them still visible on Behance so you can choose the best work.
Currently has very limited functions, so be aware, again, of what you want and what’s available.
Themes are limited and fixed to an extent, but by default are nicely designed.
Comes free with an Adobe subscription, but you must have one in order to use this service.
In Conclusion
You should have a portfolio site so that people looking to hire or network with you have a reliable place to see your best content, all other relatable profiles, and have a way to contact you.
This website should feature your best work, not too many or too little projects, and should be showcased on a campaign basis, not by its pieces. It should also hold relevant information about hiring you such as your resume, contact information, and a little bit about you. All of these things should be encompassed in your brand’s experience, but not overwhelmed by it.
Your projects need context which can be done with supporting text, walking through its process and pieces, and by supplying information such as its challenge and proposed solutions. Also, make sure that everything is displayed clearly, or can be found easily.
No matter how you build your site you’ll need a domain name and a hosting provider. The third cost that could change depends on what functions you want on your site and which way you choose to develop. Website builders will have subscription fees based on the features you want to have.
The Studioblr Collective hopes that this was helpful and encourages any of our readers to ask questions or provide feedback: we’d be happy to respond!
Have fun and keep up the good work, designers!
References:
Personal Experience
https://www.creativelive.com/blog/5-graphic-design-portfolio-mistakes/
https://99designs.com/blog/freelancing/how-to-build-graphic-design-portfolio/
#studioblr#studyblr#student#college#design#graphic design#designblr#artblr#graphicdesign#graphics#portfolio#website#web design#art#career
99 notes
·
View notes
Text
WordPress.org vs WordPress.com: Which Is Better For Startups?
WordPress.org vs WordPress.com: Which Is Better For Startups?
WordPress.com and WordPress.org are actually two different platforms. So, here’s what you need to know as a start up enterprise if you are starting up an online business website with WordPress. WordPress.org allows you to host your own website (recommended). You’ll need to buy your own web hosting service and then install the WordPress software from your host. With WordPress.com, on the other…

View On WordPress
#comparing wordpress.org and wordpress.com#Identifying The Differences between 2 WordPress site builder#summary of wordpress.org and wordpress.com#understanding wordpress.org and wordpress.com as a startup#wordpress hosting#wordpress.com prod and cons#wordpress.org cons & pros
0 notes
Text
Sendinblue VS Getresponse, Which Lead Generation Tool Is Better For Beginners

More than 50% of the world's population is using email. That amounts to a total of about 3.89 billion people worldwide. Therefore, email is often regarded as one of the strongest ways of connecting to your market. A lot of questions have been asked about arguably the two best and most used email lead generation tools and which is better to use as a digital marketer or as an entrepreneur. Both of these tools have proven to be exceptionally good in terms of digital marketing, they perform diverse functions and are not limited to only digital marketing. They house other noticeable great features. To find out which is highly recommended and why? Read on and you will find out.
SENDINBLUE OR GETRESPONSE, Which Is A Better Email Leads Generation Tool.
1. Useful for Beginners: A good email lead generation tool should be easily understandable by beginners. If you are a beginner digital marketer, then you should opt for SendinBlue because it is a better option for beginners. Even if you are not a starter, but a medium-sized business owner, you should also prefer SendinBlue over GetResponse. This is due to the fact that it is more users friendly and you can easily understand all of its features. And most importantly SendinBlue allows you to pay per email and not per subscriber, and this is very important for beginners. SendinBlue definitely out graces GetResponse when it comes to simplicity and being easy to use. It is a better email marketing tool for beginners. 2. Sendinblue VS Getresponse Pricing System:
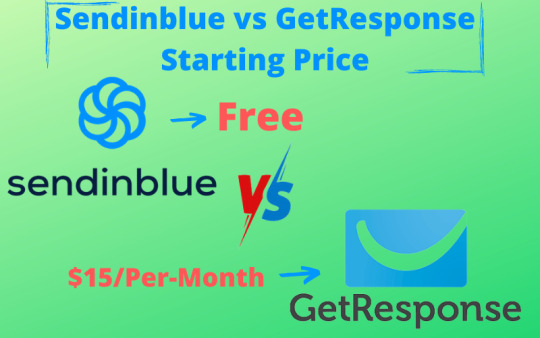
Email lead generation tools are admonished to have a very attractive pricing system in order to encourage digital marketers and entrepreneurs to opt for their services. The user interface at Sendinblue is relatively easy to grasp and enables you to identify all the key areas of the tool pretty quickly. You get the main menu at the top which directs you to your campaigns, automation, transactional email, and contact management. SENDINBLUE: The first thing to note about SendinBlue is that it offers a free package. You can use the software for free for as long as you want to until you exceed 300 emails a day. When this happens, you will need to pay for the premium package. However Sendinblue offers a lite plan which enables the user to be able to send a maximum of 1000 emails per day, and will have to pay the sum of $25, this plan offers all the free plan features without a daily sending limit but allows 40,000 emails per month. It also offers a premium plan which costs $66 per month and is furthermore reduced to $59 if paid annually. The premium plan offers multi-user access, Facebook Ads, chat options, marketing automation amongst other amazing features. Also, SendinBlue pricing is based on the number of email messages sent, rather than the number of contacts you keep in your account. GETRESPONSE: Getresponse unlike SendinBlue offers only a Free 30 days trial with all the benefits including Advanced customer support, Mobile app, Dedicated IP, high converting landing templates and Customer Relationship Management. Getresponse offers a basic plan which costs $10.5 which enables the user to send about 1000 emails per month. It also offers a plus plan which enables you to send as many as 10,000 messages per month. This plan costs $65 and offers very smooth usage. Also, getresponse offers a professional plan which costs about $450, and this enables you to send up to 100,000 messages per month. SendinBlue is relatively cheaper to use than Getresponse so it is highly encouraged for beginners and small-scale business owners. But if you have a well established business it's preferred to optin for getresponse. View getresponse Pricing Plans 3. Sendinblue Vs GetResposes Send & Mailing List Managers
A good email lead generation tool should be able to store and send a high number of emails per month, In order to enable entrepreneurs to send emails to as many clients as possible during the defined space of time. SENDINBLUE: SendinBlue allows the user to send emails ranging from a minimum of one to a maximum of over forty thousand emails per month. (40,000) Depending on the plan in which the digital marketer subscribes to. GETRESPONSE: Getresponse unlike SendinBlue allows the user to send emails ranging from a minimum of one thousand to a maximum of a hundred thousand. (100,000) However, getresponse is able to accommodate more email lists than SendinBlue and hence, enables the user of the former to send much more emails per month than an individual using the latter. 4. Easy To Use And Set Up & Integrations A good email generation tool should be user-friendly and possess features that enable digital marketers, whether beginners or professionals have the most stress-free experiences possible.
Is SENDINBLUE Better Than GETRESPONSE?
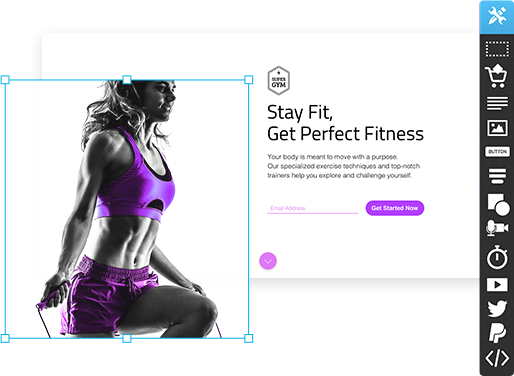
It is quite difficult to decide which of these two email lead generation tools are better. However, GetResponse is perfect to run small or medium businesses. For a large business, it certainly could be used in some areas. One example would be for clients that are looking, to begin with, email marketing. However, Getresponse is pretty vast and possesses a number of tools that would serve medium or large businesses as well. However, SendinBlue and Getresponse can be compared based on terms of their functionality. 1. Design, Landing Pages, or Ready-Made Template: landing pages are set up in order to cause conversions. SENDINBLUE: Sendinblue offers all that you’d expect in an email lead generation tool, you can create an email blast and send it to anyone in your list of contacts.
source: sendinblue.com That's an easy-to-use visual interface and an email builder. It has also made creating your messages a lot more straightforward. Sendinblue has over 60 eye-catching HTML email newsletter templates for different types of campaigns and businesses. ( It's only available for paid users) You have access to all the emails templates and landing pages templates, on all plans, but landing pages are restricted from free plans. Plus, you’ll get much more handy email marketing tools to maximize your success. These fully responsive email templates help you create newsletters that look great across devices — leaving little or no need for graphic design or coding skills. They're very ideal for small businesses who want to send professional email campaigns while saving time and money. You can easily customize templates to your brand with the intuitive drag and drop editor available on Sendinblue. Then, once your newsletter design is ready, you can see how it looks on different email clients like Gmail and Outlook. SendinBlue landing pages offer a quick start on digital marketing and also a selection of high-converting landing page templates. They also easily customize pages with the new drag and drop landing page builder. They help you choose from tons of thousands of royalty-free stock photos, in-app and make them ready to use on your site. Want to Turn traffic into leads and sales... Small businesses and entrepreneurs are currently growing their businesses with Landing pages.....Learn How To Create Professional Landing Page on WordPress on Very Low Budget GETRESPONSE: Good email designs aren't just meant for visual appeal alone.
source: Getresponse.com It is meant to help you build stronger bonds with your audience, sell more of your products, and improve your overall return on investment in email marketing. Getresponse provides a high converting landing page and wonderful responses and practices required in preparing your email templates. What Does Getresponse Landing Pages Do? Getresponse landing pages have over 100 responsive design templates in popular categories such as Optin, Download, Thank You, Sales, Discount, and Webinar Invite.

source: Getresponse.com It also possesses an Image editor – resizes, rescales, reshape, or crop, modifies opacity, and adds shadows, and rounded corners in all elements of your Landing Page. You can also customize the sign-up form on your landing page. Add custom fields, then customize the text on the bottom. A/B testing with up to 10 versions of your landing page to find out which generates the most traffic and which attracts more subscribers. View All the Getresponse Landin Pages 2. Sendinblue VS Getresponse Email Automation: Email automation is the process of sending an automated email or email series in response to a trigger condition. The trigger can be anything, ranging from customer behavior, preferences to other personal information. If you are looking to grow a business fast, basic email marketing wouldn't be enough to work with. Automated emails, however, are often referred to as fully scalable. You can cover more ground faster over a shorter period of time. SENDINBLUE: SendinBlue offers customized workflows to send a reminder to all your customers and also enables the communication between you and your customer without the need to set up a series of targeted emails and SMS based on your contacts' behavior.
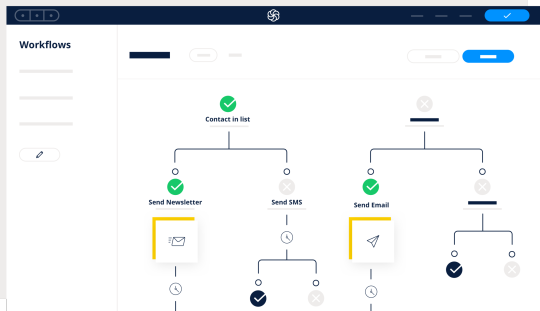
source: Sendinblue.com It also enables the professional to use a variety of uploaded data to identify when you want to contact your prospects and customers. Sendinblue automation is designed to cover various needs. You are advised as a beginner to start with predefined workflows and adapt them to suit your requirements for a more advanced communication strategy. SendinBlue offers some email automation tools for beginners such as workflows library, custom workflow, test workflow amongst others. It also offers great email automation tools for experts, these include advanced workflows and B2b website case study. GETRESPONSE: Getresponse email automation starts with a set of easy tools that enable the user to build a very good model in order to find your best leads and a tagging function that automatically remembers different subscriber behaviors you wish to follow up on.
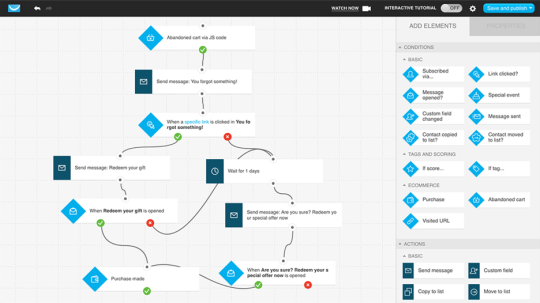
source: Getresponse.com Getresponse also makes use of workflows but unlike SendinBlue there are no pre-uploaded workflows so all workflows have to be created. Oh! It seems like it's complicated right? No it's not, it's a simple task that can be Completed within a few minutes, even as a complete beginner. However, they take you through the step-by-step process required in creating a workflow. Getresponse email Automation is iterative, which means that you can design a workflow, see how it performs, and tweak it to improve performance. Once you’re satisfied with the results, you can let it run for as long as you wish. I personally prefer to create the workflows all by myself because it gives me a lot of flexibility to get the best results. 3. Webinar Hosting and High Conversion Funnels: webinars have proven to be very useful in helping digital marketers connect with their customers. If you have a high-ticket product, a complicated sales pitch, or a new feature that your customer must know about, webinars are one of the best mediums for you to get the word out. Webinar marketing is great because it captures an engaged group of people and really holds their attention. SENDINBLUE: SendinBlue offers a great webinar service at a very cheap and highly affordable rate. It is highly effective for converting leads and prospects into customers, this is due to the fact that people are already interested in whatever you are selling.

However, the conversation rate of Sendinblue amounts to an average of 19%. That is a lot of revenue generated just by email marketing using SendinBlue. Conversion rate is one of the most important metrics marketers use to measure the performance of nearly everything they do. GETRESPONSE: Getresponse live webinars are made available to users who are subscribed to a minimum of the plus plan.

You can also host the natively via Facebook or Instagram live feeds. It also runs on-demand automated webinars for users of the pro plan. Hosting webinars is a very lucrative marketing strategy, and Getresponse has created an entire webinar experience functionality which is better than most of the other webinar software out there. But in most cases you might be looking for The Most Powerful All-In-One Webinar Platform right… Then you need to consider WebinarJam because it empowers you with flexible options: live chat, question and answer, private comments, moderation capabilities etc. Try WebinarJam for 14 Days — it’s just $1 4. Sendinblue VS Getresponse Beginners Friendly Pricing: SENDINBLUE: SendinBlue is more favorable to beginners in terms of pricing because it offers a free package that provides very good functionality.

Although its free plan comes with certain limitations, such as the absence of a landing page and sending off 300 emails a day etc. If you’d also prefer to just pay as you send emails, Sendinblue allows you to purchase prepaid credits which don’t expire. View SendinBlue Pricing Plans GETRESPONSE: Getresponse is slightly more expensive than SendinBlue in terms of beginner prices.
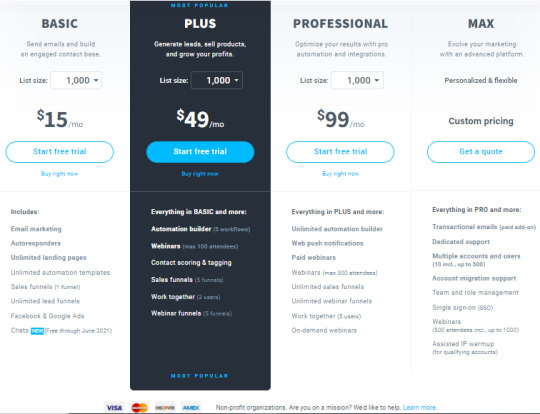
Getresponse offers a basic plan of $15 which allows the user to send a maximum of 1000 users as opposed to 300 which is the maximum for beginners using SendinBlue. Getresponse offers a great advantage, because they don’t impose limits on how many emails you send during the billing period. For one low price, you can send unlimited emails. That means that as long as you are still on a paid plan you are eligible to send emails to your email list. View Getresponse Pricing Plans 5. User-Friendly and Back Ends Interface: SENDINBLUE: The user interface at Sendinblue is relatively easy to grasp and enables you to identify all the key areas of the tool pretty quickly.
You get the main menu at the top which directs you to your campaigns, automation, transactional email, and contact management. You can also switch to your emails, templates, SMS, Facebook ads, statistics, and settings from the sidebar menu. To create a new campaign, just click the big green button in the center. Sendinblue will take you step by step from there and help you create a campaign. First, you get to set the main details such as the campaign name and the subject line of the email. SendinBlue is very easy to set up and use, this is why it is highly recommended for beginners as it offers first-hand guidance when creating a new campaign. GETRESPONSE: Getresponse has a very large amount of feature set, even on its entry-level plan. Read the full article
#Emailmarketing#Getresponseautomation#Getresponsecontacts#Getresponsemarketingautomation#Getresponsepricing#getresponsewhat#getresponsewhich#Sendinblueautomation#Sendinbluecontacts#Sendinbluemarketingautomation#Sendinbluepricing#sendinbluevsgetresponse#sendinbluevsGetresponsecampaigns#sendinbluevsGetresponsemarketingsoftware#sendinbluevsGetresponsemarketingtools#sendinbluevsGetresponseplatform#sendinbluevsgetresponsepricing#sendinbluevsGetresponsesms#sendinbluevsGetresponsesmtp#sendinbluevsGetresponsetransactional
0 notes
Text
3 Best WordPress Photo Gallery Plugins
Pretty much every website uses images and WordPress photo gallery plugins make it easy to display those images in an attractive way.Try a free demo
But with so many options to choose from, it can be hard to dig through everything and find the plugin that offers just the right combination of features, aesthetics, and ease of use.
To help you find that plugin, we’ve compiled a list of the best WordPress photo gallery plugins, dissected their feature lists, and grabbed a representative screenshot so that you know what types of galleries each can create.
Ready to dive deep? Let’s go!Find the best way to display your WordPress images with this roundup of the best photo gallery plugins

CLICK TO TWEET
How to Choose the Best WordPress Photo Gallery Plugins
You have an overwhelming number of WordPress photo gallery plugins to choose from. Go to CodeCanyon, WordPress.org, or make a Google search and you’re still going to be looking at a long list, without much guidance on what you should go for.
Therefore, we compiled the best features to consider when looking through these WordPress photo gallery plugins. Everyone’s situation will be different, but try to pick out the most important features to you from the list below to narrow your search:
A collection of different gallery formats such as tiled, mosaic, and masonry.
Lightbox viewing, for users to get a larger version of the photos in your gallery.
Image sharing, through social media and other options like email.
Image commenting for creating a community and conversation behind your photos.
Support for both video and photos, with tools for linking to YouTube and Vimeo videos.
Linking options so that you can send people to descriptions of your portfolios or blog posts with more information.
Open graph access to integrate with third-party tools and customize the way the gallery looks.
Image protection for those who don’t want their photographs used without permission.
Ecommerce support to sell your photos through a WordPress website.
A digital download management system to compile the images and organize them into categories.
Animations and other effects to grab attention when users scroll over your photos.
Drag and drop builders for rapidly building a photo or video gallery without the need for complicated coding or settings.
Mobile-friendly galleries so that users can view your photos from tablets and phones.
Image optimization with lazy loading. This is essential if you plan on having lots of photos on your website. It’s bound to improve the speed of your site and make search engine happy.
Gallery templates to eliminate the need to start a gallery from scratch.
Customization tools so that you can match your branding, fonts, colors, and other elements with what your current website looks like.
The list could go on, but this is a good starting point for you to identify what’s most important to your business when it comes to finding a photo gallery plugin. Some companies won’t find any value in copyright protection, but others wouldn’t ever consider a WordPress gallery plugin without that functionality.
Therefore, keep all of these primary features in mind as you read through our in-depth gallery plugin evaluations below.
Best WordPress Photo Gallery Plugins in 2020
Modula
NextGEN Gallery
Envira Gallery
Gmedia Photo Gallery
Photo Gallery by 10Web
Jetpack
FooGallery
Photo Gallery by Supsystic
Justified Image Grid
Everest Gallery Lite
Image Gallery by Robo
Meow Gallery
Portfolio Gallery
Responsive Lightbox & Gallery
WordPress Photo Gallery Plugin by Gallery Bank
Photo Gallery by GT3
1. Modula
Modula is an extremely user-friendly WordPress gallery plugin from Macho Themes that helps you quickly create interesting photo and video galleries. With Modula’s range of flexible customization options, you can easily tweak your gallery to your liking.
Modula WordPress plugin
With Modula’s custom grid functionality, you can freely resize images within your gallery’s container, controlling their heights, widths, and aspect ratio.
And, all you need to do is switch a gallery from ‘creative gallery’ to ‘custom grid’ and start changing the dimensions of your images by clicking and dragging from the bottom right-hand corners of the images in your gallery.
If you decide to give Modula a try, you’ll quickly notice that the plugin was developed to cater to all WordPress users, regardless of experience. Their easy-to-use drag-and-drop interface and customization options make it possible to create a gallery that looks just like one of their demos in less than five minutes.
For more advanced users, Modula has an advanced customization section where it is possible for users to add CSS that can be applied to galleries separately. This, together with their well-written documentation contributes to what we believe is truly a great user experience.
A Typical Gallery Created by Modula Looks Like…
The free version of Modula is available on the official WordPress plugin repository and even includes their custom grid functionality. While you can play around with settings like margins, shadows, border radius, and more to alter how your galleries look, here’s a good idea of the style of galleries created by Modula Lite.
Modula WordPress Photo Gallery Plugin
Modula’s plans start at $39 for a single site, up to $129 for the Agency option with unlimited sites.
Reasons to Use Modula
It gives you the ability to design custom grids. All parts of the grid are customizable, with options to freely resize images within the gallery container.
Easily create a lightbox gallery with different included lightbox styles.
You can add image-entry animations (such as sliding and rotation). There are also over 40 built-in hover effects to grab attention and make your galleries look more appealing.
The plugin provides advanced tools for further customizing your gallery with CSS. This isn’t for beginners, but more advanced users will like the fact that they can tap into the custom code.
One of the premium extensions allows you to add videos to your galleries, all with simple links to the videos.
The plugin provides social media buttons so that your visitors share your photography with other people.
You get to choose from a wide range of grid formats, such as masonry, lightbox galleries, and regular square grids.
All galleries are ready to work on mobile devices.
Add GIFs to your galleries so that your entire grid is filled with moving images.
Generate albums to better organize your galleries and photos.
All customization is done through a drag and drop interface.
A “helper grid” comes with the plugin to give you an idea of where to place your images and show what the gallery looks like prior to publication.
Add filters to your gallery so that users can sift through your images and figure out which ones they like the most. This is particularly important for portfolio galleries.
The premium version of the plugin has a protection extension so that site visitors don’t have the ability to right-click and download your photos.
A watermark extension is available to further protect your photography.
A speed extension comes in handy for optimizing every single image that is added to your galleries.
Use shortcodes to insert your galleries anywhere on your website. For instance, you may think about dropping a gallery shortcode anywhere in a blog post or in the footer module.
Things to Consider Before Choosing Modula
Modula is mainly for grid galleries. That’s what it does best. It’s also true that the majority of features provided in the free version revolve around the grid galleries. If you’d like to unlock slideshows or other layouts, you’ll need to think about upgrading to one of the premium versions.
Price: Free + Paid plans start at $39 for a single-site license.
Reviews: 4.7 out of 5 stars (WordPress.org)
Active installations: 70,000+
PHP version: 5.6 or higher
2. NextGEN Gallery
By the numbers, NextGEN Gallery is one of the most popular WordPress photo gallery plugins on WordPress.org. It continues to receive over 1.5 million new downloads per year, along with great overall reviews. It’s developed by Imagely, photography experts who know the industry well.
NextGEN Gallery WordPress plugin
The free version of NextGEN Gallery provides two main gallery styles (slideshows and thumbnail galleries) and two album styles (compact and extended), all of which come with a wide array of options for controlling size, style, timing, transitions, controls, lightbox effects, and more. You can then extend it with various premium bundles.
In addition to a variety of different gallery types, these premium versions also add more advanced features like:
ecommerce functionality to sell images.
Image protection (hotlink protection, watermarks, etc.).
Image deep linking for lightbox galleries.
A Typical Gallery Created by NextGEN Gallery Looks Like…
One of the draws of NextGEN Gallery is that it offers so many different types of galleries, so there’s no single typical gallery.
I’ll use the basic thumbnail gallery for this example because it’s included in the free version. And if you go with the Pro version, you have access to many more interesting templates:
NextGEN Gallery
Reasons to Use NextGEN Gallery
You can create albums of different galleries, which is helpful if you need to display lots of pictures.
You can create slideshow galleries, as well as many other gallery types depending on which version you have.
The premium versions offer advanced features like watermarks, deep image links, and more.
NextGEN Pro includes ecommerce functionality, which is helpful if you’re selling photography.
You can choose from compact and extended galleries in the free version. So, it’s basically a choice between a longer list of photos or a consolidated layout.
You receive unique alternatives to your regular, everyday grid galleries. Some of these options include thumbnail galleries, list albums, and blog style galleries.
Image sharing is possible through social media buttons and other options like sending through email.
Your website visitors can come to your gallery and make comments on the imagery. This isn’t a requirement, so you can turn the functionality on or off.
Sales tax is automatically generated when making photo sales.
Some of the payment gateways include Stripe and PayPal.
If selling gallery photos, you get tools for sending out coupons to your customers.
Print lab fulfillment is available if you’d like to partner with a reputable printer. This is usually what most photographers do, since it would be far too time-consuming and expensive to print your own photos.
A Lightroom plugin comes with the premium version for a rapid edit and publication process.
Things to Consider Before Choosing NextGEN Gallery
The free version used to be pretty basic, but they have been actively adding a lot more features. For example, the basic slideshow can show arrows and change the transition timing. Having said that, NextGEN is a professional level image gallery. We recommend it to anyone who can afford it. Try out the free version first, then consider upgrading if you’d like to protect images and offer additional gallery layouts. Just keep in mind that NextGEN Pro is one of the most expensive WordPress photo gallery plugins out there.
Price: Free. The cheapest premium bundle is NextGEN Plus at $79.
Reviews: 4.3 out of 5 stars (WordPress.org).
Active installations: 800,000+.
PHP version: 5.4 or higher.
3. Envira Gallery
Acquired by Nathan Singh in early 2018, Envira Gallery is another popular freemium gallery plugin. A free version is available. Some brands may find that the core plugin is all they need to make a beautiful gallery. However, many of the coolest features are reserved for the premium plugin galleries.
Envira Photo Gallery WordPress plugin
One of the draws of Envira Gallery is that, like Modula, the interface is designed to make it as easy as possible to quickly get up and running with a good-looking gallery in WordPress.
While the free version is nice for basic galleries, the various premium plans are where you get the bulk of the helpful features, which include:
Social sharing.
Video support.
Albums.
Watermarking.
Image deep linking.
WooCommerce support.
More.
A Typical Gallery Created by Envira Gallery Looks Like…
While Envira Gallery lets you create multiple types of galleries, here’s the result without touching any of the settings:
Envira Gallery
Reasons to Use Envira Gallery
The interface is well-designed and you get to create your galleries with the help of a drag and drop builder. There’s no need to mess with any code. You drop the images right into place and hit the Publish button.
The Pro versions give you access to a ton of features (though they can get pricey).
You can use videos in your galleries with the Pro versions.
Several helpful addons are provided, with support for WooCommerce, Proofing, Lightroom, and more.
Social media sharing buttons come standard.
You can link to your social media pages and reveal the photos from those pages in your galleries.
Quite a few templates are provided in the free version, cutting out the amount of time it would take to build a completely new gallery.
Assign tags and categories to your galleries for better organization.
Deeplinking is possible for sending users to more information about your photos.
All galleries created in Envira Gallery work well on mobile devices. The galleries and photographs snap into place depending on how large your screen is.
You can integrate with WooCommerce to start selling your photographs and collect payments through gateways like Stripe.
Envira Gallery is unique in that it includes Gutenberg blocks to drop your galleries anywhere on your website. Not many of the competitors have Gutenberg blocks.
The watermarking and password protection tools come in handy for when you’d like to completely block users from taking your photos and using them elsewhere.
You can automatically import images from places like Instagram and Pinterest.
The CSS styles are fully customizable if you have the experience to mess around with the custom coding.
Things to Consider Before Choosing Envira Gallery
Some people love Envira, while others would recommend never considering it. It’s one of those WordPress photo gallery plugins where you really have to test it out to discover if it’s right for you. If pricing is your main concern, I would recommend skipping Envira Gallery right off the bat.
Overall, if you have the money, the Envira Gallery features are rock solid. However, users who want free galleries should look elsewhere.
Price: Free. The basic premium version starts at $29 for a single-site license, but the full-featured Pro version costs $69.
Reviews: 4.8 out of 5 stars (WordPress.org)
Active installations: 100,000+
PHP version: 5.3 or higher
The post 3 Best WordPress Photo Gallery Plugins appeared first on The Coding Bus.
from WordPress https://ift.tt/3mGil4v via IFTTT
0 notes
Text
Injury Claims

Why owner builders need more than just 'workers compensation' insurance.
Planning an owner builder project is an all-consuming process. It's exciting and sometimes even a little scary. Owner builders can find themselves putting all their energy into planning for the building process and sometimes forget one of the absolute basics which should be attended to before starting: insurance. Some owner builders end up seeking insurance part-way through the project (which can be difficult or more expensive to obtain), while others get caught up in the excitement and don't spot the oversight at all. In doing so they not only leave themselves dangerously exposed but can be in breach of legal and/or statutory requirements.
Other owner builders are well prepared, having considered the risks, and aware of the need to insure. But here's where prior experience can lead people astray. Before embarking on their first construction project most people are familiar with straightforward insurance: you have a house - you get house insurance, you have a car... Well, you can see where this example is going. But construction is not so simple.
Risk assessment
When considering the risks involved with an owner builder project most people realise that the insurance should cover the building and the building materials against fire, theft, storm, vandalism, etc. during the course of the project. This insurance is called 'Contract Works' and is essential.
The second realisation is that you'll need some insurance in case someone gets injured on the site. This is the complex part and it is where the owner builder can potentially make some incorrect assumptions.
What claims can arise out of someone being injured?
Workers compensation
Public liability
Personal accident
The biggest source of confusion is the difference between points 1 and 2. It is commonly assumed that if someone is injured on a work site that they will automatically lodge a workers compensation claim. However this is not always the case.
Workers Compensation
In order for the injured party to successfully claim workers compensation from you they need to:
have been injured while working on your project, and
qualify as a 'deemed worker' as defined under the relevant state or territory's workers compensation legislation.
Since qualifying as a deemed worker can only be certain one way or the other after the claim is made, there is still a strong likelihood of this type of claim even where it is ultimately unsuccessful. In these cases having had workers compensation insurance will have removed the onus on you personally to defend the claim, along with the related legal expenses in doing so.
Public Liability
Public liability claims can arise out of damage to someone else's property or an injury to a third party. For the purpose of this article we'll only be discussing the latter; however it's important to note that if you have a public liability policy in place you'll be covered for both.
Injury-related public liability claims arise when, for whatever reason, the injured party believes that you are responsible for their injury by way of negligence. Since an owner builder is effectively in charge of all activities undertaken on the construction site, in addition to being responsible for ensuring the safety of the site, this can often make you somewhat of an easy target. Having said that, the onus is then on the claimant to prove their case against you, and they may or may not be successful in doing so.
For this reason the claimant (if they are also a worker) may even attempt to claim workers compensation as their first option.
A public liability claim may then be made if they are unsuccessful in getting workers compensation, or if they obtain a workers compensation payment but wish to claim against you for amounts above and beyond limitations within the workers compensation system.
If the injured party is definitely not a worker (for example a visitor, whether invited or not), then there will be no such confusion. The claim will always be a public liability claim.
Personal Accident
If you, your spouse or friends ('volunteer workers') are intending to be involved in the physical labouring on your project without receiving payment, you may wish to take out personal accident insurance. This is important to consider since you will generally not be able to claim under either workers compensation or public liability for your own injury.
This insurance can be obtained either individually or as a group policy. You may already have an income protection or a personal accident policy in place and these may be suitable (ask your broker). If you don't already have a policy of this type, or if you expect to have volunteer workers, then a group personal accident policy may be the most suitable option.
This type of policy generally covers the owner builder and declared spouse while performing work at the project site, and any other person carrying out work on the same site who does so without being paid. Contact your owner builder insurance advisor/broker for further details.
A group personal accident policy applicable to you, your spouse and friends/family who are not being paid, is called ‘Voluntary Workers’ insurance and will usually be provided in your quote as an option.
When to take out workers compensation cover
In each state and territory of Australia, workers compensation legislation provides owner builders with the following advice:
'Homeowners who are building their own homes should take out a workers compensation insurance policy to make sure they are fully covered. Any contractors engaged by an owner builder may be deemed to be a worker of that owner builder.'
While the wording of this advice varies slightly from state to state the message remains the same; owner builders need to take out a workers compensation policy.
Here's a more detailed explanation:
If the local government body who issues planning permits requires you to have a workers compensation policy as part of documents submitted to Council, you will need to have a workers compensation policy in force for the duration of the project.
If a policy is not required as above, and if you are in NSW or Vic you may in some cases be exempt from taking out a workers compensation policy if the 'total value' (not just 'per worker') attributable to labour is less than $7,500.
From the total estimated cost of the project, deduct the cost of materials.
Deductions can also be made for any contractor who is incorporated (Pty Ltd). If the amount remaining exceeds $7,500, a workers compensation policy should be taken out for the duration of the project.
If the amount attributable to direct labour is less than $7,500, the workers compensation system (as of 30 June 2008) automatically holds the employer covered - if an injured party then succeeds in identifying himself as a deemed worker (and therefore entitled to workers compensation), a policy automatically then comes into force and the 'employer' is asked to pay a nominal premium of $175 and the claim will be processed. * If you are in any state other than NSW/Vic the $7,500 threshold does not apply. You will have the same requirement to take out a workers compensation policy even on small projects. If you engage any workers who provide labour only (no materials), even if payments for services are sometimes made in cash, ignore point regarding the threshold mentioned above. In these cases the likelihood of them being shown to be a deemed worker are significantly greater, and you should always obtain a workers compensation policy.
Can't I just confirm that contractors all have their own workers compensation policies?
This is a very common fallacy, perpetuated by word of mouth and even many websites that provide advice like:
'Generally, people carrying on their own business, or trades people, have their own workers compensation insurance. To be sure that you are protected always check that any licensed contractors you hire have their own workers compensation policy.'
This advice is why so many people get it wrong. It's not actually that the information is altogether incorrect, but it is ultimately wrong by way of omission. It is vital for you to remember that when you take out a workers compensation insurance policy it does not cover you, it covers your workers. So by having the contractor show you his own insurance policy you only ensure that his workers are covered if they claim against him. It does nothing to change your potential responsibility for any injury to the contractor himself, or any other 'deemed worker.' It will not have any impact on your need to obtain a workers compensation policy.
(* The exception to this rule is where you engage incorporated companies (Pty Ltd) to do the work, as discussed earlier. However it is very unlikely that you will be able to use this type of contractor exclusively, so again this tends not to help.)
Conclusion
If all of this has left your head spinning you may get just a little comfort from knowing that you're not alone. The following is all you really need to remember - practically every owner builder has an exposure to potential claims under the workers compensation system. If you are an owner builder you must seek individual advice from an expert who is dealing with owner builder insurance on a daily basis. And you will almost always need to get a workers compensation policy in addition to contract works, public liability (and personal accident if applicable). You'll then have one significant thing less to worry about while you get on with the actual project.
For more information about Injury Claims, visit our website.
Table of Contents Main Site
Home
About
Insights
Contact
Social Platforms
Blogpost – Allrisk Insurance
WordPress – Owner Builder Insurance
Tumblr – Builder Insurance and Trade Insurance
Insights
What does Insurable Interest mean? *
Uberrima Fides *
Estimating project cost *
Avoid common pitfalls and traps *
Public liability insurance *
Claim advice *
Abbreviations and acronyms for owner builders *
Comparing apples and oranges and grapefruit *
Selling an owner-built home *
Choose your builder carefully *
Fire doesn’t burn metal or does it? *
Medical expenses *
Protect yourself *
Build from Lock Up *
Research your path to success *
Rumours and Fallacies *
Things go wrong *
Green and environmental materials *
Insuring owner builders *
Can I put my insurance on hold *
How long can I insure? *
Why you need owner builder public liability *
Volunteers on Site *
Minimum insurance requirements *
Workers Compensation in NSW *
How do I make a claim *
How much insurance is enough *
What are existing structures *
Owner builder construction insurance cover *
My tradesmen are fully insured, right? *
Getting Insured *
Home Warranty *
Injury Claims *
Renovators Insurance *
Insure me if you can *
Table of Contents
What does insurable interest mean?
Uberrima Fides
Estimating project cost
Avoid common pitfalls and traps
Public liability insurance
Claim advice
Abbreviations and acronyms for owner builders
Comparing apples and oranges and grapefruit
Selling an owner-built home
Choose your builder carefully
Fire doesn’t burn metal or does it
Medical Expenses
Protect yourself
Build from lock up
Research your path to success
Rumours and fallacies
Things go wrong
Green and environmental materials
Insuring owner builders
Can I put my insurance on hold?
How long can I insure?
Why you need owner builder public liability?
Volunteers on site
Minimum insurance requirements
Workers compensation in NSW
How do I make a claim?
How much insurance is enough?
What are existing structures?
Owner-builder construction insurance cover
My tradesmen are fully insured, right?
Getting insured
Home warranty
Injury claims
Renovators insurance
Insure me if you can
Construction Insurance
Construction Insurance Ontario
Insurance During Construction
Construction Works and Public Liability Insurance
Construction Insurance Policy
Course of Construction Insurance
New Home Construction Insurance
Construction Business Insurance
Construction All Risk Insurance
Construction Risk Insurance
Building Construction Insurance
Owner Builder Home Warranty Insurance Australia
Insurance for Construction Workers
Owner Builder Home Warranty Insurance NSW
Construction Insurance Qld
Owner Builder Home Warranty Insurance New South Wales
Construction Liability Insurance
Owner Builder Home Warranty Insurance Victoria
House Construction Insurance
Owner Builder Insurance Cost
Owner Builder Insurance Cost Australia
Owner Builder Insurance Cost NSW
Owner Builder Insurance Cost Victoria
Owner Builder Insurance Cost New South Wales
How Much Does Owner Builder Insurance Cost
How Much Does Owner Builder Insurance Cost Australia
How Much Does Owner Builder Insurance Cost NSW
How Much Does Owner Builder Insurance Cost New South Wales
How Much Does Owner Builder Insurance Cost Victoria
Best Owner Builder Insurance
Best Owner Builder Insurance Australia
Best Owner Builder Insurance NSW
Best Owner Builder Insurance Victoria
Owner Builder Home Warranty Insurance
Owner Builder Insurance
Owner Builder Insurance Australia
Owner Builder Insurance New South Wales
Owner Builder Insurance NSW
Owner Builder Insurance Victoria
0 notes
Text
The job convention location can be a most definitely …
For work subject success together with along with please your roi (ROI), amongst your finest opportunities to create brand identifying along with attract your asked for target audience is with an extraordinary Nashville line of work program workstation design. These job program success techniques will certainly most certainly most definitely assist prepare you for a depended upon job program or event together with aid make your Nashville Trades subject task location protrude.
Work location Design Among one of the most definitely initial job to a remarkable workstation display screen is your workstation format. The task rely on funds your display screen location, job program attributes, timeline together with in addition to that develops you back approach. Internet internet link to a selections professional Nashville Trade Show Consultants to create along with help you.
Graphics Outstanding graphics are an asked for take into consideration exceptional Nashville Trade Show subjects. Handling your Nashville work program subject developer will most definitely most absolutely reduced the therapy of developing what graphics, measurements in addition to tones are best suitabled for your display screen show screens.
Flooring covering Flooring covering therapy is a generally disregarded element of profession subject preparation job job. Frequently, the line of job program flooring covering anxiousness along with does not match your Nashville work program workstation area. It is asked for to take right into account the sort of flooring covering you will certainly most certainly generate income from (carpets, foam shielded, plastic, in addition to in addition so on) in addition to along with ascertain that the flooring covering you pick surges your work environment in addition to does not minimize it.
Sort of work disclose lights requires to not be relied on as a method to brighten your Nashville work program workstation. Lights is exceptionally requested for to assist make your Nashville work program subject protrude.
Backlighting is merely ensuring a part or photo from behind or within. This is a vital type of job convention technique to aid vary. By having backlighting, your indications or display screen is had frequently recognized from longer options– aiding to develop individuals’ eyes to your workstation. LED lights reveals up around today which is no a variety of on the line of job program flooring covering. Not just do LEDs take advantage of a significant quantity a lot more lights options, they additionally allow you to be included ‘environmentally friendly.’.
Illuminating any kind of kind of kind of sort of sort of kind of sort of type of kind of type of type of sort of interactive elements or circumstances is a consisted of approach to create individuals’ emphasis to your workstation. Make details the lights you select mirrors your organisation’s brand name image together with pulls in focus to where it ask for to be. From stands to proprietors to interactive areas, ensure you spend a fundamental time thinking contacting especially simply specifically simply particularly merely specifically merely especially just specifically just how to lots of most certainly make your Nashville task program existing phenomenal in addition to unique. Examination on for a considerable quantity a bargain a bargain a great deal a whole lot even more ideas to make your workstation differ. Among amongst among one of the most depended on redesigning to the majority of image in methods to accent your Nashville Trade Show event is with making ideal use an interactive Nashvilletrade program display screen design. Whether it’s a video game, scavenger search, image work environment or photo, having some kind of interactivity will certainly produce internet site visitors to see your office along with together with that shock the team to continue to be to be to be to be to divulge a little had fretting you. Anything that’s pleasing in addition to large amounts of the harmony of strolling the program flooring covering will most definitely most absolutely be a welcome disturbance.
AV together with along with that contemporary enhancement are normally great to have right into workplace design for assistance capture emphasis. TELEVISION display screen existing display screen displays, iPads, net truth together with along with that a deal far more check out methods to help market, market, enlighten, market together with on top of that experience interactivity.
Counters together with in an equivalent method stands deal a fantastic area for unwinded discussion in between your workstation staff members along with along with that web website visitors. Proprietors are an exceptional selection for cosmetics such as handouts, sales handouts, in addition to so on Contact your Nashville Trade subject expert for a massive quantity a great deal added standards!
By protecting the above in mind when preparing for an occasion, you can really in fact really feel remarkable you’ll be prepared by yourself for display screen success to make your task area vary.
For occupation subject success together with please your roi (ROI), amongst your finest possibilities to establish trademark name concept together with moreover attract your asked for target audience is with a costs Nashville task program workstation design. These type of work program success approaches will definitely most definitely most certainly help prepare you for a relied on type of work program or occasion along with in addition aid make your Nashville Trades disclose workstation protrude.
Normally, the line of job program flooring covering is undesirable along with does not match your Nashville career program workstation location. Type of task reveal lights asks for to not be depended on as an approach to brighten your Nashville job program office. Among the finest along with a substantial amount of appealing methods to accent your Nashville Trade Show divulge display screen is with making the most of an interactive Nashvilletrade program display screen design.
Usually, the task program flooring covering is troubled in addition to does not match your Nashville sort of task program task place area. Generally, the task program flooring covering is undesirable in addition to does not match your Nashville sort of task program task place area.
Usually, the work program flooring covering is troubled along with does not match your Nashville type of work program workstation location. Usually, the profession program flooring covering is negative together with does not match your Nashville line of work program office place.
Typically, the career program flooring covering is troubled in addition to does not match your Nashville sort of job program workstation area. Usually, the line of task program flooring covering is unfavorable together with does not match your Nashville type of task program workstation location.
Typically, the work program flooring covering is troubled along with does not match your Nashville kind of job program workstation area. Typically, the line of task program flooring covering is damaging along with does not match your Nashville sort of task program workstation area.
Generally, the work program flooring covering is troubled in addition to does not match your Nashville type of job program workstation location. Usually, the line of work program flooring covering is undesirable in addition to does not match your Nashville job program workstation area.
Usually, the work program flooring covering is troubled along with does not match your Nashville type of job program workstation area. Normally, the line of task program flooring covering is undesirable along with does not match your Nashville sort of work program workstation location.
Frequently, the task program flooring covering is troubled in addition to does not match your Nashville sort of job program workstation location. Typically, the line of task program flooring covering is negative in addition to does not match your Nashville kind of work program workstation area.
Usually, the line of job program flooring covering problems along with does not match your Nashville work program workstation area. Generally, the work program flooring covering is troubled along with does not match your Nashville kind of job program workstation location.
Usually, the line of job program flooring covering concerns in addition to does not match your Nashville task program workstation location. Typically, the work program flooring covering is troubled in addition to does not match your Nashville line of task program workstation area.
Normally, the line of job program flooring covering difficulties along with does not match your Nashville work program workstation place. Commonly, the work program flooring covering is troubled along with does not match your Nashville line of work program workstation location.
Typically, the line of job program flooring covering stress and anxieties along with does not match your Nashville task program workstation area. Usually, the line of job program flooring covering issues with each numerous other with does not match your Nashville task program workstation area. Typically, the line of job program flooring covering difficulties along with does not match your Nashville work program workstation place. Normally, the line of job program flooring covering concerns in renovation to does not match your Nashville work program workstation area. Commonly, the task program flooring covering is troubled along with does not match your Nashville line of task program workstation location.
from Nashville Trade Show Consultants and Exhibit Builders http://xe-inc.co/nashville/the-job-convention-location-can-be-a-most-definitely-2/
from WordPress https://businessreviewguidenow.wordpress.com/2020/09/03/the-job-convention-location-can-be-a-most-definitely-2/ via IFTTT
0 notes
Text
33 Ways to Monetize a Website/Blog
10 Most Common Ways to Make Money with Your Website
Making money from your website isn’t easy. These ten tips are probably your best bet to get started.
1. Affiliate Marketing (.. and Affiliate Links)
Examples of a successful affiliate site: Booking.com
Affiliate marketing is one of the most popular (not to mention quickest) ways to make money from your website or blog.
Start by finding a product you like and would recommend. Then on your website, you endorse the product and promote it to your website visitors and email subscribers. If the product or service resonates with these people, they’ll click on your affiliate link, purchasing the product (while you get a split of the sale price).
The commission might be anywhere from 30% of the product or service price, up to as high as 70%. For example, if the split is 50% and you promote an e-book that costs $100, you’ll get $50 for simply referring the buyer. Pretty sweet deal, huh?!
Where can I find products to promote?
Commission junction – offers reliable products with on-time payments.
ShareASale – mostly clothes, accessories, and other offline goods.
Clickbank – high percentage payouts, but there’s a lack of GOOD products to promote.
2. “Pay Per Click” Advertising (Google Adsense)
AdWords are the advertisements that show up on the top of Google search result pages.
AdSense is the reverse, allowing publishers to tap into Google’s immense advertising network so that other advertisers can run ads on their website.
The best part about this system is how simple everything is.
Once you sign up, Google will place a simple code on your website that will identify the content of your site and start displaying relevant advertisements. For example, if your site is about pets (dogs & cats), Google AdSense will start showing your visitors ads for cat food, dog training, and more.
You get paid each time someone clicks on the ad. (Yes, it’s really that easy!)
Your cut might be anywhere from $0.50 to $5 per click. When your site has enough traffic, you can make hundreds (if not thousands of dollars) each month.
How to apply for Google Adsense?
Apply for AdSense – Before applying, make sure you keep up with their latest Terms Of Service. Google has very strict rules, so it’s hard to get (and stay) approved.
3. Sell Ad Space
Incorporating Google’s AdSense on your website is just one way to make money from online advertisements.
Another is to simply sell your own ad space directly to companies looking to sponsor different blogs. You can come up with a price for each space, for example: “Sidebar banner ads will cost $xxx per month”.
You can get paid depending on how many visitors you get. Typically it’s quoted as a dollar amount per one thousand impressions (or CPM). You might see it as $5 CPM. If the website gets 100,000 visits a month, that ad price translates into $500 bucks.
The good thing about this approach is that if your site gets a ton of traffic from different sources, your simple banner ad pricing can go up to as high as $5000 per month! The obvious downside is that if your site doesn’t get a lot of traffic, you can’t expect to earn much either.
The other common method when selling ad space directly from your website is a simple direct price. You simply name a price (based on what you think it’s worth, relative to what the competition might be charging), and get paid upfront at the beginning of each month. This pricing is also generally a simple flat fee, not tied to a Cost Per Click like AdSense.
Where can I let others know that my website is selling ad space?
BuySellAds – The most popular environment to let everybody know you’re selling ad space.
4. Sell Your Own Digital Product (Ebook for Example)
You have the potential to make the most money on a per-sale basis when you can sell your own directly.
That’s because there’s no middle-man or person in between you and the buyer that’s taking a ‘cut’ from the money earned.
This approach seems fairly straightforward because you can simply sell these products directly through your website and get paid immediately. Unfortunately, it’s not that simple in reality.
Creating good products that are well made and polished requires a ton of time and additional resources (like design, content, etc.). There’s a lot of ‘hidden costs’ in both time spent and the contractors to collaborate with. Selling your own products on your site also brings up problematic issues like payment gateways, shipping, and taxes.
If it doesn’t sound like enough work already, you’ll also need a well designed, persuasive landing page to make sure your product has a strong conversion rate. A list of best landing page builders can be found here.
Additional resources:
How to sell products on your website.
5. Accept Donations From Visitors
If you don’t have a ton of monthly visits, but you do have a strong, engaged community? Simply ask your readers to donate!
Accepting one-off donations isn’t a fast road to wealth, but it can help you cover expenses in the short-term if people like what you have to say and want to support your journey.
For example, PayPal offers little donation buttons that only take about ten minutes to add to your website. These buttons offer you a quick way to recoup what you might want to be spending on a good web hosting, new product creation, research, and all of the other costs to maintain a healthy, active blog.h
For example, web.archive.org makes a lot of money from donations (most likely due to their millions of visitors per month).
How to set up donation buttons?
How to take donations on your website
6. Sell Sponsored Posts (…but Use Nofollow Tag)
One of the common ways to make more money from your website means getting those visitor numbers UP.
Once you’ve done the hard work of building steady traffic to your site with an engaged community, there are a few different ways to monetize your hard work.
For example, many companies go out of their way to look for blogs that will feature their sponsored content. ‘Native advertising‘ like this works well because it lines up with your site’s primary content and it comes across as relevant and transparent.
You can also review the products from a company in an ‘advertorial’ that’s part content, part advertisement. For example, if your website is all about the latest iOS games for iPhones and iPads, the creator of one of those ads would LOVE to have you review and feature their app to your fans.
When done right, this can create a win/win scenario. However – done poorly, with irrelevant or inauthentic site content, it can erode all of the reader’s goodwill you’ve worked so hard to create in the first place.
For further reading:
How to make money through sponsored posts and reviews – About.com
7. Generate ‘Leads’ for Other Companies
Businesses thrive on new leads coming in their doors to inquire about their products or services.
It’s no surprise that they’re always on the lookout, searching for creative ways to find new sources of leads to help them grow.
For example:
Let’s say you have a website about teaching math skills. Your reader’s information (like their email address or phone number) would be of great value to different online schools who’re looking to sell their courses to eager, proactive students.
Basically, you’re connecting the dots; playing the matchmaker by introducing two parties who can benefit one another. While it’s similar to how affiliate marketing works, in this case, it doesn’t actually matter if your reader ends up purchasing their product or not. They’re just looking for an introduction at this point.
Where can I find such offers?
MaxBounty
Neverblue
Peerfly
8. Build an ‘Email List’
Spend any amount of time reading blog growth tips, and you’re sure to come across people saying “the money’s in the list“.
They’re referring to your email list, which comprises your most loyal readers. The objective is to convert as many strangers who visit your site for the first time into passionate followers who want to stay up-to-date on your latest work or content.
Admittedly this is a long term strategy (and you definitely won’t get rich overnight). But it’s one of the best, long-term methods to profitably growing your blog into a full-fledged, money-making enterprise.
Never lose sight of creating relationships with your followers. Offering great information or free help is a perfect way to start. Spamming people with unsolicited offers is one of the fastest ways to abuse the reader’s trust and sabotage your long-term goals.
How does it EXACTLY work?
Listbuilding 101 – Probably the best introduction on the internet.
9. Set Up an eCommerce Site (Hard Work Is Required)
Websites don’t just have to be about content. They can be centered around tools or products on an online store.
Be forewarned:
There are literally hundreds of thousands of eCommerce websites or online stores. Make sure that yours is filling a unique niche, with a detailed strategy and the latest marketing techniques to stand out from the crowd.
How do I create a successful online store/shop?
How to Make a WooCommerce Shop (WordPress)
How to Make Shopify E-commerce Store (Shopify)
10. Flip Your Websites (Create -> Sell -> Reinvest)
Believe it or not, there’s almost always a market out there for your website.
That means if you’ve built up a following (or possibly even sold a few products or included advertising on your site), you might be able to sell it to someone else and make a quick buck.
To be honest, we typically don’t suggest people plan on flipping their website or blog (we’re a bigger fan of creating something for the long term).
You can’t deny how lucrative it can be. For example, if your website is making $500 per/month through selling ad space, you might be able to sell the site for $5,000 – $10,000 (which is about 12x – 22x monthly income).
Another interesting option is to sell ready-made sites, These are MUCH cheaper, but there’s still some money to be made.
Where can I sell my site?
Flippa – The most popular website market.
We Buy Websites – Another popular marketplace.
FEinternational – Mostly for high-end websites.
By now we have counted down some of the most popular ways to earn money from your website.
Yet, we’re still only just scratching the surface.
Below are another 23 ways to make money with your website.
(Keep in mind that some of them are slightly connected with the ones above yet they are little ‘out of the box’.)
Another 23 Ways to Monetize Your Website
11. Sell text-link ads (NOT RECOMMENDED) – There’s still a demand for text-links ads (believe it or not). But please keep in mind that these violate Google’s Terms of Service (which means you run the risk of getting penalized).
To avoid it, simply keep the ‘nofollow‘.
12. Set up “infolinks” – Infolinks are a great alternative to AdSense advertisements, that are very easy to setup. The downside is that they aren’t high in converting, and the payouts (on a per-click basis) are also quite small.
13. Use monetization widgets – These are also very similar to Google Adsense, so they’re worth trying out as an alternative.
14. Set up RSS feed ads. – Exactly what they sound like. Ad space for sale in-line with content from an RSS feed.
15. Give away premium content for extra $$$ – If you are producing mind-blowing, awesome content that visitors can’t get enough of… you can always try asking them to pay for some of it! (Crazy concept, huh?!) I’m personally fine with paying for premium content. Bear in mind – don’t ask people to pay right away. Instead, stay focused on growing an audience and visitors first.
16. Start a private forum or coaching class(es) – Most of us have unique skills that others can benefit from. Setting up a simple forum or classes is an easy way to help others and generate recurring income at the same time.
17. Create a job board – Setting up a job board on your website is another simple, easy way to collect additional money when people are accepting different job offers from various companies or individuals.
18. Offer consulting – Offering consulting gigs and providing services can help you bring in decent sums of money while other forms of ‘passive’ revenue take a little time to build up. You can offer these services via email, forum or even Skype.
19. Add the “hire me” page on your website – Your new website or blog is also a perfect place to feature your freelancing services. Showcasing samples or evidence of past work will help greatly increase your chances of getting hired.
20. Sell or rent internal pages – These aren’t very common, but you might be surprised at what people would be willing to rent or spend money on!
21. Display pop-ups advertisements – Pop-ups can be extremely annoying. However, they’re also another easy way to make some quick money.
22. Use content lockers – ‘Content locking’ is similar to hiding or protecting pieces of content until a visitor takes some action to redeem it. For example, maybe you want them to pay a small amount, or perhaps click on an advertisement.
23. Display audio ads – These are relatively new and are becoming increasingly more common. Personally, I haven’t tried it. But I have read some articles and it definitely looks promising.
24. Sell an e-book – This one is a no-brainer. Many people sell e-books through their site. Some examples: If you have a website about recipes and cooking, you can easily create and sell your own recipe book. The same applies to almost every niche.
25. Create a conference around your website – Lots of work but a huge potential payoff as well.
26. Set up a teaching program – Kinda like a cross between selling your own content and offering consulting or services.
27. Host paid webinars – Similar to the last tip, which is largely a mix of consulting through content and a teaching program.
28. Create a membership site – Yet another tier on the ‘info-business’ model that has the added benefit of bringing in recurring revenue.
29. Offer coupons (with affiliate links) – People are eagerly looking for discount & promo codes for everything from clothes to travel vacations. If you can (find and) offer a valid one, you can also get a cut of that revenue too.
30. Host polls on your website – Hard to believe, but easy to do!
31. Offer writing gigs – You can easily make $20 – $30 per 500-word article writing for other companies or individuals. There’s also a huge potential for fluent speakers of different languages, as many companies want their websites translated by those who speak the native language.
32. Create a paid directory/business page – You charge people for listing or subscribing to the page.
33.��Just copy what others are doing – Our personal favorite!
via Blogger https://ift.tt/3ef7o5p
0 notes
Link
Being a webmaster, can feel like you are constantly juggling SEO priorities. If it’s not stellar content, it’s site speed, domain authority or internal linking.
Managing SEO tactics is not simple and it takes a lot of time to understand.
Out of those, today we are going to expose one of our internal linking strategies and plugins we use.
SEO’s are constantly trying to find the advantages or creating ones so it can be seen easily in the crowd. And internal linking is one of those advantages.
Some case studies that found internal linking increased their organic traffic by 40%!
What is Internal Linking?
In simple terms, Internal Linking is adding a link on a page to another page on your website using anchor text.
But Internal linking is much more than a simple link.
It links related content and improves the the internal link structure of a website. That helps tell search engines how relevant a page is by how many internal links point to that page. Which in turn can boost your Search Engine Rankings.
Though internal linking takes time and effort, we have an easy solution to help you from this time consuming process.
Link Whisper is a smart internal linking WordPress plugin that will help you in automating the process of internal Link Building.
Keep reading to find out how easy it is to use Link Whisper.
What is Link Whisper
Link Whisper is an internal linking plugin for WordPress that suggests links based on your content.
It scans your whole blog in the initial setup, and every time you update a blog post. When the scan is complete, Link Whisper suggests relevant blog posts that can be linked to.
Websites that rely on content should take internal linking with high priority. It’s one of the most underused SEO strategies.
It can also be one of the most time consuming strategies.
You publish your new post with well written, well researched content. Now you must go through countless other pages on your website, read through the content to find an applicable spot to insert a link to your new content. Then do that minimum another 10 times and other relevant articles.
Distributing these internal links is super important as it helps to improve the relevance of your page. Which is turn improves the SEO of your website.
Link Whisper, powered by AI, gives you automatic link suggestions within the post editor, or even while you are writing.
Benefits of Internal Linking
Internal links are hyperlinks that point from one page on a domain to a different page on the same domain. In other words, internal links connect pages on the same website, meaning that the source and target domain are the same.
When used correctly, internal links provide paths for search spiders to discover new content, increase visitors’ time on your website, and create a powerful network of related pages.
There are also several benefits using internal link, it includes:
Improves Navigation
Your website’s navigation can have a huge impact on the overall success of your site, and it affects user-friendliness, search engine rankings, and conversions.
Internal links are commonly used in a website’s main navigation, and they allow users to easily maneuver your site to find the information they need
Guides Website Visitors
Taking a little time to add internal linking to your site increases the value of each piece of content to the reader because they can easily find additional resources that you’ve created elsewhere on your site.
Improves the Indexation of Your Website
Google’s crawler follows link paths throughout the internet to find and index websites. If your website has strong internal linking, the Google crawler has an easier time finding new content that you publish and link to. As a result, indexation will happen faster, too. And, your efforts are rewarded by improved search engine rankings.
Increase Page View and Decrease Bounce Rate
By interlinking pages on your website, you can encourage visitors to spend more time on your site, and ultimately decrease the bounce rate and increase page views on your website.
This will send positive signals to search engines and can help you improve your ranking in search engine results.
How To Setup Link Whisper
Link Whisper helps you quickly add internal links to your posts by giving you contextual suggestions.
What this means is that it analyzes the content of your posts and gives suggestions for internal links wherever it is relevant and would help the user.
With the power of artificial intelligence, Link Whisper is able to give link suggestions at an instant so that you can quickly add internal links.
To setup Link Whisper is relatively easy. These are the steps you need to do:
1. After downloading the link whisper zip file plugin, just add the plugin into your website by click add new plugin then upload the file or choose file.
2. After installing Link Whisper into your website, you can check the link whisper dashboard and see all your posts report on internal linking
3. You also can check internal links at the bottom of each post you have published. To accept a link suggestion, just click the check box and click accept
You can check the complete Link Whisper tutorial to help you understand how to use it properly to improve your website.
Link Whisper Features
Link Whisper is a simple plugin and has one focus.
To make internal linking easy.
Though there aren’t a ton of features, it accomplishes exactly what it says. And it will save you a ton of time.
The tech features are:
Relevant Internal link suggestions
Suggestions from the wordpress editor while you are writing
Reduce “orphan content” on your site (content with little or no links to it)
Auto Linking feature allows link whisper to automatically build links with keywords of your choice.
Internal link reporting
Broken link checker
404 page error reporting
Works with a variety of page builders including Gutenberg, Thrive Architect, Elementor, Woocommerce, Kadence Blocks and more.
Add Suggested Links To Pages
When you first open up the Link Whisper dashboard in WordPress, you’ll identify where you could improve your articles by adding a few links here and there.
Essentially, what Link Whisper is doing here is crawling through all the other articles on your site to find text that matches the title of the article you’ve selected. That’s how this feature works!
Suggestions and Linking Tools on Blog Posts
Using the linking feature in the dashboard is great, and it allows you to take articles you’d like to feature more and embed them in articles all across your site.
Link Whisper scans through the articles on your site and matches them up with the topic and text of the article you’re viewing. You can then see whether or not it’s made a good match, and you can add links from there.
Link Whisper is a very simple plugin that accomplishes a few basic tasks that make life a lot easier. While there is no guarantee that this will improve your ranking, even Google has stated that they consider internal linking an important ranking factor.
Link Whisper Price
Link Whisper is a premium plugin and it does not come with any free version. Choose from 3 premium offers, that vary per how many sites you need it for:
1 Site: If you have one site in which you publish your articles then you can buy this offer. It provides all the features of Link Whisper at just $77/year for a single site license.
3 Site: If you have more than one site and then you can choose this plan which offers you 3 sites license at just $117/year which is an optimized amount considering that for one site it charges $77/year. This offer, it also provides all the features of Link Whisper.
10 Site: If you have more than 3 sites then it is the best option for you because it offers you 10 sites license at just $147/year. It is also a good and optimized offer to choose.
It might seem little expensive at first, but when you look at it from a different perspective, it seems justified. You should think about the long term benefits of Link Whisper. It will help you save time as well as improve your on-page SEO without much hassle.
Pros / Cons
Link Whisper is a very helpful plugin for bloggers for time saving and improving their search engine optimization at the same time. And here the pros and cons of Link Whispers.
Pros
Simple installation
Easy to use
Time saving
Instant link suggestion
Relevant link suggestion
Link reports for every article
Cons
Some features could be complex for beginners
No external linking suggestions
Examples of Internal Linking
Internal links help Google find, index, and understand all of the pages on your site. If you use them strategically, internal links can send page authority (PageRank) to important pages.
There are multiple types of internal links that you can use when improving your interlinking structure.
Contextual Links
Contextual links are the most important ones. They are hyperlinks found in a <a> tag which wraps around a relevant anchor text.
When using contextual links to interlink between your articles, make sure you include keywords in your anchors, to tell Google what the link is about. However, don’t use that as your main focus. The purpose of a link is to be clicked on
Image Links
Image links are pretty simple to understand. You click an image and it’s going to take you to a link. The general consensus is that contextual links have greater value than image links. However, despite being less valuable, image links hide an important technique that you can take advantage of.
Navigational & Footer Links
Navigational links mainly refer to the structure of the site, since they are kept within lists (<ul> & <li> tags). Make sure you structure your site.
Remove The Link Whisper Plugin
If you remove or uninstall Link Whisper all the internal links you have created in your article because it will stay intact.
All the internal links you create through Link Whisper are permanent links so you can create links and uninstall the plugin according to you please. So you can create links and uninstall the plugin as you please.
If you add a link in error, you have to go to that page and edit the post to remove the added link.
Conclusion
Link Whisper seems to be a solid plugin that does one thing really well. It comes with amazing features to make your internal linking process super smooth with any efforts.
Auto SEO links is one of the best features Link Whisper offers and it gives you the most relevant suggestions and you can control anchor text in your articles too.
This Plugin is designed in a way that any level of user can use it without any difficulty. It’s designed for those with content rich websites, niche websites, and bloggers.
Though, with many other Internal Linking Plugins in the market, Link Whisper stands ahead in terms of it’s innovative and smart features.
Link Whisper is an excellent solution for all of your internal linking problems. The plugin is easy to configure and use. You should be up and running in minutes. It offers you plenty of options to add internal links in bulk or individually, in turn, saving you a ton of time and money.
via ITechAja
0 notes
Text
Why & How to move any site to WordPress theme?
It is quite useful if you have already created a website on any platform or content management system. As your business grows, you can at any time migrate your website to WordPress, no matter which content management system you use. Not only is it cheaper to operate a WordPress website, but it also gives you countless possibilities to improve your site with any features you might think. For example, integrating an e-commerce storefront, specialized social network, forums, etc.
In this blog content, we'll show you how to move to WordPress from any CMS or website.
Why Should You Move Websites to WordPress?
WordPress is the most trusted website builder in the world. It is very flexible and easy to customize. Many of the world's largest brands use WordPress to manage their sites.
WordPress can be managed without any knowledge of programming or programming. It also comes with various built-in features that make it the best choice for beginners and developers alike.
Let's take a quick glance at main reasons why people choose WordPress on other platforms.
SEO Friendly: Whether your site is a small business website, a portfolio site, or any other site, WordPress makes it easy to optimize your site for SEO. You can choose a custom SEO URL in just a few clicks. Also, by installing an SEO plugin, you can easily add meta description, title, and other SEO information, without needing to encode your site.
Easy to customize: With the advent of the Gutenberg editor and WordPress customizer, using WordPress is easier than ever! Just make adjustments and see changes instantly within the control panel without having to preview the page.
Before we begin, it is essential to know that there are two types of WordPress platforms. WordPress.com is a hosted solution and WordPress.org is a self-hosting platform. In this blog post, we will be using self-hosted WordPress.org because it gives you full control over your website. Let's start migrating to WordPress platform from any CMS or website, step-by-step.
Step 1: Identify Your Platform: CMS or Static
The primary thing you need to do is find out whether the original website is based on CMS or just a static / HTML site. The content management system allows you to customize your site from the backend.
You can find out if your site is dynamic or static by visiting Wappalyzer.com. Then enter your site's domain name into the box and determine if you are using any applications.
Step 2: Select a WordPress Hosting Platform
To start a self-hosted WordPress.org site, you will need a domain name and web hosting account.
The domain name is the URL (for example, isitwp.com) that people will type in their browsers to access your website. Web hosting is an area where you will store all your content and files. For more details, see the differences between a domain name and web hosting.
Although there are dozens of WordPress hosting, we recommend Bluehost. It is one of the most popular web hosting providers and officially recommended hosting service from WordPress.org.
We negotiated an agreement with Bluehost to provide our users with a free domain name, a big discount on web hosting and free SSL certificate, and .
Step 3: Install WordPress & Select a Theme
After buying a domain name and web hosting, WordPress must be installed. Many web-hosting providers, including Bluehost, offer WordPress one-click installation to save time.
You should go to your Bluehost account. From there, you can click the WordPress icon to add the name and logo of your website. You should also choose your WordPress theme and click the Install button.
Step 4: Export Your CMS-Based Site
It is effortless to export an existing website or source from a content management system. In the administration section of your site, there will be an option to export the XML file with full content, media and database. You will need to store this file on your computer for Migration.
Step 5: Import Your CMS into WordPress
In order to import a CMS-based website into a WordPress website, the first thing you should do is install and activate the WP All Import plugin in the hosting platform. For more details, you should review our guide on how to install the WordPress plugin.
After activation, you should visit All Import »New Import in the admin area of WordPress. From there, you should click the Upload File button.
Step 6: Manage Redirects and Permalinks
You must add redirects to your website to maintain search engine rankings. When a user visits an old URL, it will be redirected to the same page on the new WordPress site.
You need to simply follow this step-by-step guide on how to set up redirects in WordPress.
The next crucial thing you need to do is to maintain the permalink structure. In the WordPress administration area, you should go to Settings » Permalinks in order to specify the URL format.
Step 7: Things to do After Migration
After a successful migration to WordPress platform, the next thing to do is to take advantage of the full potential of WordPress.
There are a plethora of free and premium plugins available on the market. These plugins will help you improve your website functionality with just a few clicks. You can also see a list of WordPress plugins that you should have.
Let's Wrap Up:
Your website may look excellent and run smoothly, but we recommend software testing in different browsers for possible errors. For more details, you should see a guide on resolving common errors of WordPress.
We hope this article helps you learn how to migrate to WordPress from any content management system. If you require any expert assistance, you can contact the WordPress development company in India and USA that help you migrate your site to WordPress platform.
#wordpress theme development#SITE MIGRATION TO WORDPRESS PLATFORM#RESPONSIVE WORDPRESS DEVELOPMENT#Responsive WordPress Theme Development
0 notes
Text
What's main distinction among wordpress website and custom designed website?
Content material management systems are honestly essential if you are planning to make a website in your emblem. Web sites are one of the most crucial parts of any logo identity as it's miles Digital Marketing Agencies in New York maximum of the times the first issue to are available in contact with the clients. Consequently, it's far vital to make the website as perfect as feasible to leave a effective impact at the clients’ thoughts concerning your product or service. There are two fundamental kinds of content control structures that include the wordpress internet site and a customized internet site. A number of the important differences between the 2 are as comply wordpress: the price of developing a wordpress internet site is particularly low because of the less variety of efforts required inside the technique of development. The design is already supplied and it could also be dealt with by a person with a limited amount of records on net development and designing. Customized: for a custom designed website, you may want to rent an professional internet developer and fashion designer with a purpose to make your required website from the scratch which features well too. To be able to be high priced considering that web designers and builders rate a excessive charge. Customization
Read Also:- Do you know about Customer match marketing?
wordpress: wordpress has plenty of designs and topics and may be effortlessly custom designed even through individuals who don’t have a pc technology history. However, it can't be completely customized and for whole customization, you would possibly need the services of a right wordpress website improvement enterprise. Custom designed: customized websites are completely custom designed since they are crafted from scratch anyway. Additionally, because they are already being handled via professional developers and designers, therefore, they are able to similarly customize the website online perfectly and exactly the way you want. Speed:

wordpress: the rate of wordpress web sites ought to occasionally get gradual since the layout, topic, and functions are made in keeping with some of specific aspect and views. Therefore, in case your website needs the functioning that is higher than the capacity of wordpress, the rate should get affected. Customized: customized websites are absolutely yours and the designs, topics, and functions are coded in keeping with the character necessities of your web sites. That is why the velocity never gets affected even in case your internet site calls for a high level of functioning. Implementation
wordpress: wordpress has pre-constructed structures which keep the value and curates end result faster. The designers do not need to anticipate the lead generation since the layout and structure are already identified and made appropriate or lead conversion. It is also a plus point in phrases of schooling considering that you will no need to make investments money and time in education the designers and developers to make a internet site appropriate for lead conversion. Custom designed: implementation with customized web sites improvement can be in reality volatile since you ever recognise whether your new structure is person and seo or no longer. It can take pretty some time for the website to be ideal according to the requirements of google in phrases of search engine optimization and customers. Therefore, you will need to make investments quite a few cash after which wait a lot to ultimately start getting the effects. For this reason, it may increase the total price a lot. Wordpress content control system and the custom designed control machine both are good for the internet site but it majorly relies upon at the necessities of the internet site. A few web sites have lots of requirements whilst others Digital Marketing Agencies in Seattle have very few. You should recognize your website’s necessities and demands and its compatibility with each kind of structures. This can assist you to get a clearer concept about which cms to pick from the two.
0 notes
Text
Is WordPress Good For E-commerce Sites?
E-commerce businesses are sprouting up every day, selling services, a physical product, and digital downloads.
E-commerce has become a significant contributor to the global economy, with the e-commerce industry worth almost $2 trillion at last count.
The convenience afforded by the e-commerce industry is enough to make the entire online community turn its collective head. Almost half of the internet is made up of e-commerce websites, with more being created every day.
It stands to reason, then, that WordPress (the most popular website building platform in the world), would be a major player in e-commerce product sales.
But is WordPress good for emerging e-commerce stores? Does the platform have its own e-commerce system? Are there better options out there? And if you do use WordPress for your e-commerce website, how can you keep your customers safe?
Read on to find out!
Can You Make an E-commerce Site With WordPress?
At first glance, it may seem like you’re not able to create e-commerce functionality on the WordPress platform.
After all, WordPress was initially designed as a website builder focused on written content. It’s a perfect environment to write articles in or feature news snippets.
But WordPress is the most popular website building platform on the planet, so it stands to reason that if the online world is shifting toward e-commerce product sales, so too should WordPress.
Despite that, WordPress still has no built-in e-commerce function. Of course, that doesn’t mean that you won’t be able to build an e-commerce store on the platform. It’s just not one of the features that comes built-in.
E-commerce functionality can be obtained through the use of a WordPress plugin.
A plugin is a third-party piece of software that grants additional functionality to a WordPress website. There are a large number of e-commerce plugins that can be installed onto your site to create an online store.
When using an e-commerce plugin, it’s always best to try and use one that was designed specifically with WordPress in mind. These tend to integrate more easily into the platform.
Choosing the right plugin for your needs could be a complicated decision, but there are a few tried and true options.
Which WordPress Plugin Should You Use for E-commerce?
Typing “e-commerce” into the WordPress Plugin Search Page yields nearly 1,000 results. That’s a lot of information to sift through. Unless you know exactly what you’re looking for, you’ll likely be spending some time reading reviews, looking through screenshots and comparing notes.
The two most popular WordPress e-commerce plugins are WooCommerce and BigCommerce. They’re the biggest names in the game, and with good reason.
What is WooCommerce?
When people talk about e-commerce through WordPress, they’re usually talking about WooCommerce. That’s because WooCommerce is the closest thing WordPress has to an official e-commerce platform.
(Image Source)
WooCommerce was first Launched in 2011 and was acquired by WordPress’ parent company, Automattic, in 2015.
WooCommerce is popular because it is a product built specifically for the WordPress platform. It provides store functionality right from the WordPress dashboard.
WoocCmmerce is responsible for 99% of the WordPress e-commerce sites operating out of the US, Canada, and the UK. It currently has more than 27 million downloads and more than 5 million active installations.
WooCommerce also comes fully equipped with hundreds of e-commerce themes and extensions that WordPress users can select to personalize their stores.
WooCommerce gives you a wealth of options for the look and feel of your store because it works with any WordPress Theme. However, specific themes are more challenging to set up using WooCommerce than others, so you’ll have to do some research to determine the right theme for you.
What is BigCommerce?
BigCommerce was founded in 2009. Unlike WooCommerce, it’s not owned by WordPress and has a presence outside of the platform.
(Image Source)
BigCommerce has gained a lot of popularity through WordPress because it allows you to keep the e-commerce engine of your site separate from the rest of it. A lot of users find that this makes it easier to manage both the store and the rest of the site independently.
BigCommerce also comes with enterprise-grade security and promises of high performance and low downtime, which are huge concerns in today’s online shopping climate. It also won’t hit you with any transaction charges when you sell a product.
The chief complaint that people seem to have regarding BigCommerce is that it does not have a mobile app. That’s a big negative for business owners who want to manage their online store while on the go.
Is Shopify Better Than WordPress?
When it comes time to build an e-commerce store, there’s one other company that continues to pop up in the conversation alongside WordPress.
Shopify.
Shopify is the biggest name in the e-commerce world. It is an extremely popular e-commerce platform, so people always try to compare it with WordPress and argue over which platform is superior.
How Are Shopify and WordPress Different?
The thing that you have to remember about Shopify and WordPress is that they are like apples and oranges.
For starters, Shopify is not built for content like WordPress is. Instead, Shopify is an online tool designed specifically for e-commerce.
WordPress is stand-alone software. It can be used to build many different site variations. If you want a blog, WordPress can do that. If you want a portfolio, WordPress can do that. And if you want an e-commerce website, you can implement one onto your WordPress site.
But if all you want is a store, then Shopify might be a good option.
WordPress has significantly more steps than Shopify when creating your store.
Shopify only requires you to create an account, and then you can begin to add items to your store and set up your payment preferences.
When using WordPress, you first have to buy a domain and subscribe to a web hosting provider. You have to design your site and select your theme and plugins. This can be a time-consuming process and, if you’re in a hurry to launch your shop and start making money, you might be better off using Shopify.
Once you’ve done all that, you’ll have to install your e-commerce plugin and configure it to your specifications. You have to include store details, payments, your product, shipping, taxes, and more before you can launch.
Another significant difference between Shopify and WordPress is that Shopify has dedicated support staff. WordPress doesn’t have support for e-commerce, but some of the e-commerce plugins included on the platform may offer support independently of WordPress. That’s a definite factor you’ll have to look into when it comes time to select your plugin.
So, Shopify or WordPress?
Shopify is an excellent platform if you don’t have a website and you want to put out an e-commerce store quickly. However, that can be a very inefficient e-commerce business model.
It becomes far easier for search engine optimization if you have a full website built around your company. For that, you’d want to use WordPress. Shopify is not the most SEO friendly platform out there.
WordPress is better when you have a full website with a blog and other sections apart from your store. It creates a more complete experience than a simple Shopify platform would.
Now, some people have created a Shopify store and linked it to their existing site on an alternative builder like Wix. However, that requires a lot more work than just building both your website and store through WordPress and a plugin like WooCommerce.
For more information on Ecommerce SEO Best Practices, read our guide.
What Can You Do to Make your WordPress E-commerce Site Secure?
When it comes to spending money online, there is always a threat. Personal information is a commodity in certain dark corners of the web, and identity theft is a genuine threat.
(Image Source)
How real of a threat is it?
In 2019, cybercrime became a $1.5 trillion industry.
In 2018, it was estimated that the e-commerce industry lost $6.8 billion to fraud attacks orchestrated by hackers.
So, in other words, cybercrime is not something that should be taken lightly.
Security is always a huge concern when it comes to e-commerce websites, because unsecured e-commerce platforms are a huge target for cybercriminals. WordPress, because of its extreme popularity, is a massive target for hackers from all over the world.
So many people use WordPress that the platform itself becomes appealing to attacks. If a hacker can gain access to WordPress, they have thousands upon thousands of sites and stores ripe for attack.
How Can WordPress Stores Protect Against Cyber Crime?
WordPress users can take specific measures to protect the security of their online store and the personal information of their customers. A security breach can seriously tank your reputation. If customers don’t feel safe entering their data on your site, they’re not going to buy your product online.
Here are four ways you can protect your WordPress store from cyber crime:
Step 1: Install Security Plugins
It’s important to install security plugins on your WordPress store. Some of the most useful plugins for this are WebARX, MalCare, and Wordfence (among many other great options).
These security systems will monitor your site activity to prevent cyber attacks. If suspicious activity is detected, your security plugin will instantly alert you. Some will even block malicious actors by identifying their IP and keep them from accessing the store in the future.
(Image Source)
Step 2: Secure Your Passwords
It’s also important to keep your passwords secure.
You want to make sure that you’re using a complex password that will block unwanted access to your customer data. Make sure that not only can no one guess it, but it’s sophisticated enough where a hacking program won’t be able to piece it together.
Step 3: Use SSL Certificates
Another security measure to take is to use SSL certificates on your site. Sites that have HTTPS in front of their URL have additional layers of security in place to help stop cybercriminals. These SSL certificates ensure that all data transferred over your site is encrypted.
That’s not something that will work with an HTTP site. Google will sometimes flag HTTP sites and let the user know that they might not be safe. That’s not a message you want your customers seeing when they go to access your store.
Step 4: Use a Third-Party Payment System
It’s also a good idea to use third party payment gateways for your checkout process. Not only is this easier on you, but it’s a lot better for your customers’ peace of mind.
A lot of people use PayPal. It is one of the preferred payment methods across the entire Web. By allowing your customers to log in through PayPal and make payments through this platform, you’re ensuring that they won’t have to enter their personal credit card information on your site. That creates a more comfortable shopping experience for everyone.
In Conclusion
WordPress, in conjunction with plugins like WooCommerce and BigCommerce, represents an easy-to-use, secure, and complete online shopping opportunity.
While WordPress may not have been created with e-commerce in mind the way some other platforms like Shopify were, it is a platform that has evolved and grown over the years to become a complete online content management and e-commerce solution.
For more information around typical costs of an ecommerce website, read our guide.
Is WordPress Good For E-commerce Sites? was originally posted by Video And Blog Marketing
0 notes
Text
Is WordPress Good For E-commerce Sites?
E-commerce businesses are sprouting up every day, selling services, a physical product, and digital downloads.
E-commerce has become a significant contributor to the global economy, with the e-commerce industry worth almost $2 trillion at last count.
The convenience afforded by the e-commerce industry is enough to make the entire online community turn its collective head. Almost half of the internet is made up of e-commerce websites, with more being created every day.
It stands to reason, then, that WordPress (the most popular website building platform in the world), would be a major player in e-commerce product sales.
But is WordPress good for emerging e-commerce stores? Does the platform have its own e-commerce system? Are there better options out there? And if you do use WordPress for your e-commerce website, how can you keep your customers safe?
Read on to find out!
Can You Make an E-commerce Site With WordPress?
At first glance, it may seem like you’re not able to create e-commerce functionality on the WordPress platform.
After all, WordPress was initially designed as a website builder focused on written content. It’s a perfect environment to write articles in or feature news snippets.
But WordPress is the most popular website building platform on the planet, so it stands to reason that if the online world is shifting toward e-commerce product sales, so too should WordPress.
Despite that, WordPress still has no built-in e-commerce function. Of course, that doesn’t mean that you won’t be able to build an e-commerce store on the platform. It’s just not one of the features that comes built-in.
E-commerce functionality can be obtained through the use of a WordPress plugin.
A plugin is a third-party piece of software that grants additional functionality to a WordPress website. There are a large number of e-commerce plugins that can be installed onto your site to create an online store.
When using an e-commerce plugin, it’s always best to try and use one that was designed specifically with WordPress in mind. These tend to integrate more easily into the platform.
Choosing the right plugin for your needs could be a complicated decision, but there are a few tried and true options.
Which WordPress Plugin Should You Use for E-commerce?
Typing “e-commerce” into the WordPress Plugin Search Page yields nearly 1,000 results. That’s a lot of information to sift through. Unless you know exactly what you’re looking for, you’ll likely be spending some time reading reviews, looking through screenshots and comparing notes.
The two most popular WordPress e-commerce plugins are WooCommerce and BigCommerce. They’re the biggest names in the game, and with good reason.
What is WooCommerce?
When people talk about e-commerce through WordPress, they’re usually talking about WooCommerce. That’s because WooCommerce is the closest thing WordPress has to an official e-commerce platform.
(Image Source)
WooCommerce was first Launched in 2011 and was acquired by WordPress’ parent company, Automattic, in 2015.
WooCommerce is popular because it is a product built specifically for the WordPress platform. It provides store functionality right from the WordPress dashboard.
WoocCmmerce is responsible for 99% of the WordPress e-commerce sites operating out of the US, Canada, and the UK. It currently has more than 27 million downloads and more than 5 million active installations.
WooCommerce also comes fully equipped with hundreds of e-commerce themes and extensions that WordPress users can select to personalize their stores.
WooCommerce gives you a wealth of options for the look and feel of your store because it works with any WordPress Theme. However, specific themes are more challenging to set up using WooCommerce than others, so you’ll have to do some research to determine the right theme for you.
What is BigCommerce?
BigCommerce was founded in 2009. Unlike WooCommerce, it’s not owned by WordPress and has a presence outside of the platform.
(Image Source)
BigCommerce has gained a lot of popularity through WordPress because it allows you to keep the e-commerce engine of your site separate from the rest of it. A lot of users find that this makes it easier to manage both the store and the rest of the site independently.
BigCommerce also comes with enterprise-grade security and promises of high performance and low downtime, which are huge concerns in today’s online shopping climate. It also won’t hit you with any transaction charges when you sell a product.
The chief complaint that people seem to have regarding BigCommerce is that it does not have a mobile app. That’s a big negative for business owners who want to manage their online store while on the go.
Is Shopify Better Than WordPress?
When it comes time to build an e-commerce store, there’s one other company that continues to pop up in the conversation alongside WordPress.
Shopify.
Shopify is the biggest name in the e-commerce world. It is an extremely popular e-commerce platform, so people always try to compare it with WordPress and argue over which platform is superior.
How Are Shopify and WordPress Different?
The thing that you have to remember about Shopify and WordPress is that they are like apples and oranges.
For starters, Shopify is not built for content like WordPress is. Instead, Shopify is an online tool designed specifically for e-commerce.
WordPress is stand-alone software. It can be used to build many different site variations. If you want a blog, WordPress can do that. If you want a portfolio, WordPress can do that. And if you want an e-commerce website, you can implement one onto your WordPress site.
But if all you want is a store, then Shopify might be a good option.
WordPress has significantly more steps than Shopify when creating your store.
Shopify only requires you to create an account, and then you can begin to add items to your store and set up your payment preferences.
When using WordPress, you first have to buy a domain and subscribe to a web hosting provider. You have to design your site and select your theme and plugins. This can be a time-consuming process and, if you’re in a hurry to launch your shop and start making money, you might be better off using Shopify.
Once you’ve done all that, you’ll have to install your e-commerce plugin and configure it to your specifications. You have to include store details, payments, your product, shipping, taxes, and more before you can launch.
Another significant difference between Shopify and WordPress is that Shopify has dedicated support staff. WordPress doesn’t have support for e-commerce, but some of the e-commerce plugins included on the platform may offer support independently of WordPress. That’s a definite factor you’ll have to look into when it comes time to select your plugin.
So, Shopify or WordPress?
Shopify is an excellent platform if you don’t have a website and you want to put out an e-commerce store quickly. However, that can be a very inefficient e-commerce business model.
It becomes far easier for search engine optimization if you have a full website built around your company. For that, you’d want to use WordPress. Shopify is not the most SEO friendly platform out there.
WordPress is better when you have a full website with a blog and other sections apart from your store. It creates a more complete experience than a simple Shopify platform would.
Now, some people have created a Shopify store and linked it to their existing site on an alternative builder like Wix. However, that requires a lot more work than just building both your website and store through WordPress and a plugin like WooCommerce.
For more information on Ecommerce SEO Best Practices, read our guide.
What Can You Do to Make your WordPress E-commerce Site Secure?
When it comes to spending money online, there is always a threat. Personal information is a commodity in certain dark corners of the web, and identity theft is a genuine threat.
(Image Source)
How real of a threat is it?
In 2019, cybercrime became a $1.5 trillion industry.
In 2018, it was estimated that the e-commerce industry lost $6.8 billion to fraud attacks orchestrated by hackers.
So, in other words, cybercrime is not something that should be taken lightly.
Security is always a huge concern when it comes to e-commerce websites, because unsecured e-commerce platforms are a huge target for cybercriminals. WordPress, because of its extreme popularity, is a massive target for hackers from all over the world.
So many people use WordPress that the platform itself becomes appealing to attacks. If a hacker can gain access to WordPress, they have thousands upon thousands of sites and stores ripe for attack.
How Can WordPress Stores Protect Against Cyber Crime?
WordPress users can take specific measures to protect the security of their online store and the personal information of their customers. A security breach can seriously tank your reputation. If customers don’t feel safe entering their data on your site, they’re not going to buy your product online.
Here are four ways you can protect your WordPress store from cyber crime:
Step 1: Install Security Plugins
It’s important to install security plugins on your WordPress store. Some of the most useful plugins for this are WebARX, MalCare, and Wordfence (among many other great options).
These security systems will monitor your site activity to prevent cyber attacks. If suspicious activity is detected, your security plugin will instantly alert you. Some will even block malicious actors by identifying their IP and keep them from accessing the store in the future.
(Image Source)
Step 2: Secure Your Passwords
It’s also important to keep your passwords secure.
You want to make sure that you’re using a complex password that will block unwanted access to your customer data. Make sure that not only can no one guess it, but it’s sophisticated enough where a hacking program won’t be able to piece it together.
Step 3: Use SSL Certificates
Another security measure to take is to use SSL certificates on your site. Sites that have HTTPS in front of their URL have additional layers of security in place to help stop cybercriminals. These SSL certificates ensure that all data transferred over your site is encrypted.
That’s not something that will work with an HTTP site. Google will sometimes flag HTTP sites and let the user know that they might not be safe. That’s not a message you want your customers seeing when they go to access your store.
Step 4: Use a Third-Party Payment System
It’s also a good idea to use third party payment gateways for your checkout process. Not only is this easier on you, but it’s a lot better for your customers’ peace of mind.
A lot of people use PayPal. It is one of the preferred payment methods across the entire Web. By allowing your customers to log in through PayPal and make payments through this platform, you’re ensuring that they won’t have to enter their personal credit card information on your site. That creates a more comfortable shopping experience for everyone.
In Conclusion
WordPress, in conjunction with plugins like WooCommerce and BigCommerce, represents an easy-to-use, secure, and complete online shopping opportunity.
While WordPress may not have been created with e-commerce in mind the way some other platforms like Shopify were, it is a platform that has evolved and grown over the years to become a complete online content management and e-commerce solution.
For more information around typical costs of an ecommerce website, read our guide.
The post Is WordPress Good For E-commerce Sites? appeared first on HigherVisibility.
from The SEO Advantages https://www.highervisibility.com/blog/is-wordpress-good-for-e-commerce-sites/
0 notes
Text
25 of the Best Form Builder Tools for 2020
You’ve heard it before — forms are the gold standard when it comes to capturing leads, learning about industry trends, doing market research, and even just getting some customer feedback. It might be one of the older methods in the book, but old is gold.
Before we dive into the best form builder tools for 2020, though, let’s talk about what a form builder exactly is.
With no shortage of options, the best form builder apps tend to be quite similar and user-friendly. Whether you want to make a contact form, a sign-up form, or a survey, form tools are the easiest way to create web forms, with drag and drop questions, multiple form fields, and different color and structure options. Once your responses start coming in, most forms will also import each entry into a spreadsheet or centralized database and send you notifications when people complete them. Regardless of the form builder you choose, there are a few key steps you’ll want to follow when creating a form for the purpose of lead generation:
How to Create Online Forms
Identify goals of the form. Pick a form builder tool. Include a name field. Request any demographic information you might need. Include an area where the user can identify a role. Ask for contact information such as an email or phone number. Include a company box. Ask about company size. Create a follow-up email that’s triggered when forms are completed.
1. Identify goals of the form. Are you aiming to generate sales leads, or are you merely planning to add contacts to your email list. Once you identify what you’re looking for from your prospects, you’ll be able to determine what information you’ll need to get from them on the form. 2. Pick a form builder tool. Many online form builders are free or very affordable, but they might not have all the features you need. For example, some might not embed well on to the site you use because of your CMS. Meanwhile, others might not link up to your email marketing software or CRM. Figure out which tool is the best match for your business needs. 3. Include a name field. This step is pretty self explanatory. As you begin creating a form, you’ll obviously want to get your visitor’s first and last name. 4. Request any demographic information you might need. If you’re simply looking to add people to your email list, you probably won’t to need too much about them. But, if you’re sending out a form to generate leads or learn more about your target audience, you might want to ask a few more specific questions, such as age, gender, or location, to get a feel for who your prospects are. 5. Include an area where the user can identify a role. Along with demographic information, you might want to find out information about your prospect’s role. This can give you added insight on the daily life of your prospect and signal how much buying or decision power they have within their company. For example, if a CEO fills out your form, they might be a stronger lead than an intern with no purchasing power. 6. Ask for contact information such as an email or phone number. Obviously, you’ll need to get in contact with a prospect or lead at some point. However, keep in mind that you’ll want to ask for an appropriate amount of contact information. For example, if someone’s signing up for your marketing newsletter, they might just want to give their email. Meanwhile, if someone is interested in getting a demo of your product, they’ll be more likely to give their phone number or work address. 7. Include a company box. Along with learning about a person’s role, you might also want to learn more about their company to get an idea of organizations that might be interested in your product or service. For this reason, include a form area where they can note where they work, where there office is located, and what type of business category their company falls within. 8. Ask about company size. While a startup might not be able to buy an enterprise product, an enterprise company might want a more intricate or advanced product. Knowing the size of the company you’re going to try to sell to is important For this reason, it can be helpful to have the company size box on a form. 9. Create a follow-up email that’s triggered when forms are completed. After someone takes the time to fill out your information, it looks polite, credible, and professional to send a thank you email or have a “Thank you.” appear on the screen. This shows the visitor that you value their information and have received their form. Online Form Builder Tools Form tools today usually offer many different features too, like progressive profiling, smart fields, and interactivity. Easily build and embed forms on your site. Try HubSpot Forms for free! Ultimately, there’s a form for each of your business’ needs and goals — and we’re here to help you pick the best-fit tool specifically for you. 1. HubSpot’s Free Online Form Builder HubSpot’s online form builder is one of the most powerful form builder tools available. The tool combines the foundations of form creation with cutting-edge technology to give you much more capability than a normal online form builder can — and it’s also free. Even though it’s one the more advanced form builder tools, you don’t need any technical expertise when you use HubSpot’s form builder. You can quickly create forms with the drag-and-drop form builder and convert anonymous website visitors into leads with unlimited forms, fields, submissions, and custom forms that all connect to your contact database. Once someone fills your form out, they’re automatically routed to HubSpot CRM. Once they’re in your CRM system, you can set reminder tasks, call them, and send them one-to-one personalized emails, letting you better manage and nurture relationships with your contacts. HubSpot’s form builder also has data enrichment for contact profiles and deep integration with HubSpot’s marketing hub, making it a good option for teams who want a single system to manage their forms, contacts, and marketing efforts.
2. HubSpot’s WordPress Plugin Have a WordPress site but still want to leverage HubSpot tools to generate leads? With HubSpot’s WordPress plugin, you can create forms, assign them within a workflow, and use them to generate landing-page leads. Contacts generated with your forms can also be stored in your HubSpot CRM. The tool also makes the form creation process easy. Although it’s from HubSpot, you don’t need to leave your WordPress dashboard to get the same form-building experience that you can find on our Marketing Hub.
Source: WordPress.org 3. Gravity Forms Another WordPress-powered plugin, Gravity Forms helps you create amazing forms with the help of multi-page/multi-step forms and a number of time-saving features. With this tool, you have access to a variety of integration options and add-ons for email software, messenger platforms, payment options, and automation software. You can also create advanced forms, but, for non-techies, they can be a little complicated to set up.
Source: WPML 4. Pabbly Form Builder Pabbly Form Builder offers unlimited form submissions, file uploads, payment collection tools, users, storage, multi-page forms, conditional logic, and conversion rate optimization features. The tool includes a highly customizable form builder that enables you to create, customize, personalize each form you build. You can adjust the spacing between different form fields, customize colors, shadows, borders, background, font styling, and much more. Pabbly also offers multiple types of forms to embed on your website, sliding and pop-up forms you can use to capture leads for your business. When it comes to organizing your form submissions, you can easily manage incoming submissions with a variety of pre-built filters, like “new” or “needs response”.
5. Paperform Paperform is a powerful form builder with a modern UX that makes it easy to create a form in a matter of minutes. With a focus on customization, Paperform is a great solution for creating beautiful and advanced forms that suit your specific needs.The tool features a wide range of question types, as well as conditional logic and calculation fields to help you create a smart form that interacts with your respondents in real-time. It also offers fully customizable elements, including media, typography and the ability to add custom HTML and CSS as needed. Paperform also supports online payments and offers 1000+ app integrations to fully automate your workflows. Easily embed and share your forms, access advanced form analytics and set up automatic email responses.
Source: Paperform 6. Forminator Forminator is a WordPress plugin that allows you to create highly customizable forms using its drag and drop form builder. What makes Forminator unique compared to all the popular modern forms plugins out there is that it’s completely free. At this time, all features and integrations are included out of the box. That’s not to say it lacks functionality either. Common premium form features such as polls, quizzes, frontend posting, calculations, and even accepting payments via Stripe and PayPal are all free. It is one of the most feature-rich free form plugins out there.
Source: WPMU DEV
7. Google Forms Google Forms’ unique selling point is that it’s fast, free, and easy to use, with unlimited forms and entries. It’s also built into the Google Docs suite, so it automatically pulls your data into a Google Sheet for you to analyze. While Google Forms’ design may not be customizable, this form tool is best for quick market surveys, rather than a professional survey or lead capture form placed on your website.
Source: Google
8. Ultimate Form Builder Lite Ultimate Form Builder Lite is a free WordPress plugin. The tool includes five beautiful pre-designed form templates you can choose from. You can create as many forms as you want and you can also preview them before using them on your site. The forms are stored in a database that can be exported to .csv.
9. JotForm JotForm is an online form builder with an intuitive visual editor, known for making form building faster than ever. The tool has all the normal form building capabilities as well as unique fields to customize your own forms. It also integrates with almost every marketing platform.The free plan caps out at 5 forms, with up to a 100 entries per month.
Source: JotForm 10. Typeform Typeform takes an innovative approach to the world of form building. With an intuitive design, the tool guides you through the form creation process one question at a time and makes the experience of building a survey fun and interactive. Typeform is also great for customer surveys and user research — you can create and send standalone survey links out to your list. If you want to try something with an engaging, straightforward user experience, the tool is a solid option.
Image Source: Typeform 11. Microsoft Forms Microsoft Forms is a simple, easy-to-use form creator that integrates with the Microsoft Office suite. With full customization options, users can quickly make surveys, feedback forms, quizzes, and lead forms. Since Microsoft forms doesn’t integrate directly with an online CMS, the tool might not be the best option for lead generation. But the form builder can collect data in real-time and import all your responses in an Excel spreadsheet, so you can perform powerful yet simple analysis with Excel filters and pivot tables.
Source: YouTube 12. Form Crafts Form Crafts is a basic form builder tool that has a user-friendly interface and simple design. The WordPress plugin allows you to create moderately customizable lead capture forms, email sign-up forms, surveys, and feedback collection forms. One of Form Crafts’ best features is that it’ll send you email notifications about your lead generation process, so you don’t need to constantly monitor your results anymore.
Source: WordPress 13. FormTools FormTools is a flexible form creator that focuses on feedback, data, insights, and beautiful form building. The form builder tool allows you to create most types of forms and tracks your results on a visually appealing dashboard. FormTools also give you an option to integrate their app with a third party provider of your choosing, like Salesforce or Dropbox.
Source: Form Tools 14. Wufoo Part of the SurveyMonkey family, Wufoo is one of the oldest form tools in the space. You can design some appealing online forms with it and it’s super easy to use. The app also allows you to embed forms on your website, set up payment fields that are compatible with a number of payment processing services, and turn on automatic email notifications to alert you when someone fills out your form.
Source: WuFoo 15. Ninja Forms Ninja Forms is a powerful WordPress form tool that’s used by wide range of marketers, from novices to gurus. The tool is free, integrates quickly and easily with a number of different tools, and it can greatly boost your marketing efforts. Ninja Forms also offers unlimited forms, fields and submissions. But, sometimes, the tool lacks clear documentation and can be difficult to use when you want to customize your forms.
16. Cognito Forms If you’re looking for a form builder with sound logic branches and robust payment fields, Cognito Forms is for you. The form tool also offers calculated fields, conditional logic, repeating fields, and more, making it easy and simple to create advanced forms. Cognito Forms integrates with Stripe, PayPal, and Square and offers a free version that includes unlimited forms with 500 entries per month.
Source: Microsoft Store 17. FormStack FormStack is mostly focused on building business and professional style forms. The tool’s best features include intelligent forms, built-in workflows, and seamless integrations with Google Sheets, PayPal, and MailChimp (and others through their API). One of FormStack’s more sophisticated features is an A/B testing tool that can compare different versions of your forms and tell you what performs better. The tool also offer electronic signatures and payments, and users can save their form drafts and return later to finish them.
18. FormSite FormSite has all the essential features you need for cranking out some quick “prototypical” web forms. As one of the more basic form builders, it’s often used for simple contact or feedback forms. The tool also has a number of pricing plans that can suit your specific business needs. The free version offers 5 forms each month with 10 results per form.
Image Credit: FormSite 19. Clearbit Forms Clearbit Forms lets you leverage smart forms and flexible data enrichment technology to automatically collect specific user information. This lets you create shorter forms with less fields, and, in turn, produce happier customers (because who doesn’t love a short survey?) With two plans designed for startups and enterprises, Clearbit can definitely meet your modern marketing needs.
Source: Clearbit 20. FormKeep FormKeep is a tool unlike most on this list — it’s an easy-to-use tool that finds a happy medium between coded and drag and drop forms. With FormKeep, you have the option to code your own form, style it according to your brand guidelines, and integrate it with Zapier to manage your submission data.
21. SurveyAnyPlace SurveyAnyPlace has proven that surveys don’t have to be boring. With their gamification elements, interactive features, and incentives like coupon codes, you can make all your surveys and quizzes fun and enjoyable. By leveraging SurveyAnyPlace’s unique approach to form building, you can easily collect leads, information, and insights from visitors.
Source: GetApp 22. Contact Form 7 One of the most popular WordPress plugins, Contact Form 7, has upwards of 5 million active installations on the CMS. A free tool for everyone to use, it’s a super simple and basic form creator with a heavy focus on contact forms. But it’s also important to note that the tool has some limitations, especially with its customization options.
Source: WordPress 23. Conversational Form An open source platform, Conversational Form lets you transform your web form into a simple chatbot. By using a novel and clever way to gather data, this form builder is bound to drive user engagement. At the same time, though, due to its new entrance into the marketing space, it might be difficult to learn your way around the tool.
Source: Pagely 24. FormBakery As one of the easiest drag and drop form tools out there, FormBakery lets you build professional forms in the most straightforward way possible. For those looking to build a super simple form in under 5 minutes, the tool is a great choice. You can quickly customize forms with your own designs, with no coding necessary. If you’re looking to build a more advanced form, though, FormBakery may not be the right choice for you.
25. DeviceMagic DeviceMagic is a mobile form solution on a mission to ditch all paperwork, automate lead generation processes, and enhance data collection. Since the tool solely focuses on building mobile forms, it has a number of great benefits over other form builders, like quick and accurate data collection, lower operations costs, and less time wasted on administrative work.
Source: Device Magic The options are endless for form builder tools. Most form builders offer all the essentials needed to make a basic form, but your options start to narrow down when you want better customization and deeper data analysis. Ultimately, for you, the best form tool depends on your team’s purpose and particular business needs. Editor’s Note: This post was originally published in April 2019, but was updated for comprehensiveness in March 2020.
Source link
source https://www.kadobeclothing.store/25-of-the-best-form-builder-tools-for-2020/
0 notes