#Lense flares and blurs
Text
A lot of comic artists struggle with this to some degree, but Simone Di Meo should really work on his same face syndrome. The faces of Mistress Harsh, principal Stone, Ms. Hall and White Rabbit were all exactly the same.
Damian could also look more like Damian and less like Tim.
And considering that this book is probably going to have a lot of action it wouldn't hurt if he made the fight/action scenes less confusing. It's often hard to tell where the characters are, what is going on and what is important and what is not.
I also fear that Williamson giving Di Meo so much room for the art might have contributed to this issue feeling kind of empty. There were several pages with no or almost no dialogue, and while the art is pretty, nothing really interesting or important happened on them.
Someone like Patrick Gleason was able to pull off a silent issue like Batman and Robin #18 because he is great at letting the facial expressions, postures and actions of the characters speak for themselves.
Judging by the first two issues of Batman and Robin (2023) I don't think Di Meo could do the same. Pretty much all the characters have a constant (kind of smug) smile on their lips for no reason or they have a very neutral facial expression that doesn't tell us much about them and their feelings.
#The art is pretty#I'm not saying he can't draw#But I'm not sure if he's a good storyteller#It feels both too much but at the same time kind of empty?#If that makes sense#Lots of colors#Lense flares and blurs#But not a lot of emotions#Or plot
30 notes
·
View notes
Text
I’d love a game show of guessing a movie based off of screenshots like this
0 notes
Text
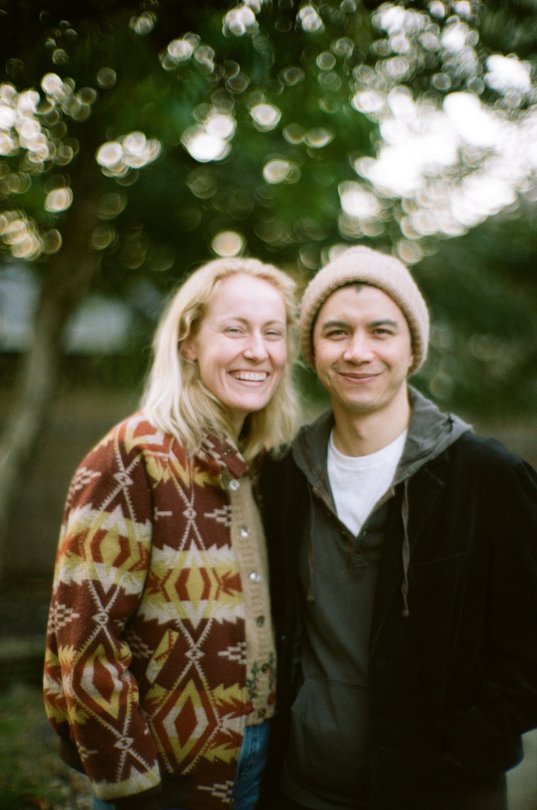
Let's talk about vintage lenses.
Here is your cool samurai show with modern lenses.

Here is your cool samurai show with vintage lenses.

Hollywood is no stranger to fads.
We are currently in the middle of a "make everything too dark" fad. But that fad is starting to overlap with "let's use really old lenses on ridiculously high resolution cameras."
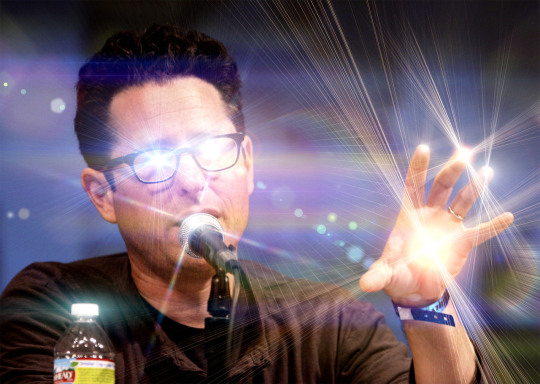
This is Zack Snyder with a Red Monstro 8K camera.
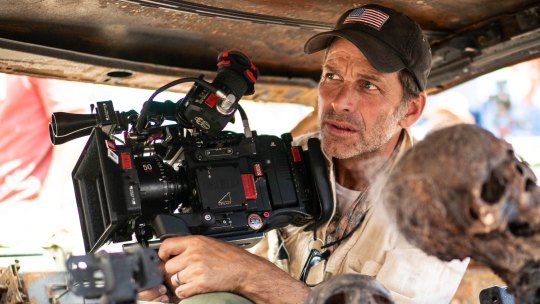
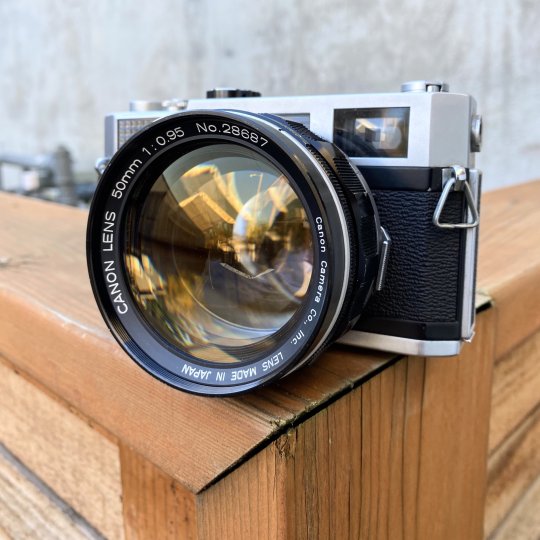
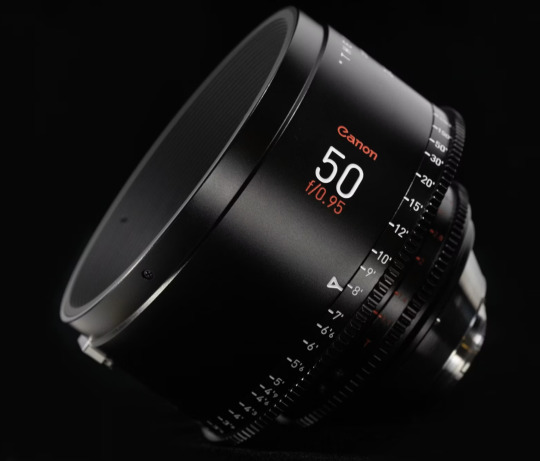
He is using a "rehoused" vintage 50mm f/0.95 Canon "Dream Lens" which was first manufactured in 1961.
This old lens is put inside a fancy new body that can fit onto modern cameras.
Which means Zack is getting nowhere near 8K worth of detail. These lenses are not even close to being sharp. Which is fine. I think the obsession with detail can get a bit silly and sometimes things can be "too sharp."
But it is a funny juxtaposition.
The dream lens is a cool lens. It has character. It has certain aberrations and defects that can actually be beneficial to making a cool photograph. It's a bit like vinyl records for photography.

[ Peter Thoeny ]
It has vignetting and distortion and a very strange swirly background blur.
[ Gabriel Binder ]
Optical engineers have been spending the last 60 years trying to eliminate these defects. And I sometimes wonder if they are confused by this fad.
"I WORKED 70 HOURS PER WEEK TO GET PERFECT CORNER SHARPNESS!"
And whether you prefer to work with a perfect optic or a vintage one... it is a valid aesthetic decision either way. I think vintage glass can really suit candid natural light photography. You can almost get abstract with these lenses.

[ Peter Theony ]
Personally I like to start with as close to perfect as possible and then add the character in later. That way I can dial in the effect and tweak how much of it I want. But even with modern image editing tools, some of these aberrations are difficult to recreate authentically.
That said, it can be very easy for the "character" of these lenses to become distracting. And just like when someone first finds the lens flares in Photoshop, it can be easy for people to overdo things.
Zack Snyder decided to be his own cameraman and used only vintage glass in his recent movies and it has led to some complaints about the imagery.
I mean, Zack Snyder overdoing something? I can't even imagine it.
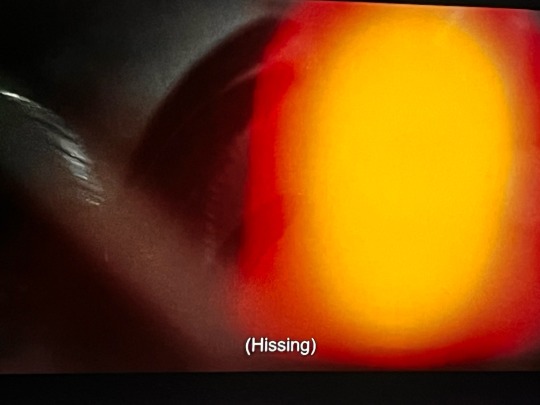
Non camera people felt Army of the Dead was blurry and a bit weird but they couldn't quite explain why it felt that way.
The dream lens has a very wide aperture and it lets in a lot of light. But it also has a very very shallow depth of field. Which means it is very difficult to nail focus.

[ Peter Thoeny ]
Her near eye is in focus and her far eye is soft. You literally can't get an entire face in focus.
There is no reason you have to use the dream lens at f/0.95 at all times. But just like those irresistible lens flares, Zack couldn't help himself.
Here is a blueprint that you can't really see.

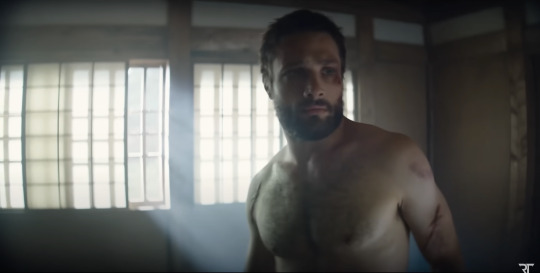
Extreme close ups of faces without autofocus at f/0.95 is nearly impossible to pull critical focus on.

Looks like Zack nailed the area just above the eyebrow here.
Let's try to find the point of focus in this one.

Ummmm... she is just... blurry. Missed focus completely.
But Zack isn't the only one going vintage. I've been seeing this a lot recently.
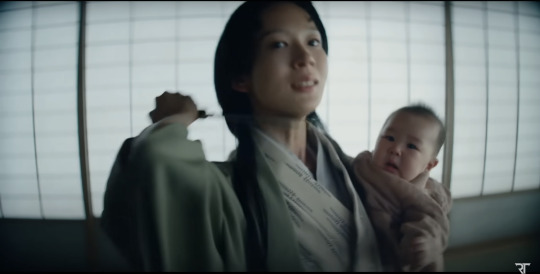
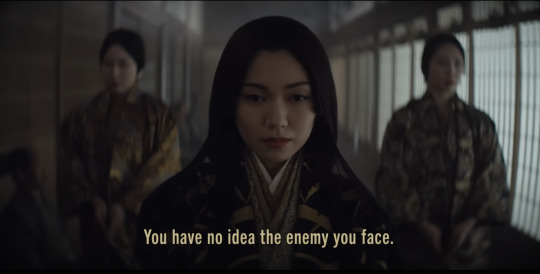
Shogun is a beautiful show. And for the most part, I really enjoyed the cinematography. But they went the vintage lens route and it kept going from gorgeous to "I can't not see it" distracting. And perhaps because I am familiar with these lens defects I am more prone to noticing. But I do think it hurt the imagery in a few spots.
Vingetting is a darkening of the corners of the frame.

Light rays in the corners are much harder to control. A lot of modern lenses still have this problem, but they create software corrections to eliminate the issue. Some cameras do it automatically as you are recording the image.
Vintage lenses were built before lens corrections where a thing—before software was a thing. So you either have to live with them, try to remove them with VFX, or crop into your image and lose some resolution.
It's possible this is the aesthetic they wanted. They felt the vignetting added something to the image. But I just found my eyes darting to the corners and not focusing on the composition.
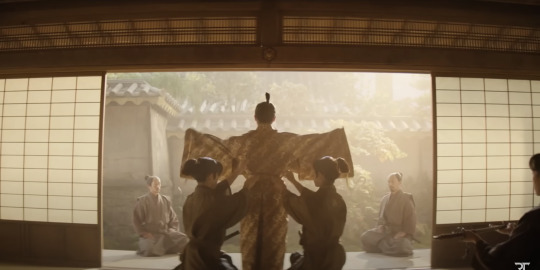
And then you have distortion.
In this case, barrel distortion.
This is mostly prominent in wide angle lenses. In order to get that wider field of view the lens has to accept light from some very steep angles. And that can be quite difficult to correct. So you kind have to sacrifice any straight lines.
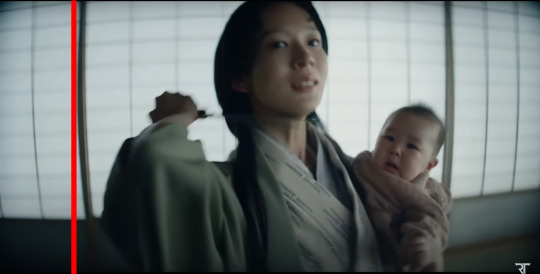
And sometimes this was a positive contribution to the image.

I thought the curved lines matched the way they were sitting here.
But most of the time I just felt like I was looking at feudal Japan through a fish's eye.
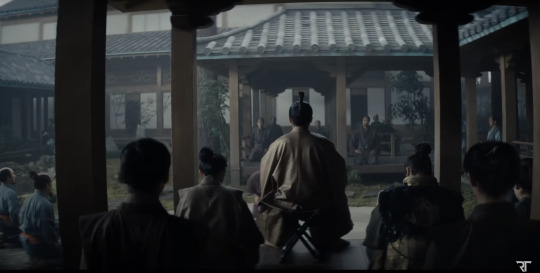
It's a bit more tolerable as a still, but when all of these verticals are bowing in motion, I start to feel like I am developing tunnel vision.
I love that this is a tool that is available. Rehousing lenses is a really neat process and I'm glad this old glass is getting new life.
This documentary shows how lens rehousing is done and is quite fascinating if you are in to that sort of thing.
youtube
But I think we are in a "too much of a good thing" phase when it comes to these lenses. I think a balance between old and new can be found.
And I also think maybe Zack should see what f/2.8 looks like. He might like having more than an eyebrow in focus.
317 notes
·
View notes
Text
Lights, Camera, ANIMATION
This is mostly an outlet for myself to vent, so no sweat if you scroll on by. I watched a reaction video complain about the depth of field in a 3d animated piece, and how there’s no need to use those techniques because there’s “no camera” in animation. WHEW. Now, I will give them a lot of leeway because they’re reacting to things live, and not all opinions are allowed the time to form more cohesive thoughts. And I’ll also say they were totally fair to critique its frequent use of rack focus in the sequence.
But this plays into a broad issue that Western, specifically American, audiences have regarding animation. They see it as a genre and not a medium. A medium that can do allllllllll the genres live action can do. If I was the type to be buried or have a tombstone when I die, it would absolutely read: ANIMATION IS A MEDIUM. NOT A GENRE. JFC.
But back to the casual comment that had me gnashing my teeth: Yes, Margaret, there IS a camera in animation. Whether it be all the ways traditional and digital animation can recreate different lens effects through other means, to programs having a robust camera feature as a layer/object/however it implements the tool.
And along with the other tools we share with live action to tell a story: lighting, color, framing, blocking, editing...all that jazz, the camera and its variety of features are a big part of that. It’s an incredibly important tool in how we direct the audience to what’s significant in the scene and when to look at it.
EXAMPLE TIME
The Lion King has a poop ton of camera techniques just in the opening sequence. In a lot of 2d it’s applying a blur effect to recreate the use of lenses, but it’s the same thought process. From mimicking wide lenses to standard lenses, to more extreme changes to the depth of field, as with this use of rack focus.

The below first shot would be overwhelming with deciding where to look if it used a wide lens. The 2nd you could argue would be less personal and emotional with the foreground and background elements in focus, pulling attention from her reflection.

We recreate flares and bokeh effects as if a spherical lens were turned towards a light source. And paint backgrounds in a way that recreates the standards’ effect of blurring objects in the distance, as our own eye would.

Arcane does every type of camera trick in the book. Rack focus can be a tricky one with me. I enjoy it when the lens doesn’t come with any extreme warping, and is really subtle. But y’all, filmmaking is just so cool with this god-like control. Thou shalt not see what is there until I deem it necessary!

I could be wrong on this one, but Kung Fu Panda’s all-out playground with depth of field looks like they’re creating a tilt shift effect in some sequences. And I frickin’ love it and wish more animated films went for it. The choice really made it feel like we were watching a miniature world that was real and not computer-animated, somewhat akin to stop-motion sets.

Sigh. I just love the medium, y’all. From all the cinematic language and techniques, on top of the movie magic of simply creating the Illusion of Life from scratch, and making it look like one person crafted the whole shebang.
So to cap it all off, let’s enjoy 2d animation going whole hog with a dang zolly.


#animation#2d animation#traditional animation#3d animation#animation is a medium#animation rant#work#animation camera#prolly delete later#had to get it off my chest
23 notes
·
View notes
Text
Constructicon Week is here! @constructiconweek
I'll be posting them here as well as reblogging with an AO3 link because they're all short pieces. :)
What Once Was
Day 6: Mixmaster | Welding
Rating: T
Tags: Minimal Editing, Canon Blender of IDW1 & IDW2, Snippets of Larger Story, Abandoned & Destroyed City, Haunted Houses, Whump, Blood and Injury, updated as necessary
Fic Summary: In a moment of peace that was either the End of the War or a Temporary Truce (no one was quite sure where they stood yet), the Constructicons claimed the shattered remains of Crystal City as their own. So far, no one else had raised a fuss, leaving them free to rebuild as they wished.
Chapter Summary: When things got ignored, someone was going to bear the brunt when it escalated. Poor Mixmaster had never even noticed anything unusual.
Note: Tags have been updated!
He was sure it hadn't been his fault. There was no way Mixmaster tripped over his own pedes and fell down a flight of sharp-edged stairs to land at the bottom, dented everywhere, cracked open in several places, and laying in a growing pool of energon. A large spike of a shattered support truss hit on the way down left him with a large puncture in one side, the source of most of his vital fluid loss. An attempt to cycle the irises of his optics resulted in a disturbing grinding sound that had Mixmaster pausing the attempt mere moments after beginning. Instead, he slowly blinked his optical shutters, holding them closed long enough to let the flowing stream of cleansing fluid give the cracked lenses a good wash. Hook would appreciate him doing at least that much.
This was very not good.
His armor creaked as he tried to roll into a position he could more easily stand from, pain flaring from the wounds stressed by the action. He pushed a bit harder, hoping he might be able to get himself to help under his own power, but it quickly became apparent that wasn't going to happen. Giving up with a sigh, Mixmaster eased his frame back down against the ground and opened the team bond. The likelihood of the others laughing at his predicament was incredibly high, simply because all of them were Like That, but he knew they'd come around to help him before he completely bled out.
::If there's a chance someone's not busy right now, I would appreciate if I could get a little help?::
As the bond crackled with a swirl of curiosity, annoyance, and long-suffering knowing, Mixmaster could only cringe and hope he hadn't misjudged them. Really, of all the ways to go, deactivating in a broken heap at the bottom of a grand staircase in a ruined city had never crossed his mind. And oh, how very big the puddle of his living energon was becoming, stretching across at least half the length of the lobby. He touched his flagging consciousness against the bond again. With luck, he didn't sound like too much of a loser as he added a little extra plea to his request.
::Please?::
It all turned into a bit of a blur after that point. He didn't feel quite so bad about it, though, when what little his optics could decipher through the static haze was familiar green and purple. Might have been nice to be able to hear whatever Bones was saying, but Mixmaster knew one couldn't have everything.
He felt the rumble of the rest of his team as they rushed into the lobby of the medical facility they were searching, felt the heady and worried crush of their erupting EM fields. Maybe a snicker slipped from his intake when one of them slipped in the slick spill of his energon on the old and cracked tiles of the floor. He couldn't have said who it was. Or if it actually happened.
Then, hands were on him, pulling and shoving him onto his back—or as well as could be obtained with his barrel in the way. Whatever sound might have escaped him, Mixmaster kind of found himself grateful he was blissfully unaware of it over the raging agony that swept over his frame from the top of his helm to the tips of his pedes. When the severed lines were tied off he wept. When a piece of scrap metal was slapped against the gaping hole in his side and the heat of Hook's torch touched the edge, welding the panel to his torn plating, Mixmaster remembered no more.
#maccadam#constructicon week#day 6: mixmaster | welding#mixmaster#constructicons#💜🚧💚#mixmaster whump
9 notes
·
View notes
Note
Uh would it be okay to add motion blur on your profile picture and then edit a lense flare over the eyes it'll be funny (💜)
YES
2 notes
·
View notes
Text
Exploring the Evolution of Ulanzi Camera Lenses: From Vintage Classics to Cutting-Edge Innovations
Ulanzi Camera Lenses
The Beginnings of Ulanzi Camera Lenses
Ulanzi camera lenses have a rich history that spans several decades. From their humble beginnings as vintage classics to their current status as cutting-edge innovations, Ulanzi lenses have continuously evolved to meet the ever-changing needs of photographers and videographers.
The Era of Vintage Classics
In the early days of Ulanzi camera lenses, photographers relied on vintage classics to capture stunning images. These lenses were known for their exceptional build quality and optical performance. They were often manual focus lenses, requiring photographers to have a deep understanding of the technical aspects of photography.
One of the key features of vintage Ulanzi lenses was their ability to produce unique and artistic effects. For example, some lenses had a soft focus effect that added a dreamy and ethereal quality to images. Others had a distinct bokeh, creating beautiful background blur that enhanced the subject's prominence.
The Transition to Modern Innovations
As technology advanced, Ulanzi camera lenses underwent a significant transformation. The transition from vintage classics to modern innovations brought about a host of new features and capabilities.
One of the most notable advancements was the integration of autofocus systems. This allowed photographers to capture fast-moving subjects with ease, making Ulanzi lenses suitable for sports and wildlife photography. Additionally, the introduction of image stabilization technology minimized the effects of camera shake, resulting in sharper images even in challenging shooting conditions.
The Rise of Cutting-Edge Innovations
Today, Ulanzi camera lenses are at the forefront of cutting-edge innovations. These lenses incorporate state-of-the-art technologies and materials to deliver unparalleled performance and image quality.
One of the key innovations in Ulanzi lenses is the use of advanced lens coatings. These coatings minimize lens flare and ghosting, allowing photographers to capture images with exceptional clarity and contrast. Additionally, Ulanzi lenses now feature aspherical elements and low dispersion glass, which reduce aberrations and ensure edge-to-edge sharpness.
Another notable advancement is the development of wide-aperture lenses. These lenses have larger maximum apertures, allowing for greater control over depth of field and low-light performance. Photographers can now achieve stunning bokeh and capture sharp images even in dimly lit environments.
Continuing the Legacy of Ulanzi Camera Lenses
The evolution of Ulanzi camera lenses from vintage classics to cutting-edge innovations is a testament to the brand's commitment to pushing the boundaries of optical technology. With each new release, Ulanzi strives to provide photographers and videographers with tools that empower their creativity and enable them to capture breathtaking images.
Whether you're a professional photographer or an enthusiast, exploring the evolution of ulanzi camera lenses will undoubtedly enhance your understanding of the advancements in the field. From the vintage classics that laid the foundation to the cutting-edge innovations that shape the future, Ulanzi continues to be a driving force in the world of photography.
References
ulanzi camera lenses
0 notes
Note
[ VENGEANCE ] WITH SONIC AND EDITH OOOOOH LORDY
And he was just starting to relax, too.
Relax, rest, and finally heal...but no. Eggman just had to get in his big stomping machine, and trample over the Mystic Ruin's jungle just to find Tails' workshop. Had to get there when Sonic wasn't there. Had to smash his little brother's home and hurt his sister.
He got there in a blur to Edith pinned under the stone, wincing in acute artificial pain, the looming mechanical monster reaching to crush her for good.
That is when the cooling rage flared again into a raging bonfire. The hottest fires were blue, as was the cannonball that struck the machine and sent it stumbling backwards.
Sonic left a crater in the glass of the cockpit. The claws in the tips of his gloves flexed to grip the edges. Blazing green eyes reflected off of the black lenses of the doctor's glasses.
"...Eggman." His voice was barely a whisper, dangerously calm. "For this one? I just might have to kill you."
1 note
·
View note
Text
when in his phantom form, it is extremely hard to get a good picture of danny. the pictures are blurred most of the time, making him look like a cryptid. the lense also causes his eyes to glow and it causes a lense flare. when in his normal form, pictures taken of him turn out normal.
#& head canons ( danny fenton )#& head canons ( all )#fans taking pictures with him must get frustrated bc of this shsjsjjsjsjsjsjs#he has to not be moving too
0 notes
Text
Exploring the Power of Professional Camera Lenses in the World of Photography
In the captivating world of professional photography, the right equipment can make all the difference. Among the essential tools in a photographer's arsenal, the professional camera lens reigns supreme. With its ability to capture stunning images, convey emotions, and freeze moments in time, a high-quality lens is the gateway to unlocking the full potential of any photographer. In this article, we delve into the significance of professional camera lenses and how they elevate the art of photography to new heights.
When it comes to photography, precision is paramount. Professional camera lenses are meticulously crafted with advanced optics and superior materials to ensure unrivalled sharpness, clarity, and detail. These lenses offer a wide range of focal lengths, allowing photographers to experiment with various perspectives, depths of field, and compositions.
With a professional camera lens, photographers can achieve tack-sharp focus, even in challenging lighting conditions or high-speed action shots. The optical elements within these lenses minimise aberrations, distortions, and chromatic aberrations, resulting in images that are breathtakingly crisp and true to life. Whether capturing landscapes, portraits, or wildlife, professional lenses deliver unparalleled precision, enabling photographers to create awe-inspiring visuals.
Professional camera lenses offer a diverse array of focal lengths, from ultra-wide angle to telephoto, providing photographers with unmatched versatility and flexibility in their creative pursuits. A wide-angle lens, for instance, opens vast possibilities for capturing sweeping landscapes, architectural marvels, and immersive street photography.
On the other hand, telephoto lenses excel in bringing distant subjects closer, making them ideal for wildlife and sports photography. These lenses allow photographers to capture intricate details and expressions that might otherwise be missed by the naked eye. The ability to switch lenses and adapt to different shooting scenarios empowers photographers to explore their creativity and capture their vision with precision and finesse.
Lighting plays a pivotal role in photography, and professional camera lenses are designed to harness light in the most effective way. With wider apertures, these lenses allow more light to enter the camera, resulting in brighter images even in low-light conditions. This capability is particularly valuable in indoor photography, night-time shoots, or capturing fast-moving subjects where additional light is limited.
Furthermore, professional lenses often possess advanced lens coatings that reduce lens flare and ghosting, ensuring optimum image quality. By expertly managing light, these lenses enhance contrast, colour rendition, and overall image brilliance. The result is photographs that exude a captivating visual allure, whether it's the warm glow of a sunset or the vibrant hues of a bustling cityscape.
Professional camera lenses are not just tools; they are extensions of a photographer's creative vision. They enable photographers to tell compelling stories, evoke emotions, and create impactful visual narratives. The ability to control depth of field, isolate subjects, and blur backgrounds with stunning bokeh empowers photographers to evoke a sense of intimacy or draw attention to specific elements within a frame.
Moreover, professional lenses offer superior autofocus capabilities, enabling photographers to capture fleeting moments with precision and confidence. Whether it's freezing a split-second sports action or capturing the subtlest expressions in portrait photography, these lenses ensure that the photographer's creative intent is faithfully translated into the final image.
In the ever-evolving world of professional photography, the right equipment can elevate an image from ordinary to extraordinary. Professional camera lenses serve as indispensable tools for photographers, offering unparalleled precision, versatility, and control over creative expression.
0 notes
Text

Canon EF 50mm F1.4 USM
By optically distributing power with a gauss type design and two high-refraction glass lenses, canon lenses flare at maximum aperture is minimized and astigmatism is greatly reduced. Moreover, improvements in the quality of the focused image and the beautiful natural blur of the background are simultaneously achieved. Use of a Micro USM (Micro Ultrasonic Motor) provides fast, silent autofocusing, as well as full-time manual focus. The colour balance is virtually identical to the ISO recommended reference values.
0 notes
Text
Christmas Lights & Tips To Help You Take The Best Pictures
The holidays are a time for family, friends, and celebrations. While you're likely to be snapping photos of these special moments on your phone or digital camera, there's no better way to capture them than with a DSLR camera.

You'll have more control over the light in your photos and can take advantage of wide-angle lenses or zoom in close to get the perfect shot. If you're looking for inspiration for taking some amazing Christmas light pictures this year, don't worry! We've got you covered below:
How to Create Stunning Christmas Light Pictures?
Use a tripod.
Use a wide-angle lens.
Use a flash.
Set your ISO to low (100 or below).
You can also use manual mode, which allows you to control all aspects of the image and gives you more flexibility when taking pictures of Christmas lights.
Best Camera for Holiday Photography
If you want to take professional-looking holiday photos, your best bet is to use a DSLR camera. I know it's an investment and can be intimidating at first, but trust me: DSLR cameras are the only way to go if you want crisp, clear images that will make your friends and family ooh and ahh over on social media.
Point and shoot cameras aren't up to par with DSLRs in terms of image quality—they just don't have the same capability for capturing detail or depth of field (how much is in focus). If you're looking for something more affordable than a DSLR, consider upgrading from your point-and-shoot with lenses that give you more control over light exposure.
Smartphones are also not good enough for this type of photography; even newer iPhones still struggle with low lighting situations (such as holiday lights), so if nothing else helps...you could try turning off automatic stabilization on your smartphone! It might help cut down on blur when shooting handheld shots too
Use a Tripod
A tripod is a great tool for creating sharp images. It helps reduce camera shake and makes it easier to take long exposures without blurring the picture. Tripods are also useful when you're taking photos in low light because they give your camera steadier support, which means less blurry shots. If you're planning on photographing fireworks or other fast-moving subjects, a tripod will be especially useful because it will allow you to keep your camera steady while shooting at slower shutter speeds than usual.
Taking Amazing Christmas Photos Outside
Use a Tripod. If you're taking photos outside at night, it's best to use a tripod so that your camera can be as steady as possible. The more stable and still your camera is when taking photos, the more likely you are to get an image with great clarity and definition.
Make Sure It's Stable. A good rule of thumb for making sure your tripod is stable: if it can easily be rocked or swayed back and forth by hand, then it probably won't hold up under the weight of your camera during photographing either!
Avoid Shooting Into The Sunlight. Try not to take pictures while shooting into direct sunlight because this will cause lens flare which makes it difficult for other objects in the frame look sharp and crisp compared to objects directly lit by an artificial light source (such as Christmas lights) next door."
Capture the Entire Light Display with a Wide-Angle Lens
If you want to capture the whole scene in front of you, a wide-angle lens is the best lens for this type of photography. The light display is supposed to be seen from far away and so you want your photo of it to also show everything around it. Wider lenses help achieve this effect by creating an image with a wider field of view than normal lenses do.
Capture a Single Light Bulb in the Dark
You can use a wide-angle lens to capture the light in its full glory. If you have a tripod, this is the time to use it. It will help keep your camera steady so that you can get great shots even in low light. Make sure to bring your flash along, too! You'll want to aim it at the bulb so that it doesn't cause any shadows on its own or cast glare on other objects nearby. Remember: if you want to capture the whole scene with your light bulbs, make sure they're placed far enough away from each other so that they don't overlap too much when taking pictures!
TPG Lighting LLC is your one stop shop for all things Christmas Lights. We offer services for commercial, residential and event rental customers in Orlando and Central Florida. We provide holiday light installation and removal by top notch professionals with years of experience in the industry.
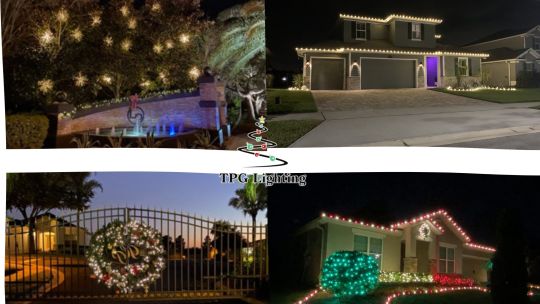
TPG Lighting LLC is Orlando's best trusted christmas light installation orlando company. Our friendly, professional staff can get you set up with all the lighting you want in no time.
TPG Lighting LLC
4150 Incubator Ct, Sanford, FL 32771, United States
407-917-7748
http://orlandochristmaslights.net/
#christmas lights celebration fl#christmas lights kissimmee#christmas light installation orlando#christmas lights orlando#christmas lights
0 notes
Text
How to suspect Keratoconus and Symptoms of Keratoconus | Risk Factor Of Keratoconus
Nearsightedness- Also known as myopia, this is the inability to see distant objects clearly i.e. Road signs or billboards, whereas your ability to read a paper or computer screen clearly is preserved. Due to the inability to focus light myopia is a hallmark feature in keratoconus.
Astigmatism –This is the blurring of vision at all distances. The light focused through the eye fail to come to a single focus on the retina which can be compared to the antenna of a television. If the antenna does not receive a clear focus signal the television becomes blurred as is the case in astigmatism.
Glare & Flare- due to the disturbances in the amount of light entering the cornea, individuals with keratoconus tend to experience high sensitivity to bright lights, especially at night time. This becomes a significant problem for those who drive at night, as due to the excessive glare of street lights and the lights of incoming vehicles the eyes tend to get tired easily leading to the risk of driving without accurate sight.
Frequent changes in lens prescriptions – this is the commonest reason why Keratoconus is detected. Patients tend to notice that they have to change prescriptions for normal spectacles more frequently as they experience blurred and distorted vision even with new spectacles after a short period of time or having to convert to contact lenses as spectacles cannot correct the vision. Upon examination by an Ophthalmologist or skilled Optometrist Keratoconus is detected.
Risk factors and Risk factor prevention of keratoconus
Inherited diseases which increase the risk of Keratoconus include Retinitis Pigmentosa which is a disease which causes night blindness and progressive loss of vision and Ehler- Danlos Syndrome which is an inherited defect in the production of collagen tissue in the body which is responsible for maintaining the dome shaped structure of the cornea of the eye and Down’s syndrome. These are all inherited diseases and hence cannot be changed with lifestyle modifications.
An Antioxidant poor individual has an increased risk of Keratoconus as it is thought that free radical damage to the cornea is a leading cause of keratoconus, and antioxidants reduce the amount of free radicals in the body hence detoxifying the body. Antioxidant rich food such as colorful fruits should be consumed regularly to replenish the antioxidant stores in the body.
Infection or irritation of the conjunctivae requires immediate medical attention. Use of over the counter eye drops are frowned upon as they carry the risk of aggravating the irritation and causing damage to the eyes. A medical professional must be consulted and prescribed treatment must be taken promptly to prevent damage to the cornea and the eyes.
The Risk Associated with exposure to increased Ultraviolet radiation can be countered by wearing polarize polycarbonate sunglasses of high quality which block UV rays 100%. These are recommended for individuals who spend increased amounts of time exposed to the sun.
When buying Contact lenses they should be bought from a reputed institution and care must be taken that it is a perfect fit. Can cleaning should be done with the recommended, eye safe cleaners.
TAG- Best doctor for Keratoconus surgery in Mumbai, Keratoconus Surgery In Mumbai, Keratoconus Specialist in India
0 notes
Text
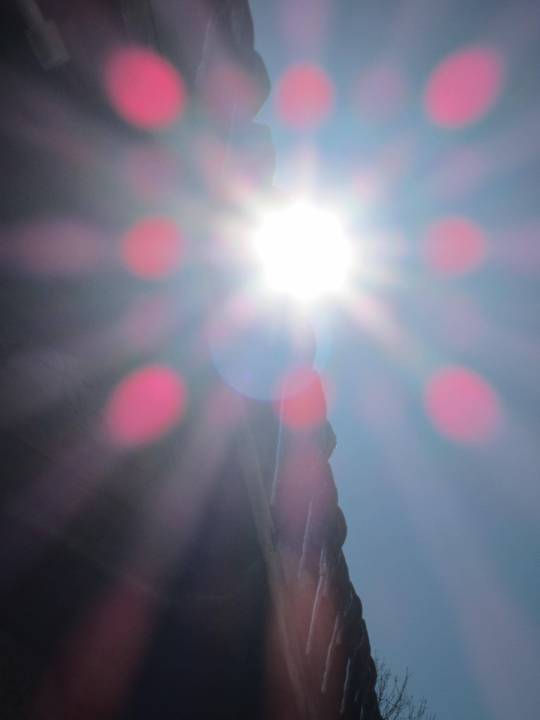
Understanding Camera Lens Flare
At some time you have actually probably encountered lens flare, that brilliant glaring light that sweeps into pictures, causing them to have a blurred, dappled appearance. Lens flare can occur when any brilliant, non-image forming light from the sun, or another light source strikes the front aspect of your lens.
While flare is sometimes utilized deliberately as an artistic improvement, for the majority of landscape photographers, it can be an unwanted addition in photos and something that you'll often want to prevent or prevent. With this in mind, let's have a look at a few things that you can do to avoid flare in your landscape images.
Lens Flare: What You Need To Know
One of the most convenient ways to assist remove lens style is by purchasing a lens hood to help block direct sun rays from reaching your front component. As a perk, a lens hood will likewise protect your camera from minor knocks and dents. While a lot of lenses feature a lens hood, if yours didn't, they are low-cost and simple to get ahold of.
If you're fighting flare, another choice is to change your angle. Flare is triggered by direct light striking the sensor, so standing in the shade can help to prevent this from happening. Furthermore, you could try angling your video camera in a various instructions, so you're not shooting straight into the sun.
Flare Photography Tips
Changing the focal length of your cam can likewise assist to get rid of lens flare. While merely zooming to a various focal length may not remove flare totally, often, it can lower unwanted sunspots. A dirty or smudged lens is more susceptible to lens flare.|Adjusting the focal length of your video camera can also assist to get rid of lens flare. A filthy or smudged lens is more prone to lens flare.
To clean your lens, usage lens tissues or a microfiber cloth and begin wiping from the center working to the outside of the lens. Just take care that there are no smidgens of grit in the fabric or on the lens itself, eliminate these with a blower or brush first, to prevent polishing them into the lens and scratching it.
Want Better Photos Or Video? Avoid Lens Flares
Particular equipment, such as prime lenses are less susceptible to lens flare that others. One factor for this is due to the fact that they have fewer internal parts for the light to disperse through. In addition, layered filters, while more expensive than routine filters, are also less prone to lens flare than regular filters considering that they do not smear as easily.
Naturally, you might likewise modify out the lens flare in post processing. While it would be hard to edit out the haze that frequently accompanies lens flare, the shapes of light could be modified out quickly enough. Consider using the brush tool or the area recovery tool to conceal or clone out the areas.
Lens Flare In Photography: How To Deal With It
Finally, while all of us understand that lens flare is typically unwanted in numerous images, sometimes it can be utilized to enhance an image also.|Finally, while we all know that lens flare is typically unwanted in many images, in some cases it can be utilized to improve an image. In reality, there's even a Photoshop filter that can assist you to place flare into your images. In many landscape images, you'll want to keep the flare to in one area of the structure, instead of allowing it to take over the entire image.
Camera producers have utilized nano-crystal coatings in their designs to restrict ghosting and flare, but unfortunately, light flare is still a really genuine thing. To decrease light flares in your shots, consider following the recommendations. Shooting into the sun is a proven method to create undesirable lens flare. While flare can in some cases be used to great effect, it's primarily to be avoided.
How To Deal With Lens Flare
The hood serves as a type of guard obstructing any scattering light from striking the lens. The lens hood purpose is to prevent the sun from getting in your eyes, just as you would by placing your hand over your forehead. What is a lens hood for when you're out shooting? It'll protect your lens from any damage.
Side note: If you're utilizing filters on your lens, a lens hood may not fit over it. Because case, you can attempt using your hand to protect the lens from the sun's rays. Obviously, you can get camera flare with any lens. But prime lenses are considerably less susceptible to camera flare than zoom lenses.
What Is Lens Flare? How To Get It & How To Avoid It
Better quality prime lenses are a more secure alternative if flare is an issue. Blocking your source of light is a simple method to avoid sun lens flare. Try utilizing trees and even mountains if you're shooting in these type of conditions and if you have enough light without it.
|
What Is Lens Flare In Photography?
As a photographer, you need to comprehend light perfectly. You can do both accidental and deliberate lens flare results. Some professional photographers like this because it enables you to add some creativity to the shot. All of it depends upon your shooting style and the result you wish to attain. Lens flare in photography includes a touch of spice and originality to every photo.
Anyway, it is useful to know what causes lens flare so that you can find out how to prevent it or, in some cases, purposefully accomplish this effect in your images. From a technical point of view, lens flare (or light flare) is a reflection of roaming light on your cam lens, triggering streaks of sunshine in addition to a reduction in the contrast and saturation in your photo.
How To Prevent Lens Flare In Your Landscape Photography
All professional photographers have a love-hate relationship with types of lens flares. When you do not desire them to appear, eliminating them is impossible. And when you do seek them out, they are tough to produce and manage.
In addition, there are numerous lens flare types that can help include imagination to your work and stick out from the rest. If you wish to add lens flare to the photo and get a really chic effect, think about contending the golden hour. Dawn and sundown are the very best times of day to achieve the softest, finest natural light.
Control Lens Flare For Portraits
In photography, we call this duration around sunrise and sunset, the golden hour. At these early and late hours, the sun is at the optimum angle for achieving quality lens flare, and light streaks and orbs are plainly noticeable in the photo. Another advantage of shooting throughout the golden hour is that you don't have to be in an awkward yoga position to get the wanted impact, as you would throughout other times of the day.
What does a lens hood do? Typically, the anti-reflective hood secures your images from a flare. A lens hood is actually a very essential thing, however not when it comes to shooting golden lens flares. By getting rid of the lens hood, you'll probably attain fairy light flares in your images.
Top Tips On Controlling And Using Flare In Your Photographs
Lens flare can be immediately achieved by shooting into the sun. Simply permit the sunlight to hit the lens at the right angle. What you require to do here is to reroute the light so that rather of straight reaching the sensing unit it shows several times internally in the past hitting the sensing unit.
If you want to include some imagination, you can partly obstruct the natural light source. If you're using the sun as your light, that will be much more magical. But even for an indoor photoshoot, the partially blocked light coming through the window will still have the very same impact.
Flare Photography Tips
As soon as you have actually chosen a subject and placed it in the preferred position, begin shooting a series of test shots to discover out which angle will give the very best optical flares. Bear in mind that when recording lens flares with the sun as your light source, they'll change considerably and quickly as the sun constantly moves.
Keep in mind that when we say small aperture, we are referring to the actual size of the aperture, not the number itself. So a small aperture will represent a high f-stop number, such as f/22. At a little aperture, you will get a more detailed lens flare. Your aperture can affect the appearance of the lens flare.
What Is Lens Flare And How To Deal With It In Photography
And if your video camera is set to automatically pick the ISO, it will also immediately choose the shutter speed. This allows you to quickly switch between apertures and see the distinction it makes to your golden lens flares. When you shoot straight into a light source, your electronic camera will have a difficult time focusing and will blur background.
Apply one image with flares on another one you wish to get innovative with. Change the quantity of the texture impact, and utilize mix modes for more alternatives. This tool permits you to play with different colors of flares. If you love red flares or possibly wish to include a blue lens flare, just discover a suitable image on the internet and blend it with yours.
|
Lens Flare Tips For Creative Photos
You can get amazing pictures as an outcome of shooting into the sun + selective focus + shallow depth of field + lens flare. Follow these simple actions and you'll immediately get a top quality shot. The smaller sized the aperture, the sharper and clearer the flare effect. However utilizing a little aperture likewise suggests it will take more time to take the picture.
You can hold a reflector in your hand, hang it on a freestanding base, or location it on the ground. Using a reflector can be efficient if your design stays in the shade. It will assist in lightening up the design's face, making the image look more pleasing. So you also get a truly elegant flare in images.
What's Lens Flare? (How To Remove It)
When it comes to pictures, the cam flare impact has actually been thought about a bothersome flaw that harms photos and ought to be eliminated with making use of a lens hood. Simply like the bokeh result, the optical flare has ended up being popular amongst professional photographers for shooting individuals with intense lights.
youtube
It's likewise simple to attain; all you require is a source of bright light (the sun in our case) and a prepared model. The secret to getting incredible lens flares is in the positioning, particularly in the angle at which light bounces off the front element of your lens. Positioning yourself so that the sun has to do with 45 from the front element is an excellent starting point.
Flare Photography Tips
The size of the front component of your lens will contribute in the type of lens flare you achieve. Bigger lenses tend to create a soft haze, while smaller lenses supply clear rings and orbs of light. Explore your lenses, change the brightness, discover which offers the most eye-catching flare, and create images that leave everyone speechless.
Go out with your video camera and devices on a great day, discover the area you wish to photograph, and try to get lens flare using some basic pointers provided here. There are still cases when lens flare in photography is not preferable.
Understanding Lens Flare In Landscape Photography
You don't desire your topic to be rinsed by flare and end up being unrecognizable. You still have a great deal of imaginative freedom in your decision to consist of lens flare. That's why it's so important to take multiple shots whenever you decide to consist of lens flare as part of your structure.
If you have multiple shots, you can pick the very best, whether with or without the sun flare result. Shoot during the golden hour when the sun offers a dreamy, soft light. Eliminate the lens hood to ensure your cam will produce flares. Utilize an appropriate lens: large or extreme wide-angle.
Understanding Camera Lens Flare
While your first run through of this may take a while, after masking a couple of images this whole technique will take you less than a few minutes to do. Compare that to the difficult job of attempting to remove flare out of an image in post-processing. Not just does it conserve you time, it likewise increases the quality of your last images.
What's Lens Flare? (How To Remove It)
You might not observe those tiny water areas on your iPhone cam lens, but you will if they add to lens flare. Attempt cleansing your camera lens with a dry, lint-free fabric to make sure there are no beads, spots, or wetness developed. There are some fantastic image modifying apps that can help you get rid of areas, lines, and circles from lens flare after the reality.
0 notes
Text
How To Reduce Lens Flare In Your Photographs
At some point you've probably come across lens flare, that bright glaring light that sweeps into photos, triggering them to have a blurred, dappled appearance. Lens flare can occur when any brilliant, non-image forming light from the sun, or another light source strikes the front aspect of your lens.
While flare is often used deliberately as an artistic improvement, for many landscape professional photographers, it can be an unwanted addition in pictures and something that you'll frequently want to avoid or avoid. With this in mind, let's take an appearance at a few things that you can do to prevent flare in your landscape images.
Lens Flare: What You Need To Know
Among the easiest methods to assist eliminate lens style is by buying a lens hood to assist block direct sun rays from reaching your front aspect. As a reward, a lens hood will also safeguard your video camera from small knocks and dents. While many lenses feature a lens hood, if yours didn't, they are low-cost and easy to get ahold of.
If you're battling flare, another choice is to change your angle. Flare is triggered by direct light striking the sensing unit, so standing in the shade can help to prevent this from taking place. Furthermore, you could attempt angling your video camera in a different direction, so you're not shooting straight into the sun.
Understanding Lens Flare In Landscape Photography
Adjusting the focal length of your video camera can likewise help to get rid of lens flare. While merely zooming to a various focal length may not get rid of flare completely, typically, it can reduce undesirable sunspots. An unclean or smudged lens is more prone to lens flare.|Adjusting the focal length of your camera can also assist to eliminate lens flare. A dirty or smudged lens is more prone to lens flare.
To clean your lens, usage lens tissues or a microfiber cloth and begin wiping from the center working to the outside of the lens. Simply take care that there are no smidgens of grit in the cloth or on the lens itself, eliminate these with a blower or brush initially, to avoid polishing them into the lens and scratching it.
How To Reduce Lens Flare In Your Photographs
Specific equipment, such as prime lenses are less vulnerable to lens flare that others. One reason for this is since they have less internal parts for the light to distribute through. Additionally, coated filters, while more pricey than regular filters, are likewise less prone to lens flare than regular filters since they do not smudge as easily.
Of course, you could also edit out the lens flare in post processing. While it would be difficult to modify out the haze that typically accompanies lens flare, the shapes of light might be edited out quickly enough. Consider utilizing the brush tool or the spot recovery tool to cover up or clone out the spots.

Lens Flare In Photography: How To Deal With It
Lastly, while all of us understand that lens flare is typically unwanted in many images, in many cases it can be used to improve an image too.|Lastly, while we all understand that lens flare is frequently unwanted in lots of images, in some cases it can be used to boost an image. In reality, there's even a Photoshop filter that can assist you to place flare into your images. In a lot of landscape images, you'll wish to keep the flare to in one section of the composition, instead of enabling it to take over the entire image.
Electronic camera producers have actually used nano-crystal coatings in their styles to restrict ghosting and flare, but sadly, light flare is still a very genuine thing. To decrease light flares in your shots, consider following the suggestions. Shooting into the sun is a proven way to create unwanted lens flare. While flare can in some cases be utilized to fantastic impact, it's primarily to be avoided.
Understanding Camera Lens Flare
The hood serves as a kind of guard blocking any scattering light from striking the lens. The lens hood function is to avoid the sun from getting in your eyes, just as you would by placing your turn over your forehead. What is a lens hood for when you're out shooting? It'll protect your lens from any damage.
Side note: If you're utilizing filters on your lens, a lens hood might not fit over it. In that case, you can try using your hand to protect the lens from the sun's rays. Of course, you can get electronic camera flare with any lens. However prime lenses are significantly less susceptible to cam flare than zoom lenses.
Top Tips On Controlling And Using Flare In Your Photographs
Much better quality prime lenses are a much safer option if flare is an issue. Blocking your light is a simple method to prevent sun lens flare. Attempt using trees or perhaps mountains if you're shooting in these kinds of conditions and if you have enough light without it.
|
What Is Lens Flare And How To Avoid It
As a photographer, you need to understand light perfectly. You can do both unintentional and deliberate lens flare impacts. Some photographers like this due to the fact that it allows you to include some imagination to the shot. It all depends upon your shooting style and the result you desire to achieve. Lens flare in photography adds a touch of spice and uniqueness to every picture.
Anyhow, it is beneficial to know what causes lens flare so that you can learn how to prevent it or, sometimes, actively achieve this impact in your images. From a technical perspective, lens flare (or light flare) is a reflection of roaming light on your electronic camera lens, causing streaks of sunlight in addition to a decline in the contrast and saturation in your picture.
How To Prevent Lens Flare
All photographers have a love-hate relationship with types of lens flares. When you do not want them to appear, eliminating them is difficult. And when you do seek them out, they are difficult to produce and manage.
In addition, there are numerous lens flare types that can help include imagination to your work and stand apart from the rest. If you want to include lens flare to the image and get a really stylish impact, consider contending the golden hour. Sunrise and sunset are the best times of day to achieve the softest, most preferable natural light.
How Do Photographers Get Rid Of Unwanted Lens Flare
In photography, we call this period around sunrise and sunset, the golden hour. At these early and late hours, the sun is at the optimum angle for attaining quality lens flare, and light streaks and orbs are plainly noticeable in the image. Another benefit of shooting during the golden hour is that you do not have to remain in an uncomfortable yoga position to get the preferred impact, as you would during other times of the day.
What does a lens hood do? Typically, the anti-reflective hood safeguards your images from a flare. A lens hood is in fact an extremely essential thing, however not when it concerns shooting golden lens flares. By removing the lens hood, you'll most likely attain fairy light flares in your images.
Control Lens Flare For Portraits
Lens flare can be immediately achieved by shooting into the sun. Simply enable the sunshine to strike the lens at the right angle. What you require to do here is to reroute the light so that instead of straight reaching the sensor it shows numerous times internally before striking the sensing unit.
If you want to include some imagination, you can partly obstruct the natural light source. If you're using the sun as your source of light, that will be a lot more wonderful. But even for an indoor photoshoot, the partly blocked light coming through the window will still have the exact same result.
Top Tips On Controlling And Using Flare In Your Photographs
As soon as you've picked a subject and put it in the preferred position, start shooting a series of test shots to discover which angle will provide the finest optical flares. Bear in mind that when catching lens flares with the sun as your light source, they'll alter dramatically and rapidly as the sun constantly moves.
Keep in mind that when we say small aperture, we are describing the actual size of the aperture, not the number itself. So a little aperture will represent a high f-stop number, such as f/22. At a little aperture, you will get a more in-depth lens flare. Your aperture can affect the appearance of the lens flare.
Lens Flare In Photography: How To Deal With It
And if your electronic camera is set to automatically choose the ISO, it will likewise immediately choose the shutter speed. This allows you to rapidly change between apertures and see the difference it makes to your golden lens flares. When you shoot directly into a light, your cam will have a difficult time focusing and will blur background.
Apply one image with flares on another one you wish to get innovative with. Modification the amount of the texture result, and utilize mix modes for more choices. This tool permits you to have fun with various colors of flares. If you're fond of red flares or maybe want to include a blue lens flare, simply find an appropriate picture on the web and mix it with yours.
|
Flare Photography Tips
You can get unbelievable images as an outcome of shooting into the sun + selective focus + shallow depth of field + lens flare. Follow these simple steps and you'll immediately get a premium shot. The smaller the aperture, the sharper and clearer the flare effect. However using a little aperture likewise suggests it will take more time to take the picture.
You can hold a reflector in your hand, hang it on a freestanding base, or place it on the ground. Utilizing a reflector can be reliable if your model stays in the shade. It will aid in brightening the model's face, making the image look more pleasing. So you likewise get a really trendy flare in photos.
How To Prevent Lens Flare
When it pertains to portraits, the electronic camera flare impact has actually been thought about an annoying defect that damages pictures and should be gotten rid of with the use of a lens hood. Just like the bokeh result, the optical flare has ended up being popular among photographers for shooting people with bright light sources.
It's also easy to accomplish; all you need provides bright light (the sun in our case) and a ready model. The secret to getting incredible lens flares remains in the positioning, particularly in the angle at which light bounces off the front element of your lens. Placing yourself so that the sun is about 45 from the front element is a good beginning point.
How To Stop Lens Flare Ruining Your Photos
The size of the front aspect of your lens will play a function in the kind of lens flare you accomplish. Bigger lenses tend to produce a soft haze, while smaller lenses supply clear rings and orbs of light. Explore your lenses, change the brightness, discover which provides the most attention-grabbing flare, and develop images that leave everybody speechless.
Go out with your camera and equipment on a great day, discover the spot you wish to picture, and try to get lens flare utilizing some simple ideas given here. There are still cases when lens flare in photography is not preferable.
How To Prevent Lens Flare
You don't desire your topic to be rinsed by flare and end up being indistinguishable. You still have a lot of creative flexibility in your decision to include lens flare. That's why it's so essential to take multiple shots whenever you decide to consist of lens flare as part of your structure.
If you have multiple shots, you can pick the very best, whether with or without the sun flare effect. Shoot during the golden hour when the sun provides a dreamy, soft light. Remove the lens hood to guarantee your cam will produce flares. Use a correct lens: large or extreme wide-angle.
youtube
Lens Flare Tips For Creative Photos
While your first run through of this may take a while, after masking a couple of images this entire method will take you less than a few minutes to do. Compare that to the daunting task of trying to get rid of flare out of an image in post-processing. Not only does it save you time, it likewise increases the quality of your final images.
How Do Photographers Get Rid Of Unwanted Lens Flare
You might not see those tiny water spots on your iPhone camera lens, but you will if they contribute to lens flare. Try cleaning your cam lens with a dry, lint-free fabric to make sure there are no droplets, spots, or moisture developed. There are some wonderful image modifying apps that can assist you get rid of spots, lines, and circles from lens flare after the fact.
0 notes
Text
Reading Week: Language of the Lens Summary.
Key Optical Aspects of a Lens: PERSPECTIVE, COMPRESSION AND EXPANSION, SOFT/HARD, CONTRAST.
LENS AND THE FRAME
Lens Perspective: Deciding which lens is best for certain moments, e.g. using a wider lens to better match human periphery for a more realistic effect or using more tighter lenses to conceal certain elements of a scene.
FG/MG/BG: Translating a 3D image to a 2D screen, e.g. Dialogue scenes focussing on characters in midground, with blurred obstacles in the foreground and extras/MES in the background to create depth [referenced in class]. Avoiding flatness.

WIDE LENSES & EXPANSION
Wide Lenses: The field of view of a lens creates different psychological effects. Wide lenses make background objects appear further away, creating a more vast feeling location, with characters further spaced apart. Not often used for close ups because it creates distortion of the face*
Deep Focus: Ensuring everything in the frame is focussed i.e. FG/MG/BG, all elements are complementary. [Classic example: Welles, Citizen Kane]. Gives the impression of theatre to me, lets the viewer assess a frame with slightly more freedom of gaze.
Compression of Space: Using *Telephoto Lenses to make the background appear closer to a subject. Gives a more intense perspective of the character by tightening the space around them to create tension. In wider framing it can be used to emulate a detached abstract third person view, as the distance between objects reamins the same but the foreground and background are blurrier and compressed, giving the foreground more focus.
Could also be used in romance films to make two lovers appear closer in the frame and thus closer romantically. It can also make characters look more attractive.
Practically it can be used to create fight scenes as the movement of the background becomes more exaggerated with these lenses, making a more action filled camera movement. Shooting something in slow motion, with a long lens has the ultimate effect of making the movement seem faster.
Manipulating Perspective: Racking focus is probably the most common and obvious way to shift perspective, allows the director to reveal information or just redirect an audiences gaze as movement occurs. Another example: Using motivated light/telephoto lenses to create a desired subtext [Welles, Lady From Shanghai].

Shallow/Selective Focus: "Depth-of-field is a product of the sensor size, not whether it is film or video." Racking focus (see above).
Rules for Focus (- Need to be rehearsed prior)
Focus goes to the person speaking. It is permissible to rack
focus back and forth as they speak.
Focus goes to the person facing the camera or most prominent
in the frame.
Focus goes to the person experiencing the most dramatic or
emotional moment [not always the person speaking].
If unsure, the actor with the lowest call sheet number.
IMAGE CONTROL
Filtration: Diffusion filters are most common to create a softer image. Gel filters can also be used for changing a colour, less common. More practical filters exist like polarising filters/ND.
Important to consider lens flares. If they aren't desired you need matte boxes or grips can set up lensers to block unwanted light.
Soft Lenses: Sometimes a director/DOP may choose older softer lens with weaker optical coating to remove lens sharpness for a more dated style or a more soft gentle feel to a scene. [Saving Private Ryan].

LENS HEIGHT
High Angle: Often used to show a characters vulnerability. Could also be used to establish the height of a structure. GEV can provide a distant omnipotent viewpoint of a scene.
Low Angle: Emphasises the dominance of a subject. WEV/DEV can give a more extreme example of this effect.
Dutch/Canted Angle: Often used to create a sense of paranoia or anxiety through disorientation.
0 notes
Last Seen Blogs