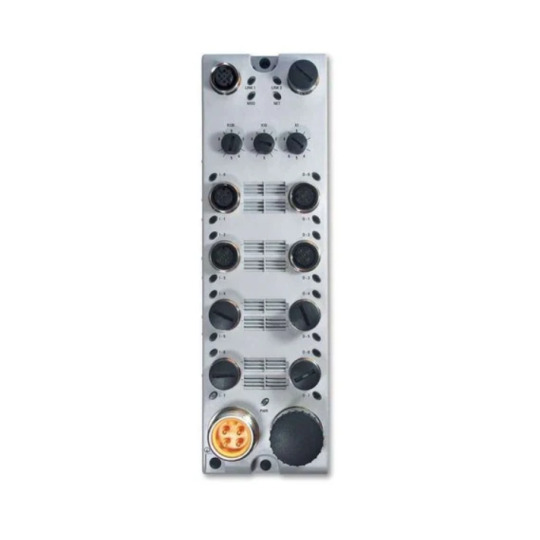
#Modular Terminal Blocks
Explore tagged Tumblr posts
Visit Tumblr Blog
Explore Tumblr blogs with no restrictions, modern design and the best experience.
Last Seen Tumblr Blogs


Fun Fact
Forty percent of Tumblr users are between the ages of 18 to 25.
Text
Modular terminal block, DIN terminal block, crimp terminal, terminal block wire
4 Position Wallnut Pushwire Terminal Block - Orange for Lighting Fixtures
0 notes
Text
https://www.futureelectronics.com/p/interconnect--connector-tools-contacts-accessories/dt06-2s-c015-te-connectivity-6076068
Wire housing, USB connectors, circular connector, socket adapter, terminal block
DT Series Contact Size 16 2 Way Gray Plug
#Connectors#Tooling and Accessories#DT06-2S-C015#TE Connectivity#Audio#pin#Wire to Cable Crimp Socket Contact#Crimp tools#Wire housing#USB#circular#socket adapter#terminal block#socket plug adapter#Data#modular jack
1 note
·
View note
Text
As I've mentioned before, the ultimate goal for my 68030 homebrew systems is to run a proper multi-user operating system. Some flavor of System V or BSD or Linux. I am not there yet. There is still so much I need to learn about programming in general and the intricacies of bringing up one of those systems, plus my hardware does not yet have the ability to support multiple users.
I've toyed with several ideas as to how to get the hardware to support multiple users, but ultimately decided to leverage what I have already. I have a fully-functional modular card-based system. I can easily build new cards to add the functionally I need. And to make development and debugging easier, I can make each card simple, dedicated to a single function.
The catch is I've already run into some stability issues putting everything on the main CPU bus. So what I really need is some kind of buffered peripheral bus I can use for developing the new I/O cards I'll need.

So that's where I started — a new 8-bit I/O bus card that properly buffers the data and address signals, breaks out some handy I/O select signals, and generates the appropriate bus cycle acknowledge signal with selectable wait states.
It wasn't without its problems of course. I made a few mistakes with the wait state generator and had to bodge a few signals.
With my new expansion bus apparently working I could set out on what I had really come here for — a quad serial port card.

I have it in my head that I would really like to run up to eight user terminals on this system. Two of these cards would get me to that point, but four is a good place to start.
I forgot to include the necessary UART clock in the schematic before laying out the board, so I had to deadbug one. I'm on a roll already with this project, I can tell.

So I get it all wired up, I fire up BASIC, attach a terminal to the first serial port, and get to testing.
Nothing comes across.
Step-by-step with the oscilloscope and logic analyzer, I verify my I/O select from the expansion bus card is working, the I/O block select on the UART card is working, the individual UART selects are working. I can even see the transmitted serial data coming out of the UART chip and through the RS-232 level shifter.
But nothing is showing up in the terminal.
I've got the terminal set for 9600bps, I've got my UART configured for 9600bps, but nothing comes across.
I did note something strange on the oscilloscope though. I could fairly easily lock onto the signal coming out of my new serial card, but the received data from the terminal wasn't showing up right. The received data just seemed so much faster than it should be.
Or maybe my card was slower than it should be.
Looking at the time division markings on the oscilloscope, it looked like each bit transmitted was around ... 1.25ms. Huh. 9600bps should be more like 0.1ms. This looks something more like 800bps.
I set the terminal for 800bps and got something, but it wasn't anything coherent, it was just garbage. I wrote a quick BASIC program to sweep through the UART baud rate generator's clock divider setting and output a string of number 5 for each setting until I got a string of 5s displaying on the terminal.
So then I tried sending "HELLORLD".
I got back "IEMMOSME".
No matter what I changed, I couldn't get anything more coherent than that. It was at least the right number of characters, and some of them were even right. It's just that some of them were ... off ... by one.
A quick review of the ASCII chart confirmed the problem.
'H' is hex 0x48, but 'I' is 0x49. 'E' is 0x45, but was coming across correctly.
... I have a stuck bit.
The lowest-order bit on my expansion bus is stuck high. That's why I wasn't seeing any coherent data on the terminal, and it also explains why I had to go hunting for a non-standard baud rate. The baud rate generator uses a 16-bit divisor to divide the input clock to the baud rate. When I tried to set the divisor to 0x0018 for 9600bps, it was getting set to 0x0118 — a difference of 256.
Another quick BASIC program to output the ASCII chart confirmed this was indeed the problem.

Each printed character was doubled, and every other one was missing.
That sounds like it could be a solder bridge. The UART chip has its D0 pin right beside a power input pin. A quick probe with the multimeter ruled that out.
Perhaps the oscilloscope would provide some insight.

The oscilloscope just raised more questions.
Not just D0, but actually several data bus pins would immediately shoot up to +5V as soon as the expansion bus card was selected. As far as the scope was concerned, it was an immediate transition from low to high (it looked no different even at the smallest timescale my scope can handle). If the UART was latching its input data within the first third of that waveform then it certainly could have seen a logic 1, but it doesn't make sense why only the one data pin would be reading high.
I thought maybe it could just be a bad bus transceiver. The 74HCT245 I had installed was old and a little slow for the job anyway, so I swapped it out for a newer & much faster 74ACT245.
And nothing changed.
It's possible the problem could be related to the expansion bus being left floating between accesses. I tacked on a resistor network to pull the bus down to ground when not active.

And nothing changed.
Well ... almost nothing.
This was right about the time that I noticed that while I was still getting the odd waveform on the scope, the output from the terminal was correct. It was no longer acting like I had a stuck bit and I was getting every letter.
Until I removed the scope probe.
Too much stray capacitance, maybe? That waveform does certainly look like a capacitor discharge curve.
I had used a ribbon cable I had laying around to for my expansion bus. It was long enough to support a few cards, but certainly not excessively so (not for these speeds at least). It was worth trying though. I swapped out the ribbon cable for one that was just barely long enough to connect the two cars.
And finally it worked.
Not only was I able to print the entire ASCII set, I could program the baud rate generator to any value I wanted and it worked as expected.
That was a weird one, and I'm still not sure what exactly happened. But I'm glad to have it working now. With my hardware confirmed working I can focus on software for it.
I've started writing a crude multi-user operating system of sorts. It's just enough to support cooperative multitasking for multiple terminals running BASIC simultaneously. It may not be System V or BSD or Linux, but I still think it would be pretty darn cool to have a line of terminals all wired up to this one machine, each running their own instance of BASIC.

22 notes
·
View notes
Text
Top 5 Must-Have Accessories for Every Electrical Panel

An electrical panel is the nerve center of any low-voltage power distribution system — responsible for delivering electricity safely and efficiently to various circuits. While the breakers and busbars often take the spotlight, it’s the accessories that enhance functionality, safety, monitoring, and reliability. Whether you’re an OEM, panel builder, or facility manager, equipping your panels with the right accessories can make all the difference.
In this article, we explore the top 5 must-have accessories for every electrical panel, based on industry best practices and real-world applications.
1. Cable Ducts and Trunking Systems
Purpose:
Cable ducts (also called wiring ducts or trunking) are essential for organizing and routing internal panel wiring. They prevent clutter, minimize the risk of short circuits, and make future maintenance more manageable.
Key Benefits:
· Improved safety through wire separation and insulation
· Neat, professional layout that meets electrical standards
· Ease of troubleshooting during inspections or servicing
Common Types:
· Slotted PVC ducts
· Halogen-free wiring ducts (for safety-critical environments)
· Flexible ducts for tight corners
Pro tip: Always select ducts with sufficient space for future cable additions — typically 20–30% free space is recommended.
2. Terminal Blocks and Marking Systems
Purpose:
Terminal blocks serve as connection points between internal and external wiring, ensuring a secure and modular setup. Combined with proper marking systems, they allow clear identification of circuits and functions.
Key Benefits:
· Safe and reliable wire termination
· Clear labeling for faster diagnostics
· Scalable for expansions and upgrades
Essential Variants:
· Feed-through terminal blocks
· Grounding terminals
· Fuse terminal blocks
· DIN-rail mounted marking strips or markers
Tip: Use color-coded terminals and labels according to IEC or local wiring codes for better clarity.
3. Panel Meters and Monitoring Devices
Purpose:
Modern electrical panels are not just passive distribution points — they are smart monitoring stations. Panel meters and current monitoring devices help track voltage, current, frequency, and power consumption.
Key Benefits:
· Real-time data for preventive maintenance
· Improved energy efficiency
· Quick response to load imbalance or faults
Popular Options:
· Digital voltmeters and ammeters
· Multi-function energy analyzers
· Load monitoring relays
Advanced choice: Consider smart monitoring units with Modbus or Ethernet communication for integration with BMS or SCADA systems.
4. Control and Signaling Devices
Purpose:
Control and signaling accessories like push buttons, selector switches, and pilot lights are critical for human-machine interaction. They allow operators to control, signal, and monitor operations within or from the front of the panel.
Key Benefits:
· Improved operator control and feedback
· Quick visual status indication
· Enhanced safety through emergency stop functions
Must-Have Components:
· Illuminated push buttons (Start/Stop)
· Pilot lights (for voltage presence or fault status)
· Emergency stop buttons
· Audible buzzers for alerts
Best Practice: Use IP65-rated front-panel devices for industrial environments to ensure durability and resistance to dust and moisture.
5. Surge Protection Devices (SPD)
Purpose:
Electrical surges — whether from lightning or switching operations — can damage panel components or connected equipment. SPDs protect against transient over voltages.
Key Benefits:
· Prevents costly downtime and equipment failure
· Increases the lifespan of electronics and controls
· Meets compliance with IEC 61643 or UL 1449 standards
Selection Tips:
· Choose SPDs according to system voltage (230V/400V) and risk level
· Type 1 for external surge protection, Type 2 for internal panel protection
· Consider combined Type 1+2 for comprehensive safety
Smart move: Pair SPDs with monitoring modules to track surge counts and SPD health.
Final Thoughts
When designing or upgrading your electrical panel, these five accessory categories are not just optional — they’re essential. They improve safety, functionality, compliance, and operational efficiency. Whether you’re building panels for industrial, commercial, or residential applications, investing in high-quality accessories will yield long-term benefits.
At Daleel Trading, we supply trusted low-voltage switchgear accessories from leading brands like Civaux — ensuring your panels are equipped with components that meet international standards.
Ready to upgrade your panel accessories?
Contact us today to learn more about our product range or request a consultation with our technical team.
6 notes
·
View notes
Text
Top Tips for Fast and Safe Panel Assembly

Panel assembly is a critical process in the electrical industry that directly impacts safety, performance, and efficiency. Whether you’re building distribution panels, control boards, or switchgear systems, the goal is to assemble panels quickly without compromising safety or quality. In this post, we’ll explore proven tips to help electricians, technicians, and panel builders streamline their workflow while ensuring compliance with safety standards.
1. Plan Thoroughly Before Assembly
Efficiency starts with preparation. Before you begin, study the layout drawings and electrical schematics carefully. Make a checklist of all the required components — circuit breakers, relays, terminal blocks, wire ducts, and enclosures.
· Pre-arrange tools and materials
· Verify component compatibility with design
· Identify high-priority tasks and dependencies
A well-organized plan saves time and avoids costly errors during installation.
2. Use Modular and Pre-Fabricated Components
Using modular devices like DIN-rail mountable circuit breakers or pre-assembled terminal blocks can reduce build time significantly.
Benefits:
· Faster mounting and wiring
· Easier upgrades and replacements
· Reduced wiring complexity
Where possible, opt for plug-and-play components or pre-terminated wiring kits.
3. Maintain a Clean and Organized Work Area
A tidy workstation boosts productivity and prevents mistakes. Use labeled bins, trays, and tool organizers to keep everything accessible.
· Segregate power, control, and signal cables
· Keep fasteners and tools sorted by size/type
· Remove scrap materials and wire offcuts regularly
A clean work area also improves safety and reduces trip hazards.
4. Label Components and Wiring Clearly
Proper labeling speeds up installation and future maintenance. Use heat-resistant wire markers or automated labeling machines for consistency.
Label:
· All wires at both ends
· Control devices (relays, contactors, timers)
· Terminal blocks and busbars
Clear identification is essential for testing, fault isolation, and panel certification.
5. Use the Right Torque Tools
Over- or under-tightened terminals can cause failures or fire risks. Always use torque screwdrivers or wrenches calibrated to the manufacturer’s specifications.
· Ensure solid mechanical and electrical contact
· Reduce the risk of arcing or overheating
· Document torque settings for quality records
Following torque guidelines is a best practice for long-term reliability.
6. Apply Effective Cable Management
Good cable routing isn’t just about aesthetics — it enhances performance and safety.
· Use wire ducts, cable ties, and strain reliefs
· Maintain minimum bend radii, especially for data cables
· Separate AC power and control wiring to avoid interference
Neatly routed cables simplify inspections and future modifications.
7. Conduct Final Visual and Electrical Inspection
Before energizing the panel:
· Inspect all terminations and mounting
· Check for exposed conductors or loose parts
· Test insulation resistance and continuity
· Verify grounding and bonding paths
A comprehensive inspection reduces commissioning delays and ensures compliance with safety standards.
8. Document As-Built Changes
If any field modifications were made during assembly, update the panel drawings and documentation to reflect those changes.
Include:
· Wiring diagrams
· Component serial numbers
· Torque test records
· Electrical test results
Accurate documentation is essential for maintenance, certification, and future upgrades.
9. Train Your Assembly Team
Skilled workers build faster and safer panels. Provide regular training on:
· Electrical safety and lockout/tagout
· Schematic interpretation
· Safe use of hand and power tools
· Latest panel-building standards (e.g., IEC, UL, NEC)
An informed and competent team minimizes rework and enhances build quality.
Final Thoughts
Fast panel assembly doesn’t mean cutting corners. By following structured processes, using the right tools, and prioritizing safety, you can consistently deliver high-quality panels — on time and within budget.
Looking for top-tier switchgear accessories and panel-building solutions? Contact us today to explore how we can support your projects with reliable, efficient, and cost-effective products.
5 notes
·
View notes
Text
digikey stop sending me modular terminal blocks challenge (infeasible) (i ordered 100x 1 ct and they’re sending me 100x 10ct and apparently i consumed their entire stock this way so this is the third or fourth batch they’ve sent me)
calling out @digikeycorp-blog even though they are deceased 😔
2 notes
·
View notes
Text
Turnstile Cooling Fans: Reliable Thermal Solutions for Continuous Operation

Ensuring 24/7 Performance in High-Traffic Areas
In busy environments such as transportation hubs, commercial buildings, and public facilities, turnstiles must operate continuously without failure. Constant operation leads to internal heat buildup, which can cause electronic components to age prematurely, system lag, or even sudden shutdowns—disrupting traffic flow and degrading user experience. The solution? A high-performance turnstile cooling fan designed to maintain stable, efficient heat dissipation.
Cooltron: Your Trusted Thermal Management Partner
With 26 years of expertise in thermal solutions, Cooltron offers custom-designed cooling modules tailored for a variety of turnstile systems. Powered by our proprietary turbo-boost air duct technology, our cooling fans feature aerospace-grade aluminum alloy frames and dual ball bearing construction for unmatched durability and performance.
Key Advantages of Cooltron Turnstile Cooling Fans:
High-Efficiency Cooling: Airflow speed up to 5.2 m/s, delivering 40% greater heat dissipation compared to conventional solutions.
Ultra-Quiet Operation: Low-noise design (<25dB) ensures minimal disturbance in public areas such as subways and office buildings.
Exceptional Durability: IP55-rated for dust and water resistance, with a certified lifespan exceeding 100,000 hours; capable of operating in extreme temperatures from -30°C to 80°C.
Proven Reliability Across Multiple Applications
Metro Stations at Peak Hours: Cooltron fans prevent motherboard overheating in turnstiles, ensuring smooth, delay-free operation even during heavy passenger flow.
Outdoor Tourist Attractions: Advanced design balances internal and external air pressure, blocking rainwater intrusion while accelerating air circulation under direct sunlight.
Smart Office Buildings: Seamlessly integrated with access control terminals, our silent cooling systems provide reliable thermal management to enhance the modern workplace experience.
Why Choose Cooltron Turnstile Cooling Fans?
Trusted by over 300 global transportation projects, Cooltron’s modular design allows for quick, tool-free installation or replacement within 5 minutes. The built-in intelligent temperature control chip monitors real-time device temperatures, automatically adjusting fan speed to balance cooling efficiency with power consumption—helping clients reduce operating and maintenance costs by 30%.
Get Started Today!
Visit www.cooltron.com to download the full product catalog or contact [email protected] for a customized thermal solution tailored to your turnstile systems.
0 notes
Text
Structural Innovation and Easy Installation Technologies in Power Socket Design

As smart homes, office automation, and industrial digitalization rapidly advance, the demand for user-friendly, efficient, and safe power sockets continues to grow. Traditional socket designs are no longer sufficient for fast-paced environments that require high reliability, ease of installation, and space optimization. This has driven innovation in both internal structure and external mounting mechanisms of modern power sockets.
This article explores key advancements in structural design and installation technologies of power sockets, focusing on terminal innovations, mounting bracket designs, and strategies to increase module density without increasing volume. We will also discuss real-world examples and applicable technologies for B2B manufacturers and system integrators.
1. Integrated vs. Modular Terminal Design: Which is More Efficient?
The terminal structure of a power socket directly determines wiring efficiency and stability. The two mainstream types are:
A. Integrated Terminal Block (One-Piece)
All terminals are integrated into a single housing.
Benefits: Shorter installation time. Reduced loose contacts. Lower resistance due to shorter conductive paths.
Limitations: Less flexible for modular replacement. May increase overall production complexity.
B. Modular Terminal Block (Multi-Part)
Each terminal is separately assembled or replaceable.
Benefits: Ideal for custom configurations. Easier to repair and replace.
Limitations: Longer assembly time. Risk of performance inconsistency.
2. Push-in Spring Connection Technology: Fast, Safe, Tool-Free Wiring
Compared to screw terminals, push-in spring terminals provide:
Quick installation: Simply push the stripped wire into the terminal.
Strong contact: Stainless steel or beryllium copper springs maintain pressure for years.
No need for torque tools: Reduces operator training and tool investment.
🔧 Case Example: A European power socket brand uses a push-in spring design that allows a full 5-gang module to be wired in under 30 seconds — 60% faster than screw terminals.
3. Quick-Mount Bracket Designs: Screw-Free, Time-Saving, and Reliable
In large-scale installations (e.g., hotels, office buildings), fast mounting systems dramatically reduce labor costs and error rates.
Key Innovations:
A. Snap-In Mounting Frame
Socket modules are inserted directly into wall plates with audible clicks.
Uses elastic clips or sliding locks for firm placement.
Ideal for drywall and modular building systems.
B. Screwless Embedded Mounting
Eliminates screw holes by using slide-in rail structures.
Allows easy front-facing maintenance or upgrades.
Common in premium wall systems and panel furniture.
C. Magnetic or Cam-Lock Fastening
Applies in high-end modular offices.
Enables tool-free repositioning.
🔧 Case Example: A Chinese manufacturer developed a double-locking quick-install bracket that passed 500N pull force tests, suitable for vibration-prone environments like rail stations.
4. Increasing Module Density Without Expanding Volume
Modern installations demand multi-functionality in limited space. Techniques include:
A. Vertical Layering of Internal PCB
Using 3D layout: control, relay, and detection circuits are stacked.
Reduces horizontal footprint while maintaining thermal separation.
B. Multi-Function Integration
Combining USB chargers, smart sensors, and energy monitors in one unit.
Example: A 55x55mm wall socket includes 2 USB-A ports, 1 USB-C PD port, and Wi-Fi controller.
C. High-Density Terminal Design
Dual-row spring contacts with insulation barriers allow up to 10 terminals in standard footprint.
Ensures safety spacing while maintaining compact size.
5. Material Innovation: Making Structural Compactness Possible
A. High-Performance Plastics:
Use of PA66, PC+ABS, and flame-retardant PBT with thin-wall molding tech.
Improves space efficiency without sacrificing insulation performance.
B. Conductive Material Optimization:
Use of laminated copper busbars.
Electroplated or stamped silver contact surfaces to reduce thickness.
6. Installation Aids and Engineering Enhancements
A. Color-coded Wiring Guides:
Reduces wiring errors during bulk installations.
Accelerates compliance with local electrical codes.
B. Pre-assembled Harnesses:
For standard socket layouts, pre-assembled wire bundles reduce on-site labor.
C. Tool-Assisted Plug-In Systems:
Modular rail sockets with plug-in interfaces (e.g., DIN-rail smart outlets) improve interchangeability.
7. Structural Testing and Validation

8. Conclusion: Towards Smarter, Faster, and Denser Power Socket Design
Power socket structure and installation are no longer just mechanical tasks—they are core parts of user experience, energy efficiency, and engineering cost control. Through structural innovation like push-in terminals, quick-install brackets, and functional integration in compact modules, manufacturers can deliver plug-and-play, space-saving, and intelligent power socket solutions.
Whether you're a B2B buyer, an engineering contractor, or a systems integrator, adopting these next-generation socket designs will result in lower maintenance costs, faster deployment, and greater end-user satisfaction.
en.dghongju.com
0 notes
Text
Mastering Terraform IAC Development: Your Path to Efficient Infrastructure Automation 🚀

If you’ve been dipping your toes into the DevOps pool, chances are you’ve heard whispers—maybe even shouts—about Infrastructure as Code (IaC). Among the many tools out there, Terraform has emerged as a favorite. Why? Because it makes infrastructure automation feel less like rocket science and more like a well-organized checklist.
In this blog, we’re going deep into the world of Terraform IAC Development, unpacking everything from what it is to why it matters—and how you can become confident using it, even if you’re just starting out.
And the best part? We’ll show you exactly where to begin your learning journey. (Hint: It’s right here—this Terraform IAC Development course could be your launchpad.)
What is Terraform, and Why Is It So Popular?
Let’s break it down simply.
Terraform is an open-source tool developed by HashiCorp that allows you to define and provision infrastructure using a high-level configuration language called HCL (HashiCorp Configuration Language). Think of it as a blueprint for your cloud resources.
Instead of manually clicking around dashboards or writing endless scripts, you write code that defines what you want your infrastructure to look like. Then Terraform builds it for you. It’s fast, reliable, and most importantly, repeatable.
What Makes Terraform Stand Out?
Multi-Cloud Support: It works with AWS, Azure, GCP, Kubernetes, and even on-premise solutions.
Declarative Syntax: You declare what you want, and Terraform figures out how to get there.
State Management: Terraform keeps track of what’s been deployed, making updates clean and precise.
Modular Approach: Reusable modules mean less repetitive code and more consistent deployments.
Real-Life Problems Terraform Solves
Still wondering what makes Terraform so essential? Here are a few scenarios:
You're working with a team and need identical dev, test, and production environments. Manually setting that up can lead to errors. With Terraform, it's as easy as duplicating a few lines of code.
You want to migrate your workloads between cloud providers. Terraform’s provider ecosystem makes this not just possible—but surprisingly smooth.
You need to spin up infrastructure automatically when new code is deployed. Terraform works beautifully with CI/CD tools like Jenkins, GitHub Actions, and GitLab CI.
Bottom line: Terraform reduces human error, increases efficiency, and gives teams a single source of truth for infrastructure.
The Building Blocks of Terraform IAC Development
Before you dive in, let’s understand the key components of Terraform IAC Development:
1. Providers
These are plugins that allow Terraform to communicate with different cloud platforms. AWS, Azure, GCP, and even third-party tools like GitHub or Datadog have Terraform providers.
2. Resources
These define what you're provisioning—like an EC2 instance, a database, or a DNS record.
3. Modules
Modules group your resources and make your code reusable and cleaner. Think of them like functions in programming.
4. Variables
Want flexibility? Variables allow you to change configurations without editing your core code.
5. State Files
This is Terraform’s memory. It keeps track of the current infrastructure so Terraform knows what needs to change during an update.
How to Get Started with Terraform IAC Development
You don’t need a PhD in Cloud Engineering to get started with Terraform. In fact, all you need is:
A basic understanding of how cloud platforms work (AWS, Azure, etc.)
A terminal (Mac, Linux, or even Windows with WSL)
A code editor (VS Code is a great choice)
And a clear learning path
We recommend starting with this hands-on, beginner-friendly course on Terraform IAC Development. It’s packed with real-world examples, clear explanations, and exercises that build muscle memory.
Top Benefits of Learning Terraform Today
✅ High Demand in the Job Market
DevOps engineers with Terraform experience are incredibly valuable. Companies are hungry for professionals who can deploy, manage, and scale infrastructure the right way.
✅ Automation = Efficiency
Imagine deploying an entire cloud environment with one command. That’s the power you get with Terraform.
✅ Open-Source Community Support
With thousands of contributors and resources, you’re never alone on your learning journey.
✅ Works Across Environments
Whether you’re a startup running on a single AWS region or a Fortune 500 with multi-cloud needs, Terraform scales with you.
Terraform in Action: Common Use Cases
Still not convinced? Let’s look at some real-world uses of Terraform:
🔹 Spinning Up Cloud Infrastructure for Dev/Test
Use Terraform to quickly set up a dev environment that mirrors production. Developers test in real conditions, bugs get caught early, and everyone’s happier.
🔹 Infrastructure Version Control
You wouldn’t deploy app code without Git. Why treat infrastructure any differently? With Terraform, your infra lives in code, can be peer-reviewed, and is version-controlled.
🔹 Disaster Recovery and Backups
By having your entire infrastructure as code, disaster recovery becomes as simple as redeploying from a repository.
🔹 Multi-Environment Consistency
Terraform ensures that dev, staging, and production environments are consistent—no more “it works on my machine” issues.
Pro Tips for Terraform IAC Success
Here are some insider tips from experienced Terraform users:
Use Modules Early: It makes your code scalable and readable.
Keep State Files Secure: Use remote backends like AWS S3 with state locking.
Integrate with CI/CD Pipelines: Automate everything—from provisioning to destruction.
Document Your Code: Use comments and naming conventions for clarity.
Lint and Validate: Tools like tflint and terraform validate keep your code clean.
Who Should Learn Terraform?
You might be thinking, “Is Terraform right for me?”
Here’s a quick checklist:
You're a DevOps engineer wanting to automate infrastructure.
You're a developer building cloud-native apps.
You're a sysadmin managing cloud or on-premise servers.
You're an aspiring cloud architect looking to understand modern infra tools.
If you nodded at any of the above, then learning Terraform is a smart career move.
What to Expect from a Great Terraform Course
Not all Terraform tutorials are created equal. A truly valuable course should:
Cover real-world scenarios, not just theory.
Offer hands-on labs and assignments.
Explain concepts in plain English, without jargon.
Be updated regularly with the latest Terraform versions.
Include lifetime access, because learning never stops.
Looking for all that in one place? Check out this complete course on Terraform IAC Development. It’s designed for beginners and pros alike.
Terraform vs Other IaC Tools
You might be wondering how Terraform stacks up against other tools like AWS CloudFormation, Ansible, or Pulumi.
Here’s a quick comparison: FeatureTerraformCloudFormationAnsiblePulumiMulti-Cloud✅ Yes❌ AWS-only✅ Yes✅ YesDeclarative Syntax✅ Yes✅ Yes❌ Imperative✅ Yes (but with code)Open Source✅ Yes❌ No✅ Yes✅ YesState Management✅ Yes✅ Yes❌ No✅ YesLanguageHCLJSON/YAMLYAMLPython/Go/TS
Terraform in the Real World: Career Paths and Projects
Let’s get practical. Once you know Terraform, what can you do?
🔧 Automate Cloud Deployments
Work in teams building and scaling AWS, Azure, or GCP infrastructure with a few lines of code.
🧰 Build CI/CD Pipelines
Use Terraform to provision resources automatically when code is pushed.
🔍 Improve Infrastructure Security
With clear, version-controlled code, vulnerabilities are easier to detect.
💼 Land DevOps Jobs
From startups to enterprises, employers love candidates who know how to manage infra with code.
Final Thoughts: The Future is Written in Code
Cloud computing isn’t slowing down. Neither is the need for automation. Terraform IAC Development is a skill that helps you stand out in the competitive world of DevOps, cloud, and infrastructure management.
You don’t need to be a cloud guru to get started. All it takes is the right guide, some curiosity, and a bit of practice. This Terraform IAC Development course is the perfect first step—and you can start learning today.
0 notes
Text
Ensuring Reliable Connections with Terminal Block PCBs and Mounting Hardware
When designing complex electronics, securing reliable connections between components is crucial. One of the best solutions to achieve this is through the use of terminal block PCBs. These specialized circuit boards are designed to allow efficient and secure connections between wires and your electronic circuits. By providing an easy way to attach wires to the PCB without complex soldering, terminal block PCBs are widely used in industries ranging from industrial automation to automotive systems.
A terminal block PCB usually comes with screw terminals, providing users the ability to quickly and securely connect multiple wires. This eliminates the risks associated with soldering, such as cold joints or loose connections, ensuring long-term functionality.
The Role of Terminal Block PCBs in Circuit Design
Terminal block PCBs play an essential role in modular systems where regular connections and disconnections are required. For example, in industrial equipment, automation systems, or home appliances, using terminal block PCBs offers flexibility and ease of maintenance. These boards allow you to connect and disconnect cables easily without disturbing the other components of the system, providing a solution for high-density applications where minimal space and maximum security are needed.
Another advantage is that these terminal block PCBs come in various forms, such as single or multi-row, and they can accommodate different wire sizes. This versatility allows for a wide range of applications, from low-voltage circuits to high-power systems.
PCB Mounting Hardware: An Essential Component for Stability
While terminal block PCBs are crucial for making secure wire connections, their stability and longevity heavily depend on the PCB board mounting hardware. Mounting hardware such as screws, standoffs, and clips, ensure the PCB remains firmly fixed in place within its designated enclosure or housing.
PCB board mounting hardware is essential for preventing physical damage to the circuit board. When a board is subjected to vibrations, physical impacts, or thermal expansion, it can cause misalignment, loose connections, or even short circuits. With the right mounting hardware, you ensure that the terminal block PCB is securely positioned and protected from such risks.
Moreover, mounting solutions are available in a variety of configurations, including fixed and adjustable standoffs, ensuring that the circuit board is properly aligned and spaced within its casing. This reduces the risk of damage from environmental factors such as temperature fluctuations, humidity, or physical impact, all of which can compromise the board’s functionality over time.
Benefits of Combining Terminal Block PCBs and Mounting Hardware
When you combine the use of terminal block PCBs with high-quality PCB mounting hardware, you get several key benefits:
Conclusion: Optimizing Your Design with Terminal Block PCBs and Mounting Hardware
The combination of terminal block PCBs and PCB mounting hardware allows designers to create more efficient, durable, and adaptable electronic systems. Whether you are working on industrial automation, consumer electronics, or automotive systems, the reliability and flexibility offered by these components make them an ideal choice for secure, long-lasting electronic connections.
By selecting high-quality terminal block PCBs and pairing them with appropriate PCB mounting hardware, engineers can ensure that their designs are robust and capable of withstanding the test of time and environmental challenges. The result is a more efficient design process and a product that delivers consistent performance.
0 notes
Text
Why WD Electronics Is the Ultimate Upgrade for Your Off-Road Ride
Every off-road enthusiast knows that power, performance, and dependability are crucial when it comes to pushing the boundaries of adventure. The electronic systems in your car must be able to survive the most difficult situations, whether you're driving over muddy roads, rough trails, or sand dunes. This is where Dig Rig Powersports' WD Electronics comes in, providing an excellent answer to all of your off-road electronics requirements.
Built for Rugged Terrain
Off-road vehicles such as ATVs, UTVs, and side-by-sides need electrical systems that are sophisticated, robust, and efficient in addition to having a lot of horsepower. This is precisely why WD Electronics was designed from the ground up. Battle-tested and trail-approved, WD Electronics devices are made to withstand mud, water, vibration, and extremely high or low temperatures. Everything you need to precisely manage your power distribution is available from WD Electronics, including reliable wiring harnesses, intelligent switch panels, and relay systems. Whether you're racing, hunting, carrying, or just having fun, this translates to fewer breakdowns, safer rides, and increased confidence.
Plug-and-Play Simplicity
The simplicity of installation is one of the main benefits of selecting WD Electronics. Dig Rig Powersports has created a plug-and-play system that is easy to set up and doesn't require much technological knowledge. This keeps professional-level outcomes while making upgrades more affordable for regular riders. To help you spend more time on the trail and less time in the garage, each kit includes waterproof components, premium terminals, connectors with clear labels, and comprehensive instructions.
Precision Power Management
For contemporary off-road vehicles, power management is essential. Your electrical load can easily overwhelm a stock setup with extra lighting, sound systems, GPS units, winches, and more. Intelligent relay panels and fuse blocks from WD Electronics guarantee the safe and effective supply of power to all of your accessories. You can now operate high-draw components without worrying about overload or failure thanks to this. Your car is safe thanks to clever layouts and circuit protection, and even in poor visibility situations, the user-friendly switch systems allow for smooth operation.
Customization at Its Best
Dig Rig Powersports is aware that every ride is unique. For this reason, WD Electronics designs its products to be flexible. There is a solution that may be customized to meet your demands, whether you need a basic switch panel replacement or a full car wiring overhaul.
You can construct your own unique system or select from pre-configured packages. Modular components make it simple to expand your setup and provide easy access to replacement parts. Your vehicle will be prepared for everything you throw at it thanks to this level of personalization.
Trusted by the Off-Road Community
Within the off-road scene, WD Electronics has rapidly established a reputation for dependability and creativity. Because the brand continuously performs well under duress, riders, racers, and builders have come to trust it.
Real riders who are aware of the difficulties in off-road settings make up their staff. Products that truly address issues in the real world are the result of this practical experience.
Built to Last
WD Electronics is an investment in longevity. To stop corrosion and failure, these systems are constructed with weatherproof connectors, marine-grade wire, and durable housings. WD Electronics will keep your equipment operating whether you're driving through a dust storm or stuck in a deluge.
For anyone who is serious about off-road performance, their components are a wise investment because they are also covered by robust warranties and the outstanding customer service of Dig Rig Powersports.
Why Choose Dig Rig Powersports?
Dig Rig Powersports is enthusiastic about the off-road lifestyle and is more than just a seller of parts. They have established themselves as a go-to resource for enthusiasts wishing to upgrade their vehicles thanks to their proficiency in off-road electronics.
Dig Rig Powersports makes it simple for anyone to update with confidence by providing comprehensive instructions, installation videos, and quick tech support. When you purchase from them, you're getting equipment that has been tried and tested by experts and is regarded as reliable by the community because of their dedication to quality and innovation.
Conclusion
Dig Rig Powersports' WD Electronics is the finest upgrade for people who expect the best from their machines. These off-road electronics systems raise the bar for dependability and performance thanks to their innovative design, robust construction, and unparalleled user-friendliness. Don't accept mediocrity. Use WD Electronics' strength, accuracy, and performance to upgrade your vehicle. Find out why so many riders rely on Dig Rig Powersports to fuel their journeys by visiting them today.
0 notes
Text
Understanding ReactJS – A Beginner-Friendly Guide

Introduction
ReactJS is widely used in various industries, including web development company in Bangalore, which leverage its capabilities to build dynamic and scalable applications.
Imagine a world where building a website is like assembling LEGO blocks—each block representing a specific function. This is exactly what ReactJS does! ReactJS is a powerful JavaScript library developed by Facebook that helps developers create interactive user interfaces in a structured, reusable, and efficient way. Since its release in 2013, it has become a game-changer in web development, powering applications like Facebook, Instagram, and Airbnb.
ReactJS has revolutionized front-end development by making it easier to build large-scale applications with reusable components and a seamless user experience. In this guide, we will break down ReactJS into simple, digestible concepts, making it easy for beginners to grasp and use effectively.
What is ReactJS?
ReactJS is an open-source JavaScript library designed to create fast and dynamic web applications. Unlike traditional HTML and JavaScript, where each change refreshes the entire webpage, React uses a smart feature called the Virtual DOM to update only the necessary parts. This significantly boosts performance and enhances user experience.
Why Choose ReactJS?
Component-Based Structure: Applications are built using reusable components, making development organized and efficient.
Lightning-Fast Performance: The virtual DOM optimizes updates, improving speed.
Strong Community & Support: With a vast developer community, solutions and tutorials are readily available.
SEO-Friendly: Unlike other JavaScript-heavy frameworks, React supports server-side rendering, improving search engine rankings.
Scalability: From small projects to large enterprise applications, React scales seamlessly.
Cross-Platform Development: React Native, a React-based framework, allows developers to build mobile applications using the same concepts.
Core Concepts of ReactJS
1. Components – The Building Blocks
Think of React components as small, reusable pieces of a website, just like individual LEGO pieces. A component can be a button, a form, or an entire page!
There are two types of components:
Functional Components – Simple, stateless components that return UI elements.
Class Components – More powerful components that can manage their own state and lifecycle events.
Components help in modular development, making it easier to maintain and scale applications.
2. JSX (JavaScript XML) – Writing HTML in JavaScript
React uses JSX, a special syntax that looks like HTML but works inside JavaScript. JSX makes UI code easier to read and write, reducing complexity and improving development speed.
3. Props – Passing Data Between Components
Props (short for properties) allow components to communicate with each other by passing data. They help in making components dynamic and reusable.
4. State – Managing Dynamic Data
State is used to store and manage data that can change over time. Unlike props, which are read-only, state can be updated dynamically. This makes applications more interactive and responsive.
5. Virtual DOM – The Secret Behind React’s Speed
Traditional web applications update the entire webpage when a change occurs. React, however, creates a Virtual DOM, a lightweight copy of the actual DOM. Instead of reloading everything, it updates only the changed elements, making applications incredibly fast.
Getting Started with ReactJS
Setting up a React project is simple. Follow these steps:
Install Node.js and npm: React requires Node.js, which comes with npm (Node Package Manager).
Create a React App: Open the terminal and run npx create-react-app my-app.
Navigate to the project folder: Use cd my-app.
Start the development server: Run npm start. Your app will open in the browser at http://localhost:3000/.
This setup creates a structured environment to build React applications efficiently.
Advanced React Features
1. React Hooks – Making Functional Components More Powerful
Hooks allow functional components to manage state and side effects. The useState hook is one of the most commonly used, replacing class components in many cases.
2. React Router – Handling Multiple Pages
React applications often need navigation between different pages. React Router enables this functionality without requiring full-page reloads, ensuring smooth transitions between components.
3. Redux – Managing Complex Application State
As applications grow, managing state becomes challenging. Redux is a popular library that helps manage state in a predictable and structured way, making applications easier to debug and maintain.
4. Context API – An Alternative to Redux
For applications that do not require a complex state management system, React provides the Context API. It allows data to be passed globally without the need for prop drilling, improving code efficiency.
5. Server-Side Rendering (SSR) – Improving Performance and SEO
React supports SSR, which allows content to be rendered on the server before being sent to the client. This enhances page speed, improves SEO, and ensures better user engagement.
Best Practices for React Development
Keep Components Small and Focused: Each component should have a single responsibility.
Use Functional Components and Hooks: They make code simpler and more readable.
Optimize Performance: Use techniques like lazy loading, memoization, and avoiding unnecessary re-renders.
Follow a Consistent Folder Structure: Organizing components, assets, and utilities properly improves maintainability.
Use Error Boundaries: They help in handling errors gracefully without breaking the entire application.
Write Clean and Reusable Code: Reusing components and avoiding redundant code improves efficiency.
Future of ReactJS
React continues to evolve with new features and improvements. Some trends shaping its future include:
Concurrent Mode: Improving performance by allowing multiple tasks to run simultaneously.
React Server Components: Enhancing server-side capabilities.
Better Developer Experience: With updates in developer tools and debugging features.
With strong community support and continuous updates, ReactJS remains a top choice for front-end development.
Conclusion
ReactJS is a powerful tool that makes web development easier, faster, and more efficient. With its component-based architecture, virtual DOM, and advanced features like hooks and routing, it’s no wonder that companies worldwide rely on it.
By learning React, you unlock the potential to create stunning, high-performance web applications. Whether you’re a beginner or an experienced developer, mastering ReactJS will open doors to countless opportunities in the tech world.
With its vast ecosystem, seamless integrations, and continuous improvements, ReactJS remains at the forefront of web development. If you're planning to dive into front-end development, ReactJS is the perfect technology to master.
Keywords: ReactJS, JavaScript, Web Development, UI Components, Virtual DOM, Front-End Development, React Hooks, Redux, Server-Side Rendering, React Router, Context API, Web Development Company in Bangalore
#ReactJS#WebDevelopment#JavaScript#FrontendDevelopment#ReactComponents#VirtualDOM#ReactHooks#WebDevelopmentCompany#BangaloreTech#SEO#UIUX#SoftwareDevelopment#Programming#Coding#ReactNative#TechTrends
0 notes
Text
Advanced Industrial Solutions for Enhanced Automation and Efficiency
Industrial automation continues to evolve, requiring cutting-edge solutions that enhance efficiency, safety, and performance. Companies seeking to optimize operations can benefit from high-performance components such as the Allen-Bradley 1732ES-IB8XOB8, Panduit FP6X88MTG, Dynamic Brake Resistor, and Armor Block I/O modules. These products deliver seamless integration, superior durability, and advanced safety features to meet the increasing demands of modern industrial environments.
Allen-Bradley 1732ES-IB8XOB8: Safety-Enhanced Ethernet I/O
The 1732ES-IB8XOB8 is a compact and robust ArmorBlock® safety I/O module, specifically designed for Ethernet/IP networks. Built to withstand harsh industrial conditions, this module ensures reliable distributed safety control with eight inputs and eight outputs. Its compact design and high-performance architecture make it ideal for automated manufacturing and process safety applications.

Key Features:
Integrated safety features to protect personnel and equipment
Ethernet/IP connectivity for real-time data exchange
IP67-rated enclosure for enhanced durability in challenging environments
Panduit FP6X88MTG: High-Performance CAT6A Modular Plug
For industrial and enterprise networking, the FP6X88MTG offers a field-terminable CAT6A modular plug that ensures high-speed, interference-free data transmission. Engineered for demanding network environments, it delivers secure connectivity with enhanced shielding to reduce crosstalk and electromagnetic interference.
Key Advantages:
Tool-free termination for quick and efficient installation
Superior signal integrity for high-speed data applications
Compatible with CAT6A cables, ensuring future-proof networking
Dynamic Brake Resistor: Efficient Energy Dissipation for Motion Control
To enhance motor braking performance, the Dynamic Brake Resistor provides effective energy dissipation, preventing overheating and ensuring smooth stopping in industrial machinery. Designed for high-power applications, this resistor is essential for systems utilizing variable frequency drives (VFDs) and servo motors.
Why It’s Essential:
Enhances braking efficiency by dissipating excess energy
Prevents overheating, protecting motor systems
Optimized for high-power industrial applications
Armor Block I/O: Rugged Distributed Control Solution
For efficient industrial automation, the Armor Block I/O module provides modular, distributed control capabilities with IP67-rated durability. Designed for on-machine applications, it eliminates the need for centralized control panels, reducing wiring complexity and increasing system reliability.
Top Benefits:
Decentralized control architecture for streamlined automation
Sealed housing protects against dust, moisture, and vibration
High-speed Ethernet/IP communication for real-time system response
Conclusion
With Allen-Bradley 1732ES-IB8XOB8, FP6X88MTG, Dynamic Brake Resistor, and Armor Block I/O, industrial facilities can enhance efficiency, safety, and system performance. These components offer reliable automation, robust connectivity, and optimized energy management, making them ideal for smart manufacturing and process automation.
0 notes
Text
The My Body Series: A Short Sci Fi Story
Trigger Warnings: Terminal diseases, suicide, self harm, and gore in the name of experimental art
Luthor Pax was a very talented artist. He had a way of bringing emotion to sculptures, most likely assisted by a doctorate in psychology he'd obtained when he was still considering becoming a therapist. He was especially interested in the idea of disassembly, internals, known to take apart engines and hang each component from wires so that it was held up in a similar way to an exploded illustration you'd find in a textbook. Luthor Pax was also dying. His brain was suffering catastrophic damage deep within, inaccessible by surgery or nanites. His paintings and sculptures stopped being of machines, but rather of organisms, disassembled in the same way. It went from animals to intelligent life. Fortunately, he never dissected a real organism. He thought that it would be excessively cruel. One day, Luthor died, leaving instructions to his apprentice, a synth by the name of A7.
A7 took Luthor's body and disassembled it, placing the parts in a massive block of resin, creating a strange display of body parts disconnected from each other, floating in roughly the place they should be, just scattered far apart. It was, of course, a highly disturbing artwork. it was titled 'My Body (Internals)', and it resulted in A7's arrest, though he was later released after it was verified that his actions were legal on Estuary, a planet in the backwater of the outer rim. All this gave A7 an idea. Synths like himself were used to seeing their own parts removed from their body, given their modular nature. In fact, one of Luthor's last experiments was to show synths the disassembled remains of a synth that never had an AI installed, and none were revolted by the sight. Those parts were reassembled into "My Body (Collection)", which was similar in design to "Internals'"
A7 went on to create a lot of other art. Surreal landscapes, strange machines, megastructures looming in the distance. And then, one night, he was found with his visor and AI core shielding removed, with a plasma scalpel plunged into his central processor. The woman who found him fled and looked for help, but by the time police arrived, A7 was gone. And then, a few weeks later, a new art piece was unveiled in the Farbanti Art Museum, in a restricted access gallery: "My Body (Disassembled)". A7's final experiment. He had one last question: if a synth knew that the disassembled parts, though in pristine condition, once belonged to a living synth, would it cause them distress? He wouldn't live to find out, but you have. And the verdict is..?
Well, it appears that some synths can, in fact, look at it neutrally. Even synths with high levels of empathy just don't react to it. A few synths would only be disturbed if they noticed the damage to the AI core. But most synths find it incredibly disturbing. It's a piece that makes a synth immediately aware of the fact that they don't have a gag reflex. It's something you can never unsee. If it's disturbing to you, it shakes you to your very core, traumatizes you. But if it's not, you'll appreciate it for what it is. A collection of parts. Perhaps you'll leave a flower for A7, and you'll move on. And it is a beautiful display of the inner workings of a synth. It's rare to see a synth's body in a way that allows you to examine their organs and how they relate to the whole. That's the beautiful and disturbing nature of the "My Body series".
0 notes
Text
Pin header cable
I like reading about Connectors, Tooling and Accessories, DT04-2P-E005, TE Connectivity, Pin header cable and Modular terminal blocks.
0 notes