#MySQL data migration
Explore tagged Tumblr posts
Visit Tumblr Blog
Explore Tumblr blogs with no restrictions, modern design and the best experience.
Last Seen Tumblr Blogs


Fun Fact
China blocked Tumblr because of pornography and censorship problems in 2013.
Text
VastEdge offers MySQL Cloud Migration services, enabling businesses to smoothly transition their MySQL databases to the cloud. Benefit from enhanced performance, scalability, and security with our expert migration solutions. Migrate your MySQL databases with minimal downtime and zero data loss.
#MySQL cloud migration#cloud database migration#VastEdge MySQL services#MySQL migration solutions#secure MySQL migration#cloud database performance#scalable cloud solutions#minimal downtime migration#MySQL cloud scalability#MySQL data migration
0 notes
Text

Transform Your Database Performance with Simple Logic!
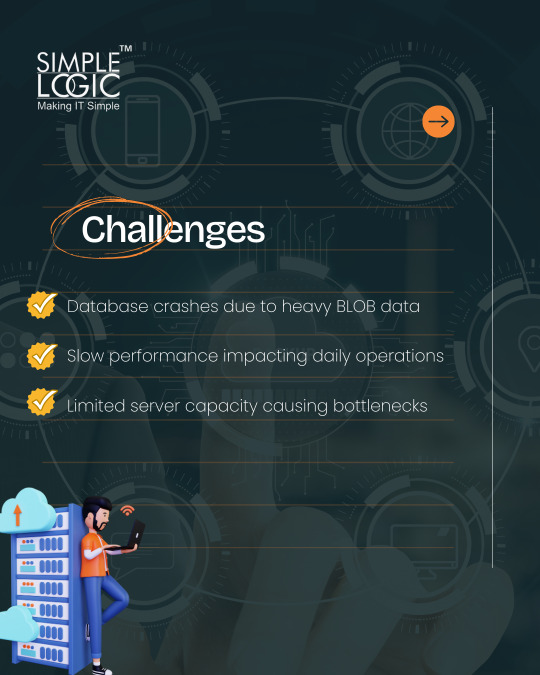
Challenges: Database crashes caused by heavy BLOB data 📉 Slow performance impacting daily operations ��� Limited server capacity leading to bottlenecks 🚧
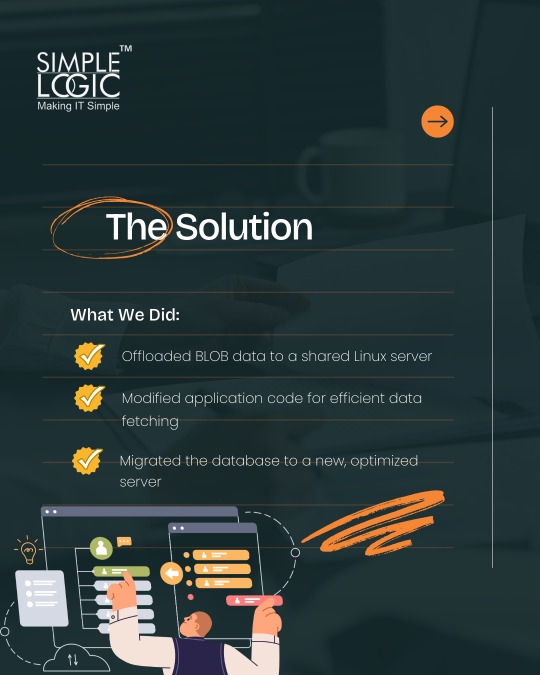
Our Solution: Offloaded BLOB data to a shared Linux server for improved efficiency 🖥️ Enhanced application code for seamless data fetching 🛠️ Migrated the database to a new, optimized server for better performance 🚀
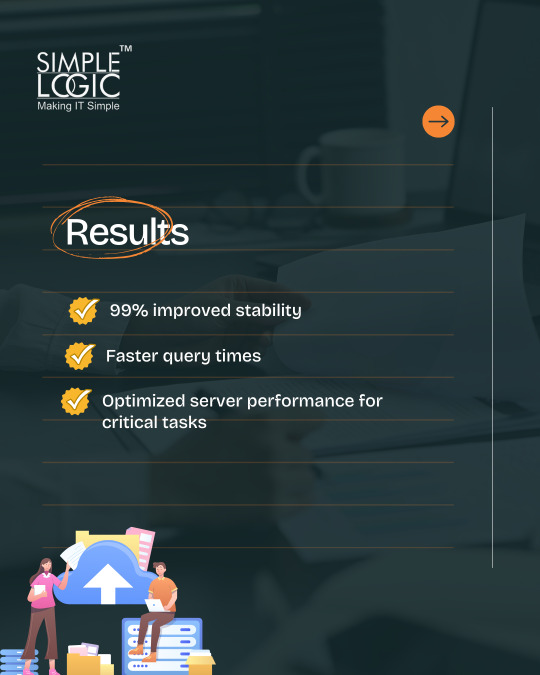
The Results: 99% improved stability ✨ Faster query times ⏩ Optimized server performance, enabling critical tasks to run smoothly 🎯
Say goodbye to database crashes and hello to high performance! Let Simple Logic elevate your database optimization today. 🌟
💻 Explore insights on the latest in #technology on our Blog Page 👉 https://simplelogic-it.com/blogs/
🚀 Ready for your next career move? Check out our #careers page for exciting opportunities 👉 https://simplelogic-it.com/careers/
👉 Contact us here: https://simplelogic-it.com/contact-us/
#Data#Database#DatabaseService#DataBasePerformance#SlowPerformance#Applications#DataFetching#Linux#Migration#BLOB#MySQL#Stability#SimpleLogicIT#MakingITSimple#MakeITSimple#SimpleLogic#ITServices#ITConsulting
0 notes
Text
Maximizing Performance: Tips for a Successful MySQL to Redshift Migration Using Ask On Data
Migrating your data from MySQL to Redshift can be a significant move for businesses looking to scale their data infrastructure, optimize query performance, and take advantage of advanced analytics capabilities. However, the process requires careful planning and execution to ensure a smooth transition. A well-executed MySQL to Redshift migration can lead to several notable benefits that can enhance your business's ability to make data-driven decisions.
Key Benefits of Migrating from MySQL to Redshift
Improved Query Performance
One of the main reasons for migrating from MySQL to Redshift is the need for enhanced query performance, particularly for complex analytical workloads. MySQL, being a transactional database, can struggle with running complex queries over large datasets. In contrast, Redshift is designed specifically for online analytical processing (OLAP), making it highly efficient for querying large volumes of data. By utilizing columnar storage and massively parallel processing (MPP), Redshift can execute queries much faster, improving performance for analytics, reporting, and real-time data analysis.
Enhanced Scalability
Redshift provides the ability to scale easily as your data volume grows. With MySQL, scaling often involves manual interventions, which can become time-consuming and resource-intensive. Redshift, however, allows for near-infinite scaling capabilities with its distributed architecture, meaning you can add more nodes as your data grows, ensuring that performance remains unaffected even as the amount of data expands.
Cost-Effective Storage and Processing
Redshift is optimized for cost-effective storage and processing of large datasets. The use of columnar storage, which allows for efficient storage and retrieval of data, enables you to store vast amounts of data at a fraction of the cost compared to traditional relational databases like MySQL. Additionally, Redshift’s pay-as-you-go pricing model means that businesses can pay only for the resources they use, leading to cost savings, especially when dealing with massive datasets.
Advanced Analytics Capabilities
Redshift integrates seamlessly with a wide range of analytics tools, including machine learning frameworks. By migrating your data from MySQL to Redshift, you unlock access to these advanced analytics capabilities, enabling your business to perform sophisticated analysis and gain deeper insights into your data. Redshift's built-in integrations with AWS services like SageMaker for machine learning, QuickSight for business intelligence, and AWS Glue for data transformation provide a robust ecosystem for developing data-driven strategies.
Seamless Integration with AWS Services
Another significant advantage of migrating your data to Redshift is its seamless integration with other AWS services. Redshift sits at the heart of the AWS ecosystem, making it easier to connect with various tools like S3 for data storage, Lambda for serverless computing, and DynamoDB for NoSQL workloads. This tight integration allows for a comprehensive and unified data infrastructure that streamlines workflows and enables businesses to leverage AWS's full potential for data processing, storage, and analytics.
How Ask On Data Helps with MySQL to Redshift Migration
Migrating your data from MySQL to Redshift is a complex process that requires careful planning and execution. This is where Ask On Data, an advanced data wrangling tool, can help. Ask On Data provides a user-friendly, AI-powered platform that simplifies the process of cleaning, transforming, and migrating data from MySQL to Redshift. With its intuitive interface and natural language processing (NLP) capabilities, Ask On Data allows businesses to quickly prepare and load their data into Redshift with minimal technical expertise.
Moreover, Ask On Data offers seamless integration with Redshift, ensuring that your data migration is smooth and efficient. Whether you are looking to migrate large datasets or simply perform routine data cleaning and transformation before migration, Ask On Data’s robust features allow for optimized data workflows, making your MySQL to Redshift migration faster, easier, and more accurate.
Conclusion
Migrating your data from MySQL to Redshift can significantly improve query performance, scalability, and cost-effectiveness, while also enabling advanced analytics and seamless integration with other AWS services. By leveraging the power of Ask On Data during your migration process, you can ensure a smoother, more efficient transition with minimal risk and maximum performance. Whether you are handling massive datasets or complex analytical workloads, Redshift, powered by Ask On Data, provides a comprehensive solution to meet your business’s evolving data needs.
0 notes
Text

Automated data movement plays a crucial role in unlocking the value of enterprise data.
Hear more from SQLOPS about how we can bring that capability to businesses of all sizes — while saving resources and improving efficiency
Also, visit our website for the best database management services & free data health & risk audits:-: https://www.sqlops.com/
#usa#DBA#dataprotectionlaw#Data#sqlops#atlanta#optimize#database#cloudmigration#GDPR#HIPAA#datapro#PCI#gov#compliances#warehouse#security#patriotact#cyberlaw#cybersecurity#microsoftsql
0 notes
Text
SysNotes devlog 1
Hiya! We're a web developer by trade and we wanted to build ourselves a web-app to manage our system and to get to know each other better. We thought it would be fun to make a sort of a devlog on this blog to show off the development! The working title of this project is SysNotes (but better ideas are welcome!)

What SysNotes is✅:
A place to store profiles of all of our parts
A tool to figure out who is in front
A way to explore our inner world
A private chat similar to PluralKit
A way to combine info about our system with info about our OCs etc as an all-encompassing "brain-world" management system
A personal and tailor-made tool made for our needs
What SysNotes is not❌:
A fronting tracker (we see no need for it in our system)
A social media where users can interact (but we're open to make it so if people are interested)
A public platform that can be used by others (we don't have much experience actually hosting web-apps, but will consider it if there is enough interest!)
An offline app
So if this sounds interesting to you, you can find the first devlog below the cut (it's a long one!):
(I have used word highlighting and emojis as it helps me read large chunks of text, I hope it's alright with y'all!)
Tech stack & setup (feel free to skip if you don't care!)
The project is set up using:
Database: MySQL 8.4.3
Language: PHP 8.3
Framework: Laravel 10 with Breeze (authentication and user accounts) and Livewire 3 (front end integration)
Styling: Tailwind v4
I tried to set up Laragon to easily run the backend, but I ran into issues so I'm just running "php artisan serve" for now and using Laragon to run the DB. Also I'm compiling styles in real time with "npm run dev". Speaking of the DB, I just migrated the default auth tables for now. I will be making app-related DB tables in the next devlog. The awesome thing about Laravel is its Breeze starter kit, which gives you fully functioning authentication and basic account management out of the box, as well as optional Livewire to integrate server-side processing into HTML in the sexiest way. This means that I could get all the boring stuff out of the way with one terminal command. Win!
Styling and layout (for the UI nerds - you can skip this too!)
I changed the default accent color from purple to orange (personal preference) and used an emoji as a placeholder for the logo. I actually kinda like the emoji AS a logo so I might keep it.
Laravel Breeze came with a basic dashboard page, which I expanded with a few containers for the different sections of the page. I made use of the components that come with Breeze to reuse code for buttons etc throughout the code, and made new components as the need arose. Man, I love clean code 😌
I liked the dotted default Laravel page background, so I added it to the dashboard to create the look of a bullet journal. I like the journal-type visuals for this project as it goes with the theme of a notebook/file. I found the code for it here.
I also added some placeholder menu items for the pages that I would like to have in the app - Profile, (Inner) World, Front Decider, and Chat.

i ran into an issue dynamically building Tailwind classes such as class="bg-{{$activeStatus['color']}}-400" - turns out dynamically-created classes aren't supported, even if they're constructed in the component rather than the blade file. You learn something new every day huh…

Also, coming from Tailwind v3, "ps-*" and "pe-*" were confusing to get used to since my muscle memory is "pl-*" and "pr-*" 😂
Feature 1: Profiles page - proof of concept
This is a page where each alter's profiles will be displayed. You can switch between the profiles by clicking on each person's name. The current profile is highlighted in the list using a pale orange colour.

The logic for the profiles functionality uses a Livewire component called Profiles, which loads profile data and passes it into the blade view to be displayed. It also handles logic such as switching between the profiles and formatting data. Currently, the data is hardcoded into the component using an associative array, but I will be converting it to use the database in the next devlog.

New profile (TBC)
You will be able to create new profiles on the same page (this is yet to be implemented). My vision is that the New Alter form will unfold under the button, and fold back up again once the form has been submitted.
Alter name, pronouns, status
The most interesting component here is the status, which is currently set to a hardcoded list of "active", "dormant", and "unknown". However, I envision this to be a customisable list where I can add new statuses to the list from a settings menu (yet to be implemented).


Alter image
I wanted the folder that contained alter images and other assets to be outside of my Laravel project, in the Pictures folder of my operating system. I wanted to do this so that I can back up the assets folder whenever I back up my Pictures folder lol (not for adding/deleting the files - this all happens through the app to maintain data integrity!). However, I learned that Laravel does not support that and it will not be able to see my files because they are external. I found a workaround by using symbolic links (symlinks) 🔗. Basically, they allow to have one folder of identical contents in more than one place. I ran "mklink /D [external path] [internal path]" to create the symlink between my Pictures folder and Laravel's internal assets folder, so that any files that I add to my Pictures folder automatically copy over to Laravel's folder. I changed a couple lines in filesystems.php to point to the symlinked folder:

And I was also getting a "404 file not found" error - I think the issue was because the port wasn't originally specified. I changed the base app URL to the localhost IP address in .env:

…And after all this messing around, it works!
(My Pictures folder)

(My Laravel storage)

(And here is Alice's photo displayed - dw I DO know Ibuki's actual name)

Alter description and history
The description and history fields support HTML, so I can format these fields however I like, and add custom features like tables and bullet point lists.

This is done by using blade's HTML preservation tags "{!! !!}" as opposed to the plain text tags "{{ }}".
(Here I define Alice's description contents)


(And here I insert them into the template)

Traits, likes, dislikes, front triggers
These are saved as separate lists and rendered as fun badges. These will be used in the Front Decider (anyone has a better name for it?? 🤔) tool to help me identify which alter "I" am as it's a big struggle for us. Front Decider will work similar to FlowCharty.

What next?
There's lots more things I want to do with SysNotes! But I will take it one step at a time - here is the plan for the next devlog:
Setting up database tables for the profile data
Adding the "New Profile" form so I can create alters from within the app
Adding ability to edit each field on the profile
I tried my best to explain my work process in a way that wold somewhat make sense to non-coders - if you have any feedback for the future format of these devlogs, let me know!
~~~~~~~~~~~~~~~~~~
Disclaimers:
I have not used AI in the making of this app and I do NOT support the Vibe Coding mind virus that is currently on the loose. Programming is a form of art, and I will defend manual coding until the day I die.
Any alter data found in the screenshots is dummy data that does not represent our actual system.
I will not be making the code publicly available until it is a bit more fleshed out, this so far is just a trial for a concept I had bouncing around my head over the weekend.
We are SYSCOURSE NEUTRAL! Please don't start fights under this post
#sysnotes devlog#plurality#plural system#did#osdd#programming#whoever is fronting is typing like a millenial i am so sorry#also when i say “i” its because i'm not sure who fronted this entire time!#our syskid came up with the idea but i can't feel them so who knows who actually coded it#this is why we need the front decider tool lol
24 notes
·
View notes
Text
Get Your Web Hosting on Cloud Nine with BigCloudy's Year-End Deals!

In today's ever-changing digital world, establishing a strong online presence is crucial for achieving success. Whether you are an experienced entrepreneur, an aspiring blogger, or someone who wants to share their passion with the world, BigCloudy is here to support you as your dependable and affordable web hosting partner.
BigCloudy has earned a solid reputation for delivering exceptional web hosting services at affordable prices. Our unwavering dedication to providing top-notch quality and ensuring customer satisfaction has gained us the trust of a diverse range of clients, including individual bloggers and well-established businesses.
We offer a comprehensive range of web hosting solutions that are tailored to meet your specific requirements and budget. Whether you need a simple platform for your personal website or a robust environment for your high-traffic e-commerce store, BigCloudy has the ideal solution for you.
BigCloudy's Year-End WordPress Hosting Deals!
Attention all aspiring bloggers! Celebrate with joy as BigCloudy's End-of-Year Sale presents an exceptional chance to kickstart your dream blog while enjoying remarkable discounts. Experience savings of up to 99% on your initial month of WordPress hosting, starting at an unbelievably low price of only $0.01!
1. Begin Small, Aspire Big
With our affordable introductory price, you can dip your toes into the world of blogging without straining your budget. Focus on crafting exceptional content while we handle the technical aspects seamlessly.
2. Effortless Integration with WordPress
Bid farewell to complex setups. BigCloudy offers a hassle-free one-click WordPress installation and automatic updates, allowing you to concentrate on what truly matters: writing and sharing your captivating stories.
3. Impeccable Security
We prioritize the safety of both you and your visitors. Enjoy peace of mind with free SSL certificates that encrypt your website, ensuring secure communication and fostering trust with your audience.
4. A Platform for Expanding Horizons
Whether you're a novice or already boast a devoted following, BigCloudy's WordPress hosting is tailored to grow alongside your blog. Our flexible plans and reliable resources are ready to accommodate your evolving needs.
5. Beyond Hosting
BigCloudy goes above and beyond by providing a comprehensive array of tools and resources to empower your success as a blogger. From informative tutorials and guides to round-the-clock support, we're here to support you at every step of your journey.
Here's what sets BigCloudy's WordPress hosting apart:
1 WordPress Site
Build a customized online presence with 1 WordPress Site, allowing you to showcase your content and engage your audience without any limitations.
Unlimited NVMe Storage
Bid farewell to storage limitations with Unlimited NVMe Storage, enabling you to store all your essential files, images, and data with complete peace of mind.
1 Email Address
Cultivate a professional image with 1 Email Address that is directly linked to your website domain.
1 MySQL Database
Efficiently and securely manage your website's information with 1 MySQL Database, ensuring smooth operations.
FREE SSL Certificate
Enhance website security and build trust with visitors by receiving a FREE SSL Certificate.
FREE WordPress Migrations
Seamlessly transfer your existing WordPress website to BigCloudy with our FREE WordPress Migrations service.
One-Click Staging
Test new features and updates safely and easily with our convenient One-Click Staging environment.
Daily Backups / Jetbackup
Protect your valuable data with automated Daily Backups / Jetbackup, allowing for instant restoration in case of any unexpected events.
99.9% Uptime Guarantee
Enjoy exceptional reliability and minimal downtime with our 99.9% Uptime Guarantee, ensuring your website is always accessible to your visitors.
30 Days Money-Back Guarantee
Experience the BigCloudy difference risk-free with our 30 Days Money-Back Guarantee.

BigCloudy's Secure and Optimized cPanel Hosting
Are you a developer, designer, or someone who desires complete control over your online presence? Look no further than BigCloudy's robust cPanel hosting solutions! We provide you with the ability to create the website you envision, without any limitations.
Embark on your journey at a fraction of the usual cost! With prices starting at just $0.01 for the first month, BigCloudy offers professional website management that is more accessible than ever before. This limited-time offer is the perfect chance to seize control of your online space and unleash your creative potential.
Discover the exceptional benefits of BigCloudy's cPanel hosting:
1. Unmatched user-friendliness
Experience effortless navigation through cPanel, even if you have limited technical expertise. Simplify website management with just a few clicks, allowing you to focus on creating remarkable content and expanding your online presence.
2. Exceptional performance
Our servers are optimized for speed and reliability, ensuring fast-loading and flawless performance for visitors worldwide. Rest easy knowing that your website is always accessible and running smoothly.
3. Robust security
We prioritize your website's security and have implemented advanced measures to safeguard it from malware, hackers, and other online threats. Your data and your visitors' information are always protected with BigCloudy.
4. Scalability
As your online needs grow, our web hosting plans can adapt to meet your evolving requirements. Choose from a range of cPanel hosting options and seamlessly upgrade your plan as your website traffic and resource demands increase.
5. Unparalleled control
With cPanel, you have complete control over every aspect of your website. Manage files, configure settings, install applications, and much more, all through a user-friendly interface.
Here's what you'll receive with our incredible CPanel hosting offer:
1 Website
Create your unique online space and let your brand shine.
5 Subdomains
Expand your online presence with additional websites under your main domain.
50 GB Disk Storage
Store all your content, images, and data with ample space.
500 GB Bandwidth
Accommodate high traffic volumes and ensure a smooth online experience for your visitors.
1 MySQL Database
Manage your website's data efficiently with a dedicated database.
1 Email Address
Stay connected with a professional email address associated with your website.
1 Core CPU
Enjoy reliable performance and the ability to handle moderate website traffic.
1 GB RAM
Ensure smooth website functionality with ample system resources.
2,00,000 Inode Limit
Host and manage a large number of files and folders effortlessly.
Daily Backups / Jetbackup
Protect your valuable data with automated daily backups for added peace of mind.
Conclusion
BigCloudy's Year-End Deals present a unique opportunity to enhance your online visibility and propel your website to unprecedented heights. With unparalleled dependability, extraordinary functionalities, and unbelievably affordable prices that will bring tears of happiness (in terms of hosting), there is no more opportune moment to embark on your online venture or elevate your current website to new horizons.
So come aboard the BigCloudy and prepare yourself for an exceptional web hosting experience like no other! Explore our website now and seize your Year-End Deal before it slips away!
5 notes
·
View notes
Text
Fast, Secure, and Affordable: Petalhost – The Best FluxBB Hosting Provider India
In the digital age, online forums continue to be a vital platform for building communities, encouraging discussions, and sharing knowledge. When it comes to hosting a lightweight and efficient forum software like FluxBB, choosing the right hosting provider is essential. That’s where Petalhost stands out as the top FluxBB Hosting Provider India, offering robust, secure, and scalable hosting solutions tailored for your community’s needs.
Why Choose FluxBB?
FluxBB is a fast, secure, and user-friendly forum application that is perfect for communities of all sizes. It is designed with simplicity and speed in mind, making it an excellent choice for users who want a clean interface and straightforward features without unnecessary bloat. Whether you're running a niche community, a technical forum, or a support hub, FluxBB delivers the performance and reliability users expect.
But to truly harness the potential of FluxBB, you need hosting that matches its performance—and that’s exactly what Petalhost delivers.
Petalhost: Your Ideal FluxBB Hosting Partner
As a dedicated FluxBB Hosting Provider India, Petalhost brings together speed, security, and affordability to give your forum the solid foundation it needs. Here’s why Petalhost is the smart choice for hosting your FluxBB forum:
1. Optimized Server Environment
Our servers are configured specifically to support FluxBB’s lightweight architecture. With PHP, MySQL, and Apache/Nginx pre-tuned for optimal performance, your forum runs faster and more efficiently than ever before.
2. One-Click Installation
Launching a FluxBB forum with Petalhost is incredibly easy. With our one-click installer available in the control panel, you can get your forum up and running in minutes—no technical expertise required.
3. High Uptime and Reliability
We understand that uptime is critical for community forums. Our infrastructure is designed to offer 99.9% uptime, ensuring your FluxBB forum is always accessible to your users.
4. 24/7 Expert Support
Whether you're setting up your forum or need technical help down the line, our support team is available 24/7 to assist you. From migration to configuration, we’re here to ensure you have a smooth experience.
5. Enhanced Security Features
Security is vital for any online community. Petalhost includes advanced security measures such as firewalls, DDoS protection, regular malware scans, and automated backups to keep your data safe and your users protected.
6. Scalable Plans to Fit Every Budget
Whether you're starting small or expecting your community to grow quickly, Petalhost has a hosting plan to match. We offer scalable solutions that can easily adapt to your traffic and storage needs—all at competitive prices.
7. Free Website Migration
Already have your FluxBB forum hosted elsewhere? No problem. Petalhost offers free migration services, making the switch smooth and hassle-free without any downtime.
Experience the Petalhost Advantage
Choosing the right FluxBB Hosting Provider India can make all the difference in the success of your forum. With Petalhost, you get a reliable partner who understands the unique needs of forum hosting. Our team works hard behind the scenes so you can focus on building your online community without worrying about technical issues.
Whether you're a developer, community manager, or hobbyist, Petalhost ensures your FluxBB forum runs smoothly, loads quickly, and stays secure around the clock. Join thousands of satisfied customers who trust Petalhost for their hosting needs.
Ready to Launch Your Forum?
Start your FluxBB journey today with Petalhost—India’s trusted name in forum hosting. Explore our affordable plans, experience industry-leading support, and enjoy the peace of mind that comes with hosting your forum with the best.
Petalhost – The most reliable FluxBB Hosting Provider India.
0 notes
Text
🎓 Oracle Certified. Results Guaranteed. 📊 Your Data Deserves a Professional Touch.
As an Oracle Certified Professional Database Administrator, I specialize in helping businesses:
✅ Convert SQL to clean, usable CSVs ✅ Map & normalize complex database structures ✅ Optimize performance & reduce query load ✅ Migrate databases with zero downtime ✅ Automate backend workflows
I’ve helped global clients on Upwork solve real data challenges — quickly, securely, and accurately.
🔧 Whether you’re dealing with Oracle, MySQL, PostgreSQL, or MS SQL Server, I bring deep expertise and real-world results.
🔗 View my Upwork profile & reviews: https://www.upwork.com/freelancers/~0109fd79bab72d0c53 📩 Need help with your database? Let’s talk!
🎯 Hashtags to Reach More Clients:
OracleDBA #CertifiedDatabaseAdministrator #SQLExpert #DatabaseMigration #UpworkFreelancer
OracleCertified #DataConsultant #BackendSolutions #FreelanceDBA #RemoteDeveloper
DatabaseOptimization #SQLToCSV #DatabaseMapping #FreelanceTech #UpworkPro
ETLExpert #DataCleanup #TechConsulting #DatabaseServices #HireDBA #UpworkTalent
1 note
·
View note
Text
What Are the Key Roles in IT Infrastructure Management?
In the modern business age of the digital world, IT Infrastructure Management is what keeps businesses running well. The task of IT infrastructure management entails efforts made in diverse areas, including the maintenance of network performance and protection of the data security. But what are exactly the major roles that make this ecosystem to be efficient?
What are the most central positions and responsibilities that propel up a reliable, safe and scalable IT infrastructure? Let us go over them at a time.

1. IT Infrastructure Manager
The head of the ladder is IT Infrastructure Manager. Such an individual is involved in planning, designing and executing the whole IT infrastructure of an organization. They make sure that every hardware, software, network as well as cloud-based service are in line with business objectives.
They have day to day tasks of budgeting IT resources, vendor selection, team management, decisions on upgrade or change of systems among others. They also liaise with the top level management to ensure that the roadmap of the infrastructure matches the growth strategies of the business.
2. Network Administrator
The Network Administrator has the duty to maintain the network systems in the company. These are local area networks (LAN), wide area networks (WAN), firewalls, routers and switches. It is their task to maintain continuous connectivity and solve any problems connected with network performance.
They can be found in the background, doing software update and vulnerability patching and management, and uptime. Businesses would be experiencing constant blackouts and jeopardized security without network administrators.
3. System Administrator
System Administrators are often mixed up with the network administrators, but they take more attention to the machines, operating systems and servers. They administer, modify, and guarantee stable performance of the computer systems particularly the multi-user computers such as servers.
General system admins are involved in a user setup, maintenance of accesses, backup, and system status. They also do software upgrades and repair hardware.
4. Database Administrator (DBA)
Most businesses rely on data in the world today. Database Administrator makes sure that vital information is stored, retrieved, and secured in a streamlined way. They keep up database platforms such as Oracle, SQL Server or MySQL, according to the requirements of the organization.
They clean up performances, configure backup and recovery procedures, apply data access control, and observe storage. They also collaborate with security departments in ensuring they guard information that may be accessed or lost without authorization.
5. Cloud Infrastructure Engineer
As other enterprises increasingly migrate to the cloud, the importance of a Cloud Infrastructure Engineer has gotten significant adoption. Such experts control systems operating in the cloud: AWS, Azure or Google Cloud.
They are to implement virtual servers, allow cloud security, cloud cost optimization, and deployment automation. They make sure that the organization takes advantage of the use of cloud technology in an effective way that neither performance nor security is affected.
6. IT Security Specialist
Cybersecurity is not an option anymore. IT Security Specialist is specialized in ensuring the safety of the infrastructure against threats, breach and vulnerability. They would watch networks and look at certain abnormal activities, use firewalls, and encrypt data, and they would make security audits frequently.
They also teach the other members of the team about good practices and adherence to regulations such as GDPR, HIPAA, etc.
7. Help Desk and Support Teams
The IT Support and Help Desk Teams are the ones who are frequently ignored, but at the same time, his workforce has to be part of the management of an infrastructure. The employees contact them when there are technical problems.
Such specialists are involved in password recovery, installation of software, and assistance. Proper support team eases productivity as issues are solved within the shortest time possible.
Conclusion
IT Infrastructure Management relies on all the diverse jobs dedicated to keep the system stable, performing well, and secure. All the job titles, be they network administrator, system admin, or cloud engineer are essential to guarantee a well-functioning technology foundation of an enterprise. The right team in the right place is not only important, but also necessary as the organizations keep on expanding and changing. Knowledge of these top functions will help businesses to organize their IT departments, prevent their outages, as well as being ready to meet any technological needs in future.
1 note
·
View note
Text
The ways to develop a website

You can approach various ways to developer website but depending on your goals, technical skill, and also resources. Below is an overview of the primary methods to develop a website:
1. Using website builders
Website builders are allow you to create website without calling knowledge and it is user friendly platform also. They offer pre designed templates and drag and drop interfaces.
• Popular tools: wordpress. com, shopify for eCommerce, wix, squarespace etc.
• How it works:
° You can choose the template that you want.
° Customize the design, layout and also content with using visual editor of the platform.
° You can also add forms, eCommerce, or blogs to plugins or also in built tools.
° Then publish the site with hosting that provided by the platform.
• Pros:
° No coding required and it is beginner friendly.
° Fast setup and development.
° Hosting, security and also updates are included.
• Cons:
°Compared to coding it have limited customisation.
° Monthly subscription costs.
° Migrating can be challenging because of platform dependency.
2. Content management system(CMS)
It require minimal coding and it allows you to manage website content efficiently with the customizable themes and plugins.
• Popular tools: wordpress. org, Joomla, drupal
• How it works:
° Install the CMS on a web server.
° With the basic coding or in built tool, you can select a theme and customize.
° To add functionality you can use plugins.
° Then you can manage content through dashboard.
• Pros:
° It is flexible and scalable and also it have thousands of themes and plugins.
° Provide community support and resources.
° It is useful for portfolios or blogs and also Complex sites.
• Cons:
° You should require some technical knowledge for the set up and maintenance.
° It have hosting and domain cost.
° It need security updates as also backups.
3. Coding from scratch (custom development)
Build a website with the raw code, it can give you complete control over design and functionality.
• Technologies:
° Frontend: HTML, CSS, JavaScript.
° Backend: python, PHP, Ruby, and node. JS
° Database: MySQL, mongoDB,postgreSQL.
° Tools: code editor, hosting, version control.
• How it works:
° You can design the site structure and visuals by using HTML/ CSS/ or JavaScript.
° For dynamic features build back end logic.
° You can connect to a database for data storage.
• Pros:
° Offers full customisation and flexibility.
° Unique functionality and also optimized performance.
° No platform restrictions.
• Cons:
° It requires coding expertise.
° Costly and also time intensive.
° Require ongoing maintenance such as security, updates.
4. Static site generator
It can create fast, and also secure website by pre rendering HTML files. It is useful for Blogs, or portfolios.
• Popular tools: Hugo, Jekyll, Next. js.
• How it works:
° You can write content in markdown or also similar format.
° Use template to generate static HTML, CSS, or JavaScript files.
° Use hosting platform like netlify,or vercel.
• Pros:
° It is fast and Secure and no server side processing.
° It provide free or low cost hosting.
° Easy to scale.
• Cons:
° It has Limited functionality.
° It required some technical knowledge.
5. Headless CMS with frontend frameworks
A headless CMS can provide a backend for content management with the conctent frontend for flexibility.
• Popular tools:
° Headless CMS: Strapy, contentful etc.
° Frontend framework: React, Vue. js etc
• How it works:
° To manage content via APIs, use headless CMS.
° With JavaScript framework built a custom frontend.
° To display the dynamic content connect both via APIs.
• Pros:
° Very much flexible and scalable.
° Allowing reuse across platforms such as web, mobile.
° Modern and also performant.
• Cons:
° It require coding skill and also familiarity with APIs.
° The setup can be complex.
6. Hiring a developer or agency
If you don't have time or lack of Technical skill, you can you can hire developer or agency.
• How it work:
° For custom development you can higher freelancers or agencies.
° They can provide your requirement such as design , features, and budget.
° In collaborate on design and functionality then launch the website.
• Pros:
° They provide professional result with your needs.
° Save time.
• Cons:
° Cost can be higher.
° Depend on third parties for maintenance.
7. Low code platforms
Low code platforms fill the gap between no code Builders and custom coding. And they offering visual development with the coding flexibility.
• Popular tools: bubble, Adalo, Outsystems.
• How it works:
° To design and configure the site, use Visual interface.
° And some custom code for specific features.
° Use built in or external hosting.
• Pros:
° It is faster than coding from scratch.
° You can offer more customizable than website Builders.
• Cons:
° Learning curve for advanced features.
° Require subscription or hosting cost.
Choosing the right method
• Beginners: if you are a beginner you can start the with the website Builders or wordpress.
• Budget conscious: if you are conscious about your budget you can use static site generators or also free CMS options.
• Developers: opt for custom coding or headless CMS for whole control.
• Businesses: for businesses, it is good to consider hiring professionals or using scalable CMS platform.
If you are looking for a website development with design, it is smart to work with an experienced agency. HollyMinds Technologies is a great choice, because they are the best website development company in Pune, and they make websites that are perfectly coded and structured to stand the test of time. The algorithms are set to bring visitors from across the globe. A structured website with right content, can bring more visitors to your business.
1 note
·
View note
Text
A Complete Guide to Data Conversion: Types, Examples & Consultant Insights

Data conversion is a crucial process in today’s digital transformation landscape, enabling seamless migration from legacy systems to modern platforms. It involves restructuring data across formats, databases, and applications—such as converting CSV to XLSX or migrating from Oracle to MySQL. Industries like healthcare, retail, and finance rely on accurate data conversion for operational continuity. A professional data conversion consultant ensures structured planning, validation, security compliance, and post-migration support. By following best practices like data backup, cleansing, and rigorous testing, businesses can streamline transitions, reduce risks, and maintain data integrity across cloud platforms, CRMs, and integrated software environments.
Read More
0 notes
Text
Simple Logic migrated a database from MSSQL to MySQL, achieving cost savings, better performance, and enhanced security with Linux support and open-source flexibility. 🚀 Challenges: High licensing costs with MSSQL💸 Limited Linux support, creating compatibility issues🐧 Our Solution: Seamlessly migrated all data from MSSQL to MYSQL🚛 Rewrote stored procedures and adapted them for MYSQL compatibility🔧 Efficiently transitioned sequences to ensure data consistency📜 Enabled significant cost savings by moving to an open-source database💰 The Results: Enhanced database performance and scalability🚀 Improved security and robust Linux support🛡️ Open-source flexibility, reducing dependency on proprietary systems🔓 Ready to transform your database infrastructure? Partner with Simple Logic for reliable migration services! 🎯 💻 Explore insights on the latest in #technology on our Blog Page 👉 https://simplelogic-it.com/blogs/ 🚀 Ready for your next career move? Check out our #careers page for exciting opportunities 👉 https://simplelogic-it.com/careers/ 👉 Contact us here: https://simplelogic-it.com/contact-us/
#MSSQL#SQL#MySQL#Migration#Linux#OpenSource#Data#Database#Scalability#LinixSupport#Flexibility#Systems#DatabaseIngrastructure#MigrationServices#SimpleLogicIT#MakingITSimple#MakeITSimple#SimpleLogic#ITServices#ITConsulting
1 note
·
View note
Text
Seamlessly MySQL to Redshift Migration with Ask On Data
MySQL to Redshift migration is a critical component for businesses looking to scale their data infrastructure. As organizations grow, they often need to transition from traditional relational databases like MySQL to more powerful cloud data warehouses like Amazon Redshift to handle larger datasets, improve performance, and enable real-time analytics. The migration process can be complex, but with the right tools, it becomes much more manageable. Ask On Data is a tool designed to streamline the data wrangling and migration process, helping businesses move from MySQL to Redshift effortlessly.
Why Migrate from MySQL to Redshift?
MySQL, a widely-used relational database management system (RDBMS), is excellent for managing structured data, especially for small to medium-sized applications. However, as the volume of data increases, MySQL can struggle with performance and scalability. This is where Amazon Redshift, a fully managed cloud-based data warehouse, comes into play. Redshift offers powerful query performance, massive scalability, and robust integration with other AWS services.
Redshift is built specifically for analytics, and it supports parallel processing, which enables faster query execution on large datasets. The transition from MySQL to Redshift allows businesses to run complex queries, gain insights from large volumes of data, and perform advanced analytics without compromising performance.
The Migration Process: Challenges and Solutions
Migrating from MySQL to Redshift is not a one-click operation. It requires careful planning, data transformation, and validation. Some of the primary challenges include:
Data Compatibility: MySQL and Redshift have different data models and structures. MySQL is an OLTP (Online Transaction Processing) system optimized for transactional queries, while Redshift is an OLAP (Online Analytical Processing) system optimized for read-heavy, analytical queries. The differences in how data is stored, indexed, and accessed must be addressed during migration.
Data Transformation: MySQL’s schema may need to be restructured to fit Redshift’s columnar storage format. Data types and table structures may also need adjustments, as Redshift uses specific data types optimized for analytical workloads.
Data Volume: Moving large volumes of data from MySQL to Redshift can take time and resources. A well-thought-out migration strategy is essential to minimize downtime and ensure the integrity of the data.
Testing and Validation: Post-migration, it is crucial to test and validate the data to ensure everything is accurately transferred, and the queries in Redshift return the expected results.
How Ask On Data Eases the Migration Process
Ask On Data is a powerful tool designed to assist with data wrangling and migration tasks. The tool simplifies the complex process of transitioning from MySQL to Redshift by offering several key features:
Data Preparation and Wrangling: Before migration, data often needs cleaning and transformation. Ask On Data makes it easy to prepare your data by handling missing values, eliminating duplicates, and ensuring consistency across datasets. It also provides automated data profiling to ensure data quality before migration.
Schema Mapping and Transformation: Ask On Data supports schema mapping, helping you seamlessly convert MySQL schemas into Redshift-compatible structures. The tool automatically maps data types, handles column transformations, and generates the necessary scripts to create tables in Redshift.
Efficient Data Loading: Ask On Data simplifies the process of transferring large volumes of data from MySQL to Redshift. With support for bulk data loading and parallel processing, the tool ensures that the migration happens swiftly with minimal impact on production systems.
Error Handling and Monitoring: Migration can be prone to errors, especially when dealing with large datasets. Ask On Data offers built-in error handling and monitoring features to track the progress of the migration and troubleshoot any issues that arise.
Post-Migration Validation: Once the migration is complete, Ask On Data helps validate the data by comparing the original data in MySQL with the migrated data in Redshift. It ensures that data integrity is maintained and that all queries return accurate results.
Conclusion
Migrating from MySQL to Redshift can significantly improve the performance and scalability of your data infrastructure. While the migration process can be complex, tools like Ask On Data can simplify it by automating many of the steps involved. From data wrangling to schema transformation and data validation, Ask On Data provides a comprehensive solution for seamless migration. By leveraging this tool, businesses can focus on analyzing their data, rather than getting bogged down in the technicalities of migration, ensuring a smooth and efficient transition to Redshift.
0 notes
Text
SmartEnd CMS Nulled Script 10.0.4

Unlock the Power of SmartEnd CMS Nulled Script – Download for Free If you're looking for a dynamic and robust content management system that streamlines your development process and enhances your project efficiency, then SmartEnd CMS Nulled Script is exactly what you need. Designed for developers and digital creators who value power, flexibility, and intuitive interfaces, this script delivers high-performance capabilities without the hassle of building a CMS from scratch. Best of all, you can download it completely free from our website. What Is SmartEnd CMS Nulled Script? SmartEnd CMS is a Laravel-based admin dashboard and content management system built with clean code architecture, modular components, and a sleek modern interface. This script empowers developers to manage website content, media, and user roles seamlessly through a smart and responsive admin panel. Whether you're building a blog, corporate website, or custom web app, SmartEnd offers a quick-start solution to get your project running effortlessly. Technical Specifications Framework: Laravel 8+ Front-End: Bootstrap 4, jQuery, and FontAwesome Database: MySQL Multi-Language Support: Yes Responsive Design: Mobile-friendly interface Authentication: Role-based access control Key Features and Benefits of SmartEnd CMS Nulled Script The Nulled Script isn’t just another content manager—it’s a complete powerhouse that simplifies your development cycle. Here are some of its standout features: 1. User-Friendly Dashboard The admin panel is intuitive, clean, and highly responsive. Whether you're managing pages, posts, or user accounts, every feature is just a few clicks away. 2. Role Management System Assign different access levels to different users. From admin to editor to viewer, the built-in role manager keeps your data secure and structured. 3. Media Manager SmartEnd includes a dedicated file manager that allows you to upload, organize, and embed media files seamlessly across your site. 4. SEO Tools Optimize your content with meta tags, slugs, and SEO settings directly from the dashboard—no plugins required. 5. API-Ready Architecture Develop custom mobile or third-party applications with ease using the RESTful API support provided by SmartEnd CMS. Ideal Use Cases for SmartEnd CMS Script Whether you're a solo freelancer or part of a development agency, SmartEnd adapts to your needs. Here’s how you can leverage its capabilities: Corporate Websites: Build scalable and customizable websites for clients. Portfolios and Blogs: Display your work and ideas with flexible post types. Content Portals: Manage and publish multimedia content effectively. Startup Dashboards: Launch your MVP quickly with pre-built admin tools. How to Install SmartEnd CMS Nulled Script Setting up SmartEnd CMS Nulled Script is quick and straightforward. Follow these simple steps: Download the SmartEnd CMS Nulled Script from our website. Upload the script files to your hosting environment. Create a new MySQL database and update the .env configuration file. Run composer install to install necessary dependencies. Set permissions for storage and bootstrap/cache directories. Execute the php artisan migrate and php artisan db:seed commands. Access the admin dashboard via /admin and start customizing! Frequently Asked Questions Is SmartEnd CMS Nulled Script safe to use? Yes, we provide a clean and verified version of the script that has been tested for security and performance. Always download from trusted sources like our website to ensure safety. Can I use this script for commercial projects? Absolutely. The script is flexible and adaptable for commercial and personal use. You can modify it to suit your client or business requirements. Will I get updates? As this is a nulled version, automatic updates are not supported. However, we regularly update our repository with the latest versions, so be sure to check back often. Download SmartEnd CMS Nulled Script Now! Don’t miss out on this powerful, free CMS solution.
Download SmartEnd CMS today and experience the ease of modern web development without licensing fees or limitations. Our platform also offers a variety of free resources to support your journey. If you love SmartEnd, you might also be interested in the avada nulled theme for premium design capabilities. Looking for even more scripts and themes? Visit pro nulled to explore a vast library of premium tools—all available for free download.
0 notes
Text
U.S. Cloud DBaaS Market Set for Explosive Growth Amid Digital Transformation Through 2032
Cloud Database And DBaaS Market was valued at USD 17.51 billion in 2023 and is expected to reach USD 77.65 billion by 2032, growing at a CAGR of 18.07% from 2024-2032.
Cloud Database and DBaaS Market is witnessing accelerated growth as organizations prioritize scalability, flexibility, and real-time data access. With the surge in digital transformation, U.S.-based enterprises across industries—from fintech to healthcare—are shifting from traditional databases to cloud-native solutions that offer seamless performance and cost efficiency.
U.S. Cloud Database & DBaaS Market Sees Robust Growth Amid Surge in Enterprise Cloud Adoption
U.S. Cloud Database And DBaaS Market was valued at USD 4.80 billion in 2023 and is expected to reach USD 21.00 billion by 2032, growing at a CAGR of 17.82% from 2024-2032.
Cloud Database and DBaaS Market continues to evolve with strong momentum in the USA, driven by increasing demand for managed services, reduced infrastructure costs, and the rise of multi-cloud environments. As data volumes expand and applications require high availability, cloud database platforms are emerging as strategic assets for modern enterprises.
Get Sample Copy of This Report: https://www.snsinsider.com/sample-request/6586
Market Keyplayers:
Google LLC (Cloud SQL, BigQuery)
Nutanix (Era, Nutanix Database Service)
Oracle Corporation (Autonomous Database, Exadata Cloud Service)
IBM Corporation (Db2 on Cloud, Cloudant)
SAP SE (HANA Cloud, Data Intelligence)
Amazon Web Services, Inc. (RDS, Aurora)
Alibaba Cloud (ApsaraDB for RDS, ApsaraDB for MongoDB)
MongoDB, Inc. (Atlas, Enterprise Advanced)
Microsoft Corporation (Azure SQL Database, Cosmos DB)
Teradata (VantageCloud, ClearScape Analytics)
Ninox (Cloud Database, App Builder)
DataStax (Astra DB, Enterprise)
EnterpriseDB Corporation (Postgres Cloud Database, BigAnimal)
Rackspace Technology, Inc. (Managed Database Services, Cloud Databases for MySQL)
DigitalOcean, Inc. (Managed Databases, App Platform)
IDEMIA (IDway Cloud Services, Digital Identity Platform)
NEC Corporation (Cloud IaaS, the WISE Data Platform)
Thales Group (CipherTrust Cloud Key Manager, Data Protection on Demand)
Market Analysis
The Cloud Database and DBaaS (Database-as-a-Service) Market is being fueled by a growing need for on-demand data processing and real-time analytics. Organizations are seeking solutions that provide minimal maintenance, automatic scaling, and built-in security. U.S. companies, in particular, are leading adoption due to strong cloud infrastructure, high data dependency, and an agile tech landscape.
Public cloud providers like AWS, Microsoft Azure, and Google Cloud dominate the market, while niche players continue to innovate in areas such as serverless databases and AI-optimized storage. The integration of DBaaS with data lakes, containerized environments, and AI/ML pipelines is redefining the future of enterprise database management.
Market Trends
Increased adoption of multi-cloud and hybrid database architectures
Growth in AI-integrated database services for predictive analytics
Surge in serverless DBaaS models for agile development
Expansion of NoSQL and NewSQL databases to support unstructured data
Data sovereignty and compliance shaping platform features
Automated backup, disaster recovery, and failover features gaining popularity
Growing reliance on DBaaS for mobile and IoT application support
Market Scope
The market scope extends beyond traditional data storage, positioning cloud databases and DBaaS as critical enablers of digital agility. Businesses are embracing these solutions not just for infrastructure efficiency, but for innovation acceleration.
Scalable and elastic infrastructure for dynamic workloads
Fully managed services reducing operational complexity
Integration-ready with modern DevOps and CI/CD pipelines
Real-time analytics and data visualization capabilities
Seamless migration support from legacy systems
Security-first design with end-to-end encryption
Forecast Outlook
The Cloud Database and DBaaS Market is expected to grow substantially as U.S. businesses increasingly seek cloud-native ecosystems that deliver both performance and adaptability. With a sharp focus on automation, real-time access, and AI-readiness, the market is transforming into a core element of enterprise IT strategy. Providers that offer interoperability, data resilience, and compliance alignment will stand out as leaders in this rapidly advancing space.
Access Complete Report: https://www.snsinsider.com/reports/cloud-database-and-dbaas-market-6586
Conclusion
The future of data is cloud-powered, and the Cloud Database and DBaaS Market is at the forefront of this transformation. As American enterprises accelerate their digital journeys, the demand for intelligent, secure, and scalable database services continues to rise.
Related Reports:
Analyze U.S. market demand for advanced cloud security solutions
Explore trends shaping the Cloud Data Security Market in the U.S
About Us:
SNS Insider is one of the leading market research and consulting agencies that dominates the market research industry globally. Our company's aim is to give clients the knowledge they require in order to function in changing circumstances. In order to give you current, accurate market data, consumer insights, and opinions so that you can make decisions with confidence, we employ a variety of techniques, including surveys, video talks, and focus groups around the world.
Contact Us:
Jagney Dave - Vice President of Client Engagement
Phone: +1-315 636 4242 (US) | +44- 20 3290 5010 (UK)
0 notes
Text

How to Set Up Your Local Development Environment for WordPress
Setting up a local development environment is one of the best ways to experiment with and build WordPress websites efficiently. It offers you a safe space to test themes, plugins, and updates before applying changes to a live site. Whether you’re a beginner or an experienced developer, having a local environment is essential in streamlining your workflow and minimizing website downtime.
Before we dive into the technical steps, it’s worth mentioning the benefits of WordPress for your business website. WordPress offers unmatched flexibility, scalability, and user-friendliness, making it an ideal platform for businesses of all sizes. When paired with a solid local development setup, WordPress becomes even more powerful in enabling fast and secure site builds.
Step 1: Choose Your Local Development Tool
There are several local development tools available that cater specifically to WordPress users:
Local by Flywheel (now Local WP): Extremely beginner-friendly with features like SSL support and one-click WordPress installs.
XAMPP: A more general-purpose tool offering Apache, MySQL, PHP, and Perl support.
MAMP: Ideal for macOS users.
DevKinsta: Built by Kinsta, it offers seamless WordPress development and staging capabilities.
Choose the one that suits your OS and comfort level.
Step 2: Install WordPress Locally
Once you’ve chosen your tool:
Install the software and launch it.
Create a new WordPress site through the interface.
Set up your site name, username, password, and email.
After setup, you’ll get access to your WordPress dashboard locally, allowing you to install themes, plugins, and begin your customizations.
Step 3: Configure Your Development Environment
To ensure an efficient workflow, consider these configurations:
Enable Debug Mode: Helps in identifying PHP errors.
Use Version Control (e.g., Git): Keeps your changes tracked and manageable.
Database Access: Tools like phpMyAdmin help manage your WordPress database locally.
If your project requires dynamic functionality, leveraging PHP Development Services during the setup phase can ensure custom features are implemented correctly from the beginning.
Step 4: Customize Themes and Plugins Safely
With your local environment set up, now's the time to begin theme development or customization. You can safely create or modify a child theme, experiment with new plugins, and write custom code without any risk of affecting your live site.
For those unfamiliar with theme structures or WordPress standards, it’s often wise to hire a professional WordPress developer who understands best practices and can ensure clean, maintainable code.
Step 5: Syncing to a Live Server
After building and testing your site locally, you'll eventually want to push it live. Popular methods include:
Using a plugin like Duplicator or All-in-One WP Migration
Manual migration via FTP and phpMyAdmin
Using version-controlled deployment tools
Syncing should always be done carefully to avoid overwriting crucial data. Regular backups and testing are essential.
Step 6: Maintain Your WordPress Site Post-Launch
Launching your website is only the beginning. Ongoing updates, security patches, and performance optimization are critical for long-term success. Enlisting website maintenance services ensures your site remains fast, secure, and up-to-date.
Services can include:
Core, plugin, and theme updates
Malware scans and security hardening
Site performance monitoring
Regular backups
Final Thoughts
A local WordPress development environment not only speeds up your development process but also protects your live website from unintended changes and errors. With tools and strategies now more accessible than ever, there's no reason not to use one.From learning the basics to running advanced builds, setting up locally gives you the confidence and space to grow your WordPress skills. And if you want to see real-world examples or follow along with tips and tricks I share, feel free to check out my work on Instagram for practical inspiration.
0 notes