#Photoshop Course
Text

Looking to unleash your creativity? Take your photo editing skills to the next level with eCare Upskill's comprehensive Adobe Photoshop course! Whether you're a beginner or a seasoned photographer, our online and offline classes cater to all levels. Learn essential editing techniques, create stunning visuals, and gain industry-recognized certification. Enroll today in Vadodara's leading IT training institute!
0 notes
Text
#photoshop course#tools in photoshop#photoshop free#graphic designing#adobe photoshop#photoshop tutorial#photoshop#what is photoshop#photoshop classes near me#lasso tool photoshop#graphic
0 notes
Text

#photoshop institute in delhi#photoshop training institute in delhi#photoshoptraining#photoshop course#photoshop course institute
0 notes
Text


THIRTY-ONE DAYS OF GHOST ⛧ DAY FOUR
favourite song from Infestissumam — Year Zero
Hell—an archaic Swedish translation of hail. Archangelo, the Italian name for an Archangel, for whom we will bow in praise; hail Satan, and welcome, with the birth of the Antichrist, an age with which humanity's calendar will begin again.
#using this 31days thing as a way to learn more about my favourite bops and here we are ig? bible studies via photoshop#didnt know what else to do with the music video tbh its not ideal#some banging shots in there (like the boy aka antichrist reading that book) just flicker in and out of a shot of papa#which of course is great in a music video and that's what matters#but a little annoying for me sjhdbchjs#anyway. this is odd? enjoy#ghost31#user copia edits#user copia all tag#the band ghost#year zero#i'm still going w this it's just taking me a while rip#this has been sat in the drafts for way too long
151 notes
·
View notes
Text
My GIF Making process: Screen capturing using MPV player, Organizing files, 3 Sharpening settings, Basic Coloring PSD + Actions set

This is a very long post so heads up.
I’ll try to be as thorough and true as much as possible to the way I make my gifs (I already use Photoshop Actions which I’ve long since set up but now for this tutorial I’m reviewing them to show you the exact steps I’ve learned to create my gifs 😃) and present them to you in a semi-coherent way. Also, please bear with me since English is my second language.
First things first. Below are the things and tools we need to do this:
Downloaded 4K or 1080p quality videos (let’s all assume we know where to get these—especially for high definition movies and tv series—so this post doesn’t get removed, okay? 😛)
Adobe Photoshop CC or the CS versions can work as well, but full disclosure I haven’t created gifs using the CS versions since 2020. I’m currently using Adobe Photoshop 2024.
mpv player. Use mpv player to get those frames/screenshots or any other video player that has a screen grabber feature. I’ve used adapter for the longest time but I’ve switched to mpv because the press to screenshot feature while the video is playing has been a game changer not to mention ultimate time saver for me. For adapter you need to play it in another video player (like VLC player), to get the start and end timestamps of the scene you want to gif which takes me ages before I can even open Photoshop.
Anyway! Please stop reading this post for a moment and head over to this amazing tutorial by kylos. She perfectly tells you how to install and use mpv player, both for Mac and Windows users.
One thing I have to share though, I had a tough time when I updated my MacOS to Sonoma since MPV is suddenly either duplicating frames or when I delete the duplicates the player seems to be skipping frames :/ I searched and found a solution here, though it didn’t work for me lol. My workaround for this in the meantime is decreasing the speed down to 0.70 then start screenshotting—it’s not the same pre Sonoma update but it works so I’ll have to accept it rather than have jumpy looking gifs.
Now, after this part of kylos’ tutorial:

you can continue reading the following sections of my gif tutorial below.
I want to share this little tip (sorry, this will only cater to Mac users) that I hope will be helpful for organizing the screenshots that MPV saved to the folder you have selected. Because believe me you don’t want to go through 1k+ of screenshots to select just 42-50 frames for your gif.
The Control + Command + N shortcut
This shortcut allows you to create a new folder from files you have pre-selected. As you can see below I have already created a couple of folders, and inside each folder I have selected screenshots that I want to include in one single gif. It's up to you how you want to divide yours, assuming you intend to create and post a Tumblr gifset rather than just one gif.

Another tip is making use of tags. Most of, if not all the time, I make supercorp gifs so I tag blue for Kara and red (or green) for Lena—just being ridiculously on brand and all that.
Before we finally open Photoshop, there's one more thing I want to say—I know, please bear with me for the third? fourth? time 😅
It's helpful to organize everything into their respective folders so you know the total number of items/frames you have. This way, you can add or delete excess or unnecessary shots before uploading them in Photoshop.
For example below there are 80 screenshots of Kara inside this folder and for a 1:1 (540 x 540 px) Tumblr gif, Photoshop can just work around with 42-50 max number of frames with color adjustments applied before it exceeds the 10 MB file size limit of Tumblr.

Sometimes I skip this step because it can be exhausting (haha) and include everything so I can decide visually which frames to keep later on. You'll understand what I mean later on. But it's important to keep the Tumblr 10 MB file size limit in mind. Fewer frames, or just the right amount of frames, is better.
So, with the screenshot organization out of the way, let's finally head over to Photoshop.
Giffing in Photoshop, yay!
Let’s begin by navigating to File > Scripts > Load Files into Stack…

The Load Layers window will appear. Click the Browse button next.
Find your chosen screenshots folder, press Command + A to select all files from that folder then click Open. Then click OK.
After importing and stacking your files, Photoshop should display the following view:

By the way, I'll be providing the clip I've used in this tutorial so if want to use them to follow along be my guest :)
If you haven't already opened your Timeline panel, navigate to Windows > Timeline.
Now, let's focus on the Timeline panel for the next couple of steps.
Click Create Video Timeline, then you’ll have this:

Now click the menu icon on the top right corner then go to Convert Frames > Make Frames from Clips

Still working on the Timeline panel, click the bottom left icon this time—the icon with the three tiny boxes—to Convert to Frame Animation
Select Make Frames From Layers from the top right corner menu button.
So now you have this:

Go and click the top right menu icon again to Select All Frames
Then click the small dropdown icon to set another value for Frame Delay. Select Other…

The best for me and for most is 0.05 but you can always play around and see what you think works for you.
Click the top right menu icon again to Reverse Frames.
I think Photoshop has long since fixed this issue but usually the first animation frame is empty so I just delete it but now going through all these steps there seems to be none of that but anyways, the delete icon is the last one among the line of feature buttons at the bottom part of the Timeline panel.
Yay, now we can have our first proper GIF preview of a thirsty Lena 😜

Press spacebar to watch your gif play for the very first time! After an hour and half of selecting and cutting off screenshots! 😛 Play it some more. No really, I’m serious. I do this so even as early (lol) as this part in the gif making process, I can see which frames I can/should delete to be within the 10 MB file size limit. You can also do it at the end of course 🙂
Now, let’s go to the next important steps of this tutorial post which I’ve numbered below.
Crop and resize to meet Tumblr's required dimensions. The width value should be either 540px, 268px, or 177px.
Convert the gif to a Smart Object for sharpening.
Apply lighting and basic color adjustments before the heavy coloring. I will be sharing the base adjustments layers I use for my gifs 😃.
1. Crop and Resize
Click on the Crop tool (shortcut: the C key)

I like my GIFs big so I always set this to 1:1 ratio if the scene allows it. Press the Enter key after selecting the area of the frame that you want to keep.
Side note: If you find that after cropping, you want to adjust the image to the left or another direction, simply unselect the Delete Cropped Pixels option. This way, you will still have the whole frame area available to crop again as needed and as you prefer.
Now we need to resize our gif and the shortcut for that is Command + Opt + I. Type in 540 as the width measurement, then the height will automatically change to follow the ratio you’ve set while cropping.
540 x 540 px for 1:1
540 x 405 px for 4:3
540 x 304 px for 16:9
For the Resample value I prefer Bilinear—but you can always select the other options to see what you like best.
Click OK. Then Command + 0 and Command + - to properly view the those 540 pixels.

Now we get to the exciting part :) the sharpen settings!
2. Sharpen
First we need to have all these layers “compressed” intro a single smart object from which we can apply filters to.
Select this little button on the the bottom left corner of the Timeline panel.


Select > All Layers
Then go to Filter > Convert for Smart Filters
Just click OK when a pop-up shows up.
Now you should have this view on the Layers panel:

Now I have 3 sharpen settings to share but I’ll have download links to the Action packs at the end of this long ass tutorial so if you want to skip ahead, feel free to do so.
Sharpen v1
Go to Filter > Sharpen > Smart Sharpen…
Below are my settings. I don’t adjust anything under Shadows/Highlights.
Amount: 500
Radius: 0.4
Click OK then do another Smart Sharpen but this time with the below adjustments.
Amount: 12
Radius: 10.0

As you can see Lena’s beautiful eyes are “popping out” now with these filters applied. Click OK.
Now we need to Convert to Frame Animation. Follow the steps below.
Click on the menu icon at the top right corner of the Timeline panel, then click Convert Frames > Flatten Frames into Clips
Then Convert Frames > Convert to Frame Animation
One more click to Make Frames From Layers
Delete the first frame then Select All then Set Frame Delay to 0.05

and there you have it! Play your GIF and make sure it’s just around 42-50 frames. This is the time to select and delete.
To preview and save your GIF go to File > Export > Save for Web (Legacy)…
Below are my Export settings. Make sure to have the file size around 9.2 MB to 9.4 MB max and not exactly 10 MB.

This time I got away with 55 frames but this is because I haven’t applied lighting and color adjustments yet and not to mention the smart sharpen settings aren't to heavy so let’s take that into consideration.
Sharpen v1 preview:

Sharpen v2
Go back to this part of the tutorial and apply the v2 settings.
Smart Sharpen 1:
Amount: 500
Radius: 0.3
Smart Sharpen 2:
Amount: 20
Radius: 0.5
We’re adding a new type of Filter which is Reduce Noise (Filter > Noise > Reduce Noise...) with the below settings.

Then one last Smart Sharpen:
Amount: 500
Radius: 0.3
Your Layers panel should look like this:

Then do the Convert to Frames Animation section again and see below preview.
Sharpen v2 preview:

Sharpen v3:
Smart Sharpen 1:
Amount: 500
Radius: 0.4
Smart Sharpen 2:
Amount: 12
Radius: 10.0
Reduce Noise:
Strength: 5
Preserve Details: 50%
Reduce Color Noise: 0%
Sharpen Details: 50%
Sharpen v3 preview:

And here they are next to each other with coloring applied:
v1

v2

v3

Congratulations, you've made it to the end of the post 😂
As promised, here is the download link to all the files I used in this tutorial which include:
supercorp 2.05 Crossfire clip
3 PSD files with sharpen settings and basic coloring PSD
Actions set
As always, if you're feeling generous here's my Ko-fi link :) Thank you guys and I hope this tutorial will help you and make you love gif making.
P.S. In the next post I'll be sharing more references I found helpful especially with coloring. I just have to search and gather them all.
-Jill
#tutorial#gif tutorial#photoshop tutorial#gif making#sharpening#sharpening tutorial#photoshop#photoshop resources#psd#psd coloring#gif coloring#supercorp#supercorpedit#lena luthor#supergirl#my tutorial#this has been a long time coming#guys. i'm BEGGING you. use the actions set - it was a pain doing all this manually again ngl LMAO#i've been so used to just playing the actions#so this has been a wild refresher course for me too 😆
120 notes
·
View notes
Text


our past is a foreign country, our neighborhoods have changed. i was the fool who got l u c k y. you were the fool who flew s t r a i g h t. (insp).
#top gun maverick#top gun#topgunmaverickedit#filmedit#filmgifs#top gun edit#tgmedit#pete maverick mitchell#nick goose bradshaw#top gun maverick gifs#tgm#filmtvdaily#stars gifs#stars tg edits#topgundaily#tom cruise#tomcruiseedit#LISTEN. I JUST THINK 'SOUVENIR' BY THE MIDNIGHT IS A DEPRESSINGLY ACCURATE SONG FOR MAV. IS THAT A CRIME OR WHAT#anyways this was my first time doing uhhhh any of this and i'm sure it's glaringly obvious so pls be gentle 😭😭 idk what im doinggg#i am just possessed by An Emotion and i HAVE to do something about it#and today's emotion was S A D#that is all <3<3#mine#IDK. SOMETHING ABOUT MAVERICK NEVER GETTING TO KEEP ANYONE. SMTH ABT BRADLEY BEING THE LAST CONNECTION TO GOOSE#AND TO CAROLE. AND BEING TAKEN AWAY FROM HIM TOO. (and just the fact that he loses bradley at all of course).#SMTH ABT MAV ALWAYS BEING THE GHOST LEFT BEHIND. smth about mav being surrounded by ghosts all the time.#i could go on but i shan't#i have been staring at photoshop so long i hate everything and regret having eyes the last thing in the world i can do rn is be articulate
106 notes
·
View notes
Text

I'M ****ING FREEE
#I MEAN#NOT REALLY#BUT I DON'T NEED TO RIDE ANYWHERE TOMORROW#AND MY HEAD ****ING HURTS FOR NO REASON#AND I HATE ILLUSTRATOR AND INDESIGN AND PHOTOSHOP AND GRAPHIC DESIGN#HOW THEY MANAGE TO EAT ALL MY NERVES#I JUST COME BACK HOME ALMOST AT NIGHT AND HAVE NO TIME AND SIT TO DRAW A LITTLE BIT AND OH MY GOD WHAT DO YOU MEAN IT'S 2 AM AND OF COURSE#CAN'T WAKE UP ON TIME AND I'M A SHITTY MESS TOMORROW AND CAN'T EVEN SLEEP FOR 6 HOURS AND THEY DON'T UNDERSTAND THAT I HAVE TO RIDE FOR 3-4#HOURS IN SUMARRY AND IT IS SO EXHAUSTING JUST BECAUSE YOU DO IT EVERYDAY#RARRRRRRAAAAAARRARARRARARARARRRRRRR#RRRRRRRRRRRRRRRRRRRRRRRRRRRRRRRRRR#ONE DAY IS NOT ENOUGH FOR ME#OH MY GOD I NEED TO DIG THROUGH SO MUCH
198 notes
·
View notes
Text


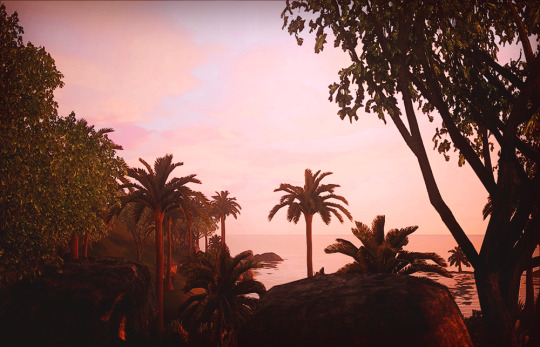

More glowy photoshopped-out-the-wazoo scenery pics taken in this save I'm experimenting with in Nimmerwald.
46 notes
·
View notes
Text

Wily Dies AU peeps come get your food
Context under the cut (also tw for a character having invasive thoughts)
After being fired from his job at a convenience store, Blues convinces Bass to start working on a farm far away from the hustle and bustle of the city.
Bass hates it at first, insisting that robots as important as himself don't do farm work and manual labor. Eventually he opens up to it with the help of Blues and the lovely couple that owns the farm.
The right sketch is from a scene where Blues gives Bass baby chicks to hold and Bass struggles to just...hold them...He's so used to destroying that he can't hold them without his thoughts trailing off to dark places. Don't worry, though, Blues and the farmer couple are there to help him through those thoughts.
Eventually Bass reaches a point where he can help with taking care of the animals on the farm without any intrusions.
Unfortunately, Wily's 2nd numbers get wind of Bass and Blues on the farm and well...that's all you get for now. :3c Okay bye until next time!
#mega man#bass#forte#wily dies au#sketches#not really but it's also not properly lined so like...yeah#also blues is off screen so I'm not tagging him LMAO#photoshop#my art#do not look at the legs in the right sketch they are NOT of this world 😭#oh wait hold on#tw invasive thoughts#for what i write in the text under the cut#of course ask me if you want something tagged!!!#invasive thoughts scare me too so i want everyone here to be safe
105 notes
·
View notes
Text

Toshiko, that shirt is not yours! 😳
#Did they sleep together? Of course😳#gta#gta lcs#grand theft auto#art#fan art#toni cipriani#toshiko kasen#grand theft auto liberty city stories#toni gta#toshiko gta#toni x toshiko#toni cipriani x toshiko kasen#digital art#photoshop#artists on tumblr#tonishiko
23 notes
·
View notes
Text

"it's just an an american wedding
they don't mean too much
they don't last enough"
#life is strange#fanart#pricefield#art#its 2am my mom is going to KILL ME#photoshop#amira paints or draws#american wedding#frank ocean#of course im quoting frank ocean
21 notes
·
View notes
Text
#photoshop course#tools in photoshop#photoshop free#graphic designing#adobe photoshop#photoshop tutorial#photoshop#what is photoshop#photoshop classes near me#lasso tool photoshop#graphic
0 notes
Photo


I wake up screaming from dreaming
One day I'll watch as you're leaving
And life will lose all of its meaning
(insp)
#our flag means death#ofmdblog#ofmdedit#taika waititi#edward teach#ofmd#taylor swift#my gifs#hoo hoo hee hee im back baby#oh how ive missed making gifs#even though photoshop crashed like a million times while i was making this#of course i had to make a gifset with lyrics from midnights#my inner swiftie wouldnt rest until i finished this#anyways i need season 2 content now my impatient ass cant wait any longer
530 notes
·
View notes
Text

Lucerys Velaryon
Ryan Corr x Milly Alcock's baby
#he has his mother's purple eyes#and a healthy dose of First Men#freckles like stars 🌟#Anisocoria#inspiration from David Bowie#what if#what if Aemond AND Luke hurt their eyes#hotd#house of the dragon#fire and blood#asoiaf fanart#ai generated#photoshop#lucerys velaryon#lucerys strong#lucemond#salt and fire#aemond targaryen#house targaryen#aemond x lucerys#house velaryon#fanfiction#hotd fanfiction#hotd fanart#lucerys velaryon fanart#aemond targaryen x lucerys velaryon#rockstar lord of the tides#of course he wears pearls
20 notes
·
View notes
Text
It's dawned on me suddenly
And for no obvious reason
That I can't go on
Living as I am.
#esteban flores#elena of avalor#disneyedit#eoaedit#don't you hate it when you have a blorbo; a million song lyrics that suit them; and no photoshop skills to speak of?#esteban flores and pierre bezukov (specifically the version in great comet) would get along great tho#the same bruised desperate heart longing for purpose and overflowing with love but no vessel to put it in (at present)#the same intellectual snobbery as a faulty mask for profound and permanent self-loathing#the same...'survivor's guilt ' isn't even the right word...it's definitely that but it's also just 'existence' guilt#like 'yes; I failed to die alongside those I love on the battlefield. but even before that; I failed at being loved in the way I wanted to'#'which is like the one job we are supposed to have as humans: to love and be loved.'#'once I'd like to think I was worthy but now I know that I am not. I have wasted my chances and made too many mistakes'#of course they both Esteban and Pierre still ARE worthy of love but it takes time and effort and willingness to change to find it#am going to try to also do something with 'dust and ashes' at some point#not to mention like my million BATB broadway; Frozen broadway and JCS lyrics that suit Esteban#myedits#mygifs#obligatory ' I used to be butter; I used to be butter; I used to be butter' joke here
47 notes
·
View notes
Text
so i have somehow unknowingly managed to hook my fandom veteran coworker into four walls (despite the fact that last week she hadn't even heard of alex turner), and the first thing she said when she walked into the office this morning was “what the FUCK? can't you just let miles be happy?” which now means that the entire rest of the office think i've screwed over some poor guy called miles and have been subtly trying to ask me about it all day
#i can't really explain to them that actually it's a fictional version of alex turner they need to go and question instead of me 😭#but yeah#this was a thing that happened to me today lol#the joys and perils of having coworkers who are also part of fandom life#i fear it's only a matter of time before she winds up on tlsp tumblr#she's falling HARD#at lunch she literally sidled over to my desk and asked me if a photo of alex and miles was photoshopped#(it wasn't of course)#milex#tlsp#lulu posts#four walls
60 notes
·
View notes
Last Seen Blogs

helen6699
tam

sofialeons-blog
Sofia Leons Blog

societaes
RESIDENT CAB DRIVER.

nrdyanameen92
Untitled

xrae-baby
♡ ravenna rae ♡