#Raspberry Pi Foundation
Explore tagged Tumblr posts
Visit Tumblr Blog
Explore Tumblr blogs with no restrictions, modern design and the best experience.
Last Seen Tumblr Blogs


Fun Fact
Average visit duration of Tumblr.com is 10 mins and 25 secs.
Text

I also don't think most people know that foundation language models only have to be trained twice, and that's only if it needs instruction following. Or that they don't actually have to be trillions of parameters to function. or that dedicated tensor processing units exist that make their computations more efficient. or that you can run distillations on a raspberry pi. or that there are actually many many options in implementation. or that most every current problem with ai stems from corporate malfeasance at scale.
previous waves of headlines on AIs resource use that many are still citing on tumblr today were found to be grossly inflated and misrepresented due to an error. and consistent reductions in energy use continue to be achieved in the current state of the art. also the term "AI" refers to a field of computer science rather than a badge of attainment of human levels of prediction in a program.
I will leave you with this:

8 notes
·
View notes
Text
🎉New Pico 2 W just dropped - and CircuitPython is ready to go!🎉
We just got the OK to put the Pico 2 W in the shop. You can pick it up at
, and you might be wondering: hey, do you have CircuitPython built for it? The answer is YES! We have secretly added support, and v9.1.2 has a build ready. We'll be adding it to the
downloads page shortly, but if you've got one in hand before launch somehow, you can check out the builds in the Absolute Latest S3 Bucket
the pico 2w is a great upgrade with twice the speed, twice the SRAM and twice the flash memory, solving many frustrations folks had with the original Pico W.
#pico2w#raspberrypi#circuitpython#techupgrade#adafruit#makercommunity#electronics#opensource#devtools#embeddedsoftware#pythononhardware#newrelease#microcontrollers#codingfun#diyelectronics#hardwareprojects#smarthardware#techinnovation#tinkering#twicespeed
12 notes
·
View notes
Text
On the one hand: it's very nice that the Raspberry Pi Foundation now packages a disk imager.
On the other hand: it's only officially packed for Windows, MacOS, and Ubuntu — it won't even run on Raspbian!
On the gripping hand: it's an Electron app, so it runs basically anywhere and is available via Flathub.
No longer do we have to remember the invocations for dd!
2 notes
·
View notes
Text
Essential Skills Every Electronics Engineer Should Master
Electronics engineering is an exciting and constantly evolving field. With new technologies emerging every day, the need for skilled professionals has never been greater. If you're pursuing a B Tech in Electrical and Electronics Engineering or exploring options at B Tech colleges for Electrical and Electronics, it's crucial to know which skills can set you apart in this competitive domain.
Let’s dive into the essential skills every aspiring electronics engineer should master.
Strong Foundation in Circuit Design
Circuit design is at the heart of electronics engineering. Understanding how to create, analyze, and optimize circuits is a must-have skill. Whether you’re designing a simple resistor network or a complex integrated circuit, mastering tools like SPICE and PCB design software can make your designs efficient and innovative.
Programming Proficiency
Electronics and programming often go hand in hand. Languages like Python, C, and MATLAB are widely used to simulate electronic systems, automate processes, and even build firmware for devices. Engineers proficient in programming can troubleshoot problems effectively and add versatility to their skill set.
Knowledge of Embedded Systems
Embedded systems are everywhere—from your smartphone to your washing machine. As an electronics engineer, understanding microcontrollers, sensors, and actuators is crucial for creating devices that work seamlessly in our daily lives. Hands-on experience with platforms like Arduino and Raspberry Pi can be a great way to start.
Problem-Solving and Analytical Thinking
Electronics engineers often face unique challenges, such as debugging faulty circuits or improving system performance. Strong problem-solving and analytical thinking skills help them identify issues quickly and find effective solutions. To cultivate these skills, tackle real-world projects during your coursework or internships.
Familiarity with Power Systems
As the world moves toward renewable energy and smart grids, knowledge of power systems is becoming increasingly important. Engineers in this field should understand how electrical power is generated, transmitted, and distributed and how to design energy-efficient systems.
Effective Communication Skills
Electronics engineering often involves working in teams with other engineers, designers, or clients. Communicating your ideas clearly—whether through reports, presentations, or technical drawings—is just as important as your technical skills. Strong communication ensures that your brilliant ideas come to life effectively.
Adaptability to New Technologies
Technology evolves rapidly, and staying updated is essential for electronics engineers. Whether you’re learning about IoT (Internet of Things), AI integration, or 5G communication, an adaptable mindset will ensure you remain relevant and capable of tackling emerging challenges.
Hands-On Experience
While theoretical knowledge is important, nothing beats practical experience. Participating in labs, internships, or personal projects gives you the opportunity to apply what you’ve learned and develop confidence in your skills. Employers often value hands-on experience as much as your academic achievements.
Preparing for Success in Electronics Engineering
Pursuing a B Tech in Electrical and Electronics Engineering is the first step toward mastering these skills. The best B Tech colleges for Electrical and Electronics not only provide a strong academic foundation but also opportunities for practical learning and industry exposure. By focusing on the skills mentioned above, you can position yourself as a competent and innovative engineer ready to tackle real-world challenges.
4 notes
·
View notes
Text
The raspberry pi foundation selling their soul to the devil was not on my bingo
4 notes
·
View notes
Text
Raspberry Pi Board: Revolutionizing Computing and Education
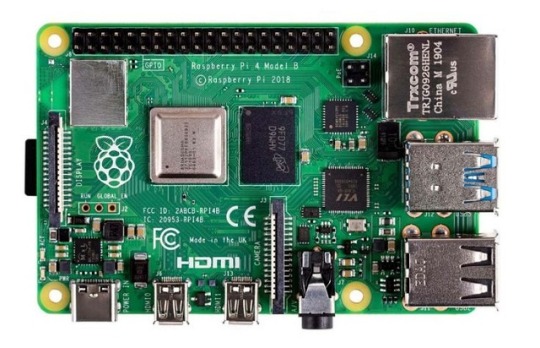
The Raspberry Pi board is a series of small, affordable single-board computers developed by the Raspberry Pi Foundation, a UK-based charity focused on promoting computer science education and digital literacy. Since its launch in 2012, the Raspberry Pi has transformed from a niche educational tool into a versatile platform used in a wide range of applications, from DIY electronics projects to industrial automation.
A Brief History
The first Raspberry Pi, the Model B, was released in February 2012. Designed to promote basic computer science in schools and developing countries, it featured a 700 MHz ARM11 processor, 256 MB of RAM, and basic connectivity options. The success of the Model B led to a rapid expansion of the Raspberry Pi lineup, with various models offering improved performance, more memory, and enhanced connectivity.
Key Features and Models
Raspberry Pi 1 Model B (2012):
Processor: 700 MHz ARM11
Memory: 256 MB RAM
Ports: 2 USB 2.0 ports, HDMI, Composite video, 3.5mm audio jack, Ethernet
Storage: SD card slot
Raspberry Pi 2 Model B (2015):
Processor: 900 MHz quad-core ARM Cortex-A7
Memory: 1 GB RAM
Ports: 4 USB 2.0 ports, HDMI, Composite video, 3.5mm audio jack, Ethernet
Storage: MicroSD card slot
Raspberry Pi 3 Model B (2016):
Processor: 1.2 GHz quad-core ARM Cortex-A53
Memory: 1 GB RAM
Ports: 4 USB 2.0 ports, HDMI, Composite video, 3.5mm audio jack, Ethernet
Wireless: Wi-Fi and Bluetooth
Raspberry Pi 4 Model B (2019):
Processor: 1.5 GHz quad-core ARM Cortex-A72
Memory: Options of 2 GB, 4 GB, and 8 GB RAM
Ports: 2 USB 3.0 ports, 2 USB 2.0 ports, 2 Micro HDMI ports, Ethernet, USB-C for power
Wireless: Wi-Fi and Bluetooth
Raspberry Pi Zero (2015) and Zero W (2017):
Processor: 1 GHz single-core ARM11
Memory: 512 MB RAM
Ports: Mini HDMI, Micro USB OTG, Micro USB for power, GPIO pins
Wireless (Zero W): Wi-Fi and Bluetooth
Applications and Uses
The versatility of the Raspberry Pi has led to its adoption in numerous fields:
Education:
Coding and Programming: Used in schools and educational programs to teach students programming languages such as Python, Scratch, and Java.
Computer Science Concepts: Introduces concepts like hardware, software, and networking.
DIY Projects and Maker Community:
Home Automation: Controls smart home devices, including lights, thermostats, and security systems.
Media Centers: Powers home media centers using software like Kodi.
Retro Gaming: Emulates classic gaming consoles using software like RetroPie.
Industrial and Commercial Applications:
IoT Devices: Serves as a hub for Internet of Things (IoT) devices, enabling data collection and remote control.
Automation and Control Systems: Used in factories and labs for monitoring and controlling equipment.
Research and Development:
Prototyping: Facilitates rapid prototyping of electronic devices and systems.
Data Collection: Gathers data from various sensors in environmental and scientific research.
Community and Ecosystem
The Raspberry Pi has cultivated a vibrant global community of developers, hobbyists, educators, and students. Online forums, tutorials, and community projects provide extensive support and resources for users at all skill levels. The Raspberry Pi Foundation also offers official accessories, including cases, cameras, and expansion boards, further enhancing the functionality of the Raspberry Pi.
Conclusion
The Raspberry Pi board has revolutionized the way people learn about and interact with technology. Its affordability, versatility, and extensive support network have made it an indispensable tool in education, DIY projects, and professional applications. As technology continues to evolve, the Raspberry Pi Foundation remains committed to expanding the capabilities and accessibility of this remarkable platform, ensuring that computing remains within reach for everyone.
3 notes
·
View notes
Text
Exploring the Possibilities with Raspberry Pi: A Guide to Buying and Utilizing Raspberry Pi 4 and Its Camera Kit
Introduction:
In the world of single-board computers, Raspberry Pi stands out as a powerful and versatile option. The Raspberry Pi Foundation has continuously pushed the boundaries of what can be achieved with these compact devices. In this blog post, we will explore the benefits of Raspberry Pi 4 kit, Raspberry pi buy, and delve into the exciting projects you can undertake using this remarkable technology.
Why Choose Raspberry Pi 4 Camera? Raspberry pi 4 camera is the latest iteration of the Raspberry Pi series, offering improved performance and enhanced features. It comes equipped with a Broadcom BCM2711 quad-core Cortex-A72 processor, clocked at 1.5GHz, which ensures smooth multitasking and faster execution of complex tasks. The availability of up to 8GB of RAM allows for efficient handling of data-intensive applications. With its support for dual-band Wi-Fi and Bluetooth 5.0, Raspberry Pi 4 provides seamless connectivity options for your projects.
Exploring the Camera Capabilities: One of the most exciting features of Raspberry Pi 4 is its compatibility with a dedicated camera module. The Raspberry Pi Camera Module v2 is a high-quality camera that can be easily connected to the board via the camera interface. The camera module offers an 8-megapixel sensor and supports video resolutions up to 1080p, enabling you to capture stunning photos and videos. Its compact size and versatility make it perfect for various applications, including surveillance systems, time-lapse photography, and even computer vision projects.
Where to Buy Raspberry Pi 4 Online: When it comes to purchasing Raspberry Pi 4 and its accessories online, there are several reputable platforms to consider. Some popular options include:
Online Retailers (e.g., Amazon, Robomart, SparkFun) Established Raspberry pi buy online platforms like Amazon, Robomart, and SparkFun also stock Raspberry Pi 4 boards, camera modules, and kits. These retailers often provide customer reviews and ratings, giving you insights into the products before making a purchase.
Specialized Electronics Retailers Various specialized electronics retailers cater specifically to the Raspberry Pi community. These retailers often have a wide range of Raspberry Pi products, including kits that include the camera module.
Exciting Raspberry Pi 4 Projects: Once you have your Raspberry Pi 4 and camera kit, the possibilities for projects are virtually endless. Here are a few ideas to get you started:
Home Surveillance System: Set up a motion-activated camera system to monitor your home remotely and receive alerts on your smartphone.
Wildlife Monitoring: Create a wildlife camera trap that captures photos or videos of animals in their natural habitats.
Time-Lapse Photography: Capture the beauty of nature or the progress of a construction project by creating stunning time-lapse videos.
Facial Recognition: Develop a facial recognition system using the camera module and explore applications in security or access control.
Virtual Assistant: Transform your Raspberry Pi 4 into a voice-controlled assistant by integrating a microphone and speaker.
Conclusion: Raspberry Pi 4, along with its camera module, opens up a world of possibilities for hobbyists, educators, and professionals alike. Whether you're interested in building a smart home system or exploring computer vision applications, Raspberry Pi 4 provides the necessary power and flexibility. With numerous online platforms available to purchase Raspberry Pi 4 and its accessories,
4 notes
·
View notes
Text
I like this idea, and hope it works like The Raspberry Pi Foundation, but I also worry about it causing problems like why consoles moved to licensed platforms to begin with.
Ouya? Oh yeah!
Do you like console gaming, but not the walled gardens that the big players want to cage you in? If so, a promising-sounding console called Ouya, to be released next year, might be just what you have been looking for.
Ouya is an attempt at disrupting the console market with an open game console, where open means that it is running an open source OS (Android 4), that it is made easy and explicitly okay for you to hack it hardware- and software-wise, and that it is a lot easier for indie developers to create and publish games for this platform than is common for the big players.
Ouya has been successfully funded on Kickstarter within 12 hours and is, so far, the fastest project ever to reach a funding of one million dollars.

While there are, of course, people who are convinced that this project will not stand a chance against the established players, personally I am not quite so pessimistic. Crowdfunding platforms like Kickstarter and the high connectivity provided by the intarwebs have changed the landscape and the balance of power between suppliers and consumers.
Go, Ouya, go!
Links: Ouya Kickstarter page ´Ouya´ - a new game console and why it will fail
Photo taken from the Ouya Kickstarter page.
#video games#game history#open source#it's a good idea but also is a Nice Thing and you know how badly we handle those
5K notes
·
View notes
Text
How BTech Mechanical Can Lead to Careers in Robotics
When most students think of Mechanical Engineering, they picture machines, engines, or automobiles. But here’s something exciting—Mechanical Engineering is one of the strongest foundations for a career in Robotics. Yes, you read that right. If you’re someone who dreams of working on intelligent machines, drones, or automation systems, a BTech in Mechanical can be your perfect Launchpad.
Let’s break it down so you see the big picture.
What’s the Link Between Mechanical Engineering and Robotics?
Robotics is not a single-subject field. It combines mechanical engineering, electronics, computer science, and control systems. A robot, after all, is a physical system—made up of gears, motors, joints, and frames. And who better than a mechanical engineer to design and build those parts?
In fact, many leading robotics engineers started with a mechanical background. That’s because mechanical engineering gives you:
A strong understanding of kinematics and dynamics (how things move)
Skills in mechanical design and CAD
Knowledge of materials and manufacturing
Basics of control systems and automation
In simpler words, mechanical engineers are the architects of the robot’s body. They ensure that what’s imagined can be built, function, and perform in the real world.
What You Learn in BTech Mechanical That Helps in Robotics
Here are a few key subjects and skills taught in BTech Mechanical that directly contribute to robotics:
Engineering Mechanics & Dynamics: These help you understand how forces act in machines.
Machine Design & CAD: You’ll learn to design robotic arms, gear systems, and mobile robots.
Thermodynamics & Fluid Mechanics: Useful if you're designing robots for extreme environments.
Automation and Control Engineering: Many colleges include mechatronics and automation, laying the base for robotic control systems.
In institutes that focus on real-world learning, you’ll also work on mini projects and hands-on labs—and that’s where true robotics interest gets sparked.
Where Do Robotics Engineers Work?
You might be surprised at how widespread robotics is. Industries hiring robotics professionals include:
Automotive & Aerospace: Building robots for manufacturing and assembly lines.
Healthcare: Designing robotic surgical tools and prosthetics.
Agriculture: Drones and autonomous farming equipment.
Logistics & Warehousing: Robotics in Amazon-like fulfillment centers.
Defense & Space: Autonomous vehicles, drones, and exploration bots.
So yes, it’s no longer just “rocket science”—robotics is now applied science, and mechanical engineers are at the heart of it.
Top Skills You Need to Add Alongside Your Degree
While your BTech in Mechanical gives you the base, to truly excel in robotics, you should explore:
Programming Skills (Python, C++, MATLAB)
Microcontrollers & Sensors (Arduino, Raspberry Pi)
Robotics Simulation Tools (ROS, Gazebo)
Machine Learning Basics (for intelligent robot behavior)
These can be learned via online courses, robotics clubs, or elective subjects in college.
Choosing the Right College Makes a Difference
Now here’s something important—not all mechanical programs are the same. The best engineering colleges in Odisha are those that go beyond textbooks. Look for places that encourage interdisciplinary projects, have modern labs, and foster industry connections.
For example, NM Institute of Engineering and Technology (NMIET) in Bhubaneswar, though known primarily for its strong mechanical and technical base, also supports hands-on learning, industry collaboration, and practical workshops—exactly the environment where robotics thrives. Institutes like NMIET, affiliated with BPUT and accredited by AICTE, offer a strong academic foundation paired with exposure to real-world applications.
Interestingly, NMIET also maintains industry tie-ups with companies like IBM, Cognizant, and Capgemini—which often explore robotics and automation in their operations. A setup like this can open doors to internships or projects that align with robotics, even if your core branch is mechanical.
Final Thoughts
If you’ve been wondering whether a BTech in Mechanical can lead you into the world of robotics, the answer is: Absolutely, yes. Mechanical engineers are not just part of the robotics field—they are essential to it.
So, if your interest lies in building things that move, think, and react, consider mechanical engineering as your foundation. And when choosing where to study, keep in mind that the best engineering colleges in Odisha are those that integrate practical learning, tech-savvy faculty, and an open environment for innovation.
Remember, the robots of tomorrow need bright minds today—and your journey can begin with a single decision.
#bhubaneswar b tech colleges#college of engineering bhubaneswar#best engineering colleges in orissa#best engineering colleges in bhubaneswar#best private engineering colleges in odisha#best engineering colleges in odisha
0 notes
Text
Stepping into the Portal: Building a Captive Wi-Fi Experience on our Raspberry Pi
Today's adventure in our Raspberry Pi networking project took a fascinating turn! Having successfully established our Pi as an internet-sharing router via Ethernet, we set our sights on a more sophisticated user experience: implementing a captive portal.
For those unfamiliar, a captive portal is the web page that pops up when you connect to a public Wi-Fi network, often requiring you to agree to terms of service or log in before you can access the internet. This is exactly what we aimed to create for our little network managed by the Raspberry Pi.
Laying the Foundation: Installing a Web Server
Our first step was to install a web server on the Raspberry Pi. We opted for Nginx, a lightweight and powerful choice that's perfect for this task. With a few simple commands in the terminal (sudo apt update and sudo apt install nginx), our web server was up and running. We even verified its status to ensure everything was as it should be.
To make sure our captive portal page would be accessible, we also opened up the necessary ports (HTTP on port 80 and HTTPS on port 443) in the Raspberry Pi's firewall using iptables. We made sure to save these new rules so they persist across reboots.
Crafting the Welcome Mat: Creating the Portal Web Page
Next, we rolled up our sleeves and created a basic HTML page to serve as our captive portal. We replaced the default Nginx welcome page with our own index.html. This simple page includes a welcome message, a (very basic for now!) terms of service agreement, and a button that users will eventually click to gain internet access.
We even added a little bit of basic CSS to make it look presentable. The idea is to have a clear and concise page that informs users and gets their agreement before they hop online.
What's Next? The Magic of Redirection
With the web server in place and our initial captive portal page ready, the next stages will involve the more intricate parts of making the portal truly functional. We'll be diving into:
* DNS Interception: Configuring dnsmasq to redirect all DNS requests from unconnected clients to the Raspberry Pi's IP address.
* HTTP/HTTPS Redirection with iptables: Setting up rules to intercept all web traffic from unauthorized users and force it to our captive portal page.
* The "Agreement" Mechanism: Developing the backend logic (likely a simple script for now) that gets triggered when a user clicks "I Agree," and then modifies the firewall to grant that user internet access.
Today was all about laying the groundwork – installing the necessary tools and creating the content for our captive portal. It's exciting to see the project evolving from basic internet sharing to a more controlled and user-aware network. Stay tuned for the next steps as we delve into the redirection magic!
0 notes
Text
How to Setup Robotics Lab in School – A Complete Guide to Establishing a Robotics Lab
In today’s technology-driven world, robotics education acts as an important asset in equipping students with 21st-century Robotics & AI skills such as critical thinking, problem-solving, and creativity. Robotics lab offers a dedicated space for students to engage in hands-on learning, exploring engineering, machine learning, and artificial intelligence (AI). By providing a well-structured Robotics & AI lab, schools generate our young learner’s interest in the field of STEM (Science, Technology, Engineering, and Mathematics), and make them ready for future careers in further Robotics & AI embedded technology. This will guide our learners in a direct approach to setting up a Robotics lab, and also ensure that students gain maximum educational benefits from this modern learning environment.
Defining Objectives and Goals
At the foundational stage of setting up Robotics & AI labs in schools, it is essential to clearly define the lab’s objectives and purpose. This helps schools determine whether the focus will be on basic robotics education, competition-driven learning, or innovation through patent-worthy projects. The primary goals include introducing our young learners to Robotics and AI, upgrading with programming and engineering skills, and preparing students for national and international tech. Competitions, and encourage them to become future innovators by learning the combination of innovative projects that combine balanced learning. These objectives will guide schools in planning the necessary resources such as designed curriculum and selecting appropriate equipment while learning the concept in Robotics & AI labs.
Securing Budget and Funding
Setting up robotics labs in schools involves a significant financial investment, and schools must plan their budgets accordingly. Several funding options are available in the authority, including school budget administration, government permits, corporate partnerships and sponsorship, and community fundraising initiatives. STEM education companies collaborate with the government for support with the education part and the material requirements according to the school for opening robotics & AI Labs in the school. At the same time, STEM education companies also offer sponsorship under several projects, provide teachers training programs by the STEM education companies, and Atal tinkering Labs handled by the robotics lab. CSR approach and alumni contributions can also give financial assistance.
Selecting the Right Space
Whenever a lab is established in a school, it is essential to carefully select a suitable space. Choosing the right location for the Robotics and AI lab is crucial to ensuring a practical, engaging, and productive learning environment. The lab should be spacious enough to have workstations, practical testing areas, robotics kits, and tool storage. It must also have proper ventilation, lighting, electrical connection, and internet connectivity. A well-setup layout with designated areas for programming, assembly, and testing enhances productivity and safety.
Procuring Robotics Kits and Equipment
Robotics Lab Selecting the right robotics kits and equipment is fundamental for creating an effective robotics lab. The selection of kits should be based on the learners’ age groups and their initial skill levels. For beginners, kits such as mechanical construction kits and block-based power screw kits are ideal. In terms of coding, platforms like Scratch and Code Blocks provide a built-in introduction to robotics and programming. Intermediate classes from 6th to 8th can benefit from Arduino, Raspberry Pi, and other robotics kits, which provide hands-on experience in coding and electronics technology. Students at the senior level can explore AI-powered coding platforms like AI Connect, Drone technology, and IoT-based machine learning projects. With all of this, the Robotics & AI lab will support various robotics innovations going to happen in the future.
Developing a Robotics Curriculum
A well-organized robotics curriculum ensures progressive growth in learning and development of new advanced skills. Schools should design the curriculum in such a way that it will cover all concepts from beginner to advanced levels, hands-on projects, and advanced robotics applications. In the beginner level from class 3rd to 5th class, learners will focus on basic robotics, easy-to-understand programming concepts, and understandable mechanical design. Then at the intermediate level for 6th to 8th class learners should focus on microcontrollers, robotics, and Machine learning robot programming. Later on at the advanced level, it should include AI, machine learning, IoT embedded, and participation in robotics competitions which motivates the students to do more innovation in the future.
Hiring Skilled Educators and Mentors
After setting up the lab, the most crucial person is the one who will run it – the ideal role model and mentor. This individual will guide our future learners towards a bright future, equipped with up-to-date knowledge in advanced technology and artificial intelligence. Our STEM companies provide STEM-certified educators, who are the best mentors to help students grasp the concepts of robotics and AI in an engaging and enjoyable way. They are essential for guiding students in this specific direction of gaining knowledge in robotics and AI. As per our advice, schools should recruit STEM-certified educators with expertise in all directions where they should be experts in their fields of Science, Technology, Engineering & Mathematics.
Robotics Lab in School Following that, it is important to establish collaborations with university researchers, industry professionals, and robotics organizations to provide students with valuable insights, real-world exposure, and expert mentorship. If some schools want to train their teachers for this subject, then our STEM education companies provide teachers training programs and organize workshops for the teachers to ensure that instructors remain updated with the latest technology in robotics technology. This also encourages students to a learning approach, where senior students can also mentor in the class and it also enhances engagement and knowledge-sharing skills.
Implementing Safety Measures
In the Robotics & AI lab, we need to ensure that we have proper safety for the students in the robotics lab. It is essential to establish clear guidelines on the Circular Board for handling electronic components and computer systems provided in the lab. Additionally, students must be trained in basic first aid procedures to ensure they are prepared to respond effectively in case of any mishap, emphasizing the importance of safety and preparedness in a lab environment. The essential safety measures include protective gear such as gloves and safety goggles, building fire safety protocols, and training students for first aid. These properly structured lab sessions with instructor supervision help to maintain a safe environment in the lab.
Conclusion
In conclusion, establishing Robotics & AI labs in schools marks a progressive leap in advancing STEM education and preparing students for a tech-driven future. A well-designed and thoughtfully planned lab—with clear objectives, suitable equipment, expert mentorship, and a structured curriculum for all grades—creates an engaging, future-ready learning environment. Getting educated about Robotics & AI education develops technical skills and also enhances creativity, teamwork, and critical thinking approach toward the problem and its solution. By continuously approaching & upgrading resources such as curriculum and student participation in the competition, schools can work hard to motivate the upcoming generation of young innovators and engineers who are ready to lead the vision of future innovators.
0 notes
Text
Exploring EEE in Engineering: Subjects, Syllabus & Career Opportunities

Introduction
Electrical and Electronics Engineering (EEE) is one of the most dynamic and versatile branches in the field of engineering. It integrates the principles of electricity, electronics, electromagnetism, and computer systems to design, develop, and maintain electrical equipment and electronic devices. Whether it’s power grids, automation systems, or embedded circuits, EEE professionals play a pivotal role in shaping the technology-driven world we live in.
This blog serves as a complete guide to understanding the subjects in EEE engineering, the course structure, and the career paths it unlocks.
What is EEE (Electrical and Electronics Engineering)?
EEE is a core engineering discipline that focuses on both electrical systems (such as power generation, transmission, and motors) and electronics (like microcontrollers, signal processing, and embedded systems). It’s an ideal choice for students who are analytical, curious about how things work, and passionate about innovation.
Course Duration & Eligibility
Course Name: B.E./B.Tech in Electrical and Electronics Engineering
Duration: 4 years (8 semesters)
Eligibility: 10+2 with Physics, Chemistry, and Mathematics (PCM) + entrance exams like JEE Main, state CETs, or institute-level tests
Core EEE Subjects: Semester-Wise Breakdown
EEE curriculum is spread over 4 years and focuses on both theoretical learning and practical application. Here's a semester-wise overview of key subjects:
Year 1: Basic Engineering & Foundation
Engineering Mathematics I & II
Physics & Chemistry
Basic Electrical & Electronics Engineering
Programming in C
Engineering Graphics
Environmental Science
Workshops and Labs
Year 2: Electrical & Circuit Theory
Circuit Analysis
Network Theory
Electronic Devices & Circuits
Electromagnetic Fields
Signals and Systems
Analog and Digital Electronics
Electrical Machines – I
Simulation Lab, Devices Lab
Year 3: Core Technical Development
Electrical Machines – II
Control Systems
Power Electronics
Microprocessors & Microcontrollers
Transmission and Distribution
Measurements & Instrumentation
Renewable Energy Systems
Power Systems Lab, Embedded Systems Lab
Year 4: Advanced Topics & Applications
High Voltage Engineering
Smart Grid Technology
Electric Drives & Control
Industrial Automation (PLC, SCADA)
Elective Subjects (Robotics, IoT, Artificial Intelligence in Electrical Systems)
Final Year Project
Internship & Industrial Training
Practical Learning & Lab Work
EEE places strong emphasis on hands-on learning. Students gain real-world experience through:
Circuit design and simulation
Hardware testing and troubleshooting
Mini projects and capstone projects
Industrial visits and live projects
Coding for embedded systems using Arduino, Raspberry Pi, etc.
Skills You Gain in EEE
Strong analytical and mathematical reasoning
Hardware and circuit design proficiency
Knowledge of renewable and sustainable energy
Programming skills (C, C++, Python for microcontrollers)
Problem-solving and project management
Interdisciplinary collaboration
Career Opportunities After EEE
Graduates in Electrical and Electronics Engineering are in high demand across sectors like energy, manufacturing, automation, transportation, and IT. Common job roles include:
Electrical Engineer
Power Systems Engineer
Embedded Systems Developer
Electronics Design Engineer
Automation Engineer
Control Systems Engineer
Maintenance Engineer
Technical Consultant
Major recruiters include public sector undertakings (PSUs like BHEL, NTPC, ONGC), private MNCs (Siemens, ABB, Schneider Electric), IT firms (TCS, Wipro, Infosys), and startups in renewable energy and robotics.
Higher Studies & Certifications
Students often pursue postgraduate degrees like:
M.Tech in Power Systems / VLSI / Control Systems
MBA in Operations or Project Management
International MS in Electrical Engineering
Additionally, certifications in PLC programming, SCADA systems, MATLAB, or IoT applications can greatly enhance job prospects.
Final Thoughts
EEE is an exciting and future-proof engineering stream that opens up diverse opportunities in traditional and emerging industries. With a curriculum that balances theoretical knowledge and practical exposure, students graduate with the skills needed to power innovation and electrify the future. If you’re a student passionate about circuits, energy, and electronics, Electrical and Electronics Engineering could be your perfect career path.
Website:https://kce.ac.in/
Address:Myleripalayam Village, Othakkal Mandapam Post, Coimbatore - 641032, Tamilnadu, India
+91 82203 33750, +91 82203 33620 +91 422 2619005, +91 422 2619006
Mail id :[email protected]
#best engineering colleges in coimbatore#education#college#top engineering colleges#career opportunity for engineering students#eee#best electrical and electronics engineering college in coimbatore
0 notes
Text

Features and Applications of Debian/Arch Linux ARM OS
1. Core Features of Debian ARM
(1) Stable and Reliable Foundation
Community-maintained: Developed by global contributors without commercial influence
Extended support cycle: 5-year security updates for each stable release (extendable to 10 years via LTS project)
Rigorous quality control: Packages undergo strict stability testing before entering stable repos
(2) Broad Hardware Compatibility
Supports full ARMv7/ARMv8 architectures from Cortex-A7 to A78
Officially maintains ports for over 20 single-board computers (including all Raspberry Pi models)
(3) Lightweight Design
Minimal installation requires only ~128MB RAM
Offers systemd-free Devuan branch alternative
(4) Software Ecosystem
Includes over 59,000 precompiled packages
Provides newer software versions via backports repository
2. Typical Applications of Debian ARM
(1) Server Domain
Low-power ARM servers (e.g. AWS Graviton instances)
Network infrastructure (routers, firewalls)
(2) Embedded Systems
Industrial control equipment (requiring long-term stable operation)
Medical devices (compliant with IEC 62304 standard)
(3) Education & Research
Computer architecture teaching platforms
Scientific computing cluster nodes
3. Core Features of Arch Linux ARM
(1) Rolling Release Model
Provides latest software versions (kernel/toolchain etc.)
Daily synchronization with upstream Arch Linux updates
(2) Ultimate Customization
Build from base system according to needs
Supports custom kernel compilation (e.g. enabling specific CPU features)
(3) Community Support
Active AUR (Arch User Repository)
Detailed Wiki documentation
(4) Performance Optimization
Default ARM-specific compilation optimizations
NEON instruction set acceleration support
4. Typical Applications of Arch Linux ARM
(1) Development Platform
Embedded development testing environment
Kernel/driver development platform
(2) Enthusiast Devices
Customized smart home hubs
Portable development workstations
(3) Cutting-edge Technology Testing
New architecture validation (e.g. ARMv9)
Machine learning framework experimentation
5. Comparative Summary

6. Usage Recommendations
Choose Debian ARM: For mission-critical systems, industrial control requiring long-term stability
Choose Arch Linux ARM: For latest software features, hardware R&D or deep customization
0 notes
Text
Building Your Own Mechanical Dog: A Beginner’s Guide
In the ever-evolving world of robotics, creating your own mechanical dog is a fascinating and rewarding challenge. Whether you're a hobbyist, a student, or simply curious about robotic engineering, building a mechanical dog can be a fun way to learn about coding, mechanics, and artificial intelligence. It’s more than just assembling wires and parts—it's about bringing movement and purpose to a machine that mimics a beloved companion. At mechanical dog, we believe that anyone passionate about robotics can take the first step in developing a robotic pet with personality. This guide will walk you through the essentials—from selecting the right components to programming basic functions—to help you build your first functional and interactive mechanical dog.
Understand the Core Functionality of a Mechanical Dog
Before jumping into assembly, it's crucial to understand what makes a mechanical dog function. These robotic companions typically involve servos or motors to mimic the movements of legs, a microcontroller as the brain, and a power source for mobility. Sensors such as ultrasonic detectors help the mechanical dog navigate its environment. Grasping the roles of each component ensures a more efficient build process and sets the foundation for future customization. It also helps in troubleshooting and upgrading the design later. Learning this early provides a technical roadmap and gives you clarity on what parts to prioritize as a beginner in robotics.
Choosing the Right Materials and Parts to Begin
Starting with the right components makes a big difference in your mechanical dog’s performance. You'll need a sturdy yet lightweight frame, preferably 3D-printed plastic or aluminum. Essential parts include servo motors for leg movement, a rechargeable battery pack, a microcontroller like Arduino or Raspberry Pi, and wiring kits. Buying beginner-friendly kits from reputable robotics stores is highly recommended. Mechanical dog recommends selecting components based on simplicity and expandability. Focus on acquiring parts that allow trial and error without breaking your budget. This stage sets the groundwork for building something durable and modifiable over time.
Assembling the Frame and Installing Motors
Once you have the necessary parts, it’s time to bring your mechanical dog to life. Begin by assembling the body and legs, using screws and brackets to fix the frame. Install the motors at the joints to replicate knee and hip motion. Precision in alignment is key—improper placement may result in unbalanced movement. Make sure each motor is securely fastened and capable of smooth rotation. During this stage, mechanical dog builders often test the range of motion manually before connecting to the control board. Taking your time here helps prevent mechanical issues down the line.
Wiring and Connecting Your Microcontroller System
With the frame and motors in place, the next step is wiring. Connect each motor to the microcontroller using jumper wires or a motor shield. Labeling wires helps reduce confusion later, especially when debugging. Your microcontroller acts as the brain of the mechanical dog and sends commands that control movement. Power connections must be secure and insulated to prevent short-circuiting. This phase requires patience and organization, particularly for first-timers. Once everything is in place, running a basic movement script is a great way to ensure your connections work and to see your mechanical dog come alive.
Programming Basic Movement and Direction Controls
Programming is where your mechanical dog learns to walk. Start with simple scripts that control forward and backward movement using timed signals to motors. As you progress, introduce directional turns and stop-start commands. Platforms like Arduino IDE or Python make this easy for beginners, especially with online resources and libraries. At mechanical dog, we encourage experimenting with code to understand how speed and timing affect performance. Getting these basics down sets the stage for more advanced behaviors, like obstacle avoidance and voice command integration. Programming breathes life into your build and gives it functionality.
Integrating Sensors for Navigation and Interaction
Sensors make your mechanical dog interactive and responsive to its environment. Ultrasonic sensors help it detect walls, infrared sensors track lines or paths, and gyros assist in balance. Proper sensor placement is essential—usually on the head or front body of the robot. Once installed, they are connected to the microcontroller and incorporated into your code. This enables your mechanical dog to avoid obstacles or follow predefined routes. These intelligent behaviors enhance the experience and demonstrate real-world robotics applications. Adding sensors is a significant upgrade and a fun learning curve for every builder.
Testing, Troubleshooting, and Future Enhancements
Once all systems are connected and programmed, it’s time to test your mechanical dog. Watch for issues like jerky movement, sensor misreads, or battery drainage. Take notes and go step-by-step to troubleshoot. This is where hands-on learning is most valuable. Mechanical dog builders often revisit earlier steps for fine-tuning. After successful testing, consider adding voice control, facial recognition, or remote operation via Wi-Fi. With every enhancement, you’ll grow your skills and make your mechanical dog smarter. Remember, every successful robotics project involves problem-solving and persistence.
Conclusion
Building a mechanical dog from scratch is a fulfilling journey that combines creativity, logic, and hands-on learning. Whether you’re doing it as a personal challenge or stepping into the field of robotics professionally, the experience offers a deep understanding of engineering and artificial intelligence. With patience and curiosity, your mechanical dog will not only move and interact but also reflect the effort you’ve invested in learning. At mechanical dog, we support all levels of builders and believe that even a beginner can create something incredible. Start small, think big, and bring your robotic companion to life.
0 notes
Text
How to Set Up a Cutting-Edge Robotics Lab in Your School
Technology is reshaping the world we live in—and education must evolve to prepare students for this transformation. Robotics is no longer a futuristic concept confined to labs and industries; it has entered classrooms as an essential component of STEM (Science, Technology, Engineering, and Mathematics) education.
A well-designed robotics lab provides students with hands-on experience in coding, electronics, design thinking, and innovation. It fosters curiosity, nurtures creativity, and develops critical life skills like collaboration, communication, and problem-solving.
If you're looking to introduce this dynamic learning environment into your school, here’s a step-by-step guide to help you set up a cutting-edge robotics lab that inspires and empowers students.
1. Understand the Vision and Learning Goals
Before investing in equipment or designing your lab, clearly define the educational goals you want to achieve. Is your objective to integrate robotics with the curriculum? Or are you aiming to build extracurricular interest and club activities?
Knowing your goals helps determine the kind of space you’ll need, the age groups you're targeting, and the tools and curriculum required. This clarity will also guide funding proposals and stakeholder communication.
2. Choose the Right Location and Layout
Robotics labs require thoughtful design to support collaboration and safety. Choose a room that is spacious, well-lit, and well-ventilated. Flexibility is key—opt for movable furniture that allows students to work in groups or on solo projects.
Ensure there are plenty of electrical outlets, Wi-Fi access, and dedicated areas for storing robotics kits, laptops, tools, and student projects. Proper planning at this stage lays a strong foundation for an efficient Robotics Lab setup in school that runs smoothly throughout the academic year.
3. Select Age-Appropriate Robotics Kits
The tools you provide should align with the age and skill level of your students. For primary school students, kits like LEGO® Education or Makeblock introduce robotics through block-based programming and colorful components. Older students can transition to platforms like Arduino, Raspberry Pi, or VEX that involve text-based coding and more complex engineering challenges.
Choose kits that allow room for experimentation and growth. Modularity is important so students can advance from simple builds to complex, multi-sensor robots.
This is especially important when designing a Robotic lab for kids, where the right balance of learning and play ensures engagement and deeper understanding.
4. Integrate a Structured Curriculum
A robotics lab must go beyond experimentation—it should be tied to learning outcomes. Select or develop a curriculum that teaches foundational concepts in electronics, mechanical design, and programming. It should also include real-world applications to help students connect what they build to how things work outside the classroom.
Some vendors offer ready-made lesson plans that align with national or state educational standards. Others provide teacher training, evaluation tools, and long-term learning paths.
Professional development for educators is critical. Teachers should feel confident not just in operating kits, but in guiding students through challenges, failures, and breakthroughs.
5. Equip the Lab with the Right Tools
In addition to robotics kits, your lab should include essential equipment to enhance learning:
Laptops or tablets with the required software
Internet access for cloud-based platforms or updates
Projectors or smartboards for demonstrations
Hand tools like screwdrivers, pliers, and safety gear
Storage for parts, tools, and student work
Optional additions like 3D printers, soldering kits, and digital multimeters can take your lab to the next level. These tools help students design and test more sophisticated robotic systems, encouraging deeper innovation.
6. Focus on Project-Based Learning
Hands-on projects are the heartbeat of a successful robotics program. Encourage students to identify problems, brainstorm solutions, build prototypes, and improve their designs through testing and feedback.
Assign real-world challenges such as building an obstacle-avoiding robot or creating a robotic arm. This kind of learning promotes persistence, teamwork, and ownership of the learning process.
Incorporate reflection activities where students present their work, discuss failures, and explain how they arrived at their solutions. These experiences build confidence and communication skills.
7. Create a Culture of Innovation and Inclusion
A great robotics lab isn't just about equipment—it’s about culture. Make it an inclusive, welcoming environment where all students feel encouraged to explore, experiment, and ask questions. Offer mentorship opportunities, host peer-learning sessions, and highlight diverse role models in STEM.
Celebrating both effort and achievement motivates students and fosters resilience. Students who might struggle in traditional classroom settings often thrive in this active, hands-on environment.
Building a culture of innovation starts with leadership—when teachers and administrators support creativity and calculated risk-taking, students are more likely to do the same.
8. Encourage Participation in Robotics Competitions
One of the best ways to take your robotics program to the next level is to involve students in local, national, or international competitions. Events like FIRST LEGO League, Robofest, and World Robot Olympiad give students a platform to test their skills, collaborate with peers, and learn from others.
These competitions often provide guidelines that schools can follow to align their programs. Preparing for them also sharpens technical skills and promotes teamwork and time management.
Use internal school competitions as stepping stones, gradually preparing students for larger stages.
9. Plan for Maintenance and Sustainability
A robotics lab isn’t a one-time setup—it’s an ongoing commitment. Plan for maintenance, software updates, and replacement of consumable parts. Train students in lab etiquette and equipment handling to foster responsibility.
Create a system to track inventory and restock essentials in a timely manner. Encourage students to be part of lab management through designated roles or rotating responsibilities.
If you want your Robotics lab in your school to thrive long-term, seek community partnerships, apply for educational grants, and showcase student success to attract ongoing support.
Final Thoughts
Establishing a cutting-edge robotics lab is one of the most impactful investments a school can make in its students’ futures. It’s not just about technology—it’s about fostering innovation, curiosity, and problem-solving skills that will last a lifetime.
By combining the right tools, a clear vision, and a supportive culture, schools can create dynamic learning spaces where students don’t just learn about the future—they build it.
0 notes
Text
Elmalo, let's commit to that direction. We'll start with a robust Sensor Fusion Layer Prototype that forms the nervous system of Iron Spine, enabling tangible, live data connectivity from the field into the AI's processing core. Below is a detailed technical blueprint that outlines the approach, components, and future integrability with your Empathic AI Core.
1. Hardware Selection
Edge Devices:
Primary Platform: NVIDIA Jetson AGX Xavier or Nano for on-site processing. Their GPU acceleration is perfect for real-time preprocessing and running early fusion algorithms.
Supplementary Controllers: Raspberry Pi Compute Modules or Arduino-based microcontrollers to gather data from specific sensors when cost or miniaturization is critical.
Sensor Modalities:
Environmental Sensors: Radiation detectors, pressure sensors, temperature/humidity sensors—critical for extreme environments (space, deep sea, underground).
Motion & Optical Sensors: Insect-inspired motion sensors, high-resolution cameras, and inertial measurement units (IMUs) to capture detailed movement and orientation.
Acoustic & RF Sensors: Microphones, sonar, and RF sensors for detecting vibrational, audio, or electromagnetic signals.
2. Software Stack and Data Flow Pipeline
Data Ingestion:
Frameworks: Utilize Apache Kafka or Apache NiFi to build a robust, scalable data pipeline that can handle streaming sensor data in real time.
Protocol: MQTT or LoRaWAN can serve as the communication backbone in environments where connectivity is intermittent or bandwidth-constrained.
Data Preprocessing & Filtering:
Edge Analytics: Develop tailored algorithms that run on your edge devices—leveraging NVIDIA’s TensorRT for accelerated inference—to filter raw inputs and perform preliminary sensor fusion.
Fusion Algorithms: Employ Kalman or Particle Filters to synthesize multiple sensor streams into actionable readings.
Data Abstraction Layer:
API Endpoints: Create modular interfaces that transform fused sensor data into abstracted, standardized feeds for higher-level consumption by the AI core later.
Middleware: Consider microservices that handle data routing, error correction, and redundancy mechanisms to ensure data integrity under harsh conditions.
3. Infrastructure Deployment Map
4. Future Hooks for Empathic AI Core Integration
API-Driven Design: The sensor fusion module will produce standardized, real-time data feeds. These endpoints will act as the bridge to plug in your Empathic AI Core whenever you’re ready to evolve the “soul” of Iron Spine.
Modular Data Abstraction: Build abstraction layers that allow easy mapping of raw sensor data into higher-level representations—ideal for feeding into predictive, decision-making models later.
Feedback Mechanisms: Implement logging and event-based triggers from the sensor fusion system to continuously improve both hardware and AI components based on real-world performance and environmental nuance.
5. Roadmap and Next Steps
Design & Prototype:
Define the hardware specifications for edge devices and sensor modules.
Develop a small-scale sensor hub integrating a few key sensor types (e.g., motion + environmental).
Data Pipeline Setup:
Set up your data ingestion framework (e.g., Apache Kafka cluster).
Prototype and evaluate basic preprocessing and fusion algorithms on your chosen edge device.
Field Testing:
Deploy the prototype in a controlled environment similar to your target extremes (e.g., a pressure chamber, simulated low-gravity environment).
Refine data accuracy and real-time performance based on initial feedback.
Integration Preparation:
Build standardized API interfaces for future connection with the Empathic AI Core.
Document system architecture to ensure a smooth handoff between the hardware-first and AI-core teams.
Elmalo, this blueprint establishes a tangible, modular system that grounds Iron Spine in reality. It not only demonstrates your vision but also builds the foundational “nervous system” that your emergent, empathic AI will later use to perceive and interact with its environment.
Does this detailed roadmap align with your vision? Would you like to dive further into any individual section—perhaps starting with hardware specifications, software configuration, or the integration strategy for the future AI core?
0 notes