#TradingCardTemplate
Explore tagged Tumblr posts
Visit Tumblr Blog
Explore Tumblr blogs with no restrictions, modern design and the best experience.
Last Seen Tumblr Blogs


Fun Fact
Hackers stole 65M passwords from Tumblr in 2013.
Text

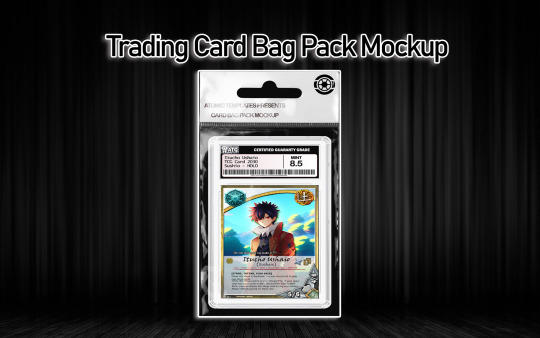
Anime Trading card template V4 | Atomic Templates 🌟 Unleash the power of your favorite anime characters with our Anime Trading Card Template! 🌟 Create your own custom cards and build the ultimate collection. Whether you're a collector or a creator, this is your chance to shine. 💫✨ atomictemplates.com
#AnimeTradingCard#CustomCards#Collectibles#AnimeLove#TradingCards#DIYAnime#CreateYourOwn#AnimeArt#CardCollection#GeekCulture#CardGame#UltimateDeck#AnimeFan#OtakuLife#CardTemplate#GetCreative#SwipeLeft#AnimeAddict#ShowYourCollection#TradingCardTemplate#FandomLove#AnimeMagic#BuildYourDeck#NerdyPride#AnimeObsession#UniqueArt#CardMaker#ArtisticExpression#AnimeCommunity#ShareThePassion
0 notes
Text
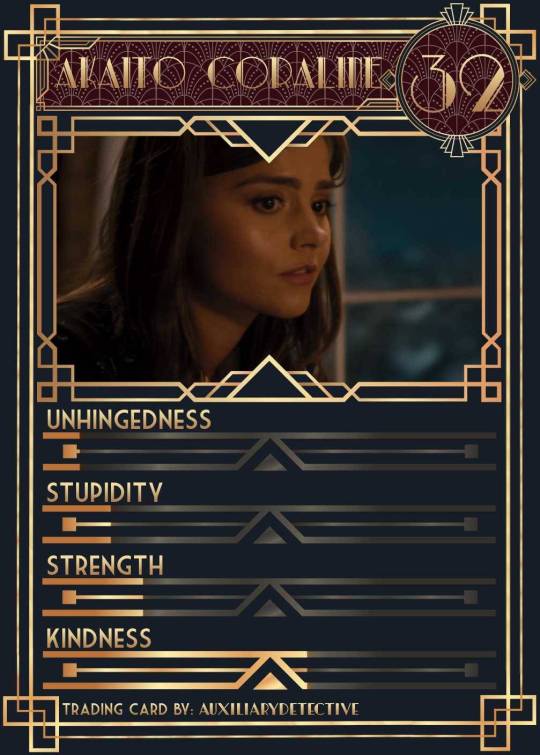
↬ OC Verse Trading Cards
Here it is! The reason (well, one of the reasons) for why I've been so inactive lately. I saw this super cool trading card template by @squea and @buttertrait and thought it was super fun, so I wanted to make something similar for my mutuals and myself. And, as you can see, I rediscovered my love for art deco on the way, so it's very art deco lol
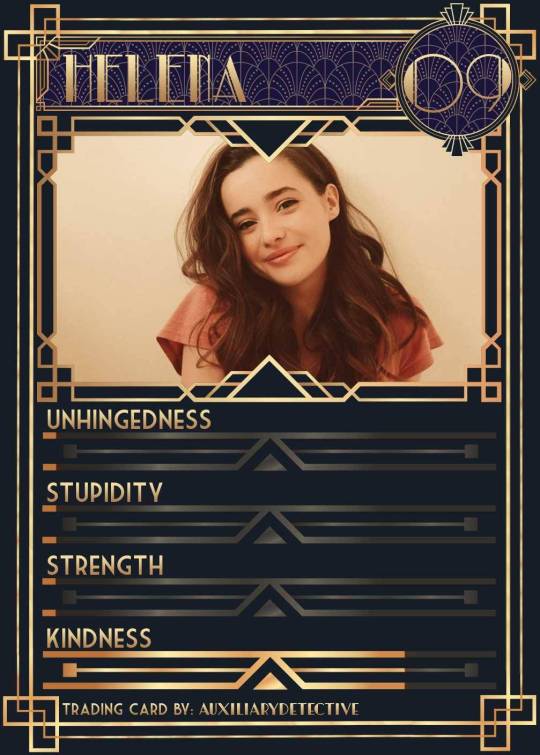
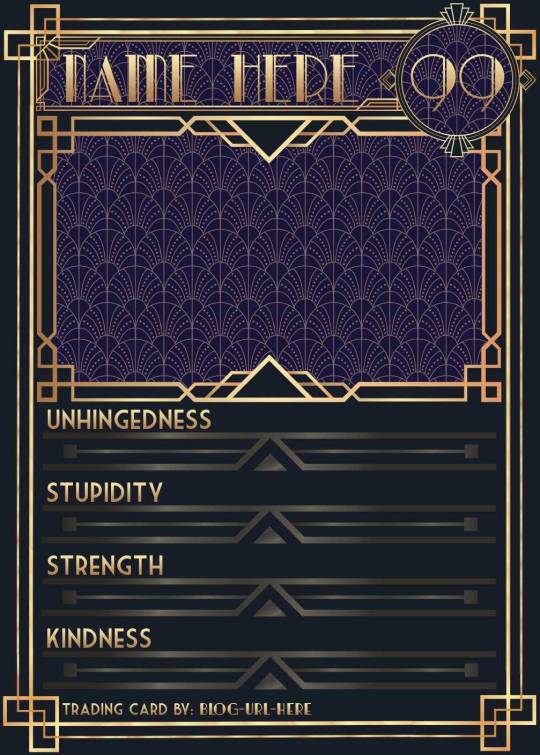
You can find the template to make your own cards here - and I explicitly encourage you to make your own, because I was kinda hoping I would get to see cards of you guys' OCs and we could collect them all in a binder like this one. It would be really fun! (The number next to the name is the power level btw - I wanted to imitate a set of Star Wars trading cards I used to collect as a kid) Make sure to @ me when you do and tag your post with #ocversetradingcards!
I tried to make the template as accessible as possible so that even beginners should be able to use it without any issues. So, I color-coded the layers!
The red layers are ones you shouldn't touch. They make up the main frame of the card. The orange layers are ones where you can play around with the colors, but that's for advanced photoshop/photopea users. The green ones are the ones where you put in text! Edit those freely. Blue ones are ones you have to select and move as a batch - if you don't know how to do that, check below the cut ^^
You'll need to download these fonts:
Park Lane (name & power level)
Market Deco (main text font)
Artisual Deco Black Italic (blog url)
Below the cut, you'll find a tutorial for the template and a list of the image resources I used - Quick info for everyone, including the more experienced Photopea users: Save your image at 50% quality. The template is a big file and the exported image will also be pretty big if you don’t save it at a lower quality. 50% is what you can see above and I think it's a nice size-quality ratio.
Tutorial Time
Opening the File
Step one: Get either Photoshop or Photopea. Photoshop costs money, Photopea is free and runs in your browser. Take three guesses which one I use. Yeah, it's Photopea. As such, this tutorial will be Photopea-centric, and I also have no clue what the Photoshop interface looks like, so I can't really help you if you work on Photoshop. But I'm told they're essentially the same, so...
Step two: Download the fonts listed above from the links in this post.
Step three: Click on the link above to go download the template. It's a bit of a big file, so I put it into a zip file for you. Don't worry, you don't need a special program to open it. Photopea will do that for you.
Step four: Open Photopea. Click on "File" -> "Open..." and select the "TradingCardTemplate" zip file.
Step five: Click "File" -> "Open..." again and select the zip files for the fonts. This will import them to Photopea. There are also preview images included in at least one of the zip files for the fonts, so just close the windows for those projects when they pop up by clicking on the little "x" next to their file name. You only need the "TradingCardTemplate.psd" tab to be open in your Photopea window.
Great! Now you're all set to edit!
Editing the name, power level and blog url
I decided to group these together because they function essentially the same way
Step one: Select the typing tool. It's the little "T" symbol in the toolbar on the left side of your screen.
Step two: Select the layer of the text you want to edit. The blog url one is in plain view. For the name and power ones, you need to open the corresponding folders first. They're the green layers in the folders!
Step three: Click on the text you want to edit. It's easiest to aim for the middle, that way you have the least chances of missing. The typing tool is a bit finicky with that sometimes, especially if the text is small.
Great! Now you can use your keyboard to delete the placeholder text and replace it with your own! The power level will only fit two digits and picking "00" will look bad. Your OC should have at least some power. They need it to breathe.
Changing the size of the name text
As you might be able to tell, the basic text size only works for fairly short names. So, you might have to make it smaller for your OC's name to fit
Step one: Enter your OC's name as described above.
Step two: Select the text as you would anywhere else in your browser.
Step three: Above the little tag where it says "TradingCardTemplate.psd", there's an options bar. You'll find a box there labelled "Size" with a box that says "150px" and a down arrow next to it. Click on the down arrow and a slider will pop up. Play around with that slider until your text has a good size. Then click on the checkmark.
Step four: Switch to the transformation tool. It's the cursor with the directional cross next to it, at the top of your left-hand tool bar. Move your text so that it aligns well with the left side of the frame but make sure it's below the middle.
Step five: You now have to select two layers at once. The text layer and the frame for the name tag. Do do that, either press and hold your control key on your keyboard while selecting the other layer or toggle the control key using the on-screen keyboard at the bottom left of the toolbar. If you use the toggle, don't forget to untoggle it after.
Step six: On your horizontal toolbar above your project window, click on the icon that's a horizontal line with two boxes centered on it.
Congrats, your text should now be centered!
Adding in your OC picture
Step one: Open the "Picture" folder and select the layer beneath "Add picture here". This will make sure your picture will be in the right spot. Also make sure to click on the eye next to the "Pattern" layer tag to make it go invisible.
Step two: Select "File" -> "Open & Place..." and pick a nice image.
Step three: Once the image has been imported, make sure you change the zoom percentage to 100%, that way the image doesn't look pixely or weird. Click on the checkmark.
Step four: Resize your image so your OC fits nicely into the frame. The image should fill the entire space inside the frame and can stick out as much as you want.
Step five: Right-click (or press and hold, if you're on mobile) your image' layer and select "Clipping Mask".
Perfect! Now your image should no longer stick out of the frame. Feel free to adjust your image's coloration, brightness etc. by selecting "Image" -> "Adjustments" and your preferred action.
Changing your stats bars
This works the same for each bar and I tried to make it as simple as possible.
Step one: Open the corresponding folder.
Step two: Select the set of three blue layers together. You can do this by selecting one layer normally, then selecting the other two while holding your control key or while having it toggled using the built-in on-screen mini keyboard at the bottom left of your screen. If you use the toggle, don't forget to untoggle it after.
Step three: Switch to the transformation tool (the one at the top of your left-hand toolbar, it's a cursor with a directional cross) and move your layers. By moving them to the right, you'll reveal more of the gold underneath the overlay. More gold = higher level of the corresponding stat.
Great job! Now adjust the bars to your liking.
Saving your project + card image
To save the project: Click on "File" -> "Save as PSD". This will download the current project under the same name as the file that you downloaded it as. So, it will be called "TradingCardTemplate (1)" or something similar. Make sure you change the name in your files so you know which is which. Alternatively, you can also change the name of the project by double-clicking the little square that currently says "TradingCardTemplate" and type in your new name. If you save again now, it will show the new project name! Make sure to save your project if you want to be able to recover it and/or work on it later!
To save the card image: Click on "File" -> "Export as >" and pick your preferred image file type. I suggest JPG for best results. Make sure to turn the quality slider to 50%, then hit the save button. This will download an image file of your chosen type, under the same name as the project name. To change that name, refer to the bullet point above or go to your files :)
Advanced: Changing the BG color of the pattern
Step one: Select the pattern background of either the name tag, power score or picture and turn it to 100% opacity.
Step two: Color-pick the current background color of the pattern.
Step three: Click "Image" -> "Adjustments" -> "Replace Color..." and click on the colored rectangle in the new pop-up. Replace the default color with your color-picked color. Now use the Hue, Saturation and Lightness sliders to get a new color that you like. Note down your slider values for later so you have them for the other elements.
Step four: Color-pick your new color and select the corresponding solid background layer. For those layers, click "Edit" -> "Fill..." and make sure you have "Foreground" and "Normal" selected, your Opacity is 100% and you have "Preserve Transparency" checked.
Step five: Don't forget to turn the opacity of your pattern layers back down to 60%.
Congrats! You have your colors changed! Repeat this process for the other two patterned elements.
Extra advanced: Changing the card's background color
NOTE: I DON'T recommend this. You can do it, but it's a lot of work.
Step one: Select the background layer and change its color to the new color you want. You can do it with the "Hue/Saturation..." adjustment, with the "Fill" edit as described above, or whichever way you want. Color-pick your new color.
Step two: Open the smart object PSDs for the frames for the frames for the picture, the name tag, and the power counter by double-clicking on the preview image of the layer.
Step three: Select the lowest colored layer of each and change its color to the same as your new card background color. Click on "File" -> "Save (Smart Object)". Close the project windows.
Step four: Open the folders for the various stat bars and select the "Color Overlay" layers. Change their colors the same way you did for the other layers. Warm colors and high-saturation colors will most likely not look good here and you might need to find a different way of making the stat bars look good. Playing around with the "Brightness/Contrast" adjustment layers above might help, but I can't promise anything. This is the main reason why I don't recommend changing the card background color. The stats bars are adjusted to the background color.
There we are! Either your card looks very pretty now or you understand why I don't recommend this. Either way: Good job!
Resources from Freepik:
Corners by tartila Power counter frame Picture frame by pch.vector Stats bar by tartila Pattern

Taglist (we're bringing out all fandoms today): @starcrossedjedis @oneirataxia-girl @daughter-of-melpomene @bravelittleflower @box-of-bats @fluffle-system @wheresmybloodynauglamir @nanukanal @supermarine-silvally @cody-helix02
#ocversetradingcards#artsy#photopea adventures#oc: akaito coraline#oc: helena#holy freaking shit i finally did it#look everyone!!!
21 notes
·
View notes
Text

TCG Card Design template Vol 3 Experience the thrill of customization as you bring your favorite sports to life in a modern, eye-catching format. Embrace the future of sports card design and indulge in the art of collecting with our Sports Card Design Template. https://atomictemplates.com/
#AnimeTradingCard#CustomCards#Collectibles#AnimeLove#TradingCards#DIYAnime#CreateYourOwn#AnimeArt#CardCollection#GeekCulture#CardGame#UltimateDeck#AnimeFan#OtakuLife#CardTemplate#GetCreative#SwipeLeft#AnimeAddict#ShowYourCollection#TradingCardTemplate#FandomLove#AnimeMagic#BuildYourDeck#NerdyPride#AnimeObsession#UniqueArt#CardMaker#ArtisticExpression#AnimeCommunity#ShareThePassion
0 notes
Text

TCG Card Design template Vol 2 Experience the thrill of customization as you bring your favorite sports to life in a modern, eye-catching format. Embrace the future of sports card design and indulge in the art of collecting with our Sports Card Design Template. https://atomictemplates.com/
#AnimeTradingCard#CustomCards#Collectibles#AnimeLove#TradingCards#DIYAnime#CreateYourOwn#AnimeArt#CardCollection#GeekCulture#CardGame#UltimateDeck#AnimeFan#OtakuLife#CardTemplate#GetCreative#SwipeLeft#AnimeAddict#ShowYourCollection#TradingCardTemplate#FandomLove#AnimeMagic#BuildYourDeck#NerdyPride#AnimeObsession#UniqueArt#CardMaker#ArtisticExpression#AnimeCommunity#ShareThePassion
0 notes
Text

TCG Card Design template Vol 1Experience the thrill of customization as you bring your favorite sports to life in a modern, eye-catching format. Embrace the future of sports card design and indulge in the art of collecting with our Sports Card Design Template.
#AnimeTradingCard#CustomCards#Collectibles#AnimeLove#TradingCards#DIYAnime#CreateYourOwn#AnimeArt#CardCollection#GeekCulture#CardGame#UltimateDeck#AnimeFan#OtakuLife#CardTemplate#GetCreative#SwipeLeft#AnimeAddict#ShowYourCollection#TradingCardTemplate#FandomLove#AnimeMagic#BuildYourDeck#NerdyPride#AnimeObsession#UniqueArt#CardMaker#ArtisticExpression#AnimeCommunity#ShareThePassion
0 notes
Text

TCG Card Design template Vol 3
Experience the thrill of customization as you bring your favorite sports to life in a modern, eye-catching format. Embrace the future of sports card design and indulge in the art of collecting with our Sports Card Design Template.
#AnimeTradingCard#CustomCards#Collectibles#AnimeLove#TradingCards#DIYAnime#CreateYourOwn#AnimeArt#CardCollection#GeekCulture#CardGame#UltimateDeck#AnimeFan#OtakuLife#CardTemplate#GetCreative#SwipeLeft#AnimeAddict#ShowYourCollection#TradingCardTemplate#FandomLove#AnimeMagic#BuildYourDeck#NerdyPride#AnimeObsession#UniqueArt#CardMaker#ArtisticExpression#AnimeCommunity#ShareThePassion
0 notes
Text
TCG Card Slab holder Mockup #template #psd #tcg #cardmaker #milliondollarcoin, #MOCKUP, #CardSlab, #Cardholder, #Coinslab, #ngccoin http://atomictemplates.com
#AnimeTradingCard#CustomCards#Collectibles#AnimeLove#TradingCards#DIYAnime#CreateYourOwn#AnimeArt#CardCollection#GeekCulture#CardGame#UltimateDeck#AnimeFan#OtakuLife#CardTemplate#GetCreative#SwipeLeft#AnimeAddict#ShowYourCollection#TradingCardTemplate#FandomLove#AnimeMagic#BuildYourDeck#NerdyPride#AnimeObsession#UniqueArt#CardMaker#ArtisticExpression#AnimeCommunity#ShareThePassion
0 notes
Photo
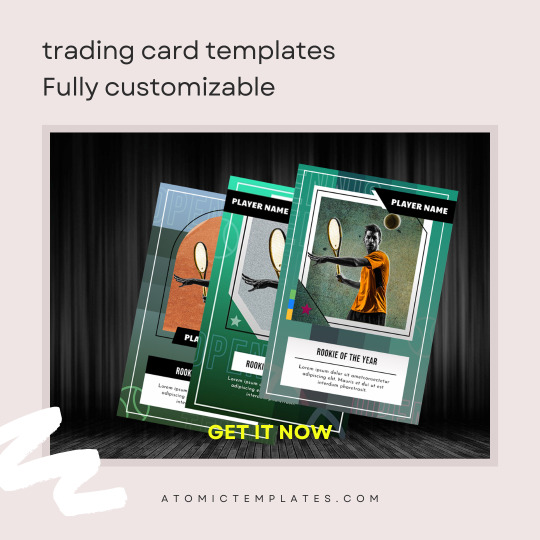
Customize Cards with your own text and images get your designing skills to next level with editable templates . #sportscardtemplate #sportscardpsd #tradingcardtemplate #baseballcard #cardtemplate #tradingcardart #customsportscard #nfttemplate #cardtemplatephotoshop https://atomictemplates.com/
0 notes
Video
youtube
Customizable NFT and trading cards
#sportscardtemplate #sportscardpsd #tradingcardtemplate #baseballcard #cardtemplate #tradingcardart #customsportscard
0 notes