#Transfer HTML to WordPress
Explore tagged Tumblr posts
Visit Tumblr Blog
Explore Tumblr blogs with no restrictions, modern design and the best experience.
Last Seen Tumblr Blogs


Fun Fact
Mobile Tumblr US users spend an average of 4.04 minutes per session on the app.
Text
The Do's and Don'ts of Transfer HTML to WordPress
Transferring your website from HTML to WordPress can enhance your site’s functionality, scalability, and user experience. With WordPress, you gain access to thousands of themes and plugins, making it easier to manage and grow your website. HireWPGeeks specializes in seamless transfer HTML to WordPress services, ensuring your site’s design and SEO integrity are preserved throughout the process. Let us help you make the switch smoothly and effectively.
#Transfer HTML to WordPress#HireWPGeeks#HTML to WordPress migration#WordPress themes#Website conversion
0 notes
Note
Do you have any tips or tutorial recommendations for making your own website?
I actually really do like the Wordpress client now I've gotten the hang of it!
I did tell 1000 of my subscribers to kill themselves in an email header by accident, and also battered those poor 1000 people with something like 100 emails in increasingly frantically apologised for errors over the course of the same three days, but that was before I really Got it.
With the above oopsies in mind, if you want to import previous newsletters or posts, for the love of God, do not import your existing newsletter subscribers until after all of your backposts have been imported across. That is the main lesson I have learned.
I had such a vision in mind of a triumphant surprise email going "Hey, look what I did! Surprise! Isn't it sexy?!" and instead everyone got 30 notifications about chapter updates from 2 years ago and an email that said "It's Your Responsibility to Kill Yourself" followed by multiple deranged apologies from me.
So. Don't do that.
Other than that, I'd actually wanted a proper website for quite a few years even before Patreon got so antsy with hiding my content - I tried to set one up a few years back with Wix, and I cannot recommend that less, it's a fucking awful site to use, and it's far less user intuitive than Wordpress.
Part of my issues with Wordpress were actually that a lot of website clients, unless you're building from scratch in HTML/CSS or another code, give you everything in Blocks, and because I remembered like 10 years ago where you didn't have to do that, and you mostly altered everything on the website with like, 10000 options tickboxes and sliders, I was like "wow this is awful". I will admit now, crotchety bastard that I am, that the Blocks system is better and more intuitive once you start to understand it. I just don't always do well thinking of things in three dimensions, so to speak, and I was shooting myself in the foot by going "WELL BACK IN MY DAY--"
Wix doesn't have a very good help section because they want you to talk to their people for help, but most sites for stuff like this do have really robust FAQ and help sections, and obviously, rely on those as much as possible.
At one point I was so upset with my inability to do something that Lorenzo literally came over and told me to leave the apartment (that was the day that I went to Pets at Home and spent a ridiculous amount of money on gifts for the cat), and while I was very grumpy about doing it at the time, taking breaks is crucial, especially if you get as frustrated as I do.
I realise that most of what I have said so far is niche tips for if you're stubborn and mentally ill, so in terms of actual website building, I would say it's important to have an idea of what you want the site to do.
Do you just want a landing page, so that if people search for your name or whatever, that this is the first result? That it links people to your books or your store, your socials? Do you want to have a gallery of work on display, or an archive of writing like I've made? Do you want people to be able to contact you, give tips?
I always wanted a robustly tagged archive with an in-depth tag page like the one I've set up now, and the goal for my Directory of Work on Medium and elsewhere was always that it would later be transferred to my website once it was built.
Then, I have an about page for people who are just curious about who I am and who I look like; commission info and information about booking me for events or inviting me to cons and such; the books I have for sale, publications I've been a part of, interviews and presentations on YouTube; my events calendar with conventions and such; the gallery where I'm showing off both art of my characters and where I'll later show art that I buy for my home and myself, such as the stuff framed in the stairwell or jewellery I buy from makers at markets and such; and then, of course, the subscriber benefits.
All of the above to go my goals which are, in order, to encourage people to read my work and make it easy for them to do so, to pay me money for my existing work or to offer me money for new work, and to show support for other events, artists, friends, and queer creators.
I would definitely advise thinking carefully about how visual or how word-based you want your site to be - I had to look for a recipe blog theme to find one that was stripped back in terms of images. Especially for adult websites, I'd be careful about payment providers and so forth.
Stripe is the default on the site, and I've been very careful about making sure none of my titles or descriptions that the Stripe client will see have words like erotica or adult in them - if someone from Stripe clicks through and sees the site, they might take issue with it, but that's another thing. I do get paid by Stripe through Medium, so I do already use them.
Most payment providers hate any kind of adult content, but are willing to give a tiny bit more wiggle room on erotica, or at least, they just don't notice it in the same way they do Real Porn, but there's nothing I can say other than "be careful and more importantly, be lucky" on that front.
Most of all, I'd say to try to have fun with it and try to enjoy the actual building process if you can - make something pretty and fun to navigate as much as you can, and if you can get some enjoyment out of it, your site users will as well.
18 notes
·
View notes
Text
14,000 Posts on Whatever
Yes! This is the official 14,000th post on the site! Mind you, there were many written before 2003 (the year the official archives go back to), but they’re not on the site now because they were written as hand-rolled HTML and I am lazy and did not manually cut and paste them into the site when it transferred over to blogging software (first Moveable Type and now WordPress). Of the posts that are…

View On WordPress
25 notes
·
View notes
Note
do you know any good places to put webcomics? is it best to just make your own website for them? I'm not really into sites like webtoon or whatever...
If you don't want much setup, you can make a Tumblr and use the Simple Webcomic Theme (or any other theme, as long as you set it so the blog shows 1 post per page for long form serialised work, or in a full-size grid for funny comics).
There are still other alternative platforms like Comics Fury, Comics Gator and Drunk Duck, those have been around before Webtoons.
If you are comfortable with HTML, CSS or generally learning/playing around with independent website setup, then you can go to Neocities or Wordpress. I use Wordpress (the dot org) for my personal website, The World in Deeper Inspection webcomic and the Comics Devices library, but that's a system that's worked with me and my brain for 11 years now.
Neocities allows you total freedom, but you really have to be comfortable with learning since this is old-school website building. There's a webcomic template though.
Squarespace or Wix is fine if you use their blog system.
I don't recommend Carrd for webcomics! I just don't think the infrastructure (one-page site) is flexible enough for yourself or your readership.
My general opinion is that I'll always recommend having your webcomic in a place that you can control, or at the least, easily export to another platform. I've been through so many eras of platforms rising and falling. And exporting all the posts/art you upload on that one dying platform only is an ordeal that you would want to avoid (ask me, who's working on manually transferring stuff from Twitter and Deviantart to my personal website OTL)
137 notes
·
View notes
Text
14,000 Posts on Whatever
Yes! This is the official 14,000th post on the site! Mind you, there were many written before 2003 (the year the official archives go back to), but they’re not on the site now because they were written as hand-rolled HTML and I am lazy and did not manually cut and paste them into the site when it transferred over to blogging software (first Moveable Type and now WordPress). Of the posts that are…
View On WordPress
7 notes
·
View notes
Text
If I disappear from society, don't be surprised.
I am so so so tired of capitalism.
For Christmas I got a Raspberry Pi. The goal was to host my own website off it. This was entirely for fun.
Step one: set up raspberry Pi so I can host a site on it. Easy. Ubuntu is free (thank fuck), I know how to set it up, but hold on! According to xfinity, I cannot change dmz or dms rules on their router. I can't even REQUEST it. I can't even use a workaround because I'm not allowed to edit the port forward that was automatically added to my router. I dig through years old forums and find out that this is because I'm using the modem provided by xfinity. I now have to buy a new modem from xfinity's "approved list".
Step two: get a domain. I swim through 4 million outrageous prices that say shit like "pay $0.01 for the first year!" with the text below saying "with purchase of 3 year agreement". I finally get to godaddy and am able to convince the stupid checkout to give me 1 year of my domain (after, of course, it corrected my awful mistake to 3 years and, if I hadn't been hyper-vigilant, I wouldn't have noticed. I have to dig through 5 pages in settings to find a way to turn off auto pay because I know better by now. While I'm there I also turn off all email notifications, which were all automatically on. It also didn't tell me that I can't transfer my domain outside of godaddy for 60 days, so I just essentially paid for something I can't use for 2 months. Great. (out of curiosity, I dug through godaddy for some time. The 60 day thing appears nowhere except on the help center page when specifically searching for it.)
Step three: create a site. WordPress, once my most beloved website creation software, now slams subscription fees on me like cardi B audios on teenager girls's tiktoks. Unrelenting. Bloodthirsty. I power through to just get past "let AI design your site!" and "pick one of our patterns" so I can reach the point where I can edit the template. I already have a free template zip file. I drop it in the box. "wait!" says WordPress, in a screen-covering popup "upgrade to the creator plan to access the theme install features!" I click the only button on the screen. It takes me IMMEDIATELY to a filled out checkout page. WordPress Creator is $300 per year. Per. Year.
I read through the "features included with your purchase" to see things like "sftp/SSH certificates", "github deployments", "free staging site", and "install plugins and themes". All of these were free 5 years ago. "Save 20% by paying for two years!" No, I don't think I will.
Out of pure spite against the demon that is modern capitalism, I'm teaching myself html and css. I would kiss the creator of w3schools on the mouth, right after I kiss the creator of Ubuntu. I'm so angry. The internet is useless now.
5 notes
·
View notes
Text
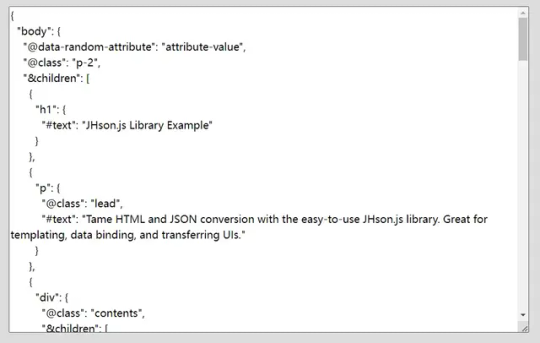
JSON To HTML & HTML To JSON Converter - JHson.js
JHson.js is a lightweight and fast JavaScript library for converting between HTML and JSON. The library converts HTML structures into JSON format so developers can easily store, manipulate, and transfer webpage layouts and data between the server and client sides. On the contrary, it also allows you to write JSON directly to the DOM for rendering. JHson.js is perfect for developers looking to…
View On WordPress
3 notes
·
View notes
Text
This.
I'm helping a friend with her website for her small business. Her previous web person* set her up with an all-in-one service (crm) that I suspect is way more than she needs and also $100 a month.
* I think they're actually basically a middleman between the client and the CRM. And not one doing a great job.
We're currently trying to get the account transferred over to my friend and I'm desperately hoping we'll have control over the domain so I can make her something easier (I was planning on Wordpress)
I'm techie and have been building websites since HTML was the only option. I can see the value in these all-in-one services, but I'm suspicious of them.
Hey if you own a business I need you to repeat after me:
I will not let my web developer manage my domain registration.
My domains are my responsibility and they cannot be handed to a contractor.
If I do not control my domains, I do not control my website.
If my domain is paid for on somebody else's credit card, it isn't really mine.
I will read every contract carefully and abide by its terms.
If the terms of a contract are not agreeable to me, I will amend them until the contractor and I both agree to and are aware of the terms.
I will pay my contractors in a timely fashion.
I will not burn bridges with my contractors.
I will pay for domain registration myself, and will never grant anyone else complete control over my domain.
I will not let my web developer manage my domain registration.
10K notes
·
View notes
Text

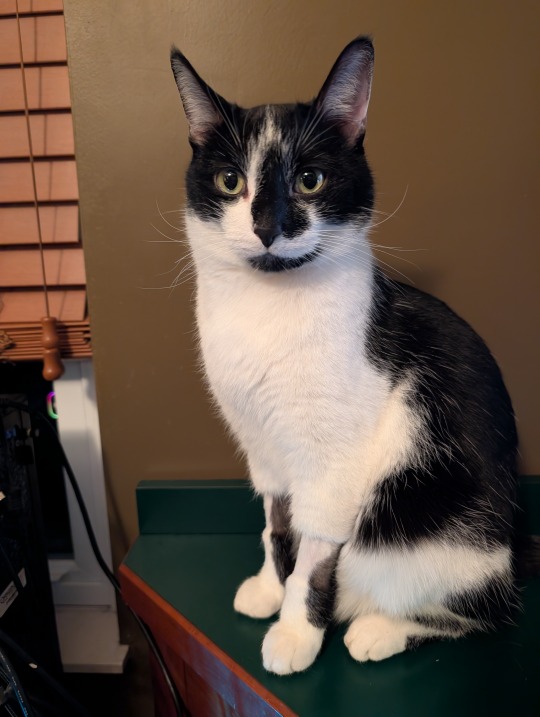
Kiwi’s unexpected journey on Royal Yacht Britannia John Batten sailed on the Royal Yacht Britannia, rubbing shoulders with royalty. Photo/ Tom Eley “What is that?” That was the question former leading mechanical engineer John Batten had in 1956 when asked to serve aboard the Royal Yacht Britannia. Built in Scotland, Britannia was launched in 1953 for £2.1 million, about $4m in NZ dollars at the time. At 412 feet long, she served as the British royal family’s floating residence for more than 44 years before being decommissioned in 1997. During her service, she visited more than 600 ports in 135 countries. Batten, 89, said he believes luck landed him on board with Princess Margaret, Prince Philip, Duke of Edinburgh, and Queen Elizabeth II. “I’ve been lucky my whole life,” said the Oropi resident. He grew up in the small coal-mining community of Glen Massey, near Ngāruawāhia, and followed in the footsteps of his father and sister by joining the Royal New Zealand Navy. He served aboard the Dido-class cruiser HMNZS Bellona, later travelling to Britain to help bring back another cruiser, HMNZS Royalist. But his course would soon change – leading him into the company of royalty. Assigned to the refrigeration room, Batten said he “saw a pair of legs coming down the ladder”. “It was Chief Pio Smith, and he said: ‘Would you like to go back to England? The royal yacht sailors “unusual uniform. Photo / Tom Eley Within days, Batten said he was being measured for a new uniform. The sailor’s new uniform was unusual: a serge top tucked into doeskin trousers, with a silk ribbon bow stitched on to the back waistband. “Next minute, we were there – on the Britannia.” He joined a crew of 200 Englishmen, four Australians and one other Kiwi, Able Seaman Bob Soper. After leaving the ship, Batten said they didn’t stay in contact. https://a42017af94bfdabf9452d7f6807dee1e.safeframe.googlesyndication.com/safeframe/1-0-45/html/container.html The vessel travelled 39,550 miles, crossed the equator three times and remained at sea for 182 days. Batten said the crew spotted 35 icebergs, drank 51,847 pints of beer and 4864 tots of rum, and smoked 1,234,385 cigarettes. “I was a goody-good and didn’t smoke or drink,” he said. Though unsure why he was chosen for the assignment, Batten said he spent much of his time entertaining the royal family. “I used to do a lot of entertaining – mainly rock ‘n’ roll.” He said he sang for Princess Margaret and shared soup with Prince Philip. “I got on quite well with Princess Margaret because she liked rock ‘n’ roll,” he said. “She was lovely.” He described his duties onboard as easy but said standards were exceptionally high. “You always walked around with a rag in your overalls pocket. If you saw a mark, you wiped it off.” During the voyage, Batten travelled to South Africa, was at the opening of the Melbourne Olympics, and cruised to Antarctica. The journey ended on February 24, 1957, in Portsmouth, and Batten was transferred to HMNZS Maori, marking the close of a remarkable chapter. “We looked into the lives of many people all over the world, and in doing so, returned home richer for the experience.” Tags and categories: All RNZN/NZDF News Past and Present via WordPress https://ift.tt/rUwRxJy June 20, 2025 at 11:59AM
0 notes
Text

I will do wordpress website migration or transfer website Fiverr Link https://www.fiverr.com/s/rEXzNND wpwar link https://wpwar.com/product/flatsome-multi-purpose-responsive-woocommerce-theme/ You are at the right gig I will provide you complete secured and guaranteed backup restore and migration of sites. I’ll migrate your WordPress sites from one domain to another or subdomain or another folder. #oververse #BAEKHYUN #SustainableBlockchain #GreenCrypto #BitcoinBIT #2025BTSFESTA #wordpress #webdesign #website #seo #webdevelopment #digitalmarketing #websitedesign #marketing #ecommerce #webdesigner #webdeveloper #wordpresswebsite #wordpressdeveloper #web #wordpressdesign #design #business #socialmedia #html #graphicdesign #branding #websitedevelopment #blog #wordpresstheme #wordpressblogger #wordpressthemes #woocommerce #wordpressblog #css #webhosting
0 notes
Text
The Easiest Way to Transfer HTML to WordPress | HireWPGeeks
Discover the easiest way to transfer HTML to WordPress with HireWPGeeks. Our expert team simplifies the migration process, ensuring a seamless transition without compromising your site’s performance or design. Whether you're upgrading to WordPress for better functionality or user experience, we make the entire process smooth and hassle-free. Let HireWPGeeks handle your HTML to WordPress migration today!
0 notes
Text

I will do wordpress website migration or transfer website
Fiverr Link https://www.fiverr.com/s/rEXzNND
wpwar link https://wpwar.com/product/blonwe-multipurpose-woocommerce/
You are at the right gig I will provide you complete secured and guaranteed backup restore and migration of sites. I’ll migrate your WordPress sites from one domain to another or subdomain or another folder.#oververse #BAEKHYUN #SustainableBlockchain #GreenCrypto #BitcoinBIT #2025BTSFESTA #wordpress #webdesign #website #seo #webdevelopment #digitalmarketing #websitedesign #marketing #ecommerce #webdesigner #webdeveloper #wordpresswebsite #wordpressdeveloper #web #wordpressdesign #design #business #socialmedia #html #graphicdesign #branding #websitedevelopment #blog #wordpresstheme #wordpressblogger #wordpressthemes #woocommerce #wordpressblog #css #webhosting
0 notes
Text
Automate Your Lead Capture: Sync Contact Forms with APIs Effortlessly
In today’s fast-paced digital landscape, manual lead handling is a bottleneck you can’t afford. Every second lost copying contact form data into CRMs, marketing tools, or spreadsheets is a missed opportunity. Automating your lead capture process by syncing contact forms with APIs isn’t just a technical upgrade—it’s a business necessity.
In this blog, we’ll break down how you can automate your lead capture by connecting your website contact forms directly to any API. Whether you use WordPress, static HTML, or a page builder like Elementor, this guide will help you build a smarter, faster lead pipeline.
Why Automate Lead Capture?
Let’s start with the why. Most websites still rely on email notifications or manual spreadsheet entries from contact form submissions. That means:
Delayed response times
Human error in transferring data
Poor lead nurturing due to lack of automation
Automating this process ensures that every lead goes directly into your sales or marketing stack—like CRMs, email platforms, or customer databases—without delay.
Key Benefits:
📈 Faster lead response time
⚙️ Improved data accuracy
🧩 Seamless integration with CRMs like HubSpot, Salesforce, or Pipedrive
🕒 Massive time savings for your team
💬 Real-time engagement triggers via SMS, email, or chatbot
What Does “Syncing Contact Forms with APIs” Actually Mean?
At its core, syncing a form with an API means that when a user fills out a form on your site, the submitted data is sent directly to an external system using a POST request (or similar HTTP method).
For example:
A user fills in a contact form on your website.
The form data is sent automatically to your CRM’s API endpoint.
Your CRM instantly creates a new lead profile with that information.
No email check. No manual copy-paste. Just pure automation.
Common Use Cases for Contact Form to API Integration
The beauty of API integration lies in its flexibility. Here are just a few practical use cases:
Send Leads to a CRM (e.g., HubSpot, Zoho, Salesforce)
Trigger Email Campaigns (e.g., Mailchimp, Brevo, ActiveCampaign)
Update a Google Sheet or Airtable in Real-Time
Create Support Tickets Automatically (e.g., Zendesk, Freshdesk)
Send Notifications to Slack, Discord, or Microsoft Teams
Trigger Automations via Zapier, Make.com, or Pabbly
How to Sync Your Contact Form with an API: Step-by-Step
Let’s walk through the typical setup to connect a contact form to an API. This process can vary depending on your tech stack, but the principles are consistent.
Step 1: Choose a Contact Form Tool
Depending on your website platform, you may be using:
WordPress: WPForms, Contact Form 7, Gravity Forms
Page Builders: Elementor, Webflow
Static HTML Forms
Custom JavaScript Forms
Step 2: Identify Your Target API
Know where you want the data to go:
CRM
Marketing platform
Database
Third-party automation tool
Check their API documentation and note:
Endpoint URL
Required headers (API keys, tokens)
Expected payload (JSON format, field names)
Step 3: Build or Configure the Integration
You have three main options:
Option 1: Use a Middleware Tool
Tools like ContactFormToAPI, Zapier, or Make.com allow no-code connections between your contact form and an API.
Advantages:
No coding required
Easy to use
Works with most form builders
Option 2: Use Webhooks or Native Integrations
Some form plugins (e.g., Gravity Forms, WPForms) support webhooks or direct API integrations.
You configure a webhook URL where form data is sent. From there, you can forward the data to your desired API.
Option 3: Custom API Integration with Code
For developers or advanced users, you can write custom JavaScript or PHP code to send form data to an API.
Example (JavaScript):
javascript
CopyEdit
fetch('https://api.example.com/leads', {
method: 'POST',
headers: {
'Content-Type': 'application/json',
'Authorization': 'Bearer YOUR_API_KEY'
},
body: JSON.stringify({
name: document.getElementById('name').value,
email: document.getElementById('email').value,
message: document.getElementById('message').value
})
});
Security and Best Practices
When dealing with APIs and user data, security is essential.
Use HTTPS: Always send data over secure connections.
Validate Inputs: Sanitize and validate form inputs before sending.
Secure API Keys: Never expose keys in front-end code.
Rate Limiting: Protect your endpoints from abuse.
Testing Your Integration
Before going live, make sure to test thoroughly:
Send test submissions to check if data is reaching the target system.
Use tools like Postman or webhook.site to simulate API calls.
Monitor for errors and ensure all required fields are populated correctly.
Pro Tips to Enhance Your Lead Automation Flow
Add Lead Scoring Before API Submission
Use form logic to assign lead quality scores.
Use Hidden Fields to Track UTM Parameters
Send marketing campaign data with the lead.
Create Conditional Routing
Route B2B leads to a CRM and B2C leads to an email tool.
Use Delayed Webhooks for Follow-ups
Trigger follow-up emails 24 hours after submission via automation.
Tools That Make This Effortless
Here are top tools to simplify syncing contact forms to APIs:
Tool
Best For
Code Required?
ContactFormToAPI
Universal form-to-API bridge
❌
Zapier
Multi-platform automation
❌
Make.com
Visual workflow builder
❌
Gravity Forms + Webhooks
WordPress forms
⚠️ Minimal
Custom Code (JS/PHP)
Full control
✅
Real-World Impact: What Businesses Gain
A SaaS startup integrated their demo request form with their CRM using ContactFormToAPI. Result?
Lead response time dropped from 4 hours to under 30 seconds
Sales follow-up speed increased conversion by 27%
Marketing gained insights from synced UTM parameters
No developers were required—just smart automation.
Final Thoughts
In a world where speed and personalization matter more than ever, automating your lead capture process by syncing contact forms to APIs is a game-changer. Whether you're running a small business or managing enterprise-level lead flow, this approach ensures your team stays agile, efficient, and focused on what matters most—closing deals.
You no longer need complex infrastructure or a dev team to make it happen. With tools like ContactFormToAPI, this once-developer-only functionality is now accessible to marketers, freelancers, and founders alike.
Ready to Automate?
Start syncing your contact forms to APIs today and supercharge your lead capture process. Tools like ContactFormToAPI make it as easy as copy-paste.
0 notes
Text
Boost Your Website’s Speed: The Essential Technical SEO Checklist
Website speed is not just a factor for user experience anymore—it's a crucial element for search engine optimization (SEO). Slow-loading websites can negatively impact rankings, bounce rates, and overall engagement. For businesses striving to stand out, improving website speed is essential, and the right technical SEO practices can make all the difference.
As one of the best SEO agencies in Pune, Osumare understands the importance of a fast website. By optimizing your site’s performance, you not only enhance the user experience but also ensure that your website ranks higher on search engines. In this blog, we'll guide you through the essential technical SEO checklist to boost your website’s speed and keep you ahead of the competition.
1. Test Your Website Speed
Before diving into fixes, it's essential to measure your website’s current performance. Use tools like Google PageSpeed Insights, GTmetrix, or Pingdom to evaluate your site’s loading time. These tools provide detailed insights into your website’s performance and suggest areas of improvement.
If you’re looking for professional support, partnering with top SEO agencies in Pune like Osumare can provide you with the expertise to evaluate and improve your website's speed effectively.
2. Optimize Image Sizes
Images are often the primary culprit behind slow-loading websites. Large, unoptimized images can significantly slow down your page speed. It's essential to compress images without losing quality, ensuring that they load faster.
Tools like TinyPNG and ImageOptim can help in reducing the file size of images. Additionally, using modern image formats such as WebP can further enhance loading times. Implementing lazy loading for images, where images are only loaded when they enter the user’s viewport, can also improve page speed.
3. Leverage Browser Caching
Caching allows browsers to store certain elements of your website (like images, CSS files, and JavaScript) locally on the user’s device. This helps speed up future visits to your site as these resources don't need to be re-downloaded.
Ensure that you set expiration dates for static resources so that browsers can cache these elements for an extended period. This reduces the number of requests made to the server and improves loading times.
4. Minify CSS, JavaScript, and HTML Files
Reducing the size of your website’s code can improve its speed significantly. Minifying CSS, JavaScript, and HTML files removes unnecessary spaces, comments, and line breaks, making the code more compact.
Tools like CSS Minifier, JavaScript Minifier, and HTML Minifier can help you compress and minify your code. Automating this process through your build tools or using a plugin (like Autoptimize for WordPress) can save you time while keeping your website optimized.
5. Enable GZIP Compression
GZIP compression helps reduce the size of your website's files, which speeds up the download time. It's a simple yet powerful way to enhance page load times. By enabling GZIP, your website can compress HTML, CSS, and JavaScript files before sending them to the browser, reducing the amount of data being transferred.
Most modern web servers support GZIP compression, and it's usually just a matter of adjusting server settings or adding code to your .htaccess file.
6. Use a Content Delivery Network (CDN)
A CDN is a network of servers located around the world that store copies of your website’s static content. By using a CDN, your website’s content is delivered from the server closest to the user, reducing the time it takes for the page to load.
CDNs can significantly improve your site’s speed, especially for users who are located far from your web server. Leading SEO agencies in Pune often recommend implementing a CDN to ensure optimal website performance globally.
7. Reduce Server Response Time
Server response time is an important factor in your website’s speed. A slow server can lead to delays in loading your site. Choose a reliable web hosting provider and consider using dedicated or VPS hosting if your website receives high traffic.
Additionally, ensuring that your website's backend is optimized can reduce server response time. Regular database optimization and using lightweight CMS platforms can improve server performance.
8. Avoid Redirects
While redirects may be necessary at times, they can slow down your website. Each redirect adds an extra HTTP request-response cycle, causing delays. Try to avoid excessive redirects, especially ones that chain multiple URLs together.
Ensure that URLs are direct and free from unnecessary redirects, which will improve overall site speed.
9. Mobile Optimization
With mobile-first indexing becoming a priority for Google, optimizing your site for mobile devices is crucial for both speed and SEO. Ensure that your mobile site loads quickly by using responsive design, optimizing images, and eliminating unnecessary scripts that may slow down the page.
10. Regular Performance Monitoring
Improving website speed is an ongoing process. As websites grow and change, it’s important to monitor your site’s performance regularly. Use the speed testing tools mentioned earlier to track your website’s speed over time and address any performance issues promptly.
Conclusion: Speed Equals Success
A fast website is not just an SEO requirement—it’s essential for a positive user experience. By following this technical SEO checklist, you can significantly improve your site’s performance, reduce bounce rates, and boost search engine rankings.
As one of the best SEO agencies in Pune, Osumare understands how technical SEO plays a crucial role in achieving long-term success. Whether you're looking to improve your website’s speed or enhance other technical aspects of your SEO strategy, partnering with top SEO agencies in Pune can help you achieve your goals efficiently.
Remember, in the fast-paced digital world, a fast-loading website is a competitive advantage. Implement these strategies today, and watch your website performance soar
0 notes
Text
Top five Plugin to Build IOS app for WordPress
1. fliperrr
For Stunning MAGAZINES, eBOOKS, REPORTS, WHITE PAPERS, etc.
Create, share and embed online magazines / eBooks / Reports, transforming your PDFs into online flipping books
With Tons of PROFESSIONAL, ADVANCED Features
No Coding or Technical skills required
2. Real3D Flipbook
Key Highlights:
3D reasonable page-turning activitys.
Upholds PDFs, pictures, and HTML content.
Adjustable flipbook UI with various skins and settings.
Works with portable and work area gadgets.
Why it's Perfect: The 3D impacts are outwardly dazzling and improve the client experience, particularly for imaginative ventures and organizations displaying portfolios.
3. FlippingBook
Key Highlights:
Switches PDFs over completely to flipbooks with intelligent page-turn impacts.
Adjustable marking, implanting choices, and a responsive plan.
Permits adding recordings, connections, and pictures to improve content.
Gives investigation to follow peruser commitment.
Why it's Perfect: Spotlights on intelligent and promoting well disposed flipbooks, making it a solid match for business use.
4. 3D FlipBook
Key Elements:
Sensible 3D page-turning impacts.
Upholds PDFs, pictures, and WordPress posts.
Offers different customization choices like page thickness and profundity.
Dynamic and advanced for touchscreen gadgets.
Why it's Perfect: Offers noteworthy 3D special visualizations and is profoundly adjustable, ideal for anybody looking for a practical flipbook experience.
5. dFlip PDF FlipBook
Key Elements:
Simple PDF transfer and transformation to flipbooks.
Lightweight and quick stacking flipbooks.
Gives customization to page size, design, and zoom highlights.
Responsive and deals with all gadgets.
0 notes
Text
Effortless Figma to Elementor Conversion for Your WordPress Needs
When it comes to building dynamic, aesthetically appealing websites for WordPress, the integration of design tools with page builders is crucial. Figma and Elementor are two powerful platforms that, when combined, can take your web design to the next level. The process of converting Figma designs into Elementor layouts might seem daunting at first, but with the right strategies and tools, the transition from Figma to Elementor can be incredibly seamless. This guide will help you understand how to effortlessly perform a figma to elementor conversion, ensuring your website looks exactly as envisioned and functions perfectly.
Understanding Figma to Elementor Conversion
Figma is a popular design tool widely used by UX/UI designers to create wireframes, prototypes, and high-fidelity mockups. Elementor, on the other hand, is a drag-and-drop page builder for WordPress that allows users to build stunning websites without needing to write a single line of code. The combination of these two tools makes designing and building a website faster and more efficient.
The key to a successful Figma to Elementor conversion lies in understanding the relationship between a static design and the dynamic elements that Elementor offers. While Figma provides an accurate visual representation of how a page should look, Elementor helps translate that design into a fully functional website. With the right workflow, converting your Figma designs into Elementor pages becomes a straightforward task.
Preparing Your Figma Design for Elementor
Before diving into the actual Figma to Elementor conversion, it’s important to ensure that your Figma design is structured in a way that is compatible with Elementor. Start by ensuring that your design is clean, organized, and broken down into sections that make sense for a web page layout. Proper use of grids, alignments, and spacing in Figma will make the conversion process smoother.
Additionally, ensure that all the images, typography, and colors used in your Figma design are clearly defined. By keeping a consistent design language, you’ll save time when transferring assets into Elementor. It’s also helpful to export Figma elements like icons, logos, and images in high-quality formats that are optimized for the web. This will ensure that the design’s integrity remains intact when using Elementor.
Tools for Effortless Figma to Elementor Conversion
There are several tools available that can significantly speed up the Figma to Elementor conversion process. For instance, there are plugins that allow you to import your Figma design directly into Elementor, reducing the manual effort of recreating each element. These tools automatically map the visual elements from Figma to their Elementor counterparts, preserving the design’s layout, typography, and other key components.
Additionally, using a Figma-to-HTML converter can also streamline the conversion. This tool generates an HTML version of your Figma design, which can then be imported into Elementor as custom HTML. Once you have the design in Elementor, you can further refine it using Elementor’s advanced styling options to ensure that it matches the original Figma design.
Steps for Converting Figma to Elementor
The process of converting Figma to Elementor involves several key steps that can be broken down into manageable tasks. First, begin by preparing your design files in Figma for export. This involves ensuring that all elements are grouped and organized in layers, so they can be easily manipulated once in Elementor.
Next, export the Figma files you need, such as images, icons, and any other assets you want to keep. These files should be saved in a web-friendly format, such as PNG or SVG, ensuring that they retain their clarity and resolution when used on your WordPress website. Now, create a new page or post in WordPress and open it with Elementor. Begin the process of building your page by replicating the design structure from Figma, using Elementor’s widgets to add elements like text, images, and buttons.
For more advanced users, Elementor allows custom CSS and HTML integration, which can be used to fine-tune the design to match Figma precisely. During this stage of the Figma to Elementor conversion, be mindful of responsiveness. Make sure your design looks great on both desktop and mobile devices by utilizing Elementor’s responsive editing features.
Customizing Your Elementor Design
Once the basic structure of your page is built, it’s time to dive into the customization options that Elementor offers. Elementor’s theme builder allows you to fine-tune the design by customizing headers, footers, and even global design settings like fonts, colors, and spacing. This gives you full control over the look and feel of your website while keeping it in line with the original Figma design.
You can also take advantage of Elementor’s advanced features, such as animations, hover effects, and dynamic content. These features enable you to add interactivity and visual appeal to your website, which might not be possible with static Figma designs alone.
Testing and Refining Your Figma to Elementor Conversion
After the Figma to Elementor conversion is complete, it’s important to thoroughly test your website for functionality and visual consistency. This includes checking how it looks on different devices and browsers to ensure that your design remains responsive and fully functional across various platforms. You may need to adjust certain elements for optimal display, especially for mobile users.
Additionally, check for any broken links, missing images, or alignment issues that might have occurred during the conversion process. Elementor’s preview mode allows you to see how your design will look once published, which is an essential step before going live with the new page.
Conclusion
The process of Figma to Elementor conversion doesn’t have to be time-consuming or complicated. With careful planning, the right tools, and an understanding of how to leverage both platforms effectively, you can easily turn your Figma designs into fully functional WordPress pages. Whether you’re a designer or developer, mastering this workflow will help streamline your web design process and ensure that your website looks exactly as envisioned.
1 note
·
View note