#WPForms tutorial
Explore tagged Tumblr posts
Visit Tumblr Blog
Explore Tumblr blogs with no restrictions, modern design and the best experience.
Last Seen Tumblr Blogs


Fun Fact
China blocked Tumblr because of pornography and censorship problems in 2013.
Text
Why WordPress Is Still the Best CMS for Business Websites in 2025

In a world full of website builders and content management systems (CMS), one name has stood the test of time — WordPress. Despite newer tools entering the market, WordPress continues to lead the way in 2025 as the most trusted platform for building professional, secure, and scalable websites.
But what makes WordPress such a powerful CMS? And why do businesses across all industries — from tech startups to cafes and tour operators — still rely on it?
What is a CMS, and Why Do You Need One?
A Content Management System (CMS) is a software platform that allows users to create, manage, and modify content on a website without needing to code everything from scratch.
Whether it’s updating a product page, writing a blog post, or adding new services, a CMS makes it simple and quick.
Popular CMS Options in 2025 Include:
WordPress
Wix
Squarespace
Shopify (for eCommerce)
Webflow
Among these, WordPress remains the most flexible and scalable, powering over 40% of all websites globally.
Top 7 Reasons Why WordPress Still Dominates in 2025
1. It’s Completely Open-Source and Free
One of WordPress’s biggest advantages is that it’s open-source — you have full control over your site’s design, content, and data.
There are no restrictions on how you use it. You can:
Customize every detail
Migrate your site anytime
Add as many users, pages, or plugins as needed
This level of freedom is unmatched by many other platforms.
2. Limitless Design Flexibility
With over 10,000+ themes and visual builders like Elementor and WPBakery, WordPress gives you endless creative control.
Want a minimalist portfolio? A vibrant online store? A multilingual booking system? WordPress can do it all — and look good while doing it.
3. Thousands of Plugins to Expand Your Site
From SEO and analytics to appointment booking and chat support — WordPress’s 60,000+ plugins let you build exactly what you need.
Popular plugin categories include:
SEO: Yoast, Rank Math
Ecommerce: WooCommerce
Security: Wordfence, Sucuri
Speed: LiteSpeed Cache
Forms: WPForms, Gravity Forms
You’re never limited by your theme — you can add new features anytime.
4. Built-In SEO Superpowers
WordPress is SEO-friendly out of the box. Combine that with tools like Yoast SEO, fast-loading themes, and schema plugins — and you’re looking at a website that’s ready to rank on Google.
Plus, it’s easy to:
Add meta titles and descriptions
Create sitemaps
Control URL structures (permalinks)
Optimize image alt tags
For businesses looking to grow organically, WordPress is the most reliable option.
5. Mobile-Responsive and Fast
Most WordPress themes in 2025 are designed to work seamlessly across all screen sizes — from phones to tablets to desktops. Speed optimization plugins like WP Rocket and LiteSpeed Cache make your website lightning fast — a key factor in both SEO and user retention.
6. Ideal for E-Commerce and Service Businesses
Want to sell products online? WooCommerce — WordPress’s native eCommerce plugin — is robust, easy to use, and supports everything from physical goods to digital services.
And if you’re a service-based business, you can add features like:
Appointment scheduling
Live chat
Online payments
Google Maps integration
All with just a few plugin installations.
7. Large Community and Ongoing Support
WordPress is backed by a massive global community. That means:
Regular software updates
Thousands of tutorials and guides
Developers ready to troubleshoot issues
Countless forums and YouTube channels for self-help
It’s a CMS that’s constantly evolving — and won’t be obsolete next year.
What Types of Businesses Use WordPress in 2025?
The beauty of WordPress is its universal adaptability. It’s used by:
Restaurants and cafes for menu display and reservations
Tour companies for blog posts, package listings, and online bookings
Real estate agents for showcasing properties
Startups for portfolio sites and landing pages
Hospitals and clinics for appointment systems and patient information
Online stores selling everything from handmade items to courses
Even major companies like TechCrunch, Sony, and The New Yorker still trust WordPress.
WordPress vs. Other CMS Platforms
FeatureWordPressWixShopifyWebflowOwnershipFullLimitedLimitedFullFlexibilityHighMediumE-commerce onlyHighCostLow to scalableMediumHighHighPlugin SupportMassiveLimitedApp-basedModerateCommunity SupportGlobalLimitedModerateModerate
WordPress wins for long-term growth and business scalability.
Should You DIY or Hire a Professional?
WordPress is beginner-friendly — but building a website that is fast, secure, mobile-optimized, and SEO-ready from day one takes expertise.
That’s where a professional web design company in Udaipur comes in. A team that understands design, development, SEO, and user behavior can help you:
Customize themes and plugins
Set up proper security and backup systems
Speed-optimize for Google ranking
Build landing pages that convert
You focus on your business — let the experts handle the tech.
Final Words: WordPress Is Still King in 2025
Trends come and go. Website builders rise and fall. But WordPress continues to rule the CMS world — and for good reason.
0 notes
Text
How to Automatically Send Contact Form Data to Google Sheets (No-Code Solution!) 🚀
Still copy-pasting form submissions into Google Sheets? That’s a waste of time, not to mention the risk of losing data or making errors.
The smarter way? Automate the process so every contact form submission is logged in Google Sheets instantly—without lifting a finger. And guess what? No coding required! 🙌
Let’s go step by step and set it up in minutes so you can focus on what matters—your business.
📌 Want the full guide? Read this: How to Send Contact Form Data to Google Sheets for Free

Why Automate Contact Form Data to Google Sheets? 🤔
Manually entering data is frustrating and prone to mistakes. Here’s why Google Sheets contact form automation is a game-changer:
✔ No More Manual Entry – Every submission appears instantly in Google Sheets. ✔ Real-Time Updates – Stay on top of new leads and customer inquiries. ✔ Organized Data – Everything is in one place, neatly stored for easy access. ✔ Team Collaboration – Shared sheets allow your team to view and update leads effortlessly. ✔ Works with Any Form Builder – Whether it’s Google Forms, Typeform, WPForms, or a custom HTML form, this setup works seamlessly.
Step 1: Choose Your Contact Form Tool 📝
First, pick the right form builder for your website. Here are some popular choices:
Google Forms – Free and integrates with Google Sheets, but lacks customization.
Typeform / JotForm – More user-friendly, but requires external integration.
WPForms / Gravity Forms – Best for WordPress users.
Custom Website Forms – Needs an automation tool to sync with Google Sheets.
If your form doesn’t have a built-in option, don’t worry—you can easily integrate it with a no-code automation tool.
Step 2: Connect Your Form to Google Sheets 🔄
Here’s how you can send form data to Google Sheets automatically:
Option 1: Google Forms (Basic but Limited)
✔ If you’re using Google Forms, responses are automatically saved in Google Sheets. ✔ Good for simple surveys and event registrations, but not ideal for business workflows.
Option 2: Google Apps Script (For Techies)
✔ Lets you customize everything, but requires JavaScript knowledge. ✔ Not beginner-friendly and can be difficult to maintain.
If you’re looking for an easier way to sync your form submissions, a no-code Google Sheets integration is the best choice.
Option 3: Use an iPaaS for Seamless Automation (Best Option) 🚀
For a fully automated, no-code setup, an iPaaS like best iPaaS software is the simplest and most efficient way to send form submissions directly to Google Sheets.
Here’s why:
✅ No coding required – Set it up in just a few clicks. ✅ Instant syncing – No delays, all data updates in real time. ✅ Works with Any Contact Form – Whether it’s WordPress, Wix, Shopify, or a custom-built form, it integrates seamlessly. ✅ Custom Field Mapping – Choose exactly what data gets sent to Google Sheets.
📌 Example Workflow: ✔ A visitor fills out a contact form on your website → Their details appear in Google Sheets instantly → Your team gets notified via Slack or email.
🔗 See how best iPaaS software simplifies Google Sheets automation
Step 3: Test Your Automation ✅
Before you go live, make sure everything works perfectly:
✔ Submit a test form and check if the data appears in Google Sheets. ✔ Verify data fields to ensure everything is mapped correctly. ✔ Set up Slack or email notifications for instant alerts on new submissions.
Once everything is working, you're good to go! 🎉
Bonus: What Else Can You Automate? 🤖
If you’re already automating Google Sheets form integration, why stop there?
✔ Send Slack or Email Alerts for new form submissions. ✔ Push leads directly into your CRM (HubSpot, Salesforce, etc.). ✔ Trigger an automatic email response. ✔ Create a dynamic dashboard to track submissions in real-time.
With best iPaaS software, you can connect your form submissions with any tool—without writing a single line of code.
📌 Need a step-by-step guide? Read the full tutorial here.
Final Thoughts – Automate & Save Time! ⏳
Manually updating Google Sheets with form submissions is outdated and inefficient. By automating this process, you:
✔ Save hours of manual work. ✔ Reduce errors & keep data clean. ✔ Get real-time access to leads & customer inquiries.
Whether you need to auto-fill Google Sheets from website forms or set up a no-code workflow, automation makes everything easier.
🚀 Want an effortless setup? Best iPaaS software lets you automate everything in minutes.
📌 Read the Full Guide Here 👀: How to Send Contact Form Data to Google Sheets for Free
0 notes
Text
WordPress: The Ultimate Guide for Beginners
If you’ve ever considered creating a website, you’ve probably come across the name WordPress. As one of the most popular website-building platforms in the world, WordPress powers over 43% of all websites on the internet. Whether you want to start a blog, set up an online store, or showcase your portfolio, WordPress offers a user-friendly, flexible, and scalable solution. This guide will walk you through everything you need to know as a beginner to get started with WordPress.
What is WordPress?
WordPress is an open-source content management system (CMS) that allows you to create, manage, and customize websites without requiring advanced technical skills. Initially launched in 2003 as a blogging platform, WordPress has since evolved into a powerful website builder suitable for any purpose.
There are two versions of WordPress:
WordPress.org: The self-hosted version where you have full control over your website. It’s free to download, but you’ll need to purchase web hosting and a domain name.
WordPress.com: A hosted version with less flexibility but easier setup. It’s great for beginners who don’t want to deal with hosting.
This guide focuses on WordPress.org, as it offers more customization and scalability.
Why Choose WordPress?
WordPress stands out among website builders for several reasons:
1. Ease of Use
Even if you’re not a tech expert, WordPress’s intuitive dashboard makes managing your site a breeze. You can easily add pages, blog posts, images, and other content without coding.
2. Flexibility
WordPress supports a wide range of website types, including blogs, eCommerce stores, portfolios, business websites, forums, and membership sites.
3. Customizability
With over 10,000 free themes and 60,000 plugins available, you can design your website to suit your specific needs.
4. SEO-Friendly
WordPress is optimized for search engines out of the box, and you can enhance it further with plugins like Yoast SEO or Rank Math.
5. Community Support
As an open-source platform, WordPress has a massive global community. You can find countless tutorials, forums, and resources to help you.
How to Get Started with WordPress
Step 1: Choose a Domain Name and Hosting Provider
Your domain name is your website’s address (e.g., www.yourwebsite.com). Choose something short, memorable, and relevant to your niche. Popular domain registrars include Namecheap, Google Domains, and GoDaddy.
Web hosting is where your website’s files are stored. Some popular WordPress-friendly hosting providers are:
Bluehost (officially recommended by WordPress)
SiteGround
HostGator
Most hosting providers offer one-click WordPress installation, simplifying the setup process.
Step 2: Install WordPress
Once you’ve secured hosting and a domain, log in to your hosting account and find the WordPress installer. Follow these steps:
Go to your hosting dashboard.
Look for the “Install WordPress” or “WordPress Tools” option.
Follow the prompts to complete the installation.
After installation, you’ll receive your WordPress login credentials. Access your site’s dashboard by visiting www.yourwebsite.com/wp-admin.
Step 3: Choose a Theme
Themes determine your website’s design and layout. To choose a theme:
Go to your WordPress dashboard.
Navigate to Appearance > Themes.
Click Add New to browse free themes.
Preview and activate the theme you like.
You can also purchase premium themes from marketplaces like ThemeForest for more advanced features and designs.
Step 4: Install Essential Plugins
Plugins add functionality to your website. Some must-have plugins for beginners include:
Yoast SEO: Helps optimize your content for search engines.
WooCommerce: Essential for creating an online store.
Elementor: A drag-and-drop page builder.
WPForms: Allows you to create contact forms.
UpdraftPlus: Simplifies website backups.
To install plugins, go to Plugins > Add New, search for the plugin, and click Install Now.
Step 5: Customize Your Website
WordPress makes it easy to customize your site. From your dashboard:
Go to Appearance > Customize to tweak your theme’s colors, fonts, and layout.
Add pages by navigating to Pages > Add New.
Create blog posts under Posts > Add New.
Tips for Managing Your WordPress Website
1. Keep Your Site Updated
WordPress frequently releases updates to improve security and performance. Always update your WordPress core, themes, and plugins to the latest versions.
2. Enhance Website Security
Install security plugins like Wordfence or Sucuri to protect your site from malware and hackers. Also, use strong passwords and enable two-factor authentication.
3. Optimize for Speed
A fast-loading website improves user experience and SEO. Use plugins like WP Super Cache or W3 Total Cache and compress images with tools like Smush.
4. Monitor Your Site’s Performance
Track your website’s performance using tools like Google Analytics and the MonsterInsights plugin.
5. Regular Backups
Create regular backups of your site using plugins like UpdraftPlus to ensure you can recover your data in case of an emergency.
Common Challenges and How to Overcome Them
1. Choosing the Right Theme
With thousands of themes available, it’s easy to feel overwhelmed. Focus on themes that are responsive, lightweight, and well-reviewed.
2. Dealing with Plugins Conflicts
Too many plugins or poorly coded ones can cause issues. Use only necessary and reputable plugins, and always test new ones before activating them.
3. Improving SEO
SEO takes time and effort. Start by researching keywords, optimizing your content, and building backlinks to improve your search rankings.
4. Managing Spam Comments
Spam can clutter your site’s comment section. Use plugins like Akismet Anti-Spam to filter unwanted comments automatically.
Exploring Advanced Features
Once you’ve mastered the basics, you can explore advanced WordPress features:
Custom Post Types: Create unique content types beyond pages and posts.
eCommerce Features: Use WooCommerce to set up payment gateways, manage inventory, and handle shipping.
Multilingual Sites: Create a multilingual website with plugins like WPML or Polylang.
Membership Sites: Offer exclusive content with plugins like MemberPress.
Conclusion
WordPress is a versatile platform that empowers beginners to build professional websites with ease. By following this guide, you’ll have a solid foundation to create, customize, and manage your website effectively. Whether you’re starting a blog, launching an online store, or creating a portfolio, WordPress has the tools to bring your vision to life. Dive in and explore the endless possibilities WordPress offers—your journey to a stunning website begins today!
0 notes
Text
How to Make a FREE Business Website in 2025 (WordPress & Elementor Tutorial for Beginners)
Creating a professional business website for free in 2025 is simpler than ever with tools like WordPress and Elementor. Here’s a step-by-step guide tailored for beginners:
Step 1: Choose a Free Hosting Platform
Platforms like InfinityFree, 000webhost, or WordPress.com (free plan) allow you to host your site for free.
Register an account on your chosen platform. Note that free plans may have limitations like ads or a subdomain (e.g., yoursite.wordpress.com).
Step 2: Install WordPress
If your free hosting service doesn’t automatically install WordPress, access the hosting dashboard and use the 1-click WordPress installer.
Log in to your WordPress admin panel at yourdomain.com/wp-admin.
Step 3: Select a Free Theme
Go to Appearance > Themes > Add New in your WordPress dashboard.
Search for a business-friendly, responsive theme like Astra, OceanWP, or Neve.
Install and activate your chosen theme.
Step 4: Install Elementor (Free Version)
Navigate to Plugins > Add New in the WordPress dashboard.
Search for "Elementor" and click Install Now, then Activate.
Elementor allows drag-and-drop design, making it easy for beginners.
Step 5: Create Essential Pages
Home Page
Go to Pages > Add New, name it "Home," and click Edit with Elementor.
Use Elementor templates or build a custom design using widgets like headings, images, and buttons.
About Page
Highlight your business mission, values, and team.
Use Elementor to add an engaging layout.
Contact Page
Include a contact form (use the free WPForms plugin), business address, phone number, and a Google Map (via Elementor widgets).
Service/Products Page
Showcase your offerings with images, descriptions, and links.
Use Elementor’s pricing table or image gallery widgets.
Step 6: Customize Site Settings
Go to Appearance > Customize to modify:
Site Identity: Add your logo and site title.
Colors and Fonts: Match your brand aesthetic.
Menu: Create and organize your navigation menu under Appearance > Menus.
Step 7: Optimize for Mobile
Use Elementor’s responsive mode to ensure your site looks great on mobile devices.
Adjust text sizes, spacing, and layouts as needed.
Step 8: Publish Your Website
Set your homepage: Go to Settings > Reading and select the static page option, then choose "Home."
Click Publish on each page to make your site live.
Step 9: Promote Your Website
Share your site on social media, Google My Business, and email signatures.
Encourage clients to visit and provide feedback.
Bonus: Upgrade as Needed
For more features like a custom domain, advanced themes, or premium Elementor widgets, consider upgrading to paid plans when your budget allows.
By following these steps, you can build a professional-looking business website for free using WordPress and Elementor in 2025!
For Get More Information then click here - https://digisequel.com/
0 notes
Video
youtube
WPForms Lite WordPress Plugin Tutorial 2024 🔥 - WordPress Contact Form -...
1 note
·
View note
Text
Do you need help design a customer WordPress Login Page?

Do you want to create a custom WordPress login page for your website? If you run a WordPress membership site or an online store, then many users will often see your login page. Customizing the default WordPress login page allows you to offer a better user experience. In this ultimate guide, we will show you different ways to create a custom WordPress login page. You can also use this tutorial for creating a custom WooCommerce login page as well.

Here is what you will learn from this guide: Why Create a Custom WordPress Login Page? Your WordPress website comes with a powerful user management system. It allows users to create accounts in eCommerce stores, membership websites, and blogs. By default, the login page shows the WordPress branding and logo. This is fine if you are the only person with admin access or have very few users.

However, if your website allows users to register and log in, then a custom login page offers a better user experience. Some users may be suspicious if your WordPress login screen looks nothing like your website. They will likely feel more at home if you use your business logo and design. Lastly, the default login screen contains nothing but the login form. By creating a custom login page, you can use the space to promote other pages or special offers. That being said, let’s look at some examples of custom WordPress login page designs. WordPress Login Page Design Examples Website owners can customize the WordPress login page using different styles and techniques. Some create a custom login page that uses their website’s theme and colors. Others modify the default login page by adding a custom background, colors, and logo. Here are a few examples of what’s possible. WPForms

WPForms is the best WordPress contact form plugin on the market. Their plugin also includes an add-on to create beautiful WordPress login and registration forms, which we will show you later in this article. Their custom login page uses a two-column layout. The left column contains the login form, and the right column is used to highlight promotions and other calls to action. Their login page shown above lets their users know about new features. It uses custom branding, background illustration, and brand colors to create a unique login experience. Jacquelynne Steves

Jacquelynne Steeves is an arts and crafts website where the author publishes content about decorating homes, making quilts, patterns, embroidery, and more. Their login page uses a custom background image matching their website’s theme with the login form on the right. Church Motion Graphics

The login page of this motion graphics design company uses a colorful background reflecting what their business is all about. It uses the same site header, footer, and navigation menus on the login screen. The login form itself is quite simple, with a light background. MITSloan Management Review

MITSloan Management Review uses a popup modal to display a login and registration form. The advantage of using a popup is that users can log in without leaving the page. It saves them from a new page load and offers a faster user experience. Now, are you ready to learn how to create a custom login page in WordPress? Creating a WordPress Login Page Using Theme My Login (Free) Theme My Login is a free plugin that changes your login page to match your WordPress theme. It’s not very customizable, but it will replace the default WordPress-branded login page and make it look a bit more professional. The first thing you need to do is install and activate the Theme My Login plugin. For more details, see our step-by-step guide on how to install a WordPress plugin. Upon activation, Theme My Login automatically creates URLs for your custom login, logout, registration, forgot password, and reset password actions. You can customize these WordPress login URLs by visiting the Theme My Login » General page. Scroll down to the ‘Slugs’ section to modify the URLs used by the plugin for login actions.

Theme My Login also allows you to use shortcodes to create custom login and registration pages. You can simply create a page for each action and then add the page slug here so that the plugin can find and redirect users properly. Let’s start with the login page. Head over to Page » Add New to create a new WordPress page. Next, you need to give your page a title and then enter the following shortcode to the page.

You can now publish your page and preview it to see your custom login page in action. This is how it looks on our test WordPress website.

Simply repeat the process to create other pages by using the following shortcode: For the registration form For the lost password page For the reset password page Creating a Custom WordPress Login Page Using WPForms WPForms is the best WordPress form builder plugin on the market. It allows you to easily create custom login and registration forms for your website. WPForms is a premium WordPress plugin, and you will need at least their pro plan to access the User Registration add-on. WPBeginner users can get a 50% discount by using our WPForms coupon code: SAVE50 The first thing you need to do is install and activate the WPForms plugin. For more details, see our step-by-step guide on how to install a WordPress plugin. Upon activation, you need to visit the WPForms » Settings page to enter your license key. You can find this information in your account on the WPForms website.

After entering the license key, you’ll be able to install add-ons. Go ahead and visit the WPForms » Addons page and locate the User Registration Addon.

Next, click on the ‘Install Addon’ button to download and activate the addon. You are now ready to create your own custom login forms. Head over to WPForms » Add New page and scroll down to the ‘User Login Form’ template. You need to click on the ‘Use Template’ button to continue.

WPForms will load the User Login Form with the required fields. You can click on the fields to add your own description or text around them.

You can change other settings as well. For example, the default button title is ‘Submit’. You can click the button and then change the text to ‘Login’ instead.

You can also decide what happens once a user is successfully logged in. You’ll need to head over to the Settings » Confirmation tab and select an action. You can redirect the user to any other URL, redirect them to the homepage, or simply show them a message that they are now logged in.

Once you are satisfied with the form settings, just click on the ‘Save’ button in the top right corner of the screen and close the form builder. Adding Your Custom Login Form to a WordPress Page WPForms makes it super easy to add your custom login form on any WordPress post or page. Simply edit the page where you want to add the login form or create a new one. Then, on the page edit screen, add the WPForms block to your content area.

Next, select the login form you created earlier, and the WPForms block will automatically load it inside the content area. You can now continue editing the login form page. Feel free to add more text or promotional blocks. Once you are finished, don’t forget to save and publish your changes. You can now visit your website to see your login page in action.

Creating a Custom WordPress Login Page Using SeedProd (Recommended) By default, your custom WordPress login form page will use your theme’s page template and styles. It will have your theme’s navigation menus, header, footer, and sidebar widgets. If you want to take over the entire page completely and design something from scratch, then you can use a WordPress page builder plugin. SeedProd is the best landing page builder for WordPress. It’s beginner-friendly and offers a drag-and-drop builder to help you create any type of landing page, including a login page, coming soon page, maintenance mode page, and more. For this article, we will be using the SeedProd Pro version because it includes a login page template and advanced page blocks for customization. There is also a free version of SeedProd, but it doesn’t include the option to create a login page for your WordPress website. First, you’ll need to install the SeedProd plugin on your website. For more details, you can follow our guide on how to install a WordPress plugin. Once the plugin is active, you’ll be redirected to SeedProd in your WordPress admin area. Here, you’ll need to enter your license key, which you can easily get from the SeedProd account. When you’ve entered the key, click the ‘Verify key’ button.

After that, you are ready to create your login page in SeedProd. To start, head over to SeedProd » Landing Pages and then select the ‘Login Page’ option by clicking the ‘Set up a Login Page’ button.

On the next screen, you can select a template for your login page. There is also an option to create a page from scratch by using the Blank Template. However, we suggest using a template as it’s easier and faster to customize the login page.

When you select a template, a popup window will appear to enter a Page Name for your login page. SeedProd will use the page name as the URL for your landing page. Once you have entered these details, go ahead and click the ‘Save and Start Editing the Page’ button.

Now, you can edit your login page using SeedProd’s drag-and-drop builder in the Design tab. Read the full article
1 note
·
View note
Link
My blog readers asked me to share tutorial on how to add or create or install "Request a Quote" form in WordPress blog or website.
So i wrote a tutorial article on how to create request a quote form in wordpress. I am sharing this with my tumblr blog reader. Check this out, it may help you to grow your bussiness website.
0 notes
Text
How to Start a Blog on WordPress: Step-by-Step Guide for Beginners

Thinking about starting your own blog? Whether you want to share personal experiences, promote a business, or build a following, blogging is one of the most rewarding digital ventures. And the best part? You don’t need to be a web developer to get started — WordPress makes it incredibly easy.
In this guide, you’ll learn how to start a blog on WordPress step-by-step. From choosing a domain to publishing your first post, we’ll walk you through everything you need to know.
Step 1: Choose a Domain Name and Hosting
Before your blog goes live, you need two things:
A domain name (your blog’s address, like myblog.com)
A hosting provider (the service that stores your website files and makes them accessible on the web)
Choose a domain that reflects your content or brand. It should be simple, memorable, and relevant.
For hosting, go for a provider that offers fast speeds, WordPress support, and good customer service. Many WordPress-optimized hosting options include Bluehost, Hostinger, SiteGround, and Kinsta.
Step 2: Install WordPress
Most hosting services offer one-click WordPress installation, which means you don’t need to touch any code. Once installed, you’ll be able to log into your WordPress dashboard and begin building your site.
If you're unsure about installation, a WordPress Development Company in Udaipur can handle it for you and ensure your blog starts off on the right foot.
Step 3: Pick the Right Theme
Your WordPress theme determines the design and layout of your blog. The right theme should be responsive, fast, and easy to customize.
Recommended free themes for bloggers:
Astra: Lightweight and highly customizable
Neve: Clean design and fast performance
OceanWP: Great for personal or business blogs
Hestia: Stylish and multipurpose
You can preview and install themes directly from your WordPress dashboard by going to Appearance > Themes.
Step 4: Install Essential Plugins
Plugins extend the functionality of your blog. Here are a few essential ones to start with:
Yoast SEO or Rank Math: Improve your blog’s visibility on Google
WPForms: Create contact or feedback forms
UpdraftPlus: Backup your site regularly
Akismet: Filter spam comments
Jetpack: Boost security and track analytics
Just go to Plugins > Add New to install any of these tools.
Step 5: Customize Your Blog Settings
Before publishing your first post, tweak the following:
Site Title and Tagline: Set this under Settings > General
Permalinks: Use “Post name” under Settings > Permalinks for SEO-friendly URLs
Logo and Favicon: Upload branding elements via Appearance > Customize
Navigation Menu: Set up a user-friendly menu to help readers explore your content
Customizing these elements makes your blog look polished and professional.
Step 6: Create Essential Pages
Every blog should have a few key pages in addition to posts:
About Page: Share your story and mission
Contact Page: Let readers reach out via a form or email
Privacy Policy: Important for compliance and trust
Blog Page: Display all your recent articles
You can create these by navigating to Pages > Add New in the dashboard.
Step 7: Write and Publish Your First Blog Post
Now comes the exciting part—writing!
Click on Posts > Add New to begin. Use the Gutenberg block editor to:
Add headings, paragraphs, and images
Embed videos or social media posts
Insert buttons and call-to-action sections
Focus on delivering value to your readers. Whether it’s a tutorial, personal story, or industry insights—make it engaging and easy to read.
Step 8: Promote Your Blog
Once published, don’t just sit back—promote your post to drive traffic:
Share on social media (Facebook, Instagram, LinkedIn)
Join relevant blogging communities
Use email marketing tools to notify subscribers
Leave thoughtful comments on related blogs with a link back to yours
Promotion is just as important as creation when it comes to growing your audience.
Step 9: Optimize for SEO
Search engine optimization helps people find your blog via Google. Follow these tips:
Use an SEO plugin to set titles and meta descriptions
Add internal links to related content
Use keywords naturally in your content
Add alt tags to your images
Submit your sitemap to Google Search Console
SEO is a long game, but it's essential if you want to rank and reach new readers.
Step 10: Keep Your Blog Updated
Consistency is key in blogging. Update your blog regularly with fresh content to keep readers engaged and encourage search engines to crawl your site more often.
Here are some blog post ideas:
How-to guides
Listicles
Personal stories
Product reviews
Interviews
Opinion pieces
Also, keep your plugins, themes, and WordPress version updated to avoid security risks.
Why Choose WordPress Over Other Platforms?
Here’s why WordPress stands out among blogging platforms:
Fully customizable
Open-source and free
Scalable with thousands of plugins
Mobile- and SEO-friendly
Great community support
Unlike limited platforms like Blogger or Wix, WordPress gives you full ownership and flexibility.
If you're serious about long-term growth, design, and performance, it's wise to consult a trusted web design company in Udaipur to fine-tune your theme, layout, and mobile responsiveness.
Final Thoughts
Starting a blog on WordPress is one of the smartest decisions for aspiring writers, entrepreneurs, and businesses. It’s easy to use, rich in features, and backed by a vast community of developers and users.
With the right theme, plugins, and a content plan, you’ll be well on your way to building a successful blog that attracts, informs, and inspires.
0 notes
Text
How to Start a WordPress Blog in 2021 | Best Step by Step Guide
So, do you want to start a WordPress blog? Do you think it’s hard to start a blog in 2021? No, you are completely wrong, WordPress made it so easy. Following this step-by-step guide, your blog will be ready in under 10 minutes. You don’t need any technical knowledge, to follow this guide. We made it so simple, anybody can create a blog without any prior knowledge.
We made this super valuable guide so that even beginners can follow it easily. By the end of this tutorial, you have your own blog ready and you will learn everything you need to start a WordPress Blog.
How To Start A WordPress Blog: What You’ll Need And What We Will Cover
Here’s a Step by Step process of how to start a WordPress Blog:
How to choose the best Web Hosting and domain name (Recommended: Bluehost)
How to install and setup WordPress Blog
How to change your WordPress Theme
How to write your first blog post
How to Install Important Plugins for your Blog
How to create a contact us form
So let’s get started.
1. How To Choose The Best Web Hosting And Domain Name
The domain is the identity of your blog. When somebody types your domain your website will load. A domain name is important for search engine optimization. so, choosing the right domain is the main part of your blog. Imagine, you are creating a blog about travel, then travel is your main niche and word travel must be available in your domain name.
Important factors while choosing a domain name
Use your main keyword in your domain name
keep your domain name short
keep it easy to remember and unique
Avoid hyphens in the domain name
Go with com extension
You can use biznamewiz domain name suggestion tool to find domain name.
Hosting is where your website files are located. When somebody visited your domain address, then it redirected to an IP address where your files are live. Choosing the right web hosting is the most important part.
A domain name costs around 15$/year and web hosting costs around 7.99$ per month. That is very expensive for the one who is just starting out, but Bluehost provides a Free domain for a year and over 60% off on web hosting. The uptime of Bluehost is 99.95% and the load time is 249ms, which is very fast. Bluehost comes with a one-click wordpress installation. Bluehost is one of the hosting providers recommended by the wordpress.org community.
→ Click Here to Claim This Exclusive Bluehost offer ←
Bluehost is an oldest hosting provider for WordPress, they are working with WordPress since 2005. It’s a reliable, cheap, and fastest hosting provider.
So lets get started with purchase your domain and hosting.
Open Bluehost.com in new window and follow along.
First click on Get started button. After that you will redirected to plans page. For beginners we recommend go with Basic plan.
Then it will ask you to enter domain name for your WordPress blog. After that click on next button.
After that you need fill account information.
As you scroll down you will see package information and some extra packages. As a beginner go with 36 months plan, that’s the best value. At this time you don’t need any extra packages, except add domain privacy + protection. Later you can add this if you want.
After completing this, you will receive an email from Bluehost, about your login information of the web hosting control panel. This is where you see your website and from this panel, you can install WordPress for your blog.
2. How To Install And Setup WordPress Blog
In the new version of Bluehost WordPress is installed automatically. The new version of Bluehost makes it easier for non-techy users to create a blog.
Just login to your Bluehost account and then click the login to WordPress button to get started. You can also login to the WordPress dashboard using this link yourdomain.com/wp-admin.
3. How To Change Your WordPress Theme
Theme is how your website look. The default theme is not that good, you can change theme easily.
Once logged in to your dashboard, hover over appearance tab and click on themes.
After that click on Add New button, then you will be redirected to a page where you will find more than 7000+ free WordPress themes. You can sort by popular, latest, or featured. You hover over on any theme and click on the preview button to see how the theme looks on your website.
Select a theme that is simple and provides the best user experience. When you find a theme, then simply click on the install button. Once installation complete, you need to click on activate button to apply the theme to your blog.
Once theme is activated, you can customize theme by clicking customize button under appearance tab.
4. How To Write Your First Blog Post
Once you installed your theme, let’s head over to writing your first blog post.
To write a post:
Hover over the Posts tab
Click on Add new option
After that you will redirected to a WordPress post editor. WordPress has a simple block editor. Each element is a block.
You don’t need to add element for simple text, just start typing. To add a new image or heading click on the + button and simply click on the image or heading.
Once you done writing publish your post by clicking the Publish button located on top right corner.
5. How To Install Important Plugins For Your Blog
Once you published your first blog, you need some other functionality to your blog, like contact form, subscription form, sliders, galleries. You need to install some plugins to access these features.
Similar to themes you can find free and paid plugins in WordPress. there are almost 58000+ free plugins available on WordPress. Some important plugins you must have.
Yoast SEO
Jetpack
How to Install Plugins:
Hover over Plugins tab
Click on Add New option
Search for the plugin
Click on Install Now button
Let’s start creating a contact us page using plugin.
6. How To Create A Contact Us Form
Your website needs a contact form, where users directly contact you by filling a simple form. WordPress does not have a built-in contact form, we need to install a plugin called WPForms.
Over 4 million+ websites use WPForms plugin. Search wpforms in plugins. After that click on Install Now button and activate it.
Once installed, you will see WPForms tab. Hover over it and click on Add new option.
After that select Simple contact form option.
After that you will get a contact form, you can add new elements to it or remove from it. After editing the form click save button located on the top right corner.
Now let’s create a contact us page. Hover over the pages tab and click on add new button. You will be redirected to the WordPress block editor. Simply search in block wpforms you will find WPForms block, just click on it.
A new block will be added to your page. Simply select your saved form. your contact us form will be added to your page.
You can read best guide to optimize your WordPress Website for SEO.
We hope you find this guide is helpful to start a WordPress blog. Comment down if you stuck somewhere.
Read this post with images
#new blog#wordpress#how to start a blog#howtostartawordpressblog#how to start a wordpress blog#how to create a blog#blogging tips#blog
1 note
·
View note
Text
WordPress Development: Build Stunning Websites Easily
In today’s digital landscape, having a robust and visually appealing online presence is non-negotiable for businesses and individuals alike. WordPress, a versatile and user-friendly content management system (CMS), has emerged as the go-to platform for creating stunning websites with ease. In this blog, we’ll delve into WordPress development, exploring its features, benefits, and how you can leverage it to craft a remarkable online presence.
Why Choose WordPress for Website Development?
WordPress powers over 43% of all websites on the internet, making it the most popular CMS globally. Its popularity stems from several key factors:
1. Ease of Use
WordPress is designed with user-friendliness in mind. Its intuitive interface allows users with little to no coding experience to create and manage websites efficiently.
2. Flexibility and Scalability
Whether you’re building a simple blog or a complex e-commerce site, WordPress can handle it all. Its modular architecture ensures scalability as your needs grow.
3. Extensive Plugin Ecosystem
With over 60,000 plugins available, WordPress lets you add almost any functionality to your website—from SEO tools to contact forms and advanced analytics.
4. Customizable Themes
WordPress offers thousands of free and premium themes, enabling you to design a website that aligns with your brand identity.
5. SEO-Friendly Architecture
Search engine optimization (SEO) is critical for online visibility. WordPress is inherently SEO-friendly and supports additional optimization through plugins like Yoast SEO and Rank Math.
6. Active Community Support
WordPress boasts a large, active community of developers and users who contribute to forums, tutorials, and regular updates.
Getting Started with WordPress Development
1. Set Up Your Hosting and Domain
The first step in WordPress development is selecting a reliable hosting provider and registering a domain name. Hosting options like Bluehost, SiteGround, and WP Engine offer seamless WordPress integration.
2. Install WordPress
Most hosting providers offer one-click WordPress installation. Alternatively, you can download the WordPress software from WordPress.org and install it manually.
3. Choose a Theme
Selecting the right theme is crucial for your website’s appearance and functionality. Explore the WordPress Theme Directory for free options or purchase premium themes from marketplaces like ThemeForest.
4. Install Essential Plugins
Enhance your site’s capabilities by installing essential plugins. For instance:
Elementor: Drag-and-drop page builder
WooCommerce: E-commerce functionality
Akismet Anti-Spam: Protects your site from spam comments
WPForms: User-friendly form builder
5. Customize Your Website
Tailor your site’s layout, colors, fonts, and features using the WordPress Customizer or page builders like Elementor and Beaver Builder.
6. Add Content
Create engaging and high-quality content for your website. Use the WordPress Block Editor (Gutenberg) to add text, images, videos, and other media effortlessly.
Advanced WordPress Development Techniques
For those looking to go beyond the basics, here are some advanced WordPress development techniques:
1. Custom Theme Development
While pre-designed themes are convenient, custom themes offer greater flexibility. By creating your own theme, you can ensure a unique design tailored to your specific needs.
2. Custom Plugin Development
Developing custom plugins allows you to add niche functionalities that aren’t available in existing plugins.
3. Child Themes
When modifying a theme, use a child theme to preserve changes during theme updates.
4. Database Optimization
Optimize your WordPress database regularly to improve site speed and performance. Plugins like WP-Optimize make this task easy.
5. Integrate APIs
Integrate third-party APIs to expand your site’s functionality. For example, you can use the Google Maps API for location-based services or a payment gateway API for secure transactions.
6. Use Git for Version Control
Version control systems like Git help you manage code changes effectively, especially in collaborative projects.
Tips for Building Stunning Websites with WordPress
Prioritize Mobile Responsiveness: Ensure your website looks and functions flawlessly on all devices.
Optimize for Speed: Use caching plugins like W3 Total Cache and optimize images to enhance site speed.
Focus on User Experience (UX): Design intuitive navigation, use clear calls-to-action, and ensure accessibility for all users.
Secure Your Website: Implement SSL certificates, use security plugins like Wordfence, and perform regular backups.
Monitor Analytics: Use tools like Google Analytics to track visitor behavior and improve site performance.
Common Challenges in WordPress Development and How to Overcome Them
1. Slow Loading Times
Solution: Optimize images, enable caching, and use a content delivery network (CDN).
2. Plugin Conflicts
Solution: Regularly update plugins and deactivate conflicting ones to identify issues.
3. Hacking and Security Threats
Solution: Keep WordPress, themes, and plugins updated, and use robust security measures.
4. Customization Limitations
Solution: Learn basic coding (HTML, CSS, PHP) to make advanced customizations.
5. SEO Challenges
Solution: Use SEO plugins and follow best practices for keyword optimization and site structure.
Future Trends in WordPress Development
1. Headless WordPress
Headless WordPress decouples the front end from the back end, allowing developers to use modern frameworks like React or Vue.js for enhanced performance and flexibility.
2. AI Integration
Artificial intelligence is revolutionizing website development. Expect to see more AI-powered tools for content creation, personalization, and analytics in WordPress.
3. Voice Search Optimization
With the rise of voice assistants, optimizing websites for voice search is becoming essential.
4. Progressive Web Apps (PWAs)
Transforming WordPress sites into PWAs can improve user engagement by offering app-like experiences.
5. Sustainability Focus
As digital sustainability gains traction, WordPress developers are exploring energy-efficient hosting and lightweight designs to reduce carbon footprints.
Conclusion
WordPress development empowers individuals and businesses to create stunning, functional websites with ease. Whether you’re a beginner or an experienced developer, WordPress’s flexibility, extensive resources, and active community make it an invaluable tool. By leveraging the tips and techniques shared in this blog, you’ll be well-equipped to build a website that stands out in today’s competitive digital world. Embrace the power of WordPress and transform your online vision into reality.
0 notes
Text
How To Gather Signatures Online NOW In 3 Simple Steps
How To Gather Signatures Online NOW In 3 Simple Steps
Studies say that WordPress is used by 34% websites in this world. It shows that WordPress is getting much stronger every day. On top of that, it’s pretty easy to create a WordPress blog, manage it and maintain it. Self-hosted WordPress is used by professional bloggers to multi-million business websites!
So, it tells that self-hosted WordPress is becoming is the #1 choice when becomes website…
View On WordPress
0 notes
Video
youtube
How to Change the Submit Button Color of The WPForms WordPress Plugin? https://youtube.com/watch?v=tjCK412ekHs 🎬🛠️💡🎨 #WordPress #WPForms #Submit #Button #Color #Tutorial
0 notes
Text
Create wpforms Conversational Forms and Boost your Conversions with Clients or Site Visitors
Take a look on Video tutorial What is wpforms Conversational Forms How to Installing the wpforms Conversational Forms Add-on in WordPress Create a conversational Forms Buy now WPForm SPECIAL OFFER – Save 50% OFF on WPForms
View On WordPress
0 notes
Text
How To Record Every Email Sent From Your Website

Email is an important component of the website. Every website owner wants to keep a record of every email sent to trusted users and ensure that they receive it promptly. One of the most significant ways to get leads is through email marketing. Whether you're running a basic blog or a large website, email is essential.
When you send an email, you must be curious to see if it was sent correctly. Sometimes you're not sure if the letter was delivered or not.
Most e-mail marketers and lead-generation strategists have trouble since some of the emails that are supposed to be sent from their WordPress site to their prospects' inboxes are routed to spam folders and others are not sent at all.
This is why it is critical to track and record each e-mail sent from your website to ensure that your messages are delivered to your intended recipients. It's also crucial to keep track of each mail's date and time of delivery, as well as whether or not it was delivered to the intended recipient. Once you've determined that some of your emails aren't being sent, the last thing you need to do is fix your email delivery system.
In this congested, competitive inbox environment, email monitoring helps us create and keep connections. That's what this tutorial is all about: boosting email efficiency and productivity by powering your inbox with email tracking.
Your best tool to record every email sent and prevent spam emails.
WP Mail SMTP plugin is the world's most popular SMTP (Simple Mail Transfer Protocol) plugin, developed by WPForms and used by millions of websites to solve deliverability concerns. It helps you enhance email deliverability and avoid spam folders.
You can keep track of who opens your emails and who clicks on them so you don't miss anything crucial.
If your email campaigns are delivered directly to your user's inbox, they are more likely to be opened and read, and you will have a higher conversion rate.
0 notes
Text
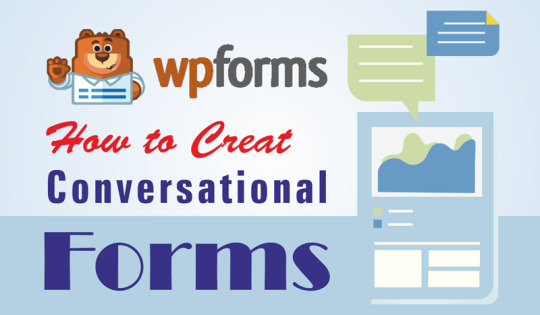
How to create a powerful Conversational Form in WordPress?
How to create a powerful Conversational Form in WordPress?
There are different types of forms available. This wide variety of forms is due to its importance. Because, forms are the first and foremost way to collect data from your visitor, which you need for further website optimization.
Among the various types of forms, conversational forms is a unique one. It asks questions to the user one by one, giving them almost a face to face experience.
Today, in…
View On WordPress
0 notes