#Worm Composting
Explore tagged Tumblr posts
Visit Tumblr Blog
Explore Tumblr blogs with no restrictions, modern design and the best experience.
Last Seen Tumblr Blogs


Fun Fact
Tumblr Inc. is funded by 13 investors.
Text

I love worm composting 🪱
3 notes
·
View notes
Note
what do yoi mean by feeding the worms fabric?
I have a worm bin! The brand is worm cafe, but most of them are pretty similar. I've used DIY bins as well. The reason I switched to a worm bin is because my knees are garbage and I don't have to bend down for this one.
I take parts of fabric that I cannot use and snip them off the main bit. I only have one piece of tiny fabric that qualifies at the moment.


Then I snip them into fabric confetti(easier on the worms, fungus, and other critters if it's smaller).

And then I sprinkle the confetti in the worm bin.


It takes about 2 months for the worms to eat it. Beetles are faster but unpredictable. I let beetles live in the worm bin, but I don't purposely add beetles. I didn't see any beetle larva this time so full credit to the worms right now.
You can do the same with almost any organic based fabric or paper. A compost pile will break down cotton as well, but I'm unsure how long it takes. I think my old pile used to take 4-6 months during the warm seasons.
A DIY bin plan is available at:
#worms#compost#composting#vermiculture#worm composting#vermicompost#ecofriendly#im not sure what to tag this#but i tried
5 notes
·
View notes
Text
Worm Bin Tutorial
Disclaimer: the information I’m giving is based on my own personal experience and research. Some of the things that work for me may not work in a different setup. If you’re interested in learning more, I’d highly recommend the book “Worms Eat My Garbage” by Mary Appelhof.
Why have a worm bin?
It’s a great way to dispose of organic matter while minimizing methane emissions! Landfills aren’t set up for aerobic decomposition, so food scraps in landfills often give off a ton of methane emissions when decomposing, which is a pretty potent greenhouse gas! Also, worm castings are an excellent fertilizer/mulch/soil amendment.
A worm bin is super low-maintenance once you figure out what you are doing. It doesn’t smell bad and can be kept indoors—I keep mine by my desk in the winter! And I think it’s pretty fun. Also, your trash won’t smell as bad when it isn’t full of rotting food!
Making the Worm Bin
Really what you need here are two containers. One of them you put a bunch of holes in, and that sits inside the other container. The holes are important because they allow for drainage of water (which is then caught by the external container) and diffusion of oxygen. I used some kitty litter buckets for this, and they work great! The lid is really useful.

Pro-tip: you don’t need a drill to make the holes. If you have a knife or razor blade, you can press it into the plastic and rotate it, which makes nice, round holes.
The bin with holes in it sits inside the other bin, but there should be space for water drainage/collection and air permeation.
Worms
The worms you want in general are “red wrigglers” or Eisenia fetida. These are sometimes sold as bait worms, but in my experience the “red worms” are actually European Nightcrawlers (labeled “ENC”). Those can also work, but they prefer different conditions from red wigglers (I believe they live deeper in the soil) so they might not be as successful. You also need a lot of worms to start out with, like a pound of worms. I had the best success going to a local vermiculture business and getting a pound of mixed worms (red wigglers, European night crawlers, and Indian blues). I think the mix is useful since having a couple different species makes the bin more resilient.
Note: buying local is really beneficial here. When worms are sold online and shipped, the sellers “dehydrate” them a bit to help lower weight and prevent overheating. The worms will be perfectly healthy after you give them moist bedding again, but you’re going to miss out on bacteria and other beneficial critters that could come with the worms if they are fresh.
Setting up the Bin
An important thing I have learned from experience: you can’t just put food and worms in a bin and expect things to work. You also need bedding. Bedding is filler material, like newspaper or coconut coir. I mostly use newspaper I buy from a local vermiculture business. I tried ripping my own paper and once it got wet it turned into a solid layer, whereas the pre-ripped newspaper I buy has a fluffy consistency.
I’ve also tried using peat moss as bedding, but that didn’t work so well—I got a huge spike in the mite population (maybe from acidic conditions?). Peat moss also isn’t great for the environment in general.
The bedding is important because worms shouldn’t eat too much food or too much of their own poop (castings) as both are bad for them. Bedding should be topped off when possible. When you add food to the bin, use a shovel to bury it in the bedding. This helps things rot properly, prevents mold and bad smells, and keeps away critters like fruit flies.
Other Critters
Your worm bin can and should have other critters in it! Some in my bin include mites and springtails, who both help the worms break down organic matter. However, there should be a balance between other critters and the worms. If something appears to be taking over, you might have a problem. I’ve also had fruit flies in my bin—this didn’t end up being a huge problem as long as I only opened the lid of the bin outdoors.
Worm Bin Maintenance
Once you get going, the worm bin doesn’t require much maintenance. I keep a freezer bag in my freezer and fill it up with food scraps, and once it seems the worms are mostly finished with the last feeding, I’ll thaw the bag and feed them again. (Freezing is helpful because it’s a convenient way to preserve the scraps, but it also helps to kickstart breaking down, since freezing damages things.) Be careful not to over-feed the worms, as this can lead to a sour bin and/or string-of-pearls (which is a pretty disturbing worm ailment).
Also be careful of what you feed the worms. You can look up lists of dos and donts online, but in general, stick to plant matter, and don’t feed them aromatic herbs or citrus. Also make sure to feed the worms plenty of crushed eggshells, as this provides grit and helps to regulate the pH of the worm bin.
The worms should be kept in a location with temperatures that are comfortable to humans. They don’t do well if conditions are too cold or too warm.
Make sure to dump out any water that accumulates and add bedding when it’s needed. I use this to water plants, and I haven’t had any negative effects, but some people will say you shouldn’t do that.
Once the bin starts to get full, you can remove worm castings. There are fancy ways to do this, but I just dig through the bin and scoop out any areas that are nearly all worm castings and then remove any worms/eggs that are in the castings by hand. The castings can be mixed in with potting soil or used on top like a mulch. (Although be careful: I've heard some species of worms are an invasive species in some areas so check before you potentially introduce them to the ground.)
Conclusions
So that’s it! If you want more information, I encourage you to do your own research. Although try to seek out multiple sources—not all the information out on the internet (or even in books) has been properly vetted. I can also try my best to answer questions based on my own experience, but I’m still relatively new at this.
48 notes
·
View notes
Text
One thing about me is that I'll always find a way to talk about worm composting.
10 notes
·
View notes
Text


4.26.24 - used the eggshells from my trade to make some ~worm seasoning~. adds calcium and other goodies to the compost 😊 🧂
#eggs#eggshells#worms#worm composting#indoor composting#paper shredding#bedding#vermi#vermicomposting#wormblr
2 notes
·
View notes
Text
Porch Garden Update: In the Light of New Leaves
Some mornings arrive not with announcements, but with quiet discoveries. Today, the leaves spoke. Ruffled and radiant, veined like maps of memory, they shimmered beneath the sun—light resting gently on the backs of mustard and turnip greens, like prayer on the shoulder of a friend. Their edges curled slightly, not from age, but from the joy of stretching toward something greater than…
#balcony garden#compost tea#composting worms#container gardening#Contemplative Gardening#eco-spirituality#fig tree care#garden mindfulness#gardening with ME/CFS#gentle gardening#healing garden#living soil#Microgreens#natural compost#nightcrawlers#organic gardening#porch garden#quiet growth#red wigglers#sacred gardening#slow gardening#soil regeneration#sustainable gardening#urban gardening#vermicomposting#worm composting
0 notes
Text
also I FINALLY harvested the compost from the lower tray! It was a lot more than I thought-- filled up the entire small bucket I had set aside for much more future compost.
I followed the instructions that came with my Worm Factory 360 as best I could.
I made sure not to feed them for a few days to have them go through what was left as much as possible.
I moved the lower bin to the top and stirred once an hour for 7 hours with the overhead garage light on the whole time. Though I found that worms were starting to pop up and explore in the last two. so it might only need like 5 hours instead.
I made up a new batch of substrate (coco coir, shredded paper, and minerals, though I should have added perlite as well, I'm realizing now) and added just a little bit of food scraps once I had collected all the compost.
I also left open the tap at the bottom to increase air flow and prevent it getting soggy. I hadn't done so originally since moving everything from my old bin which had been quite wet. Hopefully this will help moving forward.
0 notes
Text
Lmao me questioning for myself at what point something counts as a special interest and every item I've seen today has been either categorized into would be able to feed to vermicomposting worms or not, not a single thought otherwise sidebar if all the plastic was made to be worm compostable would that work????????? Probs not but I'm gonna think about it
0 notes
Text
1 note
·
View note
Text
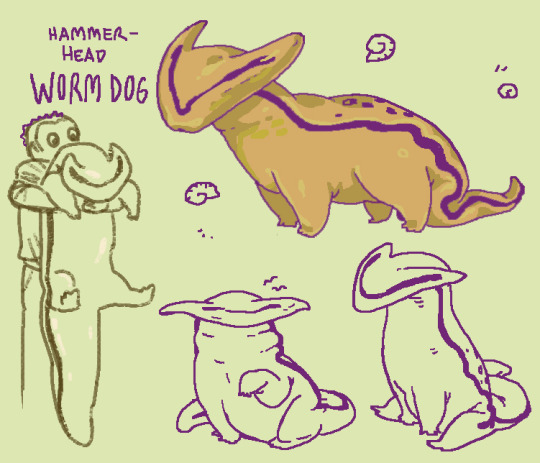
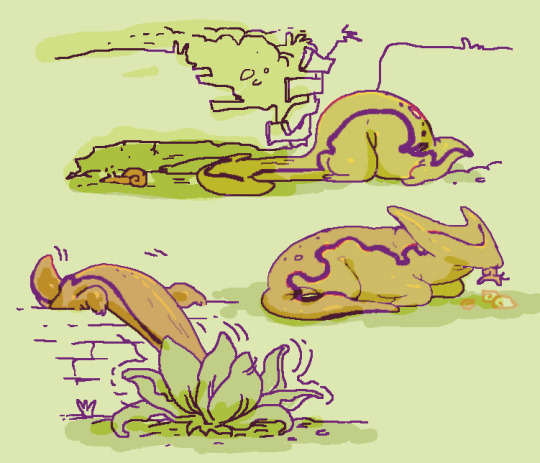
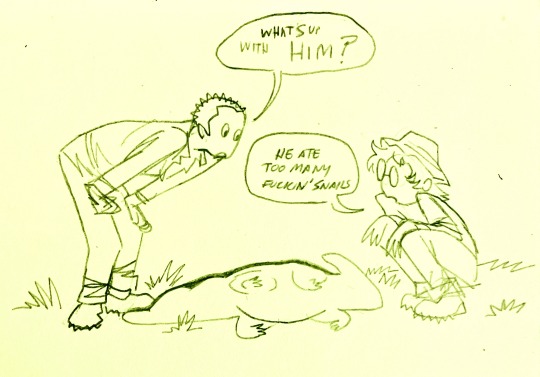
the garden i tend at work is getting overrun with snails so i thought about a world where we acquired a domesticated a "working dog" breed of hammerhead worm (they eat snails and slugs and worms) that is also. a puppy. Bred to clear vegetation of common slimy garden pests. click under readmore if u wanna see the worm theyre based off of i think theyre really cute
Itch.io / Redbubble / INPRNT / Twitter / Patreon


#in this world hammerhead worms are not a noxious invasive species im just having fun#art#my art#hammerhead worm#wormdog#vyscera#his ass is NOT allowed near the worm compost bin#worm
12K notes
·
View notes
Text
my giant lover just asked me if i’d love them if they were a worm. i said yes but i think i lied. i’m two inches tall!!! worms are huge to me!!!!! thats some dune shit!!! i’d be terrified of my worm lover like have you SEEN a worm up close
#g/t#giant tiny#if i had a lover id love them even if they turned into a worm#id build them a compost bin :)
73 notes
·
View notes
Text

How to Make a Homemade Vermicomposter
Materials Needed:
Three durable plastic totes (preferably Roughneck brand for their durability)
One lid for the totes
A cooler drain or similar item for drainage
Drill with a quarter-inch bit
Bricks or blocks for elevation
Step-by-Step Guide:
1. Preparation of Totes:
Start by drilling quarter-inch holes across the bottom of two totes. These holes are crucial for allowing worms to move between layers and for drainage.
Additionally, drill holes around the upper edges of these totes to provide adequate aeration.
2. Setting Up the Drainage System:
The bottom tote will act as your drainage collector. Here, you will need to install the cooler drain. Make sure to place it on the recessed side of the tote for effective drainage.
The drilled holes will allow excess liquid, also known as ‘worm tea’, to drain out, which can be used as a nutrient-rich liquid fertilizer.
3. Assembling the Vermicomposter:
Stack the two drilled totes above the drainage tote. These will serve as the living quarters for your worms and the composting area.
The worms and compost material will go into the top tote initially.
4. Transferring the Worms:
Carefully transfer your worms into the top tote, along with their current bedding and food scraps.
As the top tote gets filled with worm castings, shift it to the middle, making the newly top tote the active composting layer.
5. Maintenance and Harvesting:
Continue adding kitchen scraps and bedding to the new top layer. The worms will migrate upwards towards the new food source, leaving behind rich compost in the lower tote.
Once a tote is full of castings and devoid of worms, it can be emptied into your garden.
Regularly check the bottom tote for worm tea and use it as a liquid fertilizer in your garden.
6. Elevating the System:
Raise the entire setup on bricks or blocks. This elevation helps in easier drainage and accessibility.
79 notes
·
View notes
Text
very happy wormball 🪱🌱 they’re so light and gentle, it feels like holding a tiny baby chick
#two new worm bins :) hyperfixating big time. i love these little guys#composting paper waste from the library and food waste from the restaurant - best of both worlds
39 notes
·
View notes
Text

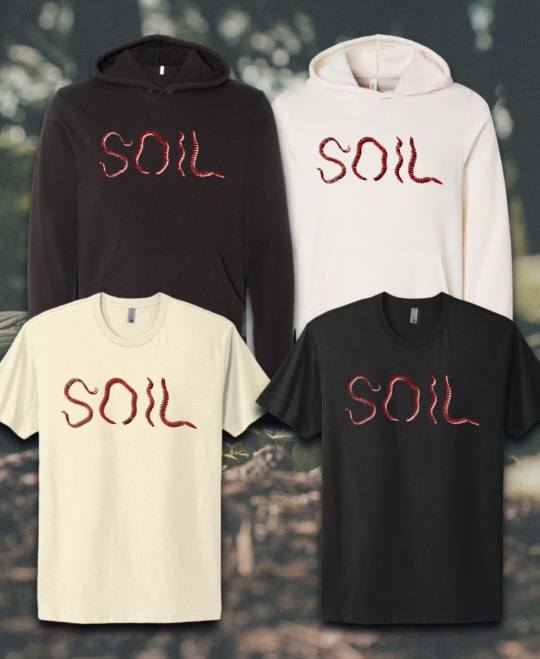
Who loves soil more than anyone? Worms! 🪱
This streetwear inspired design was made for all you people that love soil just as much as all the hard working wriggly worms in the world 🌍🌎
🌟 when you sign up for email offers and updates on our website, you get a chance to win up to 50% OFF your order!
🌟 FREE SHIPPING for orders over $50!!!
#environmental education#environmental awareness#environmental justice#regenerative agriculture#regenerative farming#agriculture#sustainability#sustainable farming#organic#organic lifestyle#compost#compost lifestyle#composting#biodiversity#ecomindset#conservation#soil health#soil#soil science#worms#worm#streetwear#apparel#farm#farm core#farm life#planet over profit#green future#take action#permaculture
63 notes
·
View notes
Text

a wormy little restock💚
89 notes
·
View notes
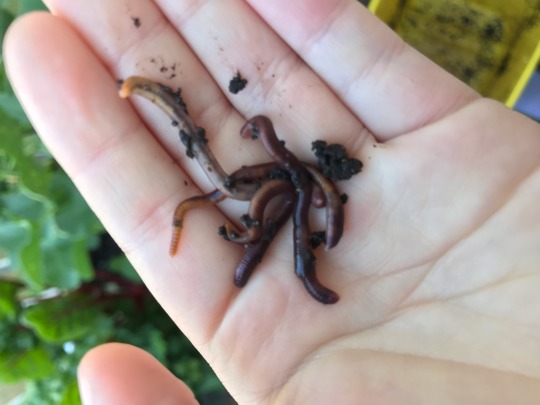
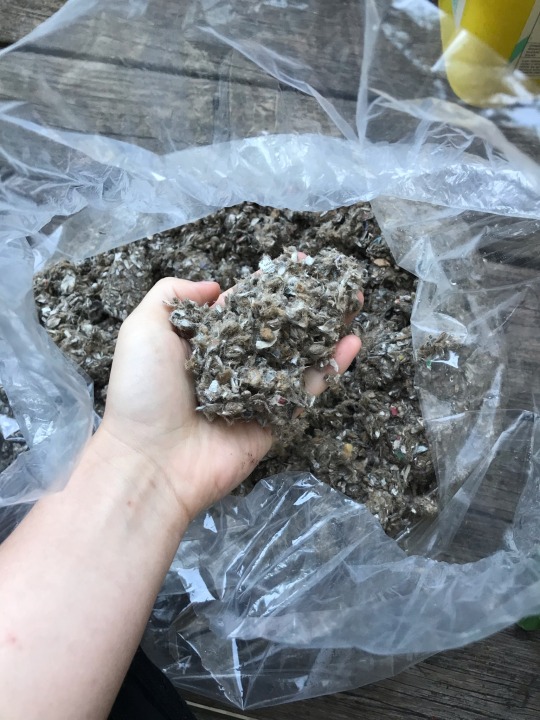
Text


4.26.24 - Did my first casting collection since getting my new colony in Nov! Just over a pound of black gold in ~5 months which is really amazing considering how small my bin is. I used what I needed for my own plants and traded the rest for some fresh eggs from my friend’s chickens 😊
#composting#trades#worms#worm composting#indoor composting#fresh eggs#vermicomposting#pets#red wigglers#houseplants#springtime#community
4 notes
·
View notes