#and many salmon
Text

how i feel this river rushing through my veins, with nowhere else to go it circles round
oil on panel // ko-fi
#my art#art#oil paint#oil painting#salmon#fish#salmonposting#so many mitski songs remind me of them. tbh.
522 notes
·
View notes
Text
a tired octoling's advice for gold ???? salmon run rotations
so i'm in evp950-999 bracket right now and seeing people clearly not use their weapons correctly and it's kind of driving me bananas. i don't know why this is happening. but it makes me want to make a cheatsheet for Grizzco weapons and what they should be doing to make the shift smoother.
note that anyone can deal with maws because of how you dispose of them, same with flippers. "grounded bosses" refers to eels + big shots + scrappers (not steelheads bc you need range or piercing to get them).
so here's some weapon-based tips for anyone who may need them during the last few hours of big run + for later gold rotations:
grizzco slosher: like the explosher, a flyfish killer. hitting the cockpit of a flyfish with a gslosh projectile is an instant splat. aim well and move fast. prioritize flyfish. also armored bosses (drizzlers, steelheads, sometimes scrappers + lids) because you two-hit all of them regardless where you hit them. mind your ink, you have 4 shots on a full tank.
unless you have 3+ gsloshers in team comp, please don't waste your shots on fish sticks i beg you
grizzco brella & blaster: as rapid-fire, you need to help handle fish sticks and stingers the most; deal with them as they show up. but outside of that, you are the flexible team slot(s) and can generally handle a lot of threats.
grizzco roller: your speed and contact damage helps you destroy hordes of lessers as well as grounded bosses. use your speed to run eggs and revive teammates, too. your flick is slow and can easily get you splatted; use it to fell steelheads, ink fish sticks, etc in a pinch. you can also use your speed to set off slammin lids very safely.
also please note the knockback from running into scrappers, it can and will get you into trouble. ALSO this weapon completely trivializes Glowflies/Rush. move slowly at the swarm.
grizzco dualies: like the rapid-fire weapons, you destroy stingers; unlike them you can't climb fish sticks easily without help. work on thinning hordes of lessers, reviving teammates, running eggs and dealing with grounded bosses. your dodge roll is a very safe bet to get slammin lids to go off. PLEASE be mindful of where you end up after you're done dodge rolling or you will get splatted.
if you don't have anything better to do, just run eggs or throw bombs at flyfish.... but this is advice for most generalist and low-range weapons.
grizzco charger: first get used to spamming it at max charge. good? okay, you handle steelheads, slammin lids, stingers, and sometimes drizzlers. you can also spam shots at steel eels and scrappers pretty effectively. in a sense you are a generalist with a lot of range.
for the love of fax machine kamisama, DO NOT WASTE YOUR SHOTS ON FISH STICKS. DO NOT. even a groller will do it better and faster than you. ink the side of a fish stick for a teammate and go do something better. please
grizzco splatana: all power, no range. focus on armored foes like drizzlers + steelheads, grounded bosses and hordes of lessers. you can kill flyfish in a pinch but you risk being hit by their exhaust and they need to be on land.
grizzco stringer: another generalist/flex team slot. you have the reach for steelheads and slammin lids but you need to align your shots well to oneshot them. i suggest helping with grounded bosses + fish sticks + stingers and then doing general duties like bombing maws/flyfish, running eggs, reviving allies.
a lot of this does rely on your whole team having common sense and knowing what each weapon is best at. and that's not always reasonable in random queue! but if you know what you're doing, then you're already doing a great job. if you're doing your best and your team still fails, it's not really your fault. it happens.
be willing to be flexible based on team composition. sometimes you get 3 stringer 1 splatana and you just have to deal with it. i've had multiple 2 roller 2 dualies compositions this weekend... and had times where the only bosses that spawn in the first 20 seconds are flyfish, with no slosher present. you gotta do stupid things to survive and hit quota and that is okay!
but being informed about what each weapon can do is very helpful too. i hope i could help. :3 please feel free to add since this is just for normal wave!
#splatoon#salmon run#salmon run next wave#marine.txt#this is secretly a rant about how many sloshers + chargers ive seen in evp 800-900 who don't know their jobs.
149 notes
·
View notes
Text

A lil guy !
#honkai star rail#dan heng#genuinely have a million things i wanna draw and then zero energy#so dan heng in a hoodie#now i gotta go get dinner sooooo maybe that will give energy and then i can draw more of what i actually wanna draw#but i kinda spent like ... hours ? talking to my mom earlier today#since shes been in the hospital for many many days#so i was catching her up on whats been goin on and showed her silly lil videos#and telling her how hyped i was for summer hrid and she (very patient with my fe talk)#was like you always tell me about banners being bad so it must have made you REALLY happy to say the whole banner is good#and im like yeah and i had multiple people on multiple sites like hey salmon/moeblob did ya see the banner#and she was like thats so cool that people acknowledge who you like and im like yeah it is p cool#and then i told her how mad i was at the absolutely criminal act of limiting how you can watch clue (1985 hit movie)#like i told her yeah sure i own it twice on dvd and once on itunes and that the only way to watch those#are either desktop or ps2 and how i dont have access to my itunes email#and i dont have it on my laptop so i sadly would have to rebuy the movie on itunes under a new acct#then i said how i loved that it was free to watch with ads on yt and id watched it twice that way#but then recently wanted to watch it on there but laptop and hoo boy you have to buy or rent it now#so i v angrily was like fine whatever ill do the thing and leave my room and go watch it on my moms tv#while she isnt around and use her amazon prime where it should be included except ! IT WASNT!#YOU HAVE TO HAVE PRIME TO BUY OR RENT IT NOW TOO!#HOW ARE THEY DOING THIS AND WHY ! who in the world is watching this movie so much that isnt me that they have to charge for it now#on all platforms unless you straight up pirate it#and hey why would i of all people be needing to pirate a movie i own physically two times and digitally once#this is literally a personalized attack to me#and my mom was like i understand how you feel cause yeah thats really weird to do to a 1985 movie#and im like yes exactly i have morals and principles that make me opposed to this and its v maddening#and she said she understood and its ok next time we are having power issues and i have to shut down#that if i really wanna watch it i can rent it on her amazon account and i looked at her and shes like oh you feel v strongly about this#and i do! I HAVE HAD IT GIFTED TO ME TWICE ! I BOUGHT IT ONCE! WHY DO I HAVE TO RENT IT FOR MORE MONEY!
261 notes
·
View notes
Text
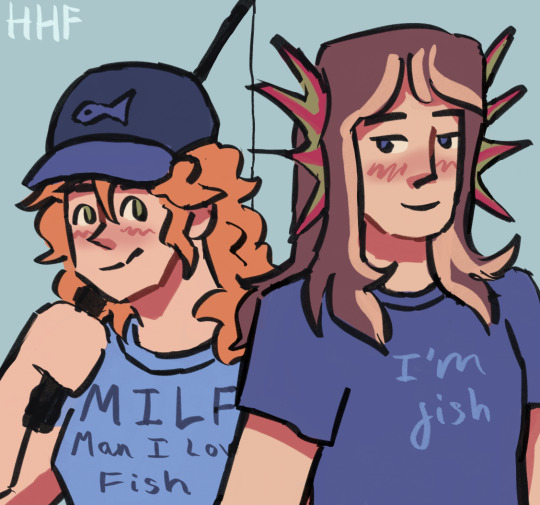
they think they’re so funny
#you see i wanted to do something with fisher gem + salmon pearl#and decided it would be funny to fuse that 1 man i love fishing shirt alongside those unfunny couple shirts#they look so underdressed in tshirts. but its the whole joke. so#this is for that poll i did a week ago. unfortunately my motivation to draw has been low#not helped by things going on in tumblr and the mcyt community which hasn’t been great for my mental health#on that note. please support shelby#but today i’ve been feeling better and have had some time to draw one of the many things i have planned!#my art#gempearl#hermitshipping#i am. so reluctant to maintag because i know theyre out there. like i imagine they have hermitshipping blocked but still#hermitshipblr
182 notes
·
View notes
Text

Chinook Salmon for day 2!!!! There are so many salmon species to choose from,,
@fish-daily
#fishuary2024#fish tag#fishuary#chinook salmon#fish#salmon#salmonid#bro had so many subtle color changes!!! and i could not get all of them
173 notes
·
View notes
Text
Who else thinks that after the salmon incident, Caleb randomly calls Essek “mein kleiner Lachs” with a little smile in his voice every time?
#critical role#critical role spoilers#cr3#caleb widogast#essek thelyss#shadowgast#salmon Essek#aeor is for lovers#Caleb has so many nicknames for him and this is just another#Essek can’t help but be amused because he loves the man
106 notes
·
View notes
Text
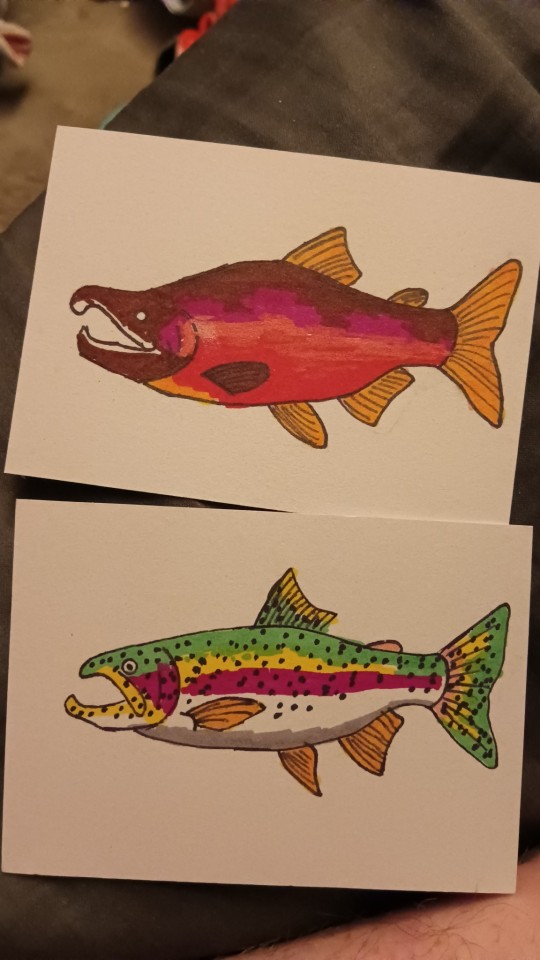
a coho salmon and a rainbow trout i drew on a couple of cards at dinner the other night
#fish#drawing#rainbow trout#coho salmon#trout#salmon#i kinda want to try selling these bc im really strapped for cash lately and work doesnt have full time openings rn#maybe for like 5 bucks#also ill rb as many fishuary entries as i can tomorrow i am tired gn
162 notes
·
View notes
Text

salmon cat cat salmon
#this is an image that has been banging around in my brain for many months#please enjoy#art#artist on tumblr#salmon#fishblr#original
70 notes
·
View notes
Text
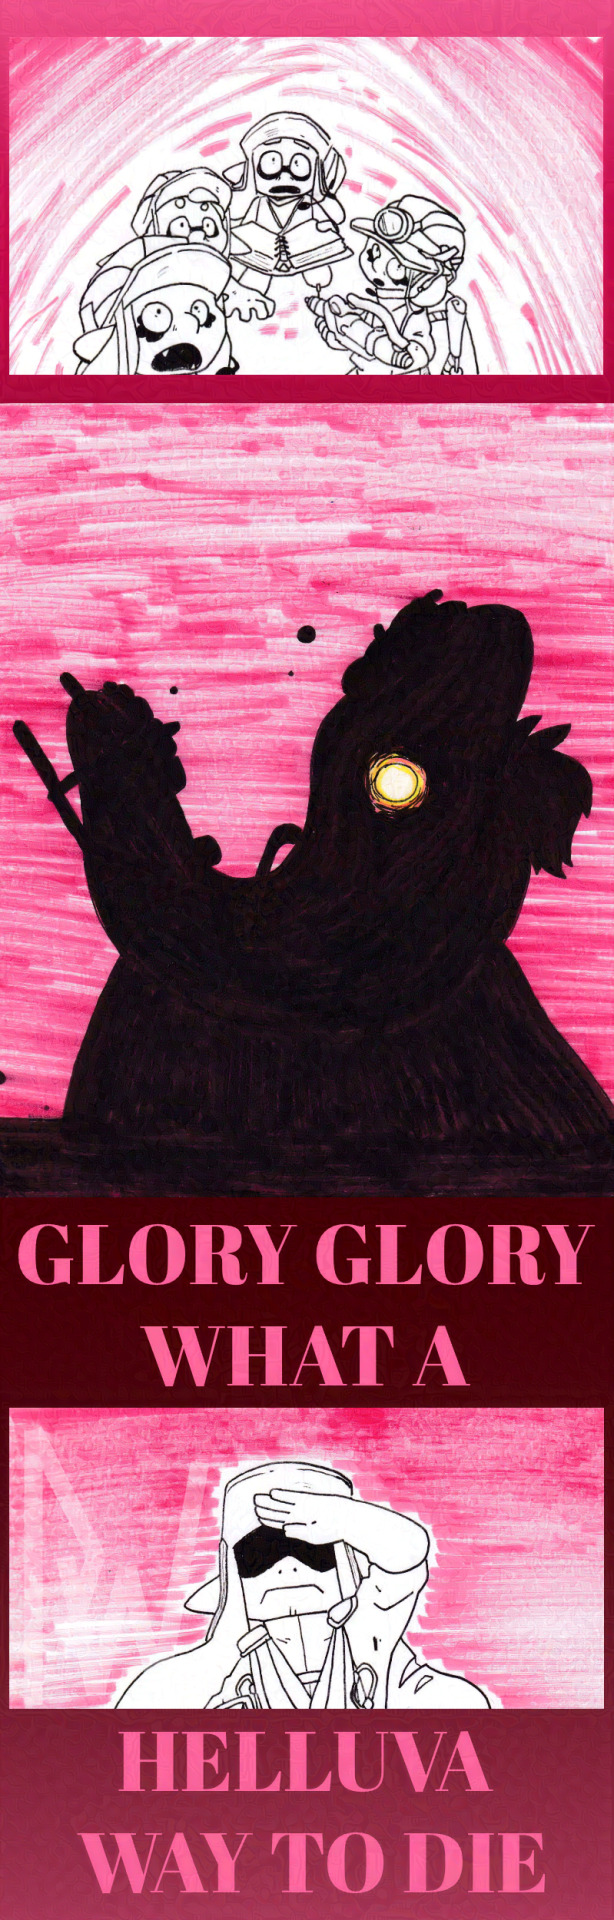
Best of luck to our troops in Big Run this weekend :]
(`v`)ゞ
#splatoon#splatoon art#comic#videogames#videogame art#videogame comic#splatoon comic#my art#Big run#splatoon big run#splatoon joe#splatoon salmon run#salmon run#Megalodontia#splatoon Megalodontia#artists on tumblr#colors#guy- guys- ive wanted to make this comic since like 5 months ago but was waiting for a new king salmonid for me to be able to make this wit#ive been waiting so long-#i have so many brain worms please-#also look forward to winter brake were ill be posting a bunch of ceramics i made like a year ago (lol) <3#im also gonna try and make a video vershion of this so uh- look forward to that <3 maby- we will see... i havent used any video editing#softwear since like highschool owo" so uh- probobly gonna be bad. but eh. xwx
194 notes
·
View notes
Text

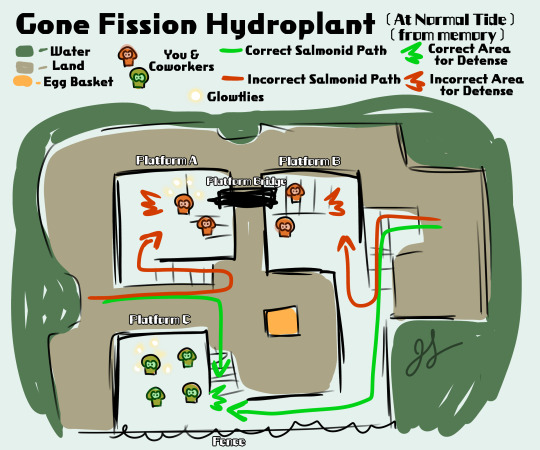
PSA (Public Salmon Announcement)
For some reason, it seems, everyone thinks that the taller platforms on Gone Fission Hydroplant are where to go during the Salmon Rush wave. THIS IS NOT TRUE. So I've made a quick visual aid to show people where the chokepoint ACTUALLY is, and why it's better. Explanation and Tips under cut.
Image A: When it starts getting dark at the beginning of a wave, it's best to run to Platform C, so you have time to (re)ink the area. Prepare for Glowflies to happen, even if it ends up being fog, or Mothership. It's better to be safe than being covered in Glowflies and scrambling to get to the chokepoint. If you or a coworker aren't at the chokepoint, GET THERE. Spam "This Way!" if you need to.
Image B: Why is Platform C better?? Well, looking at the diagram above, I've shown two possible routes that the line of Salmonids will travel, depending on where the person with the Glowflies is. Salmonids will pour in from two sides of the map. Sometimes the left, sometimes the right, sometimes BOTH sides at the same time. This is why Platform C is more safe to use than Platforms A and B. No matter the direction the Salmonids come from, they will have to approach from the single pathway up to Platform C, making them much easier to deal with. While on Platforms A & B, there are TWO potential pathways that the Salmonids could take to get to you AT THE SAME TIME. Even if they only came from one direction, you would have to guess where they'd come from next. But on Platform C, they will ALWAYS travel to this single pathway. Please use it to your advantage!
Tip A: After a few seconds, the Glowflies will switch to another person on your team (or you), so there's no reason to separate from them. The handy thing about egg throwing, is that you don't need to move from the chokepoint to deposit your eggs. Take a second to refill your ink tank, and continue shooting at Chums and Goldies, giving your coworkers the opportunity to do the same. They will also ignore players that do not have Glowflies on them, so it's safe to have one person depositing eggs while the other three fend off Salmonids. Just don't stray to far in case the Glowflies latch on to you next.
Tip B: A lot of Salmon Run guides advise that, if you are target of Glowflies, that you climb a wall and let the Salmon collect under you, allowing your teammates to easily take care of them. I have to STRONGLY advise against this, however. Firstly, you can't help shoot Salmonids if you're clinging to the wall, meaning they will be splatted a bit more slowly. It's essentially leaving your coworkers one person short. You also can't revive fallen teammates. Secondly, like mentioned before, the Glowflies will move on to someone else in a short amount of time. Having to switch out who gets to sit on the wall wastes time, and can be tricky, depending on where this wall is. It's a risky move, and may separate you from your team too much. And finally, it's just less hassle to use the normal chokepoint. There's no need to try to "cheat" the game, using the chokepoint is already the easiest way to deal with a Salmon Rush. Obviously, do whatever works, but not everyone you play with will want to use this strategy, so it's best just to do what everyone else is doing (which should be using CHOKEPOINT ON PLATFORM C. PLEASE.)
Thank you for reading :) Feel free to tell your friends! And now go commit more war crimes in the squid game
#ive lost TOO MANY SALMON RUSH WAVES LATELY OK#spamming (this way) isnt enough apparently#pleas listent to me :(#splatoon#splatoon 3#salmon run#salmon run next wave#this can be reposted anywhere btw i encourage it actually#my art#i guess??? lol
3K notes
·
View notes
Text
what are they putting in this minecraft water that’s making them all t4t
#mcyt#hermitcraft#qsmp#dsmp#life series#empires smp#do I dare tag this with ships?#yes. yes I do#beeduo#scarian#grumbo#ethubs#sally the salmon and that other guy#yknow what fuck it#fish yuri#smallidarity#don’t actually know that many empires or qsmp ships ngl#my posts
105 notes
·
View notes
Text

SOMEONE PLEASE GET JOE JR GET OUT OF GREAT GRANDADS DENTURES THEY HAVENT BEEN CLEANED FOR A FEW MILLION YEARS

LITTLE FUCKER
#little fucker /lh#it’s a (recreated) megalodon jaw!!#bf saw it first and bc i inflict everyone with my brain rot he was like “oh neat a megalodontia”#and you could see the loading wheel in my brain spinning before going “ no thats the giant salmon lmao’#anyway it’s a creature!!#they also had a gacha machine full of shark teeth#paid £1 for a plastic capsule full of teeth :3#i saw so many cool creatures the octopus didn’t wanna come out today tho he was scared of my salmonid swag;—;#splatoon#splatoon 3#splatoon salmonid#salmon run#king salmonid#splatoon salmon run#splatoon megalodontia#salmonid#salmon: joe jr
55 notes
·
View notes
Text
Hermitcraft season 10 is hermitcraft season 10 bc the lore is 10 times more insane than the other seasons were
#Im probably biased cause this is the first time im watching this many POVs#But i think with Boatem 2.0 / water lore / mafia lore / minister lore / docm baby lore / imp and bdubs city / effo joel and iskall /#The obsession lore / mending book lore / cub bases lore / ore snatcher insanity / rendoc marriage / zedaph and tangos holes /#Wolves of wool street / salmon mafia / joe muppet / bdubs courthouse / everything else going on#Its safe to say this season is even more insane than the others#Bc like. Its only been a few MONTHS.#The other seasons were insane#But this one has more COMPACT INSANITY yk#hermitcraft#hermitblr#hermitcraft s10#hermitcraft season 10
49 notes
·
View notes
Text


Happy Birthday to Ferdinand von Aegir!
I actually made 33 emotes, affectionately known as Aegirglyphics to some, for my own personal use on discord. However, I figure why not share some of them! They're free to use for discord servers/icons/pfps or whatever. However, my only request is Do NOT use them as subscriber emotes on Twitch. You can make them free follower emotes but you are not to make them locked behind a paywall.
#fe three houses#ferdinand von aegir#discord emotes#i thought long and hard about this bc idk the actual want for emotes i made ages ago but#i still love my son and its his bday ad so i should be nice and share#since i no longer have nitro and can no longer use them myself#the fact i can technically post 30 at once was tempting but#some of them arent living up to my standards and also just might not be easy to use in most contexts#so those im gonna skip on lol#whoever wants 21 aegirglyphics tho have at em#i think i might have posted some before? but only 10 and i dont recall which ones#if you want a secret the last three and the middle on the second row are my favorites to use#i used concernednand (the upper one) so much#the internet concerns me guys it was a valid use every time#debated sharing heartnand but honestly the world could benefit from it imo because gotta spread that love#fun lil trivia i love making emotes and so when i was in a server and people knew me as the ferdinand fan and artist#someone was like why hasnt salmon made a ferdinand emote yet#and im like bc i dont run the server and i cant just demand they add my art#and then a mod was like i didnt wanna put pressure on salmon but i thought about it so i was like bet#and then drew a server exclusive happy ferdinand emote#and that was the start of me somehow being able to have like.... ten emotes in that server#some of them were just me joking and then mods encouraging me#cause i used to use felix for every single art prompt theyd give and one week someone said the prompt was pog#and i just was so upset because dude why would i wanna draw felix for that hes not pog#so a mod was like hey if you make a pog felix emote we ill add it to the emotes here#so i once again was like bet and then posted it and then they really added it lmao#anyway sorry for so many rambles please feel free to use them on discord in whatever server#i cant really expect everyone to credit me but also im not really concerned since i fear people know my nands a mile away
196 notes
·
View notes
Text
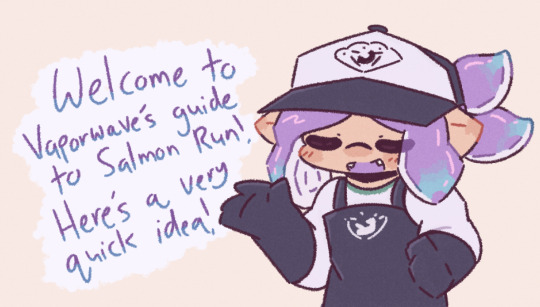
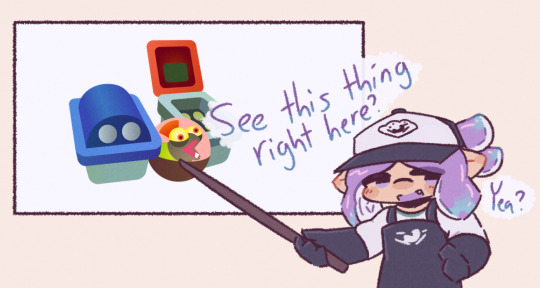
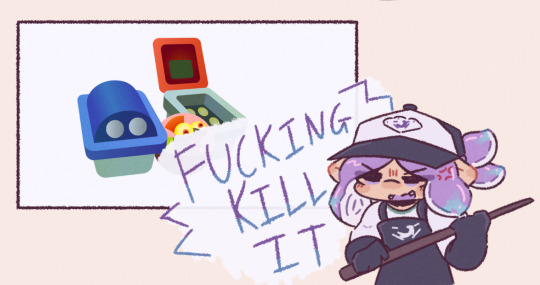
there's a weirdly high amount of people in EVP that don't understand this concept
#EDIT: I NEED TO CLARIFY IM NOT TARGETTING ANYONE SPECIFIC IM JUST MILDLY ANNOYED IN A FUNNY WAY GHBFJHBV pls dont get sad by this post ily!!#mildly annoyed by how many people i ran into today that literally do not destroy/kill flyfish like. im begging you. destroy 1 side at least#i am ONE squid i cannot one man army every time im playing genuinely#||lost kin doodles#splatoon#salmon run#//vaporwave#splatoon 3
322 notes
·
View notes
Text


quick dump of some more artfight attacks!
storm by @lightnight19, nova by @starii-lins, vey by @viarayy01-blog, jerry by @ghosteii, and WAV by @camzverse !!
#salmon scribbles#my art#dca oc#fnaf daycare attendant#splatoon#splatoon oc#fnaf security breach#other's oc#so many left facing 3/4 profiles .......#/lighthearted#artfight 2024#team stardust
53 notes
·
View notes
Last Seen Blogs

-sonouncasino
hobisognodiunabbraccio

planaeterium
MY LOOKBOOK

kathrynsevenfold
KathrynSevenfold

kathychocolate09
Jaguargirl

oursecondmoon
Our Second Moon