#cosplay build
Text
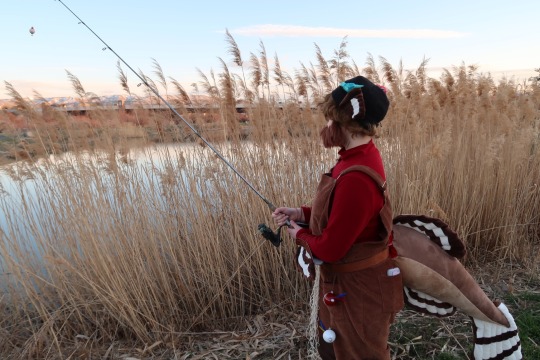
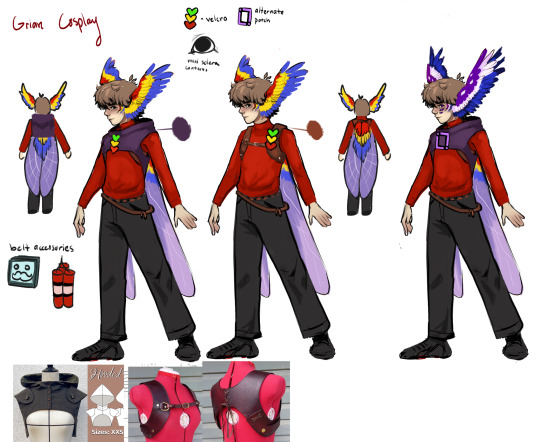
Cod Grian Cosplay Build!
The fish man himself, season 10 Grian!
Reference Sketch

Some notes:
I always end up changing somethings from the reference when making the actual outfit, although I stayed pretty close it it this time.
I initially drew him with a handlebar mustache and goatee to mimic the whiskers of a fish, however I switched to a fluffier mustache beard to match the guy from Frozen.
I also opted for my turtleneck shirt over the red sweater+collar to go for more of a fisherman vibe
Since Grian is usually drawn with parrot wings, I wanted to call back to that with red yellow and blue feathers on the bobbers.
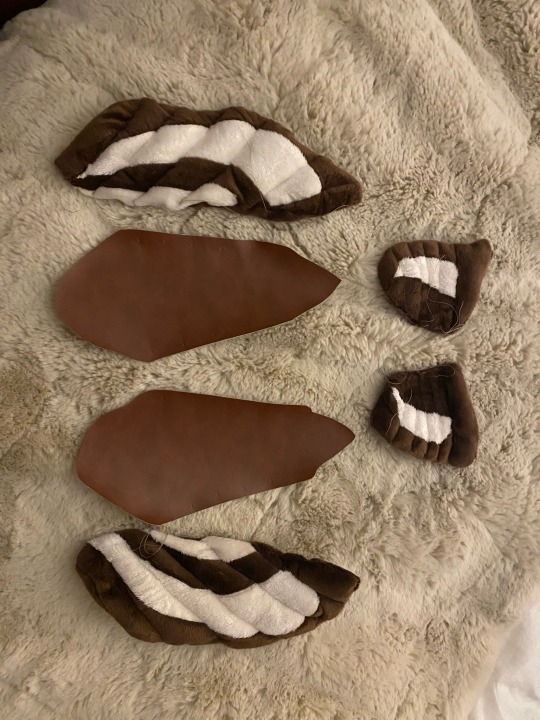
The tail and fins
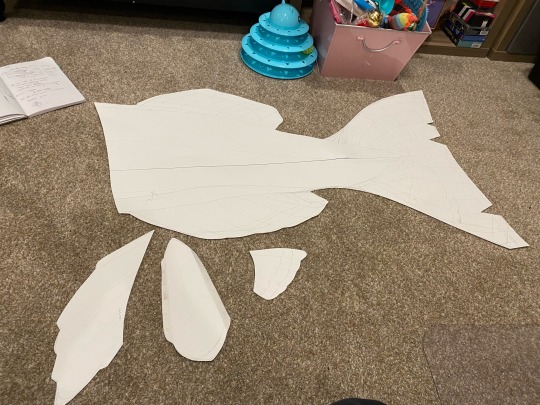
I wanted to lean into the “fish”er man design and gave him fish fins and a tail.
It’s design is based on a cod fish with striped fins based on the feathers of an osprey
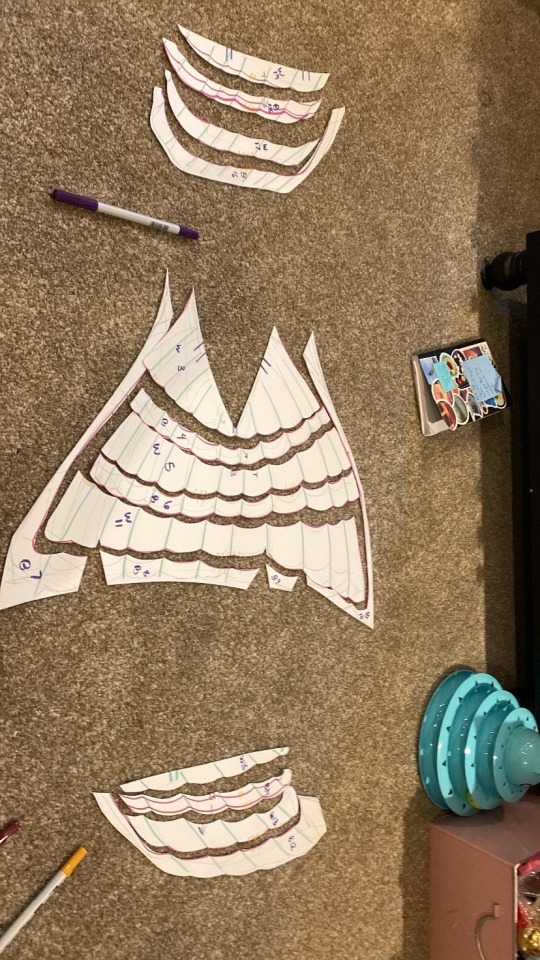
To make it, I drew the tail pattern on a large piece of paper, cut it out, cut each section out of the respective fabric times two, sewed the two sides together, and lastly filled it with a ton stuffing.
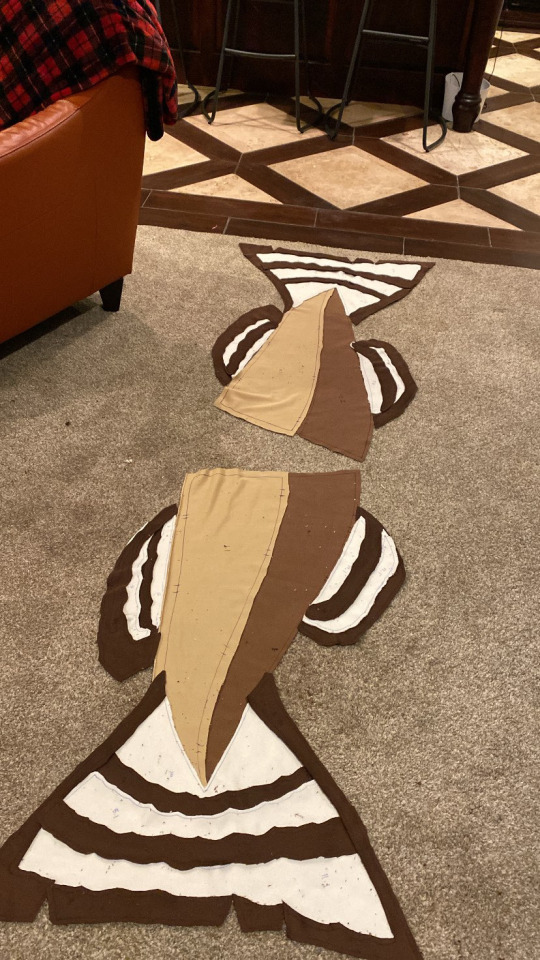
The tail is heavy, but it’s fun to wack people with it.
The fins for the arms and beanie are made in a similar way, each hand sewn onto the beanie/bracers once stuffed.
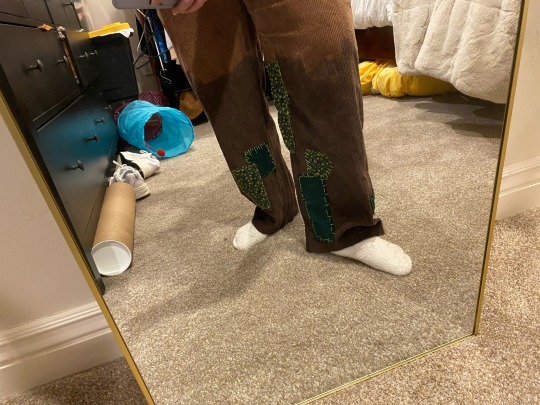
The Overalls
I had originally planned for him to be wearing waders, but wanted to make the outfit more wearable for everyday wear without overheating. So I opted for some brown corduroy overalls instead.
To add a “wet” look to each pant leg, I briefly dipped each one into some black fabric dye before rinsing and drying.
The green pixels on his skin look like they could be kelp or patches so I decided to go with the latter and dug through my scrap fabric to find these green pieces.
I embroidered the edge of each piece with a unique stitch and placed them randomly on each leg.
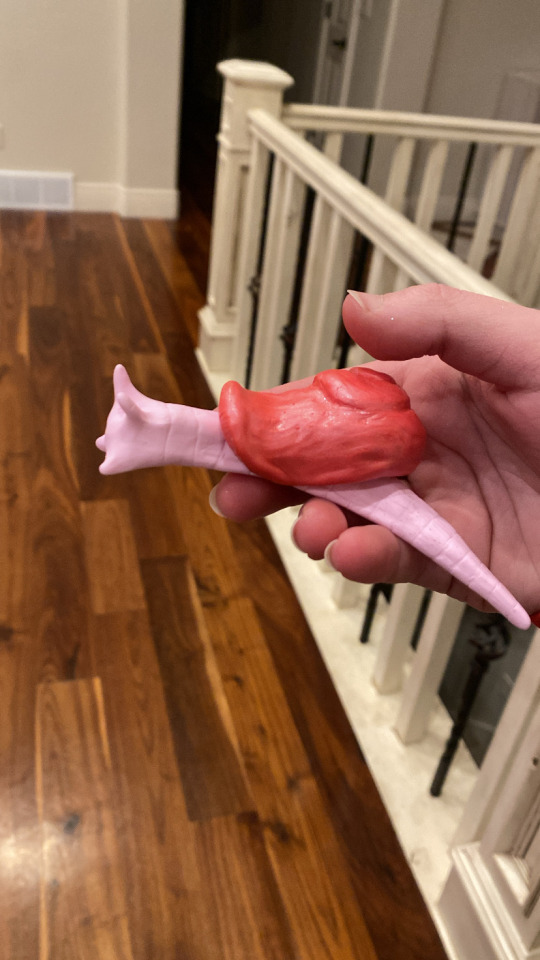
The snails!
Of course we can’t forget about the snails
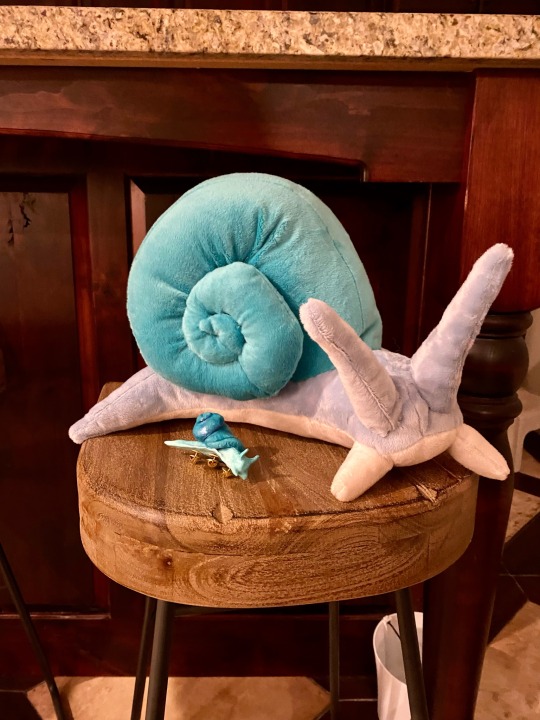
There are three snails for this project with two more eventually on the way (a plush pink snail, and a plush brown snail).
I made the clay blue snail first with polymer and attached tie tacks to the underside so I can use it like a pin and stick it anywhere on my clothes.
Same goes for the pink worm snail which is also made of clay.
The blue plush snail is based on a pattern from Etsy by willowynn with some slight modifications, mainly to the eyes/feelers, and doubling the size.
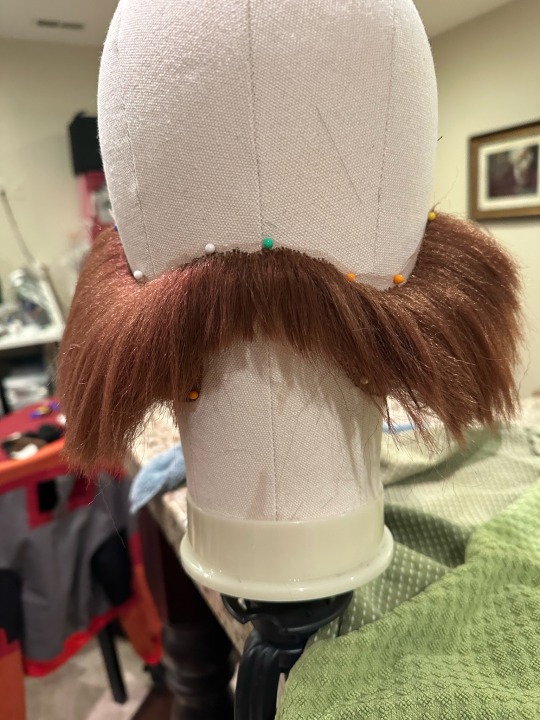
Facial hair
This was one of the parts I was the most excited about for this cosplay and the only part I didn’t do myself. I commissioned @basic-amoeba to make a custom ventilated beard, styled and everything. This part turned out so good!
Some final notes for this project
This cosplay took from Feb 20 to March 15th to complete since I was so determined to finish it before Grian changed his skin. Haha look at me now. He still hasn’t changed it.
Not pictured (cause why can I only add 10 photos 😭) is the mending book with a fish hook I made using scrap faux leather, cardboard, and some cut printer paper. I painted in galactic the word mending and sprayed the whole thing in my “enchanting” spray paint (a blue to purple iridescent glitter spray paint)
A small fun backstory to the fishing rod:
My grandpa is an experienced fisherman and has dozens of fishing poles. When I talked about this project with him, he brought me out to his workshop and pulled down the dustiest fishing rod there. He told me he had fished this fishing rod from a lake one day with the line and bait still attached. Can’t get anymore accurate to Minecraft fishing than that lol.
Obligatory cosplay photo:
#grian#hermitcraft#grian cosplay#hermitcraft season 10#cod grian#fisherman grian#hermitcraft cosplay#cosplay build#cosplay#skygoldcosplaybuild#skygoldcosplaywip
400 notes
·
View notes
Text
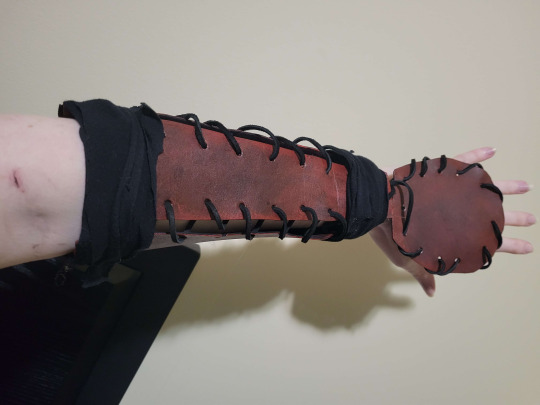
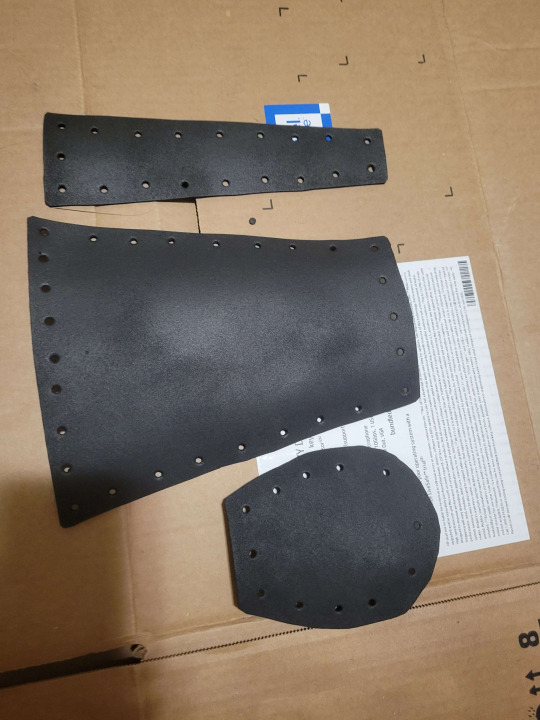
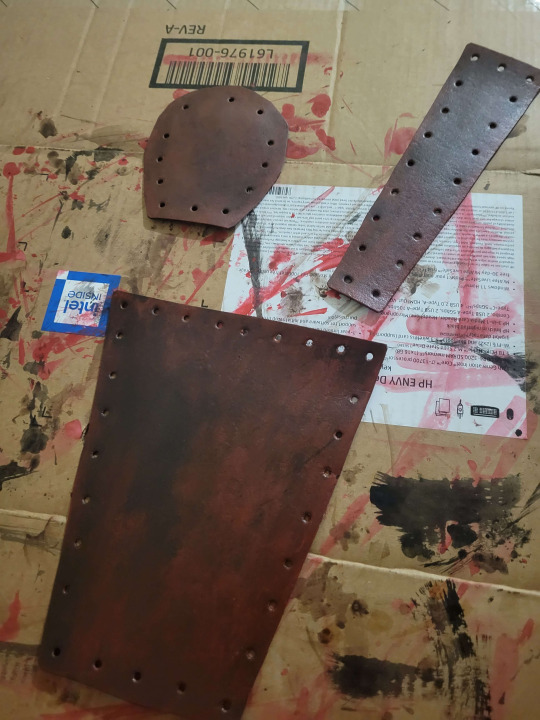
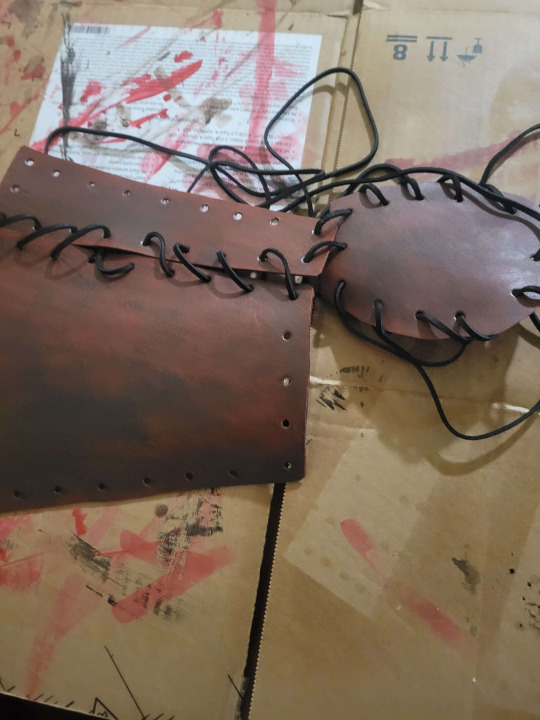
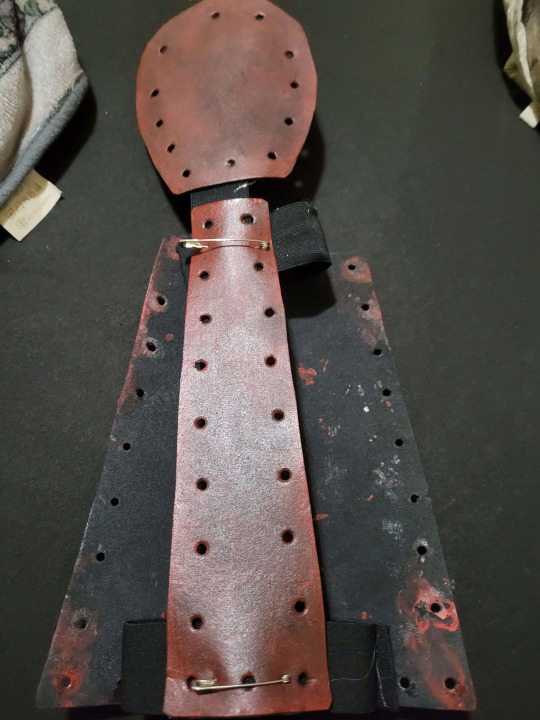
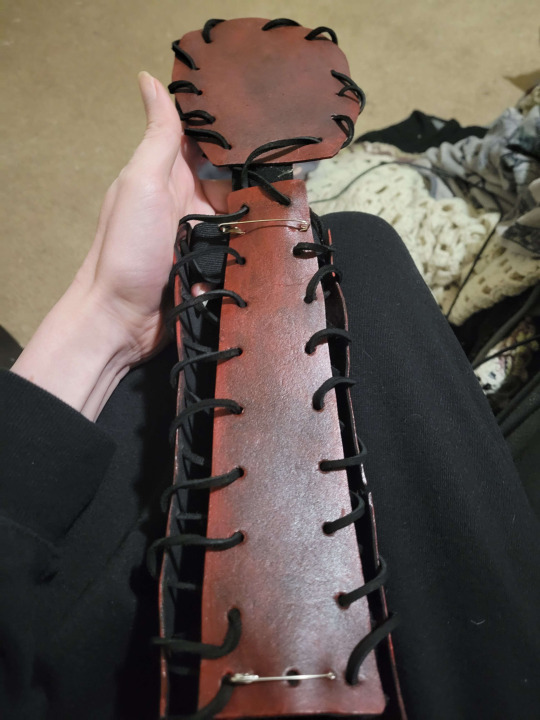
'Tis finished! After much anguish and effort, I have made a bracer for my Izutsumi cosplay! Progress pics below

92 notes
·
View notes
Text
current progress on my reverse bear trap build :3
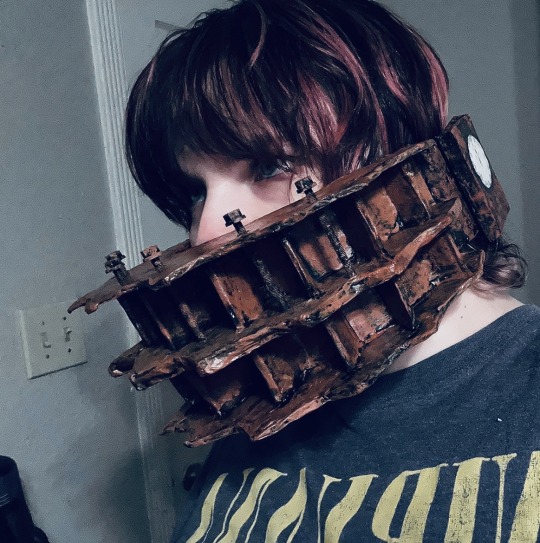
#saw 2004#adam saw#saw#my chemical romance#chainshipping#reverse bear trap#cosplay#cosplay build#saw cosplay
39 notes
·
View notes
Text
2:30am. 7.5h till ComicCon. 7h till the bus I was planning to take. I still have to hem almost every part of my costume and sew buttons on. I'm on the verge of tears.
#calgary comic expo#comic con#cosplay#cosplay build#costume build#sewing#am i a mess? yes#i havent done anything else all week
9 notes
·
View notes
Text
Phonegingi Cosplay update #1
Finished sculpting/ building the handset, it's kind of comically small compared to the rest of the head but it's the biggest I could made it. it was either that or no handset at all. next on the agenda is to paint the handset and fix some of the paint job on the main part of the head and add some more foam on the inside to make it more secure and comfortable to wear. upholstery foam came 2 days ago and more supplies are said to arrive today: 2 inch wide elastic straps, duct tape (for patterning), EVA foam and two 27 inch long zippers (so I can actually put the full suit on lmao)
boring rant about cosplay stuff: going to sculpt the digitigrade legs out of foam. if you're asking 'ew why are you making weird legs' Gingi is literally like a cryptid creature goober guy and I feel if I give him more animal like features it would make him seem more interesting. also the head is absolutely humongous and I feel like if I give him chonky legs it will give the illusion that the head isn't so big as it actually is. I've also considered giving the fullsuit arm and shoulder padding to make the head seem not as big but that is to be determined. I've always wanted to make a fullybody cosplay and sculpt body parts out with foam I just feel like it is a good learning experience and I can be really experimental with it. I'm also really excited to make gingi's stompy monster feets. anyways that's enough of my ramble.
random (cringe fact):
my first ever cosplay I did was humanoid bill cipher from when I was like 10 or 11 (I don't really remember) but my mom said the cosplay was really good but whenever I look back on it I cringe so hard. if you want to know other cosplays I did lmk
#dialtown#directdoggo#cosplay#small artist#phonegingi#gingi dialtown#cosplay build#fursuit#fursuit maker#funny#idk what else to tag#help my poor soul
8 notes
·
View notes
Text
HELLO
I am so freaking excited right now and I’m pretty much running around my house, hooting like some sort of arboreal primate because goddammit this is working out

I would go lay on the floor about it but I gotta finish this in the next five days but that looks more than possible right now.
#my midlife crisis is more fun than yours#tears of the kingdom cosplay#work in progress#cosplay build#link cosplay
68 notes
·
View notes
Text
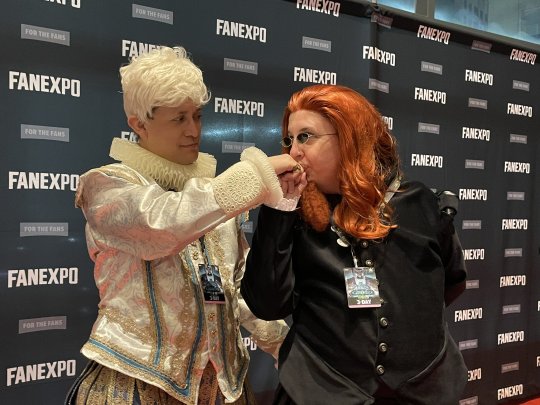
Globe Crowley Cosplay Build
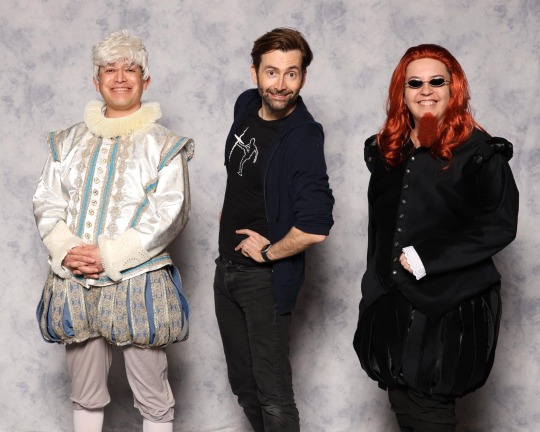
I've been telling myself I'd do this for ages just to document the process and potentially help out anyone else who wants to go down this route so...
I'm going to start with Crowley because he was nominally a smidgen easier. Their outfits are exceedingly similar in this era so there will be a lot of overlap.
Both of them are wearing a doublet with paneled trunkhose, in case you'd like to go down the googling rabbit hole. But let's start at the top and work our way down.
For the wig I actually just nabbed a lace front one on Amazon. I was going to link the exact one but I've now bought so many long red hair wigs that I'm not sure which one it is (thanks Crowley)
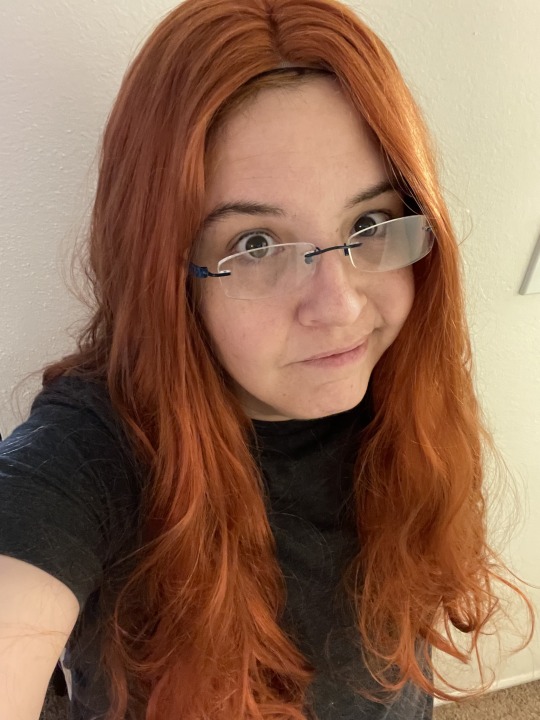
Is this the right one? I don't know. I cannot emphasize enough that I have too many red wigs and it is exactly one demon's fault. Anyway, I do recall it parted in the middle and my friend @seedsofwinter helped me use glue to make it go back rather than down the middle because I ran out of time to add some hair to the front. I think I remember trimming it a bit, too.
The beard was just crepe wool, which I'm slowly practicing with for facial hair. The longer beard was a lot easier than the shorter stuff I've tried :D
The glasses were another find by seedsofwinter on Zenni Optical, but I'm seeing those exact frames are retired now. It may be possible to find a similar pair by looking for ones that are small and oval. Most of their glasses can be ordered as sunglasses with a prescription which is wonderful for Crowley cosplays.
A warning: If like me you use Crowley's sunglasses so you can actually see, these ones are horrible for that particular purpose. I think it may have to do with how small the lenses are, they let a lot of light in but you're still looking through darkened lenses and the end result is an inability to see well, but ironically particularly in bright light.
Onto the fun stuff! @tricksyspiritworld recommended the doublet pattern to me (and if you do not follow them, you should. They are a lovely person in addition to being a wonderful cosplayer).
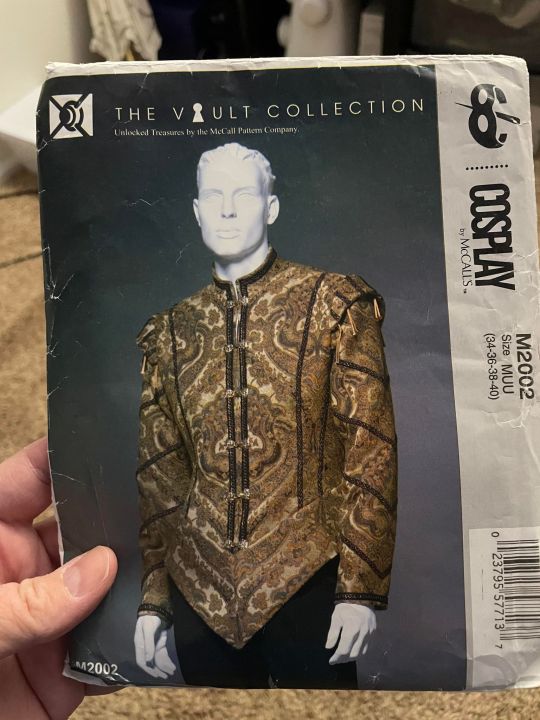
If you want it accurate for Crowley, you do need to adjust the front so that it can layover to button and the neckline a bit. I found that once I added the added fabric for the button, all I needed to do on the neckline was fold it back to take off a triangle at the top and bam, exactly what I wanted. The bottom front also needs to be adjusted, but you can do that with the add-on pieces at the bottom rather than adjusting the main body of it. This is definitely a pattern to mock up and experiment with. I did a lot of tweaking and trying on with the final doublet as well to adjust it.
I don't have a good close up of the fabric, but I went for a black suede. If you look at HD images of Crowley's Globe outfit it's actually got a little bit of a pattern to it, but alas when I actually went to buy the fabric I couldn't find one with the slightly raised pattern and thus black suede it was.

Crowley's buttons actually have a red center, but I thought these were cute and seemed very him-like so I went with them <3 I like buttons :D

The shoulder pieces became known as the burnt croissants as I was working on them. Mine are two pieces of fabric and I honestly just measured my shoulder and then cut pieces that I *thought* would work and sewed them to try. Mine are stuffed with old fabric scraps to give them shape and make them poof.
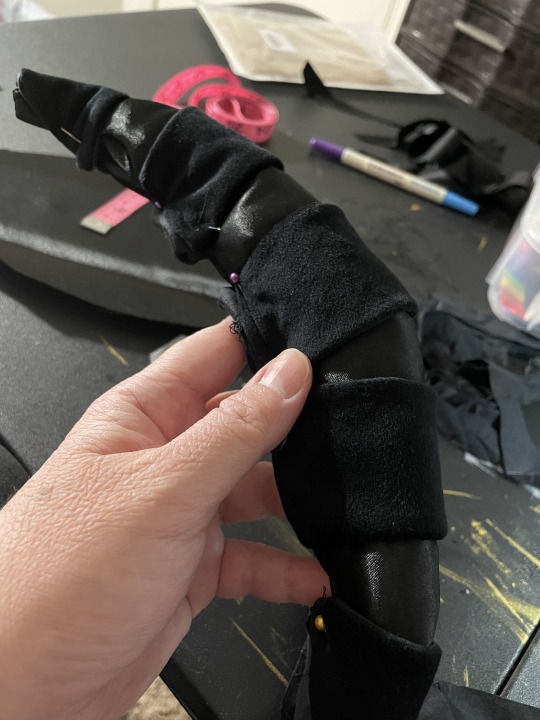
For the under fabric I used the same black shiny lining fabric I used for the base of the trunkhose (we'll get there) and for the panels I used the same fabric I used for the doublet and panels on the trunkhose. And just... all the hand stitching and then pinning them on the doublet.
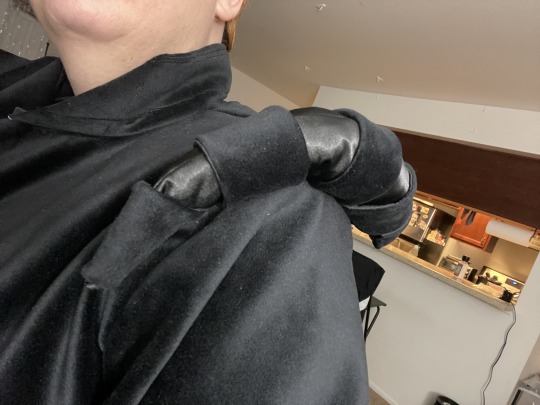
Do yourself a favor and pin this as many times as it takes to get it looking right while you're wearing it. You want the croissants to sit on TOP of your shoulder going upwards, not sliding down to your arm at all. Pin pin pin. Try it on. Pin again. Once you've got it where you want it, just slipstitch it into place.
And just like that, you've got yourself a doublet! Oh! Except one last detail. Crowley's actually got some white sneaking out at the wrist.
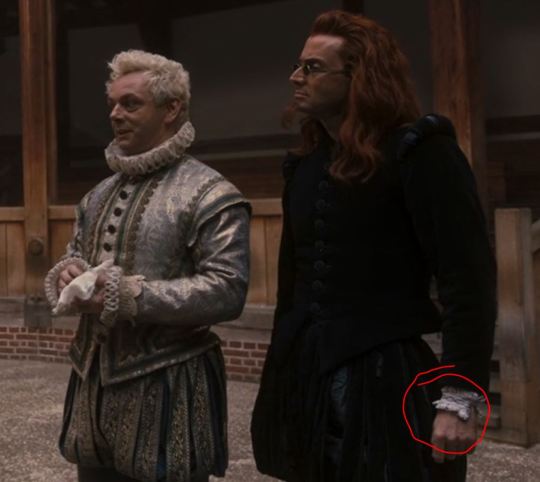
The amount of time I consider thinking about this bit of lace. Is it a bracelet? Was it a gift? Crowley, are you wearing Aziraphale's shirt? I have so many questions.
Anyway, I just sewed a bit of lace to the end of the jacket sleeve, because I didn't trust myself to always remember a lace-cuffed shirt.

Anyway, let's move on to some fancy smancy pants.
Here's the pattern I used for the Trunkhose: https://www.etsy.com/listing/78233565/rh206-quick-print-elizabethan-1570s-1600?ref=yr_purchases
You'll note, these don't include the panels. They also include some historical additions that I decided to leave off and just simplify the pattern as much as possible.
So for the trunkhose base, I used the included pattern, tried them on, adjusted, adjusted, adjusted. (the real reason I don't sell cosplay commissions is that I adjust too much).
For the base, I used a shiny, shiny lining fabric and lined it on the inside with cotton to give it some strength. For the panels, I used the same pattern but once I cut the fabric, I measured it in two inch pieces and then cut every two inches. I lost a little length to the seam allowance when I added some of the base lining for a backing, and then I started pinning the panels to see what would look right.
The panels should line the entire top, and overlap a bit at the sides at the top. On the bottom, there's going to be some overlap and this is hard to describe but you'll want to start the panels at the front rather than between your legs, but very, very close to being between your legs so that you cover everything. Again with the pin in, try it on, pin it again. I did one leg at a time because omg it's so many panels. So. So. Many. I think there are twelve per leg? It's a lot. Take your time, pin and adjust before you sew them all into place at the top and bottom. Do NOT sew them anywhere in the middle of the fabric.
Also, I advise making an extra panel or two (or three). They can catch and really I think it's a miracle we haven't accidentally ripped one off yet.
Underneath the trunkhose, Crowley has a pair of short trousers which you could sew or... hear me out you can buy a pair of loose capri leggings and then just hem them up. Do yourself a favor and get leggings with POCKETS. Because POCKETS and cosplay. Yes? Pockets!
Add some black thigh high socks and then the shoes. I never did find accurate shoes within my budget so I'm wearing the ones I wore for Bastille Crowley, which I found at TJ Maxx like three years ago in the clearance section. (None of us will be looking at your feet, it's fine)
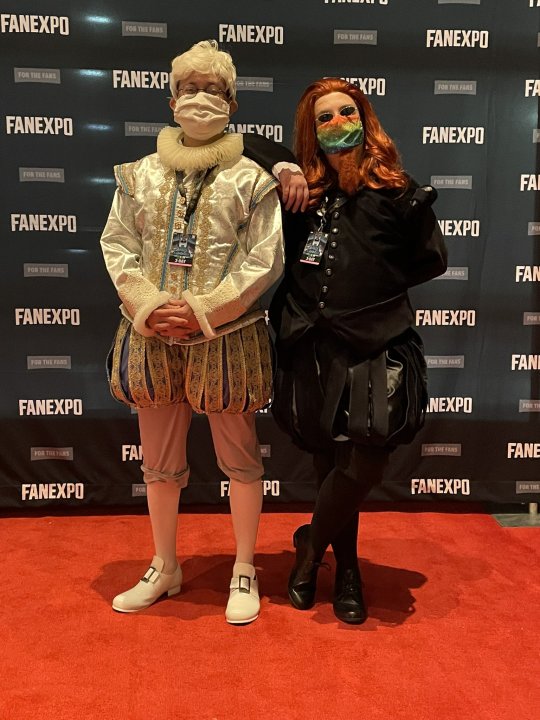
And all that to get a cosplay worthy of flirting with an angel <3
36 notes
·
View notes
Photo
Spent all of last night cutting the base pieces for Shepard's armour out of 10mm EVA foam. This piece is... weirdly my favourite. I can't wait to work on it some more!
INSTAGRAM | FACEBOOK | TIKTOK | TWITTER | DEVIANTART
#cosplay#cosplay costume#cosplay costumes#cosplay makeup#cosplayer#commander shepard#commander shepard cosplay#fem commander shepard#fem shepard cosplay#fem shepard#femshep#mass effect#mass effect cosplay#mass effect 2#mass effect 3#mass effect cosplayer#redhead#redheads#cosplay build#cosplay armour#cosplay armor#cosplay armour build#cosplay armor build#work in progress#cosplay WIP#WIP
19 notes
·
View notes
Text
Majora's Mask Link build log:
I made this cosplay back in early 2019, and planned on adding more accessories over time.
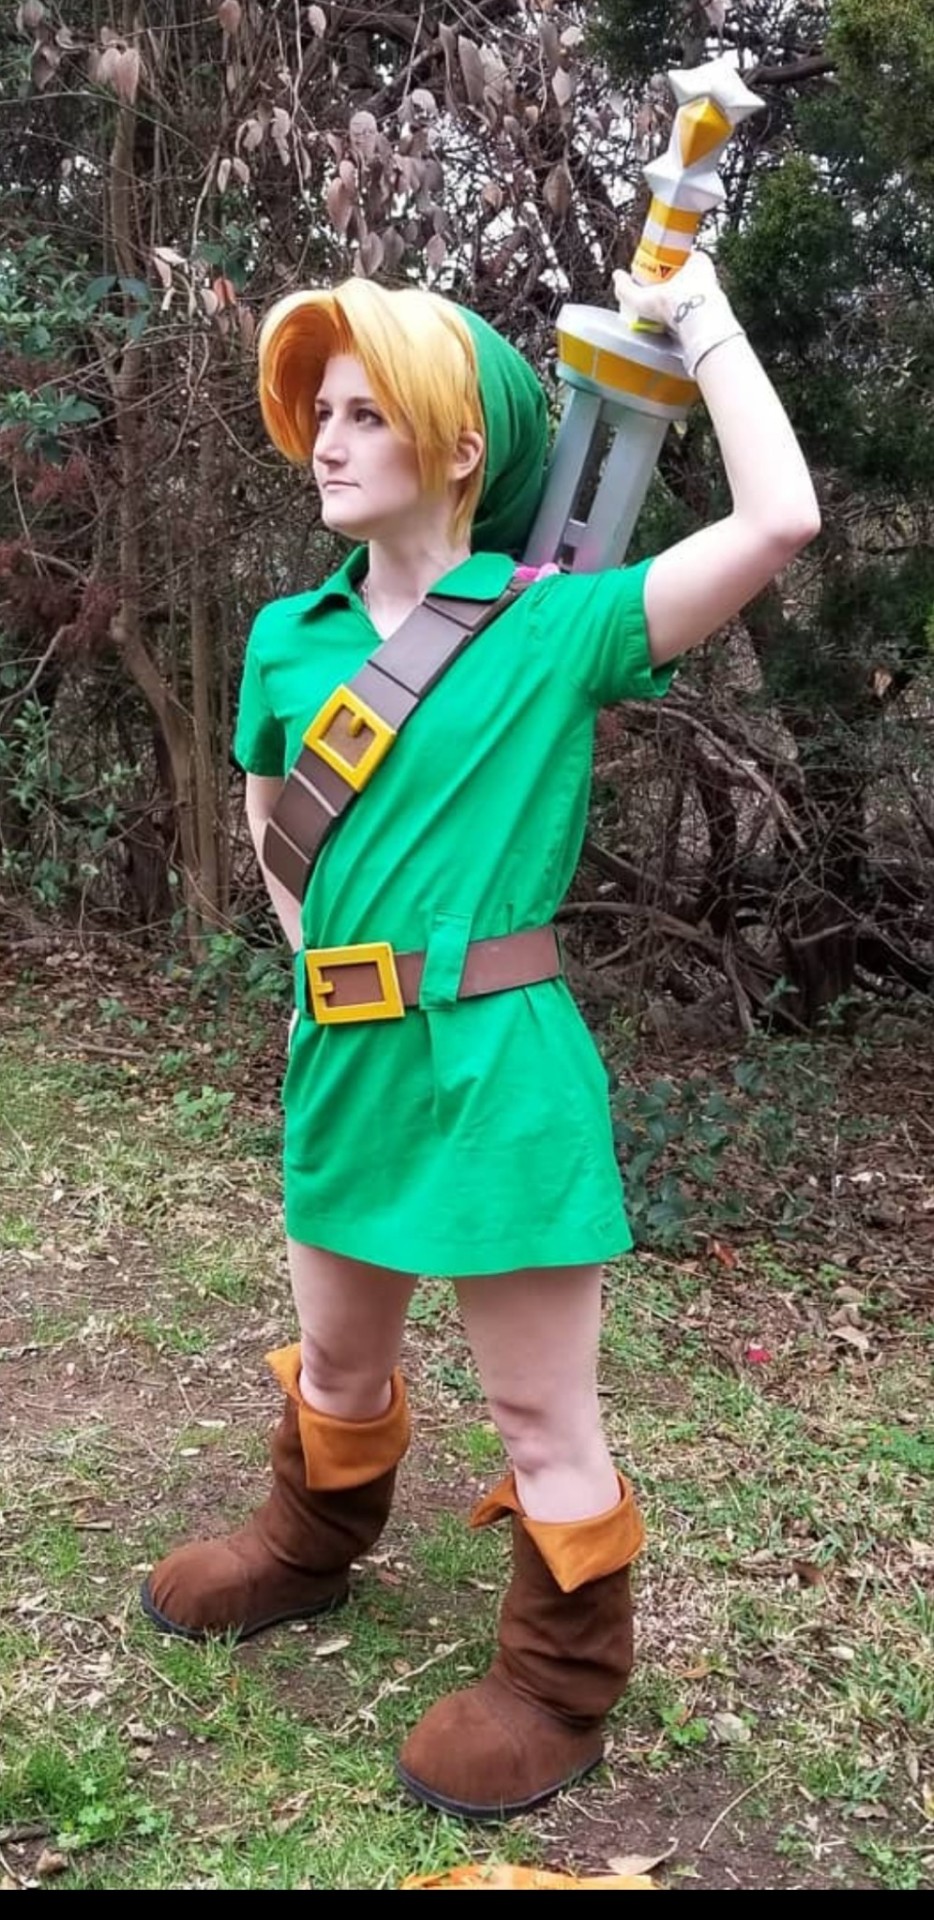
(I forgot my ears for this con, oops)
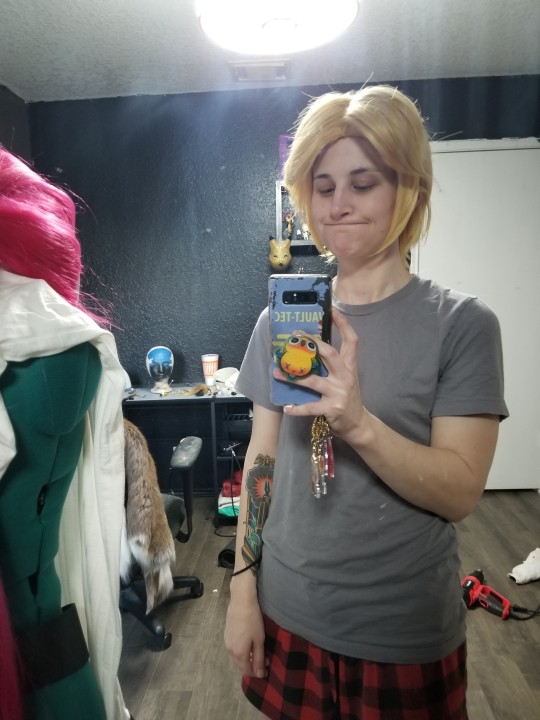
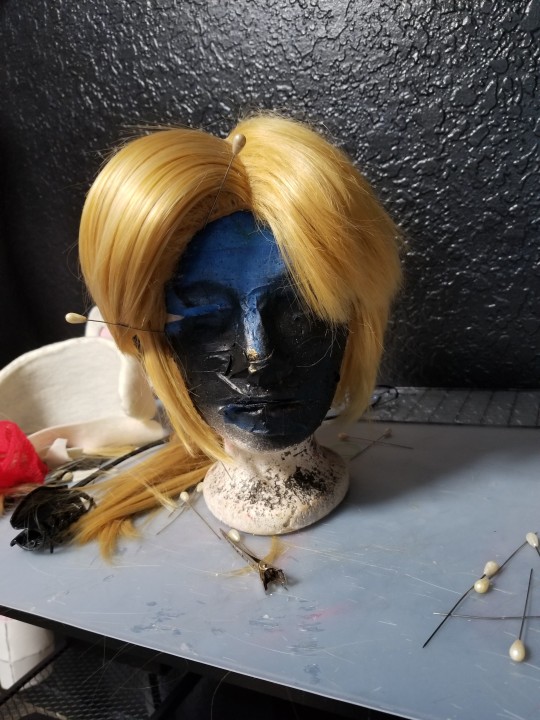
Aaand, then the pandemic came. Womp womp. So after a 3 year hiatus, I got back into cosplay, and was ready to pick up where I left off. Unfortunately, my wig had been shoved away in a box and didn't look so good. It was a sad wig.
But, that's OK. I had a plan! I had learned a lot of stuff over the pandemic and was more than ready to get to work! I started with a hand-me-down wig from a friend and some old wig clippings from an old project (Maybe she's a hoarder, maybe she's a cosplayer). With a little bit of magic, know-how, and glue (mainly the glue), I managed to make a new wig.

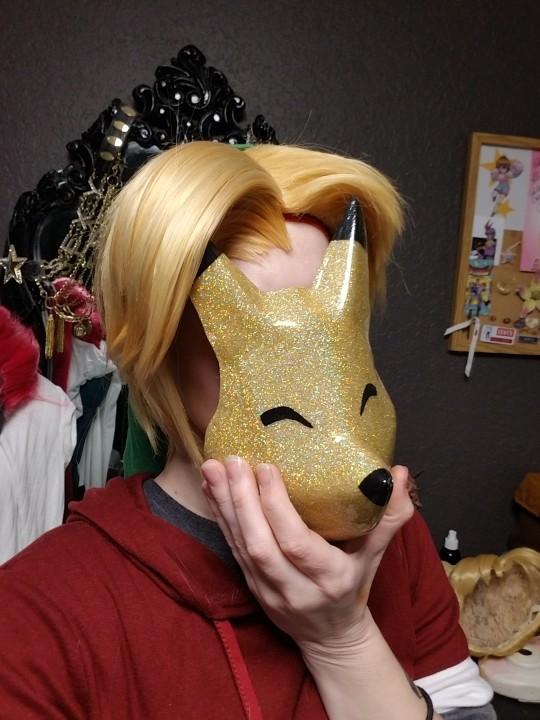
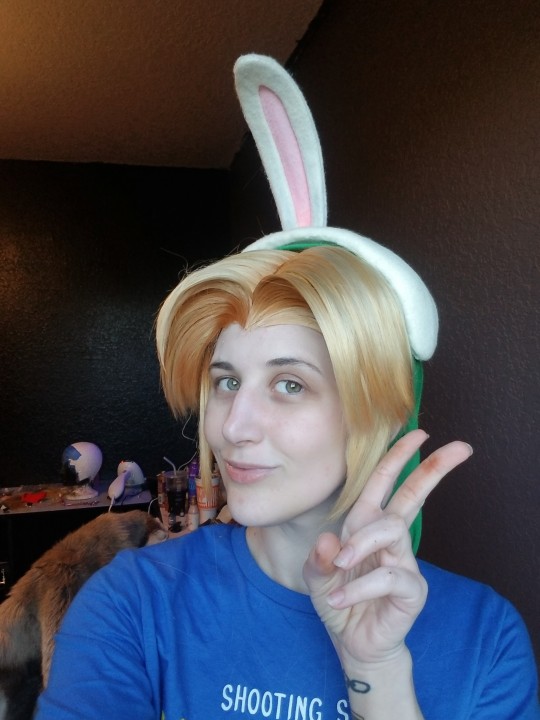
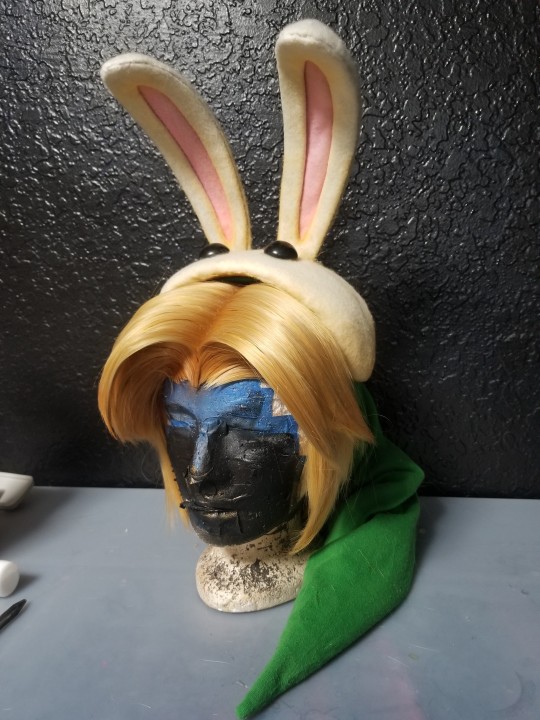
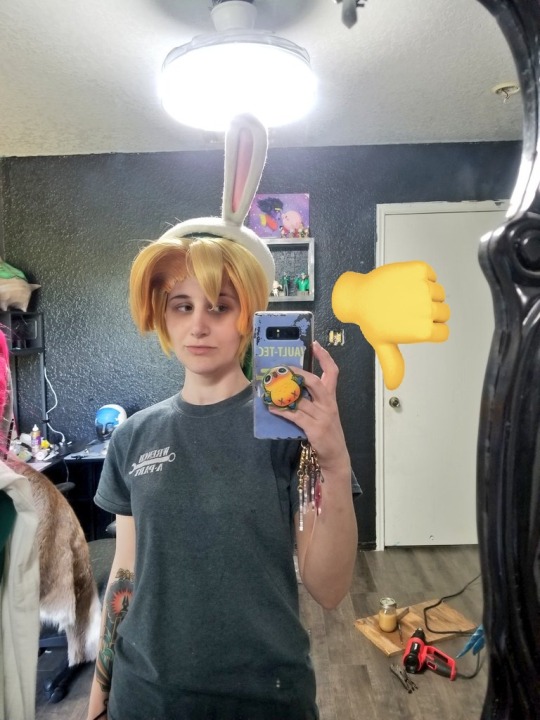
I absolutely love how it turned out! I finished my Bunny Hood as well, adding a little airbrushing to give it a cartoony look, like the 3DS version. (Plz, plz, give me the 3DS version on switch. Plz)
I have so many plans for this cosplay, I'm so excited to be able to get back to things ♡
#legend of zelda#zelda majora's mask#link cosplay#cosplay#cosplay build#cosplay wig#cosplay wip#Zelda#lozmm
12 notes
·
View notes
Text


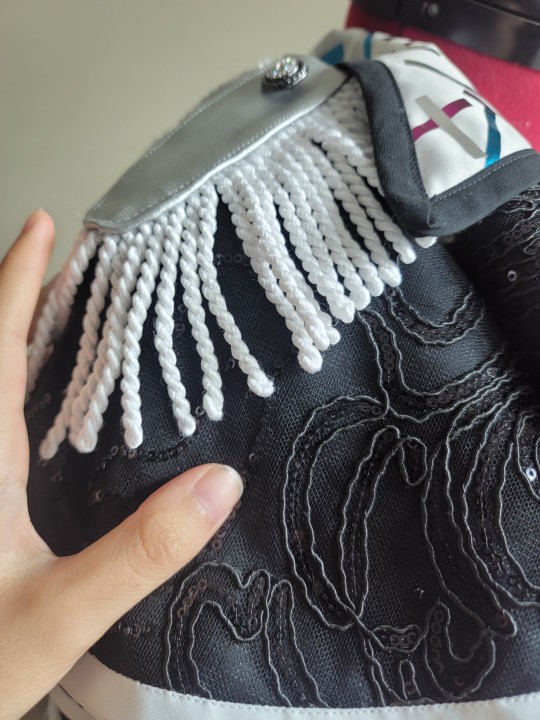
I made a REUNION Gaku cos, finished in July 2022! some interesting notes:
🌟fabrics used include this shimmer textured organza overlay from Joanns, satin (grey and white,) and a subtly geometric-patterned suiting (I think poly/wool?) the organza has interesting iridescent elements embedded on it that when seen in sunlight sparkle, kind of like an idol outfit 😂 the shoulder cape was sewn with a rose-patterned sequined mesh, which, when seen in movement, also sparkles.
🌟for some line patterns in the cos I opted to bedazzle it instead w/hotfix crystals, once again for more visual interest. additionally the skirt section is bedazzled; this is not part of the original design nor the live design but a choice lifted from the i7 group's outfits.
🌟lapel design which looks like sparkles was not printed, but rather created with foil HTV and hand arranged in layers on the lapels
📸 kassarilla.jpg (Instagram)


12 notes
·
View notes
Text
First time posting here and I wanted to start off with one of my favorite recent projects: Grian’s elytra
I also want to show off more of my progress with builds since I don’t do that often anywhere else
The idea
To say this project was painful is accurate, but the final result was well worth it.
Many Grian cosplays I’ve seen have the full parrot wings, but I was inspired by a Mumbo cosplayer I briefly met at a convention in 2022 who had a set of elytra wings on his back, and I wanted to make a version that was a “what if the hermits customized their elytras”. Hence, the parrot theme stayed with the mini layers of feathers at the top
The process
To start a cosplay I will often sketch out a character reference that is fairly accurate to the final build. What’s not shown here are the 10+ pages in my sketchbooks with the different designs for the wings, outfit variations, many accessories, as well as a visual breakdown of all the layer and steps to things.
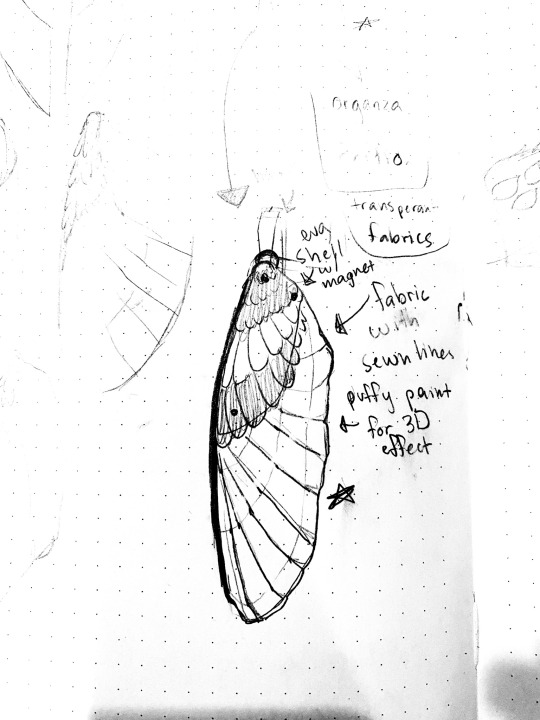
Out of all the wing designs, I picked my favorite and traced my sketchbook design of the wings onto an digital art program an cut it into 8.5x11 pages, printed it, and cut it out.
I then used some very incompatible and tricky fabrics to cut and sew each side.
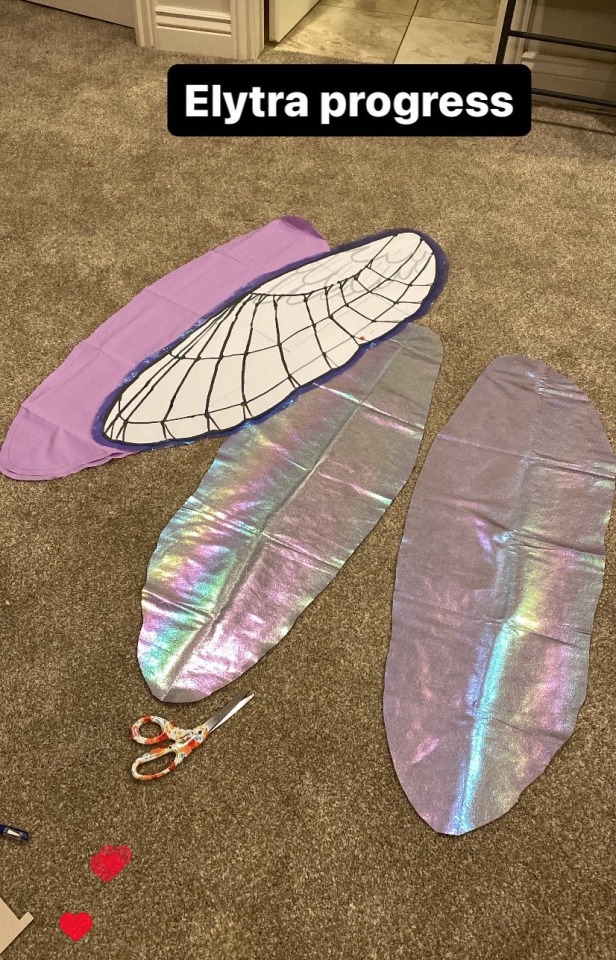
The inner side of the elytra has a holographic vinyl layer and the outer side has a layer of cotton with some shimmery toile on top.

The insect wing detailing could have been drawn on and then stitched over, but I decided to freehand the majority of it with some guide points dotted here and there to make it mostly symmetrical based on the original sketch.

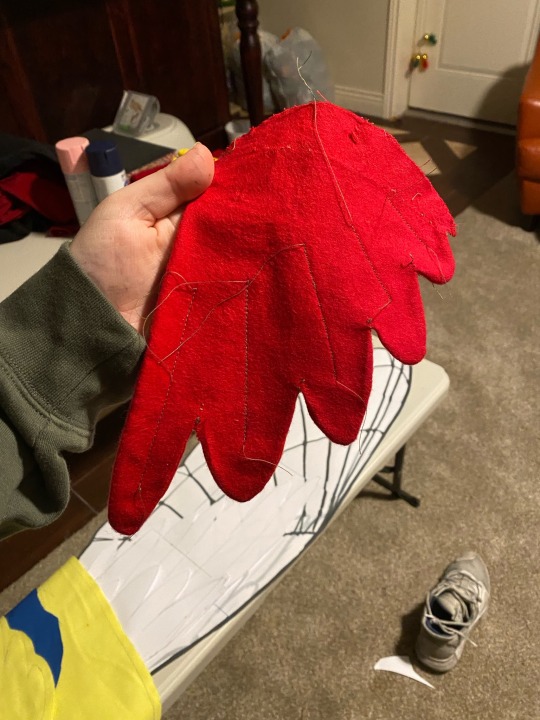
To finish it off, I made some feather layers from flannel and stitched them along the top
The final step was to add the harness the elytra connects to since I wanted it to be obvious these wings were not a part of the character, rather just an accessory.
Using a pattern from this Etsy listing, I cut faux leather using it and used rivets and cording to keep it together
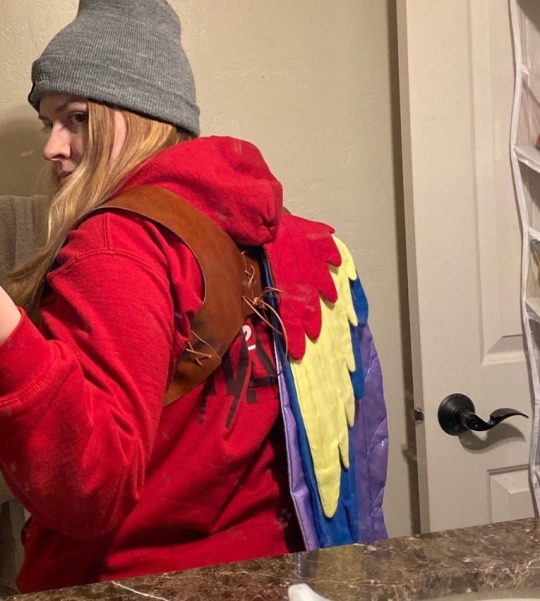
And there you have it! My Grian elytra!
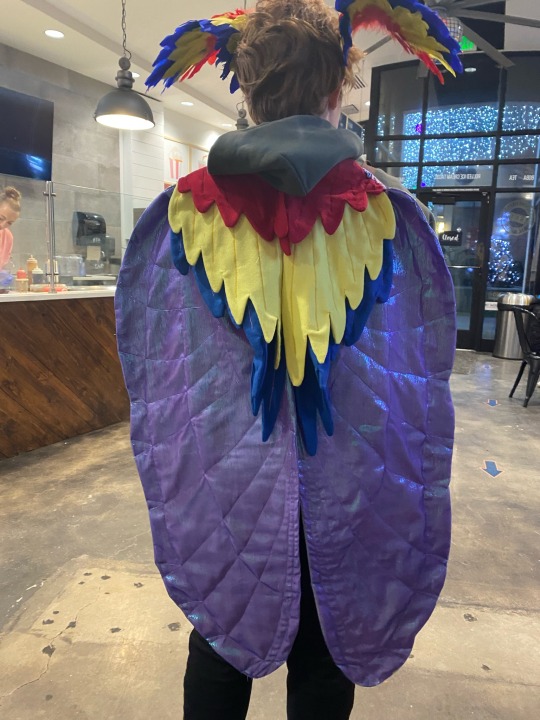
The full cosplay project isn’t fully done yet, but at least the wings are
Bonus:
Obligatory cosplay selfie in a car
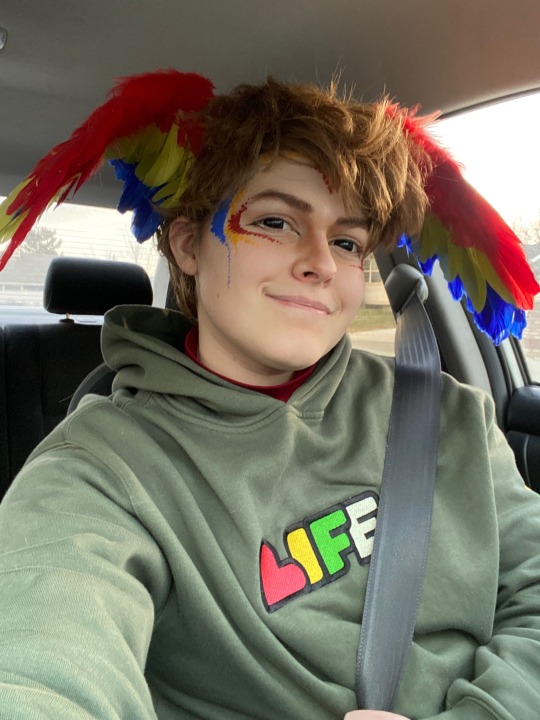
More projects coming in the future!
#grian#cosplay#grian cosplay#cosplay wip#cosplay build#hermitcraft#hermitcraft cosplay#minecraft cosplay#idk what im doing#skygoldcosplaywip#skygoldcosplaybuild
231 notes
·
View notes
Text

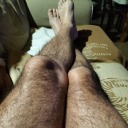
i need him back
#otto says stuff!#yippee#yippee creature#autism creature#tbh creature#creature#cosplay build#cosplay#yippee cosplay#otto irl#killer curves ily#this is my favorite shirt#also @ the person i borrowed this from please i need him i will pay you anything just to have him as my own
7 notes
·
View notes
Text
Intro~
Hi, I'm Pixie!
I'm new to cosplay sewing/building, so naturally...
I THROW MYSELF INTO THE HARDEST THING I CAN THINK OF.
My sewing cosplans include-
Calne Ca
Financier (Protag of Magical Starsign)
Rave Miku (original design)

12 notes
·
View notes
Text
Anyone want to help me choose the placement of some symbols for my Beskar'Gam?
So my family (particularly 16yo bro & I) have been making a clan sigil for our family, and I know I want that on my left pauldrons. And I have a flaming wolf design that I would definitely have tattooed on my right shoulder were it not for a combined religious recommendation against tattoos and my own hatred of needles, so that's going on that pauldron. And I have Jaig Eyes already inlaid into my helmet, and plans for mostly a firey crimson (defiance) orange (freedom) & gold (vengance) color pallette on a black (justice) base for all of my armour.
But we also decided that us kids at least are going to number off, so I need either an arubesh or mando'a 1 somewhere, but cant decide between side of my helm, left knee or right elbow. And since grey means mourning a relative or lover, dark green means protection, and yellow means rememberance, I'm thinking I want a corresponding 3 in grey within dark green (base) and yellow (border) circles, but I can't decide between my left bracer or over my heart.
21 notes
·
View notes
Text
me planning out cosplay is like. i want to be the most feminine character in media. i need to become manly man and i wish i could temporarily remove my honkers. miku? i now will perform a feat of engineering. sewing can’t be that hard, i think. if this wig doesn’t look like the picture i will curse everyone in a five mile radius. if i don’t slay the world will explode
#one minute I want to be wearing a maid dress and the next I want to become akito from project sekai#also I need to be wxs miku#and LEGO batman joker#and the riddler#yassified ofc#cosplayer#anime#cosplay#cartoons#feminine#gender#cosplayer problems#cosplay wip#cosplay diy#sewing#cosplay build#cosplay beginner#text#gender indentity#confusion#miku#hatsune miku#vocaloid#yass#yassify#slay
9 notes
·
View notes
Text


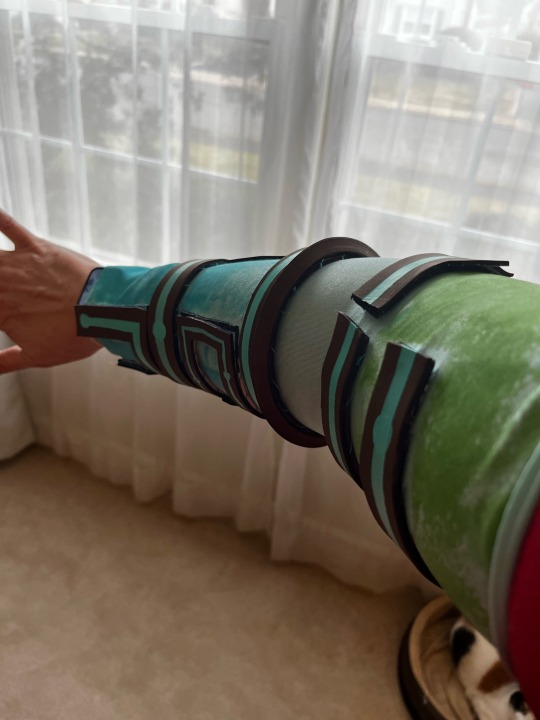
So this is super ugly stage right now BUT it is gonna look fuckin cool. I borrowed the technique from Cowbutt Crunchies Cosplay- there’s a layer of foam whip stitched to the body of the arm sleeve. I’m currently painting the top layer of foam that will be glued on top. I will probably go even out the paint a little unless I decide I like the effect.
I need to do the hand part of the glove yet and finish one of this pair of gauntlets and I think I’m done for Katsucon. I’ll work on the chainmail bits as the next phase.
#my midlife crisis is more fun than yours#link cosplay#tears of the kingdom cosplay#work in progress#cosplay build
7 notes
·
View notes
Last Seen Blogs
happysadmum
HappySadMum

desperatale
Desperatale

vuquanghung
Vũ Quang Hưng

mythik
No Clothes, Just Beauty
amicus5
Nudist