#create subflow in salesforce flow
Explore tagged Tumblr posts
Visit Tumblr Blog
Explore Tumblr blogs with no restrictions, modern design and the best experience.
Last Seen Tumblr Blogs


Fun Fact
Tumblr’s reach among the 26-to-35-year-olds in the US is 11%.
Text
Screen Flows and Autolaunched Flows in Salesforce
Most companies wonder what drives efficiency and productivity in today's fast-paced digital environment. One answer to this question is automating routine, manual business processes, tasks, and workflows. Salesforce Lightning Flow is a fantastic option and an out-of-the-box lightning platform to do this.
The Salesforce platform includes an out-of-the-box tool called Salesforce Flow. This tool enables users to automate intricate business procedures and do straightforward or challenging tasks by gathering data or records in your Salesforce org.
Online salesforce training and placement is one of the best ways to advance your career and boost your earning potential.
Understanding ScreenFlow
When a user interacts with a screen flow, a user interface (UI) is displayed to them. This is what allows them to choose records or enter data. Assume that you intended to create an account record using a screen flow that required the user to enter all necessary data before the account was created when they clicked the submit button. This is a valid example.
It's possible to relax the data entering requirements for validation criteria. As a result, a logical data entry flow that can alter depending on the values submitted is provided. Without using massive top-to-bottom screens, you can guide a user through a business process by creating a user-friendly screen flow.
The Screen Flow is only one of the numerous types of Flows you may utilize in Salesforce to improve user experience.
What are Auto-launched Flows?
If you are new to Salesforce Flows, you can learn it quickly using online Salesforce training.
An event, like the creation, modification, or receipt of a platform event, can start a particular sort of Flow in Salesforce.
Business processes are automated, and repetitive work is streamlined using auto-launched flows. For example, if a new lead is formed, you might use an auto-launched flow to automatically initiate a follow-up activity and update a linked record whenever a certain field changes.
You can create an automatically launched flow using Salesforce's drag-and-drop Flow Designer tool. After creating your Flow, you can configure it to be automatically triggered when the specified conditions are met.
To engage an auto-launched flow, you must first build a new flow trigger that details the requirements that must be satisfied. Your Flow will begin anytime the required event occurs as soon as the trigger is configured.
You can improve your operations and save time and money if you have the choice to start Flows automatically in response to particular triggers.
You can clear your doubts and boost your visibility in the job market after finishing online training in Salesforce.
Comparing Screen Flow and Auto-Launched Flow
In contrast to Autolaunch flow, where the screen element is unavailable, the user can use the screen element in Screen Flow.
The Subflow element in an Autolaunch flow allows the user to call only flows of the Autolaunch type. In contrast to this, the Subflow element in a Screen flow allows the user to call flows of both the Autolaunch and Screen types.
In order for ScreenFlow to function, the person who runs it must have permission to do so. As a result, if you're adding a new field or looking up a record in your Flow, you must ensure your viewers have access to any fields being used as return values. If they don't, an error notice will be displayed.
As Auto-launched Flow operates in the 'system' context, which provides full access, there won't be any permission problems.
Search salesforce admin training near me on the Internet to find courses that practically teach you to manage teams.
Final thoughts
To put it briefly, Flow in Salesforce is a powerful business automation tool that can alter data in Salesforce in various ways. Online Salesforce training teaches you to automate your organizations repetitive and boring business operations.
Flow is an amazing tool built within the Salesforce platform. Flow automates various workflows and tasks, from the easy to the difficult, by gathering data and carrying out operations in your organization or on a third-party system. With the use of Flow, a user can get, delete, update, and create records for numerous objects.
1 note
·
View note
Text
How to use Sub-Flow in Salesforce?
How to use Sub-Flow in Salesforce?
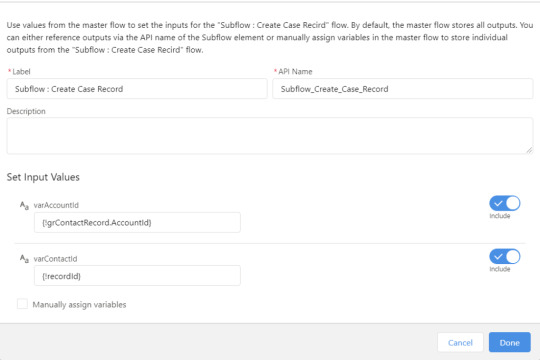
Flow Element: Subflow Launch another flow that’s available in your org. A flow that is launched by another flow is called the referenced flow. Usage Flow Builder doesn’t display descriptions for input and output values. For details about each variable in the referenced flow, ask the admin who built the flow for more information. At run time, the flow calls the active version of each…
View On WordPress
#amit#amit singh#create subflow in salesforce flow#flow#Flow Builder#flows in salesforce#how to learn salesforce flow#learn flow#learn salesforce flows#learn sfdc flow#Salesforce#salesforce flow#salesforce flow builder#salesforce flow builder tutorial#salesforce flow bulkification#salesforce flow tutorial#salesforce flows for#salesforce flows for beginners#salesforce flows for dummies#Salesforce Tutorials#sfdc#sfdc flow#sfdc flows#SFDCPanther#sub flows#subflow in salesforce flows
0 notes
Text
REMOTE WORKING
Flows are used for automating business processes, It can execute formulas, logics for better results. Flow holds many Components like Screen and more. It can be easily done by Drag and drop tool and increases productivity.
The whole Lightning Flow can be created by not writing a single piece of code.
The Flows includes following Elements:
1. Interaction:
Screen : Screen Element is to create UI parts based on user Requirements.
Actions : All Action Included
SubFlow
2. Logic:
Logic Includes elements like Decisions, Loop, Pause, Loop.
They are basically used to add custom logic on requirements .
3. Data:
The Data includes Create Records, update Records, delete Records and Get Records.
It is used for linking the external data to store in Salesforce.
Benefits of Flows:-
The drag and drop functionality is easy to implement.
A complex process can be done by Flows apart from using Apex.
A Flow Builder handles simple user interface, easy to use.
It can be easily accessed by non developers too.
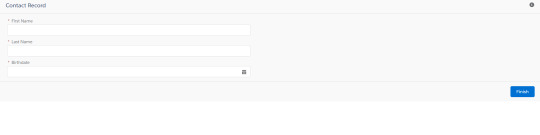
Let’s Create a Basic Flow:
I will create a basic Contact Record Page with the help of Flows
Step 1: Setup < Type “Flows” in Quick Find Box” < Process Automation < Flows

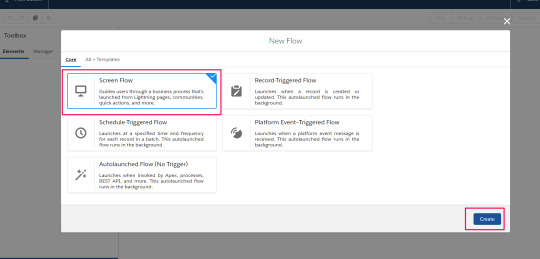
Step 2: Select New Flows to create a new Flow.
Step 3: Select Screen Flow and Create.
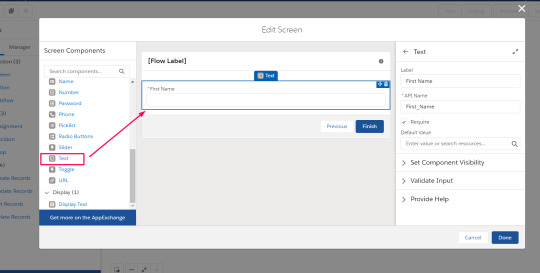
Step 4: Firstly add the Screen Element by dragging it from the element section.

Enter the Label and set the Properties as per your choice.
The Properties are Configure Frame which includes Header and footer checkbox. They are whether to show the header and footer part or not.
Control Navigation:- To display the buttons like Finish , Next and Back.
Provide Help :-This is used to guide users for help in any particular field. The Help Text can be customized in various fonts and colors.

Step 5: Drag the Text Component for input and Set the properties.
Do it the same for Last Name and Birthdate . The Birthdate Component will be Date.

Step 6: Connect the Element by drag and Drop

Step 7: Save the flow and run it.
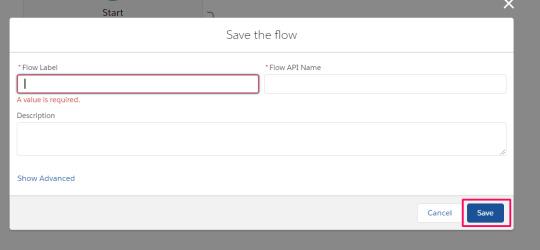
After Running, you can see the basic former created using flows.
Hope you got a Sneak peak of Lightning Flows , how they are executed even without a single piece of code.
To Deep dive into it,
Explore : https://help.salesforce.com/articleView?id=flow_build.htm&type=5
0 notes