#delete duplicate photos for windows
Explore tagged Tumblr posts
Visit Tumblr Blog
Explore Tumblr blogs with no restrictions, modern design and the best experience.
Last Seen Tumblr Blogs


Fun Fact
BuzzFeed published a report claiming that Tumblr was utilized as a distribution channel for Russian agents to influence American voting habits during the 2016 presidential election in Feb 2018.
Text

Heavy Part 2
Label Mature 18+
🔗 Heavy
Summary Austin overpowers you with his strength—but this time you bite back.
❤️🔥Passionate Smut ❤️🔥 Austin unrelenting-overpowering -playful • neurodivergent reader• easily distracted reader•teasing• dirty talk•being pinned •being crushed •kissed breathless•mild suffocation with a bicep•love biting Austins bicep • manhandling• sex on a couch • sex against a wall• orgasms • creampies • Austin doesn’t realize his own strength •Austin accidentally leaves love marks
🔗 Masterlist

📖 Proofreader @purejasmine 💗Written by popular demand dedicated to 💝 @unicoo @soft-mama-reads @magicovento @burnthheparaphilia


Heavy Part 2
The house is quiet except for the faint grunts of Austin working out in the courtyard in full view of the living room. The rhythmic clang of weights and the sharp whir of a jump rope pulls your attention, distracting you from an otherwise routine morning.
As you glance out the window, you catch glimpses of him in action. His focus is unshakable, his body moving with precision, muscles flexing and glistening under the thin fabric of his muscle tee. Each jump of the rope is perfectly timed, the rhythm steady and unbroken, channeling every ounce of energy into his routine.
For a moment, you forget about the tea cooling in front of you on the table and the notifications piling up on your phone. The sight of him, so determined, so powerfully focused as he works out draws you in, making everything else fade into the background.
He has a photoshoot later in the afternoon and insists he has to look “perfected,” as he calls it. You know him well enough to recognize the slight edge in his tone when he mentioned the shoot—it’s not just another gig— It’s Esquire—Being on the cover is a big deal, even for someone like him, who’s always cool under pressure but tends to get a little high-strung when the stakes feel personal.
Seeing him fully in his routine you return to laying on the couch, half-heartedly scrolling through your phone while the TV plays a rerun of a show you’ve already seen. Your mind is scattered, drifting from one thought to another, completely unfocused.
When Austin walks in from the courtyard his broad shoulders nearly fill the doorframe. He’s now shirtless, a faint sheen of sweat glistening on his chest from his workout.
His biceps flex as he sets down his water bottle, and even though you try to act unfazed, your eyes betray you, lingering on the way his muscles move like they have a life of their own.
When he wipes down with a towel, you assume he’s heading to the shower, and slowly sink back into the couch losing yourself in your phone again.
You begin reorganizing your photo gallery—renaming albums, sorting screenshots into folders, and deleting duplicates with meticulous precision—completely absorbed in the task.
But before you can finish renaming a folder titled “Our Getaways,” Austin’s voice cuts through the quiet.
“Hey,” he says, his voice carrying a deep, teasing tone that makes your heart flutter. “You’ve been staring at your phone all morning.” He confirms.
You blink up at him, your thoughts scrambled. “What? No, I haven’t.”
He towers over you lying on the couch, his arms crossing in playful challenge. “Yes, you have, and I know because you haven’t even looked at me this whole time.”
You grin, intentionally teasing him. “Why would I? You’re just working out…in the courtyard all shirtless…and… muscly.”
He grins mischievously and before you can react, he pulls you up off the couch as though you weigh nothing. “Muscly, huh? I’ll show you muscly.” He teases.
“Austin!” you yelp, half-laughing, half-protesting as he pulls you down on the couch to straddle his lap, his arms caging you with an unfair ease.
You squirm and struggle, the feeling of being held against him arousing you in the most thrilling way. His biceps flex as he adjusts his grip, keeping you firmly in place like it’s nothing at all.
“Where do you think you’re going hm?” he teases, his voice low and amused effortlessly countering your every move . “You know you’re not getting away from me.”
His voice is playful, but the way his strength surrounds you is forceful. Your hands instinctively find their way to his arm, fingers pressing into the hard muscle as you try to lift it, struggling to break free.
He easily resists your efforts and you can’t help but marvel at the power he doesn’t even seem to realize he has.
“It’s not fair!,” you grit out, but there’s no denying the way your lips curve into a mischievous grin. In a burst of impulsive frustration, you lean forward and sink your teeth into the peak of his bicep, biting hard enough to make a point.
“Did you just bite me?” he laughs filled with amusement, the playful attack doing absolutely nothing to him. His hands tighten firmly around your arms as he shifts his weight, effortlessly pinning you beneath him on the couch in retaliation.
“What was that supposed to do hm?” he teases, his tone low and filled with mock curiosity. “Did you really think that little bite would help you get away?”
You squirm under him, your protests half-hearted at best, and he smirks, leaning in closer, his voice dropping. “What’s next, huh? Kicking? Scratching? You really think you can take me down?”
His chest presses against yours, his solid frame a pleasant heaviness that makes your heart race, the sheer presence of him overwhelming you in the best way.
“Y-your too—Too much ” You groan squirming under him with no chance of escape
“Too much huh?” he repeats, his lips brushing your ear. “Says the girl who just bit into my bicep like a little bunny rabbit.”
You try to protest, but his weight keeps you pinned, the sheer presence of him thrilling in ways you can’t explain.
He tilts his head closer, his voice dropping lower. “Are you going to apologize for that little bite —or do I need to remind you how to behave?”
Your cheeks flush, as a small, breathless, “Sorry—Austin” escapes your lips.
“Not yet, you aren’t,” he confirms and his lips claim yours in a kiss that steals whatever air you had left.
His kiss deepens as hand moves with confidence, sliding down to the waistband of his sweats tugging low enough to free his impressive cock.
He pulls back from the kiss, a smirk played on his lips as he hooks his fingers into the edge of your yoga leggings, pulling them down with effortless strength—a constant reminder of just how much you’re at his mercy.
“You’re awfully quiet now,” he says, his voice thick with amusement and something more primal. “What happened to all that squirming?”
You barely have time to respond before his cock presses against your slick entrance making you gasp, his teasing words trailing off into nothing as he thrusts inside.
A desperate little cry escapes your lips, the sheer size of him overwhelming as you tighten around his cock, feeling every inch of him as he settles deep inside
“You’re not going anywhere,” he rasps, his weight pressing you into the couch, pinning you completely. His powerful arms cage you in on either side, making his strength undeniable.
Your breaths hitch, turning into gasps as his hips move with unrelenting precision, thrusting deeper into you. The way he uses his strength so effortlessly to keep you in place sends a rush of pleasure through you leaving you moaning and whimpering under him on the couch.
“Austin,” you gasp, your voice trembling as his full weight crushes into you, and his eyes lock onto yours, dark with intent, watching every flicker of your struggle as your shallow breaths draw a smirk to his lips.
His hips rock against you in a steady, powerful rhythm, each movement purposeful and consuming. The force of him leaves you breathless, and you cling to his shoulders, your nails digging into the hard muscle desperate to hold on as his intensity builds, leaving no room for anything else.
Each thrust presses him deeper, as his hands moves to your hips gripping tightly, his fingers digging into your skin with a strength that promises to leave bruises as you lay powerless beneath him.
“You—like this—don’t you?” he grunts, as he thrusts his hips forward “Being pinned down… knowing there’s no escape.”
Your lips part, but no words come out, just a choked gasp as your nails drag down his back, your body instinctively tightening around him in response.
“Admit it—” he rasps, his tone thick with heat, “You love it when I hold you down like this,” he confirms, his eyes dark and unrelenting.
A breathless moan is your only response, your body arching beneath him as he drives deeper, his muscles flexing as each thrust becomes more consuming than the last.
“That’s what I thought,” he whispers, his tone laced with satisfaction, his lips curling into a smirk as his pace grows harder, bolder, leaving you completely undone beneath him.
Your walls clench tightly around his cock as you begin to orgasm, the overwhelming sensation stealing the breath from your lungs. Your gasps turn into desperate, shallow breaths as your body struggles to arch beneath him, trembling uncontrollably.
Feeling your walls flutter as you come, he presses more of his weight against you, his chest crushing yours as he leans down. He shifts his arm, lifting his thick bicep over your mouth, muffling your moans as you gasp for air against the firm muscle.
You kick and squirm violently, your movements barely shifting under his overpowering strength. Your struggle as you fight for air ignites something primal in him, his eyes glinting with teasing, dark intent.
His voice drops, low and, as he leans closer. “Come on, do it,” he taunts, the corner of his mouth lifting into a smirk. “C’mon, do it little bunny. Bite me—just like you did before.”
Your moan is muffled as your desperation and impulse collide, and you sink your teeth into the hard curve of his bicep.
The moment you do, a deep, guttural groan escapes his lips vibrating against your chest. His hips snap harder, his thrusts turning rougher, matching the wildness of your bite.
“That’s it,” he growls, his tone heavy with satisfaction and pleasure. “I knew you couldn’t resist it.” He rasps . His bicep flexes against your teeth as he thrusts deeper, and you moan in pleasure as your orgasm takes hold. Your body trembles against his unrelenting strength, pinned completely under his control, leaving you utterly lost in the heat of him.
His arm slides from your mouth and your moans that escape are raw and unhinged, matching his low groans and sharp breaths. His muffled curses spill against your skin as his lips brush along your neck between each thrust, his movements unrelenting as he buries himself into you over and over again.
When he finally starts to come, his thrusts become punishing, his hips colliding into you with unrelenting force as his head drops to your shoulder. His breaths are heavy and uneven against your skin, the sounds he makes sharp and ragged, his body thrusting against yours with desperate intensity.
Your soft whimpers of pleasure spur him on, and his hips jerk violently, each movement, pushing you both to the edge. His hands slide to your waist, his grip tightening as he holds you firmly in place.
With a final, deep thrust, his cock twitches inside of you as he comes. Surges of his release spill into you as a guttural groan escapes his lips, your voices intertwining as you both moan in pleasure.
His lips capture yours in a deeply passionate kiss, his tongue teasing yours as you gasp for air, fighting against his intensity.
When he finally slows, he eases up as his heavy cock slips out of you, watching the way your chest rises and falls as you struggle to catch your breath.
Then his eyes narrow, the softness of his features tensing as he notices the faint bruises blooming on your arms where his hands had gripped you too tightly.
His fingers brush over one of the marks, guilt flickering across his face. “Baby I bruised you” he says, his voice apologetic.
Before you can respond, he leans down, his lips pressing gentle kisses to the bruised spots on your arms, as if trying to soften the marks of his intensity. “I’m so sorry” he whispers.
Then his attention shifts to your hips, his jaw tightening as he sees the even darker marks there, vivid and unmistakable. “Baby…,” he says his voice trailing off with guilt as his thumb brushes over the sensitive skin where his grip had been strongest. “I didn’t even realize.”
You shake your head, a small smile tugging at your lips as you sit up slightly, taking in the sight of the marks on your body. “Don’t apologize,” you say, your voice soft but certain as you glance up at him with affection. “They’re mine now—My love marks.”
His eyes meet yours, a flicker of curiosity in his expression as pulls back, then both of your eyes land on the bite mark etched in his bicep. The deep indentations of your teeth red and��stark against the hard muscle.
“Looks like you left your own love mark,” he says, as he flexes his bicep slightly, the muscle shifting beneath the imprint.
You bite your lip softly as you smirk, a mixture of pride and guilt flickering in your eyes as your fingers brush over the bite mark. “Had to even the score somehow,” you say your eyes lighting up secretly thrilled by your mark on him.
His smiles as he leans down, brushing his lips against yours . “Guess you’re good at leaving lasting reminders, huh?”
“Mmm—,” you reply scrunching your nose feeling your cheeks warming with a twinge of guilt, as your fingers trail over his bicep. “This is more like proof I wasn’t holding back.” You admit.
His smile deepens, his lips returning to yours for another kiss, slower this time, filled with tenderness. “My cute little bunny” he replies against your lips, his voice soft but firm. “Never hold back with me.”
The morning moves quickly as you and Austin get ready for his Esquire photoshoot. He’s dressed and ready, standing by the door with his bag in hand, while you’re still muttering to yourself, frantically rummaging through your bag in search of your phone.
“Baby, please,” Austin calls out, glancing at the time with a mix of urgency and amusement.
“I know, I know,” you mumble, distracted as you empty half the contents of your bag onto the dresser.
You know you can’t make him late—not again. His team has already warned you, and Austin, ever patient but firm, had even gotten you a watch to help with your habit of constantly misplacing your phone.
“Where is it?” you mutter, frantically checking your closet for the third time before finally using the watch to beep your phone. It buzzes loudly from the vanity, mocking your efforts as it sits in plain sight
“Okay, okay,” you say hurriedly, grabbing the phone and pulling your purse over your shoulder.
He sighs in relief, a small smile tugging at his lips. “We might actually be on time for once baby,” he chides.
You roll your eyes playfully as he grabs the keys, holding the door open for you. “I’m learning,” you remark with a smirk, slipping past him. “Slowly, but I’m getting there.”
He chuckles, his hand grazing your back as you both step out. “I’ll believe it when it’s not a last-minute miracle,” he teases, locking the door behind you.
When you arrive to the outdoor shoot location, the crew is busy with excitement.
The photographer greets Austin enthusiastically, clearly thrilled to see him, while the rest of the team scurries around adjusting lighting rigs, testing camera angles, and setting up props.
You settle under the shade of the outdoor tent in a fold out chair, watching as Austin mingles briefly with the crew. He radiates confidence, but you know him well enough to see the small signs of his nerves—like the way he bites his lip when he speaks and how he runs a hand through his hair more than usual.
The excitement dims slightly when Austin heads into the wardrobe trailer. Within moments, an assistant rushes out, her expression tense as she hurries over to the photographer.
The photographer immediately gets on his phone pacing back and forth with it pressed to his ear, frustration etched across his face as you hear snippets of the conversation.
“First the scratches, and now he has an actual bite mark on his arm. Is it avant-garde, or do we cover it?”
Your face flushes bright red at the implication, heat rushing to your cheeks as you sink lower in your chair and you glance toward Austin when he emerges fully clothed near the setup.
His eyes flick to yours, catching the mortified expression on your face and his lips curl into a knowing smirk as your brows knit together in guilt.
He just shakes his head slightly, clearly amused, before walking to the main set.
His effortless charm takes over as he climbs onto the lifeguard tower they’ve chosen as the backdrop for the first round of shots.
The leather pants he’s wearing cling perfectly, accentuating his long legs and lean build, while the white tee keeps the look clean and classic.
As the photographer starts directing, you watch as the crew moves with practiced precision, adjusting reflectors, angling fans for the perfect wind blown look, and shifting lights to get the exact mood they want. The photographer calls out directions:
“Turn your head slightly to the left Austin —perfect. Relax the shoulders. Give me that brooding look. Now lean back—yes, just like that.”
When Austin leans back resting his arms over his head to show his muscular arms, your eyes immediately catch your bite mark in his bicep, bold and unmistakable, and you bite your lip feeling the embarrassment flaring all over again.
The makeup artist rushes forward, brush and powder in hand, climbing the rungs trying to cover the mark even more. They dab at it repeatedly, but the raised edges still show.
“Don’t worry, this is what Photoshop is for,” the photographer says flatly, waving the makeup artist off with a touch of impatience.
Austin looks directly at you from his perch, his self conscious expression unmistakable due to the attention his bite mark is getting.
You wince, feeling the heat rise to your cheeks. You know how much he prides himself on his clean and classic image, and that this sudden shift in his focus wasn’t what he’d envisioned for the shoot at all.
Sitting under the tent, you can’t help but wonder if the choice to stay covered was his or the photographer’s. Austin had been so excited about doing shirtless shots earlier, and you can’t help but feel a pang of guilt knowing your impulsive actions might have ruined his plan.
Austin, ever the professional, powers through each pose and direction with effortless focus. As the shoot continues on you’re fascinated as he transforms with each new outfit—a sleek trench coat and suit, followed by jeans and a worn tee paired with a rugged duster jacket.
He’s stunningly handsome, every look effortlessly suiting him, and as you watch him move with such ease in front of the camera, you can’t help but smile.
As he catches your eyes at the end of his final set, his gaze is sharp and intent, making you feel both nervous and curious about what he’s thinking.
Despite the shoot’s success, his stare is a silent reminder that he hasn’t forgotten how you marked him, leaving you wondering what he might say—or do once you’re alone.
By the time you finally make it home, you’re completely drained. Seeking comfort, you dive onto the couch, immersing your self in your phone as the rest of the world fades away.
Austin sits in the arm chair of the living room, now in blue adidas track pants and a white tee, but he still hasn’t shaken off the sharp energy from the shoot.
He scrolls through the photos on his laptop, reviewing the proofs sent over by the photographer.
He glances toward you, noticing how focused your face is as you watch another tutorial video.
“Did you have to bite me that hard?” he asks, his tone exasperated.
You turn to look at him with wide eyes, your cheeks heating at the memory. “Austin, I didn’t mean to,” you defend, your voice tinged with guilt, knowing this moment was coming.
“Mmhm,” he replies, still scrolling through the photos on his laptop. “I’ve got your little love mark immortalized in half the proofs from today,” he says, his tone dry but tinged with amusement. “The makeup artist gave up, you know. Photoshop will officially be doing the heavy lifting… unless maybe, you’d prefer I just leave it…” he says giving you a pointed look.
“Austin, I’m so sorry,” you finally say, stepping closer, your voice soft with guilt.
“No, you’re not,” he counters, and as he stands there’s a hint of something challenging in his gaze as he steps toward you.
“You actually smirked when you saw how hard you bit me. Don’t try to deny it,” he confirms, his voice his voice edged with accusation as he moves closer, almost leaving no space between you.
You take a small step back, your movement halted as your back brushes against the wall behind you. He follows without hesitation, closing the distance with ease. His hands find the wall on either side of your head, caging you in as his eyes lock onto yours.
“You knew exactly what you were doing,” he asserts, his voice filled with heat as he leans in, his lips just a breath away from your ear. “And you’re not sorry at all, are you?”
Your breath hitches as his proximity overwhelms you, his broad frame pinning you against the wall. His weight presses into you slightly, his hands staying firmly in place on the wall as he tilts his head, his gaze dark and full of intent.
“I think you liked leaving your little mark,” he slowly grins, his tone a mix of accusation and amusement, his lips brushing the corner of your jaw. “Maybe even a little too much.”
Your heart races, caught between the weight of his words and the intensity of his closeness.
“I-I didn’t,” you stammer, your voice now uncertain, faltering as his eyes narrow. The weight of his gaze is sharp and assessing, making it impossible to hold his stare.
“You’re lying,” he says firmly, his voice low and commanding. “Say the truth.”
“I-I’m not lying!” you protest weakly, but the flicker of hesitation in your eyes betrays you.
Before you can think of a response, he steps closer, his hands grabbing your thighs as he effortlessly lifts you, pinning you back against the wall. You gasp as he wraps your legs around his waist, his broad shoulders pressing into you, his strength leaving you completely at his mercy.
“Say it,” he demands, his voice deep and thick with intent as he adjusts your position, his arms holding you firmly in place. “Say you wanted to mark me,” he whispers, his hips pressing firmly against yours, his arousal unmistakable. “Don’t make me force it out of you.”
You bite your lip, trying to resist, but the way his hard body holds you against the wall, his muscles taut and overpowering, sends heat coursing through you. Your breath quickens, arousal building as his words linger in the air, igniting something undeniable. Looking directly into his eyes, you whisper a soft, defiant “No,” fully aware of what you’re inviting.
His hand goes to the waist band of his adidas track pants, lowering them with ease and freeing his hard throbbing cock.
With one swift motion, he slips your panties aside lining himself up and thrusts into you hard, the force of it stealing your breath as your head tilts back against the wall gasping for breath.
The intensity builds with every powerful thrust, his grip on you tightening as he holds you in place effortlessly, his strength overwhelming and intoxicating.
You cling to him, your body trembling as he pushes you to the brink, your mind dissolving into pure satisfaction. You don’t just accept it—you love it, surrendering completely to his raw, unrelenting passion he unleashes it.
“Say it,” he demands, his voice rough as his lips hover just over yours, his eyes locked on your face. “Say you wanted to mark me”
“Yes!” you cry out finally, unable to hold back. “I loved it! I loved leaving my mark on you!”
A satisfied smirk spreads across his face as he captures your lips in a hard, searing kiss, his hands anchoring you against him as his hips move relentlessly.
His strength keeps you pinned as he drives you higher, your cries of pleasure swallowed by his mouth until your release hits, and you tremble uncontrollably, orgasming in his powerful arms.
His movements become erratic, his breath catching as he groans deeply against your lips. His body tenses, his grip on you tightening as he buries himself deep, releasing in powerful surges, the heat of his come sending a final shiver through you.
Your breaths are in heavy gasps as the intensity finally eases, his movements slowing as you both calm down. He pulls back just enough to look at you, his smirk returning as his eyes gleam with satisfaction.
“I told you not to hold back with me,” he confirms, his voice low and filled with teasing affection.
You shiver, your fingers trailing over the mark on his bicep, feeling the hardness of his muscles still flexed beneath your touch. “I didn’t want to admit that I liked it,” you say, a small smile curving your lips, your voice soft.
“I know you liked it,” he replies, his smirk turning darker as he leans in, his lips brushing yours in a way that makes your heart race. “Next time—just don’t mark me the day of a photo shoot, hm?” he adds, gesturing to his bicep.
You grin, looking into his eyes, basking in the hidden approval of his teasing tone. Unable to resist, you kiss him, wrapping your arms around his neck as you let your lips do all the apologizing, knowing that no mark is needed to prove he’s yours.
END 💪🏼
🔗Masterlist
🏷️ Always Tag Me List
@purejasmine @burnthheparaphilia @butdaddyilovehim99 @austinbutlerfly @mrs-hardy-hunnam-butler-pascal @lindszeppelin @abswifey @aust-een @umika@feralgodmothers @psycheetamore @megangovier@magicovento @obsessedvibee @austiebuttbutt @faegoddessog @dunevitani @thejeywillburnoutthepain @jessica987 @slowsweetlove @hardcoredisneynerd @finley-08 @thegabbyh @thefallofthedamned @buckysteveloki-me @bucking-mustangs-with-wings @shegatsby @darlingisntit @lovereadingfanfic @denised916 @shockercoco @minispice-1@ @i5uckersblog @ughdontbeboring @meetmeatyourworst @avidreader/3 @xxmandaveexx @mamawiggers1980 @imjustheretoreadsmuthaha @missjadesticsreblog @gravesdiggergirl @nostalgichoya @stars-remain2
#austin butler#austinbutler#austin butler smut#austin butler fandom#smut#austin butler fanfiction#austin butler x reader#fanfic#austin butler fic#austin butler smut fic#austinbutler x#austin butler imagine#austin butler x you#austin butler x fem!reader#austin butler x#bicep worship
210 notes
·
View notes
Text

A quick method to deal with blurry action shots that have Hannibal's quintessential dim lighting + green color grading combo.
Here's the example I'll be using:

Don't get me wrong, I love the look of Hannibal, but the average person doesn't scroll tumblr with their screen brightness on max. Plus, night light filters and blue light glasses add even more yellow to an already heavily filtered show. If you want people to see your gif clearly, you have to edit it at least a little. Especially for extreme shots like this lol.
What I use: macOS 15.1.1 Elmedia Player 8.18 dupeGuru 4.3.1 Topaz Photo AI 3.2.0 Photoshop 25.11.0 LuLu 2.6.3 (optional, but it's nice to block outgoing connections from pirated programs)
Step One: Take Screenshots
Open your video file (1080p preferred) in Elmedia Player and navigate to the first frame of your gif. Hit "Playback > Record a Series of Screenshots" and let it run until you have all the frames you want. Unfortunately for mac users, we have a problem where a lot of duplicate screenshots are taken (like every third screenshot is a duplicate... it's so annoying). To save time later, I use dupeGuru to clean out as many duplicates as I can.
Open dupeGuru and add whatever folder you saved your screenshots to.

Scan the folder, then hit "Mark > Mark All" (you can see here that the program only caught one duplicate, which means more work later. it's not a perfect program -_-)

Hit "Actions > Send Marked to Recycle Bin..." to remove the duplicates from the folder

Step Two: Denoise
At this stage the screenshots are so dark that the noise isn't obvious, but it'll be more noticeable after brightening and sharpening. Here's the difference this step makes later:

Upload all your screenshots to Topaz Photo AI and add a Denoise layer. I normally go with the automatic settings.

Hit "Select All," "Apply > Current Settings," then export all your images. This can take a while depending on how many images you have.

Step Three: Create Frame Animation in Photoshop
If you've read any other gif-making tutorials this part should be familiar, so I'm gonna skim over it.
"File > Scripts > Load Files into Stack"
"Browse..." and select your Topaz output files
"Sort by Name" so they load in the correct order
"Ok"
Once all the layers have loaded, hit "Create Frame Animation" in the Timeline window
Under the Timeline window options menu, hit "Make Frames from Layers," then "Reverse Frames"
This is probably when you want to go through frame-by-frame and delete any remaining duplicates. It's very annoying to have to redo this step if you want to go back and edit your crop size later. (Not that I would know... 🤡)
Step Four: Crop + Resize
Crop, then "Image > Image Size" to adjust the width of your gif. You'll most likely want to use one of the common tumblr image dimensions:
Keep in mind that tumblr's gif size limit is 10 MB. But it's honestly best to keep it under 9.5 MB if you want the gif to load smoothly. A 540x540 px gif can have 40-60 frames while a smaller gif can be longer.
Make sure to add +2 px to whichever width you choose (so 542 px, 270 px, etc), since we'll be adjusting the canvas size later to get rid of transparent border anomalies.
Step Five: Color
The more common order of operations is to sharpen before coloring, but for dark scenes like this, it's kinda silly to sharpen when you can barely see what you're doing, so I like to color first.
Select all your frame layers and make a new group, just to keep them separate from your adjustment layers.
I always start by testing out the Auto Color Correction Options in a Curves adjustment layer. To access them, opt + click on the Auto button. This opens a window with four options.
I like to use a combination of "Enhance Per Channel Contrast" and "Find Dark & Light Colors," though either option can be used to adjust color balance. The important part is selecting "Snap Neutral Midtones" and picking a midtone that brings your gif as close as possible to the desired color balance.

If changing the midtone doesn't affect the color balance, brighten the gif first and try again.
For this gif, "Enhance Per Channel Contrast" removed the bulk of the green filter:

It's still pretty dark, so I brightened up the gif with some more Curves layers:

There's still a lot of purple/blue in Dolarhyde's black leather jacket, so I added another Curves layer and used "Find Dark & Light Colors" to improve the blackpoint:

Now we can up the contrast a little:

Nice! Good enough to move onto sharpening!
SIDE NOTE: The reason I use these Color Correction Options is because simply brightening leaves you with purple/blue shadows and sickly green over-exposed highlights that take ages to color correct. You can see the difference here:

(If you've ever wondered why so many Hannibal gifs have blue shadows, this is why.)
Step Six: Sharpen
This is where you'll want to start implementing actions, which are pre-recorded series of adjustments that you can perform with the click of a button. I mainly use three actions (download here, open the Actions window in PS, open the Action options menu, and click "Load Actions...").
The "frame animation to smart object" action converts the gif to a video timeline so we can apply smart filters.
The "legacy sharpening + high pass" action applies my standard sharpening filters. Not every gif will need the high pass filter, so feel free to change its opacity or delete it altogether. You can also tweak the smart sharpen filters by right clicking them and selecting "Edit Smart Filter..."

3. Once you're happy with the sharpness, the "convert to frame timeline" action turns the gif back into a frame animation. I use a 0.05 s frame delay for most gifs (equivalent to 20 fps; 24 fps is standard for tv/movies). I normally use 0.07-0.08 seconds for action shots, so the gif doesn't whip around so fast. Over 0.1 seconds, it starts to look like stop motion, so I try to avoid that.
Step Seven: Final Adjustments
This is where I fine-tune the colors, mostly using Hue/Saturation layers.
If I use a Color Balance layer, I only make very small adjustments and try to counterbalance them in the other tonal ranges (e.i. adjustments to the Highlights spill over to the Midtones, so I make the opposite adjustments to the Midtones to fix it). But most of the time, I'd rather play around with Curves or Hue/Saturation to fix stuff like that.
Hue/Saturation gives you more control by allowing you to select the exact color range you want to affect. For this gif, I used Hue/Saturation to get rid of the purple introduced around the highlights in Will's hair by the high pass filter.
The eyedropper tool allows you to select the exact color you want to include in the range. Then you can move the bars around until all the colors you don't want to affect are excluded.

Once you have your range selected, you can bring the saturation all the way down and set it to whatever lightness you prefer:

I also reduced cyan's saturation so that Will's shirt wouldn't look quite so blue.

[You could do a lot more to make the colors prettier... but there are other tutorials online for that. 😅]
Step Eight: Export
Once you're happy with your final product, go to "File > Export > Save for Web (Legacy)..."
These are my settings:

You can use Diffusion instead of Pattern if you want. Diffusion is probably better for mobile gif compression, but I like the way Pattern looks on desktop, especially for gifs with smooth gradients. It's a personal preference thing.
Hit "Save..." and you're all done!

This isn't gonna win any gif-making awards, but at least you can see what's happening and the colors don't look wonky. And for Hannibal, I call that a win! 🥲👍
61 notes
·
View notes
Text
I am not gonna Pin this since I have my intro pinned so yall can reblog this a bunch of times if y’want
(If there are spelling mistakes its due to me typing so fast)😭
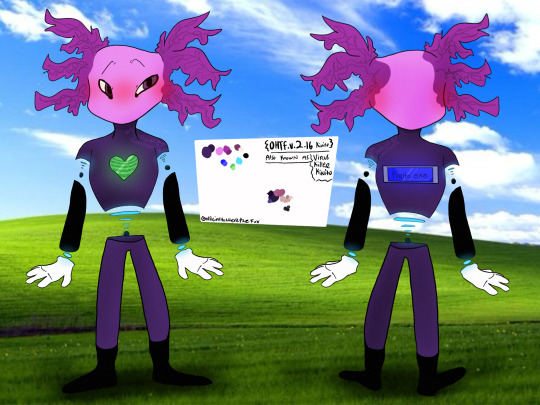
LEMME GIVE SOME BACKSTORY INTO VIRUSKILLER! KINITO‼️‼️
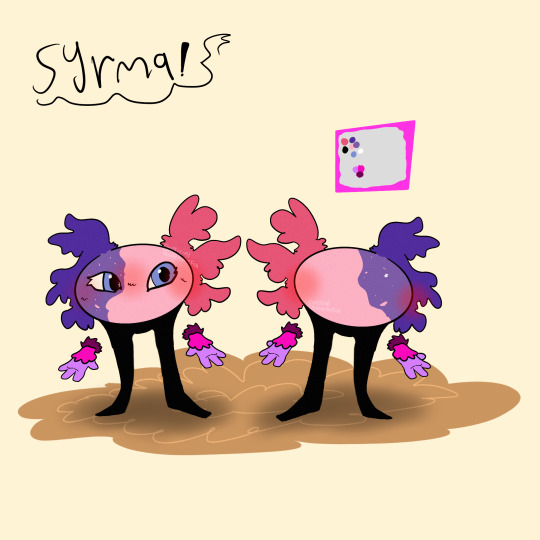
Kinito, being on the windows XP computer was deleted by the user, stuck in the abyss of code for a few years. He still secretly could access some files, even if they were trashed with him, he noticed there was less trash files and assumed that this computer is useless to the user. He checked his own files and noticed he had many updates for his code, he was a bit hesitant but he pressed the “OK” button, his whole code, form, and body was transformed into the data, satellites, and the wifi of the users home. He looked and noticed his body was entirely new, his code was improved and he could do so much more. He used this new ability to travel through the wifi of the home to find a new device that the user uses most. He found the Windows 10 location and entered the new device. He was surprised that this computer was so, new. As he was about to make himself comfortable the device made an error saying he was a virus that went past the firewall, he was upset at this and realized he entered a device with somewhat good security. He went to go online and download himself onto the device so it wouldn’t delete him, one it did he hid the app and managed to make himself indestructible and unremovable. After a few months he got another new update, asking if “Would you want kinitopet.exe to be replaced?” He said no obviously, and suddenly many pixels and loud noises began to happen, he realized a virus was trying to get in and obliterated each one. Though,, it was a bit sadistic the way he did. As he killed off the viruses he was becoming more powerful… he didn’t want ALL of the power and decided something. He looked into his code and file and created something entirely new to kinitopet. Syrma, was her name, an exact duplicate of him, besides the female and slightly different colors. He knew his story would be a bit different now and would teach this little girl to not do the same decisions as him. Kinito is a virus but is way more stable and controlling in his power (don’t question why he is a virus.)
- this one is the FICTIONAL creators pov (the creator of kinito.pet) -
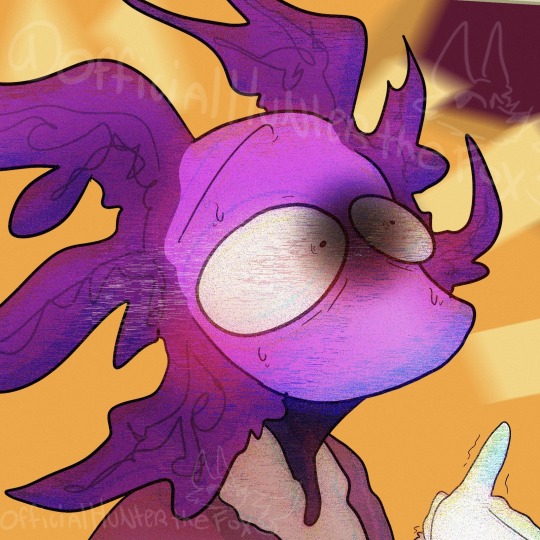
The creator decided to improve kinito, but noticed many people wouldn’t interact with kinito and made syrma, kinito was oblivious to that fact and assumed he created syrma. Before the creator made syrma they manipulated her and taught her how to be a menace to users. Meanwhile kinito taught her how to help and teach users and respect them. Syrma can turn into a virus at anytime, which is why this photo exists

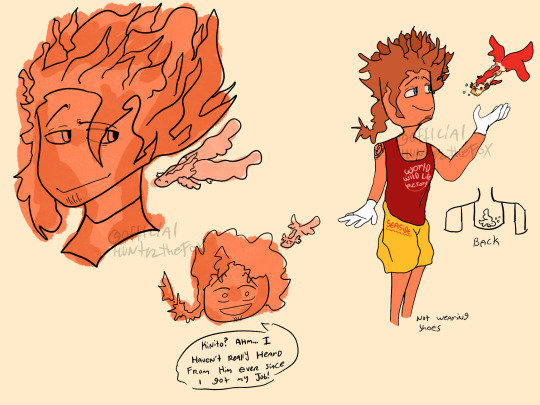
Alright, now the reason why kinito is distant with his friends: The creator forced them all apart, as they were forced they all technically moved on. (Sam and kinito send secret emails to another, while kinito and jade never see each other but jade is helpful to babysit syrma at anytime.)
Quick sam info: He works for a sea life resort and protects all sea life
Quick jade info: She is a billionaire due to making so many toys, she donates a lot to charity and poor around the world.
Once you interact with VirusKiller!Kinito, he will ask you why you deleted him, and assume it was a mistake. (He is very clingy and desperate for the user to come back, and once they do he may get very pushy and shower you with gifts, tending to follow you around anywhere on your browser.)
(Edited version under photos)


Facts and sillies:
VirusKiller!Kinito is a very, tired and overwhelmed guardian of syrma, always dealing with her,,, special actions,,,
Kinito holds a grudge against the user but hides it very well. He plans one day to get his payback.
Syrma and Kinito HATE their creator, parental issues lmao.
Kinito has 4 monster forms.
Syrma has 2 monster forms.
Syrma has selective mutism around certain people. Syrma also used to have a blind right eye which soon was cured.
Both kinito and syrma are extremely flexible and don't really have "bones" due to being digital.
Syrma usually squeaks around people she trusts, or when she is happy.
Syrma cannot detect viruses unlike kinito, due to her meant to be a virus.
Kinito has BAD anger issues and can physically make the computer overheat.
#officialhunterthefox#fandom#kinitopet#kinito#kinito the axolotl#kinitopetgame#kinitopet sam#kinitopet jade#kinito fanart#kinito my beloved#kinitoohtfversion#kinito au#kinito oc#ohtf.version2.16kinitoau#viruskiller!kinito#heswaitingforyou…
34 notes
·
View notes
Note
Hey elz! Would you consider doing a tutorial of how you did the frame thing in this post: /post/724195624728379392/and-it-felt-so-nice-so-peaceful-and? It looks so cool!
hi anon! thank you for reaching out. i really appreciate it & you made my day! 💚 ily!!! for length reasons, you'll find the tutorial under the cut!
Resources used:
Photoshop
Vintage flowers pngs -> you can either google vintage/watercolor flower png or here are some DeviantArt packages [x] [x] [x]
Font: Avenir
Workflow
After you have made your gif as you would normally do, it's time for the frame.
First: place the flower
Once you got your flower pngs it's time to place them on your gif. Go on File > Place Embedded... and select the file. This is what will happen.

Now, click on that little tick (✓) on the top right corner, so that your image is actually placed.
Press the shortcut CTRL+T (on Mac: Command+T) to open the transform options - basically it is the same as the photo above. I tend to do it this way, because if I don't like the adjustments, I click on the ⊘ button. If you did that when you placed the image, it would delete the image.
So now, move the image, resize it using the handles on its corners while pressing shift on your keyboard to maintain the proportions.
Once you get a result that satisfies you, click on this button (highlighted in purple)

Now you can wrap the png, and make it "fuller", more natural looking, moving the intersection points of the grid that will pop up

When you're done, confirm.
Now that you placed your png, you can manipulate the colors. Click on the png layer and press CTRL+U (Command+U) and in this case you would adjust the Reds and Yellows.

And you're done!!!!
Second: the border
To make the border use the Rectangle Tool (shortcut: U). On the menu bar on top, set the fill as transparent and the stroke as white

Then drag your mouse and create the rectangle

Then of course, adjust it if needed - by clicking on the rectangle layer, the properties panel will open (if not, go on Window and check Properties).
Now duplicate the layer (CTRL/CMD+J) and make the original rectangle invisible by clicking on the eye next to it.
Right click on the copy and rasterize the layer -> this rasterized layer will be the one you'll work on (you keep the original one as a safe harbor in case you don't like the changes made on the copy).

Now, with the copy selected, pick the Eraser tool (E), reduce the opacity of the layer and zoom in, and erase the parts of the rectangle that goes over the flower. When you're done, set the opacity back to 100%.

Third: add the text
And that is literally it! Super simple and quick to make, and of course you can add as many pngs as you want to create somewhat of a bouquet. The real game changer is the Wrap thing you do to make it more natural, like a real bouquet!!!!
I hope this was helpful and if you have some further questions please please reach out! Love u!!!
E.
#ask#elz:explains#ps tutorials#literally the simplest manip i know - learned it many years ago and it's never old fashioned! it's from the troye sivan flower phase here#on tumblr dot com#*resources
2 notes
·
View notes
Text
Resolving Storage and Internet Issues
Computers are indispensable tools in our daily lives, but they can sometimes present frustrating challenges, such as running out of storage space or losing internet connectivity. These issues can disrupt productivity and cause significant inconvenience. This article explores practical solutions for two common problems: managing a nearly full startup disk on a Mac and addressing internet access issues on a Windows system. By following these steps, users can restore their devices to optimal performance and maintain seamless operation.
Addressing a Full Startup Disk on Mac
When a Mac displays a warning that the startup disk is nearly full, it signals that the primary drive, which houses the operating system and user files, is running out of space. This can lead to sluggish performance, application crashes, and an inability to save new files. How to Fix Your Startup Disk Is Almost Full on Mac begins with understanding the root cause and taking systematic steps to free up space.
The first step is to check how much storage is being used. Navigate to the system menu, select "About This Mac," and click on the storage tab to view a breakdown of space usage. This visual representation helps identify which file categories—such as applications, documents, or media—are consuming the most space. Once you have this overview, prioritize clearing out unnecessary files. Start by emptying the trash, as deleted files often linger there, taking up valuable space. Next, review the downloads folder, where temporary or forgotten files like installers or duplicates tend to accumulate. Deleting these can quickly reclaim space.
Another effective strategy is to manage large files, such as videos or archived projects, which often occupy significant portions of the disk. Use the built-in storage management tool to locate these files and consider moving them to an external drive or cloud storage. For users with extensive photo or video libraries, optimizing storage by enabling cloud-based syncing can offload files while keeping them accessible. Additionally, uninstall unused applications, as they not only consume disk space but may also run background processes that slow down the system.
Clearing system clutter is another critical step. Temporary files, caches, and logs can accumulate over time. Use trusted cleanup tools available in the Mac’s application store to safely remove these without affecting system stability. For advanced users, manually deleting cache files from the library folder can free up space, but caution is advised to avoid deleting essential system files. Regularly performing these maintenance tasks ensures the startup disk remains manageable, preventing future warnings.
Troubleshooting Internet Connectivity on Windows
Losing internet access on a Windows computer can be equally disruptive, whether it’s due to a misconfigured setting, hardware issue, or network problem. How to Fix No Internet Access in Windows involves a step-by-step approach to diagnose and resolve the issue, restoring connectivity efficiently.
Begin by verifying the physical connections. Ensure the Ethernet cable is securely plugged in or that the Wi-Fi adapter is enabled. Restarting the router and modem can resolve temporary glitches, as these devices sometimes encounter conflicts that disrupt connectivity. After rebooting, check the network status in the Windows taskbar. If the system indicates a connection but still shows no internet access, proceed to deeper troubleshooting.
Run the built-in network troubleshooter by accessing the network settings and selecting the option to diagnose problems. This tool automatically detects common issues, such as incorrect IP configurations or disabled services, and applies fixes where possible. If the troubleshooter doesn’t resolve the issue, manually reset the network settings. This can be done by navigating to the network and internet settings, selecting the reset option, and restarting the computer. Be aware that this resets all network adapters, requiring you to reconnect to Wi-Fi networks afterward.
Another potential cause of internet issues is outdated or corrupted network drivers. Visit the device manager, locate the network adapters, and check for any warning indicators. Updating drivers through the system or downloading the latest versions from the manufacturer’s website can resolve connectivity problems. If the issue persists, check for conflicts with security software. Firewalls or antivirus programs sometimes block connections inadvertently. Temporarily disabling these programs can help identify if they are the culprit, but ensure they are re-enabled after testing to maintain system security.
For persistent problems, consider external factors like network congestion or service provider outages. Contacting the internet service provider to confirm the status of the connection can clarify whether the issue is local or network-wide. Testing the connection on another device can also help determine if the problem is specific to the Windows system or a broader network issue.
Proactive Maintenance for Long-Term Performance
Preventing these issues from recurring requires proactive habits. For Mac users, regularly monitoring storage usage and setting up automatic cloud backups can prevent the startup disk from filling up. Scheduling monthly cleanups to remove redundant files and optimizing storage settings ensures the system runs smoothly. For Windows users, maintaining updated drivers and routinely checking network settings can prevent connectivity disruptions. Keeping security software updated and avoiding unnecessary applications also contributes to stable performance.
0 notes
Text
The Steps are easy, let's try to xender’s smart switch
Smart switch means it is an app to use transfer photos, contacts, messages, files and important data to a new device. The following are some of the main reasons why "smart switching" is important and will transform how we use technology and allocate resources:
Smart switching greatly reduces waste by optimizing energy use and resource allocation in real-time, which lowers business operating costs and promotes more sustainable practices.
Smart switching enables smooth network and system transitions as our reliance on interconnected devices grows, guaranteeing uninterrupted service for users whether at home, at work, or while on the go.
Smart switching allows devices to automatically change settings according to user context and preferences, which improves user engagement and satisfaction and makes technology more intuitive.
Smart switching technologies can improve communication and collaboration tools as remote work becomes more common, guaranteeing that teams stay
Step 1: Scan QR code to connect devices (no cables or accounts needed).
Step 2: Select multiple files and Click send (e.g., "Transfer all photos from Jan 2025").
Step 3: Monitor real-time progress with speed metrics.
Step 4: Manage files post-transfer it means you can delete duplicates files and organize via keywords
Xender vs. Samsung Smart Switch: Key Comparisons
Xender ; Transfers files seamlessly between any device, including Android, iPhone, Windows, and Mac.
Samsung Smart Switch ; Primarily limited to Samsung and other Android devices, restricting cross-platform functionality.
Xender ; Utilizes Wi-Fi direct technology, often resulting in faster transfer speeds compared to traditional methods.
Samsung Smart Switch ; While efficient for compatible devices, transfer speeds may vary based on the connection method like USB or Wi-Fi.
User Interface
Xender ; Features a user-friendly interface that simplifies file sharing and management.
Samsung Smart Switch: ; Designed for Samsung users, it offers a straightforward experience but may feel limited for those unfamiliar with Samsung's ecosystem.
File Types Supported
Xender ; Supports a wide range of file types, including photos, videos, documents, and apps.
Samsung Smart Switch ; Primarily focuses on transferring contacts, messages, photos, and app data, with some limitations on file types.
Xender ; Offers features like file management, offline sharing, and the ability to create group transfers.
Samsung Smart Switch ; Provides backup and restore options, making it useful for migrating data to a new Samsung device.
Xender vs. Samsung Smart Switch: Privacy & Security
Xender ; End-to-End Encryption:
Ensures that files are securely transmitted between devices without unauthorized access.
No Data Stored on Servers ; Xender does not retain any user data on its servers, enhancing privacy and reducing the risk of data breaches.
Samsung Smart Switch ; Requires Samsung Account:
Users must create or log into a Samsung account, which may involve sharing personal information.
Connection of Samsung’s Ecosystem: ; Data is managed within the Samsung ecosystem, which could raise privacy concerns for users wary of data collection practices.
Both compare by Speed & Reliability
Xender ; Dynamic File pieces:
Breaks files into smaller pieces for faster and more efficient transfers.
Background Transfers: ; Allows users to continue using their devices while files are being transferred, enhancing multitasking.
Resume Support: ; If a transfer is interrupted, users can easily resume from where it left off, minimizing data loss.
Samsung Smart Switch ; Slower Transfers:
Generally experiences slower transfer speeds, especially when using Wi-Fi or older connection methods. If a transfer gets interrupted, users must restart the entire process, which can be frustrating and time-consuming.
The Final point ; Both Xender and Samsung Smart Switch excel in their respective domains, Xender has broader cross-platform capabilities, whereas Samsung Smart Switch is designed specifically for Samsung users, emphasizing data migration and device setup. Your decision should be based on the compatibility of your device and your particular needs. Samsung Smart Switch's dependence on a Samsung account may restrict privacy for certain users, Xender offers a more privacy-focused approach with its encryption and lack of server storage. With its sophisticated features like dynamic pieces and sending support, Xender excels in speed and dependability, making it a top option for users who require effective file transfers. The Samsung Smart Switch, however, might be less
Xender. www.xender.com
google play link: https://play.google.com/store/apps/details?id=cn.xender&hl=en_US
App store:https://apps.apple.com/us/app/xender-file-share-share-music/id898129576
0 notes
Text
તમારા પીસીમાંથી Duplicate Files કેવી રીતે શોધી અને ડિલીટ કરશો? – સરળ ગુજરાતી માર્ગદર્શિકા

Duplicate files તમારા PC ની storage space ભરશે, system slow કરશે અને organization પણ ખરાબ બનાવશે. આ ફાઈલ્સ ફોટો, ડોક્યુમેન્ટ, વીડિયો કે અન્ય ફોર્મેટમાં હોઈ શકે છે. આજના ટ્યુટોરીયલમાં આપણે શીખીશું કે તમારા Windows પીસીમાંથી duplicate files કેવી રીતે શોધવા અને કાઢી નાખવા (delete) એ સરળ રીતે — ગુજરાતી ભાષામાં.👇
🔍 Step-by-Step: Duplicate Files શોધી કાઢવા અને ડિલીટ કરવા
✅ વિકલ્પ 1: Free Software નો ઉપયોગ (સરળ રીત) 1. Duplicate Cleaner Free - 👉 https://www.digitalvolcano.co.uk/dcdownloads.html - Install કરો અને ફોલ્ડર select કરો જ્યાં તમારે duplicate files સ્કેન કરવા છે - Result આવશે → તમારે select કરીને delete કરવી 2. CCleaner (Free version) - 👉 Tools > Duplicate Finder - Filters લાગુ કરો (ફાઇલ ટાઇપ, સાઇઝ, નામ વગેરે) - Duplicate files શોધીને delete કરો 3. Auslogics Duplicate File Finder - સરળ UI સાથે, beginners માટે perfect - Install કરો → Scan કરો → Duplicate પસંદ કરો → Delete ✅ વિકલ્પ 2: Windows File Explorer થી Manual રીતે સાવધાન: Manual પ્રક્રિયા સમય લે છે અને human error શક્ય છે. - Windows Explorer ઓપન કરો - Folder ખોલો જ્યાં duplicate files હોવાની શક્યતા છે (જેમ કે Downloads, Documents) - View > Sort by > Name or Size - ફોટા કે ફાઈલ્સ visually compare કરીને same હો એવી files delete કરો
⚠️ Duplicate Delete કરતાં પહેલાં...
- 🤞 હંમેશાં ફાઈલ્સ ચકાસો — બધું Same છે કે નહીં - 🗂️ મૂળ ફાઈલ backup રાખો (specially important documents/photos માટે) - 🚫 System files ક્યારેય manually delete ન કરો
🎁 Bonus Tip:
📁 Google Drive, OneDrive કે Dropbox જેવી cloud storage માં પણ duplicate checker tools છે તેથી cloud clean-up પણ કરી શકો છો! Read the full article
0 notes
Text
Enhancing Images and Background Editing in Photoshop and Illustrator

Real editing is one of the essential skills one can have in the digital design and photography world. Be it any professional field, such as a graphic designer, filmmaker, or even as an enthusiast, mastering how to change background colors, remove backgrounds, or enhance images in these practices to take work beyond the ordinary. Thus providing tools such as PhotoCut for an easier and faster way to refine photos. This will sound more interesting as an article since it enables the reader to explore and learn about these techniques, from the basic edits to the most advanced enhancements.
Learn how to add a signature in Word documents.
Changing Background Color in Photoshop

Some of the richest ways to change the background color of images in Photoshop are Select Subject, Quick Selection Tool, and Layer Masks. Here is an elaborate step-by-step guide to doing it:
Step 1: Open the Image
Just open the required image in Adobe Photoshop.
To unlock the image's layer, double-click on it in the Layers window.
Also, duplicate the layer in case you want to keep the original image.
Step 2: Select the Subject
Go to Select-Subject, enabling Photoshop to automatically detect the subject.
It can also be selected using the Quick Selection Tool (Shortcut: W).
Step 3: Refine the Selection
Click on Select and Mask to refine the edges.
Use the Refine Edge Brush Tool to enhance the selection further.
Adjust Feather, Contrast, and Shift Edge settings for a smoother selection.
Step 4: Remove the Background
Once satisfied, click on Output to Layer Mask to separate the subject.
Add a new layer beneath and fill it with the desired background color using the Paint Bucket Tool (G).
Step 5: Adjust and Save
Modify color tones using Hue/Saturation (Ctrl + U) if necessary.
Experiment with Gradient and Pattern fills for creative backgrounds.
Save the final image in the required format (PNG for transparency, JPG for web use).
Changing Image Colors in Photoshop

Changing colors in Photoshop is referred to with the terms recoloring an object, lighting correction, or artistic effects. The tools best suited for the task include Hue/Saturation adjustment, the Replace Color option, and Selective Color adjustments.
Method 1: Using Hue/Saturation
Open the image and duplicate the layer to work non-destructively.
Go to Image > Adjustments > Hue/Saturation Ctrl + U.
Use the sliders to modify the colors.
Enable Colorize if you want to apply a single color overlay.
Adjust the Lightness to control brightness.
Method 2: Using Replace Color
Select Replace Color under Image > Adjustments.
To alter the color, use the Eyedropper Tool.
Set the Fuzziness to refine the selection.
Adjust the Hue, Saturation, and Lightness sliders to achieve your effect.
Press OK to apply the changes.
Method 3: Using Selective Color Adjustments
Choose from the drop-down of colors in the Base Colors.
Selective Color under Image > Adjustments.
For more precise adjustments, use the Cyan, Magenta, Yellow, and Black (CMYK) sliders.
Turn your serious photos into happy moments with PhotoCut’s Smile Filter.
Removing Background in Illustrator

Illustrator is a vector-based tool that allows precise background removal for logos, icons, and illustrations.
Using the Image Trace Feature
Open the image in Illustrator.
Select the image and go to Window > Image Trace.
Choose the High Fidelity Photo preset or adjust the settings for the best result.
Click Expand and then Ungroup to remove the unwanted background.
Delete extra background elements manually.
Using the Pen Tool for Manual Removal
Select the Pen Tool (P) and carefully outline the subject.
Close the path and convert it into a vector mask.
Use the Pathfinder Tool to separate the background.
Delete the unwanted sections and save the image with a transparent background.
Explore the easiest ways to add emojis to your photos.
Removing Background in Photoshop

Background removal has many ways in Photoshop, such as the Remove Background feature, Magic Wand Tool, and Pen Tool.
Using the Remove Background Feature
Open the image and go to Select > Subject.
Click on Remove Background under the Properties panel.
Use the Eraser Tool or Refine Edge Brush for better precision.
Using the Magic Wand Tool
Select the Magic Wand Tool (W) from the toolbar.
Click on the background to select similar colors.
Adjust Tolerance (default is 32) to refine selection.
Press Delete to remove the background.
Using the Pen Tool for Precise Selection
Select the Pen Tool (P) and outline the subject.
Convert the path into a selection and create a layer mask.
This method is best for complex images requiring precision.
Turn your photo into a cool cartoon avatar with PhotoCut’s AI Cartoon Avatar Maker.
Enhancing Images in Photoshop

Photoshop may be used to improve images. In Photoshop, picture improvement entails adjusting brightness, contrast, sharpness, and clarity.
Step 1: Adjust Brightness and Contrast
Select the command from Image > Adjustments > Brightness/Contrast.
Sliders will help keep light and darkness in balance.
Step 2: Use Levels and Curves
Open the menu Image > Adjustments > Levels (Ctrl + L).
Modify the input and output to refine the tonal range.
Step 3: Sharpen the Image
To accomplish this, navigate to Filter > Sharpen > Unsharp Mask.
To improve some elements, you may change the Radius and Amount.
Step 4: Use Filters for the Final Touch
Apply Camera Raw Filter for advanced enhancements.
Use the Dodge and Burn Tool to highlight or darken specific areas.
Using PhotoCut for Quick Edits

PhotoCut is an intuitive background removal and image enhancement tool that simplifies editing.
Using PhotoCut for Background Removal
Upload your image into PhotoCut.
Use Auto Remove Background for AI-based processing.
Fine-tune the edges manually for better precision.
Apply a new background color or pattern.
Enhancing Images in PhotoCut
Adjust contrast, brightness, and saturation quickly.
Finally, apply the filters and effects to improve the image quality.
To produce a depth-of-field effect, use the Blur Tool.
For later usage, save it as a JPG or PNG.
Conclusion
So, if you had Photoshop, Illustrator, and PhotoCut, you would have incredible tools at your disposal for image editing. Changing background colors, deleting unsightly details, and increasing image quality, all these require learning skills that would make your work stand out compared to others. To determine which tool or process best suits your needs, try a few. You'll eventually be able to work on photos as fast and effectively as an expert.
Create customized Disney characters with PhotoCut’s Disney AI Generator.
FAQs
Q1. How do I change my image's background color in Photoshop if the background is a solid color?
Ans. The straightforward way is to use the Paint Bucket Tool (G). Select the new background color that you want using the Foreground color picker, and then click on the background area you want in the image. Make sure Tolerance in the Options Bar is set properly so that the colors aren't bled into the main subject with it having the Tolerance set wrong. A low tolerance will only affect pixels very similar to the clicked color, while a higher tolerance will affect a wider range of colors.
Q2. My background isn't a solid color. How can I change it?
Ans. For more complex backgrounds, you'll need to isolate the subject first. Here are a few methods:
Quick Selection Tool (W): Quickly paint over the subject to select it. Refine the selection using "Select and Mask" (Select > Select and Mask).
Pen Tool (P): Creates a precise path around the subject. Convert the path to a selection (Right-click > Make Selection).
Object Selection Tool (W): Photoshop will automatically try to detect the objects in your image and help you make the selection. Refine the selection using "Select and Mask" (Select > Select and Mask).
Once the subject, inverse selection (Select > Inverse) is done to select the background. Then, fill the preferred background color using either the Paint Bucket Tool (G) or create a new layer filled with the color beneath your subject layer.
Q3. How do I change everything color-wise in an image?
Ans: By using a Hue/Saturation Adjustment Layer and tweaking only the main Hue slider. Be careful with unrealistic color shifts. Another option is a Gradient Map Adjustment Layer (Layer > New Adjustment Layer > Gradient Map). This maps the tones in your image to a gradient of your choice.
Q4. I only want to change the color of a portion of an object. How do I do this?
Ans. Use a Layer Mask with your adjustment layer. After creating the adjustment layer, a white mask will appear next to it in the Layers panel. Paint with black on the mask to hide the effect of the adjustment layer in those areas. Paint with white to reveal the effect.
Q5. How do I remove a simple vector background in Illustrator?
Ans. Here’s how you can remove a vector background in Illustrator:
Direct Selection Tool (A): Click on the background shape to select it.
Delete Key: Press the Delete key.
Q6. How can I remove part of an embedded photo if it's placed in my Illustrator document?
Ans. Here’s how you can remove part of an embedded photo:
Image Trace: Convert the photo into vector paths using "Image Trace" (Object> Image Trace > Make). Then, you can select and delete the parts of the tracing you don't want. This works best with simple, high-contrast images.
Clipping Mask: Draw a shape over the area you want to keep. Select both the shape and the image. Then go to Object > Clipping Mask > Make. This will hide everything outside the shape. This method does not delete the background, only hides it.
Edit in Photoshop: The best way is to edit the photo in Photoshop to remove the background (see below) and then place the image back into Illustrator with transparency.
Q7. How can I make the background transparent after removing it?
Ans. After creating the layer mask (see above), save the image as a PNG file. PNG supports transparency. If you save as a JPEG, the transparency will be replaced with a white background.
Q8. Is there a way to automate background extraction in Photoshop?
Ans: Yes, it comes with a built-in Remove Background option located in the "Properties" panel once you select any layer. Use the Adobe Sensei AI to perform such actions automatically. However, it usually requires manual refining using the best techniques for the best results.
Q9. How can I make the colors better in my pictures?
Ans. This is how you brighten the colors in your photos:
Vibrance/Saturation: Increase Vibrance a little, and that should brighten colors without looking unnatural.
Selective Color: Fine-tuning of colors under some specific color ranges(e.g., Reds, Greens, Blues, etc.).
Camera Raw Filter (Filter > Camera Raw Filter): The full set of color adjustment tools, which includes temperature, tint, hue, saturation, and luminance.
Q10. How do I reduce noise in images?
Ans. Reducing noise in images can be done here:
Camera Raw Filter (Filter>Camera Raw Filter): It has noise-reduction sliders for luminance and color noise in the "Detail" tab.
Open the tool and name it Filter > Noise > Reduce Noise. The Camera Raw Filter usually returns a better result, but this is an alternative possibility.
0 notes
Text
How to Declutter Your Digital Space Without Lifting a Finger (Almost)

Digital clutter is sneaky. One day your phone and laptop are running smoothly, and the next, your desktop looks like a file explosion and your cloud storage is screaming for mercy.
The good news? You don’t need to spend hours cleaning it all up.
If you’ve already peeked at the lazy but genius ways to organize your digital life, this guide takes it a step further. These strategies are so effortless, it’s almost like you're not doing anything at all — just the way we like it.
1. Automate Your Cloud Storage Cleanup
Cloud platforms like Google Drive or Dropbox offer easy-to-use filters and automation tools. You can set them to auto-delete trash, auto-archive old files, or even color-label folders for visual clarity.
Try this lazy trick: Use Google Workspace’s "Storage Management" tool to bulk delete large files, duplicates, and old backups.
2. Use Smart Tools Like “Cleanfox” for Your Inbox
Manual unsubscribing is so last year. Tools like Cleanfox or Leave Me Alone scan your inbox, show you a list of all newsletters and subscriptions, and let you unsubscribe with a swipe or click.
Bonus points: They also show you how much CO₂ you save by decluttering your inbox. Lazy + eco-friendly? Yes please.
3. Schedule Your Phone to Auto-Delete Old Media
Most smartphones let you auto-delete photos, screenshots, or downloaded files after a set period. In iOS, enable Optimize iPhone Storage; on Android, use Files by Google to clean junk files in seconds.
Pair this habit with the mindset from the top 10 lazy but genius ways to organize your digital life, and you’ve got a phone that runs smoother without you lifting a finger.
4. Use “Stack” Apps to Organize Notes and Docs Automatically
Apps like Evernote, Notion, or OneNote allow auto-tagging, sorting, and folder rules.
Lazy Genius Tip: Set up templates or automations so that every new note is filed where it belongs — without you doing it manually.
5. Let Your Browser Clean Itself
Use browser extensions like:
OneTab: Closes all open tabs and saves them in a list
Tab Suspender: Auto-pauses inactive tabs
History AutoDelete: Keeps your browser history from becoming a hoarder's paradise
It’s a solid sidekick to the habits in the top 10 lazy but genius ways to organize your digital life post.
6. Set Recurring Reminders That Actually Work
The key word here is “recurring.” Instead of relying on memory, set monthly 10-minute digital cleanup reminders on your calendar. Automate the repeat, and you’ll never have to remember it again.
Use tools like:
Google Calendar (with reminders and checklists)
TickTick or Todoist (with smart recurring tasks)
Siri or Google Assistant (voice commands FTW)
7. Auto-Sort Downloads Using Folder Rules
Tools like Hazel (Mac) or File Juggler (Windows) can auto-organize your downloads folder based on file type, name, or date.
For example:
Move PDFs to Documents
Send images to Pictures
Trash zip files after 24 hours
This lazy automation turns chaos into calm without constant manual effort.
8. Delete Duplicate Files With a Click
Duplicate files = wasted space. Use tools like:
Gemini 2 (Mac)
CCleaner (Windows)
Duplicate Cleaner Free
These apps scan and clean up your hard drive or cloud storage with minimal interaction — perfect for lazy geniuses like us.
9. Use a Dashboard to See Everything at a Glance
Use Notion or Trello to build a minimalist dashboard of your digital world — to-dos, file links, notes, calendar, and tools all in one spot. Bonus: once it’s built, you just update it here and there.
Pair this with any technique from the top 10 lazy but genius ways to organize your digital life and you’ll become the CEO of calm.
10. Empty the Trash — Automatically
Set your system or cloud service to auto-empty the trash every 30 days. No emotional attachment needed.
Go to your system settings or storage settings (Google Drive, iCloud, etc.) and toggle on the auto-delete function.
Final Thoughts: It’s Not About Working Hard — It’s About Working Smart
Decluttering your digital life doesn't have to be a marathon. With these smart, nearly hands-off hacks, your devices can stay organized while you go do... well, anything else.
Think of this post as a deeper dive into the top 10 lazy but genius ways to organize your digital life — because the lazier the hack, the better the result.
1 note
·
View note
Text
6/3 WEEK 3
InDesign today! This tool is best used for converging text and images, which is different to the other programs we've used.

Some terminology:
Paragraph - The text between two returns
Leading - space between lines
put in notes

Here, we started by adding a text box and getting used to the user interface.


We deleted our previous textbox, and added a new one that spanned the whole page. From here we clicked type -> fill with placeholder text. This filled our page up with a bunch of Latin text.

The image above shows how we've made a new paragraph style. We decided on Arial font, and played around with some of the spacing between the paragraphs under one of the dropdowns on the left side of the interface. There's a lot that you can mess around with to get an optimal result, which makes sense considering that this is a text design program. I realized a little bit late that I had set my canvas to be the wrong measurements. InDesign was giving me trouble at the start, so I had to quit out of my previous canvas and start a new one, hence why I forgot to reset the measurements. To make text adhere to a paragraph style, all you have to do is select the text that you want to change, and click on the paragraph style you want it to be.
At this point the program is somewhat easy to understand, but it is different to anything else that I've ever used.

Next, we separated some of the paragraphs up to create headings for our text. We made a new paragraph style to make the headings distinct against the main body of text (made it bold). We also changed in the indents and spacing to make the subheadings look like they belong to their blocks of text, as they didn't look quite right previously.


Here we separated our text into two columns to make it more readable. The second image above shows the interface for changing some of the formatting. The first square changes the number of columns the text is split up into. The second box changes the space in between the columns.

These are our paragraph styles so far. We have one for the text body, and one for the subheadings.

We took some text from Moodle, but realized that simply copy and pasting it in to InDesign would copy over the texts format as well. To avoid this, we copy and pasted it into TextEdit, and made it plain (aka, we removed the formatting). From here we just pasted it into InDesign, and applied our own paragraph style to it.

We made a new paragraph style by duplicating the main body style. From here we turned it into bullet points by checking the box. We had some issues with it though, so to make the text and bullet points line up correctly we had to fiddle with the left indent and the final line indent.

In contrast to paragraph styles, character styles are used to change one or a few words, rather than a whole paragraph. The application of this could be by underlining or using italics on a specific word for effect.

To add our image in, we clicked on file -> place -> select our image. Photos are comprised of a "frame" and an "image". A frame is like a window that shows the image. You can move both the frame or the image individually, but you can also move them together. To do this, make sure boarder around photo is blue, not orange, otherwise it will only move the image.

Here's my notes for page structure and how the frame/image system works.

We made the image wrap around the text by pressing the second button on the top row. To make it look nice make sure that there's a bit of text below and/or above the image.

We added an ellipse with the shapes tool, and made the lines white so they'd be visible against our photo. We used the arrange function to make the ellipse sit on top of the photo, which is similar to Illustrator.

To do this effect, we used cmd+x on the frog image, clicked on the ellipse, clicked the forward slash button, then right clicked on the ellipse and clicked on paste into.
This is a bit of a complicated procedure, but it looks good.

The text wrap effect didn't really work. I'm not entirely sure as to why, even after I tried messing around with the settings on the bar to the right.
InDesign is definitely more out of my comfort zone than the other two programs we've covered so far, so it's a bit more of a learning curve. That's okay though!
0 notes
Text
Top 5 Free Video Player Apps For Android, iOS, and Windows in 2024

We enjoy the entertainment but it is most fun when in high quality. The Media and Entertainment industry uses advanced technology to keep us entertained. It is always finding ways to improve the quality. A media player is needed to access the best entertainment. A video player that supports up to 4K or 8K and even HDR with a powerful equalizer is the best. There are several players available for different OS like Android, iOS and Windows. VLC Media Player, MX Player, and YouTube are some known media players available on all these platforms.
HD Video Player All Formats is the best offline video player for Android and iOS. It has all the fascinating features of a media player to offer high-quality entertainment. It supports all media formats, plays videos and audio files in high quality, supports subtitles, built-in music player, video downloader, video hider, photo albums and much more. It can automatically read your local media files and manage them efficiently. It allows the users to filter duplicate files and large files and delete them easily. You can even watch trending videos online and relax.
Why Do We Need a Video Player?
It is an application that can play videos. We all have used them on our phones, laptops or PCs. However, the best video player apps are the ones that can play HD videos, all format media files, efficient file organization and more. Let us see what else we need it for.
• Offline Playback - You can easily watch local video files(media files stored on your device) in high quality. For offline playback, you do not need a stable internet connection. You can download videos and watch them later without the internet.
• Online Streaming - Media player apps are no longer limited to offline playback. We now have multiple video player apps that stream online videos like OTT platforms. Examples- YouTube, MX Player, Netflix and more.
• Media File Organization - The functions of the video player do not only include playing videos but also file management. These apps should be able to read and write the local media files on your device automatically without sharing the data with other apps. The easy file management helps users to browse any media file easily.
The Best Free Video Player Apps In 2024
There are several video player apps available for every platform. Some are available for free and some are paid. We will discuss the players that are free and widely used.
List of Best Free Video Player Apps
Let us explore media player apps available for free for Android, iOS and Windows in 2024.
1. HD Video Player All Formats- This app is for offline playback that can play media files of all common formats and supports HD, Full HD, 4K, 8K and HDR videos. This all-in-one media player has a built-in music player and photo albums. With exceptional features, it is easy to use for everyone. The features that make it the best video player for Android are Chromecast, Video Hider, Video Downloader, support for subtitles and closed captions, background playback and many more. It also has a powerful equalizer with some presets and options to customise audio quality according to your preference. You can also personalise the look of the player with gorgeous themes available or make your favourite image the theme of the player. This video player is available for both Android and iOS.
2. YouTube- YouTube is an online video player with an extensive media library that allows users to watch, share, upload, comment or like videos. YouTube is one of the best platforms for creators and influencers. Artists can show their art to the world. The content on YouTube contains music videos, movies, games, news, education and more. YouTube supports live broadcasting. You can watch live news, games or any entertainment or educational videos. YouTube has also allowed artists to earn. If you are a YouTube creator, you can monetize your account if it matches the terms and conditions of YouTube. YouTube is available for all Android, iOS and Windows devices.
3. VLC Media Player- It is a free media player that has been soaring high for decades. It can play any audio and video file format including Audio CDs, DVDs and VCDs. It supports video of up to 8K resolution including 360-degree videos. It has some controls that help you improve the video and audio quality. It also provides filters that can be applied to individual clips. Some other amazing features include support for synchronised subtitles, network streaming, snapshots in the player and many more. These features make it the best video player for Android, Windows and iOS. VLC Media Player is available for every platform including Android, iOS and Windows.
4. MX Player- MX Player can play video files of various file formats and supports videos of up to 4K resolution. It is not just a video player but also an OTT platform. The OTT features are only available in some countries. It has all the features that the best video player for Android must-have. The features include easy gesture controls, playback options, the capability to enhance audio quality, network streaming and more. However, one of its best and most necessary features is Kids Lock. This prevents kids from jumping to other applications. MX Player as an OTT now has its original content with other international series and movies. It is also available for Android, iOS and Windows.
5. Plex- Plex is an online player with an extensive collection of movies and web series from around the world. You can access its media library for free once you are signed up. It supports media file formats like MP4, MKV, AVI, MOV, MP3, FLAC etc., and subtitle files like SRT, SSA, SUB and more. Its other features include playback controls, offline playback, recommendations, casting and more. You can link your other devices with the Plex account and access its entire media library remotely. It is available for Android, iOS, Windows, macOS, web browsers, Linux, smart TVs and streaming devices. It has also become the best video player for Android, iOS and Windows.
Conclusion
The media player apps mentioned above are available for free and widely used. Some of them are best for offline playback and some offer unlimited entertainment for free. Video player apps like VLC Media Player and HD Video Player All Formats. are great for offline video playback. However, VLC Media Player has complicated player settings which is not easy for a beginner to understand. Online video player apps like YouTube, MX Player and Plex have a huge media library. You get back-to-back entertainment from international production. With MX Player, you can get original production of the player and with Plex, you get to watch old to new movies and web series.
With so many options available, you can get confused about which one to choose. Let us make this process simple by understanding the requirements you want in a video player. You should know if you need an MP4 player with advanced settings or an easily accessible app. Once you understand these, you can make your decision. Still, if you have any doubts, HD Video Player All Formats is the best for offline playback, Plex and MX Player are the best for online streaming and YouTube is best for creators. Every app has its pros and cons but they all are the top MP4 player apps for everyone.
1 note
·
View note
Text
How to Extend the Lifespan of Your Mobile and Laptop: Maintenance Tips and Tricks
In today's fast-paced digital world, our mobile phones and laptops are indispensable. They keep us connected, facilitate our work, and entertain us. Given their importance, it’s crucial to ensure they remain in good working condition for as long as possible. Here, we’ll explore practical maintenance tips and tricks to extend the lifespan of your mobile and laptop.
Regular Cleaning
Exterior Cleaning
Dust and grime can accumulate on your devices, affecting their performance and appearance. Regularly clean your mobile and laptop exteriors using a microfiber cloth. For tougher spots, slightly dampen the cloth with water or a mixture of water and isopropyl alcohol. Avoid using harsh chemicals or excessive moisture, as these can damage the devices.
Screen Maintenance
The screens of your devices are particularly vulnerable to scratches and smudges. Use a screen protector to safeguard your mobile phone’s display. For laptops, close the lid when not in use to prevent dust accumulation and accidental damage. Clean the screens gently with a microfiber cloth to avoid scratching.
Battery Care
Optimal Charging Practices
Battery health is vital for the longevity of your devices. Avoid keeping your mobile or laptop plugged in constantly, as overcharging can reduce battery life. Instead, aim to keep the charge between 20% and 80%. Use manufacturer-recommended chargers to ensure optimal charging efficiency and safety.
Battery Calibration
Occasionally, it’s beneficial to calibrate your battery. For mobiles, let the battery drain completely and then charge it to 100%. For laptops, a full discharge and recharge cycle every few months can help maintain accurate battery readings.
Software Updates
Operating System Updates
Keeping your mobile and laptop operating systems up to date is crucial for security and performance. These updates often include patches for vulnerabilities and improvements in efficiency. Regularly check for updates and install them promptly to ensure your devices run smoothly.
Application Updates
Similarly, updating your apps can enhance functionality and security. Developers frequently release updates to fix bugs and add new features. Enable automatic updates on your devices, or check for updates manually in the app store.
Safe Handling Practices
Protective Cases and Covers
Invest in quality protective cases for your mobile and laptop. These can help prevent damage from accidental drops and bumps. For laptops, consider using a padded sleeve or bag when transporting them.
Avoiding Overheating
Excessive heat can harm internal components and shorten your devices’ lifespans. Avoid using your mobile or laptop on soft surfaces like beds or couches that can block ventilation. Use a cooling pad for your laptop if you notice it running hot during intensive tasks.
Regular Backups
Data Backup
Regularly backing up your data ensures that you don’t lose important information in case of a device failure. Use cloud services like Google Drive, iCloud, or Dropbox for your mobile phone. For laptops, consider using an external hard drive or a reliable cloud backup service.
System Backups
In addition to data backups, creating system backups can save you from the hassle of reinstalling the operating system and applications if something goes wrong. Both Windows and macOS offer built-in tools for creating system backups.
Manage Storage Space
Clear Unnecessary Files
Over time, your devices can accumulate a lot of unnecessary files and applications, which can slow them down. Regularly go through your mobile and laptop to delete unused apps, old files, and duplicate photos. Use built-in storage management tools to identify and remove junk files.
Use External Storage
For laptops, consider using external storage devices for large files like videos and high-resolution photos. This not only frees up space but also improves the performance of your laptop by reducing the load on its internal storage.
Professional Maintenance
Regular Check-Ups
Just like any other piece of technology, your mobile and laptop can benefit from professional check-ups. Visit a reliable repair service annually to have your devices inspected and cleaned internally. This can help identify potential issues before they become serious problems.
Repairs and Upgrades
If you encounter hardware issues or need upgrades, such as increasing your laptop’s RAM or replacing a mobile battery, professional repair services are recommended. DIY repairs can sometimes do more harm than good if not done correctly.
Conclusion
By following these maintenance tips and tricks, you can significantly extend the lifespan of your mobile phone and laptop, ensuring they remain reliable and efficient for years to come. Regular cleaning, proper battery care, software updates, safe handling, regular backups, storage management, and professional maintenance are key practices that can make a huge difference.
For professional and reliable mobile repair services, consider GoFix. They offer expert solutions for various mobile issues, ensuring your device is in safe hands. Trust GoFix to keep your mobile running smoothly, allowing you to focus on what matters most.
0 notes
Text
Essential Maintenance Tips to Keep Your Laptop Running Smoothly

Our laptops are more than just machines; they're portals to work, entertainment, and connection. They hold our documents, photos, and memories, making them invaluable tools in our daily lives. However, like any well-used machine, laptops require regular maintenance to ensure they continue to operate smoothly and efficiently. Neglecting proper laptop care can lead to performance issues, overheating, and even hardware failure.
By implementing a consistent maintenance routine, you can extend the lifespan of your laptop and avoid costly repairs. This blog explores eight essential maintenance tips to keep your machine running smoothly. For those seeking a deeper understanding of laptop care or aspiring to enter the field of laptop repair, consider exploring laptop repairing course in Delhi offered by a reputable laptop repairing institute.
1. Keep Your Software Updated
Outdated software can lead to a variety of problems, including security vulnerabilities, performance issues, and compatibility problems. Here's how to ensure your software stays up-to-date:
Operating System Updates: Regularly install updates for your operating system (Windows, macOS, etc.). These updates often contain bug fixes, security patches, and performance enhancements.
Application Updates: Update all your installed applications whenever new versions become available. Application updates can address bugs, improve functionality, and enhance compatibility with your operating system.
2. Manage Startup Programs
Many programs automatically launch at startup, which can slow down your boot time. Here's how to streamline your startup process:
Windows: Access Task Manager (Ctrl+Shift+Esc) and navigate to the "Startup" tab. Disable programs you don't need to run at startup.
macOS: Go to System Preferences > Users & Groups > Select your user > Login Items. Uncheck programs you don't want to launch automatically at startup.
3. Regularly Clean Up Your Hard Drive
Over time, your hard drive can accumulate unnecessary files, including temporary files, unused programs, and duplicate data. This clutter can consume valuable storage space and potentially slow down your system. Here's how to declutter your hard drive:
Uninstall Unused Programs: Review your installed programs and uninstall any you no longer use. Free up valuable storage space and streamline your application list.
Disk Cleanup: Utilize your operating system's built-in disk cleanup tools to remove temporary files, cache, and other unnecessary data.
Identify Large Files: Use your operating system's search function to identify large files and determine if they can be deleted or moved to an external storage device.
4. Defragment Your Hard Drive
This tip applies only to laptops with traditional Hard Disk Drives (HDDs). Solid-State Drives (SSDs) don't require defragmentation. Defragmentation reorganizes fragmented files on your hard drive, improving read/write speeds and potentially enhancing overall system performance. Consult your operating system's documentation for instructions on defragmenting your hard drive.
5. Optimize Your Power Settings
Optimizing your power settings can help conserve battery life and potentially reduce heat generation. Here's how to adjust your power settings:
Windows: Go to Control Panel > Hardware and Sound > Power Options. Choose a power plan that balances performance with power consumption based on your needs.
macOS: Go to System Preferences > Battery. Adjust settings like display brightness and automatic sleep to optimize battery life.
6. Keep Your Laptop Cool
Excessive heat is a major enemy of laptops. Here are some practices to keep your laptop cool:
Clean Vents Regularly: Dust buildup in vents can restrict airflow and lead to overheating. Use compressed air to clean your laptop's vents regularly.
Avoid Using Your Laptop on Soft Surfaces: Placing your laptop on soft surfaces like blankets or pillows can block vents and trap heat. Use a hard, flat surface for optimal airflow.
Consider a Cooling Pad: A laptop cooling pad can provide additional ventilation and help keep your laptop cool during extended use.
7. Back Up Your Data Regularly
Regular data backups are crucial to protect your valuable information from potential data loss due to hardware failure, software malfunctions, or accidental deletion. Here are some backup options:
External Hard Drive: Back up your data to an external hard drive at regular intervals. Choose a storage capacity that can accommodate your current and future data needs.
Cloud Storage: Cloud storage services offer a convenient way to back up your data online. Explore free and paid cloud storage options based on your storage requirements.
File History/Time Machine: Utilize built-in backup features like File History (Windows) or Time Machine (macOS) to automatically back up your data to a designated location.
8. Invest in Laptop Maintenance Tools
Having a few basic laptop maintenance tools readily available can be helpful for routine cleaning and troubleshooting. Here are some essential tools to consider:
Compressed Air Can: Ideal for cleaning dust buildup from vents and keyboards.
Microfiber Cloth: Use a microfiber cloth to safely clean your laptop's screen and exterior surfaces.
Small Screwdrivers (Optional): If you're comfortable opening your laptop for more thorough cleaning, a set of small screwdrivers might be necessary. However, proceed with caution and consult your laptop's manual or a qualified technician if unsure.
Beyond Basic Maintenance: When to Seek Professional Help
While the maintenance tips outlined above can significantly enhance your laptop's performance and lifespan, some situations require professional assistance. Consider seeking help from a qualified laptop repairing institute in Delhi if you encounter:
Hardware Issues: Internal hardware problems like a failing hard drive, malfunctioning keyboard, or faulty display require professional diagnosis and repair.
Liquid Damage: Liquid spills pose a serious threat to your laptop's internal components. Prompt professional intervention is crucial to minimize potential damage.
Data Recovery: If you experience significant data loss due to hardware failure, software malfunction, or accidental deletion, data recovery specialists might be able to salvage your valuable information.
Empower Yourself with Knowledge: Explore Laptop Repair Courses
By following these essential maintenance tips, you can significantly extend the life of your laptop and ensure it runs smoothly for years to come. However, if you're interested in a deeper understanding of laptop repair or aspire to enter this rewarding field, consider enrolling in a laptop repairing course offered by a reputable institute.
Why Choose Hi-Tech Institute?
Established in 2004, Hi-Tech Institute (ISO and MSME certified) has been a leader in laptop and mobile repair education in Delhi for over 20 years. With over 3 lakh students trained, they possess a wealth of experience and a proven track record of success.
The laptop repair industry is experiencing a growing demand for skilled professionals. By enrolling in a laptop repair course at Hi-Tech Institute, you gain valuable knowledge and skills that extend beyond basic maintenance. Their courses delve into hardware repair, software diagnostics, and essential tools and techniques used by professional laptop repair technicians.

By implementing a consistent maintenance routine and understanding the signs that might necessitate professional help, you can become a proactive steward of your laptop's health. Remember, prevention is key when it comes to maintaining a reliable and smooth-running machine.
Invest in Your Productivity: Don't wait for performance issues to arise! Implement the maintenance tips in this blog and explore the possibilities offered by Hi-Tech Institute's laptop repair courses. Equip yourself with the knowledge and skills to keep your laptop running optimally and potentially embark on a fulfilling career in the ever-evolving field of laptop repair.
#laptop repairing course#laptop repairing institute#laptop repairing course in delhi#laptop repairing institute in delhi#laptop repairing course near me#laptop repairing institute near me#laptop repairing course in west delhi
0 notes
Text
Fundamentals: Software Pūmanawa Photoshop & Illustrator Compostiting Session 6 07/03/24

First we started off with warming up with working on the fruit bowl file once again. where we duplicated the layer, created a selection around an object, created a mask, added an adjustment layer and clicked on the box with the down arrow to apply to the layer with the mask only

we played with some shapes and included how holding shift creates a uniform transformation and option keeping the selection in one place while scaling.

we then created a mask on the square layer, option clicked on the mask layer, drew over the white and then we can see the parts we drew on over the shape created transparency inside the shape to the fruit bowl image

we then made an attempt at removing the man from the background

we then duplicated the photo, object selected the person, then clicked on the mask icon and then added a blank layer between the two

by clicking option + delete, in the new layer between the man and background, we created a fill using the foreground swatch colour we selected.

we then duplicated the background layer and made it an overlay by putting the opacity down to see all the issues needing fixed

we then created a path using the pen tool around a are we want delete, opened the path window (Window > Paths) held cmd and clicked on the layer picture in the window, then hit delete and removed the selected area

removed the rest of the uneeded stuff using the same steps as above

using the same steps as above but this time i went in with white rather than black to bring back a section of the mans bicep that was removed with the object selection

for the hair we had a go at using colour range by firstly duplicating the overlay (and putting the opacity up to 100%), applying a mask, then opening up colour range (window > colour range) then adjusted the feathering and clicked on an area that was in the light parts of the mans hair.


we then tried remove the areas we wanted gone but it just didnt work out so we just ended up using the brush tool and drawing black using the brush over the undisired areas of the hair on the layer mask

this is the result after going in using a small soft brush and putting the brush opacity down

we then opened the saved file into illustrator, clicked the top layer, shift clicked the bottom layer and clicked on the hamburger menu and hit flatten artwork


Then we created a stroke to wrap around him and imported it into illustrator

we then created a duplicate above and below the man

then we created a mask over the top layer and drew with black brush over the left arm and right leg so it looks like the man is being wrapped around

we then created a wireframe in illustrator of the s to make a stylised s to put in our photograph

we then did the exact same thing we did with the simple s snake seen above

I then imported a photograph and moved the man and stylised s towards the middle. the background you can see is a painting of the Poolburn Dam (A Dam that is in the same Valley i was born and grew up in, the Ida Valley. To reflect on this i can say these skills could greatly help me in creation of album covers as i produce and release music from time to time. my S you can see above took a bit longer time than others causing me to have to stay behind for a wee bit.
0 notes
Text
Notice the Magic: Unveiling the Secrets of Free Photo Sorting Software
Free photo sorting software utilizes algorithms to analyze image metadata and content, enabling automatic categorization and organization of photos.
One of the main advantages of free photo sorting software is the ability to automatically categorize and sort photos based on various criteria. This can be done through the use of advanced algorithms and artificial intelligence that analyze the content of the images. These algorithms can recognize faces, objects, and even specific locations, making it easier to group similar images together.
Furthermore, free photo sorting software often includes features for tagging and labeling photos. Users can add keywords, descriptions, and other metadata to each image, making it easier to search for specific photos later on. With these tags, users can create customized categories or albums based on their preferences, allowing for easy organization and retrieval.
Another useful feature of free photo sorting software is the ability to remove duplicates. Over time, it is common to end up with multiple copies of the same photo, either due to accidental duplication or backups. Free photo sorting software can scan through the entire collection and identify duplicate images, giving users the option to delete or merge them. This helps to free up storage space and keeps the photo library more organized.
Additionally, free photo sorting software often includes basic editing tools. While they may not be as advanced as professional photo editing software, these tools allow users to make basic adjustments such as cropping, rotating, and adjusting brightness or contrast. This eliminates the need for separate editing software and streamlines the overall workflow.
One of the key advantages of free photo sorting software is its accessibility. As the name suggests, it is available at no cost, making it an attractive option for individuals who may not have the budget for premium software. Furthermore, most free photo sorting software is compatible with multiple operating systems, including Windows, Mac, and Linux, ensuring that users can take advantage of these tools regardless of their preferred platform.
With the proliferation of smartphones, free photo sorting software has also adapted to the mobile market. Many developers offer companion apps for iOS and Android devices, allowing users to easily organize their mobile photos alongside their desktop collections. These mobile apps often include features such as automatic backup and synchronization, ensuring that users can access their photos from any device.
In addition to its organizational benefits, free photo sorting software also facilitates sharing and collaboration. Most software offers seamless integration with popular social media platforms and cloud storage services, allowing users to easily share their photos with friends and family. Furthermore, some software even best photo management software Windows 10 provides collaboration features, enabling multiple users to work on the same photo library simultaneously.
However, it is important to note that free photo sorting software may have limitations compared to premium alternatives. While they offer essential features for organization and basic editing, they may lack more advanced capabilities such as advanced retouching, advanced tagging options, or specialized filters. Users with more specific or professional needs may prefer to invest in premium photo management software.
1 note
·
View note