#delete recovery software
Explore tagged Tumblr posts
Visit Tumblr Blog
Explore Tumblr blogs with no restrictions, modern design and the best experience.
Last Seen Tumblr Blogs


Fun Fact
Total funding amounts to $125.3M.
Text
Simply Recover Deleted Photos on PC
youtube
Recover your deleted photos with Recycle Bin.
Recover your deleted photos from Recycle Bin with Syncios D-Savior.
#data recovery#recover data#recover deleted photos#youtube#short video#data recovery software for windows#Youtube
0 notes
Text
Top Data Recovery Software for Windows
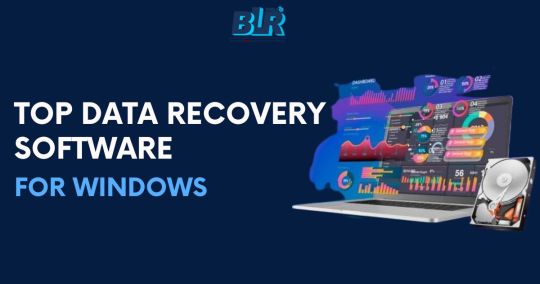
Looking for the best data recovery software for Windows? BLR Data Recovery Tool stands out as one of the top picks, offering a comprehensive solution to recover lost, deleted, or formatted files from hard drives, SSDs, USBs, and other storage devices. Its advanced scanning technology ensures deep recovery of data, even from corrupted or inaccessible drives. With an easy-to-use interface and reliable performance, BLR Data Recovery Tool is the go-to option for both personal and business data recovery needs.
Visit:- https://medium.com/@business_35188/top-data-recovery-software-for-windows-best-picks-4a58959f53bd
#data recovery#lost data recovery#deleted data recovery#best data recovery tool#best data recovery software
0 notes
Text
Don't Panic! Recovering Lost Data from Your iPhone
We've all been there. That sinking feeling when you realize you've accidentally deleted important photos, messages, or contacts from your iPhone. Maybe you lost them after an update, misplaced your phone, or simply hit the wrong button. Before you resign yourself to lost memories and information, there are ways to get your data back! This article explores different methods for iPhone data recovery, so you can potentially retrieve those precious files.
Understanding Data Loss: Why Does it Happen?
There are several reasons why data might disappear from your iPhone:
Accidental Deletion: A simple slip of the finger and important files are gone.
Software Updates: Sometimes, updates can cause glitches that lead to data loss.
Hardware Issues: If your phone experiences physical damage or malfunctions, data might become inaccessible.
Formatting or Resetting: Restoring your iPhone to factory settings wipes out all data.
Lost or Stolen Phone: If your phone is lost or stolen, you'll need to recover data from a backup, if you have one.
The Importance of Backups: Your Digital Safety Net
The best way to ensure you can recover lost data is by having a regular backup routine. iPhones offer two main backup options:
iCloud Backup: This cloud-based storage automatically backs up your phone to Apple's servers.
iTunes Backup: You can connect your iPhone to a computer and back it up using iTunes software.
Restoring from a Backup: A Straightforward Solution
If you have a recent backup, restoring your iPhone is the easiest way to recover lost data. Here's how:
Connect your iPhone to your computer or Wi-Fi.
Open iTunes or go to the Settings app on your iPhone.
Follow the on-screen instructions to choose the relevant backup and restore your device.
iPhone Data Recovery Software: When Backups Fail
Even if you don't have a backup, there are still options! iPhone data recovery software can scan your phone's internal storage for lost files. These programs work by searching for traces of data that haven't been permanently overwritten.
Here's what to keep in mind when using data recovery software:
Success Rates Vary: There's no guarantee you'll recover everything, especially if the data has been overwritten.
Free vs. Paid Options: Free versions might have limitations, while paid software offers more features and higher success rates.
Research is Key: Read reviews and compare features before choosing a data recovery software program.
Here are some resources to get you started with iPhone data recovery software: You can explore options through a web search or consider a reputable service like iPhone data recovery.
Taking Precautions: Preventing Future Data Loss
Here are some tips to minimize the risk of losing data in the future:
Enable Automatic Backups: Set your iPhone to back up automatically to iCloud or iTunes.
Store Important Files Elsewhere: Consider saving important documents, photos, and contacts to a cloud storage service or your computer.
Think Before You Delete: Double-check before deleting files, especially photos, messages, and contacts.
Update Regularly: Keep your iPhone software up to date to avoid glitches that might cause data loss.
Conclusion: Don't Lose Hope!
Losing data from your iPhone can be stressful, but it doesn't have to be the end of the world. You can potentially retrieve those lost files by understanding the different methods for iPhone data recovery. Remember, prevention is key, so make regular backups a habit to keep your precious data safe.
#iPhone data recovery#lost iPhone data#recover deleted photos iPhone#iPhone data backup#data recovery software
0 notes
Text
Find Lost or Missing Files on Windows 11: Quick Recovery Methods - Technology Org
New Post has been published on https://thedigitalinsider.com/find-lost-or-missing-files-on-windows-11-quick-recovery-methods-technology-org/
Find Lost or Missing Files on Windows 11: Quick Recovery Methods - Technology Org
With the advancement in technology, data loss has become a common threat in today’s digital world. You may encounter issues like sudden deletion of files and folders on your Windows 11 device. Such instances usually occur due to accidental deletion, power outages, virus or malware attacks, and many other such reasons.
Luckily, there are several tools and techniques available that you can use to find lost or missing files on Windows 11 devices. In this guide, we’ll explore effective methods to restore your precious data, focusing on the utilization of Windows data recovery software.
Why do Files Go Missing on Windows 11?
Files can go missing on Windows 11 devices due to multiple reasons, ranging from accidental deletion to software or hardware failures. Here are some prominent reasons for data loss on Windows 11:
Accidental Deletion: Human error is one of the main reasons for missing files on any device. You may have unintentionally deleted files or folders while performing other tasks on your device storage.
Formatting Errors: Formatting a drive or partition leads to the deletion of all its contents, including files and folders stored on it. To avoid such instances, you should create backup of important data stored on your drive before formatting it.
System Crashes: Sudden system crashes or power failures while performing file operations, like saving or transferring files, can cause data loss. If the file system is not properly updated before the crash, it may corrupt or lead to the deletion of files.
Malware or Virus Attacks: Malicious software, like viruses or malware, can infect your device and files stored in it. Some malware may encrypt files and demand ransom for their release, while others may simply delete or move files without any prior knowledge.
User Permissions or Settings: Sometimes, files may appear to be missing due to incorrect user permissions or settings. If you don’t have the necessary permissions to access certain files or folders, it will disappear or become inaccessible on your device.
Quick Methods to Find Lost or Missing Files on Windows 11
Now that you are familiar with the reasons for the missing files, it’s time to apply adequate recovery workarounds to find lost or missing files on Windows 11. Let’s discuss these recovery methods one by one in detail:
Method 01: Check the Recent Items Folder
If you are sure that you haven’t deleted that file from your device but it’s just not appearing where it was supposed to be, then the first place you should check is the Recent Files section. For this:
Launch This PC on your Windows 11 device. Enter the path %AppData%MicrosoftWindowsRecent in the address bar and press the Enter key to open the Recent Items folder.
Now, sort the files that appear on your screen with the Date of modification. For this, right-click on space and select Sort by > Date modified.
Scroll down to check your files according to the date. You can search for the file by typing the filename in the search box in the top right corner.
Method 02: Find Missing Files Using File History Backup
Another method to find lost or missing files on Windows 11 devices is by using the in-built File History backup utility. If you have enabled File History backup on your device, it will automatically create backup of all files stored on your device and restore them, if data loss occurs. Here’s how you can find missing files using File History:
Type File History in the search box of your desktop and click on the “Restore your files with File History” option.
Now, open the folder where your deleted file was earlier stored. You can use the left and right navigation buttons to view the different backup versions.
Select the files you need to restore and click the green Restore
Method 03: Restore Lost Files with Previous Version
Another backup alternative to find lost or missing files on Windows 11 devices is by using the Previous Version backup utility. Windows 11/10 comes with this backup option to help you back up all your important data and save it to internal or external storage devices. If you have enabled this option, follow the below steps to find disappeared missing files:
Open the folder where your lost or missing files were earlier stored.
Now, click three dots and select the Properties
Go to the Previous Versions tab, select the backup version you need to restore and click Open.
Select the files you need to restore and save them at another location on your Windows 11 device.
Method 04: Find Lost or Missing Files on Windows 11 Using Data Recovery Software
If your files are still deleted and you have no backup, you can try using a Windows data recovery software to find lost files on Windows 11. One such amazing tool is Stellar Data Recovery Standard, which supports the recovery of lost or missing files from any device in a few simple clicks. You can easily find missing files, like photos, videos, documents, etc. using this amazing tool in no time.
The software supports the recovery of files from both internal and external storage devices.
It provides an easy and user-friendly interface which allows beginners or non-tech-savvy users to find their lost or missing files.
Allows you to preview the recoverable files before saving them to your device
The software is available in multiple versions; you can check their features and select the one that best suits your requirements.
Here’s how to find lost or missing files on Windows 11 Using the Stellar Data Recovery Standard tool:
Step 1: Install Stellar Data Recovery Standard software on your Windows computer. Launch the software and from the homepage, select the type of file you need to restore and click Next.
Step 2: Now, from the Recover From window, choose the storage location where the deleted file was earlier stored and tap Scan.
Step 3: Once the scanning is completed, preview the recoverable files and choose the files you need to restore. Click the Recover button to save selected files at the desired storage location.
Conclusion
Having sudden data loss or missing files on Windows 11 can be a stressful experience, but it’s not the end of the road. With the above-mentioned methods, you can easily find lost or missing files on Windows 11 devices. Just go through the aforementioned steps and best practices and enhance your chances of successful data recovery and minimize the impact of future data loss incidents. Remember, prevention is key, so maintain regular backups and avoid saving data on your device when you encounter such issues to prevent data overwriting.
#amazing#back up#backup#backups#box#buttons#computer#crash#data#data loss#data recovery#delete#desktop#devices#easy#encrypt#Featured technology news#Features#folders#Future#green#Hardware#History#how#how to#human#impact#issues#it#malicious software
0 notes
Text
The Robins have returned and are beginning to reclaim the yard, cleaning things up and taking over the bird bath. The first one looks very pretty with some leucism, the white specks on the head, which can be caused by several things, including genetics. I love Robins and am happy to see them back. Also, they are the state bird of Michigan!
(It took me forever to get this post ready because I had deleted the first clip from the SD card accidentally and had to retrieve it by installing a recovery trial software on my second computer because I had already used it on my other computer months ago and did not want to pay. Sigh.)
(Description: You see a bird bath on the ground. A female Cardinal takes off when a Robin arrives. The Robin removes two leaves from the bath, takes a bath and leaves. Then another Robin appears, lets a call out and also takes off.)
#birds#birdlovers#backyard birds#birds of michigan#birds of north america#birdphotography#nature#birdwatching#signs of spring#American Robin#Michigan state bird#ostdrossel
232 notes
·
View notes
Text
Free software recommendations for various things:
LibreOffice - A full home office suite comparable to Microsoft Office. Easy to use and you can choose the UI layout from several types; it can handle docx and other Microsoft Office document formats; it still does not include AI unless you specifically add that extension on purpose, so unlike other office suites it's not shoving AI down your throat.
Calibre - Ebook manager bundled with an ebook editor and ereader software. It can follow news feeds, downloading them into epub format. Convert ebooks from one format into (many) others. Run a server to make access your books from different computers/phones/tablets easier. And so much more... without even touching on the additional functionality that plugins can add. With plugins it can be used for DRM stripping (which can still remove DRM from even Kindle ebooks, if you have a kindle that you can download the ebook to and use to transfer to your computer). It can also handle downloading fanfics and their metadata using the FanFicFare plugin. (Which I've written tutorials about.) There are officially supported plugins (like FanFicFare) that are easy to install and unofficial plugins (like the DRM stripper) that take more work, so it's extremely customizable.
Syncthing - Want to host your own local file backup system? Have an old laptop that you can reformat with a linux distro? And maybe a spare hard drive? Perfect, you have what you need to set up a home file backup system. Reformat the computer with the new operating system, install syncthing on that computer and on the computer you want to back up files for and the two installations of the software can sync over your home network. Put it on your phone and back up your photos. The software is open source, encrypted, and you can turn it off so that your computer (or phone) is only running it on a trusted network. You control where the synced data lives, which computers on your network those synced folders are shared with (allowing for sharing between multiple computers) and even what type of file backups happen if data is, say, accidentally deleted. (File recovery!!!)
Plex or Emby - Both are free to install on any computer, point at any movie/tv show/audiobook/music files you've got sitting around, and bam you've got a home media streaming server. Both have paid tiers for more features (including tv tuner integration to act as a DVR), but what they can do for free is already impressive and well handled. Both have easy to use UI and it largely comes down to personal preference as to one is better than the other.
Notepad++ - A notepad type program that can also serve as a decent lightweight code editor. I use it for noodling around with code scripts and snippets, writing lists, and various other small tasks. It's not something I'd use for my professional code writing but it's great for just messing around with something on my own time.
16 notes
·
View notes
Text
Idk if anyone has done this before BUUUUUT

I tried my best to interpret what N’s screen said here. I changed brightness and saturation and sharpness and stuff to make it easier to look at.
“A critical error has occurred and the system will shutdown. Data recovery may not be possible.
Press CTRL+ALT+DELETE to enter data recovery mode. If you do not have these keys available, please contact your nearest J.C. Jenson Certified Technician.”
Uhhh my theory(?) ig:
So this happened after J inserted the virus into N, this is making me think squad leaders (if there were any squads in the first place) had the ability to wipe the memories of their co-workers. And if there weren’t any squads, Tessa must have trusted J with technology the technicians might have had, and trusted her to not let the other drones know they had previous lives.
It says to press ‘CTRL+ALT+DELETE’ to enter data recovery mode and… if you know about basic computer commands, this closes or reboots software. This must be one of the ways the murder drones can get their memories trashed (besides y’know…. lobotomy or whatever). Then it mentions if someone wouldn’t have the keys, which is really odd to me. Are these keys scarce because of what it can do to the drones so the worker drones can’t fight back? Or maybe it is encouraging them to contact a technician.
PART OF THE THEORY IM NOT SO CONFIDENT IN BUT I THINK ITS COOL:
I believe, if it was encouraging them to contact a technician it would specifically be Tessa. Earth was already destroyed by Cyn (presumably) and Tessa is (again, presumably) the only human left. So why is it so important that it would be specifically for Tessa? Weeeeelll this is because one of my friends got me on the ‘Tessa isnt Tessa theory’ (i see you @dirty-trash-mongrel 🫵🫵🫵🫵🫵🫵). OK SO HEAR ME OUT, I think Cyn is controlling Tessa’s corpse. Tessa has literally copied her mannerisms in episode six (she has done the ‘is she…. y’know 🏳️🌈’ thing that Cyn does). And yes, most people say that she is a hologram, but I personally can’t bring myself to believe that theory because you can’t physically interact with holograms and holograms can’t physically interact with their environment.
Question you probably have about this theory:
If Tessa is dead how come she can bleed? Why isn’t her face colorless?: Well the absolute solver repairs it’s host and if Tessa’s corpse is being controlled by Cyn then the AS might be able to repair.
79 notes
·
View notes
Text
Incase anyone was planning on or thinking about switching to linux anytime soon, while I will absolutely not tell you not to, and I wouldn't go back to windows even if I could, I think this is important for you to know this.
TLDR: Troubleshooting linux things without really understand how linux works is like unscrewing something with your fingers because you can't find the screwdriver, only to realize after you've undone twelve screws that the entire thing can just peel of the wall.
A snap is a certain type of software install on linux. To my knowledge they exist on all linux systems. They are used to install certain types of third party software- I have absolutely no idea the reasons for why these aren't installed in a normal way, nor what the difference is except for the method of installing them.
On my system, every snap application took over five minutes to launch. No exception. Did not matter if I was just opening a new instance of the program after one was already open, didn't matter if I restarted the computer, recovery mode actually made things worse somehow. It gave me several error messages for this every time I did so through the command prompt (if you open something without command line, and it actually opens eventually, you don't get any errors)
Firefox and discord are snap only applications. Everytime I wanted to use Firefox or open discord, I had to wait a little over five minutes. For nearly the last year.
I tried for several hours combined over the last few weeks to look into every single error and fix them. Nothing worked. I tried dozens of forum posts of people with similar problems and it changed nothing.
The error message that I needed to be looking at wasn't even marked as an error. It was marked as a "warning" so naturally I looked at the dozen other messages that showed up as "error".
The problem was that in a folder that is ALMOST ENTIRELY UNRELATED TO SNAP (the flatpak installation, if you know that is), there was a file labeled "documents". This file had literally nothing in it, 0 bytes on the file system. It was an empty useless file.
I deleted it and everything is now fine. Instant launches. Because an unrelated file had nothing in it, it threw a fit for five fucking minutes every time, but now that I've deleted that file the system doesn't care about it being gone.
#oc posts#rant#linux will be the death of me#wouldn't change it for the world#because somehow windows and mac are WORSE than this bs#at least with this I was actually able to try fixing it#instead of being on a support line for two weeks straight#not to mention the ai bullshit windows has now
4 notes
·
View notes
Note
Hello, hope you are doing well! Would you mind sharing what writing software you use? I used to use google docs but after having the nightmare situation of my docs being deleted (with no way of recovery... I hate thinking about it), I refuse to go back. I was wondering if you've got a more reliable set-up :)
hullo! i don't mind at all! for context, i have a mac.
for fanfic i mean to publish, i personally use google docs, which i know isn't helpful hahaha. i've heard really good things about officelibre though, and i've toyed with the idea of transitioning. there are a lot of features google docs just doesn't have that annoy me, but ao3 accepts the formatting with limited things i have to alter later, hence why i keep with it. it's not my preferred program, but it's easy, and i like easy when it comes to my hobbies.
for fanfic i keep to myself, i use pages. it's actually really, really cool once you get to know it, and i like that it syncs so well into icloud where i keep the majority of my things stored. i have about twenty years of fanfic saved in the cloud, and i've only ever had one file corrupt, so i'd say it's pretty stable in terms of protecting things.
for traditional books and original fiction, i use scrivener. i like the ability to have everything in one document, and the ability to compile into all the appropriate formats is very useful. the learning curve is pretty gnarly, but once you learn it, it's an incredible tool. a bit too powerful for your average fanfic user, hence why i don't generally recommend it to most people, but really really really good for long fics or original fiction where you need to keep things more lock-step in your head.
18 notes
·
View notes
Text
Hacked
I would like first of all like to say that yesterday afternoon my tumblr account was hacked by an unknown party. i didn't realise at the time as i always have a tumblr tab open on my phone, it refreshed as normal through the day, was only in the late afternoon/early evening that i thought something was weird when any posts i liked was immediately unliked, i couldn't reblog any posts, or could i send asks, if would come up with a red error message, was only when i got home at night and checked my computer when i tried to log in was when i knew i had been hacked as my login details didn't work at all.
I went through the recovery guide and took the steps i needed to try and correct the situation. I messaged @pennedwithpassion on another social to let her know the situation as it had already been hours at this point so i just warned her what happened and to watch out for weird asks or dms or liking and unliking posts etc. Obviously Nico was the only one i could tell until i managed to get my account back. I have managed to dm a few people but most dont accept dm's so its easier just to do this post and hopefully people can read this and at least know.
I would like to send my apologies to any follower or even an account i don't follow that may have gotten any spam ask or weird interactions.
I have checked my dms and cant see anything different but maybe whoever hacked my account sent some dm's and deleted the conversation, that i dont know.
So if anyone did receive anything bad please let me know, please dm me if you like, but please know if you did i apologise as it was completely out of my control.
I have taken some further security steps to make sure this doesn't happen again but seems that 3rd party apps/software make it easy to do this.
i am very sorry to any party this has affected.
3 notes
·
View notes
Text
Complete Guide to Recovering Data from SD Cards
SD cards are widely used in devices like cameras, smartphones, and tablets to store photos, videos, and other data. However, data loss from SD cards is a common issue caused by accidental deletion, formatting, corruption, or physical damage. Fortunately, in many cases, the lost data can be recovered with the right tools and techniques. This comprehensive guide will walk you through the steps to successfully recover data from SD cards.
1. Understand the Causes of Data Loss
Identifying the cause of data loss is the first step in the recovery process. Common causes include:
Accidental Deletion: Files deleted manually by mistake.
Formatting: Unintentional formatting of the SD card or device.
File System Corruption: Errors caused by improper ejection or malware.
Physical Damage: Damage from water, heat, or bending of the SD card.
Bad Sectors: Portions of the SD card’s memory that become unreadable over time.
Knowing the root cause can help determine the best approach to recovery.
2. Stop Using the SD Card Immediately
When data loss occurs, stop using the SD card immediately to avoid overwriting the lost files. New data written to the card can overwrite the space previously occupied by deleted files, making recovery much harder or even impossible.
Key Tips:
Avoid saving new files to the card.
Do not attempt to reformat the card.
Eject the card safely and store it in a secure location.
3. Check for Backups
Before starting the recovery process, check if the lost files were backed up.
Cloud Storage: Services like Google Photos, iCloud, or Dropbox may have automatically backed up your data.
Device Backups: Some smartphones or cameras offer built-in backup options.
Local Backups: If you regularly back up your SD card to a computer or external drive, your files might still be accessible.
4. Use Built-In Repair Tools
Both Windows and macOS include utilities to repair minor issues with SD cards. These tools can fix file system errors and make your data accessible again.
For Windows Users:
Connect the SD card to your computer using a card reader.
Open File Explorer, right-click the SD card, and select Properties.
Navigate to the Tools tab and click Check under the Error-checking section.
Follow the prompts to scan and repair the card.
For macOS Users:
Open Disk Utility from the Applications folder.
Select the SD card in the left-hand menu.
Click First Aid and follow the prompts to repair the card.
If the issue persists, move on to recovery software.
5. Recover Data Using SD Card Recovery Software
Specialized recovery software can scan SD cards for recoverable files, even if they’ve been deleted or the card has been formatted.
Popular SD Card Recovery Tools:
EaseUS Data Recovery Wizard: User-friendly with deep scan options for photos, videos, and other files.
Disk Drill: Comprehensive tool for Windows and macOS that supports a wide range of file formats.
Recuva: Free recovery tool for Windows users, ideal for basic recovery tasks.
Stellar Data Recovery: Known for its ability to recover data from corrupted or formatted SD cards.
PhotoRec: Open-source software focused on recovering photos and videos.
Steps to Use Recovery Software:
Connect the SD card to your computer using a card reader.
Install and open the recovery software.
Select the SD card as the target drive for scanning.
Run a deep scan to locate recoverable files.
Preview the recovered files and save them to a different storage location.
6. Create a Disk Image Before Recovery
If the SD card is severely corrupted or physically compromised, creating a disk image is essential. A disk image is a complete copy of the card’s data, preserving its current state.
How to Create a Disk Image:
Use tools like dd (Linux), Clonezilla, or Macrium Reflect.
Save the disk image to a reliable storage device.
Perform recovery attempts on the disk image rather than the original SD card to prevent further damage.
7. Address Physical Damage
Recovering data from a physically damaged SD card requires special care.
What to Do:
Avoid DIY Repairs: Opening or tampering with the SD card can worsen the damage.
Seek Professional Help: Professional data recovery services, such as DriveSavers or Ontrack, have the expertise and tools to recover data from physically damaged SD cards.
Tip: If the card was exposed to water, place it in a sealed bag of rice or silica gel packets to absorb moisture before seeking help.
8. Recover Data from Formatted SD Cards
Accidental formatting doesn’t always erase data entirely. Recovery software can often retrieve files from formatted SD cards.
Steps to Recover Formatted SD Cards:
Use advanced recovery software like Stellar Data Recovery or Disk Drill.
Select the “Formatted Recovery” or similar option in the software.
Scan the SD card for recoverable files.
Save the recovered files to a separate device.
9. Backup Recovered Data Immediately
Once you’ve successfully recovered your data, back it up to multiple locations to ensure it’s safe from future losses.
Backup Strategies:
Use external drives or NAS (Network Attached Storage) for local backups.
Enable cloud backup services like Google Drive or OneDrive.
Regularly update backups to include new data.
10. Prevent Future Data Loss
Taking preventive measures can reduce the risk of losing data from SD cards in the future.
Tips to Protect SD Cards:
Eject Properly: Always eject SD cards safely to avoid corruption.
Store in a Secure Place: Protect SD cards from water, heat, and physical damage.
Monitor Health: Use tools like H2testw to test SD card integrity and detect bad sectors.
Use High-Quality Cards: Invest in SD cards from reputable brands like SanDisk, Samsung, or Kingston.
Recovering data from SD cards is often possible with the right tools and techniques. Start by diagnosing the issue, use built-in repair tools, and turn to recovery software if needed. For severe damage or corruption, professional recovery services can help. Once your data is recovered, focus on implementing a robust backup strategy and handling your SD cards with care. By following these steps, you can minimize the risk of future data loss and safeguard your valuable information.
#data recovery Calgary#Apple data recovery#hard drive recovery#SSD recovery Calgary#deleted file recovery#Data Recovery#Data Recovery Services#Data Recovery Software#Data Recovery Perth#Data Recovery Company
0 notes
Text
I have been receiving multiple asks and requests in my inbox regarding the updates and I really apologize for not responding until now. The reason behind me not responding is, the app I write on is being a bitch and erased half of my progress of my story under the name of “software update”. I tried to recover the files but it was to no avail and now I have to do everything all fucking over again.
I know its disappointing to not get what you were promised but trust me it sucks more to write so much and then lose it because technology hates me. I wont promise anything this time coz its taking a lot of time to write the 3/4 updates I lost and some of you all would hate me if I dont deliver on my promises, but I do wanna say that I know you all love lost cause and other stories that I write but trust me, I love it more as lost cause was my first baby, and it has happened earlier as well that my story got deleted off this platform so idk if its some sort of curse lost cause has or something else but it just cannot get a freeflowing direction towards the story’s end and it sucks more for me because that story had slight personal connection as well. I hope you all understand that writing is my passion and I am still a student, I have to manage law school, assignments, internship and my writing along with many things going on in my life.
I hope you understand i love writing and will continue the story no matter how much time it takes to finish it. Please have some faith in me, I love you all, thankyou.
This is not a hiatus but a semi hiatus where I might interact with you all but I would still need some time to figure out my updates and the recovery of my stories.
Thankyou, love you all!
6 notes
·
View notes
Note
hi sun! this is very random but do you know if the files that have been deleted from the recycle bin on an android phone can be restored somehow?😭
i accidentally deleted a whole download folder yesterday while clearing up storage and that included like 2000 files. skz and kpop vids and about 200 songs audio files i had saved are gone😭😭😭 pls help im so sad
Hi! First, I’m so sorry this happened—it’s such a frustrating and upsetting thing to lose so many files like that. i found some helpful tips online hopefully it’ll help
1. Check Cloud Backups
If you use cloud services like Google Drive, OneDrive, or Dropbox, check to see if your files were automatically backed up. Sometimes, downloads or media files are synced without you realizing it.
2. Use File Recovery Apps
There are apps specifically designed to recover deleted files from Android devices like diskdigger and dr.fone or easeUS mobisaver but i’m not sure if they’re all free. (Install the app on your phone or a computer (if your phone has USB debugging enabled) and follow the instructions to scan for deleted files)
3. Check Android’s Trash Folder
On some phones (like Samsung Galaxy devices), there’s a “Trash” or “Recycle Bin” folder in the My Files app or Gallery. If your phone has this feature, check there to see if your files can still be recovered.
4. External Storage
If the deleted folder was on an SD card, recovery tools might be more effective. You can connect the SD card to a computer and use recovery software like Recuva or PhotoRec.
but the sooner you try recovery, the better your chances of getting your files back so i hope one of those works :)
last resort is seeking professional help but that might be expensive but If these steps don’t work and the files are extremely important, that might be your last option :(
3 notes
·
View notes
Text
Was clearing up some disk space and somehow managed to delete everything in my Art folder besides the stuff in the Alice folder which is weird cuz I wasn't fucking doing anything there. Tried to recover the files from the disk using file recovery software and none of them are opening now so I'm pretty sure they're all fucked forever. The somewhat good news is I did upload a good majority of all that stuff to Patreon with PSDs so I'm working on restoring those. I also have everything else that was lost on my old laptop but it's not turning on.
14 notes
·
View notes
Text
Synology Data Recovery: A Comprehensive Guide
Synology is renowned for its NAS (Network Attached Storage) devices, which offer robust data storage solutions for both personal and business use. Despite their reliability and advanced features, data loss can still occur due to various reasons. This guide provides a comprehensive overview of Synology data recovery, covering the causes of data loss, the steps to recover lost data, and best practices to safeguard your data.
Understanding Synology NAS
Synology NAS devices are designed to provide a centralized and accessible storage solution with features such as RAID (Redundant Array of Independent Disks) configurations, data protection, and easy-to-use interfaces. They support multiple users and applications, making them a versatile choice for data storage and management.
Common Causes of Data Loss
Data loss in Synology NAS devices can result from various scenarios, including:
1. Hardware Failures
Disk Failure: Hard drives can fail due to age, physical damage, or manufacturing defects.
Power Surges: Electrical surges can damage the Synology NAS’s internal components.
Overheating: Inadequate cooling can lead to overheating, causing hardware malfunctions.
2. Software Issues
Firmware Corruption: Problems during firmware updates or bugs can lead to data corruption.
File System Errors: Corrupt file systems can make data inaccessible.
3. Human Error
Accidental Deletion: Users can mistakenly delete important files or entire volumes.
Misconfiguration: Incorrect setup or configuration changes can lead to data loss.
4. Malicious Attacks
Ransomware: Malware can encrypt data, making it inaccessible until a ransom is paid.
Viruses: Malicious software can corrupt or delete data.
Steps for Synology Data Recovery
When faced with data loss on a Synology NAS device, it’s crucial to follow a structured approach to maximize recovery chances. Here are the steps to follow:
1. Stop Using the Device
Immediately stop using the Synology NAS to prevent further data overwriting. Continuing to use the device can reduce the likelihood of successful data recovery.
2. Diagnose the Problem
Identify the cause of the data loss. Understanding whether the issue is due to hardware failure, software problems, human error, or a malicious attack will help determine the best recovery method.
3. Check Backups
Before attempting data recovery, check if there are any recent backups. Regular backups can save time and effort in the recovery process. If backups are available, restore the lost data from them.
4. Use Data Recovery Software
For minor data loss issues, data recovery software can be an effective solution. Several reliable tools support Synology NAS devices:
R-Studio: A powerful tool for recovering data from various storage devices, including Synology NAS.
EaseUS Data Recovery Wizard: User-friendly software that can recover files lost due to deletion, formatting, or system crashes.
Stellar Data Recovery: Known for its robust recovery capabilities, supporting Synology NAS and RAID configurations.
5. Consult Professional Data Recovery Services
For severe data loss scenarios, such as hardware failures or extensive corruption, it is advisable to seek help from professional data recovery services. These experts have the tools and knowledge to recover data from damaged Synology NAS devices. Some reputable data recovery companies include:
DriveSavers Data Recovery: Offers specialized services for Synology and other RAID systems, with a high success rate.
Ontrack Data Recovery: Known for its expertise in NAS and RAID recovery, Ontrack provides comprehensive solutions for Synology devices.
Gillware Data Recovery: Provides professional data recovery services, specializing in complex RAID and NAS systems.
6. Prevent Future Data Loss
After successfully recovering your data, implement measures to prevent future data loss:
Regular Backups: Schedule frequent backups to ensure you have up-to-date copies of your data.
Firmware Updates: Keep your Synology firmware updated to protect against bugs and vulnerabilities.
Surge Protectors: Use surge protectors to safeguard against electrical surges.
Proper Ventilation: Ensure adequate ventilation and cooling to prevent overheating.
Conclusion
Data loss on Synology NAS devices, though distressing, can often be remedied with the right approach. By understanding the common causes of data loss and following a systematic recovery process, you can effectively retrieve lost data. Utilize reliable data recovery software or consult professional services for severe cases. Additionally, implementing preventive measures will help safeguard your data against future loss, ensuring that your Synology NAS device continues to serve as a reliable data storage solution.
2 notes
·
View notes
Link
2 notes
·
View notes