#disable automatic driver installation windows 10
Explore tagged Tumblr posts
Visit Tumblr Blog
Explore Tumblr blogs with no restrictions, modern design and the best experience.
Last Seen Tumblr Blogs


Fun Fact
Celebrities use Tumblr as well.
Text
How to Speed Up Your Windows 11 PC
1. Manage autostart programs-disable unnecessary startup program.
Here is how to stop a program from starting automatically
Select the Start button, then select Settings > Apps > Startup .In the Startup Apps area, find the program you want to stop from starting automatically and set it to Off.
2. Clear memory via disk cleanup
To delete temporary files:
In the search box on the taskbar, type disk cleanup, and select Disk Cleanup from the list of results.
Select the drive you want to clean up, and then select OK.
Under Files to delete, select the file types to get rid of. To get a description of the file type, select it.
Select OK.
If you need to free up more space, you can also delete system files:
In Disk Cleanup, select Clean up system files.
Select the file types to get rid of. To get a description of the file type, select it.
Select OK.
3. Uninstall obsolete programs
Select the Start button, then select Settings > Apps.
Find the programs you don’t need, click on it and then select “uninstall”
4. Turn off shadows, animations, and visual effects
In the Windows 11 search box, type sysdm.cpl, press Enter, and then click the sysdm.cpl icon. That launches the Control Panel’s System Properties dialog box. Click the Advanced tab and click Settings in the Performance section. That brings you to the Performance Options dialog box. (Make sure you’re on the Visual Effects tab of the dialog box.) You’ll see a varied list of animations and special effects.
These are the animations and special effects you’ll probably want to turn off, because they have the greatest effect on system performance:
Animate controls and elements inside windows
Animate windows when minimizing and maximizing
Animations in the taskbar
Fade or slide menus into view
Fade or slide ToolTips into view
Fade out menu items after clicking
Show shadows under windows
However, it’s a lot easier to just select the Adjust for best performance option at the top of the screen and click OK. Windows 11 will then turn off the effects that slow down your system.
5. Turn off background apps
Select the Start button, then select Settings > Apps .
Scroll to the entry of the background app you wish to adjust settings for.
Click on the three-dot icon and then on “Advanced options”.
In the “Background apps permissions” section, select “Never”.
6. Turn off app notifications
Select the Start button, then select Settings > System> Notifications, and move the slider to “Off”.
7. Make sure you have the latest updates for Windows and device driver
Select the Start button, then select Settings > Windows Update > Check for updates.
Select the updates you want to install, then select Install.
Restart your PC and see if it seems to run better.
8. Check for low disk space and free up space
You may improve performance if you free some disk space on your PC.
To check for low disk space
Select the Start button, then select Settings > System > Storage . Open Storage settings
Your drives will be listed in the Storage area. Note the amount of free space and total size for each drive.
9. Pause OneDrive Syncing
On the taskbar, look for OneDrive near the notification area.
Select OneDrive > Help & Settings > Pause syncing,and then choose how long you want to pause syncing your files.
10. Check for and remove viruses and malware
Running a system scan to find viruses and malware. If you’ve already installed a security suite such as Norton Security or McAfee LiveSafe, you can use that. Windows 11’s built-in anti-malware app, Windows Defender, also does a great job.
Just type Windows Defender in the search box, press Enter, and click Scan Now. Windows Defender will look for malware and remove any it finds.
11. Last but not the least , if your have a non-genuine Windows 11 on your computer , please activate it with a genuine Windows 11 Key from the Microsfot partner store keyingo.com
1 note
·
View note
Text
Why would the headlights stay on when you turn the switch off and open the door and get out?
If your car’s headlights stay on after turning off the switch and exiting the vehicle, it’s usually due to a design feature or an electrical malfunction. Here’s a breakdown of possible causes and solutions:
1. Auto-Delay Headlights (Normal Feature)
Many modern cars have "follow-me-home" lights or "auto-delay" headlights, which keep the lights on for 20–60 seconds after shutting off the car to illuminate your path.
How to check: Consult your owner’s manual (look for "headlight delay" or "exit lighting").
How to disable: Some models let you adjust/turn off this feature via dashboard settings or by pulling the turn-signal stalk after turning off the car.
2. Faulty Headlight Switch
A worn-out or stuck switch can fail to cut power to the headlights.
Test: Jiggle the switch while the car is off. If the lights flicker, the switch is likely bad.
Fix: Replace the switch (DIY or mechanic).
3. Stuck Relay
The headlight relay (an electrical switch) might be stuck in the "on" position due to corrosion or wear.
Test: Locate the relay in the fuse box (check the manual), swap it with an identical relay (e.g., horn or AC relay). If the lights turn off, replace the faulty relay.
4. Malfunctioning Body Control Module (BCM)
The BCM, which manages electrical systems, might fail to send the "off" signal.
Symptoms: Other electrical issues (e.g., windows, locks) acting up.
Fix: Requires professional diagnostics and potential BCM reprogramming/replacement.
5. Wiring Short or Parasitic Drain
Damaged wiring (e.g., chafed insulation) or a short circuit can bypass the switch.
Test: Check for exposed wires near the headlights or fuse box. Use a multimeter to trace power flow.
Fix: Repair or replace damaged wiring.
6. Door/Jamb Switch Failure
Some cars keep headlights on until the driver’s door closes. A faulty door switch might not signal the car that you’ve exited.
Test: Open/close the door repeatedly while watching the lights. If they flicker, the switch is bad.
Fix: Replace the door jamb switch (often <$20).
7. Aftermarket Modifications
Poorly installed alarms, remote starters, or lighting upgrades can override factory settings.
Test: Disconnect aftermarket devices to see if the issue resolves.
Fix: Re-wire or remove faulty components.
8. Battery Saver Malfunction
Many cars have a "battery saver" mode that automatically turns off lights after 10–20 minutes. If this fails, lights stay on.
Test: Let the car sit. If lights stay on beyond 30 minutes, the system is faulty.
Fix: Check fuses/relays or consult a mechanic.
Immediate Action to Prevent Battery Drain
Disconnect the battery temporarily if the lights won’t turn off.
Pull the headlight fuse/relay (check your manual for location).
Key Takeaway
Start by ruling out normal features (auto-delay lights). If the issue persists, focus on relays, switches, or wiring. For complex electrical problems (BCM, parasitic drains), a mechanic with diagnostic tools (e.g., OBD-II scanner) will save time and frustration. Ignoring this issue can lead to a dead battery or fire risk from overheating components! 🔋🔧

#led lights#car lights#led car light#youtube#led auto light#led headlights#led light#led headlight bulbs#ledlighting#young artist#electrical malfunction#design feature#auto-delay lights#Aftermarket Modifications#race cars#cars#electric cars#classic cars#car#carlos sainz#truck#bmw#lamborghini#porsche#audi#car light#headlight bulb#headlamps#headlamp#headlight
0 notes
Text
A Complete Guide to OnyxCeph Software Download: Unlocking Digital Orthodontics
What is OnyxCeph Software?
onyxceph software download is a comprehensive imaging and diagnostics software platform for orthodontic and dental professionals. Designed for Windows-based systems, it supports both 2D and 3D image processing, including cephalometric analysis, virtual setups, and aligner staging.
Created by the German company Image Instruments, OnyxCeph is built on a modular architecture that allows practitioners to select only the tools and functions they need, offering flexibility and cost-efficiency.
2. Key Features and Benefits
OnyxCeph offers an impressive suite of features designed to meet the demands of modern orthodontics:
📌 2D Image Management
Import and organize patient photos and radiographs.
Automatic landmark recognition and cephalometric tracing.
Create customizable report templates.
📌 3D Model Management
Import intraoral scans or models in STL/PLY formats.
Segment teeth, perform occlusal analysis, and simulate movement.
Design appliances like aligners and retainers.
📌 Virtual Treatment Planning
Create multi-phase treatment simulations.
Set target occlusion and define step-by-step movement.
Generate output stages for 3D printing or lab workflows.
📌 Cephalometric and Superimposition Tools
Perform various cephalometric analyses (Ricketts, Steiner, etc.).
Compare pre- and post-treatment scans using superimposition.
📌 STL Export and Appliance Design
Export printable files for 3D model production.
Design clear aligners, indirect bonding trays, and splints.
Common Troubleshooting Tips
⚠ Installation Fails or Freezes:
Run installer as admin and disable antivirus temporarily.
Check that your system meets the minimum requirements.
⚠ License Not Detected:
Make sure the USB dongle is inserted properly.
Try a different port or update dongle drivers.
⚠ 3D Tools Not Available:
Ensure your license includes the 3D module.
Contact Image Instruments support for verification.
⚠ Exported Models Misaligned:
Double-check segmentation and arch alignment in OnyxCeph.
Use STL viewer to inspect geometry before printing.
10. Conclusion
The OnyxCeph software download is the gateway to a powerful ecosystem designed to enhance every step of the orthodontic workflow. With tools for imaging, analysis, appliance design, and patient communication, it allows practices to modernize and grow in a competitive landscape.
Unlike generic CAD platforms, OnyxCeph is tailored for clinical applications, offering precision and reliability that dental professionals need. Whether you're planning a full treatment setup or creating models for aligners and retainers, OnyxCeph provides a robust foundation for delivering exceptional patient outcomes.
From integration with advanced slicers like chitubox download to compatibility with popular scanners and printers, OnyxCeph ensures that your practice stays at the cutting edge of digital orthodontics.
0 notes
Text
How to Troubleshoot Common Issues in Windows 10 Home and Pro Editions
Windows 10 is one of the most popular operating systems used by millions of users worldwide. While it is known for its stability and performance, like any other software, it can also encounter issues that may hinder its functionality. In this article, we will discuss common issues that users may face in Windows 10 Home and Pro editions and provide step-by-step troubleshooting guides to resolve them.
Issue 1: Slow Performance
One of the most common issues faced by windows 10 home users is slow performance. If your computer is taking too long to start up, launch applications, or perform tasks, it may be due to various reasons such as malware, disk errors, or outdated drivers. To troubleshoot this issue, start by checking for any malware infections using an anti-virus software. Next, run the built-in Disk Cleanup tool to remove temporary files and system files that may be consuming disk space. Additionally, update your drivers to the latest version and consider upgrading your RAM if your computer is running low on memory.
Issue 2: Wi-Fi Connectivity Problems
Wi-Fi connectivity issues are another common problem faced by Windows 10 users. If you are unable to connect to a Wi-Fi network or are experiencing frequent disconnections, try restarting your router and modem. Next, check your Wi-Fi settings to ensure that you are connected to the correct network and that your Wi-Fi adapter is enabled. If the issue persists, try resetting your TCP/IP stack by running the command "netsh int ip reset" in the Command Prompt. You can also try updating your Wi-Fi drivers to the latest version.
Issue 3: Update Errors
Windows 10 is designed to automatically download and install updates to ensure that your system remains secure and up-to-date. However, sometimes updates may fail to install, resulting in error messages. To troubleshoot update errors, start by checking the Windows Update history to identify the specific error code. Next, try running the Windows Update Troubleshooter tool, which can automatically detect and fix common issues. If the issue persists, try resetting the Windows Update components by running the command "net stop wuauserv" and "net start wuauserv" in the Command Prompt.
Issue 4: Blue Screen of Death (BSOD)
The Blue Screen of Death (BSOD) is a critical error that occurs when Windows encounters a problem that it cannot recover from. If you are experiencing frequent BSODs, try running a System File Checker (SFC) scan to identify and replace corrupted system files. Next, check for any driver updates and install the latest version. You can also try running a memory test using the built-in Windows Memory Diagnostic tool to identify any issues with your RAM.
Issue 5: Login Issues
Login issues are another common problem faced by Windows 10 users. If you are unable to log in to your account or are experiencing issues with your password, try restarting your computer in Safe Mode. Next, try running the built-in System Restore tool to restore your system to a previous point when you were able to log in successfully. If the issue persists, try resetting your password using the built-in Password Reset tool.
Issue 6: Audio Issues
Audio issues are common in Windows 10, particularly after installing updates. If you are experiencing issues with your audio, try running the built-in Audio Troubleshooter tool, which can automatically detect and fix common issues. Next, try updating your audio drivers to the latest version. You can also try disabling and re-enabling your audio device in the Device Manager.
Issue 7: Display Issues
Display issues are another common problem faced by Windows 10 users. If you are experiencing issues with your display, such as blurry text or incorrect resolution, try running the built-in Display Troubleshooter tool. Next, try updating your graphics drivers to the latest version. You can also try adjusting your display settings to ensure that they are set to the correct resolution and refresh rate.
Conclusion
Troubleshooting common issues in Windows 10 Home and Pro editions requires patience and a step-by-step approach. By following the troubleshooting guides outlined in this article, you should be able to resolve most issues and get your system up and running smoothly. Remember to always keep your system updated and run regular maintenance tasks to prevent issues from occurring in the first place. If you are still experiencing issues after trying the troubleshooting steps, consider seeking further assistance from Microsoft support or a professional technician.
0 notes
Text
10 Essential HP Laptop Tips and Tricks to Boost Productivity
HP laptops are known for their reliability, performance, and a wide range of features that can enhance productivity and user experience. Whether you're a new HP laptop user or looking to get more out of your device, here are some essential tips and tricks to help you maximize your laptop’s performance and efficiency.
1. Utilize HP Support Assistant
HP laptops come with a pre-installed tool called HP Support Assistant, which helps keep your system running smoothly. It automatically checks for software updates, drivers, and other essential maintenance tasks. You can also use this tool to troubleshoot common issues, access tutorials, and contact HP customer support.
How to Access: Search for "HP Support Assistant" in the Windows search bar and launch the program to scan your device for updates or perform troubleshooting.
2. Customize Power Settings
Customizing your power settings can significantly improve battery life and overall performance. Windows 10 and 11 offer various power plans that you can optimize based on your usage:
Power Saver Mode: Ideal for extending battery life when you're away from a power source. It reduces screen brightness and processor speed.
Balanced Mode: Balances performance and power usage, perfect for day-to-day activities.
High-Performance Mode: Prioritizes performance over energy efficiency. Ideal for intensive tasks like video editing or gaming.
How to Customize: Go to Settings > System > Power & Sleep > Additional Power Settings to customize or create new power plans.
3. Enable Night Light
Staring at a bright screen for extended periods can strain your eyes, especially at night. The Night Light feature in Windows reduces blue light, which can help reduce eye strain and improve sleep quality.
How to Enable: Go to Settings > System > Display and toggle on the Night Light feature. You can adjust the strength and schedule when the feature activates.
4. Use Windows Snap to Multitask Efficiently
HP laptops with Windows 10 and 11 come with a Snap feature, which allows you to organize your open windows on the screen. You can snap windows to either side, split the screen into quarters, or view multiple windows simultaneously.
How to Use: Drag a window to the edge of your screen, and it will automatically snap to fit half of your screen. You can then select another window to fill the other half. You can also press Windows + Arrow Keys to snap windows to different parts of the screen.
5. Activate HP Fast Charge
Many HP laptops are equipped with HP Fast Charge, a feature that rapidly charges your battery when it’s low. This is incredibly useful if you're short on time and need a quick power boost.
How to Check: Look for the HP Fast Charge feature in your laptop’s user manual or on the HP website to ensure your model supports it. Fast Charge can typically charge up to 50% in about 30 minutes.
6. Utilize Touchpad Gestures
For users with HP laptops that have precision touchpads, you can take advantage of various multi-touch gestures to improve navigation and efficiency:
Three-Finger Swipe Up: Open Task View to see all your open windows.
Three-Finger Swipe Down: Minimize all open windows.
Pinch to Zoom: Similar to smartphones, you can pinch with two fingers to zoom in or out on photos, documents, or web pages.
How to Customize: Go to Settings > Devices > Touchpad to customize or disable specific gestures.
7. Optimize Disk Usage
Over time, your laptop’s performance can slow down due to unnecessary files or fragmented data. Use Disk Cleanup and Defragment and Optimize Drives to free up space and improve performance.
How to Optimize: Search for Disk Cleanup in the Windows search bar, select the files you want to delete, and run the tool. For disk optimization, search for Defragment and Optimize Drives and analyze your hard drive to optimize it.
Conclusion
By using these tips and tricks, you can improve your HP laptop’s performance, enhance battery life, and streamline your daily tasks. Whether you’re a student, professional, or casual user, these small tweaks can make a big difference in your computing experience.
0 notes
Text
can't connect to vpn after windows 10 update
🔒🌍✨ Get 3 Months FREE VPN - Secure & Private Internet Access Worldwide! Click Here ✨🌍🔒
can't connect to vpn after windows 10 update
VPN troubleshooting
When it comes to VPN troubleshooting, there are several common issues that users may encounter. By understanding these issues and how to resolve them, you can ensure a smooth and secure VPN connection.
One of the most common problems with VPNs is slow connection speeds. This can be caused by a variety of factors, including the physical distance between you and the VPN server, the server load, or even your own internet connection speed. To improve speed, try connecting to a different VPN server closer to your location or during off-peak hours when server load is lower.
Another frequent issue is difficulty connecting to the VPN server. If you are unable to establish a connection, double-check your login credentials, ensure that your subscription is active, and verify that the server you are trying to connect to is not experiencing any downtime. You may also want to try switching to a different VPN protocol or disabling any firewall or antivirus software that could be blocking the connection.
If you are experiencing frequent disconnections, this could be due to network congestion or a weak Wi-Fi signal. Try connecting to a different network, such as a wired connection, to see if the issue persists. Additionally, updating your VPN client software to the latest version may help resolve compatibility issues with your operating system or device.
By troubleshooting these common VPN issues, you can enjoy a more reliable and secure internet connection. If problems persist, don't hesitate to reach out to your VPN provider's customer support for further assistance.
Windows 10 update issues
Windows 10 update issues have been a persistent frustration for many users since the operating system's release. While updates are intended to enhance security, fix bugs, and introduce new features, they often come with their own set of complications.
One common issue is the update process itself, which can be lengthy and prone to errors. Users frequently encounter problems such as updates getting stuck at a certain percentage or failing to install altogether. These issues can disrupt workflow and leave systems vulnerable to security threats.
Compatibility problems are another headache for users. Updates may conflict with existing software or drivers, causing certain programs or hardware components to malfunction. This can be particularly frustrating for businesses relying on specialized applications or older hardware that may not be fully supported by newer updates.
Moreover, some updates have been known to introduce new bugs or glitches, despite their intended purpose of improving system performance. These unexpected issues can range from minor annoyances to major disruptions, requiring additional time and resources to troubleshoot and resolve.
Microsoft has made efforts to address these update issues by providing troubleshooting tools and releasing patches to fix known bugs. However, the complexity of the Windows ecosystem means that new issues can arise with each update cycle, leaving users in a perpetual cycle of frustration and uncertainty.
In response, some users have opted to delay or disable automatic updates altogether, sacrificing the latest features and security patches in favor of a more stable computing experience. However, this approach comes with its own risks, as outdated systems are more vulnerable to cyber attacks and may lack compatibility with newer software releases.
Ultimately, navigating the challenges of Windows 10 updates requires patience, vigilance, and a willingness to adapt to evolving technology. By staying informed and proactive, users can minimize the impact of update issues and ensure a smoother computing experience.
Virtual Private Network connection problems
Virtual Private Network (VPN) connection problems can be frustrating and hinder your online activities. Understanding common issues and how to troubleshoot them can help you enjoy a seamless and secure browsing experience.
One of the most common VPN connection problems is slow internet speed. This can be caused by various factors such as server overload, distance from the server, or your own internet connection. To address this, try connecting to a different server closer to your location or upgrading your internet plan for better speed.
Another common issue is frequent disconnections. This could be due to compatibility issues with your device or VPN client, network congestion, or firewall settings. Updating your VPN client, changing the protocol settings, or adding exceptions to your firewall can help stabilize the connection.
DNS leaks are another concern when using a VPN. This occurs when your device bypasses the encrypted tunnel and uses your ISP's DNS servers, compromising your privacy. To fix this, enable DNS leak protection in your VPN settings or manually configure your device to use the VPN's DNS servers.
Sometimes, VPN connection problems can also be attributed to outdated software, improper configuration, or server maintenance. Ensure your VPN client and operating system are up to date, double-check your settings, and contact your VPN provider for assistance if needed.
By understanding these common VPN connection problems and implementing the necessary troubleshooting steps, you can enhance your online privacy, security, and overall browsing experience.
Network connectivity problems
Network connectivity problems can be frustrating and disruptive, impacting our ability to access the internet, communicate with others, and complete tasks efficiently. These issues can arise from various factors, such as hardware malfunctions, software glitches, or network configuration errors.
One common network connectivity problem is slow internet speed. This can be caused by a variety of factors, including an overloaded network, signal interference, or outdated hardware. Slow internet speeds can significantly hinder productivity and make it difficult to stream videos, participate in video calls, or download large files.
Another challenge is intermittent connection loss. This issue occurs when the network connection repeatedly drops, making it difficult to stay connected to online services. Intermittent connection loss can be caused by issues such as router malfunctions, signal interference, or outdated network drivers.
Additionally, network security concerns can also lead to connectivity problems. Viruses, malware, or unauthorized users accessing the network can compromise its performance and stability. Implementing robust security measures, such as using firewalls, antivirus software, and strong passwords, can help protect the network and prevent connectivity issues.
To address network connectivity problems, troubleshooting steps such as restarting the router, checking for software updates, or contacting the internet service provider for assistance can be effective. By identifying the root cause of the issue and taking appropriate actions, individuals can restore network connectivity and minimize disruptions in their online activities.
Windows 10 VPN setup issues
Setting up a VPN on Windows 10 can be a practical way to enhance your online privacy and security. However, users may encounter various issues during the setup process. Understanding these challenges can help troubleshoot and resolve them effectively.
One common problem is compatibility issues with VPN software. Certain VPN clients may not be fully compatible with the Windows 10 operating system, leading to installation or connectivity issues. To address this, ensure that you're using a VPN service that explicitly supports Windows 10 and offers compatible software.
Another frequent issue is firewall or antivirus interference. Windows Defender and third-party security software may block VPN connections, mistakenly identifying them as potential threats. Temporarily disabling these programs or adding exceptions for the VPN software can often resolve connectivity problems.
Configuration errors are also common culprits. Incorrect settings or missing information in the VPN configuration can prevent successful connections. Double-check the VPN settings, including server addresses, authentication methods, and encryption protocols, to ensure accuracy.
Network issues, such as poor internet connectivity or router configurations, can also impact VPN functionality. Troubleshoot your network connection by restarting your router, connecting to a different network, or contacting your internet service provider for assistance.
Lastly, outdated VPN software or Windows 10 itself can contribute to setup issues. Ensure that both your VPN client and operating system are up to date with the latest patches and updates to address any known bugs or compatibility issues.
By identifying and addressing these common challenges, users can successfully set up and use VPNs on Windows 10 to safeguard their online activities and data privacy.
0 notes
Text
does nord vpn affect windows 10 updates
🔒🌍✨ Get 3 Months FREE VPN - Secure & Private Internet Access Worldwide! Click Here ✨🌍🔒
does nord vpn affect windows 10 updates
NordVPN impact on Windows 10 updates
NordVPN, a leading virtual private network (VPN) service, has garnered attention for its impact on Windows 10 updates. Windows 10, Microsoft's flagship operating system, regularly releases updates to enhance security, fix bugs, and introduce new features. However, some users have reported experiencing issues with Windows 10 updates while using NordVPN.
One of the primary concerns users have raised is related to update download and installation failures. NordVPN's encryption and network routing processes can sometimes interfere with the Windows Update mechanism, causing updates to fail or download at slower speeds. This can be frustrating for users who rely on timely updates to keep their systems secure and up-to-date.
Additionally, NordVPN's automatic kill switch feature, which is designed to disconnect the internet connection if the VPN connection drops unexpectedly, can further complicate the update process. In some cases, the kill switch may inadvertently interrupt the Windows Update service, leading to update failures or incomplete installations.
However, it's essential to note that not all NordVPN users experience these issues. Many factors, such as network configuration, VPN settings, and system specifications, can influence the compatibility between NordVPN and Windows 10 updates. Some users have found success by adjusting their VPN settings or temporarily disabling NordVPN while installing updates.
Despite these challenges, NordVPN remains a popular choice for users seeking privacy and security online. Its robust encryption and extensive server network offer valuable protection against cyber threats. However, users should be aware of the potential impact on Windows 10 updates and take necessary precautions to ensure smooth update experiences. Regularly checking for updates, troubleshooting VPN configurations, and reaching out to NordVPN support can help mitigate any issues encountered during the update process.
Compatibility between NordVPN and Windows 10 updates
NordVPN is a popular choice for users seeking online privacy and security. However, some users have expressed concerns regarding the compatibility of NordVPN with Windows 10 updates.
When it comes to using NordVPN with Windows 10 updates, compatibility is generally not an issue. NordVPN is designed to work seamlessly with various operating systems, including Windows 10. Users should not encounter any major compatibility issues when running NordVPN alongside Windows 10 updates.
In some rare cases, users may experience temporary connectivity issues after installing Windows 10 updates while using NordVPN. These issues are typically related to network configurations or settings on the user's device rather than compatibility problems between NordVPN and Windows 10 updates. In such situations, troubleshooting steps like restarting the VPN client, updating network drivers, or changing server locations can help resolve connectivity issues.
To ensure smooth operation when using NordVPN with Windows 10 updates, users should keep both the VPN client and their operating system up to date. Regularly updating NordVPN ensures that the software remains compatible with the latest Windows 10 updates, minimizing the risk of encountering any compatibility issues.
Overall, NordVPN is well-suited for use with Windows 10 updates, offering robust privacy protection and security features without compromising compatibility. By following best practices for maintaining both NordVPN and Windows 10, users can enjoy a safe and secure online experience.
Influence of NordVPN on Windows 10 update process
NordVPN's influence on the Windows 10 update process is a topic of interest for many users seeking to maintain their privacy and security while staying up-to-date with the latest software developments. NordVPN, a leading provider of virtual private network (VPN) services, offers features that can impact how Windows 10 updates are downloaded and installed.
One significant influence is NordVPN's ability to encrypt internet traffic and conceal users' IP addresses. When Windows 10 checks for updates, it sends information about the system to Microsoft servers. By using NordVPN, users can shield this data from potential threats such as hackers or unauthorized surveillance. This encryption ensures that the update process remains secure and private, reducing the risk of cyberattacks or data breaches.
Moreover, NordVPN's vast network of servers worldwide can enhance the update experience for Windows 10 users. By connecting to a server closer to Microsoft's update servers, users may experience faster download speeds and more reliable connections. This can be especially beneficial for users in remote locations or areas with limited internet infrastructure.
However, it's essential to note that while NordVPN can provide added security and performance benefits, it may also introduce some limitations to the Windows 10 update process. For example, if the VPN server is experiencing high traffic or connectivity issues, it could potentially slow down the update download or cause it to fail altogether.
In conclusion, NordVPN can positively influence the Windows 10 update process by enhancing security, privacy, and performance. By encrypting internet traffic and optimizing server connections, NordVPN helps users stay protected while ensuring they receive timely updates for their Windows 10 operating system.
NordVPN effect on Windows 10 update functionality
NordVPN is a renowned virtual private network (VPN) service provider that offers users enhanced online privacy and security. However, some users have reported issues with Windows 10 update functionality while using NordVPN. These issues mainly stem from conflicts between NordVPN's network settings and the Windows Update service.
One common problem is the inability to download or install Windows updates while NordVPN is active. This occurs because NordVPN's network configurations might interfere with the communication between the user's device and Microsoft's update servers. As a result, Windows Update may fail to connect or download update files, leading to delays in system maintenance and security patches.
Another issue is the disruption of the update process due to intermittent connectivity or dropped connections when using NordVPN. Since VPNs route internet traffic through their servers, network interruptions or server congestion can impede the continuous flow of data required for downloading and installing updates. Consequently, users may experience failed or incomplete update installations, leaving their systems vulnerable to security threats and performance issues.
To mitigate these issues, users can try temporarily disabling NordVPN before initiating Windows updates. This allows the system to establish a direct connection to Microsoft's servers without VPN interference. Alternatively, configuring NordVPN to exclude Windows Update traffic from VPN routing can help maintain seamless update functionality while still benefiting from VPN protection for other online activities.
In summary, while NordVPN offers robust privacy and security features, its use may sometimes impact the update functionality of Windows 10 systems. By understanding and addressing potential conflicts between NordVPN and Windows Update, users can ensure a smoother and more reliable update experience on their devices.
NordVPN and its impact on Windows 10 update mechanisms
NordVPN is a popular virtual private network service that offers users enhanced security and privacy online. With the growing concern over online privacy and security, many people have turned to VPN services like NordVPN to protect their data from cyber threats and hackers.
When it comes to Windows 10 update mechanisms, using NordVPN can have both positive and negative impacts. On the positive side, NordVPN can help users maintain their privacy and security while downloading and installing Windows updates. By encrypting the internet connection and masking the user's IP address, NordVPN ensures that their online activities remain private and secure, even during the update process.
However, using NordVPN while updating Windows 10 can sometimes lead to slower download speeds and potential connection issues. The encryption and rerouting of internet traffic through VPN servers can cause delays in the update process, resulting in longer download times for updates.
To mitigate these issues, users can try connecting to a VPN server that is geographically closer to their location to reduce latency and improve download speeds. Additionally, temporarily disconnecting from the VPN while downloading and installing Windows updates can help ensure a smoother and faster update process.
Overall, NordVPN can positively impact Windows 10 update mechanisms by enhancing user privacy and security, but users should be aware of potential speed and connectivity issues that may arise when using a VPN service during the update process.
0 notes
Text
Why do the headlights of a car automatically turn off all accessories, but turning them back on does not bring everything back up like normal?
The behavior you’re describing—headlights turning off accessories but not restoring them when turned back on—is typically due to power management protocols and safety features embedded in modern vehicle electrical systems. Here’s a detailed explanation:
1. Power-Saving Mode (Battery Protection)**
Automatic Shutoff:
Many vehicles automatically turn off non-essential accessories (e.g., interior lights, radio, infotainment) after a delay when the engine is off and doors are closed. This prevents battery drain.
If you manually turn off the headlights, the car’s system may interpret this as a signal to enter power-saving mode, cutting power to accessories.
Why Accessories Don’t Reactivate:
Turning the headlights back on does not override the power-saving mode. The system assumes you’re leaving the car and prioritizes battery preservation.
Accessories like the radio or climate control typically require the ignition to be in the ACC (accessory) or ON position to reactivate.
2. Ignition-State Dependency**
Accessories Tied to Ignition:
Most accessories (e.g., power windows, dashboard displays) are designed to work only when the ignition is on.
If the ignition is off, turning the headlights on/off won’t restore accessory power—they require the ignition switch to be cycled back to ACC/ON.
Headlights as an Exception:
Headlights can often operate independently of the ignition (e.g., parking lights for temporary use). However, they still trigger power-saving protocols when turned off.
3. Safety and Anti-Drain Features**
Battery Saver Circuits:
Modern cars have modules (e.g., Body Control Module, or BCM) that monitor battery voltage. If voltage drops below a threshold (e.g., due to lights or accessories being left on), the system shuts off non-critical loads.
Reactivating the headlights won’t reset this protection—accessories stay off until the battery recovers or the engine restarts.
Delayed Accessory Power:
Some vehicles cut power to accessories immediately when the driver exits (even if lights are on), while others allow a grace period (e.g., 10 minutes). This varies by manufacturer.
4. Design Quirks and Software Logic**
Manufacturer-Specific Logic:
Brands like Toyota, Ford, or BMW program their systems differently. For example, turning off headlights might signal the car to “go to sleep,” disabling accessories until the ignition is cycled.
Aftermarket Modifications:
If the vehicle has aftermarket lighting or wiring, improper installation can disrupt factory power management behavior.
5. How to Restore Accessories**
Cycle the Ignition: Turn the ignition to ACC or ON (or start the engine) to reset the system and restore accessory power.
Open/Close Doors: Some cars reactivate interior lights and accessories when a door is opened.
Check Settings: Consult your owner’s manual for customizable power-saving features (e.g., adjustable timeout durations).
Example Scenario:
You park the car, turn off the engine, and leave the headlights on.
After a few minutes, the car shuts off the headlights and accessories to save the battery.
You return, turn the headlights back on, but accessories remain off.
To restore power, you must turn the ignition to ACC/ON or start the engine.
Key Takeaway:
This behavior is intentional—it protects your battery and aligns with safety standards. If accessories consistently fail to reactivate, it could indicate a faulty relay, blown fuse, or software glitch, warranting a diagnostic check. 🔋🚗

#led lights#car lights#led car light#led auto light#led headlights#youtube#led light#led headlight bulbs#ledlighting#car#cars#self care#car culture#american cars#classic cars#car light#young artist#headlight bulb#headlamp#headlight
0 notes
Video
How We Enable / Disable Automatic Driver Download option in Hindi
#How We Enable Disable Automatic Driver Download option \ Hindi#how to stop automatic download in windows 10#disable automatic driver installation windows 10#how to stop auto update on wifi in windows 10
0 notes
Text
Sims 3 Performance Guide
Lately I have found the direction of The Sims 4 to be rather lackluster. Let’s face it. The game is boring. Still looking for that “Sims Fix” I found myself going back to playing The Sims 3. The Sims 3 can be tricky to get running correctly on modern computers so I figured I would share what I learned over the years. I made this guide a few years ago for another forum so I’m always open to new suggestions/edits etc. Some things may work well for others while some may not make a difference at all. I have applied all of these fixes in my own game and I still experience lag so this is by no means a guide to completely eliminate the lag in the game but a guide to perhaps help your game run a little bit smoother. All of these tips have been gathered from all over the internet and also some things I have picked up on my own over the years. I own a legit copy of the Sims 3 and have never owned a pirated version so I can't say whether or not these settings will work with a pirated version of the game. I also only have a PC so I don't know if any of these settings will effect the Mac version of the game. If anything I hope this guide brings people back to The Sims 3 or allows people to give the game another chance. The guide will be pretty extensive and I take no responsibility if you mess up your game :P
Limit Game FPS - This one has been a godsend. I was experiencing major lag especially in build/Buy mode. My computer is way over spec for this game much like most computers today. What would happen is that while in Build/Buy Mode my FPS would spike into the 200's! During these spikes the game would almost be un-playable.
To fix this issue:
Download this file: https://rd.nexusmods.com/skyrim/mods/34]https://rd.nexusmods.com/skyrim/mods/34
I know it says it's for Skyrim but it will also work for The Sims 3. After downloading it unzip the antilag.cfg and d3d9.dll into X: > Program Files (x86) > Origin Games > The Sims 3 > Game > Bin if using Origin. If you have the steam version of the game use : X: > Program Files (x86) > Steam > steamapps > common > The Sims 3 > Game > Bin . By default it is set to limit the game to 30FPS. I have been using this and it works fine. You can change it to 60FPS if you want by opening the antilag.cfg using notepad. I haven't had a chance to test the game at 60FPS but its not like The Sims 3 is a First person shooter or anything so IMO its probably not necessary. Run the game and your FPS should be capped at 30.
Alternately you can try turning on Vsync in either Nvidia Control Panel or AMD Catalyst software however I wasn't able to get it working. I'm using a Geforce 1080 and the latest Nvidia drivers. When I turned it on in the control panel it did nothing in the game.
After installing this fix I no longer experience massive lag spikes while in Build/Buy Mode the whole game also seems to be running a little bit smoother as well. Unfortunately there isn't much we can do about EA's terrible coding of the game so there will still be lag but this one has helped my game more then any of the other fixes as of yet.
**It also must be noted that FPS fix uses the same file as Reshade, d3d9.dll. I haven’t tested if this works using the d3d9.dll file from Reshade but I can assume it probably doesn’t. I do however believe there is a frame limiter built into reshade which should accomplish this same thing as this mod.
In Game Settings
1. Graphics
Resolution - You should always play at the native resolution for your monitor. Most monitors today use a native resolution of 1680x1050 or 1920x1080. If your game is struggling at this resolution you should always lower the graphics settings not the resolution.
Windowed? or Fullscreen? - This one is something that you will have to test. Some people say that the game runs better for them in Fullscreen and some say it runs better in Windowed Mode. My personal game runs better in Windowed Mode.
Object Hiding - Enabling this can help to increase performance especially if you have a large house. Essentially what this does is that the game renders every object on the lot you are in even if you aren't on that floor. So if you are playing on the first floor the game is using resources to render the items on the second/third floor etc.
Reflection Quality - Setting it to Mirrors and Water will work well for most people but adjusting this lower can offer a slight performance increase.
Edge Smoothing - I personally have not noticed much of a difference in performance adjusting this setting but this is the Anti Aliasing settings for the game. Try lowering it and see if it makes a difference in your game.
Visual Effects - According to the game "Controls the quality of particle effects on objects, Sims, and the town" Medium would be the recommended setting for Visual effects. It offers a happy medium between performance and visual quality.
Lighting and Shadows - Adjusts the shadow quality in the game. I run this on high in my game as there isn't a noticeable difference in performance between medium and high settings. Turning it to low will give a slight boost in performance but the shadows will be ugly.
Tree Detail - Keep this setting on high as there really is no difference in performance between settings. All you end up with are some ugly trees and no real boost in performance.
Enable Animation Smoothing & Enable Advanced Rendering - Both of these items should always be checked. Enable Animation smoothing makes no difference in performance and Turning off Enable Advanced Rendering can actually decrease performance.
Draw Distance - Keep this on high as it does not effect performance.
High Detailed Lots - With this turned up all the way I noticed a fair bit of stuttering in my game. I have mine set to 4 lots but this is a setting that should be tested to see what works for you.
Texture Detail and Sim Detail - Most computers should be able to handle both of these settings maxed for a small boost in performance you can lower the texture detail to medium. Sim Detail should always be set at Very High as lower this setting has only a very small boost in performance that probably wouldn't even be noticeable.
2. General Settings
Enable Shop Mode - This will disable the Sims 3 Shop from In-Game. Turning this off can help with stuttering.
Enable Lessons - Turning this off can possibly help with performance. I haven't noticed a difference but at this point we all know how to play The Sims.
Memories - Disabling Memories can offer a boost to performance and reduce in game stuttering.
**Alternately you can try using this mod if you don’t want to completely disable the memory system in The Sims 3
No (or fewer) automatic memories by velocitygrass on Mod The Sims
https://modthesims.info/d/446281
Enable Interactive Loading Screens - Turning this off has been said to reduce some in game stuttering. Besides nobody wants to play that stupid game anyway.
3. Online
Keep Me Logged In & Enable Online Notifications - Turning off both of these settings will help game performance and reduce stuttering.
4. Advanced Demographics Options
Enable Story Progression - Turning this off will reduce stuttering in the game. If you like this setting you can use the NRASS Story Progression explained further in this guide.
Advanced Settings
I will try to guide as best as I can with these but always MAKE BACKUPS of every file modified in this section.
In order to make this process easier be sure that "Hide extensions for known file types" is unchecked in the Windows Folder Options. In Windows 10 Click on View > Options > Change folder and search options. Switch to the view tab and under Files and Folders uncheck "Hide extensions for known file types"
Edit GraphicsRules.sgr - This setting will help the game run smoother and make for faster clothing changes.
1. Got to X:\Program Files (x86)\Origin Games\The Sims 3\Game\Bin
2. Copy the GraphicsRules.sgr file and back it up in either in a safe location or even in the same directory just name it GraphicsRules.sgr.orig. Click yes when prompted with the rename.
3. Now Open GraphicsRules.sgr with notepad (not the copied version)
4. You will see four lines that look like this: seti cpuLevelUber 4
seti cpuLevelHigh 3
seti cpuLevelMedium 2
seti cpuLevelLow 1
5. Change the four lines to this: seti cpuLevelUber 4
seti cpuLevelHigh 3
seti cpuLevelMedium 3
seti cpuLevelLow 3
6. Save in Notepad and close Notepad.
Edit Sims3.ini - This is how you force the game to use more then 2GB of RAM. I noticed a massive improvement in both CAS and Build/Buy mode with this. Clothing,Objects etc load almost instantly when this is changed. The Origin version of the game has already been patched to use 4GB of RAM however adjusting this value to reflect your systems total ram amount if above 4GB can be beneficial. If you currently have 4GB total of RAM and are using the Origin version of the game you can skip this step. It’s questionable whether or not this makes a difference in the game as The Sims 3 is a 32 bit game that only uses 4GB to begin with but it seems to actually make a difference in my own game.
1. Go to X:\Program Files (x86)\Origin Games\The Sims 3\Game\Bin (same as GraphicsRules.sgr)
2. Backup the Sims3.ini in the same method as the GraphicsRules.sgr
3. Open Sims3.ini in Notepad
4. Under [ResourceSystem] you will see this:
MemoryUsageLimit = 20000000 ( 10000000 for legacy/disc versions)
5. Ignoring the zeros this is showing that the Sims 3 is only using 4GB of ram (2gb for Legacy/Disc versions of the game). Depending on the amount of ram in your system you should change it to half of your total amount of ram. Examples:
8GB Total Ram MemoryUsageLimit = 40000000
16GB Total Ram MemoryUsageLimit = 80000000
32GB Total Ram MemoryUsageLimit = 16000000
**Be Sure to only change the first number not any zeros. For 32GB+ its the first 2 numbers. Putting this too high could cause your system lock up or crash and possibly do damage**
Modding
First go here and follow the instructions on this page to set up your Mods folder: https://www.carls-sims-4-guide.com/forum/index.php?topic=9187.0
1. Must Have Mods - Even if you don't plan on putting any CC in your game these Mod is highly recommended if not needed in order to keep the game running Smoothly.
NRAAS Master Controller -
https://www.nraas.net/community/MasterController
This mod is a must have. It fixes many of the errors in the game and helps immensely with game lag and stuttering.
Under Modules Download: (Not Required but useful)
MasterController Cheats - Adds "cheaty" functions to Master Controller.
MasterController Expanded Tatttoo - Expands the number of locations provided in Tattoo CAS
MasterController Progression - This mod adds progression related interactions to the "Master Controller" menu. Addition to Story Progression (below)
MasterController Integration - (Must have if you install a lot of sliders) This mod replaces all the CAS interactions in the game with the one managed by MasterController, including the "Create-A-Sim" button in "Edit Town".
Now go to this Page and download these other “Must Have Mods” by NRAAS
https://www.nraas.net/community/Mods-List
Overwatch - (Important) Contains error correction and periodic game maintenance/clean up to reduce issues and improve game longevity.
Error Trap - (Important) Core-Mod that performs save-game corruption cleanup, while catching and reporting unhandled script errors.
Traffic- (Important) Controls autonomous vehicular traffic such as the Food/Ice Cream Trucks, and provides some minor vehicle routing settings.
Saver - (Important) Adds autosave function to the game.
Register - (Important) Replaces the EA Role Manager with a custom version that corrects several bugs and allows for greater flexibility.
Other Useful Mods at NRAAS (Optional) Same page as above:
Story Progression - Basically a less buggy, less performance heavy replacement for the EA story progression in the game. Be sure to tick off “Story Progression” in the In Game options as stated above. (Install all the optional modules as well)
Decensor - We all know what this does
Dresser - Adds automated outfit control for inactive sims, adding accessories, and restricting CAS parts.
WooHooer - Alters the romance and woohoo interactions, provides greater flexibility and attraction scoring.
Retuner - Provides fine tuning of many settings in game like autonomous settings, pricing etc. This one can seem daunting at first but there are plenty of Returner settings to be found out there and its really isn’t that difficult to change the settings in game albeit time consuming.
Be sure to look over the other mods if you see something you like download it. Any of these mods should be safe to add to your game with little to no performance impact.
After that extract the files you just downloaded into \Documents\Electronic Arts\The Sims 3\Mods\Packages\Overrides If you don't have an Overrides folder create one. The “Overrides Folder” is essentially a priority folder. Mods put into this folder will be loaded before any other package files you may add to the game.
In-Game NRASS Settings
These are just some settings to change to improve game stability. This is by far not comprehensive. For Retuner settings I would suggest a Google search of other users settings or consulting the NRASS help section for explanations of how to use this mod.
Click on the Town Hall in Map View Under NRASS
Traffic
Ice Cream Truck - I hate that creepy Ice cream truck so I change everything to false and set Max Ice Cream Trucks to 0. If you like having it around still change the Max Ice Cream Trucks to 1
Routing
Allow Performance Career Limos - False (Limos create a lot of lag in the game)
Allow Use of Cars During General Routing - True (if disabled your sims will only use cars when you tell them to)
Always Use Taxis for Inactives Lacking Vehicles - False (Townies will no longer use Taxis)
Register
Allow Immigration - False (Random Townies wont move into your town keeping the population down and helping to keep performance from decreasing as sims move in.
Animal Control - Change the settings below for a performance boost
Maximum Deer - 2
Maximum Raccoon - 2
Maximum Stray Cats - 3
Maximum Stray Dogs - 3
Maximum Unicorns - 0 (Sorry Wild Horses and Unicorns add a good deal of lag to the game)
Maximum Horses - 0
Custom Content (CC)
Much like any other Sims game moderation is key. The more CC you download and put in you game the slower your game will perform. I'm not going to go into detail about how to install CC in The Sims 3 in this guide. These are just a few important tips to take into account when installing CC,
Try to install Sims3Pack files as much as you can. Sims 3 automatically merges these files and this leads to better game stability.
Merge you package files. Girl Meets Pixels made a great guide here: https://www.youtube.com/watch?v=jIZ2LdoT-HY]https://www.youtube.com/watch?v=jIZ2LdoT-HY
Keep an eye on the size of your Sims 3 Folder in /Documents. It may seem crazy to imagine but massive CC shopping sprees can lead to a massive folder to the tune of 30GB+. Skins and Hairs are a killer. These files are usually rather large sometimes in excess of 80 - 100mb. My suggestion would be to find a default skin you like and just use that. Don’t install any non default skins. Also go easy on the hair. You don’t need 20 different variations of the same ponytail in the game. Clothing is usually fine but pay attention to the size of the CC. That cute dress you found on Tumblr that’s 65mb more then likely has way too high of a poly count and will just lag and be slow to render in the game. Sure it looks great in screenshots but it wont be practical in game. I’m not sure of the exact cut-off for CC but eventually the folder gets too large for the game to handle and it will lead to issues like save corruption or in some cases not being able to save the game at all because the game has run out of memory. Sadly if this happens there is no fix for this and you will lose all of your progress and possibly your save file as well.
Advanced
World Fixes EA left many routing issues in a lot of their worlds that are known to cause lag and often times crashing as Sims bunch up in broken routing areas on the map.
All the World Fixes can be found on Ellacharmed's Wordpress page. Follow the instructions very carefully and install the fixes for all the worlds you have installed in your game.
https://ellacharmed.wordpress.com
Other Useful Tips
Delete your cache!! This one can't be stressed enough. I delete mine before every game play and never have issues starting the game up. A guide can be found here: http://simswiki.info/wiki.php?title=Game_Help:Sims_3_Delete_Cache_Files
Turn off Origin In Game - This will give a noticeable improvement.
Close all other programs running in the background.
Turn on Game Mode or Silent Mode on your Antivirus
Useful Sims 3 Programs
s3pe http://www.simlogical.com/ContentUploadsRemote/uploads/189/
Sims 3 Dashboard Tool http://modthesims.info/download.php?t=387006]http://modthesims.info/download.php?t=387006
CC Magic http://modthesims.info/download.php?t=461888]http://modthesims.info/download.php?t=461888
Delphy's Sims 3 Pack Multi-Extractor http://modthesims.info/download.php?t=364038]http://modthesims.info/download.php?t=364038
Save Cleaner by Kuree http://www.simlogical.com/ContentUploadsRemote/uploads/1532/
723 notes
·
View notes
Text
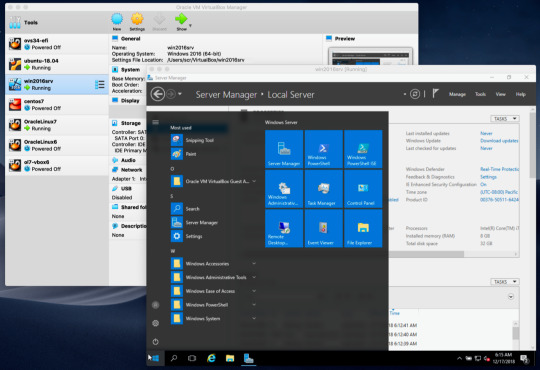
Virtualbox 6 32 Bit
Virtualbox 6 32 Bits
Virtualbox 32 Bit Win 10
Tested on VirtualBox 64-bit for Windows, version 5.2.0. Android-x86 version 6.0-r3, both 32-bit and 64-bit. Select your machine, then click the Settings button and refer to the below recommended configuration to make sure your settings match. For 64-bit Windows guests, ensure that the VM uses the Intel networking device because there is no 64-bit driver support for the AMD PCNet card. See Section 6.1, “Virtual Networking Hardware”. If you use the Create VM wizard of the VirtualBox Manager, Oracle VM VirtualBox automatically uses the correct settings for each selected 64-bit OS. Download VirtualBox 6.1.26 for Windows for free, without any viruses, from Uptodown. Try the latest version of VirtualBox for Windows. VirtualBox 6.1.26. Host a virtual operating system. Paragon Go Virtual 1.0 (32-bit) Easily migrate any physical hard drive or partition to a virtual disk.
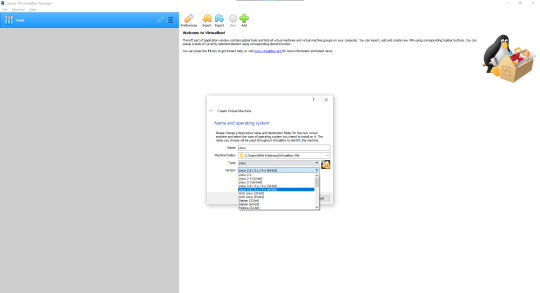
I downloaded VirtualBox (Windows 10) but after creating the virtual machine (32-bit and any OS) in Configuration the following appears, at the bottom of the window:
System Page: Acceleration: The virtualization hardware is enabled in the acceleration section of the system page although it is not supported by the host system, it should be disabled to start the virtual machine.
But it doesn't let me make any settings since the Accept button is disabled.

And I repeat,


create a 32-bit machine, not a 64-bit machine, since I have read that VirtualBox does not let you create 64-bit machines unless virtualization is activated (my PC does have virtualization, but by default it cannot be activate by any means, or by the BIOS, and also if I can create it, what I can't do is run it). And I find it very rare, since before if I could run virtual machines at least 32 bits on my computer, and now not
Virtualbox 6 32 Bits
, I don't know if it's the latest version of VirtualBox or something like that
Virtualbox 32 Bit Win 10
I have a ubuntu 14.04 32-bit guest using VMSVGA. Up until version 6.1.16 the options for seamless mode, auto-resize guest, and Virtual Screen 1 resize were available and working. Starting with 6.1.16 guest additions all those options are grayed out. With each new version of virtual box since 6.1.16 the options remain grayed out, but if I uninstall the matching guest additions version and install an older guest additions like 6.1.12 the menu options return. The 6.1.16 change log mentions 'Workaround to improve resizing of 32-bit VMs with VMSVGA graphics controller...' so that might be the cause? Should 32-bit Linux guests still have those menu options available?
1 note
·
View note
Text
Asem Port Devices Driver

Asem Port Devices Driver
Asem Port Devices Driver License Test
Synaptics Pointing Device Driver 19.0.19.63 on 32-bit and 64-bit PCs. This download is licensed as freeware for the Windows (32-bit and 64-bit) operating system on a laptop or desktop PC from drivers without restrictions. Synaptics Pointing Device Driver 19.0.19.63 is available to all software users as a free download for Windows. ASAM Port Configuration Tag Reference. Example ASAM Framework Mapping Configuration XML File. C# Walkthrough: Using the Model Access Port to Read and Write Channel Values. C# Walkthrough: Capturing and Logging Channel Values. C# Walkthrough: Configuring and Executing Stimulus Signals.
Dec 21, 2020 • Filed to: USB Recovery • Proven solutions
Have you ever had difficulty connecting your devices to your computer using a Prolific USB to Serial adapter? If yes you are lucky to find this page, it will give you all the information need to fix an unresponsive Serial driver adapter. You may have noticed a yellow exclamation mark hovering over or beside the USB to Serial Driver when searching your Device Manager and if you have we can all agree that it signifies a prevailing problem.
Overview of the Error
If you are not able to connect your device to your PC using a USB to Serial adapter it may be that
The USB driver is outdated
The USB Driver is missing
Or even a corrupted driver
While you can't be so sure what the exact problem is there are solutions you can adopt to fix the issue once and for all. Read on to find quick fixes to resolve the problem.
1# Fix Prolific USB to Serial Driver not Working
Solution: Roll your Prolific USB to Serial Driver back to an older version
Updating your drivers often work wonders for your system because it makes sure that it runs on the latest features that guarantee maximum functionality. Unfortunately updating your drivers can cause this kind of error especially if your latest update does not work too well with your hardware. Once you upgrade your PC to the latest Windows version your Prolific USB to Serial Driver also updates to the latest driver software and if the driver is not compatible with your Hardware issues may arise. To correct the error, you will have to download the driver again by following these steps.
Right-click on your PC Start button and open Device Manager
Double click LPT and COM ports then locate the Prolific USB to Serial Driver and right-click it so you can select Update Driver
For driver software click My computer
From My computer select 'Let me pick from a list of drivers available'
Choose an older version from the list then click Next
The driver you selected will be installed automatically
Once it has been downloaded reconnect the driver to see if it works.
2# Fix Prolific USB to Serial Driver 'Coder 10'

Driver issues reveal themselves in so many ways or through messages such as
This device will not start (Code 10)
There is no driver installed in this device
The driver was not successfully installed
A code 10 error may arise because the chip you are using is not an original one. If you are using a fake, the manufacturer has a way of disabling it due to copy write infringement and the copy write takes effect once you download a recent update. To protect your PC from getting this code, you will have to make sure that your Windows 10 never updates a driver without approval. Updates come in the form of 64 bit and 32-bit drivers. Below we will show you how to work your way around the problem.
Window 64 bit Fix
To fix Windows 64 bit OS including Prolific USB to Serial Adapter, follow through these steps.
Download 'PL2303_64bit_Installer.exe and Save
Remove every USB to Serial adapter from your PC and double click the 'PL2303_64bit_installer.exe
Follow the prompt by plugging in one USB to Serial adapter the click on Continue
Reboot your PC to get Windows up and running
If you have followed these process through and you still see the same error go to your device manager

Open the control panel and navigate to Device Manager
From your control panel navigate to the System category and click the Hardware tab
Scroll to the LPT/COM port and double click Prolific USB to Serial Comm Port
Click Drivers in the Properties section
The Driver you choose should read '3.3.2.102 with an appropriate date attached
If the date is wrong then it means the wrong driver was installed
Unplug the Serial adapter and run the steps again to install the correct driver
Window 32-bit
For Windows 32-bit OS systems follow these steps
You will have to download the 'PL-2303_Driver_Installer.exe and save from Microsoft download link
Run the program and eradicate the driver if you can
Run the installer once more to install a correct driver
To Troubleshoot for error if your device still does not work

Go to Control panel, enter System to access your Device Manager
Scroll down to the LPT/ COM port then double click Prolific USB to Serial Comm Port
Click Driver in the Windows Properties section
The driver must be numbered as '2.0.2.8' and dates accordingly
If the driver was not installed, remove the Serial adapter then run 'PL2303_Driver_Installer.exe' again. Follow directions in Device Manager to download the correct driver
The three solutions listed in this article have proven to be quite helpful in fixing a Prolific USB to Serial driver not working on Windows 10. They may appear confusing at first but if you follow each step in detail you can resolve the issue.
Video Tutorial on How to Fix USB Device Not Recognized
Asem Port Devices Driver
USB Solution
Asem Port Devices Driver License Test
Recover USB Drive
Format USB Drive
Fix/Repair USB Drive
Know USB Drive
1 note
·
View note
Text
Daily Tips For Computer Problems

In today's digital world, computers have become an essential part of our lives. Whether it's for work, communication, entertainment, or learning, we rely on computers for various tasks. However, like any sophisticated piece of technology, computers can encounter problems and glitches that can disrupt our daily routine. From software issues to hardware malfunctions, encountering computer problems is inevitable. In this article, we will provide you with comprehensive daily tips to address common computer problems and keep your device running smoothly. Daily Tips For Computer Problems 1. Regular Software Updates and Maintenance To ensure your computer's optimal performance, it is crucial to keep the software up to date. Operating system updates, driver updates, and software patches often include bug fixes and security improvements that can resolve potential issues. Make sure to enable automatic updates and schedule regular maintenance tasks, such as disk cleanup and defragmentation. 2. Protect Your Computer with Antivirus Software A fundamental daily tip for computer users is to have reliable antivirus software installed. This software helps protect your computer from malware, viruses, and other online threats. Regularly update your antivirus program to stay protected against the latest threats. 3. Backup Your Data Regularly Data loss can be devastating, so it's essential to back up your files regularly. Use external hard drives, cloud storage, or dedicated backup software to create copies of your important data. This precautionary measure ensures that even if something goes wrong with your computer, your files remain safe and retrievable. 4. Optimize Startup Programs If your computer takes forever to boot up, you may have too many startup programs running. Disable unnecessary startup programs to speed up the boot process and overall performance of your computer. 5. Clear Browser Cache and Cookies Is your web browser acting sluggish? Clearing the cache and cookies can often resolve this issue. It's a simple yet effective daily tip to enhance your browsing experience. 6. Scan for Malware and Adware Are you experiencing an unusually slow computer or frequent pop-up ads? Perform a full system scan to detect and remove malware and adware that might be affecting your computer's performance. 7. Monitor Resource Usage Keep an eye on your computer's resource usage regularly. The Task Manager (Windows) or Activity Monitor (Mac) can help you identify resource-hogging applications and close them to free up memory and processing power. 8. Run Disk Cleanup Over time, your computer accumulates temporary and unnecessary files. Use the built-in disk cleanup utility to delete these files and free up disk space. 9. Check for Disk Errors Regularly check your hard drive for errors using the built-in disk-checking tools. Correcting disk errors can prevent data corruption and improve system stability. 10. Manage Your Browser Extensions Too many browser extensions can slow down your browser and cause compatibility issues. Disable or remove extensions you no longer need to keep your browser running smoothly. 11. Clean Dust from Hardware If you have a desktop computer, dust can accumulate inside the case and on the fans, leading to overheating. Periodically clean the dust to prevent hardware problems. 12. Uninstall Unnecessary Programs Unused and unnecessary programs can clutter your system and use valuable resources. Uninstall programs you no longer need to free up space and improve performance. 13. Use System Restore Points Creating system restore points before installing new software or making significant changes to your computer can be a lifesaver if something goes wrong. Learn how to use this feature to revert to a stable system state. 14. Check for Driver Updates Outdated drivers can cause compatibility issues and performance problems. Check for updates regularly, especially for graphics cards and other critical components. 15. Secure Your Wi-Fi Network A secure Wi-Fi network prevents unauthorized access to your computer and sensitive information. Use WPA2 or WPA3 encryption and set a strong password for your Wi-Fi network. 16. Avoid Overcharging Your Laptop Battery If you're using a laptop, avoid keeping it plugged in all the time once the battery is fully charged. Overcharging can degrade the battery's performance over time. 17. Adjust Power Settings Optimize your power settings to balance performance and energy consumption. Choose a power plan that suits your needs and tweak the settings accordingly. 18. Check External Connections If you're experiencing issues with external devices (e.g., printers, scanners), ensure that all cables and connections are secure and functioning correctly. 19. Disable Animations Animations and visual effects might look fancy, but they can also slow down your computer. Disabling unnecessary animations can improve overall performance. 20. Use Cloud Storage for Large Files Don't burden your computer with large files. Use cloud storage services to store and access these files conveniently. 21. Avoid Clicking on Suspicious Links Be cautious about clicking on unfamiliar or suspicious links, as they might lead to malware or phishing websites. 22. Utilize Virtual Machines Experimenting with new software or visiting potentially unsafe websites? Use a virtual machine to create a sandboxed environment, protecting your primary system from potential harm. 23. Keep Your System Cool Overheating can lead to performance issues and hardware damage. Ensure proper ventilation and consider using cooling pads or fans, especially for laptops. 24. Use Reliable Password Managers Avoid using weak passwords and consider using a reputable password manager to generate and store complex passwords securely. 25. Stay Informed and Keep Learning Computer technology is constantly evolving, and new problems may arise. Stay informed about the latest trends, tips, and solutions by following reputable technology websites and forums. FAQs Q: How often should I back up my data?A: It's best to back up your data at least once a week, or more frequently if you're working on critical projects. Q: Can I use multiple antivirus programs for better protection?A: It's not recommended to use multiple antivirus programs as they may conflict with each other and cause performance issues. Stick to one reliable antivirus software. Q: What should I do if my computer won't turn on?A: First, check the power supply and ensure all connections are secure. If the problem persists, consult a professional technician. Q: How can I speed up my slow internet connection?A: You can try restarting your router, moving closer to the router, or upgrading your internet plan for faster speeds. Q: Is it safe to download software from unofficial websites?A: It's risky to download software from unofficial sources as they may contain malware. Stick to reputable websites or official app stores. Q: What do I do if my computer keeps freezing?A: Check for software conflicts, update your drivers, and make sure your computer is not overheating. Conclusion By following these daily tips for computer problems, you can enhance your computer experience, improve performance, and troubleshoot common issues effectively. Remember to stay vigilant and keep your computer protected with regular maintenance and security measures. Embrace continuous learning to stay updated with the latest technology trends and keep your computer running smoothly for years to come. Read the full article
0 notes
Text
Delux Driver

We were unable to find any drivers for your product. Remove selected files Download files. No software or drivers are available for this product with the selected operating system. Asia Pacific and Oceania. HP encountered an error while trying to scan your product. Thank you for your patience. Operating System – Windows 7, Windows 8, Windows 8.
Uploader:VosidaDate Added:24 April 2005File Size:49.66 MbOperating Systems:Windows NT/2000/XP/2003/2003/7/8/10 MacOS 10/XDownloads:41676Price:Free* (*Free Regsitration Required)
Free drivers for Pinnacle MovieBox Deluxe. Found 2 files for Windows Vista, Windows Vista 64-bit, Windows XP. Select driver to download. Deluxe Drivers Guides has been delivering same high quality services through entire France, working for elite customers from all over the world, we have developed a top-level range of means focusing on travel and transport solution providing knowledgeable onsite travel advice and meticulous attention to details.
HP is deluxs your results. HP Download and Install Assistant. Modify your browser’s settings to allow Javascript to execute. How does HP install software and gather data? This product detection tool installs software on your Microsoft Windows device that allows HP to detect and gather data about your HP and Compaq products to provide quick access to support information and solutions.
Delux USB Wired Mouse M Quick Click Optical Mouse Universal Computer Mice SP | eBay

Technical data is gathered for the products supported by this tool and is used to identify products, provide relevant solutions and automatically update this tool, to improve our products, solutions, services, and your experience as our customer.
Let HP identify any out-of-date or missing drivers and software How does HP dwluxe product data collected with this service? This page requires Javascript. I don’t see my operating system.
TRC Recreation SS Deluxe Saddle Sportsman Supply Inc. Xmas Ornaments
Select your operating system and version. HP has scanned your product but currently has no suggestions for driver updates.
Not sure which drivers to choose? No software or drivers are available for this product with the selected operating system. Email list of drivers.
Contatti – Parola dell Grazia Roma
Or, view all available drivers for your product below. Please make a different selection, or visit the product homepage. We were unable to find any drivers for your product.
We were unable to retrieve the list of drivers for your product.
Drivers may be in development so please check back at a later date or visit the product homepage. Remove selected files Download files.
Select your desired files and a list of links will be sent by email. Select veluxe operating system and version to see available software for this product. Is my Windows version bit or bit? Operating System – Windows 7, Windows 8, Windows 8.
Javascript is disabled in this browser. Download list – Download multiple files at once View, edit and download your entire list of software and drivers here.
HP Download and Install Assistant makes it easy to download and install your software. Please try again shortly. Choose ‘Refresh’ to update the list. Asia Pacific and Oceania. The list of all available drivers for your product is shown above.
Solution and Diagnostic Data Collection. This tool applies to Microsoft Windows PC’s only. Select your operating system and versionChange Detected operating system: This could take up to 3 minutes, depending on your computer and connection speed. Open download list
See Also
Evoluent Mouse Manager is an optional but powerful software that may be installed to configure the buttons to perform many common functions. For example, button 2 may be configured to perform a double click with a single actual click to open a program, button 3 may be configured to open a link in a new tab, button 4 may be configured to cycle through open tabs, button 5 may be configured to close a tab, etc. This reduces the need to frequently move your hand between the mouse and the keyboard, and the need to move the mouse and click different areas of the screen.
Install instructions:
1. Connect the VerticalMouse to a USB port and wait for Windows to set it up for basic functionality.
2. Remove any existing Evoluent driver or other mouse drivers, except for touchpad driver. Go to Programs and Features (Win 7) or Add or Remove Programs (XP) in Control Panel to find the drivers, or use the uninstaller below.
3. Click the link below to download and install the driver. After install is finished, click E icon on the taskbar to open Evoluent Mouse Manager for configuring the buttons.
4. Go to Control Panel, Mouse to uncheck the box for Enhance Pointer Precision and set the pointer speed slider to the middle for optimal control.
5. Press the pointer speed button on the mouse to set the hardware pointer speed to the MD (medium) setting.
More Deluxe Driver Videos
v6.0.9.2 for Windows 7, 8 and 10
v6.0.3.0 for Windows 7, 8 and 10
Win 7: Go to Control Panel, Programs and Features, click Evoluent Mouse Manager, and click Uninstall.
DELUXE USB PC CAMERA VC0305 WINDOWS 10 DRIVER
Win 10: Start menu, Settings, System, Apps & Features, click on Evoluent Mouse Manager, and click Uninstall.
After install, button functions show as “Disabled”.
Solution: go to Control Panel, Programs and Features, uninstall Evoluent Mouse Manager. Download and install Mouse Manager again.
Evoluent Mouse Manager is an optional but powerful software that may be installed to configure the buttons to perform many common functions. For example, button 2 may be configured to perform a double click with a single actual click to open a program, button 3 may be configured to open a link in a new tab, button 4 may be configured to cycle through open tabs, button 5 may be configured to close a tab, etc. This reduces the need to frequently move your hand between the mouse and the keyboard, and the need to move the mouse and click different areas of the screen.
Before installing the Evoluent driver, go to Applications to find and uninstall any existing mouse or keyboard driver to avoid possible software conflicts.
Download and save the dmg file to the hard drive. Click on the dmg file to generate a pkg file. Click on the pkg file to install. You may have to temporarily allow installing programs downloaded from anywhere in System Preferences, Security and Privacy.
Note for users of High Sierra (10.13) and newer:
The Evoluent Mac driver (known as “extension” in Mac language) may be blocked in Mac OS 10.13 High Sierra by a new system security feature. Refer to this article on the Apple web site: https://developer.apple.com/library/content/technotes/tn2459/_index.html.
If the mouse buttons do not perform your selected functions in the driver, go to System Preference, Security to see if there is an option to allow the Evoluent extension. The option in the security system preference is only there for 30 minutes after the extension tries to load. If it is not there, restart the computer to reload it. The extension will be listed as software from Jack Lo (the creator). If after allowing the extension it is still not working, restart the computer again. If restarting does not work, uninstall and reinstall the Evoluent software and restart the computer.
To determine if Secure Kernel Extension Loading is blocking the Evoluent extension, go to Utilities and open the Console, select the system.log on the left, and search for ‘Evoluent’ to look for a line like this: EvoluentAgent(2218): IORegistryEntrySetCFProperties Error! Result = 0x10000003.
If the system is blocking the extension, there will be a new line each time you try to change the settings.
Due to recent Mac OS update, our driver must be updated to maintain compatibility. We need a driver development kit from Apple but they have not replied to our request even after repeated emails. Therefore our driver development is unable to proceed. We apologize for the delay and will continue to contact Apple for the resource. Alternatively, the third party software USB Overdrive www.usboverdrive.com may be used to program the buttons on VerticalMouse. (Evoluent is not affiliated with USB Overdrive.)
Wired and USB wireless versions of the VerticalMouse 4 require no pairing. They are plug and play.The driver may be installed after they are plugged in.
Mac and Bluetooth versions of the VerticalMouse 4 require this pairing procedure before driver installation:
Go to System Preferences, Bluetooth and click Setup New Device or the plus sign + to add the mouse.Slide the On/Off switch on the Evoluent to the green position or cycle it off and on to begin pairing.
No other drivers are supplied, but the VerticalMouse works in most other operating systems with default system support.Shareware drivers for other Windows versions are at
(Evoluent has no business relationship with this vendor.)
For Evoluent VerticalMouse 4 only. VerticalMouse 3 wireless does not need this utility. Download and click to run. Follow the on-screen instructions. If the countdown timer does not begin after starting the utility and inserting the receiver, the receiver may be incompatible or defective.
Evoluent Receiver Pairing Utility v1.0 (for Windows only)
Essentials Keyboard pdf brochure
VerticalMouse 4 Right Wireless A4 size , letter size
VerticalMouse 4 pdf brochure
VerticalMouse 3 pdf brochure
Asus Deluxe Ii Drivers
Mouse-Friendly Keyboard letter size
1 note
·
View note
Text
Mac Disk Maker

Disk Maker For Mac
Mac Install Disk Maker
Mac Os Boot Disk Maker
Languages: EnglishFrançaisEspañolPortuguêsDeutsch日本語
Since 1998, DiskWarrior has won more awards than any other Mac disk utility. A Macworld Eddy, an Apple Design Award, a PC Mag Editors' Choice Award, a MacUser Magazine Editors' Choice Award and many more from around the world. Check out our Awards and Reviews. Developed just for Mac. Design and print custom CD, DVD or Blu Ray labels and covers with Disketch disc label software. Free to download. Quick to install, easy to use CD label maker software for PC or Mac.
Summary :
Want to format an external hard drive for Mac and Windows PC? Do you know how to do this work easily? This MiniTool article will show you specific methods to make external hard drive compatible with Mac and PC, which are easy and safe to complete.
Quick Navigation :
As we know, external hard drives are widely used to backup data or interchange files among different computers. Well, is there an external hard drive that could be shared between Mac and Windows PC? Of course, there is. Actually, most external hard disks could be compatible with Mac and PC as long as you format them correctly.
Why Need to Format External Hard Drive for Mac and PC
To put it simply, if you want to share external hard drive between Mac and PC, you need to format an external hard drive for Mac and PC.
Currently, hard drives for Windows PC are always formatted with NTFS, while hard disks for Mac are formatted with HFS+. However, when we connect a NTFS formatted disk to Mac, Mac OS X doesn't allow us to write files to the drive neither edit files, though it can read a NTFS drive. Similarly, Windows OS will ask us to format the HFS+ formatted drive when we connecting such a disk, let along edit files saved on HFS+ formatted hard disks unless we resort to third party programs.
But luckily, there are file systems well supported by both Mac and Windows PC, and they are FAT32 (it might be called MS-DOS on Mac) and exFAT. As long as we format the external hard drive to one of these 2 file systems, it can be shared between Mac and Windows.
Further Reading
Both FAT32 and exFAT have advantages and disadvantages.
FAT32: FAT32 works with all versions of Windows, Mac OS, Linux, game consoles, etc.
However, single files on a FAT32 drive can't be larger than 4GB. If your external drive saves files larger than 4GB or you plan to save larger files to this drive, converting to FAT32 is not recommended.
In addition, a FAT32 partition must be not more than 32GB if you create it in Windows Disk Management. Of course, there is free partition manager that can help create a FAT32 volume up to 2TB, which also functions correctly.
exFAT: exFAT has very large file size and partition size limits, which means it's a good idea to format your external hard drive to exFAT.
Nevertheless, a lot of users complained that exFAT is slow, and they highly suggest using FAT32 if you can avoid file size constraints.
Three Options for Accessing NTFS Drives on Mac
Paid Third-Party Drivers
Some paid third-party NTFS drivers for Mac can be used to access NTFS drives on Mac. They work well and they have better performance than the free solutions which will be mentioned in the following part. Paragon NTFS for Mac is such a driver.
Besides, you can also use the paid third-party file system converters to convert NTFS to FAT32 or exFAT which are compatible with both Mac and PC. MiniTool Partition Wizard is one representative.
Free Third-Party Drivers
FUSE for macOS is a free and open-source NTFS driver that can enable write support. But, this solution is slower relatively. And the automatically mounting NTFS partitions in read-write mode can be a security risk for your Mac computer.
Apple’s Experimental NTFS-Write Support
The Mac OS has an experimental support for writing to NTFS drives. Usually, it is disabled by default and needs some messing around in the Mac terminal to enable it.
It doesn’t work properly all the time and could lead to potential issues with your NTFS file system. For example, it had corrupted data before. Thus, we don’t suggest using this tool and we believe it is disabled by this reason.
Here, we recommend using the paid third-party tools since they are easy-to-use and can do good work for you.
Then, we will introduce these three options for you in the following content.
The Best Paid Third-Party Driver: Paragon NTFS for Mac
Paragon NTFS for Mac can write, edit, delete, copy, or move files on NTFS volumes from your Mac computer. It offers a 10-day free trial. If you want to use it all the time, you need to pay for it.
With it, you don’t have to fiddle with terminal commands to mount partitions manually. Additionally, it can mount partitions automatically and safely. More importantly, it can code with the potential corruption. If you purchase a Seagate drive, you can even get a free download of Paragon NTFS for Mac.
All in all, it does its works well and gives you good user’s experience.

The Best Free Third-Party Drivers: FUSE for macOS
FUSE for macOS is a free solution to access NTFS on Mac. But it is less secure.
If you want to make automatically mount NTFS partitions in read-write mode on Mac, you need to temporarily disable the System Integrity Protection and replace one of Apple’s built-in tools with a binary that is more vulnerable to attack. Thus, your Mac is in danger when using this driver.
However, you can use it to manually mount NTFS partitions in read-write mode if you never mind using the Terminal. This will be safer, but you need to do more work. You can go to google the steps and see how complex they are.
Apple’s Experimental NTFS-Writing Support: Don’t Do This, Seriously
Although we mentioned this method in our article, we still don’t recommend it because it is the least tested. It is just for educational purposes, and it is available on Mac OS 10.12 Sierra. Perhaps, it will be unstable forever.
How to Quickly Format External Hard Drive for Mac and PC without Losing Data
Another way to access NTFS drive on Mac is to convert the NTFS/HFS+ to FAT/exFAT. Then, the drive can be used on both Mac and PC.
There should be some important data on the drive. To keep it safe, you can choose this best NTFS/HFS+ to FAT/exFAT converter: MiniTool Partition Wizard.
How to Convert NTFS to FAT32 or exFAT Without Data Loss
To format hard drive for Mac and Windows without data loss, we suggest using MiniTool Partition Wizard and its 'Convert NTFS to FATS32' function. If you are a personal user, you can try its Professional Edition.
Step 1: Run MiniTool Partition Wizard
Download this software to your computer. Then, you can open the software and input the license key to the pop-out window to get its Professional Edition.
Step 2: Convert NTFS to FAT32 with This Software
After running the program successfully, we can see its main interface as follows:
Here, please select the NTFS partition of external hard drive and choose 'Convert NTFS to FAT' feature from the left action pane. If there is more than one NTFS partition, convert all of them one by one.
At last, click 'Apply' button to make the change executed.
When MiniTool Partition Wizard shows it applies the change successfully, the original NTFS will finally become a FAT32 partition.
By this way, you can easily format an external hard drive for Mac and PC without losing any data. Then, you can share external hard drive between Mac and PC
You Can Convert NTFS to exFAT in 3 Steps
However, if you want to convert NTFS to exFAT to make external hard drive compatible with Mac and PC, 3 steps are required.
Step 1: Transfer Data out from External Hard Drive
You can choose to copy and paste those files to other external devices or internal hard disk of Windows, but it will cost much time. Instead, you can use MiniTool Partition Wizard Free Edition to create a copy for your external drive, which is faster.
If there is only one NTFS partition on external hard drive, refer to the tutorial Copy Partition to get instructions. However, if there is more than one NTFS partition, view Copy Disk to get specific operations.
Step 2: Create exFAT Partition with MiniTool Partition Wizard
The Free Edition of this software also enables you to do this job.
Firstly, you need to delete the partition by using this software. Just open the software to enter its main interface. Then, choose the target partition and click 'Delete Partition' from the left action pane. After that, you should click 'Apply' to keep this change.
Secondly, the target partition will become unallocated. Here, you need to choose that partition and click on 'Create Partition' from the left action pane.
Thirdly, you will see a pop-out window. Here, you can choose 'exFAT' from the 'File System' setting option. At the same time, you can also set some other parameters for this partition, including 'Partition Label', 'Drive Letter', 'Size And Location'. After that, please click on 'OK'.
Fourthly, you will go back to the main interface. Then, please click on 'Apply' to save these changes.
Finally, an exFAT partition will be created on your external hard disk so that it could be shared between Mac and Windows PC
Step 3: Transfer Data back to External Drive
If you want to share files that you have backed up between Mac and PC, now please transfer these files back to external hard drive.
How to Convert HFS+ to FAT32 or exFAT without Losing Data
Besides, you can format an external hard drive for Mac and Windows by converting HFS+ to FAT32 or exFAT without losing any data.
Step 1: Backup Data in HFS+ Partition on Mac
Just transfer all useful files out from the external hard drive to other devices on Mac. Of course, if you have a backup already, ignore this step.
Step 2: Create a FAT32 or exFAT Partition on Windows PC
Some people may ask why create such partitions on Windows rather than Mac. That is because there are cases reporting FAT32 (MS-DOS) or exFAT partitions created on Mac did not work well on Windows.
Please skip to Solution 1: Format External Hard Drive to FAT32 to get steps to create a FAT32 partitions or go back to Step 2: Create exFAT Partition with MiniTool Partition Wizard to get operations to create an exFAT partition.
How to Make an Empty External Drive Compatible with Mac and PC
If there is no file saved on your external hard drive, how to make external hard drive compatible with Mac and PC?
It's very easy to share it between Mac and PC and you also need a Windows computer, a Mac machine, and the free partition manager MiniTool Partition Wizard Free Edition.
There are 3 solutions for this case, so please choose the one you like most to format external hard drive Windows 10/8/7.
Solution 1: Format External Hard Drive Windows 10/8/7 to FAT32
Since users are unable to create a FAT32 partition larger than 32GB in Windows Disk Management, they need to use MiniTool Partition Wizard Free.
Note: when you connect an external hard drive which is formatted with HFS+ with computer, Windows may ask you to format the drive. Please choose Cancel.
Please download and install this program on your Windows computer to format an external hard drive for Mac and PC.
Firstly, open the software to enter its main interface as follows. Here, please select the NTFS partition or HFS+ partition of external hard drive, and click 'Delete Partition' feature from the left action pane. If there are multiple partitions on the external disk, please select the disk and click 'Delete All Partitions' feature instead. After that, an unallocated space will be released.
Secondly, you can create one or more FAT32 partitions in unallocated space. Select the unallocated space and choose 'Create Partition' feature from the left side.
Then, you should choose 'FAT32' from the 'File System' option in the pop-out window. Meanwhile, you can set properties for this new partition and click 'OK' to go back to the main window of Partition Wizard.
At last, click 'Apply' button to make all changes performed.
Solution 2: Format External Hard Drive Windows 7/8/10 to exFAT
Firstly, please delete the NTFS or HFS+ partition in either MiniTool Partition Wizard or Windows Disk Management to release unallocated space. Then, you can create an exFAT partition with MiniTool Partition Wizard Free Edition by following steps introduced in the section Step 2: Create exFAT Partition with MiniTool Partition Wizard.
Once a FAT32 or exFAT partition is created on your external hard drive, you can share it on both Mac and Windows PC.
Solution 3: Create One HFS+ Partition for Mac and One NTFS Partition for Windows
Alternatively, you can create 2 partitions on the external hard drive: one is for Mac, and the other is for Windows. As to size for each partition, it depends on your own demands. By this way, you can easily format an external hard drive for Mac and Windows.
Step 1: Create a NTFS Partition and a FAT32 Partition
Please run MiniTool Partition Wizard Free Edition, then delete all the original NTFS or HFS+ partition(s), and create a new NTFS partition as well as a FAT32 partition, and the latter will be formatted to HFS+ in Mac machine.
Then, select the external hard drive and choose 'Delete All Partitions' to create an unallocated space.
Here, select the unallocated space and choose 'Create Partition' feature from the left action pane.
Now, please specify partition label (Windows is recommended), partition type (primary or logical), drive letter, file system (NTFS), cluster size, and partition size (you can change the length of the handle to adjust partition size). Then, click 'OK' to continue.
Now, you can see a NTFS partition is created. Please use the same way to create a FAT32 partition labeled with Mac. At last, click 'Apply' button to make all changes performed.
Step 2: Format the FAT32 Partition to HFS+ Partition on Mac
Please go to Utilities → Disk Utility.
Then, select the external hard drive and click 'Partition' tab on the top.
Now, find the FAT32 partition and format it to OS X Extended (Journaled), which is the desired HFS+. Finally, click 'Apply' button to make all changes performed.
Tip: You may receive the prompt 'The volume 'MAC' is not journaled. As a result it can not be resized'. Just ignore the message and click 'OK' button to continue.
After NTFS partition and HFS+ partition are created on your external hard drive, it can be shared between Mac and Windows PC.
Note: You might be unable to share all files saved on external drive since Windows doesn't support HFS+ partition while Mac doesn't support NTFS partition completely.
Bottom Line
Are you planning to format an external hard drive for Mac and PC? If yes, now try one of our methods to make external hard drive compatible with Mac and PC.
Should you have any problem, just feel free to leave us a message in comment part below or send an email to (email protected).
Format Hard Drive for Mac and PC FAQ
How do I make my hard drive compatible with Mac and PC?
Disk Maker For Mac
If you want your hard drive to be compatible with both Mac and PC, you should format the hard drive to the file system that is supported by both of these two operating systems. FAT32 and exFAT can meet your requirements.
What is the best hard drive format for Mac and PC?
Although both FAT32 and exFAT are compatible with Mac and PC, exFAT is a much better choice because it has fewer limitations. For example, it has a larger file size and partition size limits.
Mac Install Disk Maker
If you formatted your hard drive to exFAT with Apple's HFS Plus, Windows will not recognize the exFAT drive. You can consider using a third-party partition tool to format your hard drive to exFAT.
Mac Os Boot Disk Maker
Windows can only read a Mac hard drive that is formatted to FAT32 or exFAT using third-party software. If the file system of the Mac hard drive is HFS+ or APFS, the drive will become unreadable in Windows.
1 note
·
View note
Text
Drivers Casio USB Devices

CASIO USB Sync 2003. CASIO USB Sync 2002. CASIO USB Sync 2001. All CASIO smartphones. Are you tired of looking for the drivers for your devices? January 30, 2021 admin Input Devices Leave a Comment on CASIO WK-110 USB MIDI DRIVER DOWNLOAD Casio WK Drivers Download. All the other versions of Windows seem to be supported.
Audio Stream Input/Output (ASIO) is a computer sound card driver protocol for digital audio specified by Steinberg, providing a low-latency and high fidelity interface between a software application and a computer's sound card. Whereas Microsoft’s DirectSound is commonly used as an intermediary signal path for non-professional users, ASIO allows musicians and sound engineers to access external hardware directly.
USB Audio ASIO driver helps you connect USB audio interfaces to music applications via ASIO at latencies down to 4ms. Features: USB-audio support for ASIO compatible applications like Cubase. CASIO USB Sync 2003. CASIO USB Sync 2002. CASIO USB Sync 2001. All CASIO smartphones. CASIO USB Sync 2001. CASIO USB Sync 2002. CASIO USB Sync 2003. Are you tired of looking for the drivers for your devices? DriverPack Online will find and install the drivers you need automatically. F) Click Next to run the Hardware and Device Troubleshooter. Method 2: Disable and re-enable all the Universal Serial Bus controllers (USB) controllers. The USB controllers represent the USB ports in Device Manager. To disable and re-enable the USB controllers, follow these steps: a) Open Device Manager. B) Expand Universal Serial Bus controllers.
ASIO bypasses the normal audio path from a user application through layers of intermediary Windows operating system software so that an application connects directly to the sound card hardware. Each layer that is bypassed means a reduction in latency (the delay between an application sending audio information and it being reproduced by the sound card, or input signals from the sound card being available to the application). In this way ASIO offers a relatively simple way of accessing multiple audio inputs and outputs independently. Its main strength lies in its method of bypassing the inherently high latency and poor-quality mixing and sample rate conversion of Windows NT 5.x audio mixing kernels (KMixer)[citation needed], allowing direct, high speed communication with audio hardware. Unlike KMixer, an unmixed ASIO output is 'bit identical' or 'bit perfect'; that is, the bits sent to or received from the audio interface are identical to those of the original source, thus potentially providing higher audio fidelity. In addition, ASIO supports 24-bit samples, unlike Windows NT 5.x MME and DirectSound which truncate 24-bit samples to the upper 16 bits, whereas Windows NT 6.x mixer provides 32-bit floating point output. Higher bit-depth samples offer the potential for a higher signal-to-noise ratio.

Casio WK Drivers Download. All the other versions of Windows seem to be supported.. I would have a MIDI-file on the tablet that plays through the interface on a digital piano. I’m still unfortunately recording midi-less? Apr 27,
Uploader:NakazahnDate Added:25 December 2012File Size:6.9 MbOperating Systems:Windows NT/2000/XP/2003/2003/7/8/10 MacOS 10/XDownloads:68149Price:Free* [*Free Regsitration Required]
Here are the options I see: Posted December 9, Aug 30, 7: Ccasio Casio’s that use the generic midi driver should be fine. Tell us some more! User profile for user: Audio Speciality level out of ten: I mean, why not? Jul 23, 9: He is a lifelong computer geek and loves everything related to computers, software, and new technology.
This tool will download and update the correct Casio WK driver versions automatically, protecting you against installing the ccasio WK drivers. Thanks for your interest in FixYa.
No modification of the Driver by you or any third party is allowed.
Solvusoft is recognized by Microsoft as a leading Independent Software Vendor, achieving the highest level of completence and excellence in software development. The max point reward for answering a question is You are granted the license to install this Driver on caasio own computer. Subscription auto-renews at the end of the term Learn more. Like bit of bit.
Needs USB-MIDI Driver For WK 110 Piano for Windows 7(64 Bit)
News Blog Facebook Twitter Newsletter. Any dispute arising under or caiso to this Agreement shall come under the jurisdiction of the Tokyo District Court.
Finally, this Christmas, I got around to writing a driver for it.
Casio Usb Keyboard
Seems to have drivers for Windows acsio Mac only. Visit the product website and obtain the 64 bit version of its driver for windows vista.

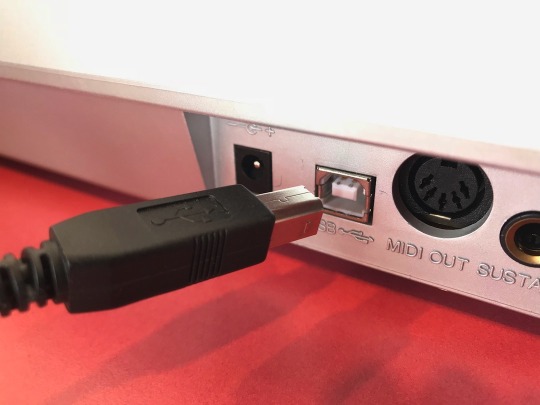
Drivers Casio Usb Devices Bluetooth
Need midi usb driver for Casio WK – Apple Community
Drivers Casio Usb Devices Wireless Adapter
The hardware ID for your keyboard can be found in “device manager”. Share this post Link to post Share on other sites.
Confirmed, the XW-G1 works with Windows 10 for me. More Print this page Share this page. This website is using cookies. You agree not to modify, adapt, translate, or reverse engineer, decompile, disassemble or otherwise attempt to discover the source code of the Driver.
The CTK should as well. Casio WK drivers are tiny programs that enable your Music Keyboard hardware to communicate with your operating system software. The display shows only t t t t t t.
Related Topics casio keyboard midi piano compatability Keyboard piano midi driver BITS 2 o exp casio p casio wk casio piano wk DriverWhiz legoland 64 bit casio wk windows 7 i river e piano drivers acs usb for windows 7 problem ussb amp infoprint 3 64 bit. I then downloaded the win 7 x64 driver for PC from http: CASIO shall bear no responsibility to you to provide maintenance or service for this Driver, or to provide you udb information about upgrade.
New Drivers
1 note
·
View note