#dynamesh
Explore tagged Tumblr posts
Visit Tumblr Blog
Explore Tumblr blogs with no restrictions, modern design and the best experience.
Last Seen Tumblr Blogs


Fun Fact
In 2020, Tumblr had 29.4 million users in the US.
Text
youtube
3 notes
·
View notes
Text
Character Design Assignment! (part 3)
31/03/2025
Hi everyone! I'm back again with a new post related to the assignment character design work! Next up, we will be working on Retopology in Maya!
So, I tried importing my character model to Maya, but I've noticed that Maya keeps getting stuck whenever I try to retopologies the character.
So I will go back to Z-brush to use the 'Decimation Master plugin' to lower the poly count while preserving my character's details!
youtube
I will add screenshots of the value and changes made. Then I will export all the subtools again to Maya and see if I can retopologies it!
Decimation Master tool usage -
Before using Decimation master, I decided to use dynamesh and z-remesh for the sub tools!
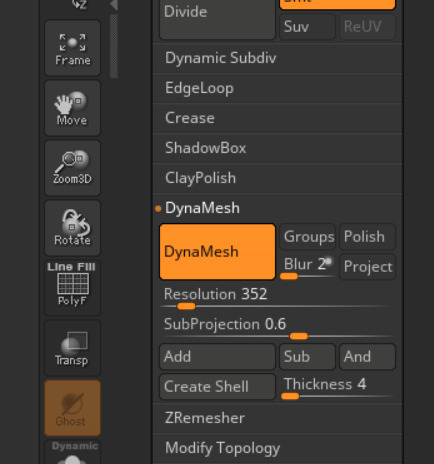
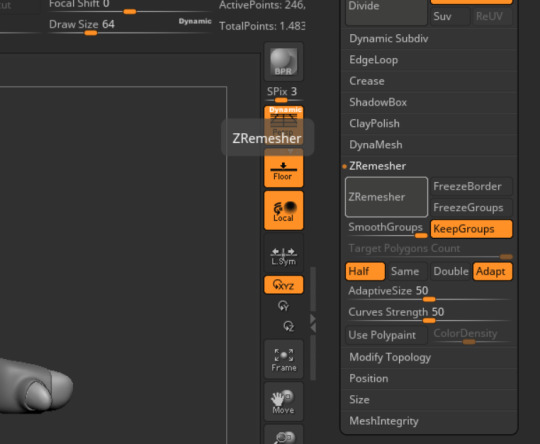
Decimation master values -
This is actually a very simple and easy plugin to use! I used the preprocess all +decimate all options so that all the subtools will be affected.
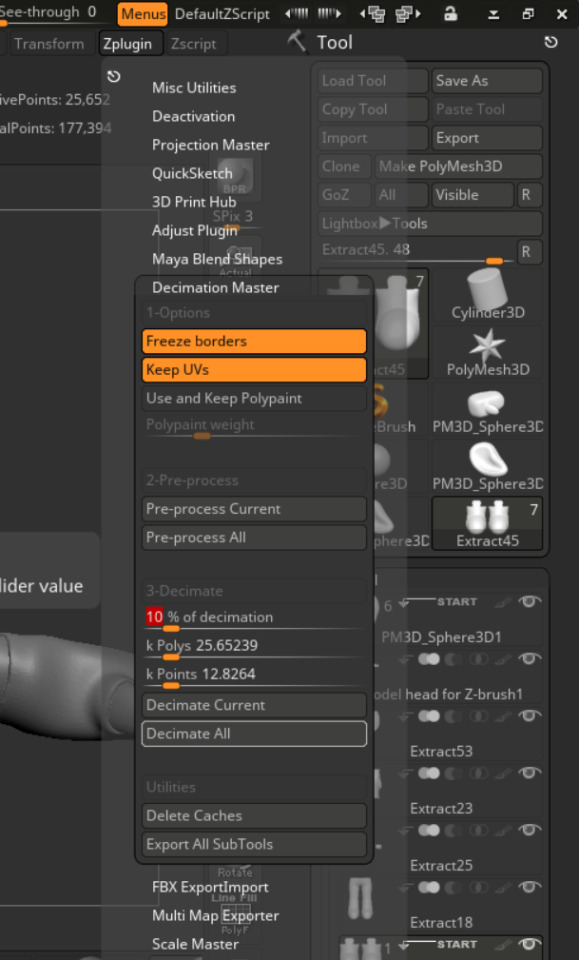
The details have actually been preserved well without many changes. And I noticed that the polycount has dropped by a significant amount!
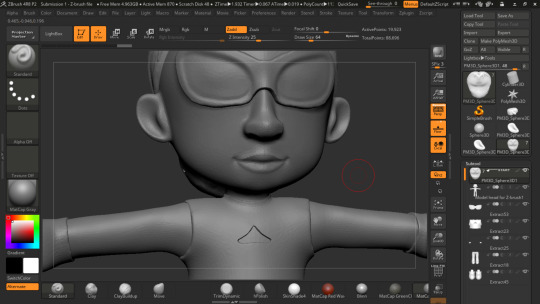
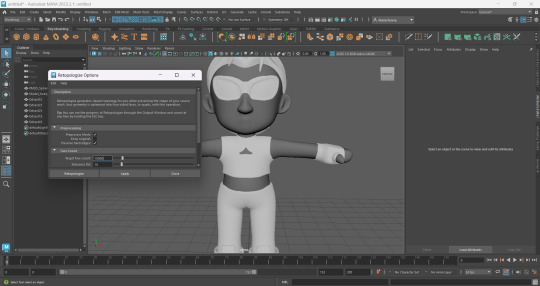
Retopology in Maya -
In Maya, there is a quick way of re-topologizing your character. You need to go to mesh > retopologies > reset settings > add in the face count values and apply!
But I noticed that most of the details made in Z-brush were vanishing ToT
Regardless, I decided to carry on with the retopology so that it would be more convenient to add in the rig to the character without the file getting stuck or Maya crashing!


File with re-topologized character - Completed!!!
That's it for this post! On my next post I will be sharing my character texturing work in progress in both Maya and Substance Painter!
2 notes
·
View notes
Text

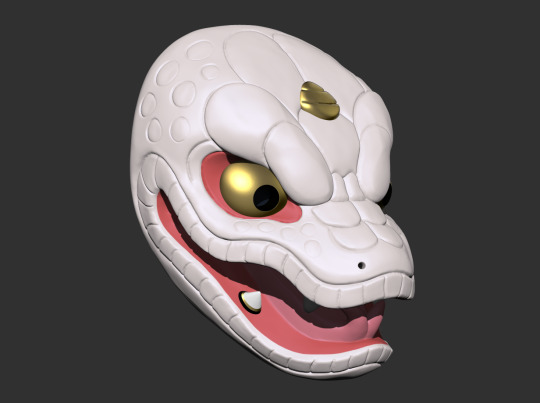


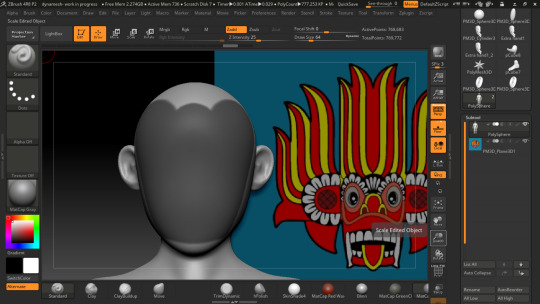
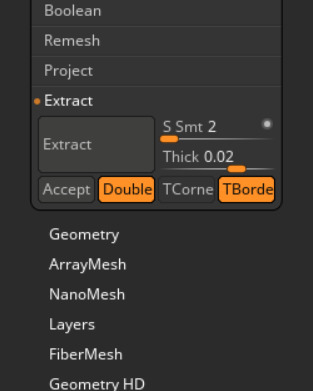
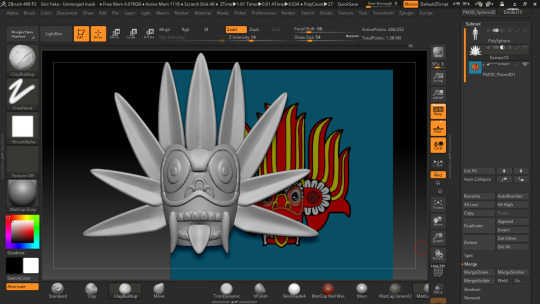
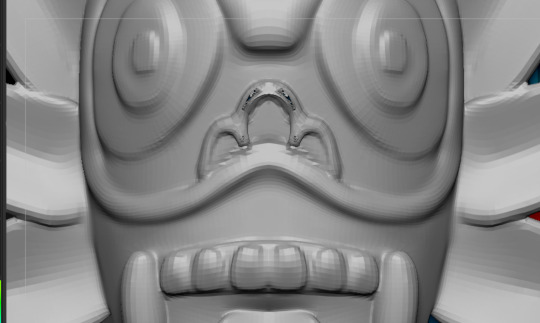
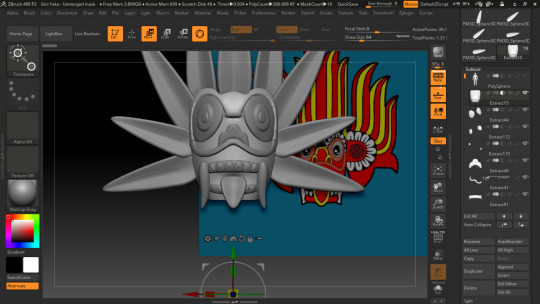
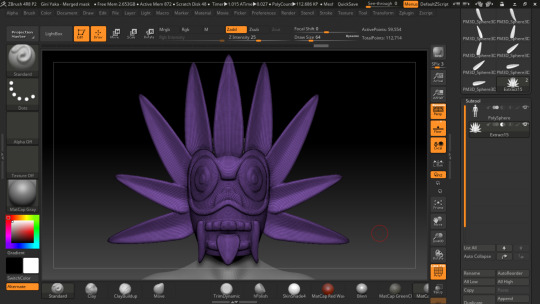
!2025 is The Year Of The Snake!
So to celebrate I thought I would share my (kinda first ever) fan art Zbrush sculpt of Hiromitsu.430’s snake mask wood carving. https://www.instagram.com/hiromitsu.430?igsh=MW5kNDZsZDAyYXVpaQ== Please check out their feed it’s wonderful!
Many thanks to Matt https://www.instagram.com/thepixelhive?igsh=cXE2aWZtcTBjeG9p for the Live Boolean advice and to Mattias https://www.instagram.com/bjurstrom_?igsh=NDhhbDZ2Y3V5cDhn for the ‘Just re Dynamesh, do it, DO IT’ encouragement!!!
Very early days for me with Zbrush, but hopefully I can share more in the future 🙏
#zbrush#digital sculpture#zodiac art#polypaint#fan art#Chinese zodiac art#digital sculpting#cgi art#snake mask#carving#lunar new year art#Zbrush snake#mask#snake#3D design
5 notes
·
View notes
Text


Atticus the Centaur This guy was inspired by Roman statues I definitely want to sculpt more centaurs soon , just need to come up with some good designs
#sculpted in zbrush#rendered in blender#3dart#blender3d#equine#fantasy#centaur#greek mythology#myth#creature
7 notes
·
View notes
Text
Update, I licensed ZBrush for my environment art and started a tutorial series by Henning & Morten from flippednormals. After watching 2 videos and finding some brush packs to install I feel comfortable enough to begin using it for my 3d models. Mainly for detail and to dynamesh and then decimate the mesh. <3
1 note
·
View note
Text
Mastering 3D Modeling: Expert Solutions to Complex Assignments

Welcome to our domain of expertise, where precision meets creativity, and challenges transform into triumphs. At SolidWorksAssignmentHelp.com, we pride ourselves on being the beacon of guidance for students navigating the intricate realm of 3D modeling. Our mission is simple yet profound: to offer the Best 3D Modeling Assignment Help Online, equipping aspiring designers and engineers with the tools they need to excel.
Today, we delve into the depths of two master-level 3D modeling questions, providing comprehensive solutions crafted by our seasoned experts. These challenges epitomize the complexity and nuance inherent in the world of three-dimensional design, demanding a blend of technical prowess and artistic vision to conquer.
Question 1: Designing a Complex Mechanical Assembly
Imagine you're tasked with modeling a sophisticated mechanical assembly comprising intricate components with precise interlocking mechanisms. Your goal is to create a fully functional representation of the assembly, allowing for realistic movement and interaction between parts.
Solution:
To tackle this challenge effectively, we employ a systematic approach, breaking down the assembly into individual components before integrating them seamlessly. Utilizing SolidWorks, our preferred software for 3D modeling, we start by sketching the basic outlines of each part, paying close attention to dimensions and tolerances.
Next, we proceed to extrude and revolve these sketches to give them depth and form. For complex components, such as gears or cams, we leverage advanced features like lofting and swept cuts to achieve the desired shapes. Assembling the parts involves employing mate relationships judiciously, ensuring proper alignment and movement constraints.
Through meticulous iteration and refinement, we fine-tune the assembly, testing each component's functionality and addressing any discrepancies or interference. Finally, we add realistic textures and appearances to enhance visual fidelity, culminating in a stunning rendition of the mechanical marvel.
Question 2: Sculpting a Lifelike Character Model
In this challenge, you're tasked with sculpting a lifelike character model, imbued with personality and depth. The emphasis lies not only on anatomical accuracy but also on conveying emotion and expression through the subtle nuances of form and gesture.
Solution:
Embarking on this creative journey, we leverage the power of digital sculpting tools like ZBrush to breathe life into our character. We begin by blocking out the basic proportions, establishing the skeletal framework upon which we'll build intricate detail.
Layer by layer, we sculpt the finer features of the character, paying meticulous attention to anatomical landmarks and surface contours. Employing techniques such as dynamesh and subdivision sculpting, we refine the model's form, adding depth and definition to muscles, facial features, and clothing folds.
But our focus extends beyond mere anatomy; we strive to capture the essence of our character's personality through subtle cues and expressions. Whether it's a wry smile, furrowed brow, or quizzical glance, each detail contributes to the narrative richness of the model.
To further enhance realism, we incorporate texturing and shading techniques, adding depth and dimensionality to the surface. Through the judicious use of materials and lighting, we create a visual narrative that invites the viewer to engage with the character on a profound emotional level.
In conclusion, mastering the art of 3D modeling requires more than just technical proficiency; it demands a blend of skill, creativity, and intuition. At SolidWorksAssignmentHelp.com, we're committed to empowering students with the knowledge and expertise they need to excel in this dynamic field. With our guidance, you can navigate even the most challenging assignments with confidence and finesse. Experience the difference today and unlock your full potential in the world of 3D modeling.
12 notes
·
View notes
Note
I see that you are using zbrush. Got any tips for someone who keeps getting holes in their even though i dont use dynamesh
When I get holes in my sculpts I usually duplicate the sculpt, dynamesh, then zremesh. Then you use the “project all” to suction it against the duplicate to get your details back. It usually works but holes are pretty hard to get rid of.
22 notes
·
View notes
Text
Plant 2 - Beginning The Modeling Process
This is the design I decided to start working on modeling next:

As my sense of perspective isn't great when it comes to 2D designs, I will only be using my drawings as a starting point for my final models, continually improving the looks of the plants throughout the development stages of modeling them.

I started off by creating the main body for my plant, creating new sub-tools for each of the plant's roots. I plan on having visible roots for this plant meaning some of the roots will be visible above ground as part of the plant's design. This will be due to the way it evolved from originating in the sea.

I then worked on the 'flower' part of my plant by creating separate sub-tools for each 'petal' so that I could work on each one individually, in doing so I can make each petal unique in shape and size to the rest.
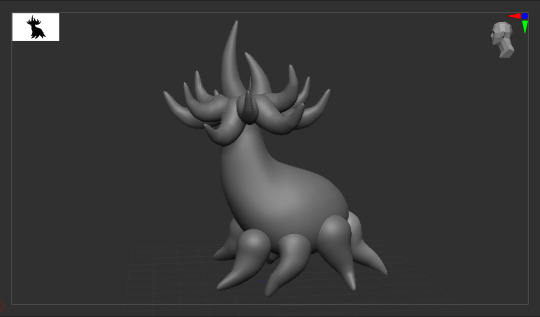
Here is a screenshot of the whole plant now all the 'petals' on the 'flower' part have been added.
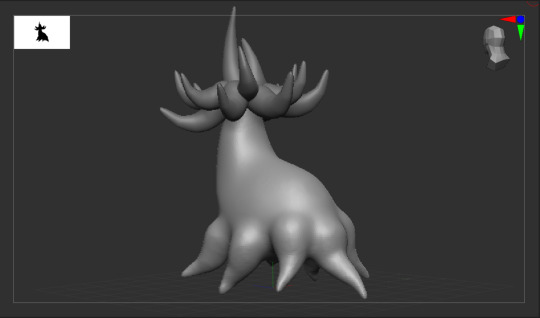
Finally, I used the Dynamesh tool to merge the 'roots' with the 'trunk' of the plant. I then smoothed the points where each sub-tool connected so the roots look like they are growing out of the trunk more 'naturally'.
I definitely feel this plant needs more work to make it look more realistic and convincing for it to link with my brief more closely. However, I am currently unsure how this plant can be improved without having feedback from my tutors first. Due to this, I will leave it how it currently is and start working on my next plant so that I can come back to this one once I have received feedback on it.
2 notes
·
View notes
Text
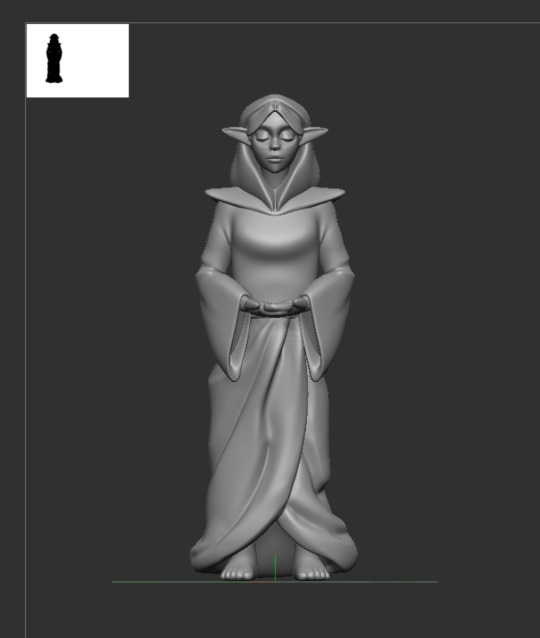
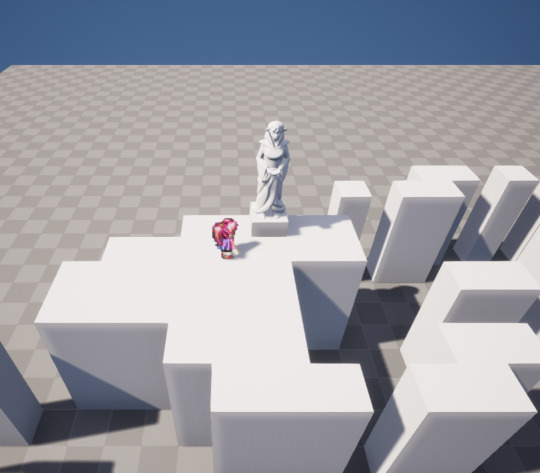
statue is in
god Im so annoyed at how many little issues I had to keep troubleshooting bc I have to keep re-remembering zbrush and forgetting basic shit. highlight of the night was that when I dynameshed the statue, it generated a bunch of tiny holes in a fold of the sleeve (the part of the mesh was too thin). I ended up just hollowing out the inside of the whole robe w the zmodeler (then masked out the inside and deleting. I feel there's gotta be a much more efficient way of doing this) so the robe was no longer doublesided and sealing the holes so that it was no longer thin. that did do the trick. but yeah I can't even name all the little issues I had to deal w. I don't plan to texture her anytime soon. I haven't retopoed her yet either, just a basic low res zremesh and projection for now and I might keep it that way since she's not gonna be rigged or anything. Will try to at least uv unwrap her later. For now I want to move onto lighting or the water
1 note
·
View note
Link
0 notes
Text
Portfolio, Documentation and Pitch (Aryan Raj Adhikari)
Modeling #3
As with every scrapyard, an immaculate debris pile is immediately noticed. I aim to model a couple of variations of the debris pile that seemingly meshes and blends with each other seamlessly to dress up my junkyard scene. To create a base for the debris pile, I jump back into Maya.
I deemed it much easier to create cracked stone pieces by utilizing the 'Shatter' effect inside Maya to shatter a cube so that it produces shattered stones that can be spread around the debris pile.
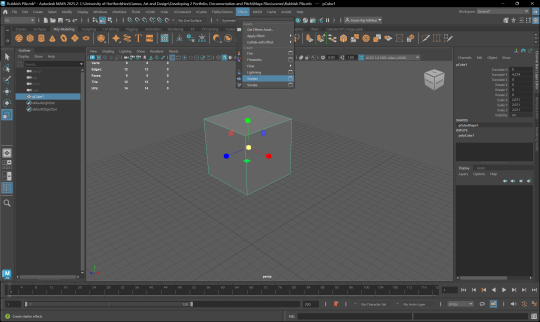
Figure 1 (Shatter effect in Maya)
It is a very simple procedure. You increase the scale of the cube, reposition it high up in the Z-axis and click on the 'Shatter' effect. You can also tweak parameters as to how many shattered pieces you want and so on. I tweaked the parameters to 12 pieces so that I have 12 different organic variations of shattered stones. You also would want a plane at the origin so that the stones don't fall through it which you can achieve by assigning a 'Passive Rigid Body' effect to it.

Figure 2 (Shattered stone pieces)

Figure 3 (Rigid body effect)
I then create a base for the debris pile on which the stones will be scattered. You can easily achieve this by applying a subdivision to a primitive cube as it makes the sphere more spherical. You can then use the soft selection to manipulate the faces to reshape the cube primitive.
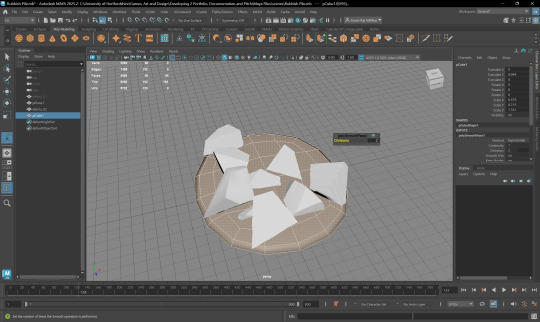
Figure 4 (Creating the pile base)
A quick and handy tip is to delete the faces which won't normally be visible inside the scene. For this instance, the lower faces of the debris pile will not be seen as I will also be sculpting the landscape inside the Unreal Engine which will overlap said faces.

Figure 5 (Deleting unwanted faces)
After finishing the base model for this, I will import this model inside ZBrush once again to start sculpting on it and add more stylized details. It is a very similar process to how I sculpted the tablet earlier.
I split all of the meshes into its own parts and dynamesh them with a resolution of 600 units. I then use the 'TrimDynamic' and the 'OrbFlattenEdge' brush together to achieve a stylized rock aesthetic.

Figure 6 (Stylization of rock assets)

Figure 7 (All of the rock assets stylized)
For this case, I wanted the rocks to have a very clean and polished look. I used the 'hPolish' brush to polish the sharp jaggedness of the sculpted rocks. I also did this not only for the edges of the rocks, but also for its faces to achieve a stylized flat polished aesthetic.

Figure 8 (Utilizing the hPolish tool)
To add some quick rock surface data, I also utilized the 'OrbRockDetail' brush to quickly overlay rock surface details onto it. However, if you used in high intensity, it will change the shape of the rocks and as so, working with a low intensity for this brush is the best approach.
To make the debris more believable and organic, I start manually rearranging the rocks in different positions. There probably is a better way to scatter assets inside ZBrush but as I am unaware of it, I took the lengthy approach. However, it gave me a lot of control as to the scales, rotation and the position of said rocks.

Figure 9 (Rearranging the rocks)
I also add a couple of IMM shapes like bricks, pipe pieces and nails to populate the debris pile so as to match the pile as closely as possible to 'Iron Giant'.

Figure 10 (Populating the debris)

Figure 11 (Stylizing brick shapes)
I simply used the hPolish brush to flatten and polish the surfaces of the bricks. Wouldn't work if the stones and the other components didn't share the same aesthetic. You can also use the OrbFlattenEdge brush to flatten the edges and make it look more painterly but I wanted it to have a bit of a surface detail variation and left it as it is.
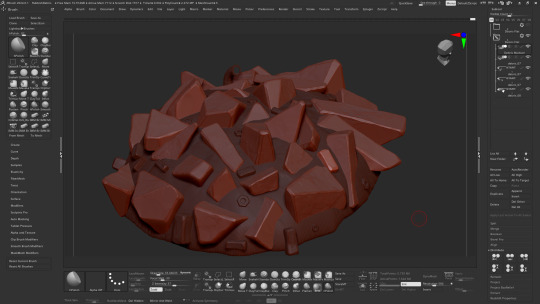
Figure 12 (Completion of stylized debris pile)
After the completion of this first debris pile, I start duplicating those said meshes and start creating different variations of it. Scaling it differently, placing the small meshes in different positions and rotating it can often fake variation and is really good for achieving diversity in meshes.

Figure 13 (Creating different variations of the debris pile)
After the completion of 3 variations of the debris pile, I start to prepare for the low poly versions of these pile that can be easily unwrapped. The normal workflow is to duplicate the high poly mesh, convert one of them into a low poly version and use the low poly mesh and the normal details of the high poly mesh while baking it. I duplicate those meshes, and compute the values for poly density so that I can decimate it.
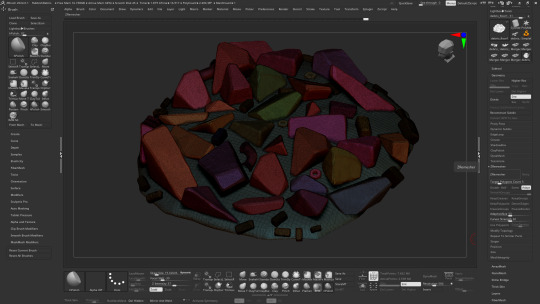
Figure 14 (Precomputing poly density of high poly mesh)
Once calculated, I decimate it to a very low poly density so that I can export both the high and the low poly models for texturing later.

Figure 15 (Low poly density of the debris pile)
1 note
·
View note
Text
UV Unwrapping on ZBrush
Today we will learn how to bake the details onto a UV unwrapped model in zbrush.
After zremeshing the base mesh
Bring it to maya (and retopologize)
Don't move the model so dont worry if its halfway through the grid. Freeze translations
clikc UV editor
manually uv unwrap or auto unwrap based on how u want the UVs to be unwrapped
rename it as uv_remesh
clear history
export as fbx (name it as uv_remesh)
open subtool and get a new model (idk he has a spehere)
go to import and get the fbx
sometimes it opens as a seperate layer (nothing inside subtool)
check the toolbox, both the projects are there
zremesh the imported model
if there's intricaate details on the dynamesh model we have to bake those details onto the low poly model. CLICK on uv remesh
geometry tab
(low res and high res subdivide the mesh.) clikc ctrl +d to subdivide. once should be enough (usually)
go to subtool and make sure the layers are off (eye icon should be off)
high poly mesh should be on top of the low poly. high poly mesh should be the only layer turned on, low poly mesh turned off
click low poly mesh
project tab
project all
click low poly mesh again and increase poly count (ctrl + d)
project all (keep repeating if not satisfied)
smooth brush to smooth out the projected details
go to geometry and reduce subdiv and export
increase subdiv and export
open substance painter and create new
template most used is pbr metallic roughness alpha blend (can use for blender maya and subtsane paitner)
turn off uv tile workflow
select and choose the low poly version and click ok
i missed some steps
under baking tab -> 1024
high definition mesh, click the document icon and find the high poly fbx. (if we dont have a high poly mesh we can just use the low poly one)
turn off ID to avoid unwanted baking errors
after this we can have the low poly model with the high detailed mesh. click the camera icon to see the render view (HDRI)
we can change the settings under this tab. scroll down and clear colour to get a more clear view of our model and cna choose the bg colour. shift + right clikc to rotate the lighting
clikc cam icon to go back to paintin mode
export textures
output template pbr metallic roughness, png, if we need high res change to 16bit, size and export
go to Maya and use substance painter plug in
select mesh
hypershader
right click mesh (in hypersahder)
assign selection to this mesh
all low and all high under subtool can also change the subdivisions so we dont have to go back and forth all the time.
base model on zbrush retopo on maya bring back to zbrush and add details
oh. I did not know this so I already added the details
Maybe I can still try with the models I have.
Refer to the screen recording.
Im too (mentally) exhausted for this T_T
Tip : When animating, use cameras
Place as many cameras as we need (I might need only 2)
Switch the view (in panels) to the camera view we want and have that view open in the side while we move the default perspective view.
Lock camera so the cam doesnt shift anywhere
We can now figure out what parts we have to move and reduce wasting time moving stuff that's not in the camera. We can easilt rotate the perspective view the way we want in order to access the controls we want to move and see the framed camera view at the same time. So we know what our output is.
1 note
·
View note
Text
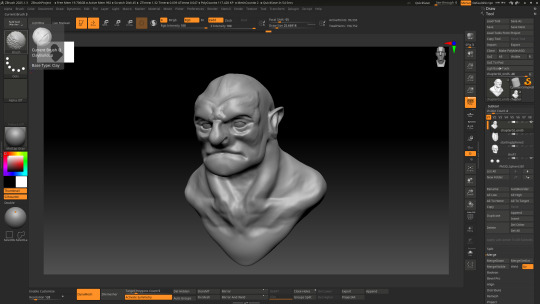
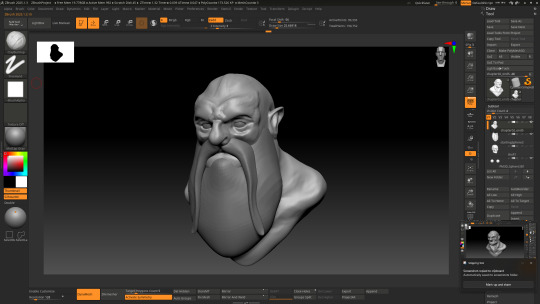
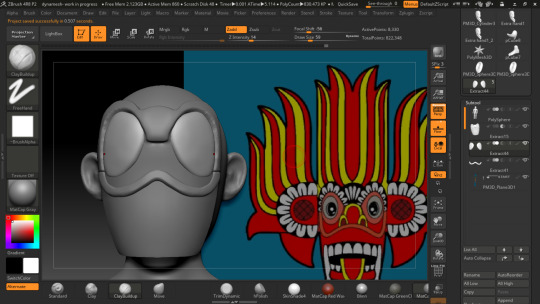
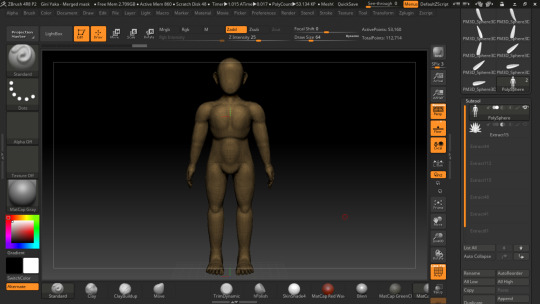
Head Sculpting process - Gini Yaka (Pt 6)
30/04/2025


keutlf7etitiewuyt fewgypewrge 9pg7 e/8t7 eti7g
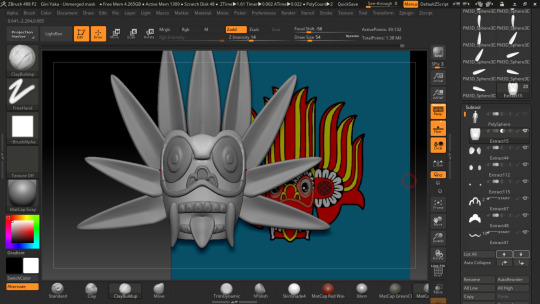


Issues
Zremesh and dynamesh :-
0 notes
Text
MODELLING: SILAS (HOMEOWNER) WIP - LEGS
After struggling through the face, hands, and upper body, I finally reached a part that didn’t completely overwhelm me; the legs. Compared to everything else, this section was actually pretty chill to work on.
I kept things simple and used two cylinders for each leg, one for the upper leg and one for the lower. That gave me a clean base to start shaping. Then I added a sphere for the knee, which helped make the joint area a bit more defined and easier to sculpt around. Once everything was merged and dynameshed, I used the usual brushes, Move, Smooth, HPolish, and Standard, to tweak the form and get the legs to look more natural.
The feet were even easier because I knew they were going to be covered by shoes later on. I just used another sphere and shaped it into a basic foot blockout. I didn’t bother with toes or fine details, just made sure the shape was solid enough to support the shoe sculpt later. It saved me a lot of time and made the process feel less overwhelming after all the work I did on the hands.
Overall, sculpting the legs was a nice breather. It reminded me that not every part of the model has to be super detailed right away, especially if it’s going to be covered up. Definitely a much smoother experience compared to the face or fingers.
0 notes
Text
STOP USING DYNAMESH! Use this instead 😎
4 notes
·
View notes
Text
mirror and blockibng out
build > merge
zpulgging > subtool master >mirror = legs , hands
ctrl + left clickn= masking
geometry > dynamic subdivision= smoother
geometry > dynamesh
0 notes