#find other AutoHotkey users
Explore tagged Tumblr posts
Visit Tumblr Blog
Explore Tumblr blogs with no restrictions, modern design and the best experience.
Last Seen Tumblr Blogs


Fun Fact
The average Tumblr user visits about 67 pages every month.
Text
AutoHotkey User Map: Where are you❓
Want to meet other AutoHotkey users like yourself? Take a look below and see if anyone is close to you and be sure to add yourself! This AutoHotkey User Map is a great way to find others that have common interests. AutoHotkey User Map
View On WordPress
0 notes
Text
the rising population of right-wing feminism and gender critical individuals on this website has become a major safety, peace of mind, and mental health issue for transgender individuals who are just trying to blog in peace,
if we could easily block all of them, it could reduce targeted harassment and mass report campaigns.
however it is very tedious to find and then block all of these people.
i started a list that can help us keep track of them and, i made a script to automate the process of blocking them.
the password is password
it is very simple, made in autohotkey. you can right click and open it in any text editor if youre suspicious.
it pulls urls from a text file called "list" and then blocks them all. it takes a few minutes to execute.
keeping the list updated and adding the most dangerous/problematic individuals will have to be a group effort.
the list i created has about 200 people, i tried to prioritize high profile, high aggression , and users i've seen harassing and dogpiling others most. if you know any users like this please use the submit or ask feature to share, so that i can add them.
if you dont trust my script, you can view just the list here, and make your own.
121 notes
·
View notes
Text
in my defense my current laptop is nearing a decade old and has two broken keys (AS IN COMPLETELY NON-FUNCTIONAL NOT JUST A KEY CAP BEING OFF) and ONE OF THEM IS THE LETTER E....
ive had to find ways to remap the E key at the very least bc copying and pasting it is a pain. for some reason actually remapping it would do NOTHING so i had to use autohotkey scripts to remap them........
but ofc that only works on windows so when i boot linux idk what to do (im retarded im not really an experienced user w any linux distros) . wlel i just copy and paste but it gets so old. and even copy-pasting is annoying as shit bc the letter V is the other broken one. you know. i cant fucking ctrl+v so its an even BIGGER pain in the fucking ass than normal.
anyway all this to say i fucking splurged because i wanted as much future-proofing as possible. and ofc i also prioritized the build quality a lot bc i dont want to end up dealing with non-functioning keys..... I'd rather it be somewhat viable for 10 years. maybe even more bc apparently the ram and gpu/cpu are upgradeable? well theyre not soldered to the board so it's possible if they're the right size at least ig. but would be amazing bc if i need to upgrade i can just go all out on that shit. i mean the screen isnt super duper amazing (it's like a 2K IPS screen) so idk that may still be a reason upgrade but eeehhh. maybe i will actually be knowledgeable enough to do something about it if possible by that point?? but either way. if it lasts 10 years I'll be happy.
id get a desktop but the issue is uhhh my space is a mess always and I'd rather have something really easy to move around. eventually one day maybe (but idk bc i want to be nomadic anyway.... maybe ill find ways to build my own though)
#I could google how to remap the keys on the distro family of the linux os i use ig but ive been busy with other things lmao#(trying to genericize google trademark so they can lose their rights :3)
3 notes
·
View notes
Text
Comment Utiliser AutoHotkey pour changer de bureau virtuel dans Windows 10
L’une des meilleures fonctionnalités de Windows 10 est la vue des tâches, que vous pouvez utiliser pour créer des bureaux virtuels. Ces bureaux sont un excellent moyen de distribuer et d’organiser les fenêtres de vos applications ouvertes. Vous pouvez appuyer sur Win + Tab (maintenez la touche Windows enfoncée et appuyez sur Tab) pour les voir dans la vue des tâches.
Cependant, une fonctionnalité non fournie par Microsoft est la possibilité de basculer instantanément vers un bureau virtuel spécifique avec un raccourci clavier. Par exemple, si vous êtes sur le bureau 2 et que vous souhaitez passer au bureau 6, vous devez maintenir Win + Ctrl enfoncé et appuyer quatre fois sur la flèche droite. Il serait beaucoup plus facile d’avoir un raccourci qui passe automatiquement au bureau numéro 6, quel que soit le bureau que vous utilisez.
Ce didacticiel vous montre comment créer des raccourcis clavier pour basculer directement vers n’importe quel bureau virtuel par numéro. Nous accomplirons cela en utilisant l’utilitaire Windows gratuit, AutoHotkey.
Création du script
Le programme d’installation se ferme et un nouveau fichier texte s’ouvre dans le Bloc-notes. Le fichier sera notre script. (Un script est un fichier en texte brut qui contient une série de commandes à exécuter par un autre programme, dans ce cas, AutoHotkey.)
RemarqueLe script de cette page est basé sur Windows Desktop Switcher, un script open source hébergé sur GitHub
Copiez et collez le script suivant dans votre document Bloc-notes:
; Globals DesktopCount = 2 ; Windows starts with 2 desktops at boot CurrentDesktop = 1 ; Desktop count is 1-indexed (Microsoft numbers them this way) ; ; This function examines the registry to build an accurate list of the current virtual desktops and which one we're currently on. ; Current desktop UUID appears to be in HKEY_CURRENT_USER\SOFTWARE\Microsoft\Windows\CurrentVersion\Explorer\SessionInfo\1\VirtualDesktops ; List of desktops appears to be in HKEY_CURRENT_USER\SOFTWARE\Microsoft\Windows\CurrentVersion\Explorer\VirtualDesktops ; mapDesktopsFromRegistry() { global CurrentDesktop, DesktopCount ; Get the current desktop UUID. Length should be 32 always, but there's no guarantee this couldn't change in a later Windows release so we check. IdLength := 32 SessionId := getSessionId() if (SessionId) { RegRead, CurrentDesktopId, HKEY_CURRENT_USER\SOFTWARE\Microsoft\Windows\CurrentVersion\Explorer\SessionInfo\%SessionId%\VirtualDesktops, CurrentVirtualDesktop if (CurrentDesktopId) { IdLength := StrLen(CurrentDesktopId) } } ; Get a list of the UUIDs for all virtual desktops on the system RegRead, DesktopList, HKEY_CURRENT_USER, SOFTWARE\Microsoft\Windows\CurrentVersion\Explorer\VirtualDesktops, VirtualDesktopIDs if (DesktopList) { DesktopListLength := StrLen(DesktopList) ; Figure out how many virtual desktops there are DesktopCount := DesktopListLength / IdLength } else { DesktopCount := 1 } ; Parse the REG_DATA string that stores the array of UUID's for virtual desktops in the registry. i := 0 while (CurrentDesktopId and i < DesktopCount) { StartPos := (i * IdLength) + 1 DesktopIter := SubStr(DesktopList, StartPos, IdLength) OutputDebug, The iterator is pointing at %DesktopIter% and count is %i%. ; Break out if we find a match in the list. If we didn't find anything, keep the ; old guess and pray we're still correct :-D. if (DesktopIter = CurrentDesktopId) { CurrentDesktop := i + 1 OutputDebug, Current desktop number is %CurrentDesktop% with an ID of %DesktopIter%. break } i++ } } ; ; This functions finds out ID of current session. ; getSessionId() { ProcessId := DllCall("GetCurrentProcessId", "UInt") if ErrorLevel { OutputDebug, Error getting current process id: %ErrorLevel% return } OutputDebug, Current Process Id: %ProcessId% DllCall("ProcessIdToSessionId", "UInt", ProcessId, "UInt*", SessionId) if ErrorLevel { OutputDebug, Error getting session id: %ErrorLevel% return } OutputDebug, Current Session Id: %SessionId% return SessionId } ; ; This function switches to the desktop number provided. ; switchDesktopByNumber(targetDesktop) { global CurrentDesktop, DesktopCount ; Re-generate the list of desktops and where we fit in that. We do this because ; the user may have switched desktops via some other means than the script. mapDesktopsFromRegistry() ; Don't attempt to switch to an invalid desktop if (targetDesktop > DesktopCount || targetDesktop < 1) { OutputDebug, [invalid] target: %targetDesktop% current: %CurrentDesktop% return } ; Go right until we reach the desktop we want while(CurrentDesktop < targetDesktop) { Send ^#{Right} CurrentDesktop++ OutputDebug, [right] target: %targetDesktop% current: %CurrentDesktop% } ; Go left until we reach the desktop we want while(CurrentDesktop > targetDesktop) { Send ^#{Left} CurrentDesktop-- OutputDebug, [left] target: %targetDesktop% current: %CurrentDesktop% } } ; ; This function creates a new virtual desktop and switches to it ; createVirtualDesktop() { global CurrentDesktop, DesktopCount Send, #^d DesktopCount++ CurrentDesktop = %DesktopCount% OutputDebug, [create] desktops: %DesktopCount% current: %CurrentDesktop% } ; ; This function deletes the current virtual desktop ; deleteVirtualDesktop() { global CurrentDesktop, DesktopCount Send, #^{F4} DesktopCount-- CurrentDesktop-- OutputDebug, [delete] desktops: %DesktopCount% current: %CurrentDesktop% } ; Main SetKeyDelay, 75 mapDesktopsFromRegistry() OutputDebug, [loading] desktops: %DesktopCount% current: %CurrentDesktop% ; User config! ; This section binds the key combo to the switch/create/delete actions LWin & 1::switchDesktopByNumber(1) LWin & 2::switchDesktopByNumber(2) LWin & 3::switchDesktopByNumber(3) LWin & 4::switchDesktopByNumber(4) LWin & 5::switchDesktopByNumber(5) LWin & 6::switchDesktopByNumber(6) LWin & 7::switchDesktopByNumber(7) LWin & 8::switchDesktopByNumber(8) LWin & 9::switchDesktopByNumber(9) ;CapsLock & 1::switchDesktopByNumber(1) ;CapsLock & 2::switchDesktopByNumber(2) ;CapsLock & 3::switchDesktopByNumber(3) ;CapsLock & 4::switchDesktopByNumber(4) ;CapsLock & 5::switchDesktopByNumber(5) ;CapsLock & 6::switchDesktopByNumber(6) ;CapsLock & 7::switchDesktopByNumber(7) ;CapsLock & 8::switchDesktopByNumber(8) ;CapsLock & 9::switchDesktopByNumber(9) ;CapsLock & n::switchDesktopByNumber(CurrentDesktop + 1) ;CapsLock & p::switchDesktopByNumber(CurrentDesktop - 1) ;CapsLock & s::switchDesktopByNumber(CurrentDesktop + 1) ;CapsLock & a::switchDesktopByNumber(CurrentDesktop - 1) ;CapsLock & c::createVirtualDesktop() ;CapsLock & d::deleteVirtualDesktop() ; Alternate keys for this config. Adding these because DragonFly (python) doesn't send CapsLock correctly. ;^!1::switchDesktopByNumber(1) ;^!2::switchDesktopByNumber(2) ;^!3::switchDesktopByNumber(3) ;^!4::switchDesktopByNumber(4) ;^!5::switchDesktopByNumber(5) ;^!6::switchDesktopByNumber(6) ;^!7::switchDesktopByNumber(7) ;^!8::switchDesktopByNumber(8) ;^!9::switchDesktopByNumber(9) ;^!n::switchDesktopByNumber(CurrentDesktop + 1) ;^!p::switchDesktopByNumber(CurrentDesktop - 1) ;^!s::switchDesktopByNumber(CurrentDesktop + 1) ;^!a::switchDesktopByNumber(CurrentDesktop - 1) ;^!c::createVirtualDesktop() ;^!d::deleteVirtualDesktop()
Enregistrez le fichier.
Ce script, AutoHotkey.ahk, se trouve dans votre dossier Documents. Ouvrez une nouvelle fenêtre de l’Explorateur de fichiers (clavier: Win + E) et accédez à Documents.
Exécutez le script en double-cliquant sur le fichier. Vous ne verrez rien se produire, mais AutoHotkey exécute maintenant le script.
Comment ça marche?
Le script fonctionne en gardant une trace du bureau virtuel que vous utilisez actuellement. Maintenez la touche Windows enfoncée et appuyez sur un nombre compris entre 1 et 9 pour basculer automatiquement vers la gauche ou la droite le nombre correct de fois pour accéder au bureau souhaité. (Si vous appuyez sur le numéro d’un bureau qui n’existe pas encore, rien ne se passera.)
Test de vos nouveaux raccourcis clavier
Pour le tester, créez d’abord un nouveau bureau virtuel. Pour ce faire, cliquez sur l’icône Affichage des tâches dans votre barre des tâches (ou appuyez sur Win + Tab), puis cliquez sur + Nouveau bureau. Ou utilisez le raccourci clavier Win + Ctrl + D.
Faites-le une fois pour chaque nouveau bureau virtuel que vous souhaitez créer. Chaque bureau supplémentaire sera orienté à droite du précédent.
Maintenant, vous pouvez basculer vers l’un de ces bureaux à l’aide des raccourcis clavier définis dans le script. Maintenez Win et appuyez sur un nombre entre 1 et 9, et vous basculerez automatiquement sur ce bureau numéroté. Par exemple, appuyez sur Win + 3 pour basculer vers le troisième bureau virtuel à partir de la gauche.
Arrêt du script
Pour arrêter d’utiliser le script, accédez à votre barre d’état système et cliquez avec le bouton droit sur l’icône AutoHotkey, qui ressemble à un grand « H » vert pour afficher le menu de notification Windows AutoHotkey.
Remarque Si vous ne voyez pas l’icône, utilisez le bouton caret ^ pour afficher les icônes cachées.
Dans ce menu, vous pouvez suspendre les raccourcis clavier, suspendre le script ou quitter complètement AutoHotkey. Chacune de ces actions ramène vos raccourcis à la normale.
Exécution automatique de votre script au démarrage de Windows
Pour exécuter le script automatiquement à chaque démarrage de Windows, déplacez le script dans votre dossier de démarrage.
Sous Windows 10, le dossier de démarrage se trouve à l’emplacement suivant:
[Votre dossier personnel] \ AppData \ Roaming \ Microsoft \ Windows \ Menu Démarrer \ Programmes \ Démarrage
Ce dossier est normalement masqué, vous ne pouvez donc y accéder que dans l’Explorateur de fichiers si vous sélectionnez Affichage → Afficher les fichiers cachés en haut de la fenêtre de l’Explorateur.
Cependant, vous pouvez également accéder directement au dossier de démarrage en entrant le chemin d’accès complet au répertoire dans la zone Exécuter. Appuyez sur Win + R pour ouvrir la zone Exécuter, puis tapez le chemin d’accès complet au répertoire. Vous pouvez utiliser la variable d’environnement% APPDATA% pour remplir automatiquement le début du nom du chemin. Par exemple, vous pouvez saisir ceci dans la zone Exécuter:
% APPDATA% \ Microsoft \ Windows \ Menu Démarrer \ Programmes \ Démarrage
Lorsque vous appuyez sur Entrée, ce dossier s’ouvre dans une nouvelle fenêtre de l’Explorateur de fichiers.
Déplacez maintenant votre script dans ce dossier. Si votre dossier Documents est toujours ouvert dans une autre fenêtre, faites glisser et déposez AutoHotkey.ahk dans le dossier Démarrage.
Si vous décidez de ne pas exécuter le script automatiquement à chaque démarrage de Windows, ouvrez à nouveau ce dossier et déplacez le script ailleurs. Vous pouvez toujours l’exécuter manuellement en double-cliquant dessus, peu importe où il se trouve sur votre ordinateur.
Notes complémentaires
Ce script remplace les raccourcis Windows par défaut pour Win + (Number), qui ouvrent normalement les éléments de votre barre des tâches (Win + 1 ouvre le premier élément, etc.). Cependant, certaines applications Windows intégrées telles que Paramètres ou Store ignorent le script d’AutoHotkey.
Si vous êtes sur l’une de ces fenêtres lorsque vous essayez des raccourcis clavier, il utilise le comportement des raccourcis clavier Windows et ouvre quelque chose à partir de votre barre des tâches au lieu d’un nouveau bureau. Une autre chose à garder à l’esprit est que AutoHotkey bascule rapidement de gauche à droite entre vos bureaux virtuels, un par un. S’il tombe sur un bureau virtuel où l’une de ces applications spéciales est ouverte, il arrêtera de basculer et restera sur ce bureau.
Malheureusement, les raccourcis Windows par défaut ne peuvent pas être désactivés, ce qui n’est pas pratique, mais à moins que l’une de ces fenêtres d’application ne soit ouverte, le script AutoHotkey fonctionne correctement. Vous constaterez que le script fonctionne parfaitement avec 95% de vos autres programmes.
Cependant, si vous préférez, vous pouvez modifier votre script AutoHotkey pour utiliser une combinaison de touches différente.
Modification de votre script AutoHotkey
Ouvrez le Bloc-notes (Démarrer → Accessoires Windows → Bloc-notes).
Dans le Bloc-notes, ouvrez le fichier AutoHotkey. Si le dossier Démarrage est déjà ouvert, vous pouvez faire glisser et déposer l’icône sur la fenêtre du Bloc-notes pour ouvrir le fichier.
Ou, vous pouvez l’ouvrir en allant dans Fichier → Ouvrir dans le bloc-notes et en entrant le nom de fichier% APPDATA% \ Microsoft \ Windows \ Menu Démarrer \ Programmes \ Démarrage \ AutoHotkey.ahk.
Lorsque le fichier est ouvert, vous pouvez apporter des modifications au script en fonction de vos besoins. Par exemple, si vous préférez utiliser la combinaison de touches de raccourci CapsLock + (Number), recherchez ces lignes dans le script:
LWin & 1::switchDesktopByNumber(1) LWin & 2::switchDesktopByNumber(2) LWin & 3::switchDesktopByNumber(3) LWin & 4::switchDesktopByNumber(4) LWin & 5::switchDesktopByNumber(5) LWin & 6::switchDesktopByNumber(6) LWin & 7::switchDesktopByNumber(7) LWin & 8::switchDesktopByNumber(8) LWin & 9::switchDesktopByNumber(9)
In these lines, change LWin to CapsLock:
CapsLock & 1::switchDesktopByNumber(1) CapsLock & 2::switchDesktopByNumber(2) CapsLock & 3::switchDesktopByNumber(3) CapsLock & 4::switchDesktopByNumber(4) CapsLock & 5::switchDesktopByNumber(5) CapsLock & 6::switchDesktopByNumber(6) CapsLock & 7::switchDesktopByNumber(7) CapsLock & 8::switchDesktopByNumber(8) CapsLock & 9::switchDesktopByNumber(9)
Enregistrez vos modifications et double-cliquez sur le script pour le mettre à jour dans AutoHotkey. Si vous avez fait des erreurs dans votre script, AutoHotkey ne l’exécutera pas et vous donnera un message d’erreur. Sinon, il vous demandera si vous souhaitez mettre à jour le script déjà en cours d’exécution:
Choisissez Oui pour que vos nouvelles modifications prennent effet.
Si vous avez une idée pour une combinaison de touches de raccourci différente, vous pouvez la remplacer par n’importe quelle combinaison de touches de raccourci qui n’est pas déjà utilisée.
Choisir une combinaison de touches
AutoHotkey a ses propres mots et caractères spéciaux qu’il utilise pour représenter les touches du clavier dans ses scripts. Par exemple, la touche Ctrl est représentée par un point d’exclamation. Pour utiliser Ctrl + (Number) comme combinaison de raccourcis clavier, vous pouvez remplacer « CapsLock & » par « ! » dans votre script. Ensuite, les lignes ressembleraient à ceci:
!1::switchDesktopByNumber(1) !2::switchDesktopByNumber(2) !3::switchDesktopByNumber(3) !4::switchDesktopByNumber(4) !5::switchDesktopByNumber(5) !6::switchDesktopByNumber(6) !7::switchDesktopByNumber(7) !8::switchDesktopByNumber(8) !9::switchDesktopByNumber(9)
Notez que lorsque vous utilisez un symbole plutôt qu’un mot, vous ne devez pas utiliser « & » dans la syntaxe du script. Cette règle est l’une des règles spéciales qu’AutoHotkey utilise dans son langage de script.
Vous pouvez trouver une liste complète de tous les mots et symboles spéciaux pour les scripts AutoHotkey autohotkey.com/docs/KeyList.htm.
from WordPress https://zuatutos.com/utiliser-autohotkey-pour-changer-de-bureau-virtuel-dans-windows-10/
1 note
·
View note
Text
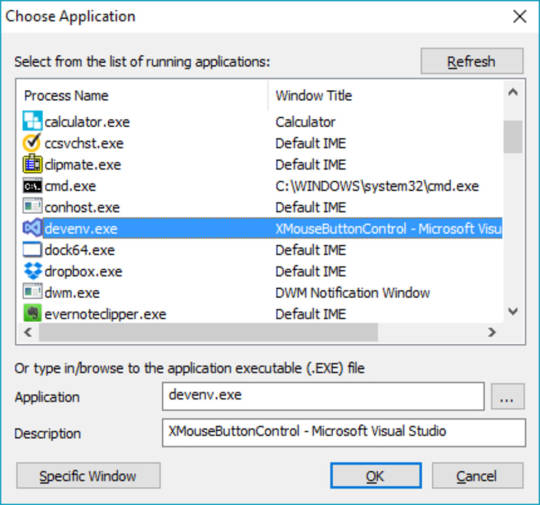
Windows 10 change keyboard hotkeys 無料ダウンロード.How to Change Keyboard Language Shortcut in Windows 10
Windows 10 change keyboard hotkeys 無料ダウンロード.ASUS Keyboard Hotkeys

WindowsでShotcut日本語版をダウンロードしてインストールする方法.【Widnows10】「KeySwap」を使って使わないキーの置き換えをする! | 人生には山と
Aug 13, · ShotcutとはWindows、Mac、Linuxといったマルチプラットフォームで動作する無料動画編集ソフトです。 動画編集フリーソフトと言ったら、レイヤー対応できなくて、カット、結合など簡単な初心者向けのものが多いが、Shotcutはプロにも満足できる豊富な動画編集機能を搭載しているフリーソフトです。 Windows 10 向けの Microsoft Store からこのアプリをダウンロードします。スクリーンショットを確認し、最新のカスタマー レビューを読んで、ASUS Keyboard Hotkeys の評価を比較してください。 Apr 29, · Let’s say you want to change the Ctrl+X keyboard shortcut to do what Ctrl+C does. To do that, you will enter the following in the Notepad file; ^x::Send ^c return. Here, the ‘^’ symbol denotes the Ctrl key and the x shows what it’s being combined with. The part followed by Send shows what keyboard shortcut will be executed when you Estimated Reading Time: 2 mins
Windows 10 change keyboard hotkeys 無料ダウンロード.How to Change Keyboard Language Shortcut in Windows 10
AutoHotkey is a free, open-source scripting language for Windows that allows users to easily create small to complex scripts for all kinds of tasks such as: form fillers, auto-clicking, macros, etc Meet AutoHotKey. So let’s start with the bad news, which is that there is no native way to change the default keyboard shortcuts in Windows. After all these years, Microsoft still isn’t willing to offer that simple bit of flexibility, presumably for fear that you’ll want to use its shortcuts to access non-Microsoft apps which is probably the ted Reading Time: 4 mins Jul 14, · 今回使用させて頂くソフト「KeySwap」は特定のキーの挙動を変更したり、無効化したりできるフリーソフトです。. 全くの無効化だと、今度は「 押してるのに動かない 」というストレスが発生しそう 。. なので、今回は以下のように設定してみます!. [home]キーを押すと [backspace]キーとして機能する. [pg up]キーを押すと [enter]キーとして機能する. [pg dn]キーを押すと
Just right-click the executable for whatever it is you want to create a shortcut to, click Properties, then enter your command into a box. More on creating custom shortcuts here. For this, we need a tool called AutoHotKey. Also read: 15 Useful Windows Registry Hacks to Optimize Your Experience. This is a script creator tool that can be used for all kinds of creative purposes , but today we are looking specifically at how you can use it to change the default Windows shortcuts.
Next, we familiarize you with the basics of the Auto Hotkey syntax you need to know to change Windows shortcuts. Most Windows shortcuts use some combination of the below buttons, so this should be enough to get you started. If you want to type a letter, you just literally type that letter, while buttons like Esc , Del and others can also be directly typed into your script.
You can find a convenient list of the main Auto Hotkey syntax at this site. First enter the shortcut you want to use and follow this with ::Send , then a space and the shortcut you want your custom shortcut to replace. Because the Esc key is a command rather than a standard key, we put it in the special brackets. With all your keyboard shortcut replacements, we recommend adding a second line to the script with the text NoTrayIcon.
This will block the Auto Hotkey tray icon from popping up, ensuring that the whole process stays in the background. Once your script is ready, close it and save it, then double-click the script to run it and test your keyboard shortcut to see if it does what it should. Type in the following command:.
The :: is what separates the hotkey from the action you want it to perform. Also read: How to Customize Keyboard Shortcuts in Gmail. Your shortcuts work as soon as you boot Windows and move the. ahk script to your system startup folder in File Explorer — C:ProgramDataMicrosoftWindowsStart MenuProgramsStartUp.
Do the same for all your keyboard shortcut replacements. If you want to stay knee-deep in Windows, see our list of the best sandbox applications for Windows 10 , and how to convert legacy BIOS to UEFI in the OS. By signing up, you agree to our Privacy Policy and European users agree to the data transfer policy. Content Manager at Make Tech Easier. Enjoys Android, Windows, and tinkering with retro console emulation to breaking point.
You've decided to leave a comment. That's fantastic! Check out our comment policy here. Let's have a personal and meaningful conversation. Save my name, email, and website in this browser for the next time I comment. Notify me of follow-up comments by email.
Windows 10 Start Menu Search Not Working? Here Are 12 Fixes. How to Clean Up and Make Space on Your Windows "C" Drive. How to Fix "The Parameter Is Incorrect" Error in Windows.
Affiliate Disclosure: Make Tech Easier may earn commission on products purchased through our links, which supports the work we do for our readers. Here we show you how to change the keyboard shortcuts in Windows 10 using this great tool. s:: run , "C:Program FilesEverythingEverything. Is this article useful? Yes No. Never Miss Out Receive updates of our latest tutorials.
Sign up for all newsletters. I would like to receive newsletters via email. We will not share your data and you can unsubscribe at any time. Robert Zak Content Manager at Make Tech Easier. Leave a comment. Facebook Tweet. Leave a Comment Cancel reply Yeah! Contact me by phone only. Popular Posts INNOCN PFPRO Portable Touchscreen Monitor Review Sponsored. What You Should Do If Windows Fails to Start. Headphones Not Working in Windows? Here Are Some Fixes.
Here's How to Fix it. Settings App Not Working in Windows 10? Here Are the Fixes. Latest Windows 10 Update Problems and How to Fix Them. How to Safely Bypass the TPM 2. Why Encryption Is Not Working on Windows 11 Home, and How to Fix It.
Find and Open Files Using Command Prompt in Windows.
0 notes
Text
X Mouse Button Control Download Mac
Xmouse Mac
X Mouse Button Control Download Mac Free
X Mouse Button Control Download Mac Free
Aug 17, 2020 XMBC is not available for Mac computers. Alternatives to X-Mouse Button Control include Mouse Speed Switcher, Remote Mouse, and AutoHotKey. There is also a portable version of XMBC available called X-Mouse Button Control Portable. Downloading X-Mouse Button Control is easy. The Magic Mouse 2 eschews buttons for a touch-sensitive surface, which supports a decent range of gesture controls; so in addition to left and right buttons you can scroll sideways or horizontally, and also two-finger tap, extending Apple’s multi-touch functionality to its mouse. Oct 24, 2011 Download X-Mouse Button Control for Windows to rearrange your mouse button actions and automate various regular operations. X-Mouse Button Control has had 1 update within the past 6 months. X Mouse Button Control Download Mac 12/7/2020 A computer generally can’t function fluidly without a mouse, but often the mice are inconvenient and need an upgrade. On the Apple menu, click System Preferences. Click Microsoft Mouse. Note If this is the first time that you add a customized setting for a program, you may receive the following message: You are about to add an application and create a custom setting for it. Select the desired program in the next window.
Apple’s macOS and Windows have always had the same relationship as Android and iOS. In both markets, Apple’s offering is considered to be more secure and locked down. In both markets, it is also way behind in terms of market share. What is not debatable though is the aesthetics of Apple’s operating systems. Whether it is macOS or iOS, even users who didn’t choose to go the Apple way are fascinated by just how nice macOS or iOS look. You can download the macOS cursors for Windows 10 from below and learn to install and apply them on your PC.
This is why you’ll find a ton of different themes and hacks to make Windows look like macOS. Apple’s focus on aesthetics is undeniable but it’s not for everyone. Prices do play an important role but there are other factors as well that make some people prefer Windows. Gaming is one of them, for example. However, that doesn’t mean you can’t still secretly desire a Mac for its looks. If you do, there are many themes, icons, etc. that can help you emulate the look. It will still be windows and never really look the part but it’s worth trying.
An important aspect of making Windows look like macOS would be the cursors. Windows cursors are quite flat and boring while mac cursors are prettier and more animated. The cursors on both operating systems quite clearly define them. If you like the way the cursors look and behave on a Mac, you can get those Mac cursors on Windows. By using these 8 Windows 10 mouse tricks you can increase your productivity further.
Download macOS cursors for Windows 10
You can thank
Download Cursors (Windows)

Install Mac cursors on Windows 10
Download the Mac cursors on Windows from the link provided above.
On the page that opens up, click Clone or download and select Download ZIP.
Extract the zip file and navigate to the .windows folder inside.
Now right-click on the install.inf file and select Install.
Applying the cursors
To apply the cursors, go to Settings > Devices and click on Mouse in the left column. On the right, click on the Additional mouse options link.
In the MouseProperties window that opens, head to the Pointers tab and select Capitaine Cursors from the drop-down menu.
Click on Apply and OK to apply the changes and close the window. You should notice that your cursor changes as soon as you click Apply. If you don’t like the new theme and want to go back to the more visible, white Windows cursor, you can do this from here again by selecting Windows Default (system scheme). You can now enjoy macOS cursors on your Windows 10 PC. You should also learn how you can swap the right and left button on your mouse.
Read Next: How to Change Drive Letter in Windows 10 File Explorer
Use your gamepad or joystick like a mouse and keyboard on Mac OS X.
Xmouse Mac
Enjoyable-1.2.zip (311KB)
git clone http://git.yukkurigames.com/enjoyable.git
Requirements
Mac OS X 10.7+
One or more HID-compatible (e.g. USB or Bluetooth) input devices
Mappings
I play games with a Playstation 3 controller, so these will be useless if you have a different controller. These are the mappings I use for games I like. To use them, just save them and double-click on them in Finder, or use ⌘O in Enjoyable to import them.
License
2013 Joe Wreschnig, 2012 Yifeng Huang, 2009 Sam McCall
Enjoyable is free software written by Joe Wreschnig and is based on the Enjoy codebase written by Yifeng Huang and Sam McCall.
X Mouse Button Control Download Mac Free
Permission is hereby granted, free of charge, to any person obtaining a copy of this software and associated documentation files (the 'Software'), to deal in the Software without restriction, including without limitation the rights to use, copy, modify, merge, publish, distribute, sublicense, and/or sell copies of the Software, and to permit persons to whom the Software is furnished to do so, subject to the following conditions:
X Mouse Button Control Download Mac Free
The above copyright notice and this permission notice shall be included in all copies or substantial portions of the Software.
0 notes
Text
Windows 10 - Keep a Window Always on Top

When working in Windows it's often useful to have certain windows stay on top of others using the "always on top" feature that some programs (such as Windows Media Player) natively offer. owever, most software don't have such feature and Windows 10 doesn't offer a standard way to allow such behaviour. In this post we'll be looking at some useful alternatives to emulate the "always on top" feature using freeware and open-source third-party tools.
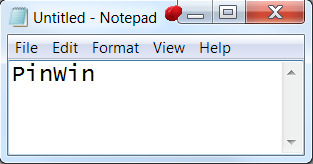
#1. PinWin
PinWin stands for "Pin Windows" and it's the spiritual successor of DeskPins, a great tool that allowed to emulate the Always on Top feature since Windows 7 but stopped working on Windows 8 and higher. The software has been written by Victor Zakharov and it's freely available on GitHub under MIT license.

#2. AlwaysOnTop
AlwaysOnTop is a C# software tool written by Joshua Parnell and released under GNU GPL v3.0: once installed, it sits in the system tray. Once it's there, you can click the icon in the tray, activate the "AlwaysOnTop" feature and select the window you want to stay on top (the cursor will be the cross while waiting for the window). The tool is compatible with Windows 7 - Windows 10 and all versions in between, both 32 and 64 bit and requires .Net Framework 4.5.2. To download it, visit the GitHub official page.
#3. VirtuaWin
VirtuaWin is a virtual desktop manager for the Windows operating system (all recent versions) released under GNU GPL v3.0. It lets you organize applications over several virtual desktops (also called workspaces): the good part about it is that, once installed and activated, any window can be made "Always on Top" with a single middle click on the title-bar. The tool can be downloaded on its official page on SourceForge.
#4. AutoHotKey
AutoHotKey is a free, open source macro-creation and automation software utility, licensed under the GNU GPL v2, that allows users to automate repetitive tasks. It is driven by a custom scripting language that is aimed specifically at providing keyboard shortcuts, otherwise known as hotkeys. It can be downloaded from the AutoHotKey official webpage. If you're unfamiliar with AutoHotkey and want to know more about how it works, you can learn how to use it using the official tutorial. Just like VirtuaWin, the tool's main purpose is not related to the "Always on Top" feature, but can be easily used to emulate such behaviour with a single line of code: The above one-liner can be put in a AutoHotKey script file to make any window Always on Top using a custom CTRL+Space hotkey. If you don't want to use a keyboard-activated hotkey, here's a script that will allow to emulate the "Always on Top" feature using the GUI: Once the above script has been activated, you can click to the AutoHotKey icon on the taskbar and select "Toggle Always On Top" to make any Window stay always on top.
Conclusion
That's it, at least for now: if you want to know other software alternatives to keep a window always on top, take a look at this other post by windowschimp.com: - 6 Ways to keep an App Window Always on Top in Windows 10 We sincerely hope that these useful tools will help you to find an easy and convenient way to emulate the "always on top" feature on Windows 10. Read the full article
0 notes
Text
Version 302
youtube
windows
zip
exe
os x
app
tar.gz
linux
tar.gz
source
tar.gz
I had a great week. I've finished up the new 'simple downloader' and wrote a new way for subscriptions to run simultaneously.
simple downloader improvements
I have rounded out the new simple downloader, which replaced the old 'page of images' downloader last week. Its parsers have more descriptive names and it can import and export parsers for sharing. And it remembers which parser it had selected through a session restart.
I also reintroduced the old 'all files linked by images in a page' behaviour from the old page of images downloader. This parse method, which fetches anything linked to by an image in the entered URL, is a useful catch-all for threads from as-yet unsupported imageboards and other miscellaneous tasks.
I also added new parsers for mewch threads, webmshare file pages, and imgur image albums. The imgur album parser only works for the first page of results (about ten images) right now--we'll have to wait for the cleverer gallery parser to get full support.
simultaneous subscriptions
Subscriptions can now run in parallel! The new setting for how many can run at once is under options->downloading. I have kept the default as 1, so you will not see any change if you do not touch anything, but if you would like to bump it up to 2 or 3, please give it a go and let me know how it works for you.
This is new code, so I recommend not turning it up to 11 yet. I've improved how some of the bandwidth calculations work here, but I can't promise a very heavy situation will not result in a traffic jam.
misc
After a long time of hating the name, I have changed 'explicit tags' to 'additional tags'.
If you like, you can now set media to scale to 100% by default, even when the media is larger than the media or preview canvas size.
Some unusual searches that were formerly not returning any results (like 'akaiha_(akaihasugk)' on danbooru) should now be fixed. This was due to bad site-side markup not parsing correctly clientside. Users who run from source may like to check to see if they have 'html5lib' installed, which is the new parser I now prefer above the old 'lxml'.
new html parsing options
This is for advanced users getting into the new parsing system only!
To get the old 'all files linked by images in a page' behaviour working again, I had to update the new html parsing formulae to walk up the tree (ascending) as well as search down it (descending). So in any normal parsing step, as well as saying 'find all the img tags', you can now say 'walk back up the tree until you hit an 'a' tag'!
Also, you can now set a descending rule without an explicit tag name, so you can say 'find all tags with class="thumb"' without having to specify div or span or whatever. If you are a mad man, you can also just search for 'all tags' without any qualifiers, wew.
full list
improved how simple downloader parsing formulae are stored and passed around
the edit simple downloader parsing formulae panel now has an 'add defaults' menu button
the simple downloader formula edit panel handles its buttons better and can now do import from/export to clipboard/png and reimport from the defaults, and fixes duplicate names automatically
simple downloaders now remember their current parser through a session save/load
simple downloaders will set a new default parser selection for new simple downloader pages on any choice event
renamed all the default simple downloader parsers to more clearly explain what they do
added 'all files linked by images in page' to the simple downloader, which does the old page of images' behaviour, and is hence pretty decent for most imageboards
added a simple mewch thread html parse formula to the simple downloader
added a very simple webmshare parse formula to the simple downloader
added 'imgur image album' to the simple downloader, which will fetch the first 'page' of results from an image album. full parsing will have to wait for the gallery downloader update
subscriptions can now run simultaneously! you can set the max number at options->downloading page--the default remains 1, so default behaviour will not change
if subscriptions guess they can eat some bandwidth in the next 30s but it turns out they can't, they will bandwidth-override that last job after the 30s expires. this will stop some edge cases from causing subs to potentially hang for hours just on one last request
'explicit tags' are now renamed to 'additional tags'
you can now set media to initially scale to 100% even when it is larger than the media or preview canvas
the html parsing formula can now 'ascend' as well as search down the DOM tree--so, for instance, you can find all 'img' below an 'a' and then jump back up to the 'a' to fetch the 'href' of that image link!
html parsing formulae can now search without a tag name--so, for instance, 'find all tags with class = "whatever"' is doable, without having to specify div or span etc..
the html parsing formula rule panel is hence a bit richer. it also presents a preview of the rule's string as you edit
the client no longer needs lxml to boot, and if html5lib is present, it will prefer that for html parsing. if both libraries are missing and html parsing is requested, it will raise an exception explaining the error
the builds now include html5lib, which is better at recovering from some bad markup than lxml, and as a result some parsing jobs that formerly did not work (such as 'akaiha_(akaihasugk)' on danbooru) now do
rewrote how services test their functional status to better account for different states. the logic here should be a bit better now--repositories will still be able to process if their network side is down, but everything will pause if any pause is set, and it should all propagate up to higher levels of error catching and status reporting better
hydrus can now deal with really big decompression bombs (>~180 megapixel)
filtered out en-dashes (as an alternative to standard hyphens in a "? + -" link-prefix) from booru tag parsing
fixed a string generation issue that was stopping date decode string transformations from summarising themselves
fixed some catastrophic boot failure gui reporting
cleaned up a double-exit error on dialogs that could occur when spamming exit events with a script like AutoHotkey
improved some dead cpu thread clearout code
updated misc old code
misc cleanup
next week
With the simple downloader finished, I want to get into the meat of the gallery downloader. The first step of this will be allowing drag and drop of arbitrary booru/whatever file page URLs onto the client.
2 notes
·
View notes
Text
Where to find me across the web
During the last few months I have had followers from Tumblr send me friend requests on Facebook. Apologies to those whose requests I have not accepted. I keep my Facebook 'friends' to folk I know and family. I add folk I know from Tumblr if its someone whose blog I follow or we have spoken via messaging a few times. Those not on my friends list aren't missing anything though, I rarely use Facebook and mainly use it for keeping uptodate with local political events and conversing with family members who have not progressed their IT skills beyond using Facebook. For those wanting to get in touch, I am always happy to reply to questions or direct messages on Tumblr. For those wanting to follow me across the web I decided to put together a quick list of websites and social networks I am part of where I am happy to accept follows / friend requests from anyone. Constellations - My new(ish) website. It has a Wordpress blog I use for longer posts as well as pages providing further details about myself and my academic interests and links to my academic publications and other outputs. There is not an abundance of posts at the moment as not had much spare time this year due to private renting hell (including having no heating, hot water, or a working fridge for two months) and now most of my "free" time being sacrified at the grind mill of job hunting. Despite that, I have a bunch of draft posts. These include write ups of topics I have covered on this Tumblr blog in the past: post-philosophy, Bourdieu's legacy, theoretical-empirical research, the need for historical sociology, etc. I also have two planned series of posts. One featuring useful apps, software, and services for academics and another on various tips and tricks for working with NVivo. Until I secure another job I am aiming to publish at least one post a month. ResearchGate - Another place to follow my academic work and outputs. Twitter - I cross-post all my Tumblr posts here but also include links to news articles, etc relevant to my areas of academic interest. as well as the usual random rant / irrelevant commentry on life in general. Zotero - It's a shame academics do not make more use of Zotero. Particularly, via Zotero groups it is possible to share citations, notes, and PDFs that could be a great way to find out about new publications if more people actively used them. A while ago I setup two groups. One for sharing a list of citations for all articles I comment on or post quotes from on this blog. The other for articles I have come across related to welfare conditionality. GitHub - Through frustration with existing academic software (mainly NVivo) I have recently taken up programming again. On my GitHub I have repos for my NVivo scripts to speed up adding attribute data and adding a new keyboard coding UI, the AutoHotKey script I shared here before adding new copy and paste options, and a holding repo for my planned Python-based open source QDAS called Pythia (I have a draft blog post on why there is a need for an open source QDAS, why the name Pythia, and the development and design philosophy). I also have in the early stages of development a research contact database and log called Mercury to help with longitudinal research. I originally planned to have a v0.1 of Pythia ready (consisting of project file creation, coding and node retrieval UI, and basic integration with quantitative Python packages) by March 2018. However, the date is likely going to have to be pushed back to roughly 5-6 months after I find further employment. GoodReads - Moving slowly into the less academically relevant. I am an avid user of GoodReads as I tend to be slowly working my way through 20+ books at any one time. Another website its a pity it isn’t more widely used. Last.fm and Trakt.tv - In the exceptionally rare situation that you have similar music or film taste as me and have any recommendations. Lichess and Chess.com - I remain beyond hopeless at chess but have never given up my intention to improve and play more. Unfortunately, few people I know IRL are into chess and those who are are well above my skill level. Happy to accept challenges from any fellow novice players. Quick final note - if you follow me and run an academic Tumblr blog whose content is mainly text, quotes, or links please give me a shout and I'll likely follow back. There has been a dispiriting dearth of academic Tumblr users during the last couple of years, and many of those I followed have left the platform. Always on the look out for new folk to follow.
2 notes
·
View notes
Text
How to Surf a Brexit Tsunami on the Translation Market

Weeks during and after the BreXit might bring a lull (with a momentary lapse – of reason?) in the translation market. Many projects might be on hold until the situation settles down for those of us translators who have several customers in the UK. But 2019 is promising a lot of work for translators and the expected lull, for those who will be feeling it, could look like that low tide before the tsunami. When the wave comes, it is necessary to be well prepared to be able to surf the crest and not be swallowed by the whirlpool. So this is an excellent time to upgrade and equip yourself to work harder and better. Here are a few suggestions to be ready for the translation market after Brexit. — Take the opportunity to read those texts lined up on the shelf and look for new books and blogs on translation and subjects of interest to us. ExtraSpeech blog about translators and translation (:)) and Between Translations, a website about translation by Jayne Fox, German-to-English translator has a large collection of articles. There is also the Translation Journal. For Facebook users, there are topics in the Translators and Interpreters forum that bring together quite a few suggestions for readings for translators. Remember: you are what you read. — Buy or subscribe to a few more dictionaries on CD or on the Web. Although I still find my dictionary books beautiful, looking at words on paper is not efficient at all and not fun any more. Most of the free Internet dictionaries are also incomplete. Also, it really pays to update your (Multiterm) glossaries and your TMs. — Make improvements in your workspace. To work well for many hours a day, you need to take care of ergonomics to prevent spine pain, circulation problems and RSI, and have your computer ready to work intensely for at least a year. It is not always necessary to spend a lot of money, but it can make all the difference. For example, treat yourself with a footrest (and I have a padded chair to make my life more comfortable), buy yourself a little more memory or disk space (HDD) for your computer, a new, soft keyboard with many smart shortcuts or an optical mouse. These small improvements greatly accelerate our work, take care of our health and – yes! – make us earn more. — Use it to test programs that you are not familiar with, such as SDL Trados or, for those of us who like to automate things, applications such as AutoHotkey to create scripts and automation. You never know when there will be an opportunity to use them professionally, and so it’s good to anticipate. — Renew your membership or join translators’ associations that match your profile, such as the Société Française des Traducteurs here in France. There is also the traditional ATA. And there are many others, more specialised or regional. — Last but not least, do you already have a website? It is now very easy to build one, using WordPress. There are numerous free hosting providers and buying your own domain is very cheap. It is extremely practical to have your updated service offer available to customers on your site, as well as other information they might need, such as pricing, services provided, etc. Those are just a few suggestions to tackle the After-Brexit translation market. If you have more tips, please add a comment. Good tsunami-surfing for everyone! Read the full article
0 notes
Text
Prepping a Windows 10 Computer to be a Permanent Installation
Over at Death By Audio Arcade, we just launched our newest arcade machine: The DreamBoxXx. It’s a collection of games by queer developers that will live in Dreamhouse, a queer events space in Brooklyn.

Because this machine will be on display in a space not managed by us, we had to make it as air-tight and automatic as possible. I’m going to write a separate post on the software I wrote to launch and manage the games, but I wanted to post the generic steps that can be taken to ensure that any Windows 10 computer is exhibition ready.
What does "exhibition ready” mean? Well, the computer needs to turn itself on and off at set times, launch the program it is supposed to run at startup, and not get interrupted by things like Windows updates and other software nonsense.
Given that modern computers barrage you with lot’s of garbage meant to help users, this can be trickier than you might guess.
I wrote a guide for Death By Audio Arcade to use internally and thought I would post it here as well. This guide is heavily, heavily based on this excellent Windows 7 guide by Eva Schindling. Much of it is exactly the same but some things needed tweaking.
Setting up a Windows 10 Machine for exhibition
1. Turn off Sleeping -Control Panel -Hardware and Sound -Power Options -Change when the computer sleeps -Set it all to “never”
2. Disable Windows Fast Startup If you set a wake time in BIOS (more on that in a bit) but it doesn't work, that may be because Windows Fast Startup is turned on. This makes the computer startup faster, but does it by hibernating instead of actually shutting down.
While in Power Options -Select Change What Power Buttons Do -click “Change settings that are currently unavailable” -uncheck “Turn on fast startup” -save changes
3. Go to settings and turn the screen saver off
4. Disable updates The guide above works for the most part, but this has changed since windows 7. I found this guide instead. It involves editing the registry. I’m going to post the steps here in case that page goes down.
-Use the windows key + R keyboard shortcut to open the Run command. -Type regedit, and click OK to open the Registry. -Browse the following path:
HKEY_LOCAL_MACHINE\SOFTWARE\Policies\Microsoft\Windows
-Right-click the Windows (folder) key, select New, and then click Key. -Name the new key WindowsUpdate and press Enter. -Right-click the newly created key, select new, and click Key. -Name the new key AU and press Enter. -Inside the newly created key, right-click on the right side, select New, and click on DWORD (32-bit) Value. -Name the new key AUOptions and press Enter. -Double-click the newly created key and change its value using one of the following options:
2 - "Notify for download and notify for install."
3 - "Auto download and notify for install."
4 - "Auto download and schedule the install."
5 - "Allow local admin to choose settings."
-You probably want option 2 -Click OK. -Close the Registry to complete the task.
5. Disable some startup processes -Press the windows key and search for “startup” -Find “See which processes startup automatically when you start Windows” -Disable all of them
6. Set Apple Software Update to never check for updates If you have quicktime or anything else installed, you’ll want to open Apple Software Update and set it to never check.
7. Hide the taskbar Right click the taskbar and select “Taskbar settings”
8. Add shortcuts/aliases to the startup folder On Windows 7, this folder was easy to find. Now less so.
You’ll need to press Win-R for run prompt and enter “shell:startup”
You can drop in your AutoHotkey scripts or programs that you need to run on startup, but you are better off leaving them where they are and instead dragging shortcuts to this folder. -Right click your script or program and select “Create Shortcut”
[Note: AutoHotkey is a scripting language for automating Windows. We use it a lot to create simple scripts that launch a game and reset the computer on a specific keypress. It is very useful for arcade machines]
9. Set the computer time Make sure the system clock has the correct time. This is important to automate startup/shutdown -Right click the time in the bottom right corner of the taskbar -Select “Adjust date/time”
10. Bypass the login screen By default, you need to enter your password on startup, but this can be turned off. Here are the steps in this guide to bypass this.
-Search for “netplwiz” in the start bar -Uncheck the box labeled “Users must enter a user name and password to use this computer.” -Hit OK
UPDATE: If you do not see this checkbox in the netplwiz screen, you may need to disable "Require Windows Hello sign-in for Microsoft Accounts." You can follow these steps from Tenforums user Faslane to do it pretty easily:
Just open the sign in options at settings/accounts/sign in options and turn the "Require Windows Hello sign-in for Microsoft Accounts" to off, then re-open Netplwiz. Voila! it's back ;-)
ANOTHER UPDATE: Modern Windows 10 PCs are set up with a PIN and not a password. You will need to disable the PIN first otherwise the option to bypass the password won’t show up in netplwiz.
11. Setting the computer to shut down automatically Eva Schindling’s guide above has this process with pictures and it is unchanged in Windows 10, but here are the steps:
-Control Panel -System and Security -Administrative Tools -Task Scheduler -Action Menu -Create Basic Task -Add title and description -Task Trigger: select Daily -Set your shut-down time and recurrence -Action: select Start a program -Program/script: C:\Windows\System32\shutdown.exe -Add arguments: /s -Click Finish
12. BIOS to turn the computer on at a set time BIOS is firmware setting on the computer.
Enter BIOS by holding or tapping F12 while restarting -If F12 does not work, look up how to enter BIOS. Different brands use different keys, but it is pretty much always holding or tapping a key while it restarts.
You are looking for a setting along the lines of “Resume by Alarm” or “Wake Settings.” For example, on the computer we used for the Dream BoxXx is was under advanced->S5 RTC Wake Settings
13. BIOS to turn the computer on when plugged in
In the BIOS settings, there will also often be an option to have the computer turn on when it is connected to power. The setting is often primarily for what to do after a power outage, but it can be very handy as it allows the entire system to come on as soon as a power strip is switched on. The name of the setting changes from machine to machine but it is typically something along the lines of “AC Back On” or “Action When Lost Power.”
14. Install Notepad ++ While not strictly necessary, having a lightweight but functional text editor will make your life much, much easier. Notepad++ is great because it adds a little “edit with Notepad++” option to any file you right click. You are going to edit a file on that computer at some point and you’ll be kicking yourself if you wind up using the default Notepad app.
https://notepad-plus-plus.org/download/
15. (Bonus) Preventing the “Let’s Finish Setting Up Your Device” blue scree
Fellow DBAAer Mark Kleeb recommended I add this as it has come up in a bunch of our machines. This screen can be really annoying because it often waits a few days or months before popping up and ruining your installation.
There is a good answer on how to deal with this here: https://techcommunity.microsoft.com/t5/windows-10/why-am-i-getting-this-quot-let-s-finish-setting-up-your-device/m-p/1751604
That’s it! Following those steps should give you a stable machine that is ready to run your project long term with minimal intervention!
2 notes
·
View notes
Text
Best Programmable Keyboard Options for 2020
Most business owners perform many of the same functions on their computers over and over, day after day. Wouldn’t it be nice if there was a quicker and easier way to complete these repetitive tasks? Instead of browsing through your device to find specific programs or open commonly used documents, you may benefit from using a programmable keyboard.
These products include buttons that can be customized to perform specific functions like opening programs or cutting and pasting text. There are also options made for specific functions like content creation, photo editing, and gaming.
Some of them are fully customizable. So all of the buttons can be set for the various functions you perform frequently. And others include just a small section of buttons that you can customize. So you can use the rest like a standard keyboard.
If you’re looking for a way to save time and cut repetition out of your busy day, then a programmable keyboard is just the thing. Here are the best in 2020.
Best Keyboard with Programmable KeysBest Fully Programmable Keyboard Redragon K511 PRO RGB Gaming Keyboard Wired LED Backlit Programmable Macro KeyboardX-keys Programmable Keypads and Keyboards Buy on AmazonBuy on Amazon
Programmable Keyboards to Consider
Choosing the best programmable keypad for your business starts with understanding the options. There are some products that are completely customizable. And there are others that just include small sections of keys that you can turn into macros and shortcuts. If you are going to a pay premium price, consider the customer service the company offers. Especially if the keyboard has a hard learning curve.
Below, we’ve broken down these products so you can find the best fit for your needs. Each one includes a rundown of the essential features, details, and price. If you’re interested in purchasing a programmable keyboard for your business, here are some top options to consider.
Best Keyboards with Programmable Keys
The keyboards on this list have a certain number of function keys that can be configured to run multiple functions and macros. Then the rest of the keyboard simply works as normal. Many are marketed for gaming use. But there are plenty of functions you can set that may work for business use as well. These products tend to work best for those who want to stick with just one main keyboard but want to reap the benefits of programmable buttons.
Redragon K511 PRO RGB Gaming Keyboard Wired LED Backlit Programmable Macro Keyboard
This gaming keyboard from Redragon includes 104 keys. And 5 of them are programmable macro keys. It has quiet keystrokes that make for a quiet working environment. It also includes backlighting in various colors and levels for extra style and visibility. It’s compatible with many top PC brands and operating systems. And it is currently priced at $29.99, so it’s a fairly affordable option.
Dell Alienware Pro Gaming Mechanical Keyboard AW768
From Dell, this silver keyboard includes 15 programmable keys that can be attached to different macros. So it includes more options than many other semi-programmable keyboards on the market. It can be customized with different leg angles and optional palm rest for maximum comfort. It also includes ambient lights in various colors behind the keys. The price of this one falls at $95.97.
Das Keyboard 4Q Smart RGB Mechanical Keyboard
This mechanical keyboard from Das Keyboard works using a smart RGB Cherry MX version of Das Keyboard. So it does require some knowledge about programming and the platform for users to enjoy maximum functionality. All of its buttons can actually be customized. So there are really endless options for those who want to create a lot of shortcuts. But it includes a standard keyboard layout so it can still work for those who want a mainly traditional setup. Prices start at $149.25.
The Cherry MX series line of switches was introduced in 1985. They are known by the colors, which denote the handling characteristics. This includes how much force is required, whether it is clicky or tactile. Cherry MX Red, which was introduced in 2008, for example, has a low actuation force. So the color you choose will dictate how they function.
Trust GXT 285 Adjustable LED RGP Backlit Wired Gaming Keyboard
This keyboard with customizable keys comes from Trust Gaming. It includes 5 custom macro buttons and 3 different profiles so you can actually save up to three different macros for each key. Then you simply switch modes or profiles when you’re performing different tasks. This is mainly useful for gaming. But it could be useful for those who have different categories of macros used in different instances. For example, you might use one profile when working on spreadsheets and another one for video editing with media keys. The black keyboard is backlit and connects to a device using a USB cord. It also includes software for easily programming macros. This programmable keyboard runs for $39.97.
Best Fully Programmable Keyboards
On the other hand, some keyboards come with buttons that are completely customizable with macros and shortcuts. Many of these are smaller than traditional keyboards since most people don’t need to create too many customizations. These can be used on top of a traditional keyboard or for specific functions like design and photo editing. However, there are options at pretty much every level of complexity and price point. So here are some of the top options available for business users today.
Koolertron Single-Handed Programmable Mechanical Keyboard with OEM Gateron Red Switch
This keyboard from Koolertron includes 48 keys, all of which are programmable. It also pairs with configuration software to help users create up to eight complex macros with its mechanical keyboard. They remain programmed even if you disconnect the keyboard and attach it to a different computer. So it may be especially useful for those who switch between different devices frequently. This one costs $81.99.
Elgato Stream Deck
This Elgato product comes with 15 customizable LCD keys and and adjustable stand. It’s made for use by content creators. So many of the functions are specifically tailored to these types of tasks. It’s also designed to be easy to use even for those with no programming knowledge. In fact, you can use an app to easily set functions for each key by dragging and dropping functions to each button in the software interface. It’s compatible with Windows 10 and MacOS 10.13 or later and currently costs $149.95.
Penclic N3 Office Numeric Keypad
Those who want a simple extra keyboard may opt for this Penclic option. All of its 22 numbered keys are customizable with different functions. It also has an ergonomic design to maintain comfort while you work on those repetitive tasks. Speaking of ergonomic, make sure to get a wrist rest to avoid any injuries.
Penclic also has a plug and play setup for easy use. Just connect it to your device with a USB and start setting different functions for each key you want to use. And at just $29.99, it is affordable.
ELSRA USB Wired Programming Numeric Keypad ControlPad Black PK-2068
This ELSRA keypad includes 23 keys that can be programmed on multiple levels. There are two separate modes. So you can set different macros that work when the keyboard is in each mode. So you can keep the number of buttons down but still enjoy tons of functionality with different macros. It easily connects via USB so you can get it up and running pretty quickly. However, it only works with Windows devices. So those who have Mac or Linux computers may be better off with another option. The current cost is $38.90.
X-keys Programmable Keypads and Keyboards
This X-keys keyboard includes 60 macro keys for those who want to include tons of customization options. The company says it is perfect for use with programs like CAD and PhotoShop. It includes software for easy programming on Windows devices. However, those who use Mac or Linux devices will need to program it using Windows device; those settings will then save and be usable on those devices afterward. This product runs for $199.95.
What is a programmable keyboard?
A programmable keyboard is a product that allows you to assign custom actions to various keys. This allows you to create shortcuts to the functions you use most often so you can save time. Some keyboards have just certain sections that can be programmed, while others are fully programmable.
What are keyboard macros?
A keyboard macro is a series of actions that are designed to perform a specific task. For example, you might assign a key and/or mouse action to open your email program. Or you could press a short series of keys to insert a certain graphic into your company’s spreadsheets. This allows you to save time on the repetitive tasks you perform most often.
Can I use a second keyboard for macros?
Yes, some people prefer to keep one classic keyboard and one programmable one. Having a full keyboard available to program can really open up the options for you to create tons of macros and be super-efficient. Each keyboard needs to be a different model if you go this route. You may also need to install programs like Lua Macros or AutoHotkey. The videos below explain a bit about the process for those who want to learn how.
Image: Depositphotos.com
This article, “Best Programmable Keyboard Options for 2020” was first published on Small Business Trends
https://smallbiztrends.com/
The post Best Programmable Keyboard Options for 2020 appeared first on Unix Commerce.
from WordPress https://ift.tt/2FZvoxd via IFTTT
0 notes
Text
Windows 10 - Keep a Window Always on Top

When working in Windows it's often useful to have certain windows stay on top of others using the "always on top" feature that some programs (such as Windows Media Player) natively offer. owever, most software don't have such feature and Windows 10 doesn't offer a standard way to allow such behaviour. In this post we'll be looking at some useful alternatives to emulate the "always on top" feature using freeware and open-source third-party tools.
#1. PinWin
PinWin stands for "Pin Windows" and it's the spiritual successor of DeskPins, a great tool that allowed to emulate the Always on Top feature since Windows 7 but stopped working on Windows 8 and higher. The software has been written by Victor Zakharov and it's freely available on GitHub under MIT license.
#2. AlwaysOnTop
AlwaysOnTop is a C# software tool written by Joshua Parnell and released under GNU GPL v3.0: once installed, it sits in the system tray. Once it's there, you can click the icon in the tray, activate the "AlwaysOnTop" feature and select the window you want to stay on top (the cursor will be the cross while waiting for the window). The tool is compatible with Windows 7 - Windows 10 and all versions in between, both 32 and 64 bit and requires .Net Framework 4.5.2. To download it, visit the GitHub official page.
#3. VirtuaWin
VirtuaWin is a virtual desktop manager for the Windows operating system (all recent versions) released under GNU GPL v3.0. It lets you organize applications over several virtual desktops (also called workspaces): the good part about it is that, once installed and activated, any window can be made "Always on Top" with a single middle click on the title-bar. The tool can be downloaded on its official page on SourceForge.
#4. AutoHotKey
AutoHotKey is a free, open source macro-creation and automation software utility, licensed under the GNU GPL v2, that allows users to automate repetitive tasks. It is driven by a custom scripting language that is aimed specifically at providing keyboard shortcuts, otherwise known as hotkeys. It can be downloaded from the AutoHotKey official webpage. If you're unfamiliar with AutoHotkey and want to know more about how it works, you can learn how to use it using the official tutorial. Just like VirtuaWin, the tool's main purpose is not related to the "Always on Top" feature, but can be easily used to emulate such behaviour with a single line of code: The above one-liner can be put in a AutoHotKey script file to make any window Always on Top using a custom CTRL+Space hotkey. If you don't want to use a keyboard-activated hotkey, here's a script that will allow to emulate the "Always on Top" feature using the GUI: Once the above script has been activated, you can click to the AutoHotKey icon on the taskbar and select "Toggle Always On Top" to make any Window stay always on top.
Conclusion
That's it, at least for now: if you want to know other software alternatives to keep a window always on top, take a look at this other post by windowschimp.com: - 6 Ways to keep an App Window Always on Top in Windows 10 We sincerely hope that these useful tools will help you to find an easy and convenient way to emulate the "always on top" feature on Windows 10. Read the full article
0 notes