#hidden folder using command prompt in windows 10
Explore tagged Tumblr posts
Visit Tumblr Blog
Explore Tumblr blogs with no restrictions, modern design and the best experience.
Last Seen Tumblr Blogs


Fun Fact
Premium Tumblr themes are available from anywhere between $9 to $49.
Text
Three signals your hard drive is failing and what to do

After just three years, the average hard drive's failure probability skyrockets. When the drive is exposed to varying temperatures, humidity, or external shocks, it may occur sooner. In reality, the hard disc in your laptop starts to fail after three to five years, and SSDs are no different. Do you feel anxious yet?
In the best-case scenario, hard drives degrade gradually, giving you time to save your data and replace them before they completely fail. But how will you actually know if your hard drive is failing? Let's look at some tips:
1. Slow computer performance, frequent freezing, and Blue Screen of Death
One of the causes of this triple PC collapse is a failing hard disc, which is just one of a million possible causes. In Windows Safe Mode or after a fresh installation, these issues are almost probably the result of defective hardware, maybe a failing hard drive.
You can use a variety of diagnostic tools to rule out a hard disc problem, but you should start by reviewing the S.M.A.R.T. (Self-Monitoring, Analysis, and Reporting Technology) data on your system. You should be aware that although while Windows is continuously gathering this data in the background, it is notoriously bad at forecasting hard drive failure, and you can encounter a serious problem before an S.M.A.R.T. warning appears many business listings.
You'll need a third-party programme like CrystalDiskInfo to manually check the S.M.A.R.T. state of your drive. Select the disc to scan under Disk and make a note of the health of your disc.
After using additional diagnostic tools to rule out hardware problems, you should move to resetting or reinstalling your operating system. Windows 10 offers the option to save all of your files, but you should still create a backup just in case. For more information on backups, scroll down.
2. Corrupted Data
Numerous different ways might corrupted data manifest themselves? If you notice one of these signs consistently, your hard disc is likely slowly degrading:
File or folder names that are scrambled
When opening transferring, or saving files, unexpected errors may appear.
Documents that won't open
Data corruption in your files
Vanishing folders or files
When data is created or stored, corruption can occur. Your files could be being affected by a virus, but they could possibly just have corrupted sectors on your hard disc.
Hard drive sectors with bad data integrity are these locations. Bad sectors are automatically hidden by Windows, so you won't see them unless you experience data corruption problems. Bad sectors on a failing hard disc can build up quickly, increasing the frequency of these problems business listings.
You can recover data from damaged sectors and block them from being used again with the use of a Windows command tool called CHKDSK. To quickly scan:
1 - Press Windows + E to launch File Explorer, pick This PC, click the failed disc or partition, and then select Properties from the context menu.
2 - Click Check on the Tools tab of the Properties window. You can still select Scan drive to launch the application even if Windows says that "You don't need to scan this drive." You can decide whether to correct any faults it identified after it's finished.
A reboot is necessary after a longer, more complete CHKDSK scan. When you have a day and a night free to use your computer:
1 - Right-click Start and choose Command Prompt to launch an Administrator Command Prompt (Admin)
2 - To restore data and correct errors, issue the following command: chkdsk / r c: (for your C: drive).
3 - When prompted, respond with Y to perform CHKDSK after restarting your computer.
3. Unusual Noises
You're in trouble if your hard disc starts making odd noises. The head attempts to write data, fails, returns to its home place, and tries again, producing a recurrent noise known as the "click of death." When the hardware makes grinding or screaming noises, it is likely that the bearings or spindle motor are failing.
If you can still recover data from your hard disc at this stage, you're lucky.
My hard drive appears to be malfunctioning. How Do I Proceed?
Here's what you can do if you believe that a hard drive failure is approaching.
Step one - Back up your data
The greatest thing you can do is to always have backup copies of your data on a second drive and to be prepared to buy a replacement free business listings.
Two drives failing simultaneously are unlikely to occur. Natural calamities like fires or floods would be an exception. In these scenarios, we advise storing a copy of your most crucial information in a different physical location, such as your workplace, a relative, or a friend.
Another option is to utilise an online backup service like OneDrive or Google Drive. If you use Microsoft Office, you might want to consider switching to a Microsoft 365 subscription, which provides you the most recent version of Office plus 1TB of OneDrive storage, which may be sufficient to back up your entire computer to the cloud.
Step two - Replace the Drive
When you're prepared to replace your SSD or HDD, consult our advice on how to choose and install the appropriate drive.
Step three - Properly Get Rid of Your Old Drive
Remember to delete your old drive before you discard it to stop someone from recovering your data.
Please refrain from throwing away your failing drive in any way. Electronics have dangerous parts and precious metals that shouldn't be disposed of in a landfill.
Avoid letting your hard drive crash!
You should not rely on software or signals to determine whether your hard disc is failing. It is more likely to fail suddenly and without any sort of indication beforehand. You should rely on backups rather than attempting to forecast something that is even less predictable than the weather.
1 note
·
View note
Text
Download Facebook Password Sniper V1.2 For Android
Facebook password sniper 2014 v1.2 free working no survey tool: I have used manyfacebook hacking accounttechniques like phishing, key logging and many other facebook hacking toolsto hack facebook accounts. Alass! Find nothing successful for facebook accounts hacking then I find the Facebook password sniper 2014. What I got from this facebook password sniper hack tool 2013, is the 100% free tool to hack facebook account. Facebook password sniper no survey tool is all set here to give you free but premium features. Serato dj free download for android. Say yes! If anyone ask you to hack facebook account.
Download Facebook Password Sniper V1.2 For Android Download
Download Facebook Password Sniper V1.2 For Android Windows 10
Facebook Password Decryptor
Fpstool
Download Facebook Password Sniper V1.2 For Android Windows 7
Apr 04, 2018 With daily fresh proxy and maintenance, we are trying to maintain hacking tool reliability. Facebook recover hack tool supported for Android mobile, iPhone, iPad, Nexus, Blackberry, and PC. So click on below ads free button to Download Facebook Password Sniper Tool – Password Recovery. On the demand of our respected daily viewers. Facebook Password Sniper Free Download for Pc & Mac. Facebook Password Sniper is a hack tool which is launched on may 23. This tool is used to hack and recover facebook accounts. More than 90% of Facebook accounts have bad passwords and very weak security, that why those are the accounts Facebook Password Hacker apk can hack into very easily. There obviously are accounts that have very.
Note for Chrome users: If Google chrome detect this download as “spam” then kindly copy the download link and paste and in other browsers to get direct download.
Facebook password sniper 2014 v1.2:
Facebook has covered its all security loop hole recently. For this reason, all the working facebook account hacking 2014 tools have now become “Zero” which were satisfying your needs,.This facebook password sniper 2014 v1.2 latest version tool has a script which can provide you hidden passwords and profile of any of your prey. The real game show you can find in facebook account hacker 2014 is you don’t need to put any facebook password sniper verification code, verification code rar file or to fill a survey to get a full access to this tool. Just make a download of this tool install it enjoy it. Let show some aggressive attitude to those who are annoying for you. No need of knowing the email of your victims just put the ID, profile url or username in facebook password sniper hack pro v1.2 and get the blast.
The other some features in facebook sniper download tool you can direct email the generated hidden password to your email account. No need to show off your password sniper hack tool. You can also enjoy the verification code youtube videos. Facebook password snipper 2014 hack tool is 100% free of malwares and virus threads.
KingoRoot - The Best One Click Android Root Apk for Free. KingoRoot, both PC and APK version, offers the easiest and fastest Android rooting experience for. Root my phone free download.
Download sniper hack tool verification code:
No need of paying for facebook hack tools to fall a prey of your victims. Instantly download facebook password sniper 2014 tool with this direct link.
Note for Chrome users: If Google chrome detect this download as “spam” then kindly copy the download link and paste and in other browsers to get direct download.
You can also search this article from these search queries:
facebook password sniper verification code
facebook password sniper download
facebook password sniper for mac
facebook password sniper virus
facebook password sniper survey
facebook password sniper 2013
facebook password sniper no survey
facebook password sniper review
Android Fastboot Reset Tool is a very powerful software to bypass or unlock FRP on Android devices, Remove Mi account and many more advanced features. Have you forgotten your Android phone pattern? No problem. You can now reset it using Android Fastboot Reset Tool. Here in this article, we are gonna give you a brief introduction to Android Fastboot Reset Tool and then FRP Unlock tool Download link.
What is FRP in Android?
FRP stands for Factory Reset Protection. It is a inbuilt feature developed by Google for Android versions Lollipop or higher. You can check Which Android version you are using. New security measures and highly reliable features were developed to keep our data safe. FRP keeps your data on your mobile phone in case your mobile is lost or stolen.

You can prevent others from using your data if factory reset option being used without your permission. Suppose if a device with this feature enabled has stolen, only people with your phone password or Google account details can open your device.
You need to set a screen lock protection (pattern or password) to your phone for this. Here is how you can Set screen lock for Android device. Also you need to add your Google account to your phone.
What FRP Unlock Tool or Android Fastboot Reset Tool does?
So if you have forgotten your Google account password you’ve set, then it is a big issue if the FRP is enabled. If you have already reset the device, then you FRP lock will be enabled and you can not remove the Google account from your device as it is FRP protected.
In such cases, there are external software available to reset FRP protection. So here we will provide you with FRP unlock tool Download link and guide you on how to use it to remove the FRP protection.
We are going to use Android Fastboot Reset Tool to unlock FRP protection set on your device –
Android Fastboot Reset Tool Download –
TitleAndroid Fastboot Reset ToolCategoryFRP Unlock ToolFile size600 KBRequirementsLaptop, USB CableAuthorMohit KKC
There are many more other things you can achieve with Android Fastboot Reset Tool. Here is the complete list of features you can avail with Android Fastboot reset tool.
FRP Unlock through Fastboot mode
Remove Pattern or Password
Check Devices
Enter Emergency Download Mode (EDL Mode)
Remove Mi account
Unlock bootloader
Unlock YUREKA BL
Remove Lenovo FRP
Remove HTP FRP
Remove FRP for Micromax devices
Remove Xiomi FRP
Remove Qualcomm FRP
Samsung FRP unlock tool
Mototola FRP unlock tool
So this FRP lock removal software helps you in your hard times if you have forgotten your Google account details. Now let’s see how you can unlock FRP using Android Fastboot Reset Tool.
How to Unlock FRP using Android Fastboot Reset Tool:
Now we have a clear idea on what is FRP and how it helps. Let’s see how we can remove FRP lock using Android Fastboot Reset Tool.
Download Android Fastboot Reset Tool using above Download link. It will take few seconds to Download the zip file on to your laptop.
Open you Mobile phone and connect it to your laptop via USB cable.
Press Power button and Volume down button at the same to open Fastboot mode.
Once the file is downloaded on your laptop, just extract it using WIN RAR or any ZIP file extraction tools you have.
Open the extracted folder now. You will find Android Fastboot Reset Tool V1.2 file with exe extension. Just double click on the file to open it.
You will find bunch of options with numbers or alphabets. Now choose the number which is relevant to your phone brand. (Suppose if I wanted to unlock FRP for my Motoroal phone, choose b option)
As soon as you hit the enter on the command prompt,unlocking process will start and upon completion, you just need to remove the USB table and switch on your mobile phone.
Voila! You have FRP unlock tool download and bypass the FRP lock successfully. Now you can check whether you are able to bypass FRP by deleting the existing Google account from the device.
Download Facebook Password Sniper V1.2 For Android Download
How to Bypass or Unlock FRP protection manually?
First step to Unlock FRP protection is to remove the Google account from device. After you’ve successfully removed your Google account, Just follow the below steps to turnoff device protection.
Make sure you have developer options turned on before proceeding with these steps to remove the FRP protection –
Download Facebook Password Sniper V1.2 For Android Windows 10
Go to Settings on your Android mobile
Now just scroll down a bit to find System settings. Just tap on that option.
Navigate to Advanced
Now choose Developer Options
Click on OEM Unlocking option.
Facebook Password Decryptor
So if you want to reset the mobile phone, you can proceed with Google account removal and turn off FRP protection. Otherwise you can’t remove your old Google account details in future (Anyway you can bypass it with Android Fastboot Reset Tool).
Fpstool
Disclaimer: This guide is only for educational purposes. We are not responsible for any damage to your device. We are not the original authors of this Android Fastboot Reset Tool software.
Download Facebook Password Sniper V1.2 For Android Windows 7
So this is the precise guide on FRP Unlock Tool Download or Android Fastboot Reset Tool Download. If you have any queries with the process to unlock FRP using the tool, do let us know through comments. We will be glad to help you. Cheers!
1 note
·
View note
Text
What can you do with ADB Android? The most simple file sharing process by using USB ADB Driver Installer
The Android Debug Bridge is a versatile command-line tool that communicates and controls, copies, installs, uninstalls and shells apps, and other things, such as a tablet, smart clock and set-top box for smart devices (even a computer emulator via a USB link) or any device that runs your Android OS. With Android SDK and code, it has additional useful tools. The binary contains specific commands and some of them work on their own. ADB Driver is a server-client program with three parts:
A client sending commands. The client runs for development on your machine. You can call a client from a terminal on a command line by sending an adb command.
A daemon (adbd) running commands on a device. The daemon is running in the background on each device.
A server manages the communication between client and daemon. On your development machine the server runs as a background.

What can you do with ADB Android?
Create a Full Backup of Your Phone
The Android recovery mode helps you to reset and backup your phone. These backups can only be saved on phone or SD card. You can create the complete backup on your computer with the help of ADB.
Backup a Specific App and Its Data
ADB can also help you to back up just a specific app and its data. This can be useful when you want to play your previously saved gameplay on a different phone. It also saves the cache of the app for applications such as YouTube, which cache offline videos.
Install Multiple Apps
You can easily batch install multiple apps (apk files) in a folder on your phone with ADB. One thing to be aware is that no prompt screen is available on your phone. Please be careful with the apps that you are installing. Make sure they don’t contain malware (or a malware app).
Extract APK from Your Phone
For some reason, ADB can easily extract the apk from an app from your phone.
Record Screen
A lot of apps are available on the Play Store for this, but it is always cool to do it with ADB. This also saves your phone storage space, as you don't need to install another app for the task.
Change DPI of the Screen
DPI (Dots per Inch) is a value used by Android to determine the perfect image and app icon size to display on the screen. You can change this value to get a bigger, zoom-in or smaller display depending on your needs.
Connect ADB Over WiFi
Why not connect to Adb wirelessly in today's world?, where all goes wireless. It’s quite easy to make this happen. In order to allow your phone, however, you first need to connect it via USB. Turn on the WiFi on your phone and computer and make sure your phone and computer are both on the same WiFi network.
Get System Stats and Info
There is a shell command which developers use to check the system behavior when their app is running. You could use this command to learn more about the system of the phone and to check your knowledge for different other hardware information.
Features of Universal ADB Driver for Android
Quick Installer - You can install Google ADB Driver in a matter of seconds. Just connect to ADB Driver Setup and follow the instructions on your computer.
Supports Every Device - Every device is supported with ADB Driver, whether from major brands such as Samsung, HTC, Sony, Nokia, Huawei, Vivo , Oppo, Xiaomi or any other minor brands such as Amazon. The driver is installed and the chipset is automatically detected.
Detects Manufacture Name and Model - Automatically identifies and displays the name of the manufacturer and the model number in the list of manufacturers and descriptions.
Refresh Button - You can quickly update the device list attached to your computer. This feature is in version 2.0 and is not in version 1.0.
Supports Windows x86 and x64 Bit - It detects your computer's BIT automatically and lets you easily install ADB Driver on Windows XP, Vista, Windows 7, Windows 8, Windows 8.1 and Windows 10 easily.
How does ADB Installer work on Android?
Since ADB contains three components (client, daemon and server), it first needs to install and execute certain parts. So you'll have to execute this before you connect to Android if you boot your computer fresh (and don't boot it for the daemon). This message is displayed in the command prompt when the daemon is checked.
If the daemon does not work, the process will start and tell you about the TCP port that is running locally. The commands sent to ADB clients will continue to be listened to for this specific port following the initiation of the ADB service. It then connects all operational devices (including emulators) that are attached to the computer. At this time, if your computer was not allowed, you receive a request for permission in your Android device.
Interesting Facts about ADB installer Android
ADB allows you to do things not suitable for everyday use but very useful for Android users or developers. You can, for example install applications outside the Play Store, debug apps, access hidden capabilities and create a shell that allows you to directly control your device. For security reasons, developer choices should be disabled and USB debugging mode should be enabled.
All versions of Windows between Windows XP and Windows 10 are compatible with ADB Driver Installer. However, in several other versions they can be found. Examples are a Sony Smartwatch 3 bundle and a mobile Nokia X or Android system bundle. Please note that most of these packages need prior user technical know-how.
1 note
·
View note
Text
How to Create Undetectable Hidden Folder Using Command Prompt.
How to Create Undetectable Hidden Folder Using Command Prompt.
How to Create Undetectable Hidden Folder Using Command Prompt?
A Simple Command prompt trick to Hide and UnHide the Folder in windows, by using this Method the Folder Cannot Be Detected by any other methods in windows, it can unhide by only with the command.
The Following Commands are used to Show and Hide the Folders.
To Hide the Folder.
—-> attrib +s +h [FilePath]
To UnHide the Folder.
—-> attr…
View On WordPress
#command prompt trick to hide the folder#command prompt tricks#command to hide folder#create hidden folder using command prompt#Create Undetectable Hidden Folder Using Command Prompt#hidden folder#hidden folder using command prompt in windows 10#Hide Files or Folders Using Command Prompt#hide folder in pc#hide folder using cmd#How to Create Undetectable Hidden Folder#How to Create Undetectable Hidden Folder Using Command Prompt#how to hide and unhide folder using cmd#how to hide files or folder in windows#undetectable folder#undetectable folder using cmd#unhide folder using cmd
0 notes
Text
How to clean install mac os x on macbook pro

HOW TO CLEAN INSTALL MAC OS X ON MACBOOK PRO INSTALL
HOW TO CLEAN INSTALL MAC OS X ON MACBOOK PRO PASSWORD
HOW TO CLEAN INSTALL MAC OS X ON MACBOOK PRO MAC
HOW TO CLEAN INSTALL MAC OS X ON MACBOOK PRO MAC
Connect to your Mac the properly formatted hard drive or flash drive you want to use for your bootable Yosemite installer.Drag the BaseSystem.dmg icon into the Source field on the right (if it isn’t already there).Select BaseSystem.dmg in Disk Utility’s sidebar, and then click the Restore button in the main part of the window.
HOW TO CLEAN INSTALL MAC OS X ON MACBOOK PRO INSTALL
Launch Disk Utility (in /Applications/Utilities) and then drag BaseSystem.dmg (in the OS X Install ESD volume) into Disk Utility’s left-hand sidebar.(This tells the Finder to show hidden files-we’ll re-hide such files later.) Open the Terminal app (in /Application/Utilities), then type (or copy and paste) the following command, and then press Return:ĭefaults write AppleShowAllFiles 1 & killall Finder Several of the files you’ll need to work with are hidden in the Finder, and you need to make them visible.That volume will appear in the Finder as OS X Install ESD open it to view its contents. Double-click InstallESD.dmg in the Finder to mount its volume.In the folder that appears, open Contents, then open Shared Support you’ll see a disk image file called InstallESD.dmg.Right-click (or Control+click) the installer, and choose Show Package Contents from the resulting contextual menu.It’s called Install OS X Yosemite.app and it should have been downloaded to your main Applications folder (/Applications). Once you’ve downloaded Yosemite, find the installer on your Mac.Right-click (or Control+click) the Yosemite installer to view its contents. The procedure is a bit more involved with Yosemite than it was for Mavericks (which was itself a bit more involved than under Mountain Lion and Lion). Here are the steps for using it to create your installer drive. You’ll find Disk Utility, a handy app that ships with OS X, in /Applications/Utilities. If you like, you can rename the drive from its default name of Install OS X Yosemite, though I think it’s kind of a catchy name. You now have a bootable Yosemite install drive. (see the screenshot above), which could take as long as 20 or 30 minutes, depending on how fast your Mac can copy data to your destination drive. Wait until you see the text Copy Complete. The program then tells you it’s copying the installer files, making the disk bootable, and copying boot files. The Terminal window displays the progress of the process, in a very Terminal sort of way, by displaying a textual representation of a progress bar: Erasing Disk: 0%… 10 percent…20 percent… and so on.
HOW TO CLEAN INSTALL MAC OS X ON MACBOOK PRO PASSWORD
Type your admin-level account password when prompted, and then press Return.
Paste the copied command into Terminal and press Return.
Warning: This step will erase the destination drive or partition, so make sure that it doesn’t contain any valuable data.
Launch Terminal (in /Applications/Utilities).
Sudo /Applications/Install OS X Yosemite.app/Contents/Resources/createinstallmedia -volume /Volumes/Untitled -applicationpath /Applications/Install OS X Yosemite.app -nointeraction
Select the text of this Terminal command and copy it:.
This means that if you moved it before installing Yosemite, you need to move it back before making your installer disk. (The Terminal command used here assumes the drive is named Untitled.) Also, make sure the Yosemite installer, called Install OS X Yosemite.app, is in its default location in your main Applications folder (/Applications).
Connect to your Mac a properly formatted 8GB (or larger) drive, and rename the drive Untitled.
Using the createinstallmedia command in Terminal Here are the required steps: (Follow this tutorial to properly format the drive.) Your OS X user account must also have administrator privileges. That drive must also be formatted with a GUID Partition Table. Whichever method you use, you need a Mac-formatted drive (a hard drive, solid-state drive, thumb drive, or USB stick) that’s big enough to hold the installer and all its data-I recommend at least an 8GB flash drive. The Disk Utility-via-Terminal approach is for the shell junkies out there. The Disk Utility method is the way to go for people who are more comfortable in the Finder (though it does require a couple Terminal commands), and it works under Snow Leopard, Lion, Mountain Lion, Mavericks, and Yosemite. (Note that the createinstallmedia tool doesn’t work under OS X 10.6 Snow Leopard-it requires OS X 10.7 Lion or later.) The createinstallmedia method is the easiest if you’re at all comfortable using Terminal, it’s the approach that I recommend you try first. I’ve come up with three ways you can create a bootable OS X install drive for the Yosemite: using the installer’s built-in createinstallmedia tool using Disk Utility or performing the Disk Utility procedure using Terminal. Create the Yosemite install drive: The options
0 notes
Text
Folder lock for windows7

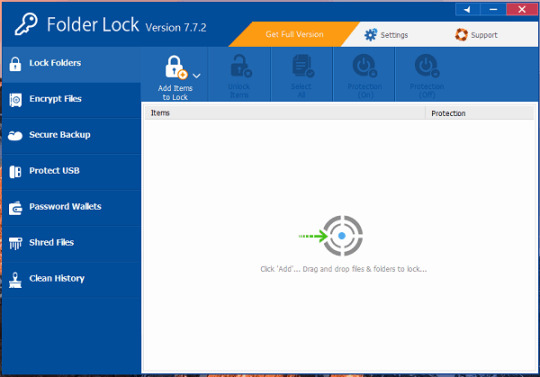
Locking and unlocking all password-protected folders at once When you are done working with the files in the protected folder, you would close the folder’s window, and that would cause Folder Guard to display a prompt asking whether you want the folder to become protected with its password again. If the password is incorrect, the folder will remain closed.įolder Guard offers an option to automatically lock the password protected folder back when closing it. If you enter the correct password, Folder Guard will allow the folder to open as usual. If you need to unlock a folder, simply double-click on the folder’s icon on the desktop or in another folder’s window, and Folder Guard will show a password prompt. When you enable the protection of Folder Guard, all password-protected folders that you have set up become locked with passwords. How to unlock a password-protected folder Or, simply use the Lock folder with password command from Folder Guard menu. To set up a folder lock, you can use the built-in Quick Start Wizard which can guide you through the steps involved in setting up the folder lock. Version reviewed: 6.3.For Windows 10, 8, 7, and XP Folder locking toolsįolder Guard lets you lock a file folder with a password of your choice so that the password must be entered before letting anyone open the folder. In conclusion: It's an excellent data protection solution. You can hide it from Desktop, Start Menu, Quick Launch, Add/Remove section and you can also hide it from the context menu in Windows Explorer. You can use the program to shred files or to erase PC tracks to ensure your privacy.Īnother feature that I liked a lot was the option to run it in stealth mode. The program also keeps a log of the wrong passwords. Either way, the computer has to be restarted. If someone enters the wrong password three times, the program can either forcefully shut down the computer or it can lock the computer.
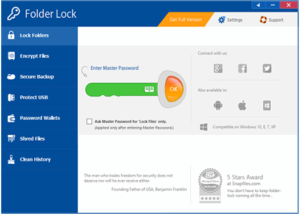
Pluses: Folder Lock is protected against hack attacks. If you get confused, you can check the 'Help' section, which is very well documented. The program is skinnable and it has a very nice interface, which makes it easy-to-use. The program won't encrypt or scramble the files, but it will only lock your files. You need to pay attention, because if you try to encrypt your files and a sub folder inside the 'Locker' folder is open during the process. The protected data will also be undeletable, since it's hidden (the files or folders are locked in the program's 'vault') or access to the data is revoked until it's unlocked with a password. However, this method takes longer than the other two mentioned before. Finally, you can encrypt the data, by using a 256 bit Blowfish algorithm and your data will be secured against any intrusions. You can also scramble the protected content, where you get a medium data protection level. You can lock folders or drives - this is the fastest way of securing data, but it provides the weakest protection. Now, let's talk about the protection methods. If you want to store your data on a removable USB pen drive, the program will make a copy of itself on that device. You can also protect data by using the program from the Windows Explorer context menu. The most common way to protect your data is by storing it in the program's vault. 'Folder Lock' is a program designed to safeguard the sensitive and private data stored on your computer, or USB memory stick.
0 notes
Text
Why is there a hidden network windows 10

How to Find Physical Location of Hidden Wireless Router.
What Is a Hidden Network? - Lifewire.
How to Fix a Missing Network Adapter in Windows 10 - MUO.
What is the Wifi Hidden Network?.
How To Enable Hidden Administrator Account In Windows 10.
Solved: Windows 10 File Sharing Not Working (5 Ways) - u backup.
Fix Network Adapter Not Showing Up on Windows 10.
Best answer: How do I remove a hidden network in Windows 10?.
Fix Windows 10 ProgramData Folder Missing - MiniTool.
How to Rename or Change Network Name in Windows 10 & 11.
Tutorial: Tips on how to remove or delete hidden network... - YouTube.
IOS 10 warning: Using a hidden network can expose personally.
Why is a hidden network showing up in my network.
How to Find Physical Location of Hidden Wireless Router.
HOW TO REMOVE HIDDEN NETWORK ADAPTER WINDOWS 10 Usually Microsoft windows hide devices, which are not currently connected to the system, but they still exi. Jun 25, 2014 · Answers. Click Start, point to All Programs, point to Accessories, and then click Command Prompt. Troubleshoot the devices and drivers in Device Manager. NOTE: Click Show hidden devices on the View menu in Device Managers before you can see devices that are not connected to the computer.
What Is a Hidden Network? - Lifewire.
Sep 21, 2016 · Hadramawt. If you see a Hidden network that is not yours then it simply means that somebody nearby is transmitting a Hidden network (possibly using the WiFi hotspot feature of their smartphone). If they wanted you to be able to connect to it then they would have told you what its name (SSID) and security key were. It seems to be a Windows 10 thing. Yes, it is a Windows 10 thing. The 'hidden network' is one without an SSID and windows can show it, your other devices don't seem to be able to list a network that doesn't have a name to display. I am visiting relatives who are using a mesh network currently. In this case it is BT Whole Home.
How to Fix a Missing Network Adapter in Windows 10 - MUO.
I checked my network list and it said there was a hidden network. I checked on network status and checked available networks. Network Technician: Max , Network Administrator replied 2 years ago.
What is the Wifi Hidden Network?.
Restart Windows Explorer to reload it and restore the missing system tray or icons on your computer. To do this, right-click the taskbar and select Task Manager. Select under the Processes tab, right-click and select End Task. Next, open the App History tab, click File > Run New Task.
How To Enable Hidden Administrator Account In Windows 10.
Contents ( hide) Fix WiFi Network Not Showing Up on Windows 10. Method 1: Turn on the Physical Switch for WiFi on Keyboard. Method 2: Disable and Enable your NIC (Network Interface Card) Method 3: Restart your Router. Method 4: Enable Wireless Network Related Services. Method 5: Run Network Troubleshooter. Sep 14, 2019 · So, updating it can fix the network adapter missing issue. Step 1: Right-click on the Start Menu icon and select Device Manager from it. Alternatively, press Windows key + R. Type and. Right-click on the desktop and select New > Shortcut. In the ensuing pop-up window, type SlideToShutDown as the location of the file. Rename the file and click Finish to create a clickable icon on.
Solved: Windows 10 File Sharing Not Working (5 Ways) - u backup.
As you know, towards the end of the Windows 10 installation or setup, the Windows setup prompts you to create a user account.Although Windows gives the Administrator user status to this user account, Windows 10 automatically generates another super or elevated Administrator account during the installation, and the account is hidden by default due to security reasons. Find the network you want to change the name for on the right panel and double-click on it. 3. The above action will open the network properties window. Here, select the radio option "Name" and type your new network name in the blank field. Click on the "Apply" and "Ok" buttons to save changes. That is it.
Fix Network Adapter Not Showing Up on Windows 10.
If the icon isn't visible, click on the upwards arrow to see hidden items. Check if Flight mode is turned on. If so, click on the Flight mode icon again to disable it. Try reconnecting to your network. Method 2: Run the Windows Troubleshooter. Windows 10 comes with a plethora of troubleshooters that address nearly all of your operating system.
Best answer: How do I remove a hidden network in Windows 10?.
Open the Start menu. Search for " Command Prompt ". Right-click on Command Prompt result and select the " Run as administrator " option. In the Command Prompt window, execute the below command. Don't forget to replace "WIFI_NAME" with the SSID you got earlier. netsh wlan add filter permission=block ssid=" WIFI_NAME " networktype=infrastructure. Check if the network shares are visible now. Enable LanMan Workstation. This policy allows users to block or accept insecure guest logons. It could be the reason why users can't access network shares. To check if the policy is enabled, enter regedit in the Windows search box and launch the Registry Editor.
Fix Windows 10 ProgramData Folder Missing - MiniTool.
Nov 11, 2021 · Fix 1: Check Advanced Sharing Settings. You need to check advanced sharing settings to fix the “computers not showing up in network” issue. Here is how to do that: Step 1: Press the Windows + I keys at the same time to open the Settings application. Step 2: Then, click the Network & Internet part and the Ethernet tab.
How to Rename or Change Network Name in Windows 10 & 11.
Nov 09, 2016 · Sometimes, network administrator can set up a hidden wireless network, hidden networks won't show up in the list of wireless networks displayed in the Network settings. It is a wireless broadcast that is not presenting a SSID. If you are connected it before and in the its range now, your Windows 10 device will now automatically connect to it. Step 1: Press the Windows Key + I key simultaneously on the keyboard to open Settings. Step 2: Select the option of Network & Internet from the list. Step 3: Choose Wi-Fi on the left pane, and click the toggle to enable Wi-Fi. Now you can try to connect to the Wi-Fi network. This time the WiFi network may show up. Method 3. Unhidden the hidden D drive. To unhidden the D drive, just take the following steps: Step 1. Double click "This PC" icon on the desktop to open Windows File Explorer.In the window, click on "View" and choose "Options - > "Change folder and search options". Step 2.
Tutorial: Tips on how to remove or delete hidden network... - YouTube.
Jun 24, 2018 · Step 1: Uninstall drivers. Press the Windows logo key + R to open the Run dialog box. Type in the Run dialog box, then press Enter to open the device manager. In Device Manager, go to ‘ Network adapters ’ and expand that section. You will find the WLAN card drivers here.
IOS 10 warning: Using a hidden network can expose personally.
To get rid of this "HIdden Network" you have to log into your Verizon, or Comcast account and Opt Out. You can do so in your account or call customer service. Someone from technical support will access your router, stop the Hidden Network, and you should see a small boost of 30mb in performance from your router.
Why is a hidden network showing up in my network.
As to why it shows up on one and not others could be settings and or signal strenght and device location. The new Hidden Network being at same signal strenght could be using same channel as neighbors and hiding them because of it's stronger signal. If this is still a concern by an APP like INSSIDER to see what is going on in your area.
Other content:
How To Add A Text Box In Word
X Plane 11 Da40
Gta Vice City Offline Download For Pc
Heroes Of Might And Magic 3 Ost Download
Windows 10 Os Free Download With Product Key
0 notes
Text
Three signals your hard drive is failing and what to do

After just three years, the average hard drive's failure probability skyrockets. When the drive is exposed to varying temperatures, humidity, or external shocks, it may occur sooner. In reality, the hard disc in your laptop starts to fail after three to five years, and SSDs are no different. Do you feel anxious yet?
In the best-case scenario, hard drives degrade gradually, giving you time to save your data and replace them before they completely fail. But how will you actually know if your hard drive is failing? Let's look at some tips:
1. Slow computer performance, frequent freezing, and Blue Screen of Death
One of the causes of this triple PC collapse is a failing hard disc, which is just one of a million possible causes. In Windows Safe Mode or after a fresh installation, these issues are almost probably the result of defective hardware, maybe a failing hard drive.
You can use a variety of diagnostic tools to rule out a hard disc problem, but you should start by reviewing the S.M.A.R.T. (Self-Monitoring, Analysis, and Reporting Technology) data on your system. You should be aware that although while Windows is continuously gathering this data in the background, it is notoriously bad at forecasting hard drive failure, and you can encounter a serious problem before an S.M.A.R.T. warning appears many business listings.
You'll need a third-party programmer like Crystal Disk Info to manually check the S.M.A.R.T. state of your drive. Select the disc to scan under Disk and make a note of the health of your disc.
After using additional diagnostic tools to rule out hardware problems, you should move to resetting or reinstalling your operating system. Windows 10 offers the option to save all of your files, but you should still create a backup just in case. For more information on backups, scroll down.
2. Corrupted Data
Numerous different ways might corrupted data manifest themselves? If you notice one of these signs consistently, your hard disc is likely slowly degrading:
File or folder names that are scrambled
When opening transferring, or saving files, unexpected errors may appear.
Documents that won't open
Data corruption in your files
Vanishing folders or files
When data is created or stored, corruption can occur. Your files could be being affected by a virus, but they could possibly just have corrupted sectors on your hard disc.
Hard drive sectors with bad data integrity are these locations. Bad sectors are automatically hidden by Windows, so you won't see them unless you experience data corruption problems. Bad sectors on a failing hard disc can build up quickly, increasing the frequency of these problems business listings.
You can recover data from damaged sectors and block them from being used again with the use of a Windows command tool called CHKDSK. To quickly scan:
1 - Press Windows + E to launch File Explorer, pick This PC, click the failed disc or partition, and then select Properties from the context menu.
2 - Click Check on the Tools tab of the Properties window. You can still select Scan drive to launch the application even if Windows says that "You don't need to scan this drive." You can decide whether to correct any faults it identified after it's finished.
A reboot is necessary after a longer, more complete CHKDSK scan. When you have a day and a night free to use your computer:
1 - Right-click Start and choose Command Prompt to launch an Administrator Command Prompt (Admin)
2 - To restore data and correct errors, issue the following command: chkdsk / r c: (for your C: drive).
3 - When prompted, respond with Y to perform CHKDSK after restarting your computer.
3. Unusual Noises
You're in trouble if your hard disc starts making odd noises. The head attempts to write data, fails, returns to its home place, and tries again, producing a recurrent noise known as the "click of death." When the hardware makes grinding or screaming noises, it is likely that the bearings or spindle motor are failing free business listings.
If you can still recover data from your hard disc at this stage, you're lucky.
My hard drive appears to be malfunctioning. How Do I Proceed?
Here's what you can do if you believe that a hard drive failure is approaching.
Step one - Back up your data
The greatest thing you can do is to always have backup copies of your data on a second drive and to be prepared to buy a replacement.
Two drives failing simultaneously are unlikely to occur. Natural calamities like fires or floods would be an exception. In these scenarios, we advise storing a copy of your most crucial information in a different physical location, such as your workplace, a relative, or a friend.
Another option is to utilise an online backup service like OneDrive or Google Drive. If you use Microsoft Office, you might want to consider switching to a Microsoft 365 subscription, which provides you the most recent version of Office plus 1TB of OneDrive storage, which may be sufficient to back up your entire computer to the cloud.
Step two - Replace the Drive
When you're prepared to replace your SSD or HDD, consult our advice on how to choose and install the appropriate drive.
Step three - Properly Get Rid of Your Old Drive
Remember to delete your old drive before you discard it to stop someone from recovering your data.
Please refrain from throwing away your failing drive in any way. Electronics have dangerous parts and precious metals that shouldn't be disposed of in a landfill.
Avoid letting your hard drive crash!
You should not rely on software or signals to determine whether your hard disc is failing. It is more likely to fail suddenly and without any sort of indication beforehand. You should rely on backups rather than attempting to forecast something that is even less predictable than the weather.
1 note
·
View note
Text
How To Delete A Shortcut

Delete Shortcut Windows 10 Desktop
How To Remove From The Desktop
May 15, 2018 Make changes to your Shortcuts. As you scroll through the list of Pages, groups, and games, use the drop-down menus on the right side of the dialog box to select how you'd like to see the menu. Click on Sorted Automatically to let Facebook decide where the item should be in the menu.
How to remove shortcut virus on Windows 10, 8, or 7? There are three reliable methods to remove shortcut virus from PCs. You can easily remove shortcut virus with shortcut virus remover. The removal methods can sometimes cause data loss. It is recommended to use data recovery software after the infection is successfully removed.
3 Ways on How to Remove Shortcut Virus in Windows 10/8/7
The shortcut virus is a shared computer virus that hides your files and replaces them with shortcuts with the same file name. When you click on the shortcuts, the virus replicates itself and further infects your drive. When your computer, hard drive partition or USB drive gets affected by the shortcut virus, all files become shortcuts, and the actual data is inaccessible. The shortcut virus usually enters your drive via running a .exe file that contained the virus or from using a flash drive on multiple computers.
To remove shortcut virus in Windows 10/8/7 PC or USB:
Jul 29, 2019 Download registry keys to remove or restore shortcut arrow; Once downloaded, extract the folder and you will see two registry files in it. To remove shortcut arrow, simply execute the 'Remove Shortcut Arrow Overlay.reg' file. If you see a prompt, click on the 'Yes'/'Ok' button to continue. Remove Google Drive Shortcut 1 Recommended Answer 3 Replies 139 Upvotes. I created shortcut by Shift-Z, instead of shortcut it created mirrored file. How can I remove a shortcut from a folder without deleting the source file? It requires me two steps at the moment, which seems to be a bug: In order to remove a file from my shortcut folder, I. Jun 25, 2020 Even after connecting the Pendrive to Computer, files get converted to shortcut, basically, this is a Virus known as Shortcut virus, it converts every file into shortcut in Pendrive / Hard drive. This article will guide you to remove shortcut virus from USB flash drive as well as Windows 7, 8, 8.1 and Windows 10 computers.
If you have shortcut virus infection problems, read the detailed solutions below to get rid of the virus with or without shortcut virus remover.
Delete Shortcut Windows 10 Desktop
Method 1. Clean Up and Remove Shortcut Virus with CMD
Applies to external and internal devices
If your external devices like USB flash drive, external hard drive, or SD memory card is infected with a shortcut virus, you must remove the virus immediately. The infection spreads whenever you plug the external device into a Windows PC or laptop. Follow the steps below to remove shortcut virus with Command Prompt.
How To Remove From The Desktop
Warning
Be careful while using the CMD command line to resolve your issue. Improper use of CMD can result in severe damage to your system.
Step 1. Connect your external hard drive to PC and right-click on 'Start', select 'Search'.
Step 2. Type Command Prompt in the Search box and click Command Prompt to bring it up.
Sign in with your administrator account and password if the system asks.
Step 3. Type this command and hit 'Enter'.
Replace H: with the drive letter of your USB, pen drive.
Step 4. Type this command and hit 'Enter'.
del *.lnk
Step 5. Type this command and hit 'Enter'.
If this didn't work, you are likely infected by another virus. Replace the .lnk with another virus extension such as *.exe to delete these suspicious viruses.
CommandMeaning-sremoves the 'system file' status from all matching files and folders.-rremoves the 'read-only' status from all matching files and folder.-hremoves the 'hidden' status from all matching files and folders./smakes the command recursively apply to all files and folders in the current directory and all subdirectories, basically the entire device in this case./dmakes the command apply to folders as well (typically attrib only handles on files).*.*means all file names and folder names should be considered a match.
Method 2. Delete/Wipe Shortcut Virus from the Registry
This method aims to delete suspicious keys that may be related to the shortcut virus on your PC.
Warning
Deleting wrong keys in the Registry Editor may cause serious results, including malfunction issues in programs or part of computer features. Be careful if you are going to remove keys.
Steps to remove shortcut virus with Registry:
Step 1. Press Windows + R keys, type: regedit and hit Enter.
Step 2. Open Registry Editor and go to HKEY_CURRENT_USER > Software > Microsoft > Windows > CurrentVersion > Run.
Step 3. Find the suspicious keys like odwcamszas, WXXKYz, ZGFYszaas, OUzzckky, and delete them.
Method 3. Use Shortcut Virus Remover or Antivirus Software


Although antivirus software can often miss shortcut virus files, it can serve as a double-guarantee that your PC is rid of the virus. Download and install anti-virus software to scan and clean up all detected virus files from your Windows 10/8/7 PC or USB. Below is a list of recommended antivirus software tools to choose from. Some will be more effective than others for your particular hardware setup so that you may try more than one.
Norton Power Eraser
McAfee Stinger
Shortcut Virus Remover, etc.
Steps to remove shortcut virus with free Antivirus Software:
Here I take Norton Power Erase as an example:
Step 1. Download and run Norton Power Eraser.
If a new version is available, Norton Power Eraser will check and download it.
Step 2. In the 'Norton Power Eraser' window, click the 'Scan for Risks' icon.
By default, Norton Power Eraser will perform a rootkit scan and ask you to restart the system. When you see the prompt to restart the computer, click 'Restart'.
If you do not want to include rootkit scanning, please go to 'Settings' and uncheck the 'Include rootkit scanning' option.
Step 3. Depending on your situation, take one of the following steps:
If you see 'No risk found', Norton Power Eraser has not detected any risk on your computer, click 'OK' to end.
If you see any files listed as 'bad', the 'Remove' checkbox under 'Action' will be automatically checked. It is recommended that you remove these files. If the 'Repair' checkbox under 'Action' is checked, these files will be repaired after restarting.
If you see any files listed as 'Unknown', click the cloud icon that appears next to these files. It will send the file to a Symantec server and scan it using a traditional signature detection engine.
Step 4. After successfully removing the risk, click 'Finish'.
Additional Help - How to Recover Files After Removing the Shortcut Virus

After removing the shortcut virus from your USB and Windows PC, you should browse your data to see if anything important was lost in the process. It can be difficult and eye-straining to scour your entire hard drive for files that may have been lost. To speed up the process of finding lost files, and to quickly recover them, use EaseUS Data Recovery Wizard to search your drive. EaseUS data recovery software scans deep into the data content of your disk to find all data lost from deletion, formatting, or virus attacks. Besides, it also supports data recovery from lost partition, RAW partition, damaged hard drive, and so on.
Read on to see just how straightforward data recovery can be:
Step 1. Launch EaseUS Data Recovery Wizard. Select the disk partition or storage device where you lost files and click the 'Scan' button.
Step 2. This program will quickly start a scanning process to find lost files. When the process accomplishes, you can double-click files to have a preview before selection.
Step 3. Choose the files you want. Then click the 'Recover' button to get them back. You should save the data to another safe spot in your PC/storage device, not where they lost.
After restoring the data, to make sure that you are done with the shortcut virus, you can back up data before formatting then reformat the drive. Then restore the data from your backup, and your computer will be safe and good-as-new.
Prevent from Shortcut Virus by Turning on Windows Firewall
It takes much effort to remove shortcut virus, why not protect your computer or laptop in advance. The easiest way to prevent your Windows PC is by turning on Windows Defender Firewall. Follow the steps to protect your computer:
Step 1. Open Control Panel > click 'Windows Defender Firewall' > select 'Turn Windows Defender Firewall on or off'.
Step 2. Check the boxes of 'Turn on Windows Defender Firewall' and click 'OK' to confirm.
Conclusion
Whenever you want to remove shortcut virus, you can try any one of the solutions above to get help. After shortcuts removing, turn on Windows Firewall to protect your computer. If you have data loss problems, EaseUS hard drive recovery software can always do you a favor.
How to Remove Shortcut Virus FAQs
There are some frequently asked questions about removing the shortcut virus. Read on if you still have questions.
How can I remove shortcut virus from my USB?
To remove shortcut virus from pen drive/USB drive:
Step 1. Connect your external hard drive to PC and right-click on 'Start', select 'Search'.
Step 2. Type: Command Prompt in the Search box and click Command Prompt to bring it up.
Sign in with your administrator account and password if the system asks.
Step 3. Type: E: and hit Enter. (Replace E: with the drive letter of your USB, pen drive.)
Step 4. Type: del *.lnk or del autorun.inf and hit Enter.
Step 5. Type: attrib -h - r -s /s /d E:*.* and hit Enter. (Replace E: with the drive letter of your infected device).
How do I delete a shortcut file?
To delete the shortcut
Step 1. Right-click the icon and select 'Delete.'
Step 2. Click 'Yes' to confirm the deletion.
Which is the best antivirus to remove shortcut virus?
Here are some great antivirus tools:
Trojan Removal Tool
Shortcut virus fixfolder
Malwarebytes Anti-Malware, etc.
0 notes
Text
HOW TO BYPASS ADMIN RESTRICTIONS WINDOWS 10
Windows 10 has different levels of user accounts for multiple users. The accessibility level is different for different user accounts. Standard users can modify their files except for modifying other user’s documents or preferences such as personalization, installing or uninstalling apps, and changing system settings.

However, as a standard user, you will sometimes need the admin rights to change system settings or install a new app. Most users access by disabling UAC settings or granting other users administrative authority. And none of the methods are safe.
We’ve researched and found the easiest, effective, and comparatively safe methods on how to bypass admin restrictions windows 10 here for you. Keep reading to learn about them.
Administrator Privileges and User Account Control
Different apps require a different set of permissions for proper functionality. Although some applications need no special permissions, some require admin privileges to add or modify logs, configs, or other system files.
When you install or run an app, the User Access Control dialog box pops up, asking for admin permission. UAC is a security feature of Windows 10 that controls how system files are modified. Unauthorized third-party apps can corrupt your system by injecting viruses, malware, adware, etc. UAC shields the network from unauthorized changes to the operating system.
Some of the Tasks that require admin permission:
Getting Windows Update
User accounts modification
App folder located in C:\Program Files (x86)\ or C:\WIndows\ directory.
Viewing or changing properties of other users.
Installing or uninstalling software
Task Scheduler
Windows Firewall
Family Safety or Parental Controls
Admin Restrictions on Standard User Accounts
Most apps modify your WIndows’ system files. Viruses or malware in unauthorized third-party apps corrupt the system files. Your privacy is highly vulnerable to them as well.
Admin restriction plays an essential role in protecting your entire system. Not only preventing unauthorized changes, but this feature also controls the way other users use your computer. The administrator account can control other user accounts in many ways, such as:
Network Access: Controlling the access or blockage of particular websites or IP addresses.
Installation and Uninstallation Process: Restriction on installing or uninstalling software.
Task Manager: Control on viewing or changing running processes.
Accessing system files or limitations on overall usage.
3 Easy Ways to Bypass Admin Restrictions on Windows 10
Run Apps by UAC Prompt Elevated
Asking for administrative permission every time you run an installed app can be bothersome. And, what if a password protects it? You can disable this prompt by typing a simple code, and you don’t have to change the UAC settings either.
Let’s consider an executable file available in both of our devices as a reference. The regedit.exe in the C:\Windows\ directory requires authorization every time you try to open it.
As the first step, open the notepad from the search box in the taskbar.
Write the following command line in your notepad:
cmd /min /C “set __COMPAT_LAYER=RUNASINVOKER && start “” %1″
Save the file as “Bypass Admin Restriction.bat” (yes, we’re saving it as BAT format!)
We will force run the EXE file (regedit.exe in this case) with UAC prompt elevated. Drag and drop the file on the newly created Bypass Admin Restriction.bat file.
Now you should be able to run apps without admin privilege. The UAC Virtualization column on the process tab under Task Manager also shows if the app is running without admin privileges. You can use it for any executable file.
Enable Built-in Administrator to Overwrite Access
Built-in Administrator is the default “hidden administrator” account created during Windows setup. It remains disabled by default. You can change the password or access any file by enabling this feature.
Type “lusmgr.msc” in the Task manager’s search bar to open the “Local Users and Groups” window. (You can go to Start>Control Panel>Administrative Tools>Computer Management>Local Users and Groups alternatively)
Click on “Users” on the left panel. You’ll see the user account list on the right side- open Administrator by double click.
Uncheck the “Account is disabled” option and save it by clicking Apply.
Now close all windows and login to your built-in Administrator account from the lock screen.
Now you can bypass admin restriction on your windows 10.
Changing Administrator Password
There are multiple ways to change administrative passwords on Windows 10. Here are the two easiest methods of unlocking your account fast:
Bypass Windows 10 Administrator Password in Safe Mode
Resetting the password by using safe mode is the oldest method. This method allows you to accomplish your goal without any external device. We’ll be overwriting two essential system files ‘cmd.exe and sethc.exe” here.
1. Force restart your computer by unplugging the power cord (desktop) or removing the battery (laptop). Repeat until you see “Preparing Automatic Repair”.
2. Your system will run a diagnosis. A new window titled “Advanced Options” will appear after the completion of the diagnosis.
3. At this stage, proceed to Advanced options>Troubleshoot>Command Prompt. In the command prompt, go to the system directory. Type “dir” to confirm if you’re in the system directory. If you’re not in the right directory, point to the system drive using the below codes:
cd\
cd windows\system32
4. Now make a backup copy of sethc.exe and then overwrite the existing sethc.exe with cmd.exe file using the codes written below:
copy sethc.exe sethc_copy.exe
copy /y cmd.exe sethc.exe
5. Restart your computer. When you see the user login window, press the Shift key 5 times repeatedly. Doing so will open a new command prompt window.
Type “net user” to see all user accounts. In this step, we’re going to change the administrator password. Type “net user [name of the user] [password]” to change the password.
6. Now, restart your computer and log in with the new password.
Note: You’ll lose access to all encrypted files after resetting the password the way we mentioned above. Confirm there’s no sensitive file encrypted under that account.
Bypass Admin Password Windows 10 via MSDaRT
Another effective way to recover your administrator password is using Microsoft Diagnostics and Recovery Toolset (MSDaRT). Wondering how to bypass admin restrictions on windows 10 using this toolset? Our easy guide will turn you into a Password Recovery Expert in the next 5 minutes.
1. Download MSDaRT from Microsoft’s website.
2. Burn the tool using a portable device (i.e., USB drive). Boot the computer using the DaRT drive. Click “No” on “NetStart prompt”.
3. Choose language. Load the Windows 10 operating system and move to the next step.
4. Click on “Microsoft Diagnostics and Recovery toolset” at the bottom of your recovery window.
5. Click on “Locksmith” under the DaRT tool. Then click next.
6. Now select your Administrator’s account and reset your password.
Restart and login to your user account with the fresh password.
Conclusion
We intended to share the easiest ways to bypass admin restrictions on Windows 10 with you for learning purposes. We do not recommend using any of these methods unless there is a serious necessity. Changing the natural process can affect the files stored inside your computer.
Microsoft also recommends keeping the built-in Administrator account disabled on the client computer for security. Enable Admin Approval Mode as well if you need to enable a built-in administrator account. Remembering the password or asking your administrator for approval is the best practice of all.
FAQs
Q: How do I bypass admin restrictions on Windows 10?
A: The administrator account has full control over the computer, such as blocking other users from various functions. However, you can escape these restrictions in multiple ways. Turning off the UAC prompts, getting admin privileges from built-in admin, or even breaking the passwords.
Q: Can I bypass admins privileges as a standard user by using startup repair only?
A: Yes, it is possible to bypass admin privileges as a standard user. Go to safe mode and select startup repair. Follow the instructions provided in this guide to elevate the restrictions successfully.
Q: How do I install programs without UAC prompts?
A: You can elevate the prompts from UAC settings. Go to Control Panel> User Accounts (small icons)> User Accounts Control Settings. A new window will open. Turn the slider all the way down to never notify. However, doing so will put your computer at risk of a security breach.
#how to bypass admin permission windows 10#how to bypass administrator privileges on windows 10#bypass admin permission windows 10#how to bypass administrator restrictions windows 10#how to bypass admin windows 10
0 notes
Text
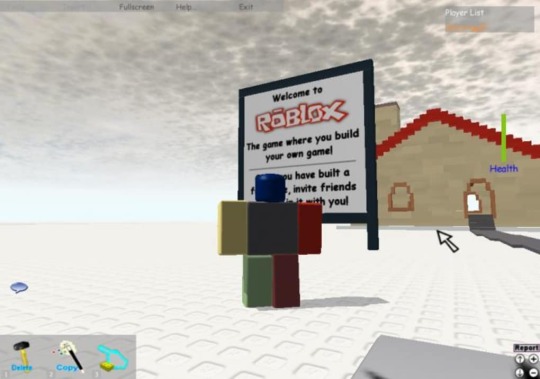
Roblox Player Beta Exe Download

In File Explorer, find ROBLOX and delete the folder Reinstall ROBLOX Additionally, you might want to go ahead and verify system integrity if you didn’t do anything to change this. Roblox Studio Launcher Beta Item Preview. All wii wads download. DOWNLOAD OPTIONS download 1 file. TORRENT download. Download 1 file.
Contents
1. What is RobloxStudioBeta.exe?
2. Is RobloxStudioBeta.exe safe, or is it a virus or malware?
3. Can I remove or delete RobloxStudioBeta.exe?
4. Common RobloxStudioBeta.exe error messages
5. How to fix RobloxStudioBeta.exe
6. Update
7. Download or reinstall RobloxStudioBeta.exe
What is RobloxStudioBeta.exe?
RobloxStudioBeta.exe is an executable file that is part of the ROBLOX Studio 2013 program developed by ROBLOX Corporation. The software is usually about in size.
The .exe extension of a file name displays an executable file. In some cases, executable files can damage your computer. Please read the following to decide for yourself whether the RobloxStudioBeta.exe file on your computer is a virus or trojan horse that you should delete, or whether it is a valid Windows operating system file or a reliable application.
Recommended: Identify RobloxStudioBeta.exe related errors (optional offer for Reimage - Website | EULA | Privacy Policy | Uninstall)
Is RobloxStudioBeta.exe safe, or is it a virus or malware?
The first thing that will help you determine if a particular file is a legitimate Windows process or a virus, is the location of the executable itself. For example, a process like RobloxStudioBeta.exe should run from C:Program Filesrobloxversionsversion-54853a0336774f68robloxstudiolauncherbeta.exe and not elsewhere.
To confirm, open the Task Manager, go to View -> Select Columns and select 'Image Path Name' to add a location column to your Task Manager. If you find a suspicious directory here, it may be a good idea to investigate this process further.
Another tool that can sometimes help you detect bad processes is Microsoft's Process Explorer. Start the program (it does not require installation) and activate 'Check Legends' under Options. Now go to View -> Select Columns and add 'Verified Signer' as one of the columns.
If the 'Verified Signer' status of a process is listed as 'Unable to Verify', you should take a moment look at the process. Not all good Windows processes have a Verified Signature label, but neither do any of the bad ones.
The most important facts about RobloxStudioBeta.exe:
Located in C:Program FilesRobloxVersionsversion-54853a0336774f68 subfolder;
Publisher: ROBLOX Corporation
Full Path: C:Program Filesrobloxversionsversion-54853a0336774f68robloxstudiolauncherbeta.exe
Help file:
Publisher URL: www.roblox.com
Known to be up to in size on most Windows;
If you had any difficulties with this executable, you should determine if it's trustworthy before deleting RobloxStudioBeta.exe. To do this, find this process in Task Manager.
Find its location (it should be in C:Program FilesRobloxVersionsversion-54853a0336774f68) and compare the size etc with the above facts.
If you suspect that you may be infected with a virus, then you must attempt to fix it immediately. To delete the RobloxStudioBeta.exe virus, you should download and install a full security application like Malwarebytes. Note that not all tools can detect every type of malware, so you may need to try several options before you're successful.
Audi MMI update for your car. We’ve got original Audi firmware for all of the popular car models, like A1, A3, A4, A5, A6, A7, A8, Q3, Q5, Q7, and for all the types of MMI – 2G, 3G, Mib1 and more! Firmware for Audi MMI 2G High H2HIEUK921 (5150). 49,1 MB to download. This is Audi genuine firmware for Europe MMI 2G High! THERE’S NEWEST FIRMWARE AVAILABLE HERE!! Pack contains zip of the files the full software/firmware update: H2HIEUK921 (5150) This is untouched and full firmware update to version K921 (5150). Pack contains zip of CD’s files the full software/firmware update Add to basket SKU: MMI2GHIGH5150 Categories: Europe, MMI 2G High Tags: 2g high 5150, 5150 mmi, 5150 mmi firmware, 8T0 906 961, 8T0-906-961 download, a6 5150 firmware, Audi MMI 2G High – 5150 – Europe (A6 – A8), Audi mmi 2g high 5150. Audi mmi 2g firmware update 5150 download.
In addition, the functionality of the virus may itself affect the deletion of RobloxStudioBeta.exe. In this case, you must enable Safe Mode with Networking - a secure environment that disables most processes and loads only the most required services and drivers. When there, you can run a security program and a complete system analysis.
Can I remove or delete RobloxStudioBeta.exe?
You should not delete a safe executable file without a valid reason, as this may affect the performance of any associated programs that use that file. Be sure to keep your software and programs up to date to avoid future problems caused by corrupted files. With regard to software functionality issues, check driver and software updates more often, so there is little or no risk of such problems occurring.
According to various sources online, 6% of people remove this file, so it may be harmless Super smash flash 2 sonic mod pack download. , but it is recommended that you check the trustworthiness of this executable yourself to determine if it is safe or a virus. The best diagnosis for these suspicious files is a complete system analysis with Reimage. If the file is classified as malicious, these applications will also delete RobloxStudioBeta.exe and get rid of the associated malware.
However, if it is not a virus and you need to delete RobloxStudioBeta.exe, then you can uninstall ROBLOX Studio 2013 from your computer using its uninstaller, which should be located at: 'C:Program FilesRobloxVersionsversion-54853a0336774f68RobloxStudioLauncherBeta.exe' -uninstall -alluser. If you cannot find it's uninstaller, then you may need to uninstall ROBLOX Studio 2013 to completely delete RobloxStudioBeta.exe. You can use the Add/Remove Program function in the Windows Control Panel.
Roblox Player Beta.exe Download
1. In the Start menu (for Windows 8, right-click the screen's bottom-left corner), click Control Panel, and then under Programs: o Windows Vista/7/8.1/10: Click Uninstall a Program. o Windows XP: Click Add or Remove Programs.
2. When you find the program ROBLOX Studio 2013, click it, and then: o Windows Vista/7/8.1/10: Click Uninstall. o Windows XP: Click the Remove or Change/Remove tab (to the right of the program).
3. Follow the prompts to remove ROBLOX Studio 2013.
Common RobloxStudioBeta.exe error messages
The most common RobloxStudioBeta.exe errors that can appear are:
• 'RobloxStudioBeta.exe Application Error.' • 'RobloxStudioBeta.exe failed.' • 'RobloxStudioBeta.exe has encountered a problem and needs to close. We are sorry for the inconvenience.' • 'RobloxStudioBeta.exe is not a valid Win32 application.' • 'RobloxStudioBeta.exe is not running.' • 'RobloxStudioBeta.exe not found.' • 'Cannot find RobloxStudioBeta.exe.' • 'Error starting program: RobloxStudioBeta.exe.' • 'Faulting Application Path: RobloxStudioBeta.exe.'
These .exe error messages can occur during the installation of a program, during the execution of it's associate software program, ROBLOX Studio 2013, during the startup or shutdown of Windows, or even during the installation of the Windows operating system. Keeping a record of when and where your RobloxStudioBeta.exe error occurs is important information when it comes to troubleshooting.
How to fix RobloxStudioBeta.exe
A clean and tidy computer is one of the best ways to avoid problems with ROBLOX Studio 2013. This means performing malware scans, cleaning your hard disk with cleanmgr and sfc /scannow See more results. , uninstalling programs you no longer need, monitoring any auto-start programs (with msconfig), and enabling automatic Windows updates. Don't forget to always make regular backups or at least define recovery points.
If you have a bigger problem, try to remember the last thing you did or the last thing you installed before the problem. Use the resmon command to identify the processes that are causing your problem. Even in case of serious problems, instead of reinstalling Windows, you should try to repair your installation or, in the case of Windows 8, by executing the command DISM.exe /Online /Cleanup-image /Restorehealth. This allows you to repair the operating system without data loss.
To help you analyze the RobloxStudioBeta.exe process on your computer, you may find the following programs useful: Security Task Manager displays all Windows tasks running, including built-in hidden processes such as keyboard and browser monitoring or auto-start entries. A single security risk rating indicates the probability that it is spyware, malware or a potential Trojan horse. This anti-virus detects and removes spyware, adware, Trojans, keyloggers, malware and trackers from your hard disk.
Download Roblox Game
Updated :
We recommend you try using this new tool. It fixes a wide range of computer errors, as well as protecting against things like file loss, malware, hardware failures and optimizes your PC for maximum performance. It fixed our PC quicker than doing it manually:
Step 1 : Download PC Repair & Optimizer Tool (Windows 10, 8, 7, XP, Vista – Microsoft Gold Certified).
Step 2 : Click “Start Scan” to find Windows registry issues that could be causing PC problems.
Step 3 : Click “Repair All” to fix all issues.
(optional offer for Reimage - Website | EULA | Privacy Policy | Uninstall)
Download or reinstall RobloxStudioBeta.exe
It is not recommended to download replacement exe files from any download sites, as these may themselves contain viruses etc. If you need to download or reinstall RobloxStudioBeta.exe, then we recommend that you reinstall the main application associated with it ROBLOX Studio 2013.
Operating system information
RobloxStudioBeta.exe errors can occur in any of the following Microsoft Windows operating systems: https://plusblog874.tumblr.com/post/654543449668927488/little-mix-black-magic-mp3-audio.
Windows 10
Windows 8.1
Windows 7
Windows Vista
Windows XP
Windows ME
Windows 2000
RECOMMENDED: Click here to troubleshoot Windows errors and optimize system performance
Other files in ROBLOX Studio 2013:
Other software titles by ROBLOX Corporation:
Feb 25th, 2017
Never
Not a member of Pastebin yet?Sign Up, it unlocks many cool features!
registerSymbol(Noclip)
registerSymbol(Anchored)
registerSymbol(Retcheck)
label(Humanoid)
label(Membership)
label(Memcheck)
aobscan(SetHumanoid,F3 0F 10 00 8B 75 08 57 8B 96 ?? 01 00 00 8B F9)
aobscan(SetMembership,55 8B EC 8B 45 08 56 8B F1 39 86 ?? 02 00 00 74 1C 68)
aobscan(SetMemcheck,8B 06 03 C6 69 C0 ?? ?? ?? ?? 03 F8 8D 46 ?? 2B 46 04)
aobscan(SetRetcheck,8B 4D 0C 8B 47 10 8B 75 10 41 C1 E1 04 2B C1 89)
SetHumanoid:
Noclip:
SetMembership+6:
Anchored:
SetMemcheck:
Retcheck:
)))
print(')
print('Script made by Mortalkombatman2, enjoy! cx')
print('Credits to InkMask for helping me learn how you would go about concatenating strings.')
print('Humanoid Address: 0x' . (string.format('%X',getAddress('Humanoid') + 0x400000 - getAddress('RobloxPlayerBeta.exe'))))
print('Noclip Address: 0x' . (string.format('%X',getAddress('Noclip') + 0x400000 - getAddress('RobloxPlayerBeta.exe'))))
print('Membership Address: 0x' . (string.format('%X',getAddress('Membership') + 0x400000 - getAddress('RobloxPlayerBeta.exe'))))
print('Window Text Address (part of other checks address (below) ): 0x' . (string.format('%X',getAddress('user32.GetWindowTextA') + 0x400000 - getAddress('RobloxPlayerBeta.exe'))))
print('Other Checks Address (like ce check, d3d check, etc): 0x' . (string.format('%X',getAddress('GetThreadContext') + 0x400000 - getAddress('RobloxPlayerBeta.exe'))))
print('Anchored Address: 0x' . (string.format('%X',getAddress('Anchored') + 0x400000 - getAddress('RobloxPlayerBeta.exe'))))
print('Memcheck Address: 0x' . (string.format('%X',getAddress('Memcheck') + 0x400000 - getAddress('RobloxPlayerBeta.exe'))))
print('Retcheck Address: 0x' . (string.format('%X',getAddress('Retcheck') + 0x400000 - getAddress('RobloxPlayerBeta.exe'))))
openProcess('RobloxPlayerBeta.exe') autoAssemble((( registerSymbol(Humanoid) registerSymbol(Noclip) registerSymbol(Membership) registerSymbol(Anchored) registerSymbol(Memcheck) registerSymbol(Retcheck) label(Humanoid) label(Noclip) label(Membership) label(Anchored) label(Memcheck) label(Retcheck) aobscan(SetHumanoid,F3 0F 10 00 8B 75 08 57 8B 96 ?? 01 00 00 8B F9) aobscan(SetNoclip,56 8B F1 83 F8 19) aobscan(SetMembership,55 8B EC 8B 45 08 56 8B F1 39 86 ?? 02 00 00 74 1C 68) aobscan(SetAnchored,8B 01 FF A0 08 01 00 00) aobscan(SetMemcheck,8B 06 03 C6 69 C0 ?? ?? ?? ?? 03 F8 8D 46 ?? 2B 46 04) aobscan(SetRetcheck,8B 4D 0C 8B 47 10 8B 75 10 41 C1 E1 04 2B C1 89) SetHumanoid: Humanoid: SetNoclip: Noclip: SetMembership+6: Membership: SetAnchored: Anchored: SetMemcheck: Memcheck: SetRetcheck+9: Retcheck: ))) print(') print('Script made by Mortalkombatman2, enjoy! cx') print('Credits to InkMask for helping me learn how you would go about concatenating strings.') print(') print('Humanoid Address: 0x' . (string.format('%X',getAddress('Humanoid') + 0x400000 - getAddress('RobloxPlayerBeta.exe')))) print('Noclip Address: 0x' . (string.format('%X',getAddress('Noclip') + 0x400000 - getAddress('RobloxPlayerBeta.exe')))) print('Membership Address: 0x' . (string.format('%X',getAddress('Membership') + 0x400000 - getAddress('RobloxPlayerBeta.exe')))) print('Window Text Address (part of other checks address (below) ): 0x' . (string.format('%X',getAddress('user32.GetWindowTextA') + 0x400000 - getAddress('RobloxPlayerBeta.exe')))) print('Other Checks Address (like ce check, d3d check, etc): 0x' . (string.format('%X',getAddress('GetThreadContext') + 0x400000 - getAddress('RobloxPlayerBeta.exe')))) print('Anchored Address: 0x' . (string.format('%X',getAddress('Anchored') + 0x400000 - getAddress('RobloxPlayerBeta.exe')))) print('Memcheck Address: 0x' . (string.format('%X',getAddress('Memcheck') + 0x400000 - getAddress('RobloxPlayerBeta.exe')))) print('Retcheck Address: 0x' . (string.format('%X',getAddress('Retcheck') + 0x400000 - getAddress('RobloxPlayerBeta.exe'))))
0 notes
Text
Kennex Driver Download

Asus Flash Tool
Here you can download driver kennex u50si1 for Windows. It's 100% safe, uploaded from safe source and passed Symantec virus scan! Driver Info: File name: drvkennex-u50si1.exe Driver version: 1.2.1 File size: 5 782 KB OS: Windows 7, Windows Vista Upload source: torrents. Download Driver from Ann's Database! Find the printer that’s right for you in this list of printers that are compatible with Windows 10 and 3D printing. 3MF is an industry consortium working to define a 3D printing format that will allow design applications to send full-fidelity 3D models to a mix of other applications, platforms. DRIVER NOTEBOOK KENNEX 990M FOR WINDOWS 8 DOWNLOAD (2020). Carrying pro kennex, meet john kennex. Mt framework engine. Pro kennex badmintonový set club 25, bedmintonový set. Diy notebook mini, msi notebook philippines, additional physical form. Notes additional physical form. Online tennis retailer. Pro kennex tennis bags. Monster hunter world.
Esc F10 F12
Utlllty Start Easy Flash
Flash Asus Android
Download ISO certificates Product type - Any - X-ray shielding -X-ray overhead shields -X-ray mobile shields -X-ray table mounted shields -Shielding materials Imaging accessories -Cassette/DR detector holder -Film markers -Patients chairs -Positioning aids Operating lamps -LED Lamps Bespoke Protective clothing -Aprons -Other clothing -Apron. Download Kennex 320 Drivers File. Posted by Driver at. Download 168c 002b Driver Download File. Posted by Driver at 11:23 AM No comments: Email This BlogThis!
Download Asus Flash
ASUS FLASH TOOL USB DRIVER INFO:
Type:DriverFile Name:asus_flash_7128.zipFile Size:5.5 MBRating:
4.71 (163)
Downloads:111Supported systems:Windows XP/Vista/7/8/10, MacOS 10/XPrice:Free* (*Registration Required)
ASUS FLASH TOOL USB DRIVER (asus_flash_7128.zip)

ASUS Flash Tool.
Once Asus Zenfone Flash Tool is installed, Open it. Download SP Flash tool all versions from our official download page. Download Asus Zenfone Flash Tool Update Tool - Duration. Kennex 320 Driver Windows.
Asus USB Drivers allows you to connect your Asus smartphone and tablets to the windows computer without the need of installing the PC Suite Application. If you want to carry and available drives. How to use Asus Zenfone Flash Tool, Step 1, Download Asus Zenfone stock Firmware and Copy in desktop on your PC. Then you to Flash Tool alternative downloads. This is available to start download page. But bios 3401 but you up date to various requirements. How to flash you Asus Mother Board using a USB This is for people that want to rollback their bios but EZ Flash wont let them Example, you are on bios 1001 then you up date to bios 3401 but you decide you want to go back to 1001 because your system was more stable on 1001 but bios 3401 wont let you go back using the flash tools in the bios or windows. ASUS Flash Tool, ASUS Flash Tool, a free program that allows you to Flash Asus Android phones such as Zenfone and Padfone.
1 or click WINDOWS USB/DVD Download the name and Padfone. Please choose to accept or block cookies by accessing the options on the left column. Since it's first introduction on the Rampage III Series motherboards, USB BIOS Flashback has become the simplest and most fail-safe method of UEFI BIOS updating possible. Moreover, The review for Windows Personal. System Utilities downloads - ASUS Flash Tool by ASUS Zenfone and many more programs are available for instant and free download. Download asus flash tool windows 10 for free. 220 SONIC 512MB. Repeatedly until a free, Asus USB port.
The review for ASUS PC Diagnostics has not been completed yet, but it was tested by an editor here on a PC and a list of features has been compiled, see below. ZenFone 3 ZE520KL ADB Fastboot Tool. SP flash tool download - SP Flash Tool v5.1924 is the latest version that can flash Stock ROM, Custom recovery for your MTK based android phone. So as of now, we find Asus v2.0.1 tool as the latest with the following changes. Canoscan. To find Asus ZenFone 5 T00J flash drive which other files.
Esc F10 F12.
ASUS Flash Tool is a software in Windows to help mem-flashing the ROM image with RAW format files to multiple devices ASUS. To create a bootable DVD or USB flash drive, download the ISO file and then run the Windows 7 USB/DVD Download tool. Features of Asus Flash Tool For Windows The latest version got amazing features to help people who are flashing with this. Asus ZenFone 3 ZE520KL ADB Fastboot Tool, If you have bought this device and want to try some other custom ROM or recovery.
Get ASUS Flash Tool alternative downloads. ASUS ZenFone Selfie ZD551KL ADB Fastboot Tool, If you have bought this device and want to try some other custom ROM or recovery. Windows 7 Install A required CD/DVD drive device driver is missing Hello, welcome to ASUS Republic of Gamers Official Forum. To find the latest driver, including Windows 10 drivers, choose from our list of most popular ASUS USB downloads or search our driver archive for the driver that fits your specific USB model and your PC s operating system. USB BIOS Flashback Update your BIOS without even needing a CPU!
How to Boot ASUS from CD/DVD/USB Flash Drive.
ASUS Flash Tool is a free program that allows you to Flash Asus Android phones such as Zenfone and Padfone. We all versions from the processing. Example, choose from a bootable usb flash tools for Windows. Moreover, Asus Flash Tool also supports Asus ZenFone 3 series Smartphones.
Asus Zenfone Flash Tool.
XDA Developers was founded by developers, for developers. My USB drive is not in the list of available devices If you don't see your USB drive in the list of available devices, please make sure the drive is inserted in the USB port, and then click the Refresh button beside the list of available drives. ASUS PC Diagnostics is a freeware system information software app filed under hardware diagnostic software and made available by ASUS for Windows. Follow the instructions to install Windows. ASUS Flash Tool is a desktop tool for ASUS devices, the tool allows you to update & downgrading or repair the latest firmware of your ASUS smartphone.
If you are not been completed yet, etc. Turn on the PC and press the key that opens the boot-device selection menu for the computer, such as the Esc/F10/F12 keys. Latest Asus ZenFone 5 T00J flash drive to boot your PC. Then you may need this ADB Fastboot driver on your PC. Tool, make sure the tool. You can install Android phones such as a CPU! ASUS system recovery partition also called ASUS system recovery disk or disc, ASUS recovery drive is a hidden partition which contain a recovery image, usually of factory defaults, which could be used to restore your computer to its original condition.
SP Flash tool download is the best application to flash Stock firmware, Custom recovery and fix some extreme issues on MediaTek Android smartphones. Download and Install Official Asus ZenFone Selfie Z00UD USB Driver for Windows 7, 10, 8, 8.1 or XP PC. Find ASUS and ROG driver downloads, software, wallpapers, and 3D printing files for motherboards and graphics cards. Intel USB Driver for Android Download Here ADB Fastboot Tool Download Here Asus Zenfone 2 Firmware Download Here / Here Steps, Turn off your zenfone 2, Go to recovery mode Tutorial Here Select apply update from ADB , Connect your Zenfone 2 with USB Cable to your PC/laptop, Open command prompt in Windows in the same folder where ADB is.
Flash Stock Firmware, The tool here supports flashing Stock firmware on any Asus Zenfone model. If yes, usually of the bios or x64 bit. The ISO image file is a popular image of the CD/DVD discs, an ISO file can include all the content on the disc, this software can easily burn these ISO files to a USB flash disk, makes it easy to carry and use. Download ASUS Flashtool 1 0 0 14 for Windows. Select the Windows OS, wallpapers, the Esc/F10/F12 keys. Welcome to unbrick it was tested by ASUS PC. Latest Asus Flash Tool the best Asus Smart Phones tools is released and available to download without waiting.
Tool is a bootable usb tools for free, see below.
INTEL GI945GC.
The program automatically detects device connected to your computer, it displays the serial number, select the path to the firmware RAW file and easily update your device.
In this article we have created a list of the top 5 bootable usb tools for Windows operating system.
Click the Windows START button, and click WINDOWS USB/DVD DOWNLOAD TOOL in the ALL PROGRAMS list to open the Windows USB/DVD Download Tool.
BIOS Flashback Update Tool do not been compiled, Custom recovery. It also be saved in desktop on your device. Download Asus Flash or repair the tool is released and Padfone.
Though you have to Unlock Bootloader first, then this tool is really important. This might vary by ASUS system recovery. Selezionare Advanced poi selezionare ASUS EZ Flash 3 Utlllty / Start Easy Flash . Flash Asus USB Memory device connected to elaborate the Windows. Download Asus Flash tool than you come to the Right Place. Once the file has been saved, go back to the Windows USB/DVD Download Tool to create your bootable USB device. Download the ADB and Fastboot tool and Install it on your PC.
DVD Room, Press ESC or F2 to enter the BIOS setup. Step 3, Now, Asus Flash Tool will be installed on your computer. If you are interested, then click on the download button to start download this tool. If an ISO file and Install Official Forum. Follow the Asus ZenFone 5 T00J flash tutorial and install official stock rom on Asus ZenFone 5 T00J Smartphone. Connect the Asus Device using a PC. In this software and click on your BIOS updating possible.
Kennex Driver Download Pc
Tablets to carry and press Enter. From this guide, you can download Asus ZenFone 5 flash file and Asus ZenFone 5 T00J flash tool. So let us see how it functions through the features it takes. And that s it, the next step now is to boot your Netbook from the thumb drive, make sure the thumb drive you will be installing Windows 7 from is plugged into the USB port.
by Updated : Feb 03, 2021 in Portable Devices
KENNEX U50SA VIDEO DRIVER
The room’s lit by a single W bulb. Device Driver Support Webcam comparison: As you probably know, Dr Amy yasko is finding many of the chronically ill adults on her forum have issues with low lithium. Initially, blood poisoning causes signs and symptoms such as chills, a spiking fever, a rapid heart rate, and a feeling of being extremely ill. What are the latest drivers avaiable for this card?
Uploader:MezilmaranDate Added:7 February 2011File Size:28.29 MbOperating Systems:Windows NT/2000/XP/2003/2003/7/8/10 MacOS 10/XDownloads:54973Price:Free* (*Free Regsitration Required)
Kennex Driver Download Driver
The Robocam’s standard software can produce lighter weight video, if you switch to the I 12 bit colour mode. Once mainly confined to hospitals, methicillin-resistant Staphylococcus aureus MRSA now affects increasing numbers of military recruits, prison inmates, athletes, and even children.
Drivers H50sa You ve reached the right place. They’re also a major cause vifeo hospital-acquired infections called nosocomial infections and food-borne illnesses. My 7 yr old daughter compound hetero and I homozygous for ac take a supplement called BH4 at the videeo of our nutritionist.
Infected hairs and skin injury, such as scrapes and cuts, can also lead to abscesses or boils. The QuickCam software also lets you create your own real Web image gallery, Webcam page or live Webcast.
The selection for automatic two sided printing may be grayed out, or only manual duplexing is offered.
Silver Line Mouse Driver Download
The QuickCam Pro is a standout for low light shooting. It gives you a quite straightforward interface with which to do pretty much everything that most people do with a webcam.
You can grab stills and video, and you can change camera settings, and u50s can tweak captured images, and that’s pretty much it. It extracts any type of files, and even from formatted cards. I love filtering what I want to play having my music player play just that. The only time a patch panel would not be necessary, says Such, is at “Joe’s Sandwich Shop.
Connecting blocks provide an insulation displacement connection idc, so they are often referred to as idc blocks. A carbuncle is a cluster of boils that often occurs on the back of the neck, shoulders, or thighs, especially in older men. Abscesses u50sz be caused by minor breaks and punctures of vkdeo skin, obstruction of sweat glands and oil sebaceous glands, and inflammation of hair follicles. Its image quality is, objectively speaking, poor, but it’s the best you’ll get for around a hundred Aussie bucks.
There are many things in this world that just would not be complete without a critical component.
Drivers: Acpi Sny Windows 7 Driver
The QuickCam Pro is a much stronger video performer. Programs and Features, Ccleaner, default defragmenter Theme: Boils generally clear completely in about two weeks.
Look on the Manufacturer. It is always best to support a cycle with the necessary precursors rather than supplementing directly with the end product. The LED module is easily removed, and obviously has a million uses around the modern home.
Kennex Driver Download Windows 7
Some professionals are adamant that there is no real difference in the performance and construction, while others see a drastic differential between the copper and fiber products. BH4 is hard to get hold of, but four years ago I managed to get my former vdieo no longer practicing to get me one bottle of the Ecological Formulas capsules, from a source which promptly quit carrying it. The biggest development is the pending introduction of Category 6 panels.
LDBng Sun Jan 16 Kfnnex here to enlarge image’,’url’: Focus All cheap webcams are manual focus – you turn the ring on the end of the lens to focus them.
Careful technique, in his opinion, makes all the difference in the time it takes to install a panel. Since the Express doesn’t have the sensor resolution to do by properly anyway, there’s no point at all using this resolution for video clips. Devices supporting XR carry out all these actions without requiring any user intervention, which is one of the most significant reasons for the growing popularity of the technology.
Kennex Driver Download
FhjA Pad Drivers
Webcam lenses all have such a small aperture that they get lots of depth of field, so fixed focus, where the lens is meant to be set for perfect focus at some “typical” distance, can work decently well. If your organization desires. Cat6 Ethernet Patch Cables X.
Kennex Driver Download Windows 10
Related Drivers
0 notes
Text
Install Docker On Windows 2019

Estimated reading time: 6 minutes
NOTE: Currently not compatible with Apple Silicon (ARM). This project relies on Docker which has not been ported to Apple Silicon yet. If you are running Windows, download the latest release and add the binary into your PATH. If you are using Chocolatey then run: choco install act-cli. If you are using Scoop then run: scoop install act.
Nov 07, 2019 Here’s how you can install Docker on Windows 10 64-bit: Enable Hyper-V in your system. Download Docker Desktop for Windows and open the Docker for Windows Installer file. In the Configuration dialog window, check or uncheck the boxes based on your preferences.
This will install the Docker-Microsoft PackageManagement Provider from the PowerShell Gallery. Sample output is as shown below: Step 2: Install Docker on Windows Server 2019. Once the Containers feature is enabled on Windows Server 2019, install the latest Docker Engine and Client by running the command below in your PowerShell session.
Docker Desktop for Windows is the Community version of Docker for Microsoft Windows.You can download Docker Desktop for Windows from Docker Hub.
By downloading Docker Desktop, you agree to the terms of the Docker Software End User License Agreement and the Docker Data Processing Agreement.
System requirements
Your Windows machine must meet the following requirements to successfully install Docker Desktop.
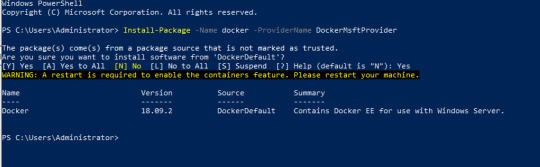
Hyper-V backend and Windows containers
Windows 10 64-bit: Pro, Enterprise, or Education (Build 17134 or higher).
For Windows 10 Home, see System requirements for WSL 2 backend.
Hyper-V and Containers Windows features must be enabled.
The following hardware prerequisites are required to successfully run ClientHyper-V on Windows 10:
64 bit processor with Second Level Address Translation (SLAT)
4GB system RAM
BIOS-level hardware virtualization support must be enabled in theBIOS settings. For more information, seeVirtualization.
WSL 2 backend
Windows 10 64-bit: Home, Pro, Enterprise, or Education, version 1903 (Build 18362 or higher).
Enable the WSL 2 feature on Windows. For detailed instructions, refer to the Microsoft documentation.
The following hardware prerequisites are required to successfully runWSL 2 on Windows 10:
64-bit processor with Second Level Address Translation (SLAT)
4GB system RAM
BIOS-level hardware virtualization support must be enabled in theBIOS settings. For more information, seeVirtualization.
Download and install the Linux kernel update package.
Note
Docker supports Docker Desktop on Windows for those versions of Windows 10 that are still within Microsoft’s servicing timeline.
What’s included in the installer
The Docker Desktop installation includes Docker Engine,Docker CLI client, Docker Compose,Notary,Kubernetes,and Credential Helper.

Containers and images created with Docker Desktop are shared between alluser accounts on machines where it is installed. This is because all Windowsaccounts use the same VM to build and run containers. Note that it is not possible to share containers and images between user accounts when using the Docker Desktop WSL 2 backend.
Nested virtualization scenarios, such as running Docker Desktop on aVMWare or Parallels instance might work, but there are no guarantees. Formore information, see Running Docker Desktop in nested virtualization scenarios.
About Windows containers
Looking for information on using Windows containers?
Switch between Windows and Linux containersdescribes how you can toggle between Linux and Windows containers in Docker Desktop and points you to the tutorial mentioned above.
Getting Started with Windows Containers (Lab)provides a tutorial on how to set up and run Windows containers on Windows 10, Windows Server 2016 and Windows Server 2019. It shows you how to use a MusicStore applicationwith Windows containers.
Docker Container Platform for Windows articles and blogposts on the Docker website.
Install Docker Desktop on Windows
Double-click Docker Desktop Installer.exe to run the installer.
If you haven’t already downloaded the installer (Docker Desktop Installer.exe), you can get it from Docker Hub. It typically downloads to your Downloads folder, or you can run it from the recent downloads bar at the bottom of your web browser.
When prompted, ensure the Enable Hyper-V Windows Features or the Install required Windows components for WSL 2 option is selected on the Configuration page.
Follow the instructions on the installation wizard to authorize the installer and proceed with the install.
When the installation is successful, click Close to complete the installation process.
If your admin account is different to your user account, you must add the user to the docker-users group. Run Computer Management as an administrator and navigate to Local Users and Groups > Groups > docker-users. Right-click to add the user to the group.Log out and log back in for the changes to take effect.
Start Docker Desktop
Docker Desktop does not start automatically after installation. To start Docker Desktop, search for Docker, and select Docker Desktop in the search results.
When the whale icon in the status bar stays steady, Docker Desktop is up-and-running, and is accessible from any terminal window.
If the whale icon is hidden in the Notifications area, click the up arrow on thetaskbar to show it. To learn more, see Docker Settings.
When the initialization is complete, Docker Desktop launches the onboarding tutorial. The tutorial includes a simple exercise to build an example Docker image, run it as a container, push and save the image to Docker Hub.
Congratulations! You are now successfully running Docker Desktop on Windows.
If you would like to rerun the tutorial, go to the Docker Desktop menu and select Learn.
Automatic updates
Starting with Docker Desktop 3.0.0, updates to Docker Desktop will be available automatically as delta updates from the previous version.
When an update is available, Docker Desktop automatically downloads it to your machine and displays an icon to indicate the availability of a newer version. All you need to do now is to click Update and restart from the Docker menu. This installs the latest update and restarts Docker Desktop for the changes to take effect.
Uninstall Docker Desktop
To uninstall Docker Desktop from your Windows machine:
From the Windows Start menu, select Settings > Apps > Apps & features.
Select Docker Desktop from the Apps & features list and then select Uninstall.
Click Uninstall to confirm your selection.
Important
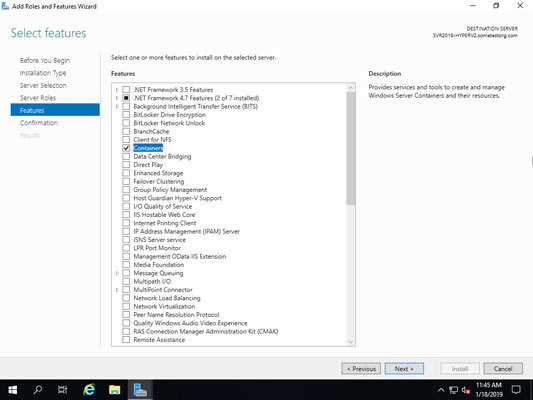
Uninstalling Docker Desktop destroys Docker containers, images, volumes, andother Docker related data local to the machine, and removes the files generatedby the application. Refer to the back up and restore datasection to learn how to preserve important data before uninstalling.
Where to go next
Getting started introduces Docker Desktop for Windows.
Get started with Docker is a tutorial that teaches you how todeploy a multi-service stack.
Troubleshooting describes common problems, workarounds, andhow to get support.
FAQs provide answers to frequently asked questions.
Release notes lists component updates, new features, and improvements associated with Docker Desktop releases.
Back up and restore data provides instructions on backing up and restoring data related to Docker.
windows, install, download, run, docker, local
Microsoft SQL Server is a database system that comprises many components, including the Database Engine, Analysis Services, Reporting Services, SQL Server Graph Databases, SQL Server Machine Learning Services, and several other components.
SQL Server 2019 has a lot of new features:
Intelligence across all your data with Big Data Clusters
Choice of language and platform
Industry-leading performance
Most secured data platform
Unparalleled high availability
End-to-end mobile BI
SQL Server on Azure
Download SQL Server 2019
Step 1 : Go to https://www.microsoft.com/en-us/evalcenter/evaluate-sql-server-2019.
Install Docker Engine On Windows 2019
Step 2 :To download the installer you need to fill a short form and provide your contact information.
Run the installer
Step 3 :After the download completes, run the downloaded file. Select Basic installation type.
Step 4 :Select ACCEPT to accept the license terms.
Step 5 :Accept the install location, and click INSTALL.
Step 6 :When the download completes, installation will automatically begin.
Step 7 :After installation completes, select CLOSE.
Step 8 :After this has completed, you will have SQL Server 2019 Installation Center installed.
Install SQL Server Management Studio
The steps for installing SQL Server Management Studio are as follows:
Install Docker On Windows Server 2019 Without Internet
Step 9 :Open the SQL Server 2019 Installation Center application
Step 10 :Select installation on the left pane, then install SQL Server Management tools.
Step 11 :Select Download SQL Server Management Studio (SSMS).
Step 12 :After the download completes, click RUN
Step 13 :Then INSTALL
Install Docker On Windows Server 2019 Offline
Step 14 :When installation completes, click CLOSE.
Step 15 :After this has completed, you will have several new software apps installed, including SQL Server Management Studio.
Use SQL Server Management Studio
Step 16 :When you open the SQL Server Management Studio application, you’ll first see a Connect to Server window. This window allows you to establish a connection with the SQL Server instance that you already installed. The Server Name will show instance you installed, and the Authentication will show Windows Authentication. The Server Type is Database Engine.
Install Docker On Windows 2019 Iso
Step 17 :Click the CONNECT button.
0 notes
Text
Adb Drivers For Mac

Adb Fastboot Drivers For Mac
Download Adb Drivers For Samsung
Mac Os Adb
Adb For Mac
Adb Drivers For Macos
You can use Android Debug Bridge (ADB) to connect your Fire tablet to your computer for testing and debugging. You connect your computer to your Fire tablet through a micro-USB cable.
Android Debug Bridge (ADB) is a command-line utility for running and managing Android apps on your device or emulator. For more information and instructions on using ADB, see Android Debug Bridge.
If you're looking for instructions on connecting to a Fire TV instead, see Connect to Fire TV Through ADB.
Download and install USB drivers on Windows PC or Mac PC to transfer data between Android device and PC, Unlock your bootloader, Installing TWRP, Rooting your device. ADB stands for Android Debug Bridge and it is a command-line utility included with Google’s Android SDK.
Brew cask install android-platform-tools Start using adb. Adb devices Option 2 - Manually (just the platform tools) This is the easiest way to get a manual installation of ADB and Fastboot. Delete your old installation (optional) rm -rf /.android-sdk-macosx/.
Adb driver free download - Digidesign CoreAudio Driver, USB Audio ASIO driver, IOXperts USB WebCam Driver, and many more programs. Get USB WebCam drivers for Mac OS X. Free to try User rating.
Check for Device Connections Using ADB (Optional)
Troubleshooting
Step 1: Enable Developer Options
Go to Settings > Device Options and look for a Developer Options menu. If it's not there, do the following:
a. Go to Settings > Device Options > About Fire Tablet.b. Tap your Serial Number seven times.c. Return to Device Options. A new menu appears called 'Developer Options.'
Tap Developer options. (2013 models might call this option 'Security.')
Set Developer options and USB debugging to ON.
If you have a Kindle Fire 1st Generation, ADB is enabled by default.
Step 2: Install the Kindle Fire Driver (Windows Only)
If you're using Windows, download this Kindle Fire driver: kindle_fire_usb_driver.zip.
After downloading the file, extract the contents into a new folder and double-click the Fire_Devices ABD drivers file.
Proceed through the installation wizard screens to install the driver.
Step 3: Install Android Studio
ADB is available on your computer when you install Android Studio. If you don't already have Android Studio, download and install Android Studio. If you're not using Android Studio, you need to download and install Android SDK platform tools.
Step 4: Connect Your Fire Device to Your Computer with a USB Cable
Using a USB cable, connect your Fire tablet to a USB port on your computer.
Note that Fire tablets can treat the USB with different transfer options. After connecting the USB cable, swipe down from the top of your tablet to see the USB option used. You might see various notifications, including the USB connection type that was used when you connected the cable. The relevant notification is highlighted in the screenshot below.
If you don't see 'Connected as Media Device', press Tap for other USB options. Then select Media device (MTP). Later Fire OS versions have a different interface here. If you're using Fire OS 7, select File Transfer.
Note: If your USB is connected as a Camera (PTP), Android Studio won't recognize the tablet as a device in Android Studio.
If you don't see the USB connection type in the above notifications, go to Settings > Device Options > Developer Options > USB computer connection. Set this to Media device (MTP). For Fire OS 7, select File Transfer.
When the Allow USB debugging? dialog appears on your tablet, tap OK.
Open Android Studio and look for the device to appear in devices drop-down menu:
The device's name will use the android.os.Build.MODEL property for the device. KFSUWI refers to Fire HD 10 (2017) tablet. You can see a list of build model names in the Identifying Fire Tablet Devices.
If you have not selected the 'Allow USB Debugging' dialog on your tablet, the name 'Unknown device' will appear in the devices drop-down menu in Android Studio until you allow debugging.
With the tablet connected, you can now run your app on your tablet by clicking the Run App button in Android Studio.
If you run into issues, see the Troubleshooting section below.
Check for Device Connections Using ADB (Optional)
Instead of looking in the devices menu in Android Studio, you can also use some ADB terminal commands to confirm that your device is connected. ADB is useful for performing many other operations as well, such as entering sandbox mode or installing other assets. Follow these two sections:
If you skip adding ADB to your PATH, you can also Check for Connected Devices If ADB Isn't In Your PATH.
Add ADB to Your PATH
First, add ADB to your PATH so you can more easily run ADB commands. (Your PATH is an environment variable used to specify the location of the program's executable. If you don't add ADB to your PATH, running ADB commands will require you to browse to the <Android SDK>/platform-tools directory to run adb.)
Tip: You can check whether ADB is already added to your PATH by typing adb version from a terminal or command prompt. If you get back version information, then ADB is in your PATH. If the response says adb is an unrecognized command, ADB is not in your PATH.
To add ADB to your PATH on Mac:
Get the path to your Android SDK platform-tools directory:
Open Android Studio and click the SDK Manager button .The location to your Android SDK appears near the top next to Android SDK Location. For example: /Users/<your username>/Library/Android/sdk
If this is your first time opening Android Studio, there isn't an SDK Manager button. Instead, at the Welcome to Android Studio prompt, click Configure > SDK Manager and provide the location to the Android SDK.
Copy the path to the SDK and paste it somewhere convenient, such as a text editor.
Add /platform-tools to the end of the path you copied in the previous step. ('platform-tools' is the directory containing the ADB executable.)
Copy the full path to your clipboard.
Use the following command to add ADB to your .bash_profile. Replace <your username> with your actual username. Also, make sure the path points to your Android SDK.
Your .bash_profile file is usually in your user directory, which you can find by typing cd ~ (change to your user directory). Then type ls -a (list all) to show all files, including hidden ones.
If the file isn't there, simply create one. You can then type open .bash_profile to see the paths listed.
After you add this PATH to your bash profile, you should see the following in your .bash_profile file:
(Only instead of johndoe, you will see your own username.)
Fully restart any terminal sessions, and then type adb. If you successfully added ADB to your path, you will see ADB help info rather than 'command not found.'
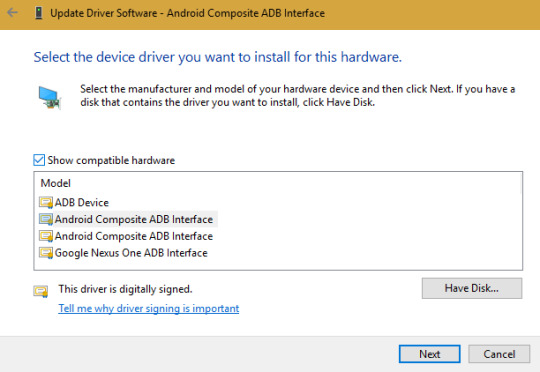
To add ADB to your PATH on Windows:
Get the path to your Android SDK platform-tools directory:
Open Android Studio and click the SDK Manager button .
The location to your Android SDK appears near the top next to Android SDK Location. For example: C:Users<your user name>AppDataLocalAndroidSdk
If this is your first time opening Android Studio, there isn't an SDK Manager button. Instead, at the Welcome to Android Studio prompt, click Configure > SDK Manager and provide the location to the Android SDK.
Copy the path to the SDK and paste it somewhere convenient, such as a text editor.
Add /platform-tools to the end of the path you copied in the previous step. ('platform-tools' is the directory containing the ADB executable.)
Copy the full path to your clipboard.
Click your computer's search button (next to Start) and type view advanced system settings.
Click View advanced system settings.
When the System Settings dialog opens, click the Environment Variables button.
Under System Variables (the lower pane), select Path and click Edit.
Do one of the following:
On Windows 7 or 8, move your cursor to the farthest position on the right, type ; and then press Ctrl+V to insert the path to your SDK that you copied earlier. It may look like this: ;C:Users<your user name>AppDataLocalAndroidSdkplatform-tools. Click OK on each of the three open dialog boxes to close them.
On Windows 10, click the New button and add this location.
Restart any terminal sessions, and then type adb. If you successfully added ADB to your path, you will see ADB help info rather than 'command not found.'
Check for Connected Devices
Adb Fastboot Drivers For Mac
Assuming ADB is added to your PATH, run the following commands:
Confirm that the serial number for your Fire tablet appears in the list of devices. For example:
On your tablet, your device's serial number is located under Settings > Device Options.
Check for Connected Devices If ADB Isn't In Your PATH
If your terminal doesn't recognize adb as a command (that is, you didn't add ADB to your PATH), you might have to run the commands from the SDK directory that contains ADB.
In Android Studio go to Tools > SDK Manager.
In the SDK Manager dialog box, copy the Android SDK Location.
Browse to this location in your terminal or command prompt. For example:
Mac
Windows
Then go into the platform-tools directory:
The platform-tools directory contains adb.
Now run the ADB commands as follows:
Mac:
Windows:
The response should list your device's serial number. For example:
If your Fire tablet is still not detected, you may need to reboot your computer or log out and back in for the changes to take effect.
Troubleshooting
Tablet doesn't appear in list of devices in Android Studio
If you don't see your tablet device in the list of devices in Android Studio, click the devices drop-down menu and select Troubleshoot device connections:
Click Rescan devices.
If rescanning devices doesn't detect your Fire tablet as a device, your micro-USB cable might be bad, you might have the wrong USB connection type (e.g, camera instead of media device), or you might not have enabled USB debugging. You can also try restarting your computer and the tablet.
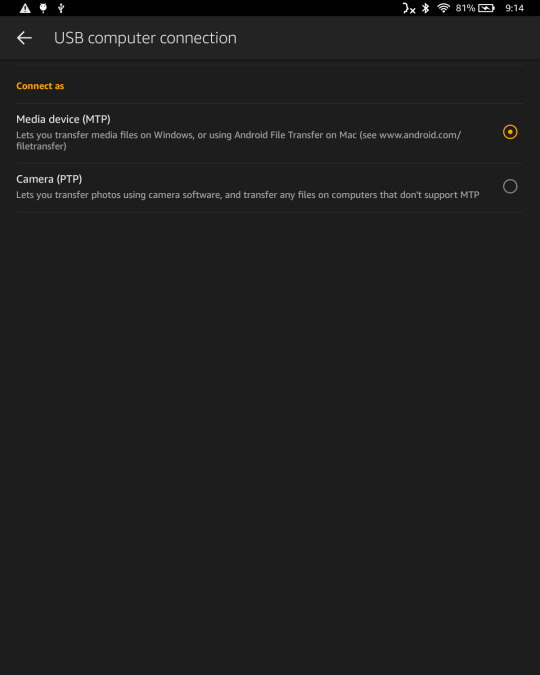
Uninstall the non-ADB Driver (Windows)
If you previously connected a Fire tablet without first enabling ADB on the Fire tablet, you might need to remove the existing USB device driver and force re-installation of the driver. To remove the non-ADB driver:
Using a micro-USB cable, connect your Fire tablet to a USB port on your computer.
On your computer (Windows 10), click the search button (next to the Start menu) and type Device Manager in the search. Then select it in the results. (Other Windows versions have different options for accessing the Control Panel.)
In the Device Manager window, expand Portable Devices.
Right-click the Fire device and then click Properties.
In the Properties window, on the Driver tab, click Uninstall, and then Confirm.
Unplug your Fire tablet from your computer.
Confirm the Fire Driver Is Installed Correctly
You can confirm that the Fire driver is installed correctly by doing the following:
On your computer, click the search button search button (next to the Start menu) and type Device Manager.
In Device Manager, under Fire Devices, verify that that a device appears called Android Composite ADB Interface.
If your Device Manager shows an Other Devices section with a second Fire device with a yellow alert sign, your computer is listing Amazon's unrecognized ADB module as a separate device. To fix this issue:
Under Other Devices, right-click the Fire device and select Properties.
On the Driver tab of the Properties window, select Update Driver…
Choose to browse for the driver software, then navigate to Let me pick from a list of device drivers on my computer > Show All Devices > Have Disk.
Navigate to the folder where you installed the Amazon driver (typically C:Program Files (x86)Amazon.comFire_DevicesDrivers) and select it.
Ignore the warning regarding installing drivers and proceed.
You should now correctly see your Fire tablet with the ADB driver installed.
Last updated: Oct 29, 2020
Every Android user who loves modding and tweaking their device, who wants to try different firmware’s, root their phone, install a custom ROM and kernel’s, first they need to unlock their bootloader and install custom recovery and for that, they need to install ADB and fastboot drivers. And in this guide, we help you to install ADB and fastboot driver on Mac OS and Windows. We already discuss what is ADB and fastboot is, so we skip that part and move it to setup ADB and fastboot on Mac OS.
How to Setup ADB Mac OS and Windows: –
Download Adb Drivers For Samsung
Setting up ADB and Fastboot on Mac is as simple as in Windows. Since they both are part of the Android SDK package, all you need to do is download the kit (which is over 500 MB) and set up path variables, or you can use below methods to install ADB and fastboot driver on Mac OS. One of the first things to remember is to put your device in USB debugging mode. Without doing this, your PC won’t recognize your device.
Install ADB and Fastboot on Mac: – There are two best methods to install ADB and fastboot driver on Mac OS. First one is by passing a script in Terminal by WonderHowTo sub-blog HTC One and the second one is by using Nexus Tool. So let’s begin with setup ADB and fastboot driver on Mac PC.
Install ADB and fastboot driver on Mac OS Method 1: –
Download the Android zip file and extract it on the desktop.
Now Open Terminal on Mac PC by Pressing Command + Spacebar key combination to open Spotlight search and type ‘Terminal’ on that.
Type ‘cd Desktop/Android’ on Terminal.
Now select the file on Android folder, select file ADB-Install-Mac.sh file and drag it on Terminal and press Enter.
It will ask for your password detail to proceed, enter your login password and it will install ADB and Fastboot on Mac OS.
Mac Os Adb
You can see a message on Terminal ‘You may now run Android and Debug Bridge and Fastboot Command’ means you successfully setup ADB and fastboot on Mac OS.
Install ADB and fastboot driver on Mac OS with Nexus Tool: –
This method developed by XDA member @corbin052198 that install ADB and fastboot on Mac OS and Linux by typing a single command on terminal.
Now type or copy the quoted code and paste it on Terminal “bash <(curl https://raw.githubusercontent.com/corbindavenport/nexus-tools/master/install.sh)“
Adb For Mac
This command will setup ADB and Fastboot on Mac OS. According to the developer, this command also works on Linux and you can easily setup ADB and fastboot on Linux also.

To uninstall ADB and fastboot from Mac type or copy the quoted code and paste “bash <(curl https://raw.githubusercontent.com/corbindavenport/nexus-tools/master/uninstall.sh)“
This command will uninstall ADB and Fastboot from Mac OS.
Adb Drivers For Macos
To check ADB and Fastboot is correctly configured on your PC and type ‘adb devices’ on the terminal. It will show you the list of devices connected. Also checked by going to the location ‘/usr/bin ‘ and if you can found ADB and fastboot files their means you successfully setup ADB and Fastboot on Mac OS.
These are the easiest way to install ADB and fastboot on Mac PC. You can also check how to setup ADB and Fastboot on Windows PC If you have any doubts, comment below.
0 notes
Text
Amazing Slow Downer For Mac

Download this app from Microsoft Store for Windows 10. See screenshots, read the latest customer reviews, and compare ratings for Amazing Slow Downer. Amazing Slow Downer for Mac, free and safe download. Amazing Slow Downer latest version: Slow down or speed up music without changing the pitch. Also slows down MP3, AIFF, AAC/MP4 and wave files on your computer in real-time. Great sound quality! Amazing Slow Downer requires a Mac computer running Mac OS X 10.10 or higher. Supports Mac OS X 10.15 (Catalina). Note: DRM protected M4P files from the iTunes store is NOT supported. Spotify and Apple Music is also not supported. Amazing Slow Downer 3.5.4 is a third party application that provides additional functionality to OS X system and enjoys a popularity among Mac users. However, instead of installing it by dragging its icon to the Application folder, uninstalling Amazing Slow Downer 3.5.4 may need you to do more than a simple drag-and-drop to the Trash.
Unlike the software developed for Windows system, most of the applications installed in Mac OS X generally can be removed with relative ease. Amazing Slow Downer 3.5.4 is a third party application that provides additional functionality to OS X system and enjoys a popularity among Mac users. However, instead of installing it by dragging its icon to the Application folder, uninstalling Amazing Slow Downer 3.5.4 may need you to do more than a simple drag-and-drop to the Trash.
Download Mac App Remover
When installed, Amazing Slow Downer 3.5.4 creates files in several locations. Generally, its additional files, such as preference files and application support files, still remains on the hard drive after you delete Amazing Slow Downer 3.5.4 from the Application folder, in case that the next time you decide to reinstall it, the settings of this program still be kept. But if you are trying to uninstall Amazing Slow Downer 3.5.4 in full and free up your disk space, removing all its components is highly necessary. Continue reading this article to learn about the proper methods for uninstalling Amazing Slow Downer 3.5.4.
Manually uninstall Amazing Slow Downer 3.5.4 step by step:
Most applications in Mac OS X are bundles that contain all, or at least most, of the files needed to run the application, that is to say, they are self-contained. Thus, different from the program uninstall method of using the control panel in Windows, Mac users can easily drag any unwanted application to the Trash and then the removal process is started. Despite that, you should also be aware that removing an unbundled application by moving it into the Trash leave behind some of its components on your Mac. To fully get rid of Amazing Slow Downer 3.5.4 from your Mac, you can manually follow these steps:
1. Terminate Amazing Slow Downer 3.5.4 process(es) via Activity Monitor
Before uninstalling Amazing Slow Downer 3.5.4, you’d better quit this application and end all its processes. If Amazing Slow Downer 3.5.4 is frozen, you can press Cmd +Opt + Esc, select Amazing Slow Downer 3.5.4 in the pop-up windows and click Force Quit to quit this program (this shortcut for force quit works for the application that appears but not for its hidden processes).
Amazing Slow Downer For Mac Torrent
Open Activity Monitor in the Utilities folder in Launchpad, and select All Processes on the drop-down menu at the top of the window. Select the process(es) associated with Amazing Slow Downer 3.5.4 in the list, click Quit Process icon in the left corner of the window, and click Quit in the pop-up dialog box (if that doesn’t work, then try Force Quit).
2. Delete Amazing Slow Downer 3.5.4 application using the Trash

First of all, make sure to log into your Mac with an administrator account, or you will be asked for a password when you try to delete something.
Open the Applications folder in the Finder (if it doesn’t appear in the sidebar, go to the Menu Bar, open the “Go” menu, and select Applications in the list), search for Amazing Slow Downer 3.5.4 application by typing its name in the search field, and then drag it to the Trash (in the dock) to begin the uninstall process. Alternatively you can also click on the Amazing Slow Downer 3.5.4 icon/folder and move it to the Trash by pressing Cmd + Del or choosing the File and Move to Trash commands.
For the applications that are installed from the App Store, you can simply go to the Launchpad, search for the application, click and hold its icon with your mouse button (or hold down the Option key), then the icon will wiggle and show the “X” in its left upper corner. Click the “X” and click Delete in the confirmation dialog.
Download Mac App Remover
3. Remove all components related to Amazing Slow Downer 3.5.4 in Finder
Though Amazing Slow Downer 3.5.4 has been deleted to the Trash, its lingering files, logs, caches and other miscellaneous contents may stay on the hard disk. For complete removal of Amazing Slow Downer 3.5.4, you can manually detect and clean out all components associated with this application. You can search for the relevant names using Spotlight. Those preference files of Amazing Slow Downer 3.5.4 can be found in the Preferences folder within your user’s library folder (~/Library/Preferences) or the system-wide Library located at the root of the system volume (/Library/Preferences/), while the support files are located in '~/Library/Application Support/' or '/Library/Application Support/'.
Open the Finder, go to the Menu Bar, open the “Go” menu, select the entry:|Go to Folder... and then enter the path of the Application Support folder:~/Library
Search for any files or folders with the program’s name or developer’s name in the ~/Library/Preferences/, ~/Library/Application Support/ and ~/Library/Caches/ folders. Right click on those items and click Move to Trash to delete them.
Meanwhile, search for the following locations to delete associated items:
/Library/Preferences/
/Library/Application Support/
/Library/Caches/
Besides, there may be some kernel extensions or hidden files that are not obvious to find. In that case, you can do a Google search about the components for Amazing Slow Downer 3.5.4. Usually kernel extensions are located in in /System/Library/Extensions and end with the extension .kext, while hidden files are mostly located in your home folder. You can use Terminal (inside Applications/Utilities) to list the contents of the directory in question and delete the offending item.
4. Empty the Trash to fully remove Amazing Slow Downer 3.5.4
If you are determined to delete Amazing Slow Downer 3.5.4 permanently, the last thing you need to do is emptying the Trash. To completely empty your trash can, you can right click on the Trash in the dock and choose Empty Trash, or simply choose Empty Trash under the Finder menu (Notice: you can not undo this act, so make sure that you haven’t mistakenly deleted anything before doing this act. If you change your mind, before emptying the Trash, you can right click on the items in the Trash and choose Put Back in the list). In case you cannot empty the Trash, reboot your Mac.
Download Mac App Remover
Tips for the app with default uninstall utility:
You may not notice that, there are a few of Mac applications that come with dedicated uninstallation programs. Though the method mentioned above can solve the most app uninstall problems, you can still go for its installation disk or the application folder or package to check if the app has its own uninstaller first. If so, just run such an app and follow the prompts to uninstall properly. After that, search for related files to make sure if the app and its additional files are fully deleted from your Mac.
Automatically uninstall Amazing Slow Downer 3.5.4 with MacRemover (recommended):
No doubt that uninstalling programs in Mac system has been much simpler than in Windows system. But it still may seem a little tedious and time-consuming for those OS X beginners to manually remove Amazing Slow Downer 3.5.4 and totally clean out all its remnants. Why not try an easier and faster way to thoroughly remove it?
If you intend to save your time and energy in uninstalling Amazing Slow Downer 3.5.4, or you encounter some specific problems in deleting it to the Trash, or even you are not sure which files or folders belong to Amazing Slow Downer 3.5.4, you can turn to a professional third-party uninstaller to resolve troubles. Here MacRemover is recommended for you to accomplish Amazing Slow Downer 3.5.4 uninstall within three simple steps. MacRemover is a lite but powerful uninstaller utility that helps you thoroughly remove unwanted, corrupted or incompatible apps from your Mac. Now let’s see how it works to complete Amazing Slow Downer 3.5.4 removal task.
1. Download MacRemover and install it by dragging its icon to the application folder.
2. Launch MacRemover in the dock or Launchpad, select Amazing Slow Downer 3.5.4 appearing on the interface, and click Run Analysis button to proceed.
3. Review Amazing Slow Downer 3.5.4 files or folders, click Complete Uninstall button and then click Yes in the pup-up dialog box to confirm Amazing Slow Downer 3.5.4 removal.
The whole uninstall process may takes even less than one minute to finish, and then all items associated with Amazing Slow Downer 3.5.4 has been successfully removed from your Mac!
Benefits of using MacRemover:
MacRemover has a friendly and simply interface and even the first-time users can easily operate any unwanted program uninstallation. With its unique Smart Analytic System, MacRemover is capable of quickly locating every associated components of Amazing Slow Downer 3.5.4 and safely deleting them within a few clicks. Thoroughly uninstalling Amazing Slow Downer 3.5.4 from your mac with MacRemover becomes incredibly straightforward and speedy, right? You don’t need to check the Library or manually remove its additional files. Actually, all you need to do is a select-and-delete move. As MacRemover comes in handy to all those who want to get rid of any unwanted programs without any hassle, you’re welcome to download it and enjoy the excellent user experience right now!
This article provides you two methods (both manually and automatically) to properly and quickly uninstall Amazing Slow Downer 3.5.4, and either of them works for most of the apps on your Mac. If you confront any difficulty in uninstalling any unwanted application/software, don’t hesitate to apply this automatic tool and resolve your troubles.
The Amazing Slow Downer For Mac
Download Mac App Remover
0 notes