#how to remove apple id from iphone using computer
Explore tagged Tumblr posts
Visit Tumblr Blog
Explore Tumblr blogs with no restrictions, modern design and the best experience.
Last Seen Tumblr Blogs


Fun Fact
Tumblr Inc. has $15.1M in annual revenue.
Video
youtube
How to Unlock Apple ID without Password on Activated iPhone [iPhone Pass...
#youtube#how to remove apple id from iphone#how to remove apple id from iphone 13#how to remove apple id from iphone using computer#how to remove apple id from iphone without password#how to remove previous owner apple id without password#delete apple id without password
0 notes
Text
How to Remove Password/Face ID from iPhone
youtube
If you’ve forgotten your password, entered the wrong code too many times, and got the “iPhone Unavailable” message, what should you do?
First, keep entering the wrong passcode until iPhone Unavailable screen appears. Then tap the Forgot Passcode option in the bottom-right corner. Next, you can enter your Apple ID password to erase the device including the screen lock.
If you’re unable to unlock your phone because you’ve forgotten your newly updated password, you can reset it within 72 hours. Just tap “Forgot Passcode” in the bottom-right corner, enter your previous password, and then reset your password from there.
The third method is using iTunes. Log in to your iTunes account and navigate to the “Summary” section. Here, you’ll see your iPhone’s basic information. Select “Restore iPhone” and iTunes will begin downloading the latest iOS firmware. Once the download is complete, click “Restore iPhone” again to back up your data. You’ll see a progress bar at the top indicating that the device is being prepared for restoration.
If you can’t remember your Apple ID password, you can try using TunesKit iPhone Unlocker. This multifunctional iOS unlocking tool can help users unlock disabled or unavailable iPhones, and iPads without entering the passcode. Just connect your phone to your computer and select “Unlock iOS Screen” to unlock your iPhone easily without entering any password.
0 notes
Text
Can You Track IMEI Number Through Google Earth? (Spoiler: No, But Here's What Works)
Can You Track IMEI Number Through Google Earth?
Okay, so your phone's gone. Maybe lost. Maybe stolen. And now you're googling like crazy trying to find it.
Someone told you about tracking IMEI numbers with Google Earth? Yeah, I've been there too. Spent hours trying to make it work.
Bad news first. It doesn't work. At all.
But don't worry. I'll show you what actually does work. And save you from the same mistakes I made.
First Thing: What's an IMEI Number Anyway?
IMEI is just a fancy name for your phone's ID number. Every phone has one. No two are the same.
It's like your phone's social security number. Except it's 15 digits long.
Here's what mine looks like: 352094087654321.
Want to find yours? Easy:
Type *#06# on your phone
Check your phone settings
Look at your phone's box
Check under your battery (if you can remove it)
When I first heard about IMEI, I thought it was some spy stuff. Nope. Just a boring number that identifies your phone.
Can Google Earth Track Your IMEI? Nope.
Let me save you some time. Google Earth cannot track IMEI numbers.
I know. Bummer, right?
It sounds like it should work. Google Earth has all those satelite photos. Your phone has a unique number. Put them together and... nothing.
Because that's not how it works.
Here's Why It's Impossible
Google Earth is just photos. That's it. Pictures taken from space.
Think about it. Can you see your phone from space? No way.
Even if you could, how would Google Earth know it's YOUR phone? It can't read IMEI numbers from orbit. That's science fiction stuff.
I wasted three hours trying every "trick" online. Nothing worked. Because physics doesn't work that way.
It's like trying to use binoculars to hear someone's conversation. Wrong tool, wrong job.
So How Does Real IMEI Tracking Work?
Actual IMEI tracking is totaly different. And regular people can't do it.
Only these folks can track IMEI:
Your phone company (Verizon, AT&T, etc.)
The police
Sometimes the phone maker
Here's the deal. Your phone talks to cell towers. When it does, it shares its IMEI. The phone company logs this.
But catch this. Your phone must be:
Turned on
Have a SIM card
Connected to a network
Phone turned off? Can't track it. SIM card removed? Forget about it.
Those "Track Any IMEI" Websites Are Scams
Trust me on this one. Every single website that promises IMEI tracking? Fake. All of them.
I tested dozens. Here's their playbook:
You type in your IMEI
They show a fancy "scanning" animation
They ask for money
You pay (don't do this!)
They give you nothing
Some are nastier. They might:
Put viruses on your computer
Steal your info
Use your IMEI for bad stuff
Almost fell for one myself. My bank saved me by blocking the payment. Thank god.
What to Actually Do When Your Phone Goes Missing
Forget Google Earth. Here's what works:
1. Use Your Phone's Built-In Tracking
Got an Android?
Go to android.com/find
Log in with your Google account
Pick your phone
See where it is (if it's on)
Got an iPhone?
Go to iCloud.com/find
Log in with your Apple ID
Click your phone
Check the map
I've used both. They work great. But only if your phone's on and online.
2. Call Your Phone Company NOW
Don't wait. Call them immediately. Tell them what happened. Give them your IMEI.
They can:
Block your phone
Stop anyone from using it
Sometimes show where it last connected
Once they blacklist your IMEI, that phone becomes a paperweight. Good.
3. Get a Police Report
I know, I know. Cops probably won't launch a manhunt for your phone. But you need that report.
Why? Insurance claims. Plus, sometimes cops find batches of stolen phones. They use IMEI numbers to return them.
Happens more than you'd think.
4. Change All Your Passwords
Super important. People always forget this part.
Change passwords for:
Email
Banking apps
Social media
Any app with your credit card
Do it now. Not later. Now.
Myths That Drive Me Crazy
Let's kill some myths:
"Anyone can track IMEI numbers" Nope. Only phone companies and cops. With the right tools.
"Secret apps can track any IMEI" These are scams. Or viruses. Usually both.
"Google Earth has hidden IMEI features" It doesn't. Google Earth shows maps. That's all.
"Hackers track IMEI easily" Actually pretty hard. They'd need to hack your phone company.
About Those YouTube Videos...
Oh man. Those videos make me mad.
"Track ANY Phone with Google Earth!" Millions of views. All fake.
They show:
Fancy computer screens
Random typing
Fake "hacking"
Magic phone finding
It's all video editing. Hollywood tricks. Total BS.
I tried copying one once. Wasted an hour. Felt real dumb after.
Is IMEI Tracking Even Legal?
Quick reality check. Even if you COULD track someone's IMEI (you can't), it's probably illegal.
Tracking people without permission is:
Creepy
Illegal
Called stalking
Only legal reasons to track:
Your own lost phone
Your kid's phone (if they're underage)
Company phones (that the company owns)
Cops with warrants
Don't track your ex. Or your neighbor. Or anyone. Just don't.
Stuff That Actually Works
Stop chasing IMEI fantasies. Try these instead:
GPS Apps That Work
Like:
Life360
Find My Friends
Google Maps sharing
These work. But everyone has to agree to share location.
Bluetooth Trackers
Those AirTag things? Or Tiles? They're great.
Not for phones exactly. But amazing for keys and wallets. I got one after losing my keys a million times. Best 25 bucks ever.
Security Cameras
Worried about theft? Cameras beat any tracking. They might not find your stolen phone. But they stop theft before it happens.
My Phone Got Stolen. Here's What Happened.
True story. Coffee shop. Put my phone down. Looked away for five seconds. Gone.
First thought? "I'll use the IMEI to track it!"
Yeah, right.
What actually worked:
Opened Find My iPhone on my laptop
Saw it moving away fast
Called cops with the location
Locked it remotely
Put my number on the screen
Thief dumped it once it locked. Good person found it. Called me. Got it back next day.
Never used the IMEI once.
Why Do People Fall for This?
Good question. Why do smart people think Google Earth tracks IMEI?
My theory:
Both sound high-tech and mysterious
Movies show impossible tracking
Desperate people try anything
Scammers keep lying about it
Like those Nigerian prince emails. Obviously fake. But desperation makes people stupid.
Will This Ever Be Possible?
Will satelites ever track IMEI numbers?
No.
Satelites take pictures. They don't read electronic signals from phones. Two different things entirely.
What might get better:
Phone tracking features
Faster police response
Better security systems
More phones recovered
But Google Earth reading IMEI? Never gonna happen.
Keep Your Phone Safe (So You Don't Need Tracking)
Better to not lose it in the first place, right?
Keep It Physically Safe
Never leave it alone
Front pockets, not back
Watch it in crowds
Get a case with a strap
Digital Safety Too
Use a real passcode (not 0000)
Set up fingerprint lock
Turn on find my phone
Back up everything
Just In Case
Write your IMEI somewhere
Photo your serial number
Save your carrier's number
Maybe get insurance
This boring stuff works better than satelite tracking dreams.
Simple Tips Everyone Ignores
The best advice is usually the most obvious.
Don't:
Wave your expensive phone around
Leave it on tables
Let strangers "borrow" it
Skip security updates
I learned all this the hard way. Several times. I'm not that bright aparently.
Here's the Deal
Lost phones suck. Stolen phones are worse.
But Google Earth won't help. Can't track IMEI. Never could. Never will.
What works:
Find My Phone features
Calling your carrier fast
Police reports
Being careful
What doesn't:
Fake tracking websites
Bogus YouTube videos
Scam apps
Google Earth dreams
Stick with what works. Skip the fantasy.
My Final Take
I've wasted so much time on this. Testing everything. Trying every method.
Know what I learned? Boring security beats exciting myths.
Strong passwords. Regular backups. Being careful. Not as cool as satelite tracking. But it works.
So when someone says they can track IMEI with Google Earth? Now you know better. Send them this article. Save them the headache.
Lost your phone? Skip Google Earth. Use Find My Device. Call your carrier. File that report.
Yeah, it's boring. But boring works.
Keep your phones safe, friends. The smart way. Not the Google Earth way.
Quick note: This is just for learning. Respect privacy. Only track your own stuff. And seriously, those YouTube videos are fake. All of them.
0 notes
Text
How Has Apple Revolutionized the Tech Industry?
Apple changed the world of tech. It made things easy to use. Before Apple, computers were complex. Only experts used them. Then came the Macintosh. It had a simple interface. People loved it. I remember my first Mac. It felt smooth and fast. Apple’s focus on design was clear. The company kept improving. The iPod changed music. The iPhone changed phones. Now, Apple leads in many areas.
The iPhone Changed Smartphones Forever
Before the iPhone, phones had buttons. They were slow and bulky. Apple removed buttons. It gave us a full screen. The touch system worked well. Other brands copied Apple. Now, all phones look similar. The App Store changed software. Before that, apps were rare. Now, millions exist. I use many apps daily. From maps to banking, they help a lot. Apple made it normal.
Apple’s Focus on Speed and Security
Apple made devices faster. It built its own chips. Macs with M-series chips are fast. They use less power, too. This helps battery life. Apple also cares about safety. Face ID keeps phones secure. iMessage has strong privacy. Many trust Apple for this. I feel safe using Apple Pay. Hackers find it hard to break. Apple keeps updating systems. This helps people stay secure.
Apple keeps changing tech. It sets new trends. Other brands follow. From design to safety, Apple leads. The company will not stop. It may change the future again. We will wait and see.
0 notes
Text
Jailbreak iOS 17.7.4
Are you looking to Jailbreak iOS 17.7.4 and explore unlimited customization options? Jailbreaking allows you to install tweaks, themes, and IPA files to personalize your iPhone beyond Apple’s restrictions. Let’s dive into everything you need to know about Jailbreak iOS 17.7.4.
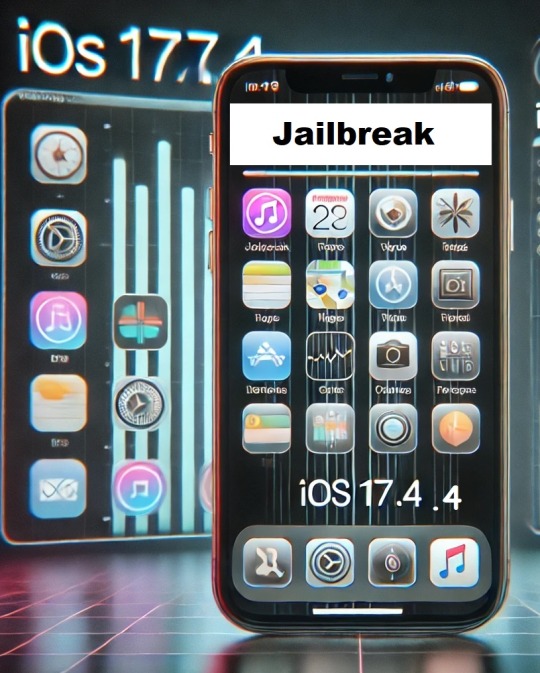
What is Jailbreaking?
Jailbreaking removes software restrictions imposed by Apple, giving you access to third-party apps and advanced customization features. With Jailbreak iOS 17.7.4, you can modify system settings, install unique themes, and enjoy exclusive tweaks unavailable on the App Store.
Why Jailbreak iOS 17.7.4?
Here are the top reasons to Jailbreak iOS 17.7.4:
Install Tweaks – Unlock new features and enhance your iPhone’s functionality.
Apply Custom Themes – Personalize your icons, fonts, and interface.
Use IPA Files – Install apps that Apple does not allow in the App Store.
Full System Control – Modify settings and optimize performance.
How to Jailbreak iOS 17.7.4
To Jailbreak iOS 17.7.4, you need a reliable tool. Currently, InstantJB is the only way to Jailbreak iOS 17.7.4. The process is simple and requires no computer.
Steps to Jailbreak:
Visit the InstantJB official website.
Download and install the jailbreak tool.
Follow the on-screen instructions to complete the process.
Restart your iPhone and enjoy full customization.
For more details, visit https://www.instantjb.com/cydia-ios-17-1-2-3-4-5-6-7-8-9-jailbreak.html.
Best Tweaks for Jailbroken iOS 17.7.4
After jailbreaking, you can install powerful tweaks to enhance your experience. Here are some must-have tweaks:
Activator – Customize gestures and shortcuts.
Filza File Manager – Access system files and modify settings.
Cylinder Reborn – Add animations to home screen transitions.
iCleaner Pro – Remove junk files and optimize system performance.
SnowBoard – Customize your home screen with new themes.
Installing IPA Files on Jailbroken iOS 17.7.4
With Jailbreak iOS 17.7.4, you can sideload IPA files easily. Here’s how:
Download your desired IPA file.
Open AltStore or Sideloadly.
Sign in with your Apple ID.
Install the IPA file and enjoy third-party apps.
Best Themes for Jailbreak iOS 17.7.4
Here are some of the best themes to customize your jailbroken iPhone:
Dark Mode Pro – A sleek, fully dark UI.
Minimalist – A clean and simple design.
iOS Retro – Bring back the classic Apple look.
Neon Glow – Bright, colourful icons for a modern feel.
Is Jailbreaking Safe?
Many users ask if Jailbreak iOS 17.7.4 is safe. The answer is yes—if done correctly. InstantJB is a trusted method, but keep these points in mind:
Jailbreaking voids your Apple warranty.
Some tweaks can cause system instability.
Only install tweaks from trusted sources.
Always back up your data before jailbreaking.
How to Remove Jailbreak iOS 17.7.4
If you want to undo Jailbreak iOS 17.7.4, you can restore your iPhone using iTunes or Finder:
Connect your iPhone to a computer.
Open iTunes (or Finder on Mac).
Click “Restore iPhone.”
Wait for the process to complete.
This will remove all jailbreak modifications and return your device to its factory settings.
Final Thoughts
Jailbreaking allows you to customize your iPhone like never before. With Jailbreak iOS 17.7.4, you can install tweaks, themes, and IPA files to enhance your experience. Just follow safe jailbreaking practices and use InstantJB for a hassle-free process.
0 notes
Text
iPhone Data Recovery: How to Recover Lost Data from Your iPhone

In today’s digital world, our iPhones store a significant amount of important data, including photos, contacts, messages, and more. Losing this data due to accidental deletion, software crashes, or hardware damage can be distressing. Fortunately, there are solutions available for iPhone data recovery, allowing you to restore lost files and get back to normal.
In this article, we will discuss the common causes of data loss, the methods for recovering your iPhone data, and why you should consider professional services for a safe and effective recovery.
Common Causes of iPhone Data Loss
Losing data on your iPhone can happen in various ways, some of the most common reasons include:
1. Accidental Deletion
One of the most frequent causes of data loss is accidental deletion. Whether it's deleting photos, contacts, or messages, it only takes a few taps to mistakenly remove important files.
2. Software Update Failure
Sometimes during an iOS update, things may go wrong, causing data to be lost. This can occur if the update is interrupted, if there is insufficient storage, or if the software fails to install properly.
3. Water or Physical Damage
Physical damage to your iPhone, such as dropping it in water or cracking the screen, can lead to data loss. In extreme cases, hardware damage can make the device inaccessible, making data recovery a challenge.
4. Jailbreaking Errors
Jailbreaking your iPhone can offer more customization options, but it also increases the risk of data corruption, software crashes, and other issues that may lead to data loss.
5. Forgotten Passwords or Locked Devices
Getting locked out of your iPhone due to forgotten passwords or security issues can prevent you from accessing your data. In some cases, even attempts to recover the device can lead to data being wiped.
Methods for iPhone Data Recovery
There are several methods for recovering lost data on your iPhone, depending on the situation and the cause of the data loss.
1. Using iCloud Backup
If you regularly back up your iPhone to iCloud, you can recover lost data by restoring the device from a previous iCloud backup.
Steps:
Go to Settings > General > Reset > Erase All Content and Settings.
Choose Restore from iCloud Backup and sign in with your Apple ID.
Select the backup that contains the lost data, and follow the on-screen instructions.
2. Using iTunes/Finder Backup
For users who back up their iPhone via iTunes or Finder, restoring from a local backup can be an effective way to recover lost data.
Steps:
Connect your iPhone to the computer where the backup is stored.
Open iTunes or Finder (depending on your macOS version).
Select your iPhone and choose Restore Backup.
Choose the appropriate backup and follow the prompts to complete the process.
3. Third-Party Data Recovery Software
In cases where iCloud or iTunes backups aren’t available, third-party data recovery tools can help recover lost files. These software solutions can scan your iPhone for recoverable data, such as photos, videos, contacts, and messages.
Popular third-party data recovery tools include:
Dr.Fone by Wondershare
iMobie PhoneRescue
EaseUS MobiSaver
These tools often offer free trials and are relatively easy to use. However, be sure to choose a reputable service, as some tools may cause additional issues.
4. Professional Data Recovery Services
If your iPhone is physically damaged or none of the other methods work, you may need to turn to a professional data recovery service, like Apple Expert. These services specialize in extracting data from severely damaged devices, and they have access to advanced tools and technology.
Why Choose Professional iPhone Data Recovery Services?
When dealing with sensitive or critical data, opting for professional iPhone data recovery services is often the safest option. Here’s why:
1. Expertise and Advanced Tools
Professional data recovery experts have access to specialized tools and technology that can recover data from even the most damaged iPhones. Whether it’s a hardware issue or a software glitch, these experts can find a solution that works.
2. Increased Chances of Recovery
While DIY software can be effective, professional services have a higher success rate, especially when it comes to more complicated cases such as water damage, physical damage, or inaccessible devices. They can perform in-depth analyses and recover data that might not be visible through conventional methods.
3. Secure Data Handling
Your data is valuable, and ensuring that it is handled securely is paramount. Professional services follow strict data privacy and security protocols to ensure that your information remains confidential throughout the recovery process.
4. Support for Complex Issues
For cases where data loss is the result of severe hardware failure or physical damage, professionals can disassemble the device to repair or bypass damaged components and retrieve the data. This is something that can’t be done with consumer-level tools.
What to Expect from a Professional Data Recovery Service
When you opt for professional iPhone data recovery, the process generally follows these steps:
1. Evaluation
The service provider will first perform an evaluation of your device to determine the extent of the damage and whether data recovery is possible. This step usually comes with a no-obligation quote.
2. Data Recovery Attempt
Once the evaluation is complete and the scope of recovery is confirmed, the experts will use specialized tools to recover your lost data. This might include using hardware repair techniques or advanced software tools, depending on the situation.
3. Data Restoration
Once the data is recovered, it can be transferred back to your device, saved to an external drive, or uploaded to a secure cloud storage option, depending on your preference.
4. Post-Recovery Support
A reputable data recovery service will also provide post-recovery support, ensuring that your device is functioning correctly and offering guidance on how to prevent future data loss.
How to Prevent Future Data Loss on Your iPhone
To avoid the stress and hassle of losing important data on your iPhone, it’s essential to take steps to protect it. Here are a few preventive measures:
1. Regular Backups
Always back up your iPhone regularly, either to iCloud or iTunes/Finder. This will ensure that even if data loss occurs, you can easily restore your device from a recent backup.
2. Use a Reliable Data Recovery App
There are various data recovery apps that you can install on your iPhone. These apps act as an extra layer of protection, allowing you to recover files even if something goes wrong.
3. Avoid Unnecessary Risks
Try to avoid jailbreaking your device or installing unauthorized software. Jailbreaking increases the risk of data corruption, while untrusted apps may introduce malware or other security risks.
4. Invest in a Durable Case and Screen Protector
Prevent physical damage by investing in a high-quality protective case and screen protector. These can safeguard your device from drops, impacts, and other accidents.
Losing valuable data from your iPhone can be an overwhelming experience, but with the right recovery methods and services, it’s possible to restore your files. From simple iCloud backups to advanced professional services like Apple Expert, there are solutions available to suit every type of data loss scenario. Make sure to back up your device regularly and seek professional help when needed to ensure that your important information remains safe and accessible.
0 notes
Text
How to Recover Permanently Deleted Photos on iPhone Without Backup
Accidentally deleting important photos from your iPhone can be a distressing experience, especially when you don't have a backup. Fortunately, all hope is not lost.
There are methods and tools that can help you recover your permanently deleted photos even without a backup. This guide will walk you through the steps and options available for recovering your lost photos.
Understanding Photo Deletion on iPhone
Before diving into the recovery process, it's essential to understand how iPhone photo deletion works:
Recently Deleted Folder: When you delete a photo on your iPhone, it doesn't immediately disappear. Instead, it moves to the "Recently Deleted" folder, where it stays for 30 days before being permanently deleted. If your photos are still in this folder, you can easily recover them.
Permanent Deletion: After 30 days, photos in the "Recently Deleted" folder are permanently removed. Additionally, photos can be immediately deleted if you manually empty this folder or use certain cleaning tools.
Data Overwriting: Once a photo is permanently deleted, the space it occupied is marked as available for new data. If new data overwrites this space, the chance of recovering the photo decreases significantly.
Steps to Recover Permanently Deleted Photos Without Backup
If you find yourself in a situation where your photos have been permanently deleted, and you don't have a backup, don't panic. Here are the steps you can follow to try and recover your photos:
1. Stop Using Your iPhone
The first and most crucial step is to stop using your iPhone immediately. This action prevents new data from being written to your phone's storage, which could overwrite the space previously occupied by your deleted photos, making recovery more difficult or even impossible.
2. Use a Third-Party Data Recovery Software
There are several third-party data recovery tools specifically designed for iOS devices. These tools can scan your iPhone for any recoverable files, including photos that have been permanently deleted. Here are a few popular options:
Dr.Fone - Data Recovery (iOS): This is a popular data recovery tool for iPhones. It can recover various types of data, including photos, messages, contacts, and more.
iMobie PhoneRescue: PhoneRescue is another reliable tool that offers photo recovery from iOS devices. It supports recovery without requiring a backup.
Tenorshare UltData: This tool can help recover photos, videos, and other files directly from your iPhone. It offers a user-friendly interface and a high recovery success rate.
Steps to Use Data Recovery Software:
Download and Install: Download the recovery software of your choice and install it on your computer.
Connect Your iPhone: Use a USB cable to connect your iPhone to your computer. Make sure to trust the computer on your iPhone if prompted.
Select Data Recovery Mode: Launch the software and select the mode for recovering data from the iOS device. Each software may have slightly different options, but look for a feature like "Recover from iOS Device."
Scan Your iPhone: Start the scanning process. The software will analyze your iPhone and look for any recoverable photos. This process may take some time, depending on the storage size of your device and the amount of data.
Preview and Recover: Once the scan is complete, you will be able to preview the recoverable photos. Select the ones you want to restore and click the "Recover" button to save them to your computer.
3. Check iCloud Photos
If you have iCloud Photos enabled, your deleted photos might still be available in the cloud. Here’s how you can check:
Sign In to iCloud: Visit iCloud.com and sign in with your Apple ID.
Go to Photos: Click on the "Photos" icon. You might see the deleted photos still available here, especially if the deletion hasn't synced yet.
Recently Deleted Folder: Check the "Recently Deleted" folder in iCloud as well. Photos deleted from iCloud Photos also remain here for 30 days.
4. Contact Apple Support
If you cannot recover the photos using third-party tools or iCloud, you can reach out to Apple Support. They might have solutions or suggestions, especially if the deletion was recent. While Apple doesn't guarantee recovery of permanently deleted files, it's worth exploring all available avenues.
Tips to Prevent Future Data Loss
Recovering permanently deleted photos without a backup can be challenging, and sometimes, not all files are recoverable. Here are some tips to prevent future data loss:
Regularly Backup Your iPhone: Use iCloud or iTunes to create regular backups of your iPhone. This practice ensures that you have a copy of your photos and other essential data.
Enable iCloud Photos: This feature automatically uploads and stores your entire photo library in iCloud, making it accessible across all your devices.
Use Alternative Cloud Services: Consider using additional cloud storage services like Google Photos, Dropbox, or OneDrive to back up your photos automatically.
Be Cautious with Deletion: Double-check before deleting photos, and make it a habit to review the "Recently Deleted" folder before emptying it.
Use Data Recovery Apps: Keep a data recovery app handy, as it can be a lifesaver if you accidentally delete important files.
Conclusion
While losing photos can be a heart-wrenching experience, the methods and tools mentioned above provide hope for recovery, even if you don't have a backup. The key is to act quickly and carefully, avoiding further use of your iPhone to maximize the chances of successful recovery. Remember, prevention is always better than cure, so make regular backups a part of your routine to safeguard your precious memories.
0 notes
Text
How Do I Remove Activation Lock If I Forgot My Apple ID?
The Activation Lock is a security feature built into Apple devices such as iPhones, iPads, and Macs. It ties your device to your Apple ID, helping prevent unauthorized access or theft. However, it can become an issue when you forget your Apple ID or password, as you will need that information to disable the Activation Lock. This article will explain various methods to remove the Activation Lock if you've forgotten your Apple ID, including the role of iforgot.apple.com.
Understanding Activation Lock
Before delving into the solutions, it's essential to understand what the Activation Lock is and why Apple implements it. Activation Lock is part of the Find My feature, which allows users to locate their Apple devices if lost or stolen. Once the feature is enabled, the device is locked to your Apple ID. If someone attempts to reset or reactivate the device, they will need to enter the Apple ID and password linked to it.
This feature is a powerful deterrent against theft because it makes the device virtually unusable without the correct credentials. However, it can also present a challenge if you forget your Apple ID and need to regain access to your device.
Common Reasons for Forgetting Your Apple ID
You may find yourself locked out of your Apple device due to Activation Lock for several reasons:
You haven't used your Apple ID for a long time and have forgotten the email address or password.
You've recently changed your Apple ID or password but didn't update the information on all your devices.
You’ve inherited a used device from a friend or family member but don’t have access to their Apple ID.
No matter the reason, there are solutions to help you remove the Activation Lock.
Method 1: Recovering Your Apple ID with iForgot.apple.com
If you've forgotten your Apple ID, the first and most straightforward approach is to recover it using Apple's dedicated recovery site: iForgot.apple.com. Follow these steps to recover your Apple ID and password:
Step 1: Visit iForgot.apple.com
Go to the website iForgot.apple.com from any web browser on a computer, smartphone, or tablet.
Step 2: Enter Your Information
Once you're on the site, you’ll be prompted to enter the email address that you believe is associated with your Apple ID. If you can't remember the exact email address, try using any email addresses you may have used with Apple services.
Step 3: Verify Your Identity
Depending on your settings, you may need to verify your identity using security questions, an email verification code, or two-factor authentication (2FA). Apple will send a confirmation code to your phone or email to ensure that you are the account owner.
Step 4: Reset Your Password
Once your identity is verified, you'll be able to reset your password and regain access to your Apple ID. After resetting your password, enter it on the locked device to disable the Activation Lock.
Step 5: Use the New Credentials to Unlock Your Device
Now that you’ve recovered your Apple ID and password, you can use these credentials to remove the Activation Lock from your device. When prompted, enter your Apple ID and the new password. The lock should be removed, and you will regain access to your device.
Method 2: Using Account Recovery for Two-Factor Authentication
If you have two-factor authentication (2FA) enabled on your Apple ID and can't access your account, you can initiate the recovery process directly from iForgot.apple.com. Follow these steps to recover your Apple ID via account recovery:
Step 1: Begin Recovery on iForgot.apple.com
Visit iForgot.apple.com and enter your Apple ID email address. If you’ve forgotten the Apple ID, follow the steps on the screen to try to recover it.
Step 2: Start the Account Recovery Process
If you are unable to access your Apple ID using 2FA or security questions, you’ll be prompted to start the Account Recovery process. Account Recovery is a slower but secure way of regaining access to your Apple ID when traditional methods fail.
Step 3: Provide a Recovery Contact
During the recovery process, Apple may ask you to provide a contact phone number. This number will be used to send updates on the progress of your recovery request.
Step 4: Wait for Account Recovery to Complete
Once you’ve provided the necessary information, Apple will begin the recovery process. This could take several days, depending on your account’s specific security details. Apple will notify you when your account is ready to be restored.
Step 5: Disable Activation Lock
Once your account recovery is complete and you’ve regained access to your Apple ID, use the credentials to disable the Activation Lock on your device. Enter your Apple ID and the new password, and the device should unlock.
Method 3: Contacting Apple Support
If the previous methods don't work, your next option is to contact Apple Support for assistance. In some cases, especially when the device was purchased second-hand or if you’re the legal owner but can't provide the necessary credentials, Apple Support may be able to assist you in removing the Activation Lock.
Step 1: Gather Proof of Ownership
Before contacting Apple Support, gather proof of ownership for the device. This may include a receipt, invoice, or other documentation showing that you legally own the device.
Step 2: Contact Apple Support
Reach out to Apple Support via the Apple website or visit an Apple Store in person. Explain the situation, including that you’ve forgotten your Apple ID and are locked out of your device due to Activation Lock.
Step 3: Follow Apple’s Instructions
Apple Support will guide you through the steps necessary to unlock your device. Depending on the situation, they may require you to provide proof of ownership or other documentation. If they verify that you are the legal owner, they can help disable the Activation Lock.
Method 4: Unlocking a Device without Apple ID via Third-Party Services
If you’re unable to recover your Apple ID or get help from Apple Support, there are third-party services that claim to remove the Activation Lock without requiring your Apple ID. Be cautious, as many of these services may not be legitimate and could potentially be scams. Additionally, using third-party tools could compromise the security and functionality of your device.
That said, there are some reliable third-party tools that have been reported to help with Activation Lock removal. Popular tools include:
Tenorshare 4MeKey
iMobie AnyUnlock
Dr.Fone – Unlock
These tools require you to connect your device to a computer and follow on-screen instructions. Be sure to research any tool thoroughly before using it, and be aware that such methods may void your warranty or violate Apple's terms of service.
Method 5: Requesting Help from the Previous Owner
If you've acquired a used device that is locked with Activation Lock, you will need the Apple ID and password of the previous owner to unlock it. Follow these steps to request their assistance:
Step 1: Contact the Previous Owner
If you know the previous owner, reach out to them and explain that the device is locked. Ask them to either provide their Apple ID and password temporarily or unlock the device themselves.
Step 2: Ask Them to Remove the Device from iCloud
The previous owner can log into their iCloud account from any device or computer and remove the locked device from their account. Here's how they can do it:
Go to iCloud.com and sign in with their Apple ID.
Click on Find My iPhone.
Select All Devices at the top of the screen.
Choose the device you’re trying to unlock.
Click Remove from Account.
This will remove the Activation Lock from the device, allowing you to use it with your Apple ID.
Tips for Preventing Future Lockouts
Once you’ve successfully removed the Activation Lock, it’s crucial to take steps to prevent this issue from happening again in the future. Here are some tips:
Use a Password Manager: Store your Apple ID and password in a secure password manager to avoid forgetting it in the future.
Enable Two-Factor Authentication: Ensure your account is protected with two-factor authentication, which can make it easier to recover your account if you forget your password.
Keep Your Contact Information Updated: Make sure the email address and phone number associated with your Apple ID are always up to date.
Regularly Backup Your Device: Regular backups can help you avoid data loss if you need to reset or recover your device.
Conclusion
Forgetting your Apple ID and being locked out of your device due to Activation Lock can be a stressful experience, but it’s not insurmountable. By utilizing tools such as iforgot.apple.com to recover your Apple ID, contacting Apple Support, or seeking assistance from the previous owner, you can regain access to your device. Always take preventive measures to keep your Apple ID credentials secure to avoid future lockouts.
0 notes
Text
iOS 18 Jailbreak
Welcome to the ultimate guide on jailbreaking iOS 18! Whether you're a seasoned jailbreak enthusiast or a newbie looking to explore the world of iOS customization, you've come to the right place. This article covers everything you need about jailbreaking iOS 18, including its benefits, risks, and the step-by-step process to jailbreak your device successfully. So, let's dive in!
What is Jailbreaking?
Jailbreaking is removing software restrictions imposed by Apple's iOS operating system. By jailbreaking your iOS device, you gain access to the root file system, allowing you to install third-party apps, tweaks, and themes unavailable in the Apple App Store. This opens up a whole new world of customization and functionality for your iPhone or iPad.
Why Jailbreak iOS 18?
There are several reasons why you might want to jailbreak your iOS 18 device:
Customization: Jailbreaking allows you to customize your device's appearance and functionality to your liking. You can change icons, themes, and even the overall user interface.
Access to Third-Party Apps: Jailbreaking gives you access to a wide range of apps and tweaks unavailable in the App Store. These apps can enhance your device's performance, add new features, and improve your overall experience.
Enhanced Control: With a jailbroken device, you have greater control over your iOS system. You can modify system files, install system-wide ad blockers, and use advanced file management tools.
Better Performance: Some jailbreak tweaks can help improve your device's performance by optimizing system processes and freeing up resources.
Risks of Jailbreaking iOS 18
While jailbreaking offers many benefits, it's essential to be aware of the potential risks:
Security Vulnerabilities: Jailbreaking can expose your device to vulnerabilities, removing some of Apple's built-in security features. This makes your device more susceptible to malware and unauthorized access.
Void Warranty: Jailbreaking your device will void its warranty. Apple may refuse to provide support or repairs if you encounter any hardware or software issues.
Stability Issues: Some jailbreak tweaks may cause instability or crashes on your device. It's essential to be cautious and install trusted tweaks from reputable sources.
Updating iOS: Once your device is jailbroken, updating to a new iOS version can be challenging. You should wait for a new jailbreak tool to be released for the latest iOS version.
How to Jailbreak iOS 18
Before you begin jailbreaking, back up your device to avoid data loss, follow these steps to jailbreak your iOS 18 device:
Step 1: Check Compatibility
Ensure that your device is compatible with the iOS 18 jailbreak. Most modern iPhones and iPads should be supported, but verifying this before proceeding is always best.
Step 2: Download the Jailbreak Tool
Visit https://www.instantjb.com/cydia-ios-18-1-2-3-4-5-6-7-8-9-jailbreak.html to download the latest jailbreak tool for iOS 18. Make sure to download the correct version for your device and operating system.
Step 3: Prepare Your Device
Disable Find My iPhone: Go to Settings > [Your Name] > Find My > Find My iPhone and turn it off.
Disable Passcode: Go to Settings > Face ID & Passcode or Touch ID & Passcode and turn off the passcode.
Enable Airplane Mode: Swipe down from the top-right corner of the screen to open Control Center and enable Airplane Mode.
Step 4: Connect Your Device to Your Computer
Use a USB cable to connect your iOS device to your computer. Make sure your computer recognizes the device.
Step 5: Run the Jailbreak Tool
Open the jailbreak tool you downloaded and follow the on-screen instructions to start the jailbreaking process. This usually involves putting your device into DFU (Device Firmware Update) mode and letting the tool do its work.
Step 6: Complete the Jailbreak
Once the jailbreak tool has finished its process, your device will restart. You should see a new " Cydia " app on your home screen. Cydia is the app store for jailbroken devices, where you can find and install various tweaks, themes, and apps.

Best Tweaks and Apps for Jailbroken iOS 18
Now that your device is jailbroken, here are some of the best tweaks and apps you can install to enhance your iOS experience:
Activator
Activator is a powerful tweak that lets you assign custom actions to various gestures and button presses. You can use it to create shortcuts for frequently used tasks, making your device more efficient.
Springtomize
Springtomize is a must-have tweak for customizing your device's appearance. It allows you to modify almost every aspect of the iOS interface, including icons, animations, and the dock.
iFile
iFile is a file manager that gives you full access to your device's file system. You can browse, edit, and manage files on your device, similar to a traditional file explorer on a computer.
AdBlocker
AdBlocker is a useful tweak that blocks ads system-wide, including in apps and Safari. This can improve your browsing experience and save data by preventing ads from loading.
BatteriDoctor
BatteriDoctor is a tweak that provides detailed information about your device's battery health and usage. It can help you monitor and optimize battery performance.
Frequently Asked Questions (FAQs)
Q1: Is jailbreaking legal?
Yes, jailbreaking is legal in many countries, including the United States. However, it may violate Apple's terms of service, which could void your warranty.
Q2: Can I un-jailbreak my device?
You can un-jailbreak your device by restoring it to its original factory settings using iTunes or Finder on your computer. This will remove the Jailbreak and return your device to its default state.
Q3: Will jailbreaking affect my device's performance?
Jailbreaking does not significantly affect performance, but installing too many or poorly optimized tweaks can slow down your device. It's essential to be selective about the tweaks you install and regularly remove those you no longer need.
Q4: Can I still use the App Store after jailbreaking?
You can still download and install apps from the App Store. Jailbreaking does not affect your ability to access the App Store or use apps from it.
Q5: How can I stay safe while using a jailbroken device?
To stay safe:
Only install tweaks and apps from trusted sources, such as the default repositories in Cydia.
Avoid installing pirated or cracked apps, as they may contain malware.
Consider using a security tweak to protect your device from unauthorized access.
Conclusion
Jailbreaking iOS 18 opens up a world of possibilities for customizing and enhancing your iOS experience. You can safely and successfully jailbreak your device by following the steps outlined in this guide. Remember always to back up your data, be aware of the risks, and only install trusted tweaks from reputable sources.
1 note
·
View note
Text
How to Fix iPhone Unavailable on Lock Screen [2024 Updated] - Technology Org
New Post has been published on https://thedigitalinsider.com/how-to-fix-iphone-unavailable-on-lock-screen-2024-updated-technology-org/
How to Fix iPhone Unavailable on Lock Screen [2024 Updated] - Technology Org
If your iPhone displays the message “iPhone Unavailable” on the lock screen, it means that you have entered an incorrect passcode multiple times, triggering Apple Security measures to safeguard your device from unauthorized access. You may find yourself in a situation where you have forgotten your iPhone password and cannot unlock your device. However, there’s no need to worry. This article will guide you through several methods to fix “iPhone Unavailable” lock screen issue.
When you encounter the “iPhone Unavailable” message, often with a timer, it signifies that you have made multiple consecutive incorrect password attempts within a short period. Your iPhone will then be locked, preventing further access to the device. The lockout time varies from 1 minute to 8 hours or longer. In a nutshell, the more failed attempts, the longer the lockout.
Additionally, depending on your settings and the version of iOS you are using, your iPhone may alternatively display “Security Lockout” or, in earlier versions before iOS 15.2, the prompt will appear as “iPhone is disabled“.
Solution 1: Fix iPhone Unavailable without Computer
Starting from iOS 15.2 and later, iPhone has introduced a helpful feature known as “Erase iPhone” to assist users in resetting their devices. This functionality enables individuals who have forgotten their screen passcode to reset their unavailable iPhone using their Apple ID. It’s worth noting that “Erase iPhone” will permanently erase all content and settings on the device. Follow these steps:
Step 1: On the iPhone Unavailable screen, continue entering the wrong passcode until you see Erase iPhone option in the lower right corner.
Step 2: Tap Erase iPhone > Erase iPhone (for iOS 17 and later, tap Forgot Passcode > Start iPhone Reset), then enter your Apple ID password to sign out of the account. Then follow the onscreen instructions to complete the process.
Step 3: Once the reset is finished, proceed with the setup process, including the option to restore their data from a previous backup, if any.
Solution 2: Unlock iPhone Unavailable using iSumsoft iPhone Passcode Refixer
If you find yourself cannot remember the Apple ID password required to wipe your iPhone, there are other solutions. One of the recommended methods is to use a trusted third-party tool called iSumsoft iPhone Passcode Refixer, which allows you to easily bypass the lock screen and effectively fix the “iPhone Unavailable” screen.
Learn how to use this software:
Step 1: Download and install iSumsoft iPhone Passcode Refixer. After the installation, connect the locked iPhone to the computer and launch the program.
Step 2: On the Home page, select Unlock Lock Screen.
Step 3: Click Start to proceed. Please note that if your iPhone cannot be recognized by the software, try to put the iPhone into recovery mode or DEU mode.
Step 4: Your iPhone info will be loaded and displayed on the interface, and you will be asked to download a firmware package. Click Download to proceed.
Step 5: After the successful download and verification, click Unlock to begin unlocking iPhone.
Step 6: When “Unlock Screen Successfully” appears on the screen, it means that the iPhone Unavailable message has been removed and your iPhone will restart automatically.
Solution 3: Fix iPhone Unavailable with Previous Passcode
For devices running iOS 17 and later, you are allowed to use your previous password to access the device without losing any data. This method, however, is time-limited as it is only valid for 72 hours after changing the screen lock passcode. So, if you are the lucky guy, follow the steps below:
Step 1: From the iPhone Unavailable screen, proceed with entering the wrong passcode. When you see Forgot Passcode? on the lock screen, tap on it.
Step 2: Tap Enter Previous Passcode, then follow the onscreen instructions to create a new passcode.
Solution 4: Bypass iPhone Unavailable Message with iTunes
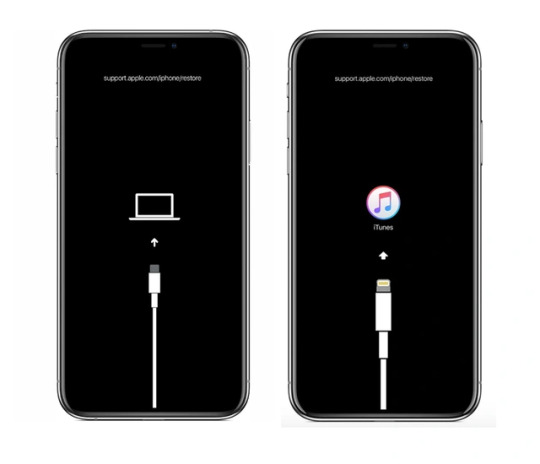
iTunes serves as an official tool for solving many common iPhone issues, including restoring iPhone when the iPhone says “iPhone Unavailable”. To utilize iTunes for this purpose, you’ll need a computer with the latest version of iTunes installed. Here’s a step-by-step guide on how to restore your iPhone using iTunes:
Step 1: Connect the iPhone to the computer and then put it into recovery mode.
Step 2: Launch iTunes. You will then be asked to Update or Restore. Select Restore and follow the onscreen prompts to reset the iPhone.
Note: If you haven’t signed out of your Apple ID before restoring the iPhone with iTunes, you may be stuck on the Activation Lock, asking for the previous Apple ID and password.
Solution 5: Fix iPhone Unavailable with iCloud
If you prefer not to install the iTunes application on your computer, there is an alternative method to address the “iPhone Unavailable” issue by using the iCloud website. By logging in to the iCloud website, you can resolve the problem without the need for iTunes. However, please note that you will require your Apple ID and password to sign in to iCloud. Here is how to use iTunes to unlock iPhone:
Step 1: Visit iCloud.com and sign in with your account associated with the unavailable iPhone.
Step 2: From the iCloud page, locate Find My and select it. You may be asked to enter your Apple ID passcode.
Step 3: You will then see a list including all devices linked to this account. Select the locked iPhone.
Step 4: Click Erase This Device.
Q1: Is iPhone Unavailable Permanently?
According to some reports, some users can be locked for up to 23,056,476 minutes, rendering the iPhone permanently unavailable. In theory, the amount of time the screen is locked is directly proportional to the number of times an incorrect passcode is entered.5th failed attempt, 5 minutes;
6th failed attempt, 5 minutes;
7th failed attempt, 5 minutes;
8th failed attempt, 15 minutes;
9th failed attempt, 1 hour;
After 10 failed attempts, your iPhone will be locked for more than 1 hour if you enable the “Erase iPhone after 10 failed attempts” feature, or you will be locked for more than 1 hour.
Q2: How to Unlock iPhone Unavailable without Losing Data
To preserve data, fixing an unavailable iPhone without data loss is only possible if you possess the Screen Lock passcode or have a recent backup of your iPhone. Apple prioritizes data protection, which contributes to its immense popularity.
#2024#apple#Article#backup#computer#content#data#data loss#data protection#devices#display#displays#firmware#Hardware & gadgets#how#how to#icloud#iOS#ios 15#iPhone#issues#it#Learn#list#logging#message#Method#One#Other#Other posts
0 notes
Link
0 notes
Text
How to Remove iPhone Locked to Owner
youtube
This situation occurs because the Activation lock is triggered. You can first check to see if there is an "unlock with Passcode" option. If so, you can unlock it with the lock screen password.
In the second case, if you bought a second-hand phone from someone else, you need to ask the original owner to erase the device in iTunes or iCloud.
iTunes: Summary>Restore iPhone
iCloud: All devices>Erase device
If none of the above methods work, you may need to use third-party software to unlock the software. During the process, you need to jailbreak to meet the unlocking requirements.
TunesKit Activation Unlocker is the best choice. it supports iOS12——16.7.5.
You need to download a jailbreak tool within the software to remove the activation lock, but it is very safe and has a high success rate.
After using TunesKit Activation Unlocker, your device has no risk of being erased or locked remotely by others and your device couldn't be tracked via the Apple ID that's linked to Activation Lock.
Computers with different systems have different jailbreak methods. You can operate according to the detailed instructions of the software.
For a detailed tutorial, watch the video above.
0 notes
Text
FACTORY RESET IPHONE YOUR KEY TO A CLEAN AND SMOOTH RESTART
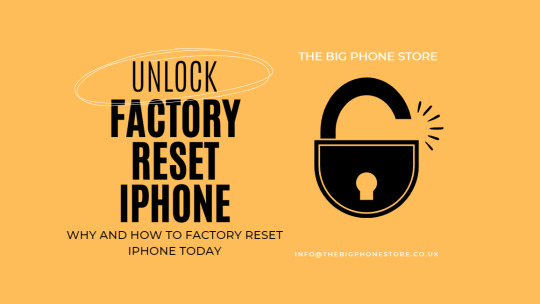
A Step-by-Step Guide on Factory Resetting an iPhone
Restoring your iPhone to factory settings is a useful procedure whether you're getting ready to sell it, are having technical problems, or are just looking for a change of pace. Please be aware, though, that doing this will remove all of your phone's data. Thus, before moving further, it's imperative to make a backup of any important data.
There Are Two Ways to Factory Reset iPhone
You can reset your iPhone to factory settings using one of two main methods:
Step One: Before doing a factory reset, log out of iCloud to circumvent the iCloud Activation Lock. Open Settings > General > Reset > Delete All Settings and Content. Next, to start the reset process, enter your Apple ID password or passcode.
Step Two: Factory Reset from Your Computer: You can use iTunes or the Finder on your computer to carry out a factory reset if you are unable to access your iPhone. To reset your locked iPhone, connect it, launch recovery mode, and choose "Restore iPhone".
Before you reset your iPhone, make a backup
It's important to make a backup of your iPhone before doing a factory reset. You can perform this by connecting your iPhone to your computer, opening iTunes or Finder, and choosing "Back Up Now"; alternatively, you can do this using iCloud (Settings > [your name] > iCloud > iCloud Backup).
Take Out Your SIM Card and Look into Upgrade Options
Once you've successfully performed a factory reset, your iPhone will be like new. Don't forget to take the SIM card out of your phone if you plan to trade or sell it. The Big Phone Store UK can help you determine the value of your iPhone if you're thinking about selling it. We make sure you get the best possible deal by constantly monitoring the costs of our competitors and providing free shipping to refurbishing centres in the UK in addition to our affordable rates. Working with a qualified refurbisher can increase the trade-in value of your iPhone. Visit https://blog.thebigphonestore.co.uk/how-to-factory-reset-iphone/ to find out how much your iPhone is worth.
1 note
·
View note
Text
How to Sell Your iPhone 14 Pro Max: A Comprehensive Guide
Introduction
The iPhone 14 Pro Max is a technological marvel, but as new models continue to roll out, you might be thinking about upgrading or simply parting ways with your current device. Selling your iPhone 14 Pro Max can be a great way to recoup some of your investment and ensure your old device finds a new home where it will be appreciated. In this article, we'll walk you through the process of sell your iPhone 14 Pro Max, from preparation to the sale itself.
Gather Your Accessories
Before you put your iPhone 14 Pro Max up for sale, make sure you've gathered all the accessories that originally came with it. This includes the charging cable, power adapter, and the original box. Having all the accessories in good condition can significantly increase the resale value of your phone.
Backup Your Data
Your iPhone likely contains a lot of personal data, from photos and videos to contacts and messages. Before selling it, ensure that you've backed up all your data to iCloud or your computer. You can do this by going to Settings iCloud Backup and selecting "Back Up Now." Afterward, you can erase all content and settings by going to Settings Unlock Your Phone
If your iPhone 14 Pro Max is locked to a specific carrier, it's a good idea to contact your carrier and unlock it. An unlocked phone is more attractive to potential buyers as it can be used with any carrier, providing more flexibility.
Determine the Value
Before listing your iPhone, it's important to research its current market value. Various factors influence the price, including its condition, storage capacity, and any additional accessories. Online marketplaces and smartphone resale websites can provide a general idea of what you can expect to get for your device.
Choose a Selling Platform
When it comes to selling your iPhone 14 Pro Max, you have several options. You can list it on popular online marketplaces like eBay, Craigslist, or Facebook Marketplace, or use dedicated smartphone resale websites like Gazelle or Swappa. Each platform has its advantages and disadvantages, so choose the one that aligns best with your preferences and needs.
Create a Detailed Listing
When creating your listing, provide detailed information about your iPhone. Be sure to include:
The model, storage capacity, and color.
The phone's condition (e.g., like new, good, fair) and any cosmetic imperfections.
The accessories included.
Whether the phone is unlocked or locked to a specific carrier.
The price you're asking.
High-quality photos are also crucial. Take clear, well-lit pictures that showcase your iPhone from various angles.
Set a Competitive Price
Price your iPhone competitively. Research similar listings on your chosen platform to get an idea of the market value. Offering a competitive price will attract more potential buyers.
Meet Safely
When you find a potential buyer, arrange a safe and public meeting place to complete the sale. Many police stations offer their facilities as secure meeting spots for such transactions. Always take precautions to ensure your safety and privacy during the exchange.
Complete the Sale
Once you meet the buyer and are satisfied with the terms of the sale, transfer ownership of the iPhone 14 Pro Max by:
Disabling "Find My iPhone" in the settings.
Removing your Apple ID from the device.
Providing the buyer with the necessary login credentials and any necessary assistance.
Conclusion
Selling your iPhone 14 Pro Max can be a straightforward process with the right preparation and research. By gathering your accessories, backing up your data, unlocking your iphone, determining its value, choosing the right selling platform, creating a detailed listing, setting a competitive price, and following safe practices during the sale, you can ensure a smooth and successful transaction. Whether you're upgrading to the latest model or simply looking to declutter, selling your iPhone can be a win-win situation for both you and the new owner.
0 notes
Text
Protecting Your Privacy When Buying or Selling a Used iPhone 14

In today's digital age, smartphones have become an integral part of our lives, holding a vast amount of sensitive and personal information. When buying or selling a used iPhone 14, it's crucial to prioritize your privacy and security. This comprehensive guide will walk you through the steps to ensure your data remains safe and protected.
The process of buying or selling a used iPhone 14 can be both exciting and daunting. On one hand, you may be eager to upgrade to a new device or find a budget-friendly option. On the other hand, the prospect of parting with your old iPhone or acquiring a pre-owned one raises important questions about data security and privacy. Your smartphone is a personal information repository, from photos and messages to login credentials and financial data. Mishandling this information can lead to privacy breaches or identity theft, making it imperative to take appropriate precautions.
Section 1: Before You Sell - Preparing Your iPhone 14 for Sale
Before you sell your iPhone 14, it's crucial to ensure that your data is securely backed up, and the device is wiped clean of any personal information. Here are the steps to follow:
Back Up Your Data: Begin by backing up all your data to iCloud or your computer. This includes photos, videos, contacts, messages, and app data. Having a complete backup ensures you won't lose any essential information during the selling process.
Sign Out of Accounts: To prevent the new owner from accessing your personal data, you should sign out of all your accounts on the iPhone 14. This includes your Apple ID, email accounts, social media profiles, and any other accounts linked to the device.
Erase Your Data: Perform a factory reset to erase all data from your iPhone 14. This process will restore the device to its original settings, effectively wiping out your personal information. To do this, go to Settings > General > Reset > Erase All Content and Settings. Confirm your decision and enter your Apple ID password when prompted.
Remove iCloud Activation Lock: Ensure that you've disabled the iCloud Activation Lock. This lock can prevent the new owner from setting up the device if it's still associated with your Apple ID. To remove it, sign in to iCloud.com, go to Find My iPhone, and select your device. Click "Remove from Account."
Section 2: Privacy Considerations When Selling
Selling your iPhone 14 involves more than just wiping the data. You should also take steps to ensure your personal information remains private during the sale:
Choose a Secure Payment Method: When selling your iPhone 14, it's essential to select a secure payment method. Cash in person is one option, but it's not always practical. Payment through secure platforms like PayPal or trusted reselling services can provide added security.
Meet in a Safe Location: If you're selling your iPhone in person, choose a well-lit, public location for the transaction. Some police stations even offer designated areas for online transactions to enhance safety.
Keep Your Personal Information Private: Avoid sharing unnecessary personal information with the buyer. They don't need your home address, personal phone number, or any other sensitive data. Stick to discussing the sale itself.
Record the Sale: For your protection, document the sale by taking a photo or video of the iPhone's condition before handing it over to the buyer. This record can be invaluable in case of disputes or misunderstandings.
Section 3: When Buying a Used iPhone 14 - Protecting Your Privacy
On the flip side, if you're buying a used iPhone 14, you should be equally vigilant about protecting your privacy. Here's how to go about it:
Research the Seller: If you're buying from an individual, do some research. Check their online presence and reputation. Look for reviews or feedback from previous buyers. Consider buying from reputable marketplaces or certified resellers with a reliable track record if possible.
Meet in Safe Locations: When meeting the seller, choose a public, well-populated area. This minimizes the risk associated with meeting strangers for a transaction. Some areas even have designated safe zones for online transactions, which can offer an added layer of security.
Inspect the iPhone: Before finalizing the deal, thoroughly inspect the iPhone's physical condition and functionality. Test all the features, buttons, and ports. Ensure the screen isn't cracked and there are no signs of water damage. If possible, check the battery's health as well.
Check for Activation Lock: Verifying that the iPhone is not locked or blacklisted due to theft or unpaid bills is crucial. Ask the seller to disable the Activation Lock by signing out of their Apple ID before completing the purchase.
Section 4: Secure Your Data on the Newly Bought iPhone
Once you've acquired the used iPhone 14, it's essential to secure your data and set up the device properly to protect your privacy:
Perform a Factory Reset: Even though the seller should have done this, resetting the iPhone to its factory settings before setting it up as your own is good practice. This ensures that no remnants of the previous owner's data remain.
Set Up as New iPhone: Avoid restoring from a backup created by the previous owner. Instead, set up the iPhone as a new device. This guarantees that no lingering data or settings from the previous owner carry over.
Enable Two-Factor Authentication (2FA): Enable two-factor authentication for your Apple ID and any other accounts linked to your iPhone. This adds an extra layer of security by requiring a verification code and your password.
Update Your iOS: Ensure your iPhone's operating system is updated with the latest security patches. Go to Settings > General > Software Update to check for and install any available updates.
Install a Reliable Security App: Consider installing a reputable security app that can help protect your device from malware, phishing attempts, and other online threats. Such apps often offer features like real-time scanning and safe browsing.
Use Strong, Unique Passcodes: Create a strong passcode for your iPhone. Avoid using easily guessable information like birthdays or "1234." A strong passcode adds an extra layer of protection to your device.
Enable Touch ID or Face ID: If your iPhone supports biometric authentication (Touch ID or Face ID), enable it. Biometric data is more secure than traditional passcodes and makes unlocking your device convenient.
Regularly Review App Permissions: Periodically review and update app permissions to limit the data apps can access. Go to Settings > Privacy to manage these settings. Revoking unnecessary permissions can help safeguard your data.
Use a VPN on Public Wi-Fi: When connecting to public Wi-Fi networks, use a Virtual Private Network (VPN) to encrypt your internet traffic and protect your data from potential eavesdropping or hacking attempts.
Beware of Phishing Attempts: Stay cautious of phishing emails or messages that ask for personal information or contain suspicious links. Always verify the authenticity of the sender before responding or clicking on links.
Regularly Back Up Your Data: Continuously back up your iPhone data to iCloud or a trusted computer. Regular backups ensure your information is safe in case of device loss, theft, or hardware failure.
Section 5: When It's Time to Upgrade Again
When the time comes to upgrade to a newer iPhone or another device, it's essential to repeat the data protection process:
Repeat the Erasing Process: Before selling or trading in your iPhone for an upgrade, perform a factory reset to erase all data from the device. This ensures that your personal information is not accessible to the new owner.
Remove Device from Apple ID: Don't forget to remove the device from your Apple ID account. This step is essential to prevent lingering access to your data or accounts.
Consider Encryption: When creating backup files for your new device, consider encrypting them for added protection. Encryption ensures that even if someone gains access to your backup files, they cannot read the data without the encryption key.
In today's interconnected world, smartphones are central to our personal and professional lives. When buying or selling a used iPhone 14, it's essential to safeguard your privacy and data security. Following the comprehensive guide outlined above, you can enjoy the benefits of a new device or a successful sale while protecting your personal information. In a world where data privacy is paramount, taking the right steps ensures that your digital life remains secure and under your control.
0 notes
Text
Unlock iPhone|For Forgetting iPhone Passcode
1. Using Erase iPhone (Without Computer and iOS 15 & Later)
In iOS 15.2, Apple added a new function called Security Lockout. It enables iPhone unlocking without a computer or iTunes and it is only available if Find My is turned on on your phone. Your iPhone will display the Security Lockout screen with an “Erase iPhone” option at the bottom right corner of the screen after you have entered the erroneous passcode more than seven times.
To reset your iPhone, you must utilize the Erase iPhone option. This is the steps:
Step 1.Make sure a cellular or Wi-Fi network is active on your iPhone.
Step 2.To verify your action, tap Erase iPhone one more after doing it the first time.
Step 3.To log out of your Apple ID, enter your password.
Step 4.To permanently remove all files and settings from your iPhone, tap Erase iPhone.
Step 5. Configure your iPhone.
2. Using iCloud (Without Computer)
iCloud might be your best bet for unlocking your iPhone if you don't see the Security Lock screen or if your iPhone is running iOS 15.1 or earlier.
Step 1. Visit iCloud.
Step 2. Log in to your iCloud account.
Step 3. Click All Devices in the menu at the top, then choose the iPhone you want to unlock.
Step 4. To disable Find My, click the Erase iPhone option and enter your Apple ID password.
Step 5. To delete your iPhone, click Next and adhere to the on-screen instructions.
Step 6. Set up your iPhone after the reset process is complete.
3. Using iTunes or Finder(Apple ID Required)
Using iTunes or the Finder is a different method to unlock your iPhone. iTunes and Finder do not detect your iPhone because it is locked. In order to unlock your iPhone on your computer, you must first put it in Recovery mode. Here's what you should do:
Step 1. Connect your Mac or PC to your iPhone.
Step 2. To put your iPhone into recovery mode, take the following actions:
1) iPhone 8 and later: Press the Volume Up button once, immediately let go, then press the Volume Down button. When the recovery mode screen appears, press and hold the Side button.
2) iPhone 7 and iPhone 7 Plus: Hold down the Side and Volume Down buttons while tapping the Home button to enter recovery mode.
3) In order to enter recovery mode on an iPhone 6s or earlier, press and hold the Side and Home buttons simultaneously.
Step 3. You will see one of the following windows if your iPhone successfully enters recovery mode:
Step 4. To restore your iPhone, launch Finder on a Mac or iTunes on a PC and follow the on-screen directions.
Step 5. Set your iPhone once the restoration process is finished.
Choose the approach that works best for you to recover access to your iPhone now that you know how to unlock your iPhone if you forgot your passcode.
Be aware that all of the aforementioned techniques will wipe your iPhone. Do a backup of your iPhone if you haven't done so before carrying out the reset procedures.
1 note
·
View note