#i need to find some sort of face tutorial or refs or something
Explore tagged Tumblr posts
Visit Tumblr Blog
Explore Tumblr blogs with no restrictions, modern design and the best experience.
Last Seen Tumblr Blogs


Fun Fact
US Tumblr user growth rate is estimated to slow down to 4.1%.
Text
anyways.
im drawing rn as to not think of the Horrors™ — only to confront the Old Horrors™...
i just dont know how to draw long, slender faces. :||||

#i need to find some sort of face tutorial or refs or something#cause i always somehow default to drawing very round faces
2 notes
·
View notes
Note
Do you have any advice on how to begin drawing a cetacean? When I'm drawing terrestrial animals, I can break them down into simpler shapes pretty easily, but cetaceans are just Big Tubes and I'm completely stumped on how to start
(Disclaimer that my work is rather stylised, so I'm not looking for advice on photorealism! Just any advice you have in general. I admire your ability to understand and render these sausage-bodied beasts)
Hi! That's an interesting question. I have to admit I had to draw a couple of dolphins first to see how I actually deal with them when free-handing lol. So much of my work as of late is scientific illustration, where in many cases I can build upon my own older illustrations. The new pieces are always 100% new, but correcting a base - however poor - is easier than starting from scratch.
Before I go any further let me stress the eternal importance of references. I can draw a dolphin fine from memory but for it to be actually accurate I need references. I always use them. Especially when it comes to weird poses or angles, but even for illustrations I will reference 25-50 photographs. Use them, study them, find them. They are a resource not a cheat.
Also, years ago I actually started work on a whole series of dolphin drawing tutorials. Or rather, collections of notes and tips for different topics (anatomy, differences between males and females, colouration, variation). Looking at the files now I see I had actually written and drawn a frightening amount already. Perhaps I should try to finish them? Is that something people would be interested in? Anyway, it starts off with a word of encouragement, which I do want to share here:

Actual advice is below the cut:
ONTO METHODS - illustrations
I found that for me, my method depends on whether I'm making an illustration or a full scene painting. For illustrations - which are in flat side view - I actually embrace the sausage. I drew a dolphin for you and saved the steps of how I go about it.
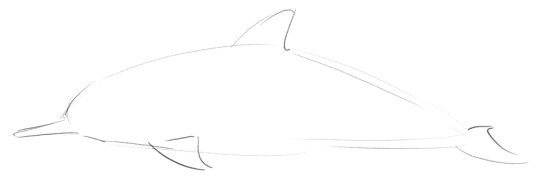
And this is the first. I start with a sort of flat-bottomed airfoil shape, and then add fins and a beak in approximate locations.

Next is refining the appendages and giving a face. Shape and placement of appendages as well as eye and mouth line is all experience and/or reference work.

Then comes fixing what I messed up lol. I always make the head too big first try (would have been good for a baby dolphin though!). Using cutting/transforming/moving selections around I correct proportions to what feels correct to me (again, that part comes from having seen and drawn a lot of dolphins).

Add some markings and hooray we have a spinner dolphin! This is the part where I would seriously start consulting references to check all the details and proportions are in order. If you don't need (photo)realism you can skip that step and use refs further back in the process just to get the shape/idea/colour of the species you're trying to paint right.
MORE METHODS - for different poses
When it comes to dynamic poses, my workflow is completely different. I just start from the nose and build my dolphin from there. Because as said above, they do have anatomy. And I think the way the beak flows into the cheek, the eye bumps connect, then the curve of the throat, the attachment of the pectoral fin, the way the belly curved up towards the genital region, the slight bulge behind that, then the muscles of the peduncle which flow into the flukes - I think the relations between those separate parts are enough for me?

These are the little dolphins (and a porpoise) I sketched from memory. In all cases I started from the tip of the nose and built from there, with minimal or no adjustments/erasing along the way. It was very much outline work. Details on eyes, mouth, etc, would come later. The killer whale is a bit different and got way more detailed than the rest. With such a front view angle I do use some spherical shapes to break it down for the body and face.
Otherwise I've never really liked or used the method of breaking an animal down into shapes, it never felt logical or intuitive to me. My "method" (if you can call it that lol) just comes from having drawn a lot of dolphins. I don't know if it is necessarily helpful when you want to get a grasp of them when starting out. Regardless I do hope this answered your question somewhat and you could get something useful out of it!
Also, I realise now I mostly talked about "standard "dolphins - for whales/short-beaked smaller cetaceans/etc my process is mostly the same, except their heads just have different shapes.
#namtalk#tutorial#sort of?#i always wish I had a clearer answer to these kinds of questions!#but i do hope this is still helpful#seeing those old tutorials also really makes me want to finish them#so many projeeccctttssss
42 notes
·
View notes
Note
So, how exactly are you good with shades, shadows, light sources in drawing? I've always had trouble with those sort of things so I was wondering if you could give me some advice other than "practice." Also, are you an animator or what exactly is your art profession? I'm an art student soon to be taking her Masters, but I still want to know.
i think some good advice is to grab some objects you have, and maybe a flashlight, and move the light around these things and see what parts cast shadows and which parts attract light. shadows and light sources all come from understanding that what you’re drawing is a 3 dimensional object. the more you start to understand the shapes that make up forms (like the human face, what cloth folding means, etc) the more you will start to see your art as an object that casts shadows instead of just a flat drawing. practice will only get you so far, a lot of art is thinking hard about what you’re drawing.
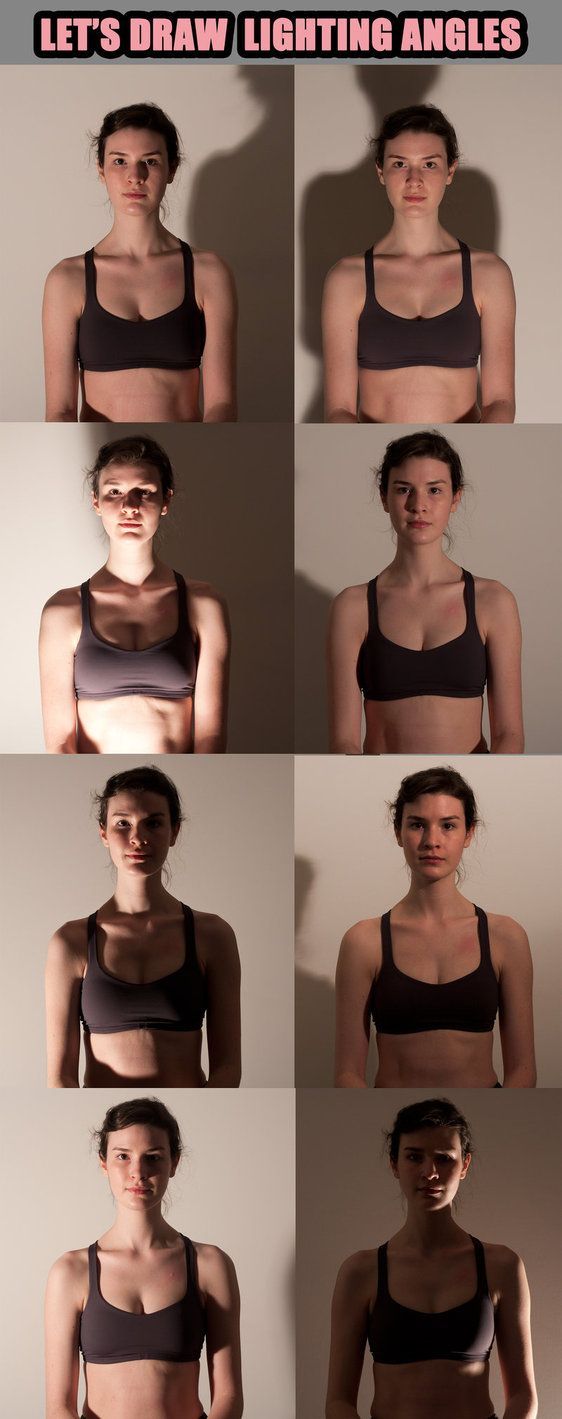
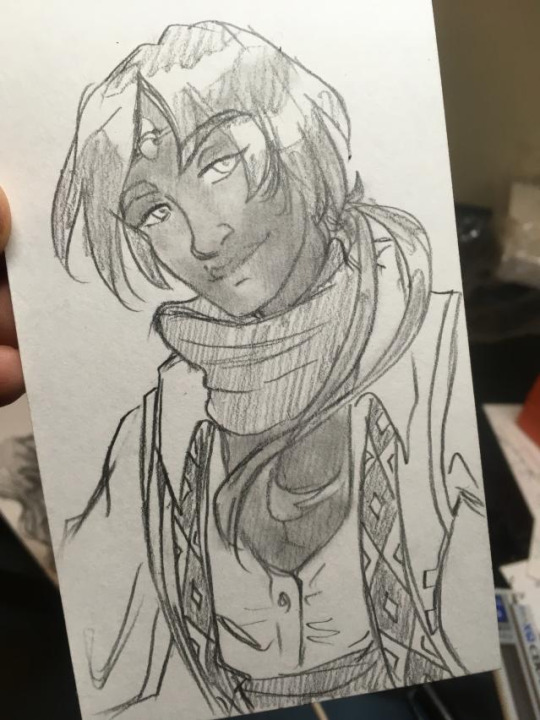
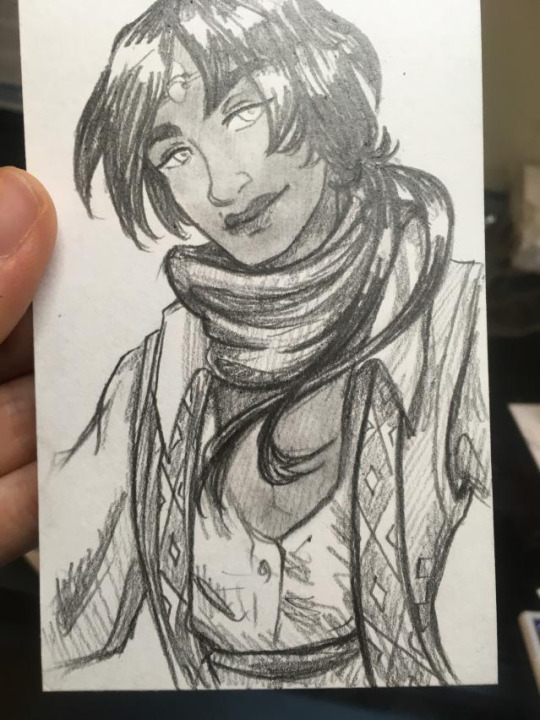
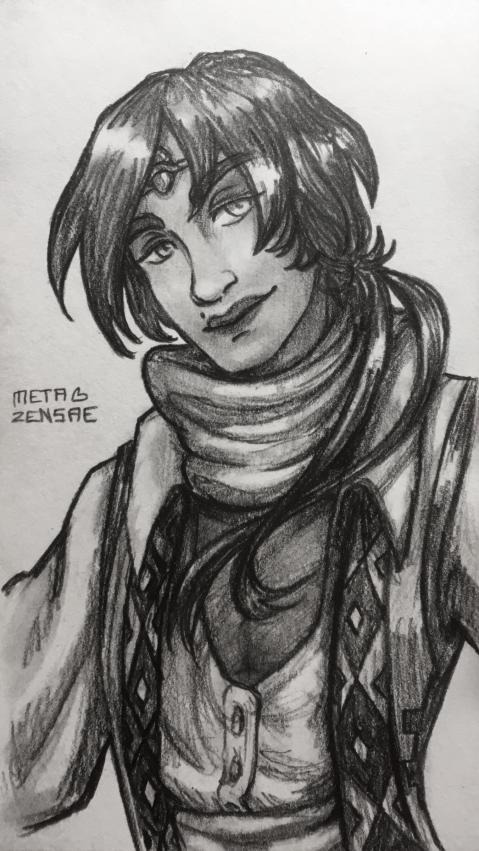
Here are some images that visually explain what I mean. I wouldn’t even draw these myself bc time is short and there is always so much I want to draw, BUT looking at them and studying them is a valid form of practice just as much as drawing is.
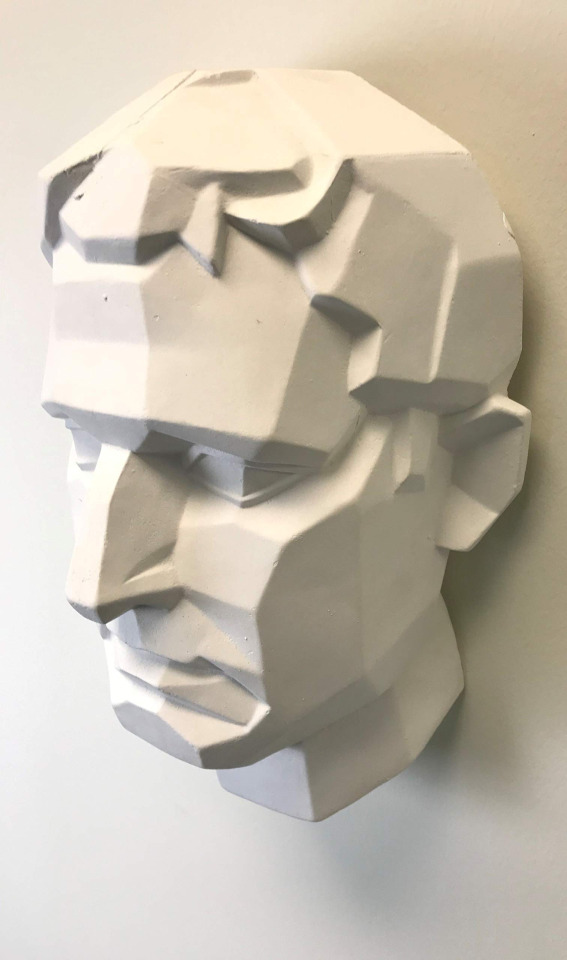
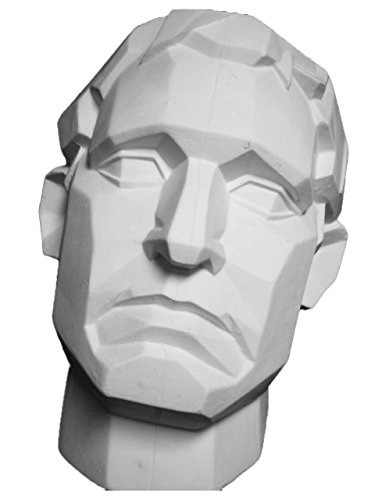

^^^^ this is the same head, shown at three different angles, but the head is made of the same basic shapes each time. In each photo can you identify the light source? if you can, great! now think, Why do you know where the light is coming from? Its because even though these are 2D photos, the object in the photo has a very clear 3D form. Apply that knowledge to your art! If you can’t tell where the light source is coming from, start to analyze which parts of the face are highlighted and which parts are in shadow. Reality tells us things that are brighter are closer to the light, things that are darker are obscured by some other form which is why shadows are cast. Shadows happen when the light is unable to reach part of the form because something opaque is obscuring the light from passing through!
Here is another great image from RobynRose on deviantart that shows how light from different angles casts shadows on different parts of the face and body. This happens because we are 3 dimensional forms!
When it comes to finding visual refs to study from, another awesome resource is senshistock on deviantart. Its literally a god send for art refs. They do great poses, have amazing diversity with their models and are an overall great resource!). I also recommend pinterest boards that people have already made. its a really quick and easy way to find a large amount of tutorials and visual explanations on like any art topic you need help with! The only downside with pinterest is if you’re going to use any specific image as a direct reference for a piece, make sure you can hunt down the source creator for that tutorial if you plan on sharing it anywhere! Pinterest is often a helpful but creditless place lol.
So, you say you’re tired of being told to just practice. Well, thats super fair! But realize part of bettering your art is paying attention to the way things look all! the! time! Pay attention, detailed attention to everything around you when you’re not drawing. And by paying attention I mean like, walking into a room and identifying the light source, is there more than one light source, is there any kind of secondary light source, etc. Now, its not that I’m consciously doing these things 24/7 but it’s more of like, a mode of vision.
Art is just as much about understanding, thinking, and problem solving as it is making things look pretty and knowing which colors to pick. ESPECIALLY when it comes to shading and light sources, that stuff requires serious thought. So, when you are ready to practice some more I recommend using a reference photo to practice (being told using references is cheating or shameful is the biggest lie young artists are told. its so damaging) and when you have your reference photo, don’t just copy what you see, think about WHY it looks the way it does. Why is there a shadow there? whats blocking it? why does the clothes fold the way it does? what is it being pushed or pulled against? All these questions become clearer the more you start to visualize what youre seeing as something that is 3 dimensional instead of 2 dimensional.
Sorry that was so long, I really hope it helps not just you but others.
ALSO my degree is in animation but I rarely animate for fun / for work / in my own time. I consider myself to be a visual development artist for animation (character design, color scripting, and background art are some of my favorite things to do!) as well as a freelance illustrator.
429 notes
·
View notes
Note
oh wow i haven’t been on tumblr in so long bc mobile is shit but how tf did i forget abt ur art ??? fukcin blows me away wow. any tips on anatomy for a rly bad artist? ik practice, but i get so frustrated when it doesn’t look like what i see in my head :(
yeah lol mobile on tumblr sucks major ass now. i cant even publish drafts on there. and im in the same boat wiht you on anatomy lmao. it might look like i know what im doing, but sometimes not really. maybe im just good at deceiving ppl on the way i draw when its kinda inaccurate
anyway, i also struggle with never really composing the shit i want, and even i tell myself to go practice anatomy but im never really granted a lot of time in my life, so i gotta make use of whatever i can find whenever i draw.
this post is actually long, so if you just want anatomy resources, you can check these out:
stuff that i made tutorials/tips on: torso/hands/pose
these are all very condensed tutorials/tips, so a lot of this is just collection of stuff that i’ve learned/noticed from others. this might be helpful, but idk man
here’s a list of other resources for anatomy/any other refs
this one was mentioned in the list, but its easily looked over: posemaniacs, it has different modes you can try out (timed/casual study), and its good for practicing foundations in anatomy. i paid more attention to this one when i saw a twitter post of it
bodies in motion is a site you can also use. it has a catalog of images to see people acting something out, and you get to see all the frames of it occurring. even though you’re just looking at images, its still a reference to learn how arms, legs, or torsos move B^) its a good way to pay attention to the smaller details like the various muscles in bodies
and honestly, check out what other ppl say too. there’s a lot of artists out there who might’ve already wrote some shit that i mentioned or have new info that i never thought about. just type in “anatomy/art tips” into any kind of search bar and you’re sure to find something useful at some point. but main takeaway i really want you to have is to seriously study from life. dont do it based on memory or anything. there’s no other general advice that i can really give besides 1) practice 2) study from life 3) dont stress out and take your time. if you want me to give a specific tip/tutorial on a body part, i can try, but the amount of depth i can give is really based on my own knowledge of it
now for the 2nd part of this post:
COMPOSING SHIT OR MAKING STUFF LOOK LIKE WHAT YOU EXPECTED IT TO LOOK LIKE:
“i get so frustrated when it doesn’t look like what i see in my head :(“
i suck at it, whoever is reading this prob sucks at it (and they secretly know it too) we all gotta start somewhere. you’re kinda asking for composing stuff while also anatomy tips, but its kinda broad, so lemme mention something about composition:
use perspective grids or at least practice using them first. the best way to understand how things are supposed to look is also based around the way you’re trying to see it in, like a certain angle of some sort. here, lemme give an example where i drafted a sketch a lot:
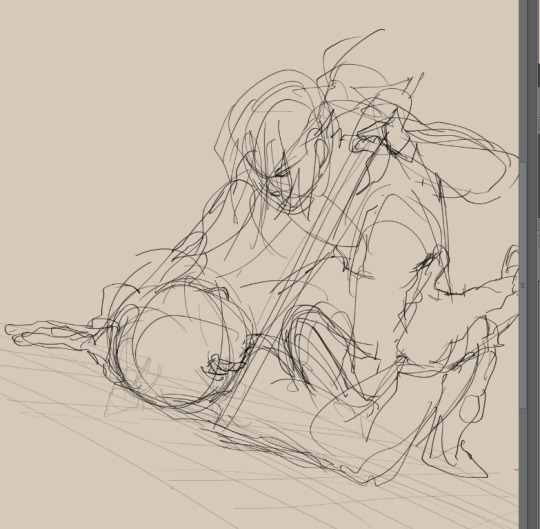
ok cool, got a pose i want, got the general idea, niiiiiiiiiceee. but i didnt think it was good enough, but i still managed to plan out a pose anyway with that grid on the bottom. it helped me gain a focus on how these characters were supposed to lay down on the ground, but it still wasnt good enough yet. character on top was facing their right instead of the person in front of them, which wasnt what i wanted.
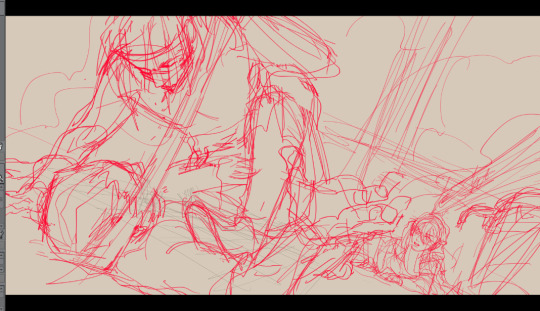
then i sketched it again. this time the “camera” of the scene was more based around the front of the characters rather than the side, and now the character is looking at the person below them. but wait, it wasnt good enough yet. i didnt like how relaxed their position looked.

i changed the position of the character to make it seem more convincing that they were pressing hard into the ground and possibly sneering at the person below them. they held dominance over the person simply based on the way theyre positioned in the scene. the way people move suggests a lot about what is happening in the scene and what might be apparent about their character. i was able to make a pose i wanted with the help of a perspective grid, and it really does help at times. use perspective grids to help you out with making anatomy. also, dont forget that what you learn from simply observing how bodies work can help you out with giving clues to how the bodies should look at a certain angle
but am i a master at using perspective grids? no, lol. i always have to make several perspective grids while i draw as a way to convince myself that i really am drawing my shit right.
some of the resources i listed lean into something related to perspective, so there’s that. there’s definitely tutorials out there to understand how to use perspective grids, so i suggest you search those up too. there’s a program called carapace thats specific for creating perspective grids, but im not sure where the original download site is, but if you want to know what it looks like or where to download it, google is your friend. if you use digital media and your drawing software offers a perspective grid function, then i highly suggest you learn how to use it.
i wouldnt say that there’s a specific thing you need to learn first (i.e. learning perspective before anatomy), but if you want to just simply learn how to draw anatomy, then go ahead and find whatever you can. if you wanna create some cool ass poses with some interesting perspective shots, then take what you learn from anatomy and apply it to how you practice your perspective shots or vice versa. there’s a lot of variety in what you can do and how you can do it simultaneously with something else to learn something out of it B^)
164 notes
·
View notes
Note
Any art tips for someone who's never drawn? QvQ
Okay I'm just gonna list stuff from the top of my head and some things I wish ppl told me.
If you want to start drawing that's great! I'd suggest to begin drawing things more familiar to you, probably on paper but if u have a drawing tablet and wanna give it a go then u can do that to! I began drawing traditionally but now I mostly draw with my tablet.
That being said, don't be afraid to experiment! Esp when ur just starting out.
Keep in mind that if ur a beginner your arts not going to look how you want it to be at first but that's okay! Just keep drawing and practicing, you will grow. Even comparing old drawings from a few weeks ago to what you've made now you'll usually notice a difference.
Another big thing I feel is to use references! Please use references! Your own face, your own things, pics u take/or stock pics u find, tutorial refs made by artists to help others. Please use them! I still do. Eventually some things do get easier to draw without ref esp as u develop a style of sorts but that's some things not everything!
I think the most important thing is to take breaks/make sure not to get burnt out. Some drawings you won't be happy with and you'll throw out. I do it all the time. You might get frustrated and that's understandable. Taking a break is not giving up, we all need rests ok? Remember that in the end art is also supposed to be fun and you want to make something that YOU like/are happy with.
In short, draw what you like/familiar with, experiment with styles/brushes/subjects, use references!!!, take it easy/take breaks, remember art is work that requires practice and time but it still should be fun!
Sorry this came out kinda long I hope it helped somewhat 😅
3 notes
·
View notes
Text
HELLO SOMEONE ASKED FOR A TUTORIAL ON MY STYLE SO...
Here we go?
Honestly, I don’t think I do anything special???? So to be asked this was both REALLY SURPRISING and SUPER FLATTERING! I’ll just go through the steps, so you can see what goes into a more refined drawing.
First of all, I don’t use SPECIAL material at all. I’m talking mechanical pencils and regular 3x5 index cards. I like mechanical pencils because the point stays sharp and I hate pencil shavings... and I use index cards because 1) we have a huge box of them from when my husband was doing animation story boarding and 2) I find the weight of cardstock pretty forgiving when it comes to how much I typically abuse thinner sketch paper so...
This is my daily arsenal.


Ok, I guess my pencil is kinda special?? It has some sort of pressure thing where the lead doesn’t break as easily, but you can get it from Amazon. For the other stuff, I use a white eraser and 0.5 B lead. I know there are different values for lead (2B, B, whatever) but honestly, I’m poor and SUPER LAZY, so this is what we’re working with.
So, for this, I’m going to be using the drawing I did for @winsbuck‘s Ciel. I’ll just take you through the basic steps I go through. This particular drawing was a half body portrait, which is a pose I do regularly, so I didn’t really need to sketch out anything dynamic here.
I pulled up refs of Ciel so I could get the details right, but I basically went STRAIGHT for the line art, as you can see...

After that, I started working on shading. Because this is traditional and my style is ME S S Y, I try to work from top to bottom to avoid getting lead all over my hand. Of course, the index card is still pretty small, so I can turn it as needed, but I was a DUMB who did not do that for this particular drawing, so it was a M E S S.
Anyway, I just hatched in some light shading, which I’m calling level 1 shading here.

Nothing special. We’re just filling in the large areas that will get shaded. The skin is particularly important for me, so I focus on that primarily. I also leave the parts that should be highlighted bare. I’ll let my blending fill those in instead of putting hatching there. I like to keep the areas with similar values together so I don’t forget how heavy my hand should be at any one moment.
OK BLENDING TIME
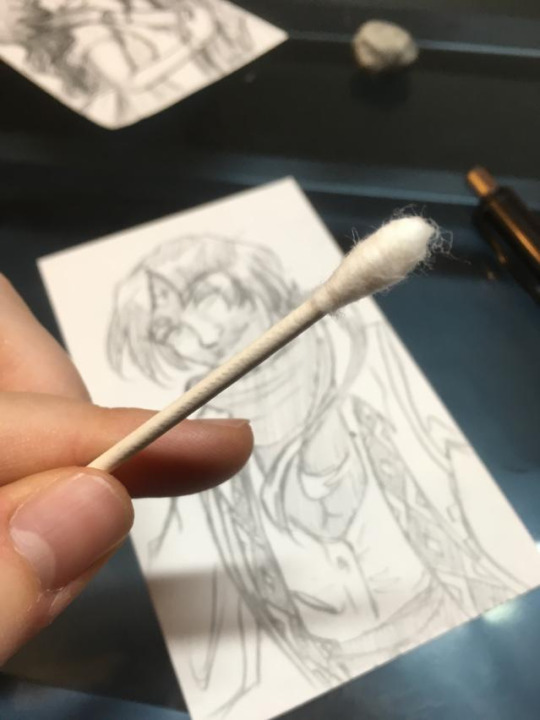
Again, I’m CHEAP, and I don’t own any blending stumps at this moment, so I pulled out the q-tips/cotton swabs for this. Get a clean one for stuff you wanna keep light (the cotton will actually take the lead off the paper and lighten areas) and use dirtier ones (the cotton is now too saturated to steal from you, so it smears easier now) for darker areas.
And WE BLEND!
Looking good already! Notice the highlighted parts? ALSO NOTICE SOMETHING ELSE REALLY IMPORTANT - the lines & details (nose and mouth in particular) in the blended areas are now much lighter. Don’t worry about fixing this yet. We gotta keep layering and blending, so we leave those details for last.
Ok bc I work top to bottom, I wanted to finish his hair. So I went in with darker values next.

And then added some light shading on the lower half
BLEND AGAIN, BUDDY!!!!!

Ciel’s shirt is a light brown color, so I didn’t actually push a pencil across most of the space. I just used the dirty q-tip to keep it soft and light. A cleaner one would have kept the shirt more WHITE.
I wanted to go in and reassert where the highlights were, so I put my eraser to work!

Blend the edges of those badboys out too. Use a clean boy for it tho. You don’t wanna accidentally darken your HIGHLIGHTS with smudges.

I forgot to take a picture right after the blend, but I also went in and added darker values to the vest and some shadows on the body and such.
After that, layer values to get those GOOD SHADOWS and blend as needed.
When you’re satisfied with all the values and blending? Now, we can go back and fix those lines that got smudged in the first blending stage. Go back in and finalize the lines on the face especially, and if you like hard edges like I do, fix up that line art.
DO NOT. BLEND.
Remember to sign it, because thieves are everywhere!
And viola! Done! :)
Now you can d r a w like m e!
94 notes
·
View notes
Text
advice for trans boys/men
before i say anything: im not exactly the right person to give this advice, im not trans, im not saying i think my experiences let me know what its like to be trans, im not saying my experiences are exactly like what its like to be trans. But please hear me out, I wanna try and help someone with what I know if I can.
I wanna try and give a couple tips on passing as male because I’ve been misgendered pretty frequently as male after a recent wardrobe change. I identify as a cis gendered female but i dress pretty androgynously, i made some alterations to the way i dress and i’ve been addressed as a male a lot in public after that. i just wanna list some stuff that might help someone pass as male:
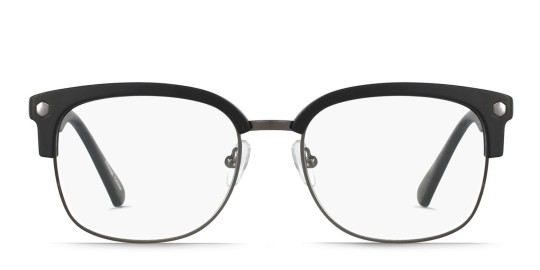
Glasses: they could be your best friend and the bigger the better when it comes to glasses. They’re a pretty quick and easy way to change the shape of your face. Glasses can make your face look larger and change the look of your cheek bones to look somewhat more masculine. They can also change the shape of your eyes as well, making them look smaller and less traditionally feminine. These changes are by no means drastic but they could help you. If you aren’t so fucking blind you can’t see two feet in front of you like me you can get no prescription or clear glass lenses that are just a single layer of glass. You can get them pretty cheap online too, most pairs don’t cost too much more than $10. You could also wear sunglasses as well but there are times that you can’t wear them like inside or at night without raising suspicion.
heres a few links for some pretty cheap clear lenses you can get online: https://www.bleudame.com/Eyewear/Clear-Glasses-277.aspx
https://www.amazon.com/s/ref=nb_sb_noss?url=search-alias%3Daps&field-keywords=clear+glasses

Big Clothing: It helps to wear clothes big enough to hide your form (especially if you haven’t gotten/don’t want to get surgery). Wear a shirt that has enough fabric to loose your form in the waves of it. Wear pants that don’t allow you to see your hip forms. and if you aren’t wearing mens clothes and want to, i recommend you switch right now because there are a million benefits to mens clothes you never would have thought of. the point is to wear things that make feminine forms disappear or almost disappear. whatever size you wear, buy something the next size or two up, it might help you. Amazon has tons of good clothing cheap and you can often get it in a bunch of sizes. Theres also a site called Wish were you can get clothes absolutely dirt cheap but its not always reliable and most clothes come from china and take a long time to come, but if you need really cheap clothes id go there.
(also if you wear a binder please be diligent about it. make sure you take it off for a little while and let yourself breathe, don’t exercise or do really labor intensive stuff in it. you could get hurt. but you’ve probably heard all that anyway)

Short Hair: If you haven’t already and you’re comfortable with it, cut your hair short. This was probably what gets me misgendered the most. get a traditionally masculine hair style and own it. Look for exactly what you want. If you get a haircut and absolutely fucking love it then your more likely to be confident and happy. This is kinda a no brainer i would think but i’m saying it really helps.

Makeup: this could drastically help you if you do it right. giving yourself more traditionally masculine features using makeup can really help. bigger eyebrows, more defined cheekbones and a larger nose are all things you can accomplish and more. there are tutorials online of how to apply male makeup that will help as well. the one thing i would avoid is giving yourself facial hair with makeup. Drug store stuff is usually pretty cheap and isnt the best quality but it will do if you’re on a budget or don’t want to commit or buy really expensive stuff.

(this is a weird one but) Men’s Products: If you aren’t using them already men’s products will help you in more ways then one. you won’t get as dysphoric using men’s products compared to others and other people that get close enough to smell your musk will smell “man” and assume you’re a man. This probably helped me, i sort of prefer men’s deodorant because it works really really well and it usually smells strong enough to mask strong stress odor so people could usually smell it on me from five feet away. It also comes in more fruity scents than your average “man” deodorant.
heres some coupons if you want them (i could only find them for dove men+care) x x
You can do as few or many of these as you want and i can’t promise you results for all of them but I just wanna try and help if I can. These are all just suggestions. Most of you who read this probably already knew about this stuff so im sorry if it doesn’t help.
I wanna reiterate that im not trans nor do i think i know what its like. Im not saying I know these things will work for you, but after i did them i noticed a change in people’s behavior toward me. I don’t know what its like. but i do know that passing as male is a huge worry for some people. I just wanted to try and help some guys feel more sure of themselves and get recognized as male a lot more. I really hope at least one thing here will help one person.
I hope I was able to help someone in some way with this. please remember that you are valid. and remember to take life at your own pace and to only do things if you want to, not because you think you should. you deserve to be happy. Don’t let others get you down and live as loud as you want to. I wish you all the best and thank you for reading all the way down to here <3
130 notes
·
View notes
Note
So I tried asking this over messenger but it wouldn't let me, but I was wondering how I'd go about making a beard for my Obi wan kenobi cosplay?
Huh. Don’t know why messenger is being weird, but there are a few main ways to make Obi-Wan’s beard for cosplay, depending on what sort you’re going for:
1. Buy a pre-made beard. Higher end costume shops often have a variety of premade beards, either of the strap-on variety, or of the lace-variety which you need to glue on. I don’t generally use this option, because I don’t like the selection or the fit of most pre-made beards, but it is a good option if you don’t have much time.
2. Make one out of craft foam - I only recommend this approach for clone wars Obi-Wan, where you are trying to immitate the animation style.
3. Using prosthetic glue, glue crepe wool directly to your face in the right style. This is less work than the next option, but it means you spend a lot of time applying it each time, and it’s hard to re-use.
OR (and this is the option I’d go for)…
4. Ventilate the beard yourself.
This option is the most time-consuming by far, but it creates the best looking and most reusable beard. For this, you will need:
– Wig-making lace that matches your skin tone (also called swiss lace). This brand is what I have used in the past:
https://smile.amazon.com/BHD-Swiss-Making-Light-Brown/dp/B00KB057AW/ref=sr_1_3_a_it?ie=UTF8&qid=1487625955&sr=8-3&keywords=wig+lace
– A ventilating needle. I use this latch-hook style needle, which is less precise, but easier to use:
https://smile.amazon.com/GEX-Aluminum-Ventilating-Holder-Needles/dp/B00NPJVJ1C/ref=sr_1_1_s_it?s=beauty&ie=UTF8&qid=1487625842&sr=1-1&keywords=gex+aluminum+ventilating+holder+and+needles+kit+making+lace+wig
–Scissors
– Hair in the color you want the beard to be, and least twice the length of the beard you want. Some people use crepe wool for this, or braiding hair from a beauty store. If you are also ordering a wig for Obi-Wan, you can sometimes buy extra matching wefts of hair, to get a precise match. That is what I did for my Baris dwarf lady beard. Wigisfashion definitely has this option, and I think Arda might as well.
– A piece of plastic wrap
– A permanent marker
– Tailors chalk
– Sewing pins
– A wig head (optional, but very helpful)
To create your beard, first find a place with a mirror, and put the plastic wrap over the part of your face where you want the beard to go. Draw the lines of the beard directly onto the plastic wrap, matching the shapes and contours of your face.
Next, lay the plastic wrap out flat, and place your lace on top of it. Trace the shape of the beard onto your lace with tailors chalk.
Pin your lace over a round, vaguely face-shaped surface. Preferably, this should be something in a contrasting color that is a little bit pliable, but not something your needle can easily catch on. I used a leftover piece of dark green knit fabric stretch over a styrofoam wig head, though for next time, I will probably get a wig head in black canvas.
Take a small segment of your hair. Make sure there are no tangles in it, then loop it so that the mid-point of the hair is roughly over the index finger of your non-dominant hand.
Now you are ready to actually start ventilating. I watch a lot of youtube videos about how the ventilating physically works (like this one: https://www.youtube.com/watch?v=nBaTImiNUTA) but honestly, you mostly just learn it through practice.
Some tips I learned about ventilating while making Baris’ beard:
– Make sure to ventilate more thinly at the edges than further in. This gives you the natural fade appearance of hair
— Don’t attach more than three or four hairs in a single loop. Close to the edges, don’t attach more than one or two hairs.
When you are done ventilating your beard, use your scissors to trim it to the desired length, then trim off most of the excess lace around the beard. For a light-weight beard like Obi-Wan’s, your beard is now complete. If you were making something heavier like a dwarf beard, though, you would want to attach some ribbons to the sideburn area so you could tie the beard up under your wig.
To wear your beard, just glue it to your face using spirit gum or pros aide (I prefer pros aide, because it holds better, and is hypo-allergenic). Use your make up to blend the edges naturally to your face.
And that’s everything! Next time I make one of these again, I will totally do a more detailed photo tutorial, but this should be enough to get you started.
#cosplay#cosplay tutorials#my costuming tutorials#beards!#every cosplayer needs a good beard sometime#star wars#obi wan kenobi#a hand-venilated beard is very tedious#but it's SO worth it
20 notes
·
View notes