#i will share a slice of cake and homemade bread with you <3
Text
I recently had to do a project in one of my psych classes, and man, I knew that CBT was used for every little thing, but seeing over and over, "do CBT! CBT is the best for every mental illness!" was so jarring. I'm absolutely biased because of my own experiences, but I just don't think it's as universal a treatment model as it's touted.
If you didn't benefit from CBT, it's not because you're lazy or didn't try hard enough or lacked intelligence or foresight into your own needs. Frankly, it's a therapy model that (I think) shouldn't be the only readily-accessible model and among the only therapy models covered by insurance. Some of us should not be treated in a CBT model and that's okay. It's not a sign of poor character or unreasonable demands, and if you don't think it's a model that works for you, then it's your right to express that!
#mental health#mental health advocacy#it was just so annoying because every resource i could access for this project often ONLY recommended cbt and#that just doesn't seem helpful for a good chunk of people#because i know i never benefitted from that model of therapy#obligatory: i am not against this therapy. me having a negative experience with it is not indicative that i believe it should be abolished'#if it works for you: KEEP DOING IT. cbt is not inherently harmful for MANY people and it's a good and valuable tool for many#but the overemphasis of cbt as the Only Therapy Model You Need sends this message that YOU failed...#...if you don't miraculously recover with that therapy model. it often feels like you'll Fail Recovery/Therapy and you're now a Bad Person#i've tried for over a decade to stick out cbt with a dozen therapists to boot. so i think i know a thing or two about my experiences with it#and overall its an unimpressive model (for me) as someone whos had a history with abuse and miscellaneous mental knickknacks rattling around#it's also frustrating because i genuinely like psych and i love learning about people#it's just. i'm tired of only being exposed to cbt (because i hate it honestly)#i feel similarly about cbt as i do with sigmund fucking frued#anyway i just want other insane people (affectionate) to remember that they deserve to not beat themselves up over this#if you're an insane person reading this: i love you i love you i love you i love you#i will share a slice of cake and homemade bread with you <3
1K notes
·
View notes
Note
what do you usually make for dinner? i’m looking for new things to try and the food you show in your photos always looks so tasty
Hi :) I have very seasonal menus, here are some of my go-to summer dishes:
Rice salad with lentils, maize, tomatoes, hard-boiled egg, rocket. My salad dressing is olive oil + sunflower oil + cider vinegar + Dijon mustard + whatever herbs I have at hand (usually thyme, basil, sage, rosemary)
I also make a salad-salad with the same dressing but with just lettuce and some rocket + walnuts + goat cheese + my homemade spicy plum-raisin chutney, or a fig chutney. Classic but delicious.
My laziest salads are potato-herring-red onions salad, or just grated carrots & black radish (and dressing obvs)
I love cold tomato soup in summer—I don't think I'm allowed to call it gazpacho because I don't like cucumber and have banished it from this recipe. It's just normal tomato soup with some olive oil, onion, garlic, Espelette pepper, and herbs, and I keep it in the fridge. I'm proud to say all the ingredients save the olive oil are from my greenhouse! Cold beetroot soup is also great, I often have cold soup with croûtons + a hard-boiled egg for supper (and then cheese + bread, and often dark chocolate + bread for dessert if I haven't made any dessert. Plus a fruit)

The chocolate tart I described here is to be eaten cold so it's a nice summer dessert (and breakfast). I keep carrot cake in the fridge too and since my recipe makes for a very moist cake it's very refreshing (I am positive I shared this recipe on here before but tumblr's blog search is useless :( It's my abuela's pastel de zanahoria esponjoso made with biscuit crumbs instead of flour, it's somewhere on this blog I swear, I remember illustrating it with a little carrot drawing 😭)
Another refreshing summer dessert is compote (or do you call it fruit purée?) Right now my favourite flavour is apple-plum (mostly because that's what I currently have and your own fruits always taste better<3) I just put a few (three?) apples to cook in a pan with a bit of water, a couple of tablespoons of sugar, a dash of lemon and a bunch of red plums, let it cook then blend it and put it in the fridge.
Three weeks from now I will be drowning in blackberries and apple-blackberry will be my favourite flavour.
Quiche!! Endless possibilities with quiche. I like to make a quiche-ratatouille combo—I start with sautéing whatever vegetables I have (often courgettes, tomatoes, a couple of potatoes, maybe an aubergine & bell pepper, + Espelette pepper, onions, basil) in a pan with some olive oil; while it's cooking I prepare the body of the quiche in a bowl (20cL of milk, 2 or 3 tablespoons of flour, 2 eggs, some herbs and a tiny bit of olive oil for luck). I make a pie crust with flour, water, salt, oregano and olive oil (sorry I'm from the Mediterranean, I put herbs and olive oil everywhere). I spread the ratatouille on the pie crust then add the milk/egg mixture on top of it, then add little bits of cheese on top (gruyère or bleu or St Nectaire personally). I eat it with a side of rocket, it's perfect. And very colourful:

When I'm too lazy to do the ratatouille (and quiche) steps I just make a tomato tart—the same pie crust as above, then I spread Dijon mustard over it then cover it with sliced tomatoes, and add some (obligatory) herbs and olive oil. It's less effort and also looks very summery:

Some favourite autumn-spring dishes: vegetable lasagna, chilaquiles, hachis parmentier with mashed pumpkin, fish brandade, potato-courgette gratin (with blue cheese)... Then winter is for comfort foods like camembert fondue, risotto, calzones, pumpkin-chestnut soup, and crêpes—the savoury kind with sarrasin flour, what we call galettes.
I grew up eating a ton of fish and seafood but I've curbed this habit due to environmental worries—hence why I'd like to raise edible fish in my greenhouse tanks! I get to eat a lot of eggs thanks to my hens, but I don't eat meat very often—hardly ever in summer except if I'm invited for dinner at someone's house. Sometimes I buy a homemade duck terrine from my neighbour and have a tartine for apéritif. My cold-season dishes call for ham in galettes and chicken in chilaquiles / risotto / quesadillas, and I make my hachis parmentier with duck. But yeah soup / salad / 'ratatouille quiche' and pasta with veggie sauce are my staples.
This list lacks pasta, I eat a lot of pasta. But mostly in autumn and spring; I just prepare my sauce in summer and store it for later. I also prepare & freeze a lot of soup and vegetable mash in summer with my greenhouse harvests. I often eat green beans as a side with my crêpes or other winter dishes because they grow so fast and incessantly in summer, my freezer ends up stuffed with bags of green beans.
My usual pasta sauce is pretty much the same ratatouille combo as above (minus the potatoes so it's less thick), sauté'ed in a pan with olive oil, I also add an egg, parmesan (sometimes extra blue cheese or emmental) and liquid cream, then blend everything. I have a lot of courgettes and tomatoes right now, industrial quantities of basil and rocket, and beautiful Ecuador purple chili, so I've been making lots of jars of this sauce and also my new basil-rocket-cashew pesto! October-me will be thankful.
739 notes
·
View notes
Text
You feel like a leech.
I hate myself for feeling that way, but you do. You hover around me as I do things or obtain things for myself, hoping to get a bite. If I give you a little, and I always do because you look so pitiful, you take more than you are owed and I’m left with crumbs.
A friend I haven’t seen in YEARS bakes me homemade breads before leaving for another year and I share with my family for dinner, have one single slice, you have at least three and gobble up the last pieces behind my back.
I buy and bake us cookies; if we all get 4, I get 3 and you get 5.
I spend $100 taking us out to the movies and you say we should do it again next month for a film you want to see—and who would be driving, paying?
It wouldn’t bother me quite so much if you reciprocated even a tiny bit. If you bothered to write “happy birthday” on a card once in a while instead of only coming out to eat someone else’s birthday cake.
You are an adult who acts and is treated like an eternal baby.
M and I finally get a weekend (without the smelly dog) to watch something on the big tv together after the end of an incredibly difficult week, a moment of victory, and now you’re here because you heard me start up the oven, sitting in the chair I always do during these rare kinds of weekends.
#off my chest#I’m a bad sister#and you trigger me bc you don’t seem to try or truly consider anyone but yourself
0 notes
Text
Chocolate Covered Strawberries - Cooking Classy
Chocolate Covered Strawberries - Cooking Classy

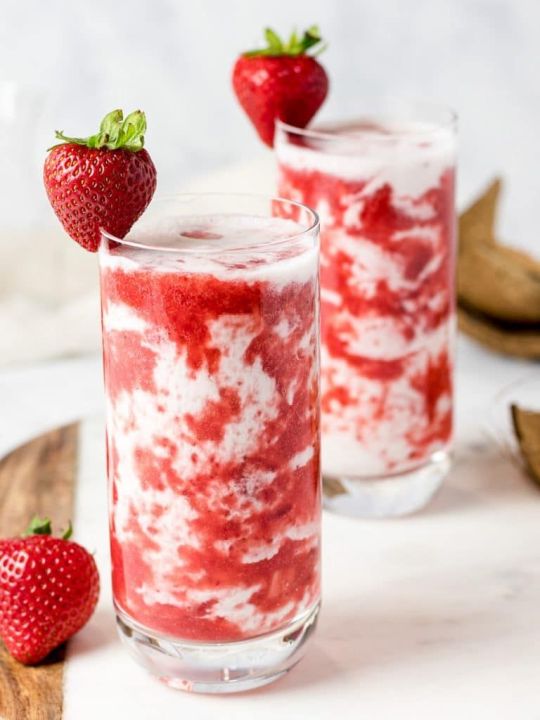
Strawberry-Mint Lemonade
The secret to this sangria-inspired (nonalcoholic) sipper is a mint- and berry-infused simple syrup with lots of fresh fruit and mint to finish.

Strawberry Balsamic Pie
Strawberry Balsamic Pie
Strawberry Gin & Tonic: A Fresh Strawberry Cocktail for Summer!
A strawberry cocktail that's a summery twist on the classic gin and tonic recipe. With an easy-to-make strawberry syrup, this promises to be your go-to cocktail of the summer!
Japanese Fruit Sandwich フルーツサンド (Strawberry Fruit Sando)
This Japanese fruit sandwich, also called fruit sando or strawberry sando, is a Japanese sandwich made with fresh strawberries and other fruit, sliced white bread or milk bread (shokupan), and fresh whipped cream!

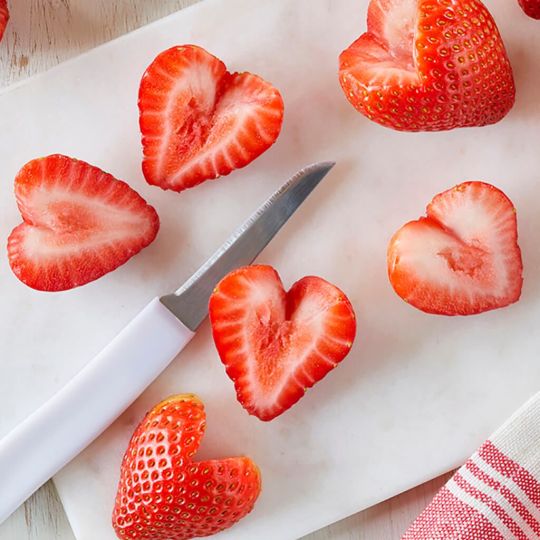
How to Make Strawberry Hearts | California Strawberries
This video shows how to make the cutest chocolate-dipped strawberry hearts. See recipe card for full instructions and recipe.
Strawberry Cheesecake Overnight Oats
This strawberry cheesecake overnight oats is the perfect springtime breakfast! Creamy, thick overnight oats packed with fresh strawberries, greek yogurt, milk, oats, chia seeds and sugar.
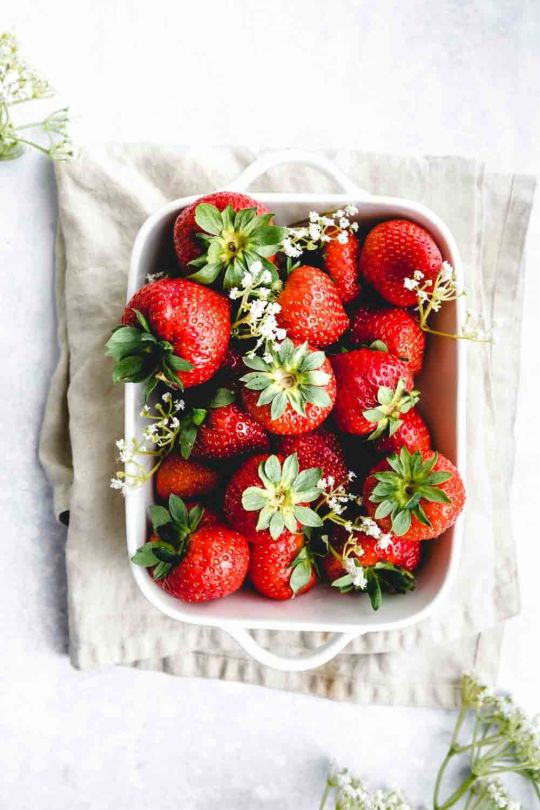
Make Your Own Strawberry Jam!
Make your own strawberry jam at home, without preservatives and added pectin! This Strawberry Jam Recipe is super easy!

Korean Strawberry Milk Recipe - Maya Kitchenette
Homemade Strawberry Ice Cream Recipe - House of Nash Eats
Homemade Strawberry Ice Cream is made with juicy ripe fruit and fresh cream for real strawberry flavor. It's perfectly creamy and scoopable thanks to the custard base. Enjoy this bright and sweet classic flavor on its own in cones, sundaes, milkshakes or ice cream sandwiches!
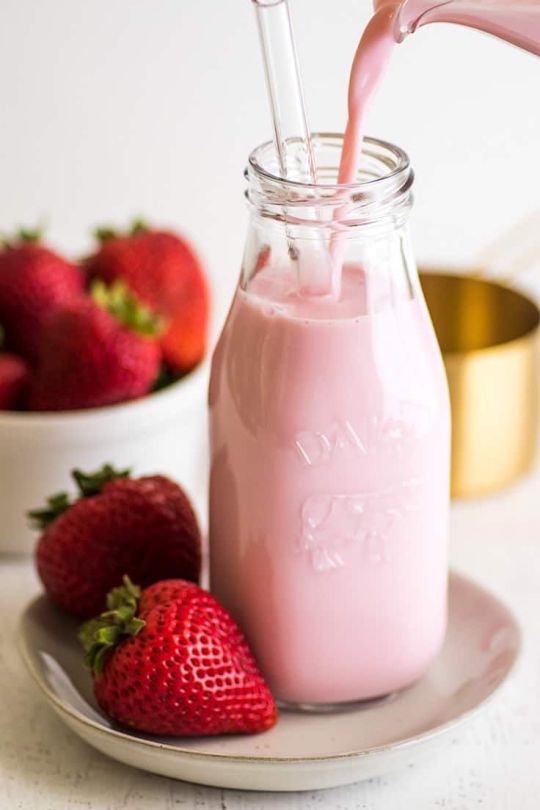
Easy Homemade Strawberry Milk for One or Two - Baking Mischief
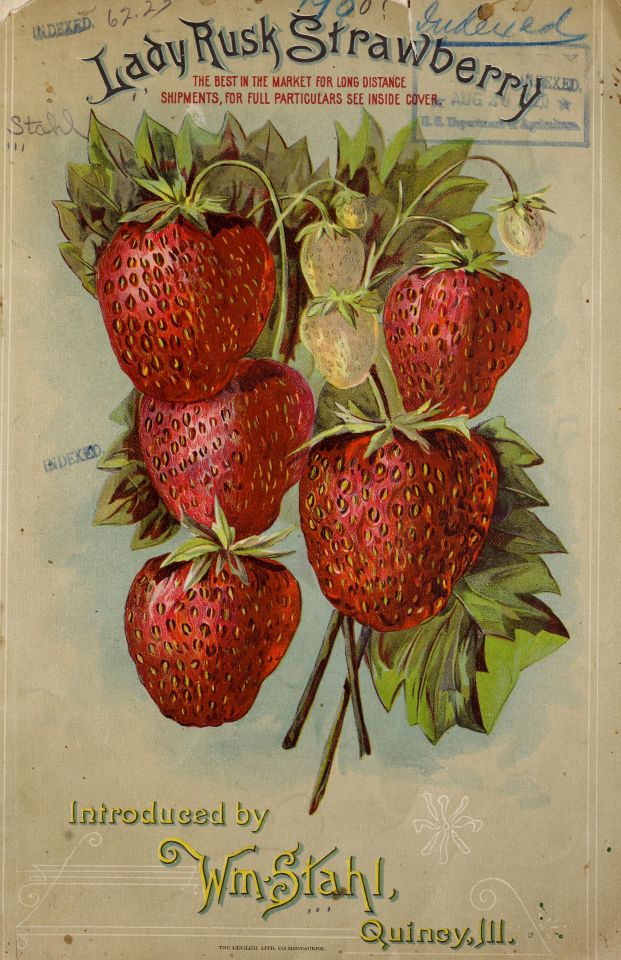
Lady Rusk strawberry : Wm. Stahl (Firm) : Free Download, Borrow, and Streaming : Internet Archive
Cover title
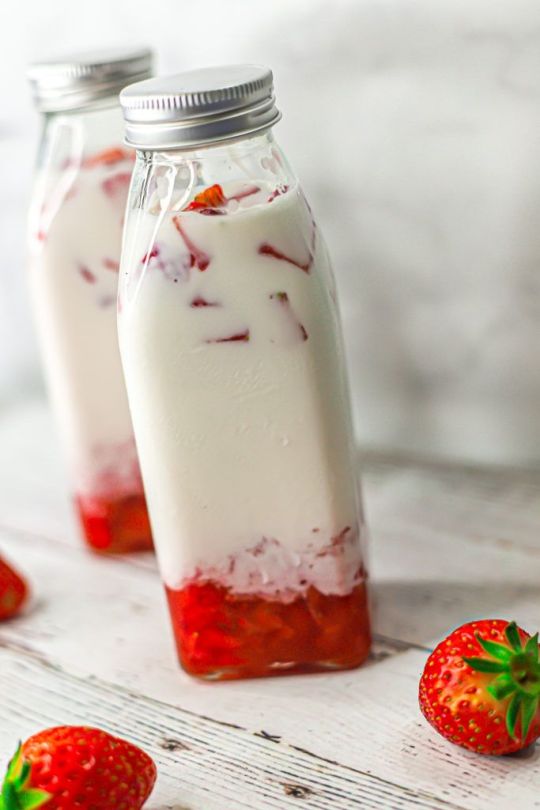
Homemade Korean Strawberry Milk
Homemade Korean strawberry milk is made with fresh chunks of strawberries & homemade strawberry syrup made of pureed strawberries. A favorite Korean drink made with fresh strawberries!
Strawberry Cake Roll | Love and Olive Oil
A Japanese-inspired patterned roll cake perfect for spring, filled with a fluffy strawberry whipped cream.

Pan Roasted Strawberries With Yogurt - The Green Creator
Easy yogurt bowl with delicious pan roasted strawberries! Roast your strawberries and enjoy for breakfast, snack, or dessert.
Easiest Chocolate Covered Strawberries! Dessert doesn’t get much better than this and it’s the ultimate upgrade to fresh strawberries! These only require 3 basic ingredients, they take minutes to prepare and they’re always sure to impress.Love this flavor combination? Try my Chocolate Covered Strawberry Cupcakes!Homemade Chocolate Covered StrawberriesChocolate covered strawberries are one of everyone’s favorite treats aren’t they? And I like to look at this gourmet treat as a semi-healthy. It’s a smarter choice than a slice of cake right?There’s a local soup restaurant that serves up soup, salad and always a chocolate covered strawberry for dessert and I think it’s absolutely genius. Their soups are pretty good, the salads subpar but honestly I think those chocolate covered strawberries are what keep people coming back time and time again.Making them at home couldn’t be easier and they use ingredients you likely have on hand much of the time, especially in the summer when strawberries are plentiful.Here I share an in depth guide and foolproof recipe to ensure they turn out perfect for you every time! Dessert doesn’t get any easier, or quicker than this!Only 3 Ingredients Needed!Chocolate chips Fresh strawberries Coconut oil How do You Make Chocolate Covered Strawberries?Clean strawberries: Scroll down to see how best to do this.Melt chocolate, microwave directions: Add chocolate chips and coconut oil to a small microwave safe mixing bowl. Heat mixture in microwave in 20 second intervals, stirring well between each interval until melted and smooth.Melt chocolate, stovetop directions: Place chocolate chips and coconut oil in a heat proof bowl (such as glass or stainless steel bowl) that sits well over a saucepan. Bring about 1-inch of water to a simmer in saucepan, reduce heat to low, set bowl with chocolate over saucepan. Heat, stirring constantly until chocolate has melted.To Dip Strawberries:To dip strawberries in chocolate: Set a sheet of parchment paper over a 18 by 13-inch baking sheet. Working with one strawberry at a time dip, hold the strawberry by the leaves and dip into melted chocolate. Tilt bowl as needed to pool chocolate to one side, and rotate strawberry to coat all sides as needed.Transfer to parchment paper: Lift and let excess chocolate run off, slide strawberry across the inside edge of the bowl to remove just some of the chocolate then set that side facing down on parchment paper (note if dipping in toppings that dip before transferring to baking sheet).Repeat and use up strawberries: Repeat with remaining strawberries. Transfer dipped strawberries to refrigerator and let chocolate harden, about 15 minutes.Optionally decorate: To finish with a chocolate drizzle (optional): Melt (1/2 cup) 2 oz. chocolate chips (dark, milk or white) with 3/4 tsp coconut oil as directed in step 2 or 3 above. Transfer melted chocolate to a small resealable bag, seal bag and cut a tiny corner from one point. Drizzle over the strawberries with set chocolate then return to fridge to solidify.How do I Choose the Best Strawberries?Look for those that are vibrantly red and plump. Normally I look for those that are red to the tops but in winter we can’t always get that. Check for vibrantly green leaves, that’s a sign of freshness. Avoid those that are bruised and blemished or molding. Size doesn’t determine good flavor but for for this recipe preferably use larger berries. Can I Use Frozen Strawberries?No. Only fresh strawberries will work in this recipe. Frozen strawberries thaw up much too wet and mushy to be used here.How to Wash and Dry StrawberriesPlace strawberries in a colander. Organic strawberries: Rinse under cold water gently tossing strawberries occasionally, about 30 – 60 seconds. Drain well. Conventionally grown strawberries: Soak in a vinegar solution to cover of 4 parts water 1 part vinegar for 5 minutes (this helps remove pesticides and destroy harmful bacteria). Transfer to colander, rinse well and drain well. Working with one strawberry at a time gently wrap paper towel around each strawberry and dab dry with paper towels then transfer to a sheet of paper towels to air dry further as needed. Forms of Chocolate to Use for Chocolate Dipped StrawberriesYou can make chocolate covered strawberries with:Chocolate chips Chocolate bars (such as baking bars) Chocolate melts My go-to choice is usually just chocolate chips because they are cheap, they have great flavor and I always have an abundance of them stored on hand. So just use what you have or what you prefer. If using melts no coconut oil is necessary.Can I Use Milk Chocolate or White Chocolate?Yes this recipe works great with milk chocolate or white chocolate (chips or chopped bars) too.Why Add Coconut Oil or Shortening to the Chocolate?When using chocolate chips and even chocolate too I usually like to add 1 Tbsp coconut oil (shortening may be substituted). Why?It helps thin the chocolate so it’s not overly thick for dipping. It also helps prevent blooming (speckled appearance in the chocolate upon chilling). It also seems to keep the chocolate from being too hard and solid once cold, making the strawberries easier to bite into and leaving them with an overall better mouthfeel. What are Good Topping Ideas?Of course toppings are totally optional but if you want to make it fun for the kids, or just to spruce them up try dipping them in:Crushed Oreos Chopped nuts (pistachios, hazelnuts, or pecans are great choices) Finely shredded coconut Crushed pretzels (my favorite with white chocolate) Crushed Biscoff cookies or graham crackers Sprinkles Mini chocolate chips If dipping in toppings be sure to dip while chocolate is still melted before transferring to parchment paper, otherwise toppings won’t stick.How to Store Chocolate Covered StrawberriesStore strawberries in a single layer. Store in an airtight container. Keep in refrigerator. How Long do They Keep?They can be stored for up to 48 hours but they are best enjoyed within about 12 hours. The sugar in the chocolate starts to draw the moisture from the strawberries making them wet and dewy after too long. Tips for the Best Chocolate Covered StrawberriesUse good quality chocolate chips or chocolate bars. Use chilled strawberries, the chocolate sticks better. Rinse and dry thoroughly. If strawberries are wet chocolate doesn’t stick and the water droplets can ruin the chocolate. If chocolate is overly runny let it cool briefly before you begin dipping. Chill dipped strawberries to let chocolate set completely. If you like it melty though go ahead and enjoy right away. For best results serve within the same day of coating with chocolate. More Strawberry Recipes You’ll LoveFresh Strawberry CakeStrawberry ShortcakeStrawberry Rhubarb Crumb BarsStrawberry SyrupMore Chocolate Treats to Try3-Ingredient Chocolate Almond ClustersChocolate Dipped Mandarin OrangesChocolate Dipped Toffee Pecan Shortbread CookiesFollow Cooking Classy5 from 4 votesReview RecipeChocolate Covered StrawberriesPrint Pin Easiest Chocolate Covered Strawberries! Dessert doesn't get much better than this! These only require 3 basic ingredients, they take minutes to prepare and they're always sure to impress.Servings: 14Prep12 minutesCook3 minutesChill15 minutesReady in: 30 minutes16 oz. fresh strawberries* 8 oz. semi-sweet chocolate chips** (good quality) 1 Tbsp coconut oil*** To clean strawberries: for organically grown strawberries place in a colander and rinse well under cold running water, tossing occasionally, drain well. For conventionally grown strawberries soak in a solution of 4 parts water 1 part vinegar for 5 minutes. Rinse and drain well in a colander. Dry strawberries: Dry each strawberry individually very well with paper towels, then set aside to continue to dry while melting chocolate. If strawberries are wet chocolate won't stick and you don't want any water in the chocolate mixture. How to melt chocolate microwave option: Add chocolate chips and coconut oil to a small microwave safe mixing bowl. Heat mixture in microwave in 20 second intervals, stirring well between each interval until melted and smooth. If chocolate is runny let it cool just briefly to thicken up slightly before you begin to dip berries. How to melt chocolate stovetop directions: Place chocolate chips and coconut oil in a heat proof bowl (such as glass or stainless steel bowl) that sits well over a saucepan. Bring about 1-inch of water to a simmer in saucepan, reduce heat to low, set bowl with chocolate over saucepan. Heat, stirring constantly until chocolate has melted. Remove from heat. To dip strawberries in chocolate: Set a sheet of parchment paper over a baking sheet. Working with one strawberry at a time dip, hold the strawberry by the leaves and dip into melted chocolate, coating nearly to the top. Tilt bowl as needed to pool chocolate to one side, and rotate strawberry to coat all sides as needed. Lift and let excess chocolate run off, slide strawberry across the inside edge of the bowl to remove just some of the chocolate then set that side facing down on parchment paper (if dipping in toppings then dip before transferring to baking sheet). Repeat with remaining strawberries. Transfer dipped strawberries to refrigerator and let chocolate harden, about 15 minutes. To finish with a chocolate drizzle (optional): Melt (1/2 cup) 2 oz. chocolate chips (dark, milk or white) with 3/4 tsp coconut oil as directed in step 3 or 5 above. Transfer melted chocolate to a small resealable bag, seal bag and cut a tiny corner from one point. Drizzle over chocolate set strawberries, return to fridge to solidify. How to Store Strawberries: Store strawberries in a single layer an airtight container in refrigerator, for best results enjoy within about 12 hours. *Preferably use larger strawberries if possible. To pick the best strawberries look for those that are vibrantly red and plump with vibrantly green leaves, avoid those that are bruised, blemished or molding. **Good quality milk chocolate or white chocolate chips work here too. Chopped chocolate bars work well too. If chocolate is thin upon melting let it cool just briefly to thicken up slightly. **8 oz. Chocolate melting wafers (such as Ghirardelli) work well too - no coconut oil is necessary with this option. If using melting wafers refer to melting directions on the back of the package. ***Shortening can be used in place of coconut oil if that's what you have on hand. If you have any leftover melted chocolate don't toss it! Use it to dip pretzels, marshmallows, Oreos, banana chips, toss with almonds, or simply fill into lightly greased ice cube trays. Let set in fridge. Topping ideas: Of course these strawberries are delicious as is no toppings necessary but if you want to spruce them up you can dip in: Crushed pretzels (my favorite with white chocolate) Crushed Oreos Chopped nuts (pistachios, hazelnuts, or pecans are great choices) Finely shredded coconut Crushed Biscoff cookies or graham crackers Sprinkles Mini chocolate chips Nutrition FactsChocolate Covered StrawberriesAmount Per ServingCalories 113 Calories from Fat 63% Daily Value*Fat 7g11%Saturated Fat 4g25%Cholesterol 1mg0%Sodium 2mg0%Potassium 141mg4%Carbohydrates 11g4%Fiber 2g8%Sugar 8g9%Protein 1g2%Vitamin A 12IU0%Vitamin C 19mg23%Calcium 15mg2%Iron 1mg6%* Percent Daily Values are based on a 2000 calorie diet.Nutrition values are estimates only. See full disclaimer here.Course: DessertCuisine: AmericanKeyword: Chocolate Covered StrawberriesAuthor: Jaclyn
0 notes
Note
kas kas how are you? also, the basement..???? i do hope everything is okay :( ahhh if you don’t wanna talk about whatever happened I’ll share my freshly baked bread with you instead, well i mean- i planned to anyways! i mean how could i not share my fluffy bread with you <3 pls accept my bread offering ✨🍞✨
helloooo my lovely sweet ollie <3333
the basement had some water get into it a couple days ago, but nothing was damaged so we're all gooood! There have been worst instances with water so I'm relieved it wasn't super bad this time! :D
AND YESYESYES I WILL HAVE BREAD HUSJKANSCJK
thankthankthank yooouu, my esposo! <3 a recently had a big slice of bread with french vanilla ice cream and homemade strawberry jam- and IT TASTED JUST LIKE A YUMMY CAKE AND NOW THAT'S WHAT I THINK OF WHEN I THINK BRREEAADDD!!!
1 note
·
View note
Text
What They Bring to a Picnic
BNHA x reader
warning(s): none! <3 not edited
a/n: tyyyy @kirixfilms for the ideaaaa :)) <333 big hugs! my thoughts on what they’d bring to a picnic date :) and what a perfect way to send the summer season on its way!
characters: izuku, shoto, iida, kirishima, ochaco, bakugou, denki, sero, & mina
Izuku
Homemade Pinwheels
He spent an ungodly amount of hours on pinterest trying to find the perfect treat to bring just to land on pinwheels. He had a slap from reality when he really tried to imagine himself cooking some dish that had at least 6 hours prep time - he’s sweet and devoted but he’s also realistic. So what better than a light but filling meal than pinwheels!!
He was so proud of himself it was adorable. He opens the tray with a big smile and a little “ta-da!” He gets even giddier when you take a bite and send him a little thumbs up and hum, telling him it’s “so good!” with your mouth still full. Yeah yeah you just made his week
Shoto
Water & Homemade fruit & bread cakes
His first thought was definitely keeping the both of you hydrated and he almost settled on just bringing water - until he thought about it a little more and realized hm, maybe he should contribute with something else, too.
And then he remembered those cute little easy to make cakes you sent him on TikTok a while back and it was like a lightbulb went off in his head :) you really should’ve seen him all focused with his eyebrows furrowed as he tried to evenly spread the whipped cream and cut the bread just right. Not only that, but huffing and puffing while cutting the fruit as he debated with himself how big the slices should be. He even made the strawberries line up like little hearts under the bread even if you couldn’t see it, he was particularly proud of that.
Iida
Those mini sandwiches with no crust
He’s SO so proud of himself as he sets them out for you two to share; even periodically taking glances at you as you take your first few bites, smiling to himself proudly when you hum and smile. He even still asks you,
“Do you enjoy them? I made sure to be careful cutting the crust!”
As if your joy wasn’t obvious enough.
He even made a few different kinds! That way you had your options with flavors - he knows your favorite, but maybe you wanted to try something new!
Overall a very considerate gentleman :-)
Kirishima
Your favorite drinks & egg salad sandwiches
He tries to keep it light but yummy for his contribution to lunch, but just in case you don’t like them (cause he forgot to ask rip) he’s made sure to bring your favorite drinks so you’ll be happy somehow.
He cuts them into diagonals (after trying and failing to cut them into heart shapes of course - which he made sure to tell you about) and thinks it’s so chic and cute and is very proud of himself for the fact (what a sweetie).
Please give him a kiss on the cheek and tell him thank you, he’ll be wearing he biggest brightest smile the rest of the week about it
Ochaco
Homemade Rice Krispies & Melon Kebobs
Picnic dates have always been a must for her, they’re fun and cute so she already knew what she was gonna make - something tasty and simple!!
She made sure she whipped out the scooper and made the sweetest melon kebobs with honeydew, cantaloupe, & watermelon! And of course she made to make those extra sweet Rice Krispies :3
She was so excited to show you what she made and see what you made in return, too. She was adamant on feeding each other the first bites of what the other made, and she made the cutest face and gave you the biggest smile with her mouth full when you fed her that first bite of what you brought :,,(((. She also loved the way your lips tasted so sweet when she gave you little pecks after having the Rice Krispies
She’s decided she’ll have to make those for you more often <333
Bakugou
Charcuterie Board
As soon as you mentioned you wanted to go on a picnic date he understood the assignment. You had been nonstop talking about charcuterie boards and how bad you wanted to try one and then you mention a picnic date? Yeah you aren’t slick he knows what you’re throwing down.
He shows up all straight faced and whips everything out while you’re just gaping at him like, wow? And he just rolls his eyes like it’s nothing and crosses his arms, saying you better enjoy it and he doesn’t want to see a single scrap when this date is over cause he put a lot of work into this damn thing.
You guys definitely walk home with tummy aches from how full you are, but happy tummy aches <3
Denki
Pop rocks & Shrimp Chips
Listen, he believes in convenience when it comes to a picnic. He doesn’t plan on going all out cause he knows he’s just gonna want to snack and then either cuddle or explore! So of course he packs his fav snacks he can take on the go!
He does feel a little sheepish when he realizes you packed lunches for the two of you, and all he brought was candy and chips. But after you give him a kiss on the cheek and tell him to get over himself
Sero
Charcuterie Board
ANOTHER one here, he’s seen the tiktoks and Pinterest pics, he knows what you really want. Besides, he would love to show up with something fancy like a charcuterie board layout and impress you. And so he does exactly that.
You stroll up with your water and other various treats in your bag and walk upon him sprawled out next to that?? You’re a little bashful at first comparing what you brought in your own bag, but he assures you it’s cause he wanted to make you feel special and you feel a little bit better.
He tries feeding you some cheese on a cracker, but some of the spread drips onto your shirt and he laughs, so he’s off feeding duty from now on.
Mina
Assorted Fruit
Girlie busts OUT with the seasonal fruit collection.
She skips up to you and pulls it all out of her bag, pre cut in nice Tupperware’s and it’s so fresh. She even made some chocolate strawberries as a cute little side!
She’s all about being cute and feeding you fruit and giving you a smooch after, humming when she tastes the sweet left over remnants of fruit on your lips. She’s also all about taking the cutest pictures of you guys together and posting them everywhere - she has one of you with fruit juice dripping down your chin as her lock screen cause she’s obsessed <3
—————
taglist: @kirixfilms - I hope ur feeling better with school and all that! (psps let me know if you’d like to be added!)
#[bnha.ohmy!]#bnha fluff#bnha x reader#izuku x reader#shouto x reader#todoroki x reader#sero x reader#denki x reader#bakugou x reader#kirishima x reader#ochaco x reader#iida x reader#mina x reader#deku x reader#deku fluff#katsuki bakugo x reader#bakugou fluff#denki fluff#kirishima fluff#kirishima headcanon#midoriya x reader#midoriya headcanons#midoriya fluff
436 notes
·
View notes
Text


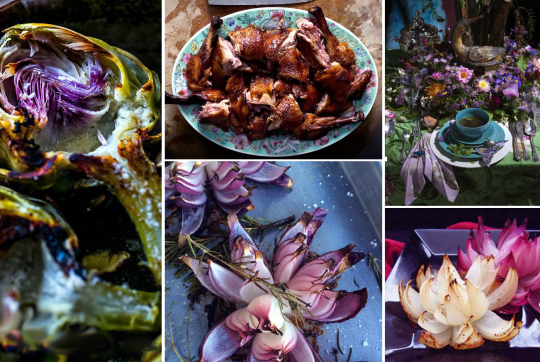


Spring Crossquarter {Beltane} Fantasy Feast
We are nearing the pinnacle of Spring! I long for the day when I can have the most dreamy aromatic sensual Beltane feast and celebration. However creating visual boards is the first step towards that reality.
I did go overboard with some of the selections with this one, like I tried to be more Honest in my Imbolc and Ostara board (like as if I were to actually have a feast and constructed a menu) but this one I did not care about portions or the amount of dishes present, I just threw everything in there.
As I have decided to update my 2016 fantasy feasts Beltane was next after Ostara and Imbolc. These visualization posts have helped me manifest some incredible celebrations and gatherings and as my tastes have gotten more extravagant and complicated its time for an upgrade.
In the read more there are the recipe links and additional explanations on personal symbolism and of course the image credits! I also always plan my feasts to be vegan inclusive for those with dietary restrictions but also aim for all the food to be somewhat local which matters in these seasonal feasts since it's celebrating local nature. Anyway there is something for everyone here.
1: Starters
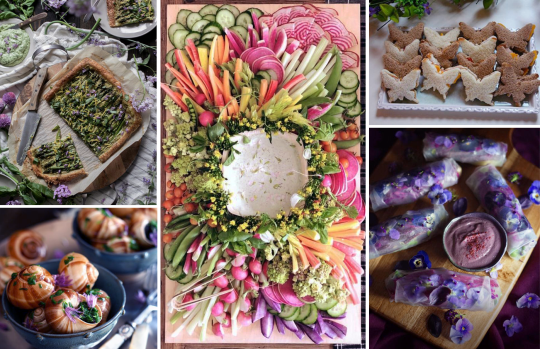
Since we are in still in Spring of course there will be a crudité board, yet unlike Ostara which was refreshing and green, this would show all the floral extravagance of spring from the zesty radishes, edible flowers (Romanesco broccoli is technically a flower!) to floral seasonal toppings. To make the dip vegan for all to enjoy I would go for an Oatley crème fraiche dipping sauce I would infuse with some olive oil and chive blossoms. Along with this I would love to have the delicacy of chive butter snails with chive flowers. Not everyone would be adventurous for snails but there are a lot of other ideas here for starters such as the Creamy Garlic Scape with Chive Flower Pesto tart. Or the Purple Pansy Salad Rolls which would be a nice addition to the crudité board. Lastly I just love the presentation of the butterfly sandwiches. I'd imagine them to be like the little cucumber or spiced egg sandwiches you'd get at high tea.
If I were to slap all of these dishes into one feast I would mostly have the crudité board with the scape tart and the snails. I am unsure about the rolls and sandwiches because it would just be really filling before the main course! But they deserve to be seen haha.
Floral Crudite Board
Creamy Garlic Scape + Chive Flower Pesto and Asparagus Tart Recipe
Purple Pansy Salad Rolls Recipe
Snails with Chive Flowers
Tea Party Butterfly Sandwiches Source
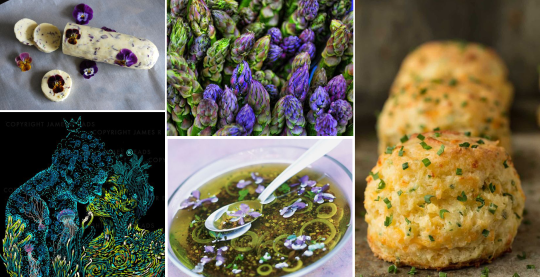
2: Sides
The bread choice would be chive rolls. To accompany this would be floral compact butter. A lot of flowers are actually more savory and salady then fragrant and sweet. Even some of the more aromatic blooms have a vegetal undertone to their flavor which is why the violet vinaigrette caught my eye. That would definitely accompany the artichoke veggie main where guests would be able to dip each artichoke petal in. Lastly there will definitely be asparagus locally grown as they taste incredible when fresh out the garden. The ones the local garden I volunteer at taste so aromatic yet also slightly meaty? It's hard to describe but incredible sensual like the same way truffles have a somewhat "meaty" or umami flavor to them but are very aromatic.
Compound Flower Butter Recipe
Honorable Mention: Compact Chive Garlic Butter Recipe
Cheddar Chive Bread Rolls
Asparagus Source
Violet Vinaigrette
3: Mains
The Main two dishes would be an aromatic duck served with a side of spring onions sliced into blooms. Duck also has such a fragrant and rich flavor to it that would accompany the floral salads and dishes very well. The vegan option would be roasted artichoke that guests can dip into the floral vinaigrette.
Roasted Beer Duck Recipe
Garlic Butter Charred Artichoke Recipe
Red Onion Flowers with Rosemary Recipe
Roasted Onion Flowers
4: Desserts
Ok this is definitely where I have gone overboard but there were too many dishes to choose from which made the selection difficult so I just included all of them for the visuals.
If I were to host this feast I would realistically just pick 1 or 2 of these things (A cake and a tart) but for each sabbat I have a special dessert, a tart and a simple cake in mind so it would really depend on how many people are attending. For the special dish I would love a floral jelly, a floral panna cotta or floral jello cake like with blossoms or violets. The tart is rhubarb (I know in some regions rhubarb is very summer-y but mid-April is when it's season starts here in the UK) and the pound cake would be rose buttercream or violet sugar. I do love how buttercream can be easily shaped into flowery shapes so I’d be leaning towards that.
I just love the complexity and versatility of floral desserts. You do have to be a little familiar with what you're doing because floral flavors can easily go from sensual and enchanting to soap/perfume getting squirted in your mouth. Some flavors like rose and jasmine are very safe but others like lavender and violet can get edgy. A great way to balance those flavors out is adding honey as it balances it with a nectary undertone which makes you feel like you are eating delicious butterfly food instead of a block of soap.
Lastly the Wondersmith's beautiful cake is very summer solstice vibe I will admit, but I really loved the presentation of butterflies and the elderflower blooms which are starting to bud around this time of year anyway so I thought it was worth adding in. Usually I would not include anything like strawberries in something like this as I feel they peak closer to summer solstice and are more symbolic to summer than spring for me and the region I live in currently.
Rhubarb Rose-twisted Tart
The Wondersmith Elderflower Rhubarb Fairy Cake
Lilac & Violet Panna Cotta Tart
Lavender Lemon Sugar Pound Cake
Rose Buttercream Cupcakes
Cherry Blossom Jelly No bake Cheesecake
Buttercream Pansy Cake
Black Sesame Swirl Cake
Honorable Mentions:
Lilac Cake with Matcha Glaze (Gluten Free)
Flower Bouquet Cake
5: Drinks
Every beverage of course would be infused with more blooms and nectary flavors. I would love to serve fleurette cocktails upon arrival with fairy floss in them that would melt down upon pouring. Fleurette cocktails are pink prosecco, st germain (or elderflower syrup), rose water and a flower garnish. There would be so many options for non alcoholic drinks such as Lavender lemonade, floral teas and of course I would love to have a blooming tea being served in a glass pot during the main course.
La Fleurette Cocktail
Fairy Floss Champagne reference
Lavender Lemonade
Flower Tea Source
Blooming Tea Source
Honorable Mentions:
Rose Tea
Turkish Delight Cocktail
6: Treats
Ok finally last part!! This would probably be omitted from a real feast I would host because we would probably get our sweet-tooths satisfied by dessert, however I always feel like including this part as treats always made holidays more memorable for me as a kid. Each holiday had its specific candy or snacks and they were like memorable tokens you acquired and snacked on days later after the celebration. Especially the candy!! If there were kids present these treats would definitely be given in little goody bags maybe in flower pots or planters as buckets to encourage them to grow something for their garden in them.
Some ideas for treats would be glazed sugar cookies (the butterfly ones), home made pixie sticks with edible glitter, rose pops (I also love the idea of dressing up regular lollipops as flowers), rose Turkish delights, violet candies and gummy worms. The only savory treat I can think of would be like kale chips.
Rose Cake Pops recipe
Butterfly Iced Cookies
Homemade Pixie Sticks
Homemade Rose Turkish Delights
Leone Violets
___________________
Please share your thoughts with me!! Tell me about the recipes you like to have on this day or what you associate with spring. I feel like my approach to Beltane may be different from what most of the community does but its because it's often a reflection of the nature that surrounds me. I grew up this time of the year being bombarded (literally I was surrounded by magnolia trees) with flowers so Beltane has always been a sensual floral flirty fairy festival to me.
_________________
Image Credits:
Beltane Tea by Julia Nikitina
Butterfly Animation Gif
Embracing by: James R Eads
Floral Tablescape
Bigger Floral Tablescape
Rose Lanterns
Misty Forest with Bluebells
Magnolia Tree
Mushroom Lantern
Floral candles and Lilac
Dessert tablescape
#beltane#feast#recipe#recipes#food#spring crossquarter#crossquarter#sabbat#feast days#I went overboard with this one#fairycore#spring magic#long post#I'll probably end up redoing this one cause it's so excessive lol
275 notes
·
View notes
Note
I can’t believe I’ve found an active hetalia blog! This is so freaking exciting! Could I request some headcanons for Germany, Canada, and France having a s/o that constantly bakes and uses the three as testing dummies for their recipes? Excited to see what Comes of your blog! Best of wishes to ya
Thank you so much, darlin’, I hope you enjoy <3
Canada|Matthew Williams
Honestly? He finds it incredibly sweet of you
For starters, he’s always under so much stress, so you bringing him any kind of treat is something he always appreciates
E s p e c i a l l y if it’s homemade
Also, the fact that he’s the person you go to whenever you try a new recipe makes him very happy
One of his favorite things about you is seeing your eyes light up as you ask him how you newest cookie, cupcake, or bread recipe tastes
He also loves watching you jot things down whenever you have a new idea for a recipe or ingredient additive
Whenever you bake around him, he’s content with doing the dishes as you bake, listening to you talk about your day
There's only one downside, and it’s that’s, if you’re trying to find someone to give you constructive criticism for your recipes, he’s not a great person to ask
He just loves everything you do
France|Francis Bonnefoy
When Francis found out that you were into baking, he was overjoyed
Since he owns a pastry shop himself, he’s often in the kitchen in his free time, trying out different recipes, so having an s/o who shares the same passion will make him enjoy it that much more
He really enjoys the calm afternoons during the weekends where you both stay in the kitchen for a few hours, trying out your own recipes as soft music and a gentle breeze futters through the air
Whenever you guys are done baking, you both try each other’s sweets
That being said, he’s a wonderful person to go to for critiques
He’s amazing at tasting something and deciding if it needs a little something added to it, or if you should substitute an ingredient for another entirely
If you’re not looking for a critique, he’ll still be happy just trying what you made (He’ll definitely ask for your opinion on his, though)
Whenever you come up with a particularly good recipe, he’ll ask if you’d allow him to integrate it into the regular menu
If you decline his offer, he’ll completely respect your decision, but if you accept it, he’ll show much zeal as he puts them on display, giving you full credit for your sweet creations
Let’s just take a moment of silence for the other bakeries/patisseries around you guys who are gonna have to take an L
Germany|Ludwig Beilschmidt
Ludwig likes baking too!
Unfortunately, he’s pretty embarrassed about it
Luckily, however, you taking your passion in stride will make him feel more confident in his own pursuits
Actually, after the first few times you had him try your stuff, he made you try a slice of German chocolate forest cake that he recently made
Unsurprisingly, he’s also a really good person to go to for cooking advice
On the downlow, he’d want you two to bake together
It’s just that he finds baking calming, and he likes being around you, so he’d really like to have those two things mix
And, while he prefers baked goods with chocolate and/or raspberries in them the most, if you made it, he’ll certainly try it, without a doubt
He’s very specific on not eating junk food until he’s had an actual meal first, though, so he may not have it right away
That being said, you might have to be careful, though, because if you don’t put your man’s name on the container, Feliciano will probably eat it
At least you know everyone likes your stuff, though
42 notes
·
View notes
Link
Sig's Bread and Butter Pudding #myfavouriterecipes. This classic bread and butter pudding brings out all the right feelings of nostalgia. Arrange a layer of bread, buttered-side up, in the bottom of the dish, then add a layer of sultanas. Pour over the bread, making sure the slices are soaked.

Cut each slice in half diagonally. Arrange half the bread in rows in prepared dish. Repeat with remaining bread and sultanas.
Hey everyone, I hope you're having an incredible day today. Today, we're going to make a special dish, sig's bread and butter pudding #myfavouriterecipes. One of my favorites food recipes. For mine, I'm gonna make it a little bit unique. This will be really delicious.
This classic bread and butter pudding brings out all the right feelings of nostalgia. Arrange a layer of bread, buttered-side up, in the bottom of the dish, then add a layer of sultanas. Pour over the bread, making sure the slices are soaked.
Sig's Bread and Butter Pudding #myfavouriterecipes is one of the most favored of recent trending foods on earth. It's simple, it's fast, it tastes yummy. It is enjoyed by millions daily. Sig's Bread and Butter Pudding #myfavouriterecipes is something which I have loved my whole life. They are fine and they look fantastic.
To begin with this recipe, we must prepare a few ingredients. You can cook sig's bread and butter pudding #myfavouriterecipes using 13 ingredients and 4 steps. Here is how you can achieve that.
The ingredients needed to make Sig's Bread and Butter Pudding #myfavouriterecipes:
{Get 125 grams of Unsalted butter.
{Get 6 of egg yolk.
{Prepare 2 tbsp of sugar.
{Prepare 250 grams of homemade bread crumbs,made from breakfast rolls.
{Take 1/4 liter of milk.
{Take 125 grams of each, currants,raisins, ground almonds or other nuts.
{Get 200 ml of brown rum.
{Get 6 of egg whites.
{Take 1 of recipe for sauce.
{Take 4 of eggs.
{Get 3 tbsp of corn starch.
{Get 1/2 liter of red or rose wine,(only use one you would drink).
{Get 185 grams of sugar.
Bread and Butter Pudding is surely the ultimate use of leftover bread!! While wonderful made with pre-sliced bread, it's company-worthy made with chunks of bread, whether it's a leftover loaf, dinner rolls or even hot dog buns(!) A classic comfort dessert, custardy on the inside, golden and buttery on. This British bread and butter pudding is an easy way to use up stale bread, sweetened with dried fruit and spiced with nutmeg. Save a fortune and make this tasty pudding.
Instructions to make Sig's Bread and Butter Pudding #myfavouriterecipes:
Mix butter together with sugar and yolk until creamy, fold gently under then add the bread crumbs and milk,add raisins,currants and almonds. Whisk the egg white to a almost solid form and lift under..
Grease your pudding or cake pan (2 ltr) and cover with dust with some bread crumbs..
Fill to 3/4 with mixture. cover tightly with tin foil and add to big sauce pan. fill halfway up to the pudding pan with water.cover lot with lid.Simmer for about 1 hour,than leave standing for 15 minutes on stove..
For the sauce mix all ingredients and heat gently whisking all the time until thickened,when thickened take of heat and whisk some more. Serve at once and enjoy..
I like to serve this with custard sauce but it goes well with whipped cream, ice cream, or also great on its own. Most bread and butter pudding recipes involve a very simple custard - a combination of milk, cream, sugar and eggs, mixed together and poured straight over the bread without further ado. Victorian cookery writer Eliza Acton's recipe involves making a more conventional pouring custard by heating. Simple, fast and tasty bread and butter pudding - a winner!! The cinnamon is a lovely addition to this classic pudding.
So that is going to wrap this up with this special food sig's bread and butter pudding #myfavouriterecipes recipe. Thank you very much for reading. I'm confident that you will make this at home. There is gonna be interesting food at home recipes coming up. Don't forget to bookmark this page in your browser, and share it to your family, friends and colleague. Thanks again for reading. Go on get cooking!
0 notes
Link
Dosa wrap with falafel. Image above: Nutty Falafel Dosa Wrap with Turmeric Tahini Sauce. Her light, chickpea-free take on the classic street food was an instant favorite, and it inspired one of our most popular menu items, a falafel dosa wrap packed with nuts, seeds, herbs, and spices and finished with a golden turmeric. Nash Patel and Leda Scheintaub of Dosa Kitchen in Brattleboro, VT have written Dosa Kitchen: Recipes for India's Favorite Street Food, and we have chosen their recipe for a Nutty Falafel Dosa Wrap with Turmeric Tahini Sauce to share with you.

Fill the dosas with a swirl of green hummus, warmed Woolworths falafel, mixed seeds, the pickled turnips and onion. Cook's note: If dosas aren't your thing, try Woolworths Carb Clever cauliflower wraps instead. Savory falafel wrapped with spicy hummus, fresh cucumber, tomato, and a creamy lemon-garlic dill sauce—full of warming and elevating flavor! -To make your wrap, spread some of the spicy hummus on the pita bread, add a few greens plus some tomato slices and cucumber if using, then top with.
Hello everybody, it's Drew, welcome to our recipe page. Today, I'm gonna show you how to prepare a distinctive dish, dosa wrap with falafel. It is one of my favorites food recipes. This time, I will make it a little bit unique. This will be really delicious.
Image above: Nutty Falafel Dosa Wrap with Turmeric Tahini Sauce. Her light, chickpea-free take on the classic street food was an instant favorite, and it inspired one of our most popular menu items, a falafel dosa wrap packed with nuts, seeds, herbs, and spices and finished with a golden turmeric. Nash Patel and Leda Scheintaub of Dosa Kitchen in Brattleboro, VT have written Dosa Kitchen: Recipes for India's Favorite Street Food, and we have chosen their recipe for a Nutty Falafel Dosa Wrap with Turmeric Tahini Sauce to share with you.
Dosa wrap with falafel is one of the most favored of recent trending foods in the world. It is easy, it's quick, it tastes delicious. It is enjoyed by millions daily. They're fine and they look fantastic. Dosa wrap with falafel is something that I've loved my whole life.
To begin with this recipe, we must first prepare a few ingredients. You can cook dosa wrap with falafel using 24 ingredients and 26 steps. Here is how you can achieve that.
The ingredients needed to make Dosa wrap with falafel:
{Take 1 cup of Urad dal.
{Get 3 cups of rice.
{Take 1 tbsp of sambar powder.
{Take of For falafel.
{Make ready 1 cup of kabuli chana.
{Get 1 of chopped onion.
{Take 2-3 of green chillies chopped.
{Prepare 1 tsp of cumin powder.
{Take 1/2 tsp of chilli flakes.
{Make ready 2-3 tbsp of chopped parsley.
{Prepare of Cooking oil to deep fry the falafel.
{Take of For hummus.
{Take 1 cup of boiled chick peas or black chana.
{Make ready 1 tbsp of roasted white sesame seeds.
{Get 2 of big garlic pods.
{Make ready 1 tbsp of olive oil.
{Get 1 tsp of lemon juice.
{Get to taste of Salt.
{Take of Some pickled salad.
{Take of For pickled salad.
{Take 1 of cucumber.
{Get 1 of carrots.
{Get 2 of big chillies(mild spiced one).
{Prepare 1 cup of white vinegar.
Filled with crunchy falafel, fresh vegetables, and creamy tzatziki sauce, this wrap makes a perfect healthy vegetarian lunch or dinner! Falafel (/fəˈlɑːfəl/; Arabic: فلافل, [fæˈlæːfɪl] (listen)) is a deep-fried ball or patty-shaped fritter made from ground chickpeas, fava beans, or both. Falafel wrap is a delicious vegan lunch. Find out how to make quick and easy falafel wraps with canned chickpeas, veggies, flatbread, and homemade tahini sauce for the most delicious lunch or dinner.
Instructions to make Dosa wrap with falafel:
Wash and soak dal and rice for 4 hours..
Grind them in a mixer grinder with water and keep overnight to ferment..
Soak kabuli chana(chick peas) overnight..
In a mixture grinder put soaked chana, chopped parsley, chopped green chillies, chopped onion and salt..
Grind to a coarse paste..
Heat sufficient oil in a kadai(pan) and make small sized falafel pakodas or fritters with the paste..
Keep aside..
Now to make hummus add boiled chick peas or black chana to a mixer jar..
Add garlic pods, chilli flakes, cumin powder,lemon juice,olive oil and salt..
Make a smooth paste. Add water or chana stock if required to make the paste..
Put in a bowl and adjust seasoning. Hummus is ready..
To make pickled salad put cucumber, carrot and green chilli (cut in long strips) in a glass jar..
Add white vinegar up to the level of the veggies..
Keep overnight. Pickled salad is ready..
Now all the Stuffings are ready. So we will make dosa..
Heat a non stick pan or skillet..
Grease with oil and pour 2 tbsp of dosa batter..
Spread in circular motion to make a thin pan cake..
Cover and cook for a minute..
Remove the cover. Drop some oil to make it crisp..
Gently remove from the pan with a spatula.
Like this make all the dosas you required..
Now assemble the dosa wrap..
To assemble take a prepared dosa. Sprinkle some sambar powder. Put some prepared falafel, hummus and pickled salad..
Wrap the dosa to make roll. Cut in half..
Dosa wrap is ready now. Serve immediately with some more hummus in the side..
This wrap is stuffed with crispy falafel along with lettuce, avocados, red onions topped off with creamy garlic mayonnaise and makes for an interesting snack recipe. It is an easy snack recipe that does not require much efforts from your side. If you want to become a favourite among your kids, then pack this. These tasty veggie wraps can be easily adapted for vegans by swapping the plain yoghurt for a dairy-free alternative. Packed with crunchy veg, they are a healthy choice for lunch or a light dinner.
So that is going to wrap this up for this special food dosa wrap with falafel recipe. Thanks so much for reading. I am sure you can make this at home. There's gonna be interesting food at home recipes coming up. Don't forget to bookmark this page on your browser, and share it to your family, colleague and friends. Thank you for reading. Go on get cooking!
0 notes
Link
Chicken Parmesan with Homemade Red Sauce.

Hello everybody, hope you are having an incredible day today. Today, I'm gonna show you how to make a special dish, chicken parmesan with homemade red sauce. One of my favorites. This time, I'm gonna make it a bit unique. This will be really delicious.
Chicken Parmesan with Homemade Red Sauce is one of the most favored of recent trending meals in the world. It's simple, it is fast, it tastes delicious. It's enjoyed by millions daily. They are nice and they look fantastic. Chicken Parmesan with Homemade Red Sauce is something which I have loved my whole life.
To get started with this recipe, we must first prepare a few components. You can cook chicken parmesan with homemade red sauce using 23 ingredients and 5 steps. Here is how you cook that.
The ingredients needed to make Chicken Parmesan with Homemade Red Sauce:
{Take of pasta.
{Take 1 box of of thin spaghetti noodles.
{Get of red sauce.
{Take 2 of whole garlic cloves diced.
{Get 3 of onions diced.
{Prepare 1/2 cup of olive oil.
{Prepare 2 bunch of fresh basil chopped. add to your liking. the more the better..
{Prepare 2 of bay leaves.
{Get 1 of salt and pepper.
{Take 1 can of tomatoe paste.
{Take 2 pinch of sugar.
{Take 6 can of whole tomatoes.
{Get of chicken parm.
{Make ready 1 of italian seasoned crumbled breadcrumb.
{Get 3 of eggs.
{Make ready 1 cup of milk.
{Prepare 2 cup of fresh cut parm cheese.
{Get 1 of mozzarella cheese.
{Prepare 1 of salt pepper.
{Get 6 piece of of chicken breast boneless.
{Prepare 1 cup of cooking oil.
{Get 1 of oregano.
{Make ready 1 of chopped parsley.
Instructions to make Chicken Parmesan with Homemade Red Sauce:
Before we start I just want to make it clear, all ingredients can be adjusted to your liking, such as you can add more herbs or reduce the amount, you can add more onions and garlic or reduce etc. I just suggest that you taste your sauce as you go and see what you like best :) Dice your onion and garlic cloves and set aside. Pour into a kettle your olive oil and get hot. Once oil is hot add in your onions and garlic. Cook on medium for about 5 mins until onions are clear and transparent. Then you will need to take your tomatoes and drain out excess juice into a bowl as you may need if your sauce is to thick for your liking. Then take tomatoes and put them in a blender and puree them ( they will look foamy). Once blended pour the tomatoe puree into the kettle with the onions and the garlic. Then add in one can of tomato paste. Stir in. Then lightly chopped your basil and throw in the sauce . Add salt and pepper and oregano to taste and add a small pinch of sugar. Give it a stir. N.
Slice all chicken breast long ways down the center. Pound out the chicken with a meat pounder until about 1/2 inch thick. I use wax or parch paper to wrap the chicken in while I pound the chicken. This prevents it from sticking. Pound lighty until you get the hang of it. Once pounded out you can cut them in half to make good portion size or leave it whole if you like but they will be very large pieces of chicken if so. Now beat your eggs, milk, salt and pepper in a bowl. In a separate bowl your bread crumbs. Make sure oil is hot in your frying pan. Take the chicken pieces and dip in eggs and milk then dredge them into the breading on each side fully covered in bread crumbs and fry them until golden brown on both sides. You dont want them to be FULLY cooked as you will finish them off in the oven. Once they are browned remove them from the pan and lay on paper towel to drain oil..
In a baking pan ( like a cake pan or something wide to fit all the chicken in side by side. I also cover the pan with Grill Foil to prevent any sticking from the breading of the chicken, Grill foil is the best as it doesnt allow sticking) take some sauce and layer the bottom of panlightly just to coat it with some of the sauce. Place your pieces of chicken on the sauce. Spoon more sauce over the chicken as you like. Not to heavy though. Then layer the parmesan cheese on each chicken piece. Then cover and bake for 20 mins on 375. After 20 mins uncover and sprinkle mozzarella cheese over the chicken and then some parsley over the cheese and broil the top so the cheese is nicely toasted. I usually start on a low broil to melt and then once done turn on high broil to give the nice golden brown on the cheese. Just watch and keep an eye on it!.
Once the chicken is done broiling, cover and set in oven on low warm so the cheese stays melted. Then boil your thin spaghetti noodles and once cooked then drain them. I let mine set to assure all water is off. Once drained place back in your boiling pan and I then take a couple tablespoons of oilive oil and toss in the noodles and then about 3 to 4 ladel dippers full of the red sauce and add in the noodles and toss it to mix. You can eyeball this for how much noodles you have to how much sauce you like. Then take the chicken out of the oven..
Combine the perfet meal by taking pieces of chicken and lay on the plate. You can add more red sauce if you want on the chicken ( I would add to the side as it would cover your beautiful chicken and we dont want to do that!) ..I do cause the sauce is AMAZING. Then place some noodles on the plate beside the chicken or you can put noodels first and chicken on top. Which ever you like! Mmmmmmm heaven has arrived. People all over are asking me for this recipe so follow this step by step and you will succeed and you will never buy precanned or pre made marinara or spaghetti sauce again lol..enjoy ..tell me how you like it and picssssssss.
So that's going to wrap this up with this special food chicken parmesan with homemade red sauce recipe. Thanks so much for reading. I am sure you will make this at home. There's gonna be more interesting food in home recipes coming up. Don't forget to bookmark this page on your browser, and share it to your family, colleague and friends. Thanks again for reading. Go on get cooking!
0 notes
Link
Hot Head Maggi Burger.

Hey everyone, I hope you are having an incredible day today. Today, I'm gonna show you how to prepare a special dish, hot head maggi burger. It is one of my favorites food recipes. For mine, I will make it a bit unique. This will be really delicious.
Hot Head Maggi Burger is one of the most popular of recent trending foods on earth. It's enjoyed by millions every day. It is simple, it is quick, it tastes yummy. Hot Head Maggi Burger is something that I have loved my entire life. They're fine and they look fantastic.
To get started with this particular recipe, we have to first prepare a few components. You can cook hot head maggi burger using 16 ingredients and 7 steps. Here is how you cook that.
The ingredients needed to make Hot Head Maggi Burger:
{Get of Burger.
{Get 3 slices of bread.
{Make ready of Chicken thigh.
{Prepare of Slaw.
{Get 100 g of Cabbage sliced/shredded.
{Make ready 1/4 of Red onion, thinly sliced.
{Make ready 3 of olives, sliced.
{Prepare 1 tbsp of vinegar.
{Take 1 tbsp of olive oil.
{Make ready of Spicy dressing.
{Make ready 2 tbsp of mayonnaise.
{Take 1 packet of hot head maggi powder.
{Get of Frying.
{Make ready of Corn Flour.
{Get of Maggi noodles, blended into powder.
{Get 1 of egg.
Steps to make Hot Head Maggi Burger:
Cake 1 slice of bread and the chicken with flour. Dip both into the egg..
Roll them around the maggi noodle powder until covered..
Refrigerate these for 30 minutes..
Combine cabbage, onion and olives in a bowl. Add olive oil and vinegar. Toss around till coated evenly..
Combine Mayonnaise and hot heads powder into a paste..
Fry the coated bread and chicken in a frying pan until browned on both sides..
Spread mayo onto the 2 plain slices of bread. Then the slaw and fried bread and chicken. Sandwich them all together and slice diagonally..
So that's going to wrap it up for this exceptional food hot head maggi burger recipe. Thank you very much for reading. I am confident that you will make this at home. There's gonna be interesting food in home recipes coming up. Don't forget to save this page on your browser, and share it to your family, friends and colleague. Thanks again for reading. Go on get cooking!
0 notes
Text
This Month On The Farm: July 2020

July's weather was full-on summer complete with heat, humidity, and lots o' sunshine. And surprisingly, a lack of mosquitoes. Hooray for that! We did receive some rain and when we did, oh boy was it a lot.
Tents - Not Just For Camping
As you can see in the photo above, we decided to make use of a couple of our extra craft show tents and set them up on the upper and lower decks. On the upper deck it's wide open, used just for rain cover and shade (Ollie is afraid of the netting walls so we left them off). On the lower deck we used the netting walls and put our outdoor table and chairs inside so we can enjoy eating or sitting outside without bugs attacking. Ollie, as noted, is afraid of the walls but if he's sitting in his tower with me by his side, he deals with it ok.
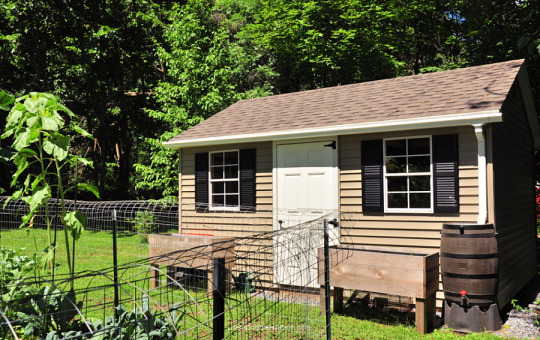
gutters and rain barrel installed!
Barrels Of Rain
Woo hoo! Jay was able to get the gutters installed on the outbuildings and the rain barrels are up and working. This has been on our "someday" list for years. Years! We've been able to successfully use the barrels to water the garden through most of the month, only needing to resort to our well water a couple of times.

Harvesting
As I've mentioned (probably too many times), our garden is mostly shaded. We receive morning sun over about 70% of it and afternoon sun for a few hours over it all, and it's fully shaded the remainder of the day. And so, our harvesting starts late. Then, of course, we had the infamous whistle pig debacle that set us back a bit but we are now enjoying the fruits of our labor.
Green beans are coming in by the bushel. I know that many people don't enjoy frozen green beans but we do, so I grow enough to enjoy fresh weekly as well as enough to put up in the freezer for winter and springtime eating. I planted 3 types this year: Blue Lake, Red Noodle, and Calima Bush Beans. The Red Noodle are still small and green but this is the first year we've planted them so, fingers crossed, they are delicious.
We finally have tomatoes!!! Well, we finally have ripe tomatoes! We have a ton, I mean TON, of green tomatoes amidst the 25 plants so we will definitely have plenty for fresh eating as well as for oven-drying to freeze for sauce during the winter.
We are also harvesting onions, cabbage, kale, swiss chard, mixed greens, arugula, microgreens, peppers (jalapeno, ancho, and bell), summer squash, zucchini, the last of the peas, beets, blueberries, blackberries, herbs and radish.
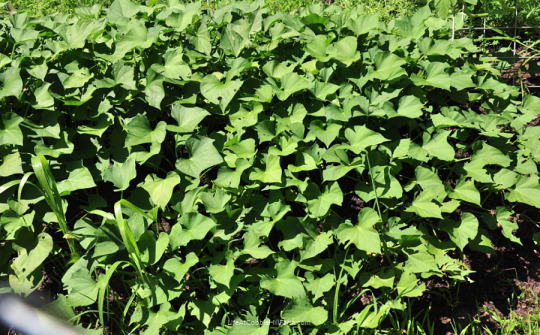
our sweet potato hill
Sadly, our pear and asian pear trees did not do well this year. I've ordered new "partners" for them (and the paw paw tree) so our hope is we will be swimming in their fruits in a couple of years! And our whistle pig took out all of our summer broccoli and cauliflower so we won't be harvesting either of those until fall.
At the start of the season I would grab a big bowl from the cupboard and Ollie and I would head to the garden to harvest whatever was ready. One day, as my bowl was so full the veggies were spilling out of it, Jay looked at me and said "you need a bucket or a basket or something". I said "I know. Someone I follow on Instagram just posted a picture of her harvest basket that her husband made. It was nice - metal mesh and wood sides and handle. You're too busy though, so maybe next year." I didn't give it another thought.
Later in the week Jay comes out of his shop holding the PERFECT harvest basket. He had made it in between other projects he was working on. Such a sweet gift!
So now, Ollie and I take our harvest basket with us to the garden on our daily check-in.

looking up one of our mammoth sunflowers

the 2 mammoth sunflowers that survived the whistle pig feast are on the left
Homestead Projects
We have a list of projects that we are hoping to accomplish before fall. We've managed to check off some of the easier projects, but not so much the larger projects. Here's what we're chipping away at:
paint the dining room (done)
stain the back deck (done)
paint the living room
fix columns and lay new flooring on one of the two front porches (second porch will be done next year)
paint 2 sides of the house (same color, just refreshing it - the other 2 sides will be done next year)
install fence around the garden (temporarily done - permanent fencing will be done next spring)
build and install a new outdoor pole light in the front yard
build a small nesting box area/water station for garden (so when the chickens are tasked with the garden fall clean-up, they have a place to lay eggs)
chop and stack wood for the woodstove in the shop (done although we may chop a bit more)
install gutters on the outbuildings and hook-up rain barrels (done)
create a raised bed hoop house for one of our garden beds so we can grow greens through late fall/early winter (done for now - we purchased/found the items needed to make this in fall)
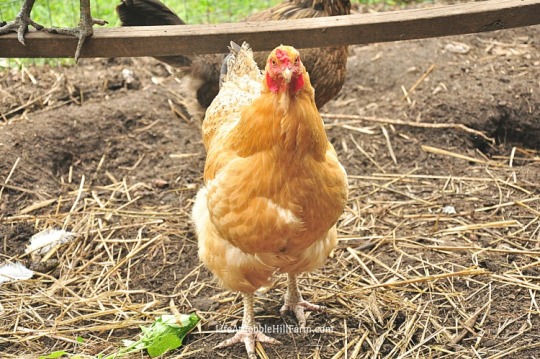
Animals
We are not going to add any more animals to the homestead for now and that includes chickens. The current flock will get smaller, gradually, as the inevitable happens. We had one pass away this week, she was one of the older girls, and we fully anticipate a few more passing this year from old age. It certainly doesn't get any easier to deal with death, but at least we have developed a bit of a plan now, of keeping them safe and comfortable during the process. We also know more about signs, because with chickens, they usually mask illness. This helps us so we can watch closer and try to make sure they are protected.
Death is one of the parts of having animals that is so difficult. Unfortunately, as birds become sick and/or begin the dying process, some of the others can become very cannibalistic. It's not a pretty sight. So once we see that one of the girls isn't feeling well, we are able to remove them, but not totally, from the flock. They are social creatures, so full removal seems to make them stressed and upset. Instead, we make sure they are separated by a fence allowing them to still feel a part of the flock without getting incessantly pecked at and stepped on. And no, we don't let them suffer. If there's any sign of that, and we've done all we can do to make them well, we step in.
Our overall plan is to get out of the egg-selling business and keep a very small flock (6-8 girls). With a flock of 24 girls, it will take some time for the flock to naturally reduce (we're down from the 32 we had last year), so we won't be bringing in any chicks until we have less then 8 girls.
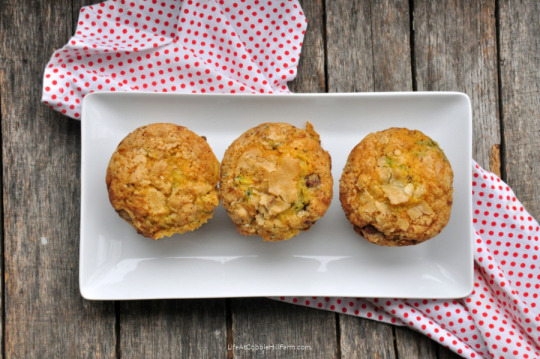
zucchini chocolate chip muffins
What Do You Do With All Of That Zucchini?
Isn't this the question you ask yourself every single year? I always think I have a plan to keep up with it but I struggle by August. I give it a heck of an effort though. Here's what we've been doing with our zucchini:
slicing it lengthwise and grilling it (alternatively, you could broil or bake it). We both love it. Jay sprinkles a bit of parmesan on his and I like mine plain. It's sooooo juicy and delicious.
cutting it into chunks and sautéing it with onions and corn. I add a bit of butter to Jay's and mine is plain. We just love the combination.
stuffing it. As noted in this weekending post (at the bottom), I always enjoy coming up with new stuffing ideas. The key is to bake, boil, or grill the scooped out zucchini halves before you fill and bake them so they are nice and soft once finished.
making our very favorite chocolate zucchini cake. Even my husband who isn't the world's biggest chocolate fan LOVES both versions. The original version is here. The healthier/reduced oil and sugar version is here.
making Kate's recipe for healthier zucchini bread.
making zucchini and chocolate chip muffins. They are ah-mazing! I just realized I've never shared the recipe here. I'll try to get that on the blog!
making zucchini noodles with homemade pesto. Soooo good!
adding zucchini to grilled kebabs. (everything gets marinated in italian dressing first)
adding zucchini to soups such as minestrone.
making zucchini cobbler. (tastes just like apple cobbler)
making veggie stew. I use zucchini and whatever fresh veg is in the garden to make stew as the temps begin to drop in the fall.
I'm not a big fan of eating it raw (there's a weirdness to it) or as zucchini "fries", so those didn't make the list. We've made zucchini pickles in the past but we aren't huge pickle eaters so I haven't been making them.
I'd love to hear your family's favorite ways to eat zucchini!

Oliver, my garden/kitchen/preserving/everything helper
Preserving, Or, What We'll Be Eating This Winter
Since our garden is now in full swing, the preserving process has finally begun!
Green beans - as noted above, they are being put up in the freezer weekly.
Peppers - so far we've only collected enough jalapeno's to preserve, so those have been made into pickled jalapeno rings.
Relish - our cucumbers are struggling this year. I've never had an issue with cukes, so I'm not sure what's happening. So we purchased some cucumbers from the farmer's market and, along with our bell peppers and onions we'll can enough relish for my husband to enjoy with his occasional hot dog lunch.
Zucchini - I did freeze some grated zucchini (portioned into 2 cup servings) that I can add to muffins, quick breads, etc.
Onions - we are drying quite a few and then I'll chop and freeze the remainder.
How do you figure out how much veggies to preserve? This is a question I receive a lot. For us, this is how I plan it. We typically rotate the same dishes all winter long so I can usually predict how often during the week we'll eat veggies such as green beans, broccoli, winter squash, tomato sauce, etc. I then times that by how many weeks we'll need preserved food and that's how I calculate it. So, as an example, I plan on serving green beans twice a week for 28 weeks which means I will need to freeze 56 bags of green beans (bagged in single-serving sizes).
It gets a bit more difficult with carrots, corn, onions, canned chopped tomatoes, and peppers because I use them on their own as well as in many different dishes. Over time, through trial and error, I've made it so I can get pretty close. For the frozen veggies, I flash-freeze them and then store them in large, gallon-size bags, so I can just take out what I need when I'm cooking.
That's July around the homestead!
This Month On The Farm: July 2020 was originally posted by My Favorite Chicken Blogs(benjamingardening)
0 notes
Text
An easy summer rustic tart that makes the most of ripe and juicy seasonal tomatoes. This tomato galette has a beautifully crisp and flaky pastry. It’s topped with a layer of basil pesto which is then covered in colourful cherry tomatoes. Delicious served either warm from the oven or cold next day.
Galettes are now my favourite form of tart to bake, be they savoury or sweet. They’re just so much easier to make than a classic tart or pie. There’s no need for any pre-cooking before the tart is assembled and goes into the oven. No tin is required either, which means less faffing about and less washing up – hooray!
What’s a Galette Anyway?
The word galette is a French noun derived from galet, which means pebble. It’s usually used to describe a form of flat round dough. This could be a cake, biscuit, crèpe, bread or pastry. These days, the term mostly refers to a rustic tart, as in this tomato galette, which you free-form into a round rather than shape in a tin. You may or may not fold the pastry up over the edges. In fact, I’ve sometimes made this particular galette as a completely open tart, as in the photo below.
As you can see, this tomato galette is easily adaptable. For this one, I didn’t use a rolling pin at all, just my hands. I also used a few less less tomatoes but added some spring onions. The Italians refer to this type of free-form tart as crostata.
Tomato Galette with Basil Pesto
In the summer months, I often make this rustic French inspired tomato tart. As tarts go, it’s a pretty easy one to make. It can be on the table from start to finish in less than an hour. It’s a good one to make for friends as, despite its rustic appearance, it has a wonderful aroma, looks really appealing and is absolutely delicious. We tend to enjoy it with a large serving of zingy green salad.
Tomatoes and basil are a classic pairing and there’s a good reason for it. They seem to both compliment and bring out the flavours of the other at the same time. They are paired all over the Mediterranean, but particularly so in France and Italy it seems. One of Italy’s most famous salads features tomatoes, basil and mozzarella cheese. Here’s my version of it, Caprese salad bowl for one.
I’ve used wholemeal spelt pastry in this recipe. It’s delicious and always produces a gorgeous flaky result. But if you’re in a real rush or just can’t be bothered, use shop-bought pastry. Likewise homemade pesto is generally much nicer than the commercial stuff and it’s really easy to make. But again, sometimes life just gets in the way, so you can easily substitute bought pesto for homemade if you need to.
#gallery-0-4 { margin: auto; } #gallery-0-4 .gallery-item { float: left; margin-top: 10px; text-align: center; width: 50%; } #gallery-0-4 img { border: 2px solid #cfcfcf; } #gallery-0-4 .gallery-caption { margin-left: 0; } /* see gallery_shortcode() in wp-includes/media.php */
Roll out pastry.
Spread with a layer of pesto, leaving a centimetre or so clear around the border.
Top with halved cherry tomatoes.
Fold the edges up and over the tomatoes.
You’ll probably find it hard to resist finishing this tomato galette immediately; it’s especially good warm from the oven. However, any leftovers will perk up the morrow’s lunch box no end, so if you can muster up some restraint, it’ll be worth it.
Wholemeal Spelt Pastry
This pastry recipe is my absolute favourite homemade pastry. It’s easy to make, rolls well and produces a beautiful flaky crust. The secret to its success, is wholemeal spelt flour and yoghurt. The yoghurt binds the dough together, but keeps it light and the spelt gives a nutty and slightly sweet flavour. I’ve added some ground cayenne pepper to the pastry to give it a little additional oomph, but this is entirely optional.
Homemade Basil Pesto
The amount of pesto given in this recipe is more than you’ll need for the tomato galette. But it will keep in the fridge for a few days and you can use it in any number of ways. It’s perfect for pasta, of course, but it’s also delicious in sandwiches, forked through rice or quinoa, mixed into cooked vegetables or simply spread on crackers.
All you need to do, is add the pesto ingredients into a blender and whizz it into a paste. I used my power blender, the Optimum Vac2* for this pesto, but you can easily use a food processor instead.
Homegrown Tomatoes
We’ve managed to grow quite a few tomatoes this year and all of them outdoors. They’re the most delicious tomatoes I’ve had in a long time and we’ve saved them specifically for eating just as they are or in a salad. CT grew the cherry tomatoes, pictured below, at work. They’re also very good and are perfect for making this tomato galette.
Cherry tomatoes work particularly well in this type of tart. They’re small enough so that you can just cut them in half. And if you place them skin-side down, they’ll mostly contain their juice. On the other hand, you’d have to slice large tomatoes which would allow the juice to leek out all over the dough and the edges of the tin. This not only creates an awful mess, but it produces a wet and soggy dough.
For me, chilli and tomatoes are a match made in heaven, so I sprinkle a few chilli flakes over the top of this tomato galette. The same goes for this though as it does for the pastry, any chilli is entirely optional. Reduce or increase the amounts depending on how ‘hot’ you like your food.
More Galette Recipes You Might Like
Double blackberry chocolate galette
Gooseberry galette
Green vegetable galette
Rhubarb galette with orange flaky pastry
Roasted beetroot galette (with puff pastry)
More Pesto Recipes You Might Like
Carrot top pistou with lemon (vegan)
Fat hen & chickweed pesto
Hedgerow pesto with hazelnuts
Parsley & almond pesto
Walnut basil pesto (vegan)
Wild garlic pesto
Show Me
Thanks for visiting Tin and Thyme. If you make this tomato galette, I’d love to hear about it in the comments below or via social media. Do share photos on social media too and use the hashtag #tinandthyme, so I can spot them. For more delicious and nutritious recipes, follow me on Twitter, Facebook, Instagram or Pinterest.
Tomato Galette. PIN IT.
Tomato Galette with Homemade Pesto – The Recipe
Tomato Galette with Homemade Pesto

This easy summer rustic tart has a beautifully crisp and flaky pastry topped with a layer of basil pesto which is then covered in cherry tomatoes.
Pastry
250 g wholemeal spelt flour
150 g unsalted butter
pinch of sea salt
3 tbsp yoghurt
½ tsp ground cayenne pepper or chilli powder of choice ((optional))
Basil, Almond & Cheddar Pesto
50 g basil
50 g almonds
50 g mature cheddar cheese
1 clove garlic
1 pinch sea salt
50 ml extra virgin olive oil + a little for drizzling
35 cherry tomatoes – halved ((multi-coloured ones are fun))
½ tsp chilli flakes ((optional))
Pastry
Cut the cold butter into the flour, chilli and salt with a knife, then either rub between finger tips or pulse in a food processor until the mixture resembles coarse breadcrumbs.
Stir in the yoghurt with a knife until the mixture comes together into a ball.
If the dough is too soft to roll immediately, cover and leave to rest in the fridge or a cool place for ½ hr. I generally have a cool kitchen, so I tend to roll mine out straight away.
Roll out on a floured surface into a rough circle, about 4mm in thickness.
Place on a baking tray lined with baking parchment.
Basil, Almond & Cheddar Pesto
Blitz the basil, almonds, cheese, garlic and salt in a blender or food processor until roughly ground. I've been using my Optimum Vac2 blender* for this recently.
Add the olive oil and blitz again until you have a rough paste.
Spread a thin layer of pesto over the pastry leaving a border of about 1 cm.
Cover the pesto with the tomato halves cut side up, but leaving a border of about 1 cm from the pesto edge. Drizzle a little olive oil over the tomatoes and scatter the chilli flakes on top if using.
Fold the 2 cm edges inward over the filling, tucking the pastry in as you go. You should have a large (ish) open centre with the tomatoes shining out..
Bake in a pre-heated oven at 200℃ (400℉, Gas 6) for about 25 minutes when the tomatoes should be cooked and the pastry crisp and golden.
Serves 6 – 8 people depending on how hungry they are and what you serve with the tart.
You will make more pesto than you need for this recipe. Place the unused pesto in a jar, pour over a thin layer of olive oil and seal. Will keep in the fridge for a week or so. But once opened, eat within three days.
Excellent served with a zingy green salad.
Please note: calories and other nutritional information are per serving. They’re approximate and will depend on serving size and exact ingredients used.
Sharing
I’m sharing my tomato galette with Jo’s Kitchen Larder and Apply to Face Blog for #BakingCrumbs. I’m also sending them to #CookBlogShare, which is hosted this week by Chipa by the Dozen.
This post contains affiliate links to Froothie Optimum products*. Links are marked with an *. If you buy through a link it won’t cost you any more, but I’ll get a small commission. Thanks to my readers for supporting the brands and organisations that help to keep Tin and Thyme blithe and blogging.
Tomato Galette with Homemade Basil Pesto An easy summer rustic tart that makes the most of ripe and juicy seasonal tomatoes. This tomato galette has a beautifully crisp and flaky pastry.
0 notes
Link
Chicken Parmesan with Homemade Red Sauce.

Hello everybody, hope you're having an amazing day today. Today, we're going to make a special dish, chicken parmesan with homemade red sauce. It is one of my favorites food recipes. This time, I am going to make it a little bit unique. This will be really delicious.
Chicken Parmesan with Homemade Red Sauce is one of the most popular of current trending meals in the world. It's enjoyed by millions every day. It is easy, it is quick, it tastes yummy. They are fine and they look wonderful. Chicken Parmesan with Homemade Red Sauce is something that I have loved my whole life.
To begin with this recipe, we have to prepare a few ingredients. You can have chicken parmesan with homemade red sauce using 23 ingredients and 5 steps. Here is how you cook it.
The ingredients needed to make Chicken Parmesan with Homemade Red Sauce:
{Take of pasta.
{Prepare 1 box of of thin spaghetti noodles.
{Get of red sauce.
{Prepare 2 of whole garlic cloves diced.
{Prepare 3 of onions diced.
{Prepare 1/2 cup of olive oil.
{Make ready 2 bunch of fresh basil chopped. add to your liking. the more the better..
{Take 2 of bay leaves.
{Make ready 1 of salt and pepper.
{Make ready 1 can of tomatoe paste.
{Prepare 2 pinch of sugar.
{Take 6 can of whole tomatoes.
{Make ready of chicken parm.
{Get 1 of italian seasoned crumbled breadcrumb.
{Get 3 of eggs.
{Take 1 cup of milk.
{Take 2 cup of fresh cut parm cheese.
{Get 1 of mozzarella cheese.
{Prepare 1 of salt pepper.
{Prepare 6 piece of of chicken breast boneless.
{Make ready 1 cup of cooking oil.
{Make ready 1 of oregano.
{Get 1 of chopped parsley.
Instructions to make Chicken Parmesan with Homemade Red Sauce:
Before we start I just want to make it clear, all ingredients can be adjusted to your liking, such as you can add more herbs or reduce the amount, you can add more onions and garlic or reduce etc. I just suggest that you taste your sauce as you go and see what you like best :) Dice your onion and garlic cloves and set aside. Pour into a kettle your olive oil and get hot. Once oil is hot add in your onions and garlic. Cook on medium for about 5 mins until onions are clear and transparent. Then you will need to take your tomatoes and drain out excess juice into a bowl as you may need if your sauce is to thick for your liking. Then take tomatoes and put them in a blender and puree them ( they will look foamy). Once blended pour the tomatoe puree into the kettle with the onions and the garlic. Then add in one can of tomato paste. Stir in. Then lightly chopped your basil and throw in the sauce . Add salt and pepper and oregano to taste and add a small pinch of sugar. Give it a stir. N.
Slice all chicken breast long ways down the center. Pound out the chicken with a meat pounder until about 1/2 inch thick. I use wax or parch paper to wrap the chicken in while I pound the chicken. This prevents it from sticking. Pound lighty until you get the hang of it. Once pounded out you can cut them in half to make good portion size or leave it whole if you like but they will be very large pieces of chicken if so. Now beat your eggs, milk, salt and pepper in a bowl. In a separate bowl your bread crumbs. Make sure oil is hot in your frying pan. Take the chicken pieces and dip in eggs and milk then dredge them into the breading on each side fully covered in bread crumbs and fry them until golden brown on both sides. You dont want them to be FULLY cooked as you will finish them off in the oven. Once they are browned remove them from the pan and lay on paper towel to drain oil..
In a baking pan ( like a cake pan or something wide to fit all the chicken in side by side. I also cover the pan with Grill Foil to prevent any sticking from the breading of the chicken, Grill foil is the best as it doesnt allow sticking) take some sauce and layer the bottom of panlightly just to coat it with some of the sauce. Place your pieces of chicken on the sauce. Spoon more sauce over the chicken as you like. Not to heavy though. Then layer the parmesan cheese on each chicken piece. Then cover and bake for 20 mins on 375. After 20 mins uncover and sprinkle mozzarella cheese over the chicken and then some parsley over the cheese and broil the top so the cheese is nicely toasted. I usually start on a low broil to melt and then once done turn on high broil to give the nice golden brown on the cheese. Just watch and keep an eye on it!.
Once the chicken is done broiling, cover and set in oven on low warm so the cheese stays melted. Then boil your thin spaghetti noodles and once cooked then drain them. I let mine set to assure all water is off. Once drained place back in your boiling pan and I then take a couple tablespoons of oilive oil and toss in the noodles and then about 3 to 4 ladel dippers full of the red sauce and add in the noodles and toss it to mix. You can eyeball this for how much noodles you have to how much sauce you like. Then take the chicken out of the oven..
Combine the perfet meal by taking pieces of chicken and lay on the plate. You can add more red sauce if you want on the chicken ( I would add to the side as it would cover your beautiful chicken and we dont want to do that!) ..I do cause the sauce is AMAZING. Then place some noodles on the plate beside the chicken or you can put noodels first and chicken on top. Which ever you like! Mmmmmmm heaven has arrived. People all over are asking me for this recipe so follow this step by step and you will succeed and you will never buy precanned or pre made marinara or spaghetti sauce again lol..enjoy ..tell me how you like it and picssssssss.
So that's going to wrap this up for this exceptional food chicken parmesan with homemade red sauce recipe. Thanks so much for your time. I'm confident that you can make this at home. There's gonna be more interesting food in home recipes coming up. Don't forget to save this page in your browser, and share it to your family, friends and colleague. Thanks again for reading. Go on get cooking!
0 notes
Last Seen Blogs

allagan-weeb
Allagan Weeb

suzumenosu
雀の巣も構うに溜まる

awealfly
Fly

soldoutts
soldoutts

avtaarskin23
Untitled