#ink cartridge
Text
#printer#ink cartridge#ink#blog#tumblog#writers on tumblr#tumblr stuff#toner cartridge#brother printer#hp printer#canon printer#wordpress#laser printer
1 note
·
View note
Text
How to replace parts at the time of printer maintenance
Quick Replacement of the Fuser
To change any part the first thing one should do is turn off the power of the printer. This is to save the printer from some power damage and for the safety of the person who changes it. If you have recently used the printer then the fuser will be quite hot and you will need to wait at least half an hour to change the fuser and execute other operations.
If your maintenance kit includes a duplexer, you must replace it as it’s an important part.
First, you remove the output bin, and then after taking the fuser out.
In the next step, you need to create a small space and open the front output vent section and then take a screwdriver to carefully take the vent out and remove it completely. You may need to push over the hinge till the time the door opens up.
After that push, the levers (two levers one on each side) carefully to the reverse side of the fuser until they take out and pull the fuser without putting pressure on it.
Take the new fuser, push it from the back side of the machine and push it until the lever compresses and fits properly into its position without any space. You need to reinstall the back side outgoing vent door by using the given pings and put it towards the back of the hinges.
Replacement Process of the Transfer Roller
There is a packing strip with the cartridge and the drum. This will become the biggest obstacle if you forget to remove it, so remove it first of all.
2nd step is to open the cover that is on the top and pull the toner cartridges gently.
You need to use the pointed end of the tool that is provided with the maintenance kit (or the part of the screwdriver). You need to pull the left side end of the transfer roller. Once that part has come out, just push it to the left side and remove it in such a way it doesn’t get damaged.
Be careful at the time to installing the new transfer roller, one should not touch the surface of the roller. It is compulsory to wear latex gloves and carefully grip the ends of the roller and install it.
One should start placing the transfer roller by pushing it and it will slide toward the right end. It will be adjusted in place and after that start working the left side of the gear and own it till it fits its right place.
Replacement of the Tray One Pickup Roller.
First of all, one should take down the front side cover of accessories.
At this step, you should point the pickup roller at the center side of the tray.
You need to find the clips on both sides of the roller and press them to release the pressure and this is to release the roller from both sides.
Immediately after that one should slide the new roller into the checkpoint until it clicks.
At last, change the plate of accessories from the front. The Toner cartridge should be reinstalled and shut the cover down.
Replacement of the Second Tray Pickup Roller
The first step this time to take is to remove tray two.
Find out the location of tray number two at the pickup roller
In this step, quickly release the roller by pressing the tabs on any side of the roller, after that shift the roller off the shaft.
Slowly push the new roller onto the shaft and keep rotating the roller until it fits in place.
Replacement of the Tray Two of the Separation Roller
In the first attempt install the tray number two paper bin by releasing it towards the mid-way and allowing access to the separated roller.
Operate the access door towards the second tray and completely expose the roller.
One thing you should not forget is to take out the roller by pushing the two tabs at the end side and pulling toward the left side.
After that the last step is to install the new roller, pushing it in the gap until it fits into the available space.
One should completely close the access door without failure.
Now close tray number two that is remaining.
We now finished the replacement and separation of the roller, now plug your power cord into the printer and switch it on. You will see some display on your printer and if you see the message that some new components have been installed that printer will take some time. That time is to run some kind of diagnostic testing, this testing will make sure that they are properly installed.
The Printer Manual is Your Best Friend Forever

When it comes to maintenance and troubleshooting, your best friend is the printer manual that you get when you buy the printer. You should keep it handy near the printer so in case of any problem you can review it and believe it or not this manual resolves 90% of your problem. This is right for Canon, HP and Bother ink cartages and all other major company maintenance tips. All these companies, when you buy a new printer, provide service manuals and also the schedule of maintenance for the printer. At last, the complicated maintenance schedule will get on and you will have to figure out from the printer manual to keep these things up to date.
If you ever lose your printer manual than there is option to find PDF manual for replacement. So, no worries in case if you don’t find manual. The option is always available.
#hp cartridge#canon ink#canon cartridge#hp printer ink#printer ink#ink cartridge#hp ink cartridges#canon ink cartridges
1 note
·
View note
Text
every. single. day. i lie in bed and i am unable to sleep. in ace attorney investigations 1 some blonde bitch gives miles edgeworth a bottle of ink for his fountain pen. it is made of some sort of oil. immediately this is inaccurate to real life. there is not a single fountain pen ink sold anywhere that is oil based. oil based ink is reserved for ballpoint pens. and some permanent markers. if this didn't already tell me that the venn diagram of people who know shit about pens and people who work at capcom are two circles separated by ten thousand light years, the next thing that comes out of the blonde bitch's mouth is "just dip the pen in when you need to refill." what. that's not how you refill fountain pens. they aren't dip pens. they aren't water brushes. while refilling via a piston involves dipping it in the ink, that is not the only step. for roughly three years this has been all i have been able to think about
#xenon screams#ace attorney#ace attorney investigations#pen#pens#fountain pens#fountain pen#ink#i donr even have any fountain pens#i prefer fineliners#ig they both use cartridges
197 notes
·
View notes
Text
GMMTV BL series with the most sponsors in the opening credits.
Not commenting, just making an observation.
7 sponsors: SOTUS S, Still 2gether, Fish Upon the Sky, Bad Buddy


8 sponsors: Theory of Love, Cherry Magic


10 sponsors: Vice Versa

11 sponsors: My Love Mix-Up

#canon is back time for more flirting via ink cartridges#nothing will ever beat the vice versa choco pie though#sotus s#fish upon the sky#bad buddy#theory of love#cherry magic thailand#vice versa#my love mix up thailand#still 2gether
103 notes
·
View notes
Text

made some Worf quote calligraphy cards!
i also still have all of my calligraphy stuff set up so lmk (replies, asks, whatever) if anyone has requests for other silly quotes.
[ID: nine white index cards with the following quotes written in black and red ink in a blackletter calligraphy style. card 1 reads "There is an ancient Klingon proverb that says 'You cannot loosen a man's tongue with root beer'." Card two reads: "You will never achieve the 24th level of awareness." Card three reads: "Death to the opposition." Card four reads: "Sir, I must protest! I am not a merry man!" Card five reads: "At the first sign of betrayal, I will kill him, but I promise to return the body intact." Card six reads: "Today is a good day to die." Card seven reads: "Find him and kill him!" Card eight reads: "Good tea. Nice house." Card nine reads: "This is the story of a little ship that took a little trip." /end ID]
#calligraphy#my art#star trek#tng#ds9#worf#theyre very far from perfect but my hand has been hurting for the past week so its as good as it will get#also think im gonna invest in some automatic pens and different ink because i love the pilot parallel pens#but switching color is so inconvenient unless you have different pens for Every Color#and i desperately want gold ink but it usually doesnt come in cartridges#but.... expensive#also damn i just realized the 24th awareness quote is “attain” not “achieve”... just ignore that#my posts
226 notes
·
View notes
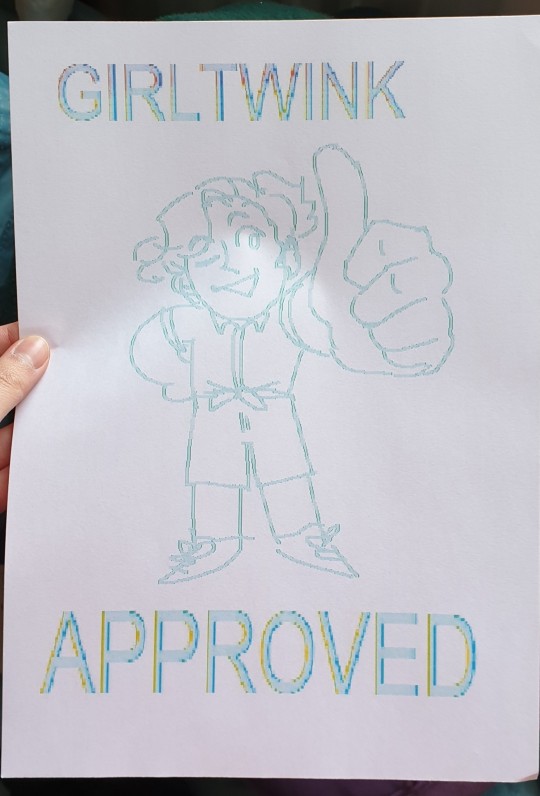
Photo

#discord#discord chat#out of context discord#submission#admin boa#the printers are sold at a loss so the cost of ink is where the profit comes in#which is irriating and bad. cause ink cartridges cost like <a dollar
52 notes
·
View notes
Text
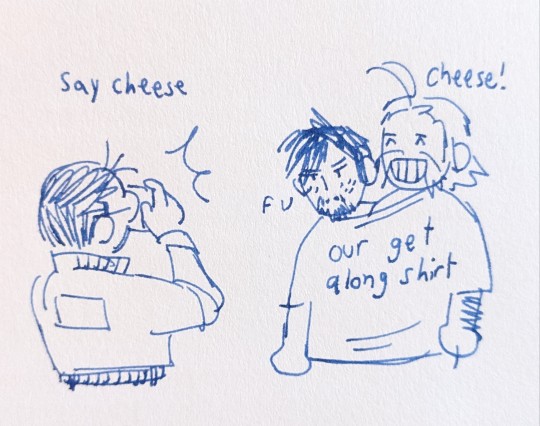
yippee more thank you doodles!
#accidentally put a blue ink cartridge in and im dealing with it very well <is not dealing with it well at all#disco elysium#kim kitsuragi#jean vicquemare#harry du bois
434 notes
·
View notes
Text
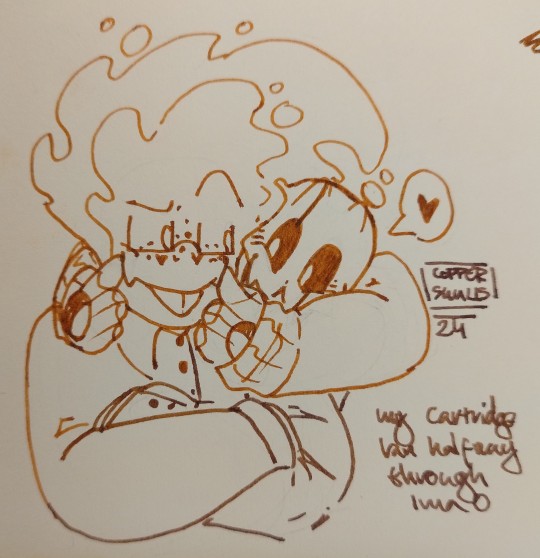
pfffpfbrbfb
#undertale#grillby#gaster#grillster#rough#razzmatazz related drawings#traditional art#anxiety might be kicking my ass rn but drawing The Boys being cute at least managed to get my heartrate down to somewhat manageable levels#wheezes.#also it was supposed to be 'my cartridge ran OUT halfway through lmao' woops!! cannot english#i'M gonna go clean the pen i was drawing this with now. the ink buildup is starting to get a bit ridiculous fhjkad
64 notes
·
View notes
Text

they think life is all cookies and cream
#adventure forward 2#cyalm#i have 2 more cyalms in the work actually#this one came out too desaturated#my ink cartridges were damaged </3
23 notes
·
View notes
Text
If Kim used fountainpens, he’d use a Pilot Vanishing Point with Platinum Carbon Black cartridges
#or you know#a moonman A1#I could theoretically see him using converters too but with the CON-40? never#fuck that thing#Harry would have a bunch of patterned platinum preppy with shimmer inks that he never cleans#listen this is all very important to think about#im just gonna#assume the cartridges fit#if not he refills pilot cartridges himself
92 notes
·
View notes
Text
This article tells you how what print density is and how to adjust it on your printer. By properly adjusting the print density on your printer, you can improve print quality and reduce your spending on ink and toner cartridges.
0 notes
Text


give it to me..... GIVE IT TO MEEE.....
(not my photos)
#I used to break the ink cartridges in pens and smear the ink all over my hands to look like this#since i was like 13 years old#they've always made me feel much more comfortable :)#dont do this tho you will get in trouble there was always ink all over my clothes#I think i've only just connected the drawing on my hands to look like that#and my nonhuman identity#nonhuman#otherkin#foxkin#ghostkin#spiritkin
400 notes
·
View notes
Text
testing the printer. safe to say that it is not doing its job
#there's the smallest bit of magenta at the top but THATS IT... only yellow and cyan are coming through and it's driving me nuts#not even BLACK?#i changed the cartridges yesterday... i think the inks are just mad old and dried up#or however they work#btext
18 notes
·
View notes
Text


this is what I meant from the last tag on previous post
#yes I had to include the korok in there#astor#age of calamity#more images are to be printed#if I can find the damn ink cartridge
17 notes
·
View notes
Text
grrrr why is my printer. not printing.
#there seems to be smth wrong with my black ink BUT there shouldnt be????#it should be a pretty new cartridge??? why is it barely getting any ink out??????#on top of that i SHOULD have a second one somewhere but i cant find it#shh ac
7 notes
·
View notes
Text
Nothing is funnier than while watching a GMMTV series with my husband, glancing over and realizing that he’s on Canon’s website browsing printers. The product placement got him 🤦🏻♀️
#my love mix up th#I also caught him looking at euro cakes#NO#i don’t care how easy the ink cartridges are to change
13 notes
·
View notes
Last Seen Blogs

savingthrowpillows
Untitled

turtlesalads
WaterBip

stylandhairbeauty
Untitled

meholt
Not Your Real Dad

insane-clan
insane-clan