#install composer on mac
Explore tagged Tumblr posts
Visit Tumblr Blog
Explore Tumblr blogs with no restrictions, modern design and the best experience.
Last Seen Tumblr Blogs


Fun Fact
Tumblr is available in 18 languages.
Text
#mac composer install#composer macbook#download composer for mac#install composer mac#install composer mac os x#installing composer on mac#install composer osx#install composer on mac#composer install mac os#composer install on mac#mac install composer#How to Install and Configure PHP Composer in MacOS
0 notes
Text
⋅•⋅⊰∙∘☽༓☾∘∙⊱⋅•⋅
Howard's Car Headcanons – The Jaguar and the Man Behind the Wheel
Howard’s Jaguar wasn’t just a car—it was an extension of himself. Sleek, elegant, and impeccably maintained, the black Jaguar XJ spoke to Howard’s appreciation for the finer things in life. He had purchased it after securing his partnership at HHM, a reward to himself for all the long hours and sacrifices he’d made. The car was a statement: sophisticated, polished, and with just enough power under the hood to make it exciting.
⋅•⋅⊰∙∘☽༓☾∘∙⊱⋅•⋅
Why the Jaguar?
The Jaguar XJ had always appealed to Howard for its combination of luxury and performance. It wasn’t as ostentatious as a Ferrari or as ubiquitous as a Mercedes; the Jaguar had a certain understated class to it, something Howard deeply resonated with. He liked the way it handled—smooth, with a bit of bite when he pressed down on the accelerator. It was a car that reflected his personality: refined and composed on the surface, but with an underlying intensity that could surprise you.
The sleek black exterior was always kept immaculate, gleaming as if it had just rolled off the showroom floor. Howard was fastidious about cleanliness, and his car was no exception. He often took it for a detailing session on weekends, ensuring that the leather interior remained pristine and the wood paneling gleamed under the sun.
⋅•⋅⊰∙∘☽༓☾∘∙⊱⋅•⋅
Inside the Car – The Details
Inside the Jaguar, everything was organized down to the last detail, much like Howard’s life. The leather seats were always conditioned, the smell of polished wood and a faint trace of cologne lingered in the air. In the glove compartment, you’d find a few essentials—his designer sunglasses in a leather case, an extra set of cufflinks (just in case), a pristine leather-bound notepad, and a Montblanc pen. There was a sleek umbrella neatly tucked into the backseat pocket, though rarely used, and a copy of the latest issue of *The Economist* or *Forbes* in the door pocket, ready to flip through during any downtime.
In the trunk, there was a small emergency kit, but nothing excessive. Howard liked to be prepared, but he didn’t clutter his space. There was also a neatly packed gym bag, complete with a change of clothes, because despite his busy schedule, Howard tried to fit in workouts whenever he could—be it tennis, golf, or a quick run at the country club.
⋅•⋅⊰∙∘☽༓☾∘∙⊱⋅•⋅
Music – The Soundtrack of Howard's Drives
Music was a particular pleasure for Howard, but like everything else in his life, it was carefully curated. When he drove, especially on longer stretches of road, he gravitated toward jazz—something about the smooth saxophones and rhythmic piano made him feel at ease, particularly after a stressful day at the firm. Artists like Miles Davis, John Coltrane, and Stan Getz were frequent staples on his playlist.
On other days, especially after closing a major deal or winning a big case, Howard liked to indulge in a bit of Frank Sinatra or Tony Bennett. There was something about those classic crooners that resonated with him—the effortless class, the confidence. "Fly Me to the Moon" and "The Best Is Yet to Come" were often blaring through the speakers as he zipped through Albuquerque, the volume turned up just enough for him to lose himself in the music but not so loud as to draw attention.
The car’s sound system was state-of-the-art, of course, installed shortly after he bought the Jaguar. Howard appreciated good sound quality, and nothing less than perfection would do. He liked his music crisp, with deep bass notes and clear highs, enveloping him in the rich tones of whatever was playing.
On rare occasions, if Howard was in a particularly nostalgic mood, he would play some old rock—The Rolling Stones or Fleetwood Mac. He wouldn’t admit it often, but there was a side of him that still appreciated the rebellious spirit of rock music, though it wasn’t something he indulged in regularly. These tracks reminded him of his younger days, before the pressures of being a partner at HHM, when life was a little looser, a little less defined by expectation.
⋅•⋅⊰∙∘☽༓☾∘∙⊱⋅•⋅
The Way He Drives
Howard’s driving style was much like his demeanor: smooth, controlled, and deliberate. He wasn’t one for speeding—unless the road stretched out ahead of him, empty and inviting, and then he might push the accelerator just a little harder, feeling the power of the car beneath him. But even then, there was precision to the way he handled the wheel, never reckless, always in control.
Driving was a way for Howard to decompress. When the firm’s pressure weighed heavily on him or the complicated dynamics with Jimmy and Chuck got too much, a drive through the open roads surrounding Albuquerque provided the perfect escape. He rarely took calls during these drives, preferring to disconnect and let the motion of the road clear his head.
⋅•⋅⊰∙∘☽༓☾∘∙⊱⋅•⋅
Other Details – The Little Things
Howard’s attention to detail extended to the smaller aspects of the car, too. The air freshener was a subtle, woodsy scent—not overpowering but enough to give the interior a fresh, inviting atmosphere. He always had a bottle of mineral water tucked into the cup holder, usually untouched but there for whenever he needed it.
The GPS was programmed with his most frequent destinations—HHM, the country club, and Emilia’s place—but he knew most routes by heart. He liked to think that navigating Albuquerque’s streets was second nature to him, a reflection of the many years he’d spent mastering the legal landscape of the city.
Even the radio presets were methodically chosen—jazz stations, talk radio, and a classical station he enjoyed on particularly slow days when he needed to center himself before a big meeting.
⋅•⋅⊰∙∘☽༓☾∘∙⊱⋅•⋅
Howard’s Jaguar was more than just a vehicle—it was a sanctuary, a reflection of his tastes, his precision, and the man he wanted the world to see. And, in those rare, quiet moments when it was just him and the open road, it became a space where he could let go of the expectations and pressures, if only for a little while.
10 notes
·
View notes
Text
How to host local Club Penguin Private Server (CPPS) on Silicon Mac (M1/M2/M3) thru play.localserver & Solero's Wand install.
I spent so long looking for a solution to this that I want to contribute what worked for me. I got so frustrated looking for something that worked, and I hope this guide will help others avoid that frustration.
This is NOT a guide on hosting or serving a CPPS. This is a guide on making a CPPS playable by locally hosting your server on your Silicon M1/M2/M3 Macbook. This worked on my M3 Macbook, and, in my experience, it seems the newer the hardware/operating system gets, the harder it is accomplish this.
DISCLAIMER *I do not know very much about this topic. I can paste commands into terminal and execute them, I know how to install DMG files I downloaded from the internet (the bar is in hell, I am aware), and I know how to enter play.localhost to run this in a browser. I am no expert; this guide is for beginners like myself who want a CPPS. This is beginner-level stuff. If you want advice or need help hosting, refer to the Wand Github page, Solero's Dash (an actual web-hosting solution for Houdini/Wand), Solero's discord, or, when in doubt, Google it. (I recommend only asking for help in Solero's discord for help AFTER trying your best to search for a solution, and even after that, trying to search key terms in their chat logs. They often have to repeat the same advice over, and over, and over again.)*
TLDR; IDK shit about shit
USING WAND INSTALLER
wand description from github: Wand makes it easy to configure dash, houdini and a media server utilizing docker & docker-compose.
All the assets are located here.
Installation instructions from the above link:
Installation script 1. run the script: bash <(curl -s https://raw.githubusercontent.com/solero/wand/master/install.sh) 2. Answer Questions which are: Database password (Leave blank for random password) Hostname (example: clubpenguin.com) (Leave empty for localhost) External IP Address (Leave empty for localhost) 3. Run and enjoy. Run this command: $ cd wand && sudo docker-compose up
The steps I took:
1. Install Docker via Terminal & Homebrew.
Installing the Docker DMG file did not work properly when I tried. I realized later that Docker is seperate from Docker Desktop (the DMG file). I got Docker to work by using Terminal to install Homebrew, and then using Homebrew to install Docker.
Indented text = paste into Terminal.
Command to install Homebrew:
/bin/bash -c "$(curl -fsSL https://raw.githubusercontent.com/Homebrew/install/HEAD/install.sh)"
Ensure Homebrew is installed:
brew --version
Install Docker:
brew install docker
Recommended: Install Docker Desktop (useful in determining if your server is running, stopped, or stuck in a restart loop).
brew install --cask docker
Run Docker Desktop:
open -a Docker
2. Run installation script:
bash <(curl -s https://raw.githubusercontent.com/solero/wand/master/install.sh)
From Github instructions:
Answer Questions which are:
Database password (Leave blank for random password)
Hostname (example: clubpenguin.com) (Leave empty for localhost)
External IP Address (Leave empty for localhost)
3. $ cd wand && sudo docker-compose up
This is what is provided in the Github. This command didn't work on Mac; I believe it's formatted for Linux OS. Here's how I broke it up and enabled it to run from Mac's Terminal.
Navigate to Wand directory:
cd wand
Double-check if you're in the right directory:
ls
Start Docker container:
docker-compose up
If the above doesn't work, try
docker compose up
or
brew install docker-compose
Takes a second...

Ensure Docker is running:
docker info
If it isn't, open the Docker Desktop application.
*After using compose up, this error may appear:*
WARN[0000] /Users/[user]/wand/docker-compose.yml: the attribute version is obsolete, it will be ignored, please remove it to avoid potential confusion
This is harmless. If you get annoyed by errors, this can be solved by:
nano docker-compose.yml

See Version 3.7 at the top? Delete that line.
Ctrl-X (NOT COMMAND-X) to exit, Y to save, Enter.
PLAY.LOCALHOST
Type http://PLAY.LOCALHOST into a browser.

Create a penguin.

Try logging in that penguin:

This step was agony. I'm not savvy with running obsolete or deprecated software, and, of course, Club Penguin (and Houdini/Wand's assest) uses Flash, which was discontinued, and timebombed by Adobe, in 2021.
I tried Ruffle. Club Penguin Journey uses Ruffle, so why can't I?
Running Ruffle in Firefox:


No luck.
In the Solero discord, they'll direct to this blog post:

This method does not work on Mac M1/M2/M3. The program is "out of date" and you cannot run it. It works on Macbook's running Sonoma and backward. I'm on an M3 running Sequoia.
they'll often post this video in the discord:

In theory, this method should work, and it does for many, but for whatever reason, not on my M3. I tried different versions of Ungoogled, I tried so many different patches of Pepperflash, and it never cooperated. I tried Pepperflash, I tried Fast Patch!, I tried dedicated Flash browsers, running Flash plugins for Pale Moon, Ungoogled, Waterfox, but I could never get past him.

Every time I see this stupid penguin's face I'm filled with rage. But I am going to save you that rage!!!
If you get this method to work, yay! I could not. Maybe I don't know enough about patching, maybe I'm a little tech stupid.
WHAT WORKED: Using a dedicated CPPS desktop application that allows you to plug in a URL.
I give you...

He is your solution, your answer to
I discovered this solution through Solero's Discord, when someone answered a question re: playing online.

Waddle Forever was not what I was looking forever, but I noticed in their credits:
The electron client is originally forked from the Club Penguin Avalanche client. The server is based in solero's works in reverse engineering the Club Penguin server (Houdini server emulator). The media server is also mostly from solero's media servers.
And that's how I found out the solution: Using CPA Client
Download the CPAvalanche Client
It runs Adode Flash x64. Easy peasy.
(the instructions are in Portuguese, but for English users:
Navigate to releases.

And download this one:

Once downloaded, open.

Drag into applications.
Run http://play.localhost through the client:
Open CPAvalanche Client. It will direct you to CPAvalance once loaded, but you're here because you want to play play.localhost.
Navigate to CPAvalanche Client next to your Apple. Click Mudar a URL do Club Penguin.

Press Sim.

URL: http://play.localhost
Ok.

Press Login once the page loads, and...

That's it! No more penguin! Have fun :)
CREDITS:
Solero Discord / Waddle Forever / Wand / CPA Client / Solero.Me
#solero/wand#wand#solero#cpps#club penguin private server#cpps localhost#club penguin#macbook#macbook silicon#mac m1#mac m2#mac m3#apple silicon
2 notes
·
View notes
Text
How to Install
Looking for easy, step-by-step guides on how to install everything from software to home devices? Our "How to Install" blog provides clear, beginner-friendly instructions to help you get things up and running without the hassle. Whether you're setting up a new app, assembling tech gadgets, or configuring tools, we simplify the process for you. Each post is written with accuracy and user convenience in mind.
How to Install How to Install Printers Without CD How to Install Webcam Drivers How to Install SSH How to Install Pixelmon How to Install OptiFine How to Install Fabric How to Install Zend Framework with XAMPP on Windows How to Install Roblox on Chromebook How to Install Roblox Studio How to Install Firefox on Mac How to Install Firefox on Linux How to Install Firefox on Windows How to Install Java Step-by-Step Guide for Beginners How to Install Java on Mac Follow Full Process Ultimate Guide How to Install Java for Minecraft Easy Step Guide for How to Install VPN for Privacy How to Install VPN Server Virtual Private Network How to Install VPN on Router A Step-by-Step Guide : Complete Guide for How to Install Anaconda How to Install Anaconda on Linux Complete Guide How to Install Anaconda on Mac: A Step-by-Step Guide How to Install Anaconda on Ubuntu: A Step-by-Step Guide How to Install Anaconda on Windows How to Install npm A Step-by-Step Guide for Beginners How to Install npm on Ubuntu Step-by-Step How to Install NVM on Ubuntu Tips, and Explanations How to Install npm on Windows Solve Common Issues How to Install NVM on Windows Troubleshooting Tips How to Install npm on Visual Studio Code How to Install Node.js on Your Machine How to Install Node.js on Linux Step-by-Step Guide How to Install Node.js on Mac Step-by-Step Guide How to Install Node Modules on Angular How to Install Node.js on Ubuntu The Latest Version How to Install Node.js on Windows Get started Full Method How to Install APK File on Your Android Device Complete Guide on How to Install APK on Android TV How to Install APK on Chromebook Step by Step Process How to Install APK on iOS A Comprehensive Guide How to Install IPA on iPhone A Complete Guide How to Install APK on Windows 10 Complete Guide How to Install Git A Step-by-Step Guide for Beginners How to Install Git Bash A Complete Step-by-Step Guide How to Install Git on Visual Studio Code How to Install GitHub Simple Step-by-Step Process How to Install Git on Mac Step-by-Step Guide How to Install Git on Linux A Step-by-Step Guide How to Install Git on Ubuntu Step-by-Step Guide How to Install Git on Windows A Simple Guide How to Install Docker How to Install Docker on Linux How to Install Docker on Mac How to Install Docker Daemon Mac How to Install Docker on Ubuntu How to Install Docker Compose on Ubuntu 20.04 How to Install Docker Compose on Windows How to Install Docker on Windows How to Install WordPress How to Install WordPress on Ubuntu How to Install WordPress Plugins How to Install WordPress on Windows 10 How to Install Kodi on Firestick How to Install Exodus on Kodi How to Install The Crew on Kodi How to Install XAMPP on Mac
0 notes
Text
Download Sample Logic – Vocal AI
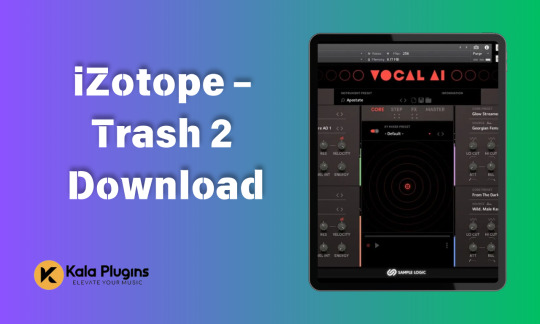
If you’re looking for an innovative and dynamic cinematic vocal instrument, Sample Logic – Vocal AI is a game-changer! This revolutionary Kontakt library blends human vocals, synthesis, and morphing effects, allowing you to create breathtaking compositions for film scoring, music production, and sound design. In this guide, we will walk you through how to download and install Vocal AI – Animated Intelligence so you can unleash its full creative potential.
Step 1: Download KONTAKT PRO
Before you can install and use Vocal AI, you need KONTAKT PRO. This high-performance sampler software is essential for running the library.
Visit our website and navigate to the KONTAKT PRO download page.
Choose the appropriate version for your system (Windows/Mac).
Follow the on-screen instructions to complete the installation.
Once KONTAKT PRO is installed, you’re ready to proceed with Vocal AI!
Step 2: Purchase and Download Vocal AI
To get your hands on Sample Logic – Vocal AI, follow these steps:
Visit the official product page: Download Here
Click on the “Add to Cart” button and complete your purchase.
After payment, you’ll receive a secure download link.
Download the library files and store them in an easily accessible location on your computer.
Step 3: Install and Load Vocal AI in KONTAKT PRO
Open KONTAKT PRO on your computer.
Click on “Add Library” and navigate to the folder where you saved Vocal AI.
Select the library folder and confirm the addition.
Once added, locate Vocal AI in the KONTAKT browser and load it into a new track.
Explore the 450+ meticulously crafted instruments and start creating!
Why Choose Vocal AI – Animated Intelligence?
Cinematic Vocal Instruments at Their Best 🎶
VOCAL AI offers a unique blend of human vocals, AI-powered synthesis, and morphing effects that breathe life into your productions. Whether you’re crafting cinematic atmospheres or chart-topping beats, this tool provides an edge like no other!
Worldwide Vocal Sounds 🌍
Featuring vocal elements from Asia, Africa, Europe, and Persia, Vocal AI delivers diverse and authentic textures. From choirs to soloists and beatbox effects, it captures global vocal inflections with stunning realism.
Limitless Vocal Motion & AI Animations 🤖
With an extensive library of presets and intelligent Step Animator capabilities, this instrument offers evolving arpeggios, dynamic vocal sequences, and smart rhythmic motifs. Create everything from simple soundscapes to intricate AI-driven compositions.
Randomization for Endless Creativity 🎲
The built-in randomizer allows you to generate new and unique sounds effortlessly. With trillions of combinations available, inspiration is just a click away!
Final Thoughts
Sample Logic – Vocal AI is a must-have for composers, producers, and sound designers looking for cutting-edge vocal instruments. With KONTAKT PRO as a requirement, be sure to install it first before downloading Vocal AI.
Don’t wait—download Sample Logic – Vocal AI today and unlock limitless creativity! 🎤🔥
#SampleLogic#VocalAI#KontaktPRO#FilmScoring#MusicProduction#SoundDesign#CinematicVocals#AIComposing#VirtualInstruments#AudioPlugins
1 note
·
View note
Video
youtube
Laravel 11 Tutorials in Hindi | Part-2 | Environment Setup | Install XAMPP & Composer
🚀 Set Up Your Development Environment with #XAMPP and #Composer!
In this beginner-friendly tutorial, we’ll guide you step-by-step on how to configure your environment for XAMPP and Composer, two essential tools for #PHP #development. Whether you’re a newbie or refreshing your skills, this video will get you started quickly and effectively!
🔍 What You’ll Learn: ✅ Installing XAMPP on your system (Windows/Mac). ✅ Setting up Composer for dependency management. ✅ Configuring PHP with Composer. ✅ Running your first PHP project using XAMPP and Composer.
💻👉 Watch Now: https://youtu.be/1zcnygB5mbc
#webdevelopment #xamppsetup #xampp #composer #composersetup #learnphp #programmingtips #phpdevelopment #codelikeapro #laravel #laraveltutorials
0 notes
Text
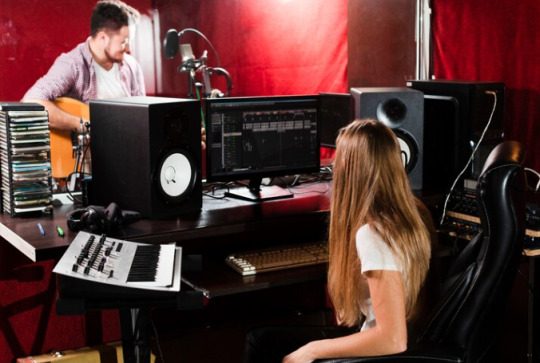
Choosing the Right DAW for Music Production
Music production is a craft that demands dedication, creativity, and, of course, the right tools. When diving into the world of music production, one of the fundamental choices you'll face is selecting the right Digital Audio Workstation (DAW) to bring your musical visions to life. With an overwhelming array of options available, from industry standards to beginner-friendly software, it's crucial in choosing the right DAW that it not only meets your needs but also nurtures your growth as an aspiring music producer.
Understanding DAWs: The Building Blocks of Your Musical Journey
Digital Audio Workstations serve as the backbone of your music production process, offering a platform where you can create, edit, arrange, and mix sound recordings with precision and efficiency. Each DAW comes with its unique features, interface, and workflow, catering to different levels of expertise and musical genres. For beginners, the challenge lies in finding a DAW that strikes a balance between user-friendliness and powerful capabilities.
The Top Contenders: Exploring DAWs for Beginners
1. GarageBand (Mac)
As an entry-level DAW exclusive to Mac users, GarageBand offers a seamless introduction to music production. With its intuitive interface, pre-installed loops, and virtual instruments, GarageBand allows beginners to start creating music without a steep learning curve. While limited in advanced features compared to other software, GarageBand provides a solid foundation for honing your production skills.
2. FL Studio
FL Studio, known for its user-friendly interface and comprehensive feature set, is a popular choice among beginners and professionals alike. Offering a wide range of built-in plugins, virtual instruments, and a step sequencer, FL Studio empowers users to compose, mix, and master tracks with ease. Its pattern-based workflow simplifies the music creation process, making it an attractive option for those new to music production.
3. Ableton Live
Ableton Live stands out for its versatility in both studio production and live performances, making it a favorite among electronic music producers. With its innovative Session View and flexible arrangement options, Ableton Live encourages experimentation and improvisation in music creation. While its interface may seem daunting at first, the wealth of tutorials and online resources available can aid beginners in mastering this powerful DAW.
Choosing the Right DAW: A Personalized Decision
When selecting a DAW as a beginner, it's essential to consider your musical goals, preferred genre, and workflow preferences. While each DAW has its strengths and limitations, the ideal software for you is one that aligns with your creative vision and enhances your productivity. Take the time to explore different options, experiment with their features, and choose a DAW that resonates with your artistic aspirations.
Conclusion
In the realm of music production, the choice of DAW can significantly impact your creative journey. As a beginner, investing time and effort in selecting the right software can set the stage for your growth and development as a music producer. Whether you opt for the simplicity of GarageBand, the versatility of FL Studio, or the innovation of Ableton Live, remember that your DAW is not just a tool but a companion in your musical endeavors. Embrace the learning process, unleash your creativity, and let your chosen DAW be the canvas on which your musical masterpieces unfold.
Unveil the perfect DAW that resonates with your passion for music and watch as your creative aspirations take flight. Let your music speak volumes, guided by the harmony between your talent and the ideal music production software.
Unveiling the Perfect DAW: A Beginner's Guide to Choosing the Ideal Music Production Software serves as your gateway to the world of music production, offering insights, recommendations, and inspiration to fuel your creative pursuits. Explore the possibilities, harness your creativity, and embark on a musical journey like no other with the perfect DAW by your side.
#MusicProduction#HomeStudio#SoundDesign#ProducerLife#MusicProducer#CreativeProcess#AudioEngineering#MusicGear#MusicMaking#DigitalAudioWorkstations#DAWSelection
0 notes
Text
How to Download Muze SO Celesta (KONTAKT)

The Muze SO Celesta (KONTAKT) is a powerful, feature-rich virtual instrument designed for musicians and sound designers. It offers a vast array of sounds, ranging from classic Yamaha Celesta tones to guitars, mallets, bells, and more. With a massive sample library and high-quality effects, this tool is a must-have for anyone looking to elevate their sound production. If you're interested in downloading and installing this incredible instrument, here's a detailed guide to help you.
Step 1: Download KONTAKT PRO
Before you can install and use the Muze SO Celesta (KONTAKT) library, you need to download and install KONTAKT PRO from the official website. This is essential as the library requires KONTAKT PRO to function properly. You can find the latest version of KONTAKT PRO here. Ensure that your system meets the minimum requirements, including at least 8 GB of RAM and an Intel i5 CPU or equivalent.
Step 2: Check System Requirements
To ensure optimal performance, make sure your system is up to date and meets the following requirements:
8 GB RAM (more if you plan to load additional sample sets).
CPU: Intel i5 or equivalent.
Operating System: Compatible with both Mac and PC.
MIDI Keyboard: Highly recommended for ease of use and performance.
KONTAKT Retail Version: v.5.8 or newer.
Step 3: Features of Muze SO Celesta (KONTAKT)
The Muze SO Celesta (KONTAKT) comes with a plethora of features that make it stand out from other virtual instruments. Here are some highlights:
5.41 GB Sample Library: The library consists of 3,233 high-quality samples, giving you a rich palette of sounds to choose from.
12 Built-in Effects: Includes effects like Compressor, Delays, Reverb, Limiter, Cabinet, Gainer, Rotator, Stereo Panner, and a 3-Band Equalizer. These effects allow you to fine-tune and enhance your sounds with precision.
45 Sound Sources: The instrument offers a wide variety of sound sources such as Yamaha Celesta, guitars, mallets, bells, e-pianos, and more, enabling you to create unique, layered compositions.
Powerful Layering Engine: The layering engine allows you to blend multiple sounds using the sound browser and FX options, offering limitless possibilities for creative expression. You can mix anywhere from 2 to 45 sounds simultaneously.
Custom User Interface: The flexible interface provides complete control over all aspects of the sound and effects, including layering, morphing, and blending sounds in real-time.
Step 4: Download and Install Muze SO Celesta
Once you’ve installed KONTAKT PRO, head over to the official Muze SO Celesta product page to download the library. The download size is 5.41 GB with lossless compression, so ensure you have enough disk space available.
You can download the demo version if you’d like to test it before purchasing the full version. To access the demo or purchase the full library, visit the official download page.
Conclusion
The Muze SO Celesta (KONTAKT) is an incredibly versatile and powerful instrument for musicians, composers, and sound designers. With its extensive library, built-in effects, and powerful layering engine, it offers a unique sound experience that can elevate your music production. Ensure you have the required system specifications and KONTAKT PRO installed to make the most of this exceptional virtual instrument.
To get started, download Muze SO Celesta (KONTAKT) from here, and start creating amazing sounds today!
1 note
·
View note
Text
Logic Pro X for Windows
Logic Pro X is among the most powerful and popular digital audio workstations (DAWs). Originally developed for macOS, this software has long been a favourite among music producers, composers, and audio engineers for its comprehensive features and user-friendly interface. But what if you’re a Windows user? Can you use Logic Pro X on Windows? This article delves into everything you need about Logic Pro X for Windows.

Introduction to Logic Pro X
Logic Pro X is known for its robust functionality, which includes a vast library of sounds and instruments, powerful mixing and mastering tools, and seamless integration with other Apple products. Its intuitive user interface allows beginners and professionals to produce high-quality music efficiently.
Can Logic Pro X Be Installed on Windows?
Officially, Logic Pro X is only available for macOS. However, there are several methods and alternatives that Windows users can consider to run or find similar functionality to Logic Pro X for Windows.
Methods to Use Logic Pro X on Windows
1. Using a Virtual Machine
One popular method to run Logic Pro X on Windows is using a virtual machine (VM). A VM allows you to install macOS on a Windows PC. Here’s how you can do it:
Download and Install VirtualBox: This is a free VM software.
Obtain a macOS Image: You’ll need a macOS disk image (DMG) file.
Set Up the Virtual Machine: Allocate enough resources (RAM and storage) to your VM.
Install macOS: Follow the prompts to install macOS.
Install Logic Pro X: Once macOS is running, you can install Logic Pro X just as you would on a Mac.
2. Using a Hackintosh
A Hackintosh is a non-Apple computer that runs macOS. This method involves more technical knowledge and can be unstable, but it’s another way to get Logic Pro X for Windows. You’ll need:
Compatible Hardware: Not all PCs can run macOS.
macOS Installation Tools: Software like UniBeast can help you install macOS on your PC.
Follow a Guide: There are many online communities and guides to help you build a Hackintosh.
Alternatives to Logic Pro X for Windows
If running macOS on a Windows PC sounds too complicated, several excellent alternatives to Logic Pro X for Windows offer similar features.
1. FL Studio
FL Studio is a powerful DAW with a user-friendly interface. It offers a wide range of plugins and instruments, making it a great alternative to Logic Pro X for Windows.
2. Ableton Live
Ableton Live is known for its unique session view, which is ideal for live performances and music production. It’s another top choice for Windows users looking for a Logic Pro X alternative.
3. Cubase
Cubase offers professional-level features for recording, editing, and mixing music. It’s a solid choice for anyone seeking a Logic Pro X for Windows alternative.
Download Logic Pro X for Windows
For those determined to use Logic Pro X on a Windows system, you can visit Logic Pro X for Windows to download the necessary tools and guides to help set up Logic Pro X on your Windows PC. https://www.logicprodownload.com/logic-pro-windows/
Key Features of Logic Pro X
Even if you’re using Logic Pro X for Windows through a VM or Hackintosh, you’ll still get access to its impressive features:
1. Comprehensive Sound Library
Logic Pro X comes with an extensive library of sounds, loops, and samples. Whether you’re producing electronic music, hip-hop, rock, or classical, you’ll find a vast array of sounds to enhance your tracks.
2. Smart Tempo
This feature automatically manages tempo across all your recordings, making it easy to integrate different tracks seamlessly. It’s particularly useful for live recordings and collaborative projects.
3. Drummer and Drum Kit Designer
Logic Pro X includes virtual drummers that can play along with your music. The Drum Kit Designer lets you create custom drum kits with unique sounds.
4. Flex Time and Flex Pitch
These powerful tools allow you to edit the timing and pitch of your recordings with precision. Flex Time lets you adjust the timing of notes, while Flex Pitch corrects pitch issues.
5. Advanced Mixing and Mastering
Logic Pro X offers professional-grade mixing and mastering tools, including a variety of EQs, compressors, and reverb units. These tools help you create polished, radio-ready tracks.
Why Choose Logic Pro X for Windows?
While there are many DAWs available for Windows, Logic Pro X stands out for several reasons:
1. User-Friendly Interface
Logic Pro X’s interface is intuitive and easy to navigate, even for beginners. Its layout and design help streamline the music production process.
2. Integration with Apple Products
If you use other Apple products, Logic Pro X integrates seamlessly with them. For instance, you can use an iPad as a remote control for Logic Pro X, or import projects from GarageBand.
3. Regular Updates
Apple regularly updates Logic Pro X with new features and improvements, ensuring that you always have access to the latest tools and technologies.
Conclusion
Logic Pro X for Windows may not be officially supported, but you can still enjoy its powerful features on your Windows PC with the right tools and methods. Whether you use a virtual machine, build a Hackintosh, or explore alternatives, plenty of options suit your needs.
0 notes
Text
Puf Sandwich Panels Manufacturer
Enhancing Efficiency and Sustainability with Mac Tech’s Puf Sandwich Panels
In today’s fast-paced industrial landscape, efficiency and sustainability are not just buzzwords but essential components of a successful business. Mac Tech, a pioneering leader in innovative building solutions, exemplifies these principles through its cutting-edge Puf Sandwich Panels.
Why Choose Puf Sandwich Panels?
Puf Sandwich Panels are engineered to perfection, offering superior thermal insulation, structural stability, and aesthetic versatility. At Mac Tech, we utilize advanced manufacturing techniques to produce panels that meet the highest standards of quality and performance. These panels are composed of a polyurethane foam (PUF) core sandwiched between two layers of durable metal sheets, creating a product that is lightweight yet remarkably strong.
Key Benefits
Energy Efficiency: Our Puf Sandwich Panels provide excellent thermal insulation, significantly reducing energy consumption for heating and cooling. This results in lower operational costs and a smaller carbon footprint, aligning with global sustainability goals.
Durability and Longevity: Designed to withstand extreme weather conditions, our panels are resistant to corrosion, moisture, and pests, ensuring longevity and minimal maintenance.
Versatility: Available in a variety of finishes and colors, these panels can be customized to fit the aesthetic and functional needs of diverse applications, from industrial buildings to commercial establishments.
Ease of Installation: The lightweight nature of our Puf Sandwich Panels allows for quick and easy installation, reducing labor costs and project timelines.
Applications
Mac Tech’s Puf Sandwich Panels are ideal for a wide range of applications including cold storage facilities, warehouses, clean rooms, prefabricated structures, and more. Our commitment to quality and innovation ensures that every panel we produce not only meets but exceeds industry standards.
Conclusion
With Mac Tech’s Puf Sandwich Panels, businesses can achieve enhanced energy efficiency, durability, and aesthetic appeal while contributing to a greener planet. Discover the future of building solutions with Mac Tech – where innovation meets excellence.

0 notes
Text
Mastering the Art of Video Editing: A Comprehensive Guide

In today's digital age, video content reigns supreme. Whether you're a budding YouTuber, a marketing professional, or an aspiring filmmaker, understanding the art of video editing is essential. It's not just about stitching clips together; it's about crafting a narrative, evoking emotions, and captivating your audience from start to finish. In this comprehensive guide, we'll delve into the fundamentals of video editing and explore tips and techniques to help you elevate your editing skills to the next level.
Understanding the Basics
Before diving into the intricacies of video editing software, it's crucial to grasp the fundamental concepts that underpin the editing process.
Storyboarding: Begin by outlining the structure of your video. A storyboard serves as a visual roadmap, detailing the sequence of shots and transitions.
Composition: Pay attention to framing, rule of thirds, and visual balance. A well-composed shot can significantly enhance the overall quality of your video.
Transitions: Smooth transitions between shots maintain continuity and flow. Experiment with different transition effects to find the right balance between creativity and subtlety.
Audio: Sound plays a crucial role in video editing. Pay attention to audio levels, background music, and sound effects to create a dynamic auditory experience.
Choosing the Right Tools
The next step is selecting the right video editing software. With a plethora of options available, it's essential to choose a platform that aligns with your skill level and editing needs.
Beginner-Friendly Options: For novice editors, user-friendly software like iMovie (for Mac) or Windows Movie Maker (for PC) provides a straightforward interface and basic editing functionalities.
Intermediate to Advanced Software: As you progress, consider transitioning to more robust editing software such as Adobe Premiere Pro, Final Cut Pro, or DaVinci Resolve. These platforms offer advanced features, including multi-track editing, color grading, and visual effects.
Online Editing Tools: If you prefer a cloud-based solution, platforms like WeVideo and Clipchamp provide accessible editing capabilities without the need for software installation.
Mastering Techniques and Tips
Now that you've chosen your editing tool, let's explore some techniques to enhance your editing prowess.
Trimming and Cutting: Use precise trimming techniques to remove unwanted footage and tighten your edits. Cutting on action or dialogue cues helps maintain rhythm and momentum.
Color Grading: Experiment with color correction and grading to enhance the visual aesthetics of your video. Adjusting contrast, saturation, and white balance can dramatically impact the overall look and feel.
Audio Mixing: Achieve a balanced audio mix by adjusting volume levels, adding background music, and incorporating sound effects. Pay attention to dialogue clarity and ensure that audio elements complement the visual narrative.
Utilize Keyboard Shortcuts: Familiarize yourself with keyboard shortcuts to streamline your editing workflow. Mastering shortcuts for common tasks like cutting, copying, and pasting can save time and improve efficiency.
Storyboarding and Planning: Invest time in pre-production planning and storyboarding to streamline the editing process. A well-thought-out plan helps maintain focus and ensures that your final product aligns with your creative vision.
Conclusion
Video editing is both an art and a science. By mastering the fundamentals, choosing the right tools, and honing your editing techniques, you can create compelling and engaging content that captivates your audience. Whether you're telling a story, promoting a product, or expressing your creativity, the power of video editing lies in your hands. So grab your camera, unleash your imagination, and let your creativity shine through the magic of editing.
1 note
·
View note
Text
Download the Best Service – Chris Hein Orchestral Brass EXtended

Chris Hein Orchestral Brass EXtended is a premium orchestral brass library that redefines realism and versatility in music production. Whether you’re creating cinematic scores, classical compositions, or epic soundtracks, this library is a must-have. Follow this guide to download and install it effortlessly.
Step 1: Download KONTAKT PRO
To use Chris Hein Orchestral Brass EXtended, you first need to download and install KONTAKT PRO. This advanced sampler is essential for running the library. Visit kalaplugins.com to download KONTAKT PRO. Ensure your system meets the following requirements:
Mac: macOS 10.14+, Intel Core i5/Apple M1, 4GB+ RAM
Windows: Windows 10+, Intel Core i5 equivalent, 4GB+ RAM
Step 2: Purchase Chris Hein Orchestral Brass EXtended
Head to the official product page at KalaPlugins to purchase the library. After completing your payment, you’ll receive a download link along with the serial key required for activation.
Step 3: Download and Extract Files
Click the download link provided after purchase.
Ensure you have sufficient storage space (at least 40GB).
Use file extraction tools like WinRAR or 7-Zip to unpack the downloaded files into a designated folder.
Step 4: Install the Library in KONTAKT PRO
Open KONTAKT PRO on your system.
Navigate to the "Libraries" tab and click "Add Library."
Browse and select the extracted folder containing Chris Hein Orchestral Brass EXtended files.
Activate the library using the serial key provided in your purchase confirmation email.
Step 5: Explore the Instruments
Once installed, you can access a variety of brass instruments, including trumpets, trombones, French horns, and low brass additions like the euphonium and sousaphone. Use the user-friendly interface to experiment with articulations, dynamic modes, and ensemble patches.
Why Choose Chris Hein Orchestral Brass EXtended?
This library is perfect for composers seeking unmatched realism and versatility. From its phase-aligned samples to advanced note-head variations and true legato transitions, the EXtended version offers an extraordinary orchestral experience.
0 notes
Text
Macで、Pythonで、OpenAIのAPIで喋らせてみたい
自分用。なにせPythonは初めてなもんで。
MacBook-Air openai % python -V Python 3.8.15 MacBook-Air openai % pyenv zsh: command not found: pyenv MacBook-Air openai % brew install pyenv MacBook-Air openai % pyenv -v pyenv 2.3.36 MacBook-Air openai % eval "$(pyenv init -)" MacBook-Air openai % pyenv install -l Available versions: 2.1.3 2.2.3 ...... MacBook-Air openai % pyenv install 3.12.2 MacBook-Air openai % pyenv versions * system (set by /Users/wantwant/.pyenv/version) 3.12.2 MacBook-Air openai % pyenv local 3.12.2 MacBook-Air openai % pyenv version 3.12.2 (set by /Users/wantwant/ruby/openai/.python-version) MacBook-Air openai % python --version Python 3.8.15 MacBook-Air openai % eval "$(pyenv init -)" MacBook-Air openai % python --version Python 3.12.2 MacBook-Air openai % pyenv versions system * 3.12.2 (set by /Users/wantwant/ruby/openai/.python-version) MacBook-Air openai % pyenv local system MacBook-Air openai % pyenv version system (set by /Users/wantwant/ruby/openai/.python-version) MacBook-Air openai % python -V Python 3.8.15 MacBook-Air openai % pyenv local 3.12.2 MacBook-Air openai % python -V Python 3.12.2 MacBook-Air openai % pip install openai MacBook-Air openai % emacs ~/.zshrc 次の行を追加 export OPENAI_API_KEY='xxxxxxxxxxxxxxxxxxxxxxxxxxxxxxxx' MacBook-Air openai % source ~/.zshrc MacBook-Air openai % echo $OPENAI_API_KEY MacBook-Air openai % emacs hello.py
以下は hello.py
from openai import OpenAI client = OpenAI() completion = client.chat.completions.create( model="gpt-3.5-turbo", messages=[ {"role": "system", "content": "You are a poetic assistant, skilled in explaining complex programming concepts with creative flair."}, {"role": "user", "content": "Compose a poem that explains the concept of recursion in programming."} ] ) print(completion.choices[0].message)
MacBook-Air openai % python hello.py ChatCompletionMessage(content="In the realm of code, there lies a wondrous art,\nWhere loops and fun<<略>>", role='assistant', function_call=None, tool_calls=None)
0 notes
Link
0 notes
Text
Harmony Unleashed: Exploring the Best Composers for Mac – Elevate Your Musical Creativity
Whether you're a seasoned professional or a budding artist, the Mac platform offers a rich array of composers tailored to diverse musical preferences and skill levels.
Logic Pro X: A Maestro's Toolkit:
Logic Pro X stands as a flagship composer for mac software, renowned for its powerful features and intuitive interface. Catering to both beginners and professionals, it offers a vast library of virtual instruments, audio effects, and an extensive sound library. The inclusion of advanced features like Flex Time and Flex Pitch ensures precise control over every musical element.
GarageBand: Unleash Your Musical Journey:
For those taking their first steps into music composition, GarageBand is the ideal companion. Pre-installed on most Mac computers, it provides a user-friendly interface with a diverse set of virtual instruments, loops, and audio effects. GarageBand seamlessly integrates with Logic Pro X, allowing users to graduate to a more advanced platform as their skills evolve.
Sibelius: Precision in Notation:
Sibelius is a powerhouse in the realm of musical notation software, offering an unparalleled platform for composers, arrangers, and educators. Its advanced features include dynamic parts extraction, cloud collaboration, and an extensive sound library. For those focused on creating intricate musical scores with precision, Sibelius stands as an invaluable tool.
Dorico: Forward-Thinking Composition:
Dorico is a relatively new player in the composition software scene, but it has quickly gained acclaim for its forward-thinking approach. Developed by Steinberg, the creators of Cubase, Dorico emphasizes ease of use and efficient workflow. It's an excellent choice for composers seeking a fresh perspective on notation and layout.
MuseScore: Open Source Brilliance:
MuseScore stands out as an open-source composition software that delivers exceptional functionality without the price tag. Suitable for musicians of all levels, MuseScore allows users to create, play, and print beautiful sheet music. The collaborative nature of its open-source community ensures continuous updates and improvements.
Cubase: A DAW Powerhouse:
Cubase has long been a staple in the digital audio workstation (DAW) realm, providing a comprehensive solution for music production, recording, editing, and mixing. With its robust set of features, VST instrument support, and seamless integration with Mac systems, Cubase remains a top choice for composers seeking a professional-grade DAW.
0 notes
Text
FabFilter Twin 3 – Download Now!"
Embark on a sonic journey like never before with FabFilter Twin 3, the latest evolution in synthesizer technology. Offering a seamless blend of power, versatility, and innovation, Twin 3 is your gateway to crafting sounds that transcend the ordinary. Download FabFilter Twin 3 now and unlock a world of possibilities for your music production.
🔮 Unleash Unparalleled Creativity: Dive into a realm of limitless sonic exploration with FabFilter Twin 3's advanced synthesis capabilities. From rich analog warmth to futuristic digital textures, this synth empowers you to sculpt sounds with unparalleled precision. Elevate your music to new heights by tapping into a vast array of modulation options, filter types, and intuitive controls that inspire creativity at every turn.
🎹 Intuitive Design, Effortless Workflow: Designed with the modern producer in mind, FabFilter Twin 3 boasts a sleek and intuitive interface that streamlines your workflow. Effortlessly navigate through oscillators, filters, and modulation sources, and witness your musical ideas come to life with unprecedented ease. Download Twin 3 today to experience a synthesis powerhouse that aligns seamlessly with your creative vision.
🌐 Cross-Platform Compatibility: Whether you're a Windows enthusiast or a dedicated Mac user, FabFilter Twin 3 caters to your needs with its cross-platform compatibility. Download and install with confidence, knowing that you have a synthesizer that integrates seamlessly into your preferred digital audio workstation (DAW) environment, enhancing your production experience on any system.
🚀 Stay Ahead with Regular Updates: FabFilter is renowned for its commitment to excellence and continuous improvement. By downloading Twin 3, you're not just getting a synth – you're investing in a dynamic instrument that evolves with your musical journey. Benefit from regular updates that introduce new features, enhancements, and optimizations, ensuring your sound palette stays ahead of the curve.
🎧 Immerse Yourself in FabFilter Quality: Join the ranks of producers, composers, and sound designers who trust FabFilter for uncompromising quality. Twin 3 exemplifies this commitment, delivering a synthesis experience that's not just functional but inspiring. Download FabFilter Twin 3 now and witness the transformative power it brings to your music.
1 note
·
View note