#jsonschema
Explore tagged Tumblr posts
Visit Tumblr Blog
Explore Tumblr blogs with no restrictions, modern design and the best experience.
Last Seen Tumblr Blogs


Fun Fact
The Tumblr app for Google Glass was released on May 16, 2013.
Text
RDS Data Extraction with RFtap and Wireshark
RDS (Radio Data System) is a communication protocol standard used for embedding small amounts of digital information in traditional FM radio broadcasts. It enables radio stations to transmit data such as station identification, program information, and traffic updates.
To capture and decode RDS data, one method involves using a Software Defined Radio (SDR) along with GNU Radio and RFtap. GNU Radio provides a framework for creating software radios, while RFtap acts as a bridge between GNU Radio and conventional network monitoring and packet analysis tools like Wireshark.

Unfortunately, as of the time of writing, RFtap is no longer being maintained and does not work with the latest version of GNU Radio (version 3.10.10). This post offers guidelines for rebuild and using RFtap with the new GNU Radio release.
This post assumes that the reader has access to DVB-T dongles based on the Realtek RTL2832U and a PC running Ubuntu or Debian Linux. For this, I used an RTL dongle with Rafael Micro R820T tuner and Ubuntu 24.04 LTS release.
As the first step install the following GNU Radio build dependencies into the OS:
sudo apt-get install cmake libboost-all-dev \ liblog4cpp5-dev qtcreator qtbase5-dev \ qt5-qmake python3-cheetah python3-numpy \ python3-pygtk python3-gi python3-gi-cairo \ gir1.2-gtk-4.0
sudo apt install git g++ libgmp-dev swig \ python3-mako python3-sphinx python3-lxml \ doxygen libfftw3-dev libsdl1.2-dev \ libgsl-dev libqwt-qt5-dev libqt5opengl5-dev \ python3-pyqt5 liblog4cpp5-dev libzmq3-dev \ python3-yaml python3-click \ python3-click-plugins python3-zmq python3-scipy \ libcodec2-dev libgsm1-dev libusb-1.0-0 \ libusb-1.0-0-dev libudev-dev \ python3-setuptools
sudo apt install pybind11-dev python3-matplotlib \ libsndfile1-dev libsoapysdr-dev soapysdr-tools \ python3-pygccxml python3-pyqtgraph
sudo apt install libiio-dev libad9361-dev \ libspdlog-dev python3-packaging python3-jsonschema \ python3-qtpy
sudo apt remove swig
Next, clone and build Volk (Vector-Optimized Library of Kernels)
mkdir ~/rf cd rf git clone --recursive https://github.com/gnuradio/volk.git cd volk mkdir build cd build cmake -DCMAKE_BUILD_TYPE=Release -DPYTHON_EXECUTABLE=/usr/bin/python3 ../ make sudo make install sudo ldconfig
After installing the Volk library, we can proceed to build GNU Radio.
cd ~/rf wget https://github.com/gnuradio/gnuradio/archive/refs/tags/v3.10.10.0.tar.gz tar -xvf ./v3.10.10.0.tar.gz cd gnuradio-3.10.10.0 mkdir build cd build cmake -DCMAKE_BUILD_TYPE=Release -DPYTHON_EXECUTABLE=/usr/bin/python3 ../ make -j8 make test sudo make install sudo ldconfig

Now GNU Radio is installed with all necessary components. To enable RTL SDR support, we must build and install Osmocom RTL SDR libraries and SDR components.
cd ~/rf git clone https://gitea.osmocom.org/sdr/rtl-sdr.git cd rtl-sdr mkdir build cd build cmake ../ -DINSTALL_UDEV_RULES=ON make sudo make install sudo ldconfig
cd ~/rf git clone https://gitea.osmocom.org/sdr/gr-osmosdr cd gr-osmosdr mkdir build cd build cmake ../ make sudo make install sudo ldconfig
Before plugging in the RTL-SDR dongle, we need to prevent the kernel modules for the RTL-SDR USB device from being loaded into the kernel and taking ownership of the device. To do this, simply navigate to the /etc/modprobe.d directory and create a file called rtl-sdr-blacklist.conf with the following content:
# This system has librtlsdr0 installed in order to # use digital video broadcast receivers as generic # software defined radios. blacklist dvb_usb_rtl28xxu blacklist e4000 blacklist rtl2832 blacklist rtl2830 blacklist rtl2838
Next, you should clone and build the FM RDS/TMC transceiver module for GNU Radio.
cd ~/rf wget https://github.com/bastibl/gr-rds/archive/refs/tags/v3.10.tar.gz tar -xvf ./gr-rds\ -v3.10.tar.gz cd gr-rds-3.10 mkdir build cd build cmake .. make sudo make install sudo ldconfig
For the next steps, we need to have Wireshark and RFTap. Wireshark can be installed using a package manager.
sudo apt-get install wireshark
To run Wireshark without requiring root user permissions, use the following set of commands:
sudo dpkg-reconfigure wireshark-common sudo usermod -a -G wireshark $USER newgrp wireshark
A message may be prompted in the first step above and proceed by selecting the "Yes" option.
Now restart the OS and continue with the RFTap installation.
The official RFTap repository is no longer being maintained and is not compatible with newer versions of GNU Radio. For this step, please use the RFTap fork available in my GitHub repository. This version has been successfully tested with GNU Radio 3.10.10 and Wireshark 4.2.2.
cd ~/rf git clone https://github.com/dilshan/gr-rftap.git cd gr-rftap mkdir build cd build cmake .. make sudo make install sudo ldconfig
Now get the modifier version of rds_rx_rftap.grc from the above repository.

The Wireshark Dissector file for RDS data is also available in the repository. Copy it to the ~/.config/wireshark/plugins directory. Create the directories if they do not exist.
Launch Wireshark and monitor the loopback (lo) adapter. Start GNU Radio and execute the rds_rx.grc file, which was downloaded in the above step.
youtube
If all the steps are performed correctly, the RDS data should appear in the packet list pane as UDP messages. The dissected messages can be observed through the packet bytes pane.
0 notes
Text
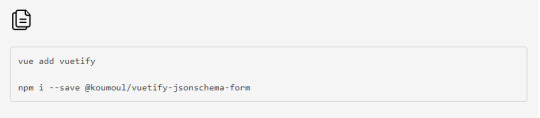
Easy and Quick Form Generation Using JSON Schema in VueJS
We developers always find ways to get things done quickly and efficiently. Keeping the need for easy form generation in lesser time, here’s a tutorial for you! A few days back, there was a client requirement for integrating form and customizing it in the project using vuetify-jsonschema-form. Searching for a proper informative tutorial for the same was a real struggle. The task was done with efficiency within the deadline. But, the thought crossed my mind what if another fellow developer might face this same issue. So, to lessen their struggle and smoothen the process here’s a form generation using JSON schema in VueJS that will show a hustle-free technique of implementing vuetify-jsonschema-form to generate and customize the form.
Here are some benefits of implementing vuetify-jsonschema-form:
Supports all basic data types.
Allows the implementation of nested objects and nested arrays.
Supports different display options.
Supports validation against the provided schema.
Allows content injection using slots.
Provides consistency and reusability.
There are many packages that support jsonSchema. But, here in this tutorial, we will discuss @koumoul/vuetify-jsonschema-form and implement a few advanced features.
Initial Set-Up
Install Dependencies
Configure SchemaForm.vue
Passing Values to Props
Read More: Form Generation Using JSON Schema in VueJS
#jsonschema#softwaredevelopment#form generation#development#vue js tutorial#programming#agile#technology#web development
2 notes
·
View notes
Link

This blog post explains how to build integration contract tests between a frontend App and a RESTFul backend on the basics of the data-interchange format JSON and the related JSON schema format. The linked Github repository contains a sample on the basis of the Spotify-API
Additional resources:
https://martinfowler.com/bliki/IntegrationContractTest.html
1 note
·
View note
Text
Pg_jsonschema – JSON Schema Support for Postgres
https://supabase.com/blog/pg-jsonschema-a-postgres-extension-for-json-validation Comments
0 notes
Text
React dist unpkg

#React dist unpkg how to#
#React dist unpkg install#
#React dist unpkg code#
#React dist unpkg code#
To lint your code, run the tests, and create code coverage reports: npm run full-test Requirementsreact-vis makes use of ES6 array methods such as.
#React dist unpkg install#
DevelopmentTo develop on this component, install the dependencies and then build and watch the static files: npm install & npm run startOnce complete, you can view the component's example in your browser (will open automatically).Īny changes you make to the example code will run the compiler to build the files again. Sunbursts about making sunburst diagrams. Parallel Coordinates about making parallel coordinate charts.
#React dist unpkg how to#
Scales and Data about how the attributes can be adjusted.Īnimations about how to tweak animations in the library. #4 More informationTake a look at the folder with examples or check out some docs: The global reactVis object will now be available for you to play around. If you're working in a non-node environment, you can also directly include the bundle and compiled style using basic html tags. … and add the following code to your render function: Import the necessary components from the library. Here's an example of importing only the legends "~react-vis/dist/styles/legends" This helps minimize the size of the outputted CSS. You can also select only the styles you want to use. npm install react-vis -saveInclude the built main CSS file in your HTML page or via "~react-vis/dist/style" react-vis supports the React's lifecycle and doesn't create unnecessary nodes. The library provides a set of defaults which can be overridden by the custom user's settings. This provides a high level of control of chart layout for applications that need it. For instance, separate X and Y axis components. react-vis provides a set of basic building blocks for different charts. react-vis doesn't require any deep knowledge of data visualization libraries to start building your first visualizations. This project initially started as a mozilla-services project.OverviewA collection of react components to render common data visualization charts, such as line/area/bar charts, heat maps, scatterplots, contour plots, hexagon heatmaps, pie and donut charts, sunbursts, radar charts, parallel coordinates, and tree maps. Title: Ĭonst log = (type) => (console, type) įor more information on what themes we support, see Using Themes. You'll also need to alias the default export property to use the Form component: const Form = fault Note: The CDN version does not embed react or react-dom. You can also install react-jsonschema-form (the 1.x version) which works with React 15+. Then import the dependency as follows: import Form from latest version requires React 16+. Installation ¶įirst install the dependency from npm: $ npm install -save React-jsonschema-form also comes with tools such as uiSchema and other form props to customize the look and feel of the form beyond the default themes. If you have a priori knowledge of your data and want a toolkit for generating forms for it, you might look elsewhere. If you want to generate a form for any data, sight unseen, simply given a JSON schema, react-jsonschema-form may be for you. React-jsonschema-form is meant to automatically generate a React form based on a JSON Schema. A simple React component capable of building HTML forms out of a JSON schema.Ī live playground is hosted on GitHub Pages:
0 notes
Text
personally, i like reading jsonschema definitions
0 notes
Text
A simple React component capable of using JSON Schema to declaratively build and customize web forms
1 note
·
View note
Text
Easy and Quick Form Generation Using JSON Schema in VueJS
Overview
We developers always find ways to get things done quickly and efficiently. Keeping the need for easy form generation in lesser time, here’s a tutorial for you! A few days back, there was a client requirement for integrating form and customizing it in the project using vuetify-jsonschema-form. Searching for a proper informative tutorial for the same was a real struggle. The task was done with efficiency within the deadline. But, the thought crossed my mind what if another fellow developer might face this same issue. So, to lessen their struggle and smoothen the process here’s a form generation using JSON schema in VueJS that will show a hustle-free technique of implementing vuetify-jsonschema-form to generate and customize the form.
Here are some benefits of implementing vuetify-jsonschema-form:
Supports all basic data types.
Allows the implementation of nested objects and nested arrays.
Supports different display options.
Supports validation against the provided schema.
Allows content injection using slots.
Provides consistency and reusability.
There are many packages that support jsonSchema. But, here in this tutorial, we will discuss @koumoul/vuetify-jsonschema-form and implement a few advanced features.
Initial Set-Up
For initial set-up, use the below-mentioned commands.
(If vue-cli is not already installed, npm install -g @vue/cli)

Install Dependencies
Now it’s time to install vuetify and vuetify-jsonschema-form. For that, fire the below commands.
Since this is a small demo application, the folder structure will be quite simple. Here’s the basic structure. Read more...
0 notes
Photo

MacでUnity ML-Agentsの環境を構築する https://ift.tt/2nDlFAb
これはcloudpack あら便利カレンダー 2018の記事です。
概要
Unityで機械学習ができると聞いて試してみたくなり、環境をつくってみました。
参考) 【Unity】Unityで機械学習する「ML-Agent」を色々と試して得た知見とか http://tsubakit1.hateblo.jp/entry/2018/02/18/233000
Unityをまだインストールしていないという方は下記をご参考
Macでhomebrewを使ってUnityをインストールする(Unity Hub、日本語化対応) https://cloudpack.media/42142
手順
基本的には公式のドキュメントに沿えばよい感じです。
Unity-Technologies/ml-agents/docs/Installation.md https://github.com/Unity-Technologies/ml-agents/blob/master/docs/Installation.md
Pythonをインストールする
Python 3.5または3.6が必要だそうなので、お手元に環境がない方は下記ご参照 https://cloudpack.media/42033
ML-Agentsリポジトリをダウンロード
適当なディレクトリにリポジトリをダウンロードする。
> mkdir 適当なディレクトリ > cd 適当なディレクトリ > git clone https://github.com/Unity-Technologies/ml-agents.git
必要なライブラリをインストールする
TensorFlowなどを利用するみたいなので、pipを利用してインストールします。 ここではPythonの仮想環境を作ってインストールします。
仮想環境?なにそれ?な方は下記をご参照(再掲 https://cloudpack.media/42033
> cd 適当なディレクトリ/ml-agents > pyenv local 3.6.6 > python -m venv unity-ml > . unity-ml/bin/activate # fishな方は下記 > . unity-ml/bin/activate.fish > cd python > pip install . Processing 適当なディレクトリ/ml-agents/python Collecting tensorflow==1.7.1 (from unityagents==0.4.0) (略) Successfully installed MarkupSafe-1.0 Pillow-5.2.0 Send2Trash-1.5.0 absl-py-0.3.0 appnope-0.1.0 astor-0.7.1 atomicwrites-1.1.5 attrs-18.1.0backcall-0.1.0 bleach-1.5.0 cycler-0.10.0 decorator-4.3.0 docopt-0.6.2 entrypoints-0.2.3 gast-0.2.0 grpcio-1.11.0 html5lib-0.9999999 ipykernel-4.8.2 ipython-6.4.0 ipython-genutils-0.2.0 ipywidgets-7.3.1 jedi-0.12.1 jinja2-2.10 jsonschema-2.6.0 jupyter-1.0.0 jupyter-client-5.2.3 jupyter-console-5.2.0 jupyter-core-4.4.0 kiwisolver-1.0.1 markdown-2.6.11 matplotlib-2.2.2 mistune-0.8.3 more-itertools-4.2.0 nbconvert-5.3.1 nbformat-4.4.0 notebook-5.6.0 numpy-1.15.0 pandocfilters-1.4.2 parso-0.3.1 pexpect-4.6.0 pickleshare-0.7.4 pluggy-0.6.0 prometheus-client-0.3.0 prompt-toolkit-1.0.15 protobuf-3.5.2 ptyprocess-0.6.0 py-1.5.4 pygments-2.2.0 pyparsing-2.2.0 pytest-3.6.3 python-dateutil-2.7.3 pytz-2018.5 pyyaml-3.13 pyzmq-17.1.0 qtconsole-4.3.1 simplegeneric-0.8.1 six-1.11.0 tensorboard-1.7.0 tensorflow-1.7.1 termcolor-1.1.0 terminado-0.8.1 testpath-0.3.1 tornado-5.1 traitlets-4.3.2 unityagents-0.4.0 wcwidth-0.1.7 werkzeug-0.14.1 wheel-0.31.1 widgetsnbextension-3.3.1
はい。
動かしてみる
引き続き、公式のドキュメントに沿って実際に動かして見ます。
Using an Environment Executable https://github.com/Unity-Technologies/ml-agents/blob/master/docs/Learning-Environment-Executable.md
Installationから進むと下記ガイドへ自然と進んでしまうのですが、上記のほうが、お試しするには罠が少なかったです。(1敗)
Basic Guide https://github.com/Unity-Technologies/ml-agents/blob/master/docs/Basic-Guide.md
Unityの起動とプロジェクトファイル読み込み
Unityを立ち上げます。
> open /Applications/Unity/Hub/Editor/2018.2.1f1/Unity.app
アプリが立ち上がったら「開く」ボタンからml-agentsの以下フォルダを選択します。
ml-agents\unity-environment
どうやらML-Agentsリポジトリにpushした時点でのエディタのバージョンが最新でないようで、再インポートするかの確認ダイアログが立ち上がりました。(2018/07/27時点) 「続行」で進めます。
再インポート処理をしているのか、プロジェクトが開くまでに時間がかかります。
Scenes(シーン)が開くか確認する
ひとまず、サンプルが動作するかUnityでプロジェクトを読み込み、動作させてみます。
参考) Unityの公式サンプルml-agentsでAIを試す http://am1tanaka.hatenablog.com/entry/2017/11/08/230525
Unityの下パネルにある[Project]タブから以下のフォルダまで開く。
[Assets] > [ML-Agents] > [Examples] > [3DBall] > [Scenes]
開いたら、[3DBall]ファイルがあるので、ダブルクリックして開く。

なんかでてきたー(感動)

ついでにUnityの上にある再生ボタンをクリック。
なんかうごいたー(感動)

読み込んだサンプルが動作することが確認できました。 現時点ではボールが板からすぐに落ちてしまいます。これを機械学習させて、落とさないようにするわけです。
Scenes(シーン)の設定
ML-Agentsで学習させるための設定です。
Unityの[Edit]メニューから[Project Settings] > [Player]を開く

[Inspector]ビューで以下の設定を確認する。
[Resolution and Presentation]の[Run In Background]がチェックされている
[Display Resolution Dialog]がDisableになっている

[Hierarchy]ビューから[Ball3DAcademy] > [Ball3DBrain]を開く
[Inspector]ビューで[Brain Type]を[External]に変更する

[Ctrl] + [s]キーでシーンを保存する
設定変更後、しっかりと保存しないとビルド時に設定が反映されなくてハマります。(1敗)
ビルド
[File]メニューから[Build Settings]を選択する
[Build Settings]ダイアログで[Platform]で[PC, Mac & Linux Standalone]が選択されていることを確認する
[Build Settings]ダイアログで[Build]ボタンをクリックする

ファイル保存ダイアログで以下を指定してビルドを開始する
ml-agents\python\3DBall.app
学習の実行
ターミナルで以下を実行して、学習を開始する。 実行時にビルドしたAppが起動して学習が開始されます。 放っておくとずっと学習が続くので、[ctrl] + [ c ]で終了させます。 終了させると学習結果が保存されます。
学習結果は以下に保存されます。
ml-agents\python\models\firstRun\3DBall_firstRun.bytes
# 3DBall: 出力したapp名(拡張子なし) # firstRun: 実行ごとに結果が保存されるので、名称をつける(任意) > python3 learn.py 3DBall --run-id=firstRun --train ▄▄▄▓▓▓▓ ╓▓▓▓▓▓▓█▓▓▓▓▓ ,▄▄▄m▀▀▀' ,▓▓▓▀▓▓▄ ▓▓▓ ▓▓▌ ▄▓▓▓▀' ▄▓▓▀ ▓▓▓ ▄▄ ▄▄ ,▄▄ ▄▄▄▄ ,▄▄ ▄▓▓▌▄ ▄▄▄ ,▄▄ ▄▓▓▓▀ ▄▓▓▀ ▐▓▓▌ ▓▓▌ ▐▓▓ ▐▓▓▓▀▀▀▓▓▌ ▓▓▓ ▀▓▓▌▀ ^▓▓▌ ╒▓▓▌ ▄▓▓▓▓▓▄▄▄▄▄▄▄▄▓▓▓ ▓▀ ▓▓▌ ▐▓▓ ▐▓▓ ▓▓▓ ▓▓▓ ▓▓▌ ▐▓▓▄ ▓▓▌ ▀▓▓▓▓▀▀▀▀▀▀▀▀▀▀▓▓▄ ▓▓ ▓▓▌ ▐▓▓ ▐▓▓ ▓▓▓ ▓▓▓ ▓▓▌ ▐▓▓▐▓▓ ^█▓▓▓ ▀▓▓▄ ▐▓▓▌ ▓▓▓▓▄▓▓▓▓ ▐▓▓ ▓▓▓ ▓▓▓ ▓▓▓▄ ▓▓▓▓` '▀▓▓▓▄ ^▓▓▓ ▓▓▓ └▀▀▀▀ ▀▀ ^▀▀ `▀▀ `▀▀ '▀▀ ▐▓▓▌ ▀▀▀▀▓▄▄▄ ▓▓▓▓▓▓, ▓▓▓▓▀ `▀█▓▓▓▓▓▓▓▓▓▌ ¬`▀▀▀█▓ INFO:unityagents:{'--curriculum': 'None', '--docker-target-name': 'Empty', '--help': False, '--keep-checkpoints': '5', '--lesson': '0', '--load': False, '--no-graphics': False, '--run-id': 'firstRun', '--save-freq': '50000', '--seed': '-1', '--slow': False, '--train': True, '--worker-id': '0', '<env>': '3DBall'} CrashReporter: initialized Mono path[0] = '適当なディレクトリ/ml-agents/python/3DBall.app/Contents/Resources/Data/Managed' Mono config path = '適当なディレクトリ/ml-agents/python/3DBall.app/Contents/MonoBleedingEdge/etc' INFO:unityagents: 'Ball3DAcademy' started successfully! Unity Academy name: Ball3DAcademy Number of Brains: 1 Number of External Brains : 1 Lesson number : 0 Reset Parameters : Unity brain name: Ball3DBrain Number of Visual Observations (per agent): 0 Vector Observation space type: continuous Vector Observation space size (per agent): 8 Number of stacked Vector Observation: 1 Vector Action space type: continuous Vector Action space size (per agent): 2 Vector Action descriptions: , INFO:unityagents:Hyperparameters for the PPO Trainer of brain Ball3DBrain: batch_size: 64 beta: 0.001 buffer_size: 12000 epsilon: 0.2 gamma: 0.995 hidden_units: 128 lambd: 0.99 learning_rate: 0.0003 max_steps: 5.0e4 normalize: True num_epoch: 3 num_layers: 2 time_horizon: 1000 sequence_length: 64 summary_freq: 1000 use_recurrent: False graph_scope: summary_path: ./summaries/firstRun memory_size: 256 use_curiosity: False curiosity_strength: 0.01 curiosity_enc_size: 128 INFO:unityagents: Ball3DBrain: Step: 1000. Mean Reward: 1.293. Std of Reward: 0.742. INFO:unityagents: Ball3DBrain: Step: 2000. Mean Reward: 1.345. Std of Reward: 0.802. INFO:unityagents: Ball3DBrain: Step: 3000. Mean Reward: 1.592. Std of Reward: 1.001. INFO:unityagents: Ball3DBrain: Step: 4000. Mean Reward: 2.028. Std of Reward: 1.306. INFO:unityagents: Ball3DBrain: Step: 5000. Mean Reward: 3.289. Std of Reward: 2.465. INFO:unityagents: Ball3DBrain: Step: 6000. Mean Reward: 5.163. Std of Reward: 4.913. INFO:unityagents: Ball3DBrain: Step: 7000. Mean Reward: 9.106. Std of Reward: 10.157. INFO:unityagents: Ball3DBrain: Step: 8000. Mean Reward: 17.119. Std of Reward: 17.467. INFO:unityagents: Ball3DBrain: Step: 9000. Mean Reward: 41.421. Std of Reward: 28.326. INFO:unityagents: Ball3DBrain: Step: 10000. Mean Reward: 48.120. Std of Reward: 34.576. INFO:unityagents: Ball3DBrain: Step: 11000. Mean Reward: 72.271. Std of Reward: 33.733. INFO:unityagents: Ball3DBrain: Step: 12000. Mean Reward: 69.794. Std of Reward: 34.551. INFO:unityagents: Ball3DBrain: Step: 13000. Mean Reward: 95.523. Std of Reward: 15.509. INFO:unityagents: Ball3DBrain: Step: 14000. Mean Reward: 92.423. Std of Reward: 26.247. INFO:unityagents: Ball3DBrain: Step: 15000. Mean Reward: 76.550. Std of Reward: 35.733. INFO:unityagents: Ball3DBrain: Step: 16000. Mean Reward: 81.850. Std of Reward: 29.841. INFO:unityagents: Ball3DBrain: Step: 17000. Mean Reward: 69.775. Std of Reward: 32.864. INFO:unityagents: Ball3DBrain: Step: 18000. Mean Reward: 87.154. Std of Reward: 25.547. INFO:unityagents: Ball3DBrain: Step: 19000. Mean Reward: 81.967. Std of Reward: 36.149. INFO:unityagents: Ball3DBrain: Step: 20000. Mean Reward: 83.971. Std of Reward: 24.420. ^]INFO:unityagents: Ball3DBrain: Step: 21000. Mean Reward: 93.446. Std of Reward: 22.703. INFO:unityagents: Ball3DBrain: Step: 22000. Mean Reward: 90.321. Std of Reward: 25.878. INFO:unityagents: Ball3DBrain: Step: 23000. Mean Reward: 89.362. Std of Reward: 26.171. INFO:unityagents: Ball3DBrain: Step: 24000. Mean Reward: 82.127. Std of Reward: 33.026. INFO:unityagents: Ball3DBrain: Step: 25000. Mean Reward: 72.694. Std of Reward: 40.881. INFO:unityagents: Ball3DBrain: Step: 26000. Mean Reward: 91.575. Std of Reward: 16.235. INFO:unityagents: Ball3DBrain: Step: 27000. Mean Reward: 81.640. Std of Reward: 32.242. INFO:unityagents: Ball3DBrain: Step: 28000. Mean Reward: 100.000. Std of Reward: 0.000. INFO:unityagents: Ball3DBrain: Step: 29000. Mean Reward: 80.227. Std of Reward: 39.547. INFO:unityagents: Ball3DBrain: Step: 30000. Mean Reward: 79.075. Std of Reward: 38.136. INFO:unityagents: Ball3DBrain: Step: 31000. Mean Reward: 95.458. Std of Reward: 15.063. INFO:unityagents: Ball3DBrain: Step: 32000. Mean Reward: 100.000. Std of Reward: 0.000. INFO:unityagents: Ball3DBrain: Step: 33000. Mean Reward: 83.950. Std of Reward: 32.743. INFO:unityagents: Ball3DBrain: Step: 34000. Mean Reward: 76.846. Std of Reward: 36.478. INFO:unityagents: Ball3DBrain: Step: 35000. Mean Reward: 93.162. Std of Reward: 23.689. INFO:unityagents: Ball3DBrain: Step: 36000. Mean Reward: 93.200. Std of Reward: 23.246. INFO:unityagents: Ball3DBrain: Step: 37000. Mean Reward: 93.077. Std of Reward: 17.433. INFO:unityagents: Ball3DBrain: Step: 38000. Mean Reward: 87.154. Std of Reward: 29.409. INFO:unityagents: Ball3DBrain: Step: 39000. Mean Reward: 87.671. Std of Reward: 28.051. INFO:unityagents: Ball3DBrain: Step: 40000. Mean Reward: 98.158. Std of Reward: 6.108. INFO:unityagents: Ball3DBrain: Step: 41000. Mean Reward: 83.300. Std of Reward: 30.993. INFO:unityagents: Ball3DBrain: Step: 42000. Mean Reward: 83.147. Std of Reward: 34.732. ^C--------------------------Now saving model------------------------- INFO:unityagents:Learning was interrupted. Please wait while the graph is generated. INFO:unityagents:Saved Model INFO:unityagents:List of nodes to export : INFO:unityagents: action INFO:unityagents: value_estimate INFO:unityagents: action_probs INFO:tensorflow:Restoring parameters from ./models/firstRun/model-42346.cptk INFO:tensorflow:Froze 16 variables. Converted 16 variables to const ops.
学習中の様子

学習がすすむと、徐々にボールが落ちないようになっていきました。
学習結果をアプリに組み込む
[Edit]メニューから[Project Settings]>[Player]を選択する
[Inspector]ビューの[Other Settings]欄で以下を設定する
[Scripting Runtime Version]を[Experimental(.Net 4.6 Equivalent)]にする
Scripting Defined Symbols欄にENABLE_TENSORFLOWを入力する

ターミナルかFinderで学習結果を以下フォルダにコピーする。
保存先
unity-environment/Assets/ML-Agents/Examples/3DBall/TFModels/
> cp models/firstRun/3DBall_firstRun.bytes ../unity-environment/Assets/ML-Agents/Examples/3DBall/TFModels
Unityの[Hierarchy]パネルから以下を選択する
[3DBall] > [Ball3DAcademy] > [Ball3DBrain]
Unityの[Inspector]パネルにある[Brain Type]を[internal]に変更する
[Project]パネルで以下フォルダを選択する
[Assets] > [ML-Agents] > [Examples] > [3DBall] > [TFModels]
[Brain Type]下に[Graph Model]という項目が現れてるので、そこに[TFModels]フォルダ内の以下ファイルをドラッグ&ドロップする
3DBall_firstRun.bytes

Unity上部にある再生(三角)ボタンをクリックする
これで、学習結果が組み込まれた状態でアプリが起動する(はず)です。
サンプルは他にもあるので、���ろいろとお試しあれ。
参考
【Unity】Unityで機械学習する「ML-Agent」を色々と試して得た知見とか http://tsubakit1.hateblo.jp/entry/2018/02/18/233000
Unity-Technologies/ml-agents/docs/Installation.md https://github.com/Unity-Technologies/ml-agents/blob/master/docs/Installation.md
Using an Environment Executable https://github.com/Unity-Technologies/ml-agents/blob/master/docs/Learning-Environment-Executable.md
Unityの公式サンプルml-agentsでAIを試す http://am1tanaka.hatenablog.com/entry/2017/11/08/230525
元記事はこちら
「MacでUnity ML-Agentsの環境を構築する」
August 15, 2018 at 02:00PM
1 note
·
View note
Photo

react-jsonschema-form: A React Component for Building Forms from a JSON Schema - https://t.co/zdQgyTfQkZ
0 notes
Photo

react-jsonschema-form: A React Component for Building Forms from a JSON Schema - https://t.co/zdQgyTfQkZ
0 notes

Photo

react-jsonschema-form: A React Component for Building Forms from a JSON Schema - https://t.co/zdQgyTfQkZ
0 notes
Text
Great post from one of our Principal Developer Advocates @rlondner! #JSONSchema https://t.co/LLjpY6y75n
Great post from one of our Principal Developer Advocates @rlondner! #JSONSchemahttps://t.co/LLjpY6y75n
— MongoDB (@MongoDB) December 13, 2017
MongoDB
0 notes
Text
Show HN: JSONSchema to TypeScript compiler
https://github.com/bcherny/json-schema-to-typescript Comments
0 notes
Link
#JSONSchema , #SchemaOrg , #JSONLD :
What”s the Difference ?
Via @dashjoin @danbri @SmartBear @jsonschema
@MDroettboom
#JSONSchema Form on #GitHub
#JSON Schema Form Playground
#DashJoin on GitHub
#SchemaOrg #Person
#JSONSchema Miscellaneous Examples
Understanding #JSONSchema
#Swagger #PetStore
Website #SchemaOrg
SchemaOrg Schemas & Supporting #Software on #GitHub
SchemaOrg Project on GitHub
Website #JSONLD #JSON For Linking #Data
JSONLD #Documentation
JSONLD on GitHub
0 notes