#krita tuto
Note
how do you make gifs?????
uuuuuh the hard way for me
I use krita on my laptop (needed to download an extra thing and watched tutorials, it is NOT intuitive XDc But now that's an habit, it's fine)
But before I had the habit of using flipaclip on my phone
Annnd tho I never used the animation part of it, ibis pain x does have an animation tool
For a two frames gif like that, the process is very simple once you have the right tools 👍Just one doodle of the start and one of the end. Save the thing as a gif and then you can use it in your posts like pics :3
Doodle gifs are just so fun

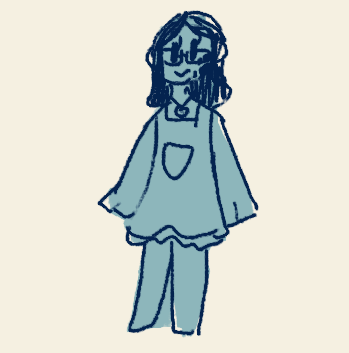


#ask#anon#not really a tuto since I didn't really know what part of the gif process you were asking about#what's a bit annoying is that gifs can't be too big or dumblr refuse to post it ;w;#not enough gifs#all of these are krita made#the old flipaclips ones are somewhere else
8 notes
·
View notes
Video
youtube
✦ TUTO ✦ créer un GIF animé sur Krita
1 note
·
View note
Text
krita pixel art tips
I had a pixel art class (our teacher, Alexandre de la Serna, is part of Haunted Tie, they’re making a really cool pixel art fighting game); the class was about photoshop, but I translated it for Krita (I’m really proud, there was nothing photoshop could do that krita couldn’t); here are the tips he gave, plus a few krita-specific things I discovered while using it; I included a few very basic things at the beginning, but you can just skip to the rest if you’re used to krita:
Krita pixel art shortcuts:
1) general shortcuts for complete beginners
2) pixel art tips: sharp-edged everything
3) using tiles: making your own tiles and applying them on a large space
4) animation tips: drawing/erasing on several frames at once
(I put it under the cut because it’s pretty long)
GENERAL SHORTCUTS FOR COMPLETE BEGINNERS (scroll down to see the more advanced stuff):
- B: brush; E: eraser (E again: go back to the previous mode) (click B or E once)
- Ctrl-LeftClick when using the brush: pick the color you clicked on.
- X: change between primary and secondary color (click X once)
- palette: Settings>Docker>Palette; or in the color selection (or RightClick anywhere on the canvas); it remembers the 10 or so last colours used (you can change how many in Settings>Configure Krita>Color Selector Settings>Color History>Max Patches)
- T: move selection (or layer or group of layers depending on your Tool Options settings)
- Ctrl-T: modify selection
- sharp-edged selection: in the contiguous selection tool (the wand icon), have fuzziness at 0; in the Fill tool, you'll probably want threshold at 0 so it only selects that one precise colour you're clicking on (and "feathering radius" too); ALSO ALWAYS HAVE ANTI-ALIASING OFF in all the tools when you're doing pixel art. And when something doesn't go your way, check the Tools Options (Seetings>Dockers>Tool options), that's very likely where your solution is.
- F: fill tool (paint bucket icon) (you can use it with the "similar colour selection tool", with the "Fill entire selection" option of the Fill tool activated, to change all pixels of one colour to another)
MORE PIXEL ART-RELATED, ALSO MAYBE LESS WELL-KNOWN TIPS
- To have a sharp-edged brush, tick "sharpness" in the brush editor (fourth icon in top horizontal bar; don't forget to save by clicking "overwrite preset" or "save to preset").
- Sometimes you may want a real-size view of your work: go to Window>new Window; in that new window: Window>new View>nameOfYourFile (also: 1: zoom 100%, and Tab: remove the menus and strip down your window to only the canvas); I've seen it make krita crash on some computers, though, so if this happens for you, you know where to look to make it stop.
- V (with the brush): make a straight line (with V pressed down, clic and drag to make your line); Shift-V: constraint the line to the X, Y or diagonal axis.
- for sharp-edged resize and modifications: (with Ctrl-T or when resizing the image, like for showing on the internet): choose the filter "Box"
USING TILES
Did you know you could make your own tiles? Like, for a whole meadow, you just need one tile of grass, you select the whole area, and fill it with the tile repeating automatically?
- Making a tile: Select your tile (Ctrl-R: rectangle selection tool), go to the patterns (second icon on the horizontal bar at the top), Custom Patterns Tab, Current Layer, Update, then Use as pattern, or Add to predefined patterns if you're gonna use it often.
(you can also use tiles for brushes btw)
- Using your tile: Then select the area you want your tile repeating over, use the Fill tool (F) with "use pattern" checked (in the Tool Options tab), click once, and that's done! If you want more variation, whatever, just add a few different tiles on another layer, easy-peasy.
ANIMATION TIPS
When you're animating, and you copy-paste then merge parts of layers as part of your usual workflow, you have to remember to check all frames; usually you just need to add a new frame just after the current one (and maybe as first image too), so your pasted drawing only merges with that one frame of the animation instead of staying there unchanged through the whole animation. Just remember to think of the whole animation, not just the frame you're working on. But then, it means you can use this to your advantage:
- Let's say I just realized I had an ugly useless pixel (or several) left over on all of my animated frames (and that doesn’t move, or only on a limited area). I can remove it from all frames at once: make a new layer, paint over what you want to erase, put the layer in "erase" mode, play your animation once slowly to check that it is as you want on all images, and merge with layer below (Ctrl-E) (the merging is optional, actually, but if you have lots of layers and are sure you hate what you erase, just do it).
Now what if I actually need that ugly pixel on, like, four frames? Well, I can just animate my eraser layer. On the first frame I need it, I click "New frame" on the eraser layer so it'll be empty, then I copy my eraser frame on the next frame I don't need it.
2 notes
·
View notes
Photo

Premier Test d’animation sur Krita grace au tuto de Sociamix sur Youtube.
1 note
·
View note
Text
things to check on: -walds issue* -anas issue - plot line of dc -krita tuto
0 notes
Last Seen Blogs

scelew
ΑFTERWORD ✾
abedison
You like me because I'm immature

perfectliartoyou
Little coffee mogul
perfectliartoyou
Little coffee mogul
thedevilsteardrop
log/4949cry。