#metal paper towel holder
Text
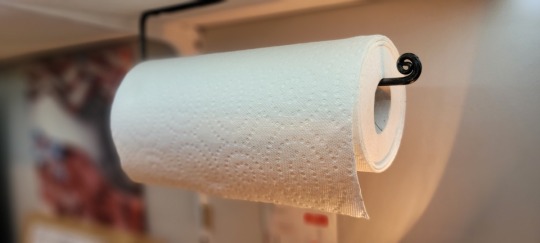
Making a Paper Towel Holder (Metalworking)
I needed a paper towel holder. Instead of just buying a cheap one from the dollar store, I wanted to make a better one and DIY it from 1/4" steel round bar.
I needed a paper towel holder. Instead of just buying a cheap one from the dollar store, I wanted to make a better one and DIY it from 1/4″ steel round bar. Using a blowtorch, a hammer, and a drill, I make this simple but elegant (if not rustic) paper towel holder for the basement.
Watch the video here:
✅For more metalworking videos, check out this playlist
🛠️Tools and supplies used in this…
View On WordPress
#1/4" round bar#best paper towel holder#best paper towel holders#diy paper towel holder#how to make a paper towel holder#janky#metal paper towel holder#metal work#Metalworking#new janky workshop#paper towel#paper towel dispenser#paper towel holder#paper towel holder diy#paper towel holder for bathroom#paper towel holder for kitchen#paper towel holders#paper towel roll#paper towels#shop paper towel holder#the new janky workshop#tnjw#towel holder
1 note
·
View note
Text

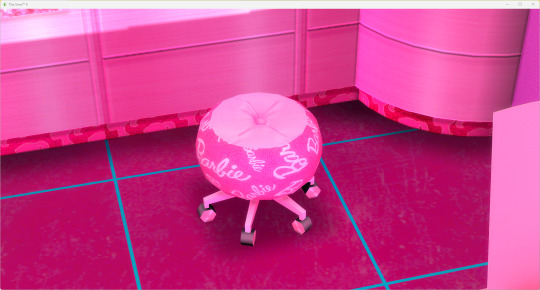
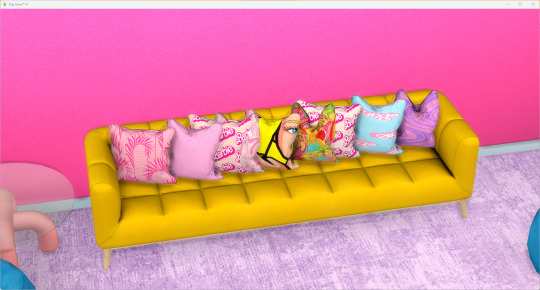
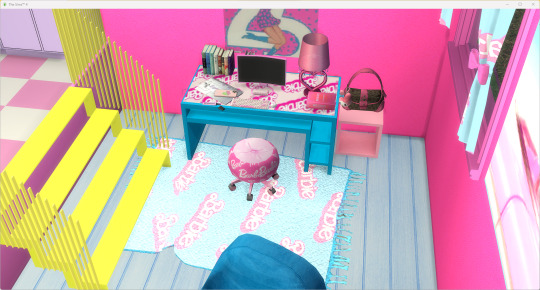
BARBIE COLLECTION N1.
The Barbie Collection x SeSeSimmi & A Barb's Closet <3
The Barbie Girl Collection Includes:
Barbie Graphic Tee and Comfy Cotton Joggers
Barbie Cocktail Flirty Dress
Leotard and Leggings
Leotard and Short Shorts
Sleep 2 pc.
Barbie Mini Dress
Metallic/Glitter Catsuit
Flirty 2 pc. Swimsuit
1 pc. Swimsuit
HotGirl Barbie 2 pc.
Velour Suede Matching Pant and Jacket Set with Matching Leotard top.
Barbie Dog Tag Chain


The Barbie Build Buy Mod Set <3
The Build Set Includes :
Brick Wall
Carpet
Elevator
Foundation
3 House Doors
House Garage Door
6 House Windows
Pool Rail
2 Roofs
2 Stone Walls
Terrain
The Buy Mode Set :
Barbie Print Blanket
Chair
Curtain
Desk
2 Dressers
Mirror
Piano
2 Pillow Sets
Pool Umbrella
Rug
Toilet
Toilet Paper Holder
Towel Rack
Wall Arts


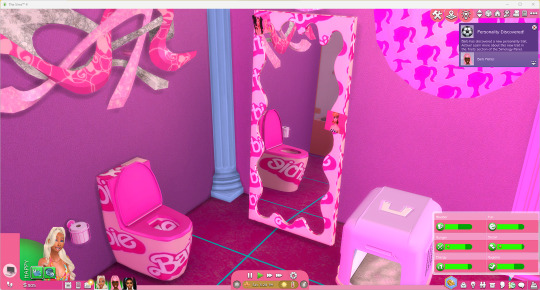
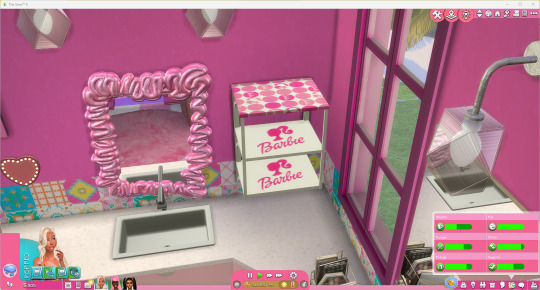


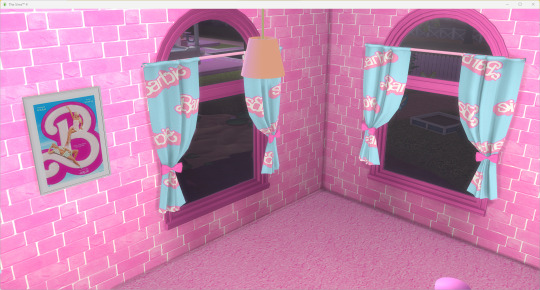
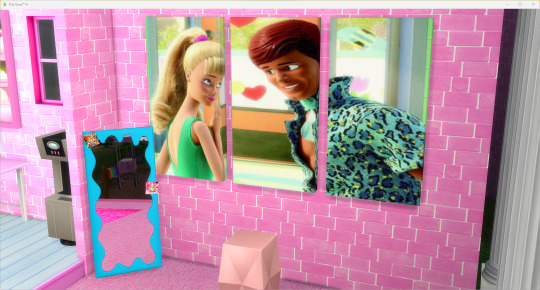
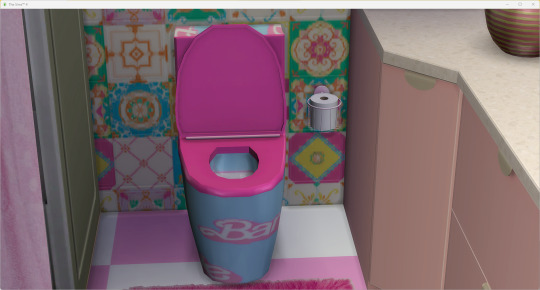
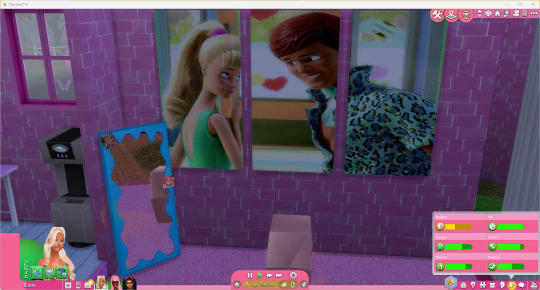

The Barbie Lane Build !!!


Download Build/Buy Set
Download Barbie CAS Collection
Download Barbie Lane House Lot
Thank You to EACH and Every Creator whom CC I used for my build <3
Thank Yall for yall continuous Support
PUBLIC OCT 3. 23
#sims 4#sims 4 cc#ts4cc#sims4ccfinds#Barbie Sims 4#Sims 4 Barbie#ts4 Barbie#BArbieTs4#Ts4Barbie#Barbie#Sims 4 Barbie CC#BarbieCC#BarbieCAS
160 notes
·
View notes
Text
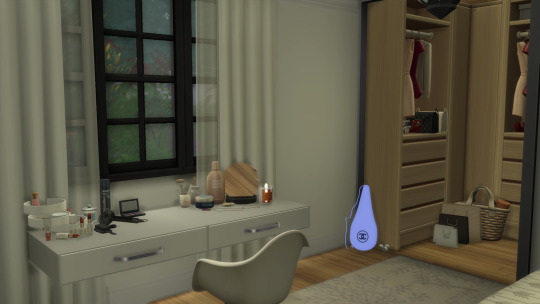
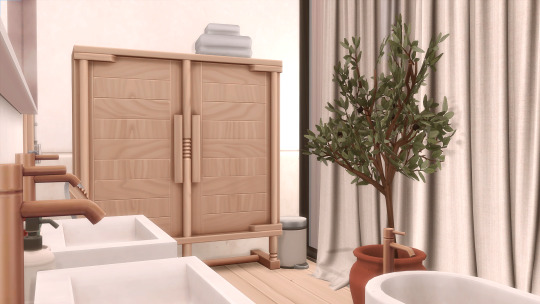
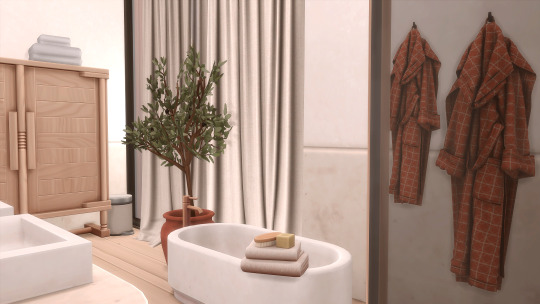
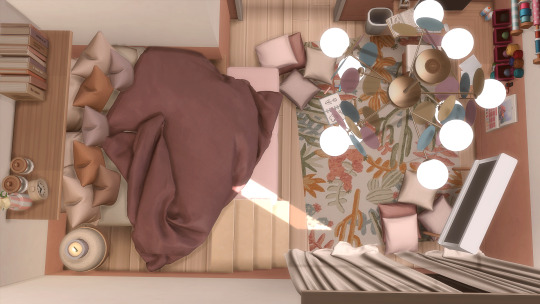
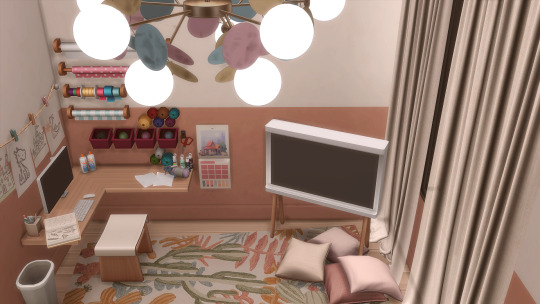
House Tour: 715 Falls Park Drive

Watch the House Tour
2 Bed 2 Full Bath
Mudroom
Coffee Nook
Walk in Closet
Price: §117,301
Lot Size: 20 x 20


Occupant: Jennifer Smallwood
CC/DLC List below along with my ramblings/notes on the build too :)
Gallery ID: SimsyCatx - tick to show custom content and use bb.moveobjects


I wanted this home to be super cosy with "Live Love Laugh" vibes. Very much decorated with a feminine eye with lots of cute B&M/Best Buy/cheap & cheerful clutter decor.
I have play-tested this and it all works except the two bathroom sinks because the sinks aren't designed for those counters. I'm guessing the counters are too high which puts the sinks too high to use. I did try to play around and try and get it working but couldn't manage it. It doesn't bother me (it kinda eliminates the dishwashing in the bathroom) so I left it for the ✨ aethestic✨ but they can easily be replaced if you want!
I've also removed the custom images in the bedroom (you can see them in the video), just because they are boudoir shots :)
DLC LIST:
Essential:
For Rent
High School Years
Cottage Living
Eco Living
Seasons
Get Together
Non-Essential:
Growing Together - lamps & light
Island Living - landscaping plant
Get Famous = stairs
Cats & Dogs- sculptures
City Living - Rug
Get to Work - sculpture
Dream Home Decorator- plant
Dine Out -plant
Spa Day - towel
Outdoor Retreat - condiment clutter
My First Pet Stuff - blinds
Romantic Garden - landscape flowers
Free Holiday Pack - lights
CC LIST:
by House of HarlixORJANIC
Brick Foundation
Sectional Sofa
Curtain Right & Left - Short
Cushion 1 & 2
BAYSIC
A good chunk of it
BAFROOM
Scrub
Bathtub
Shampoo
Towel Rack
Toilet roll
Soap Dispenser
Face Cloth
KICHEN
Rubber Plant
Olive Oil
Lovely Lady Bush
Cabinets Shallow
Counter
Wine Rack
Glass Pendant Short
Chopping Board Set
Bay Tree
HARLUXE
Sink
Beach Bag
Coffee Table
JARDANE
A good chunk
LIVIN' RUM
Stacking Box
Tiny Tray
Remote
Simsung Frame TV
Magazine
End Table
Book Series
by The Clutter Cat
Understairs Shelf - Short
by @simcredibledesignsOh Reykjavik
Paintings
Cushions
Zara
Bed
Nothing to Fear
Geomentric Shelves
Silky Intentions
Toilet Brush
Lotions
Nuance
Mugs
Scandi Fever
Sideboard
Plant 2
3 Cushions
TV
Rug
Naturalis
Hanging Plant tall
Hanging Plant Suculenta
Coffee Maker
Calligaris
Purse
Rug
Sandals
Purse Rack Hanger
Welcome Sculpture
Paper Shop Bag
Botts
Bag Rack
Country Coffee
Flower
Straws
Wall Mug Board
Painting 1 & 2
Deco Cutting Board
Capsule Tower
Capsules
Pomeriggio Candle
Jules
Sandals
Lipstick
Dream
English
Latitude
Make Up Trays
Toilet Brush
Shampoos
Cotton Swabs
Agata Candle - Small
Keep Life Simple
Bathroom Towel
Toilet
Bidet
Bedroom Mirror
La Femme
Painting Small
Go Trendy
Plant Bottle
Spotlight
Desk
Daydreamer
Pillow
Love the Less
Sphere
Glass Cloche Decor
Cotton Plant
4 Cushions
by @onyxsimsExcelsior
Toilet Paper
Toilet Paper Holder Free Standing
by @simkoosMorning Routine
Closet Clutter Shoe Box
Plant Mum II
Mini Plants
Eucalyptus v2
Cup of Straws
Metal Tongs
Tiny Living Room Television - Standing
Thermos
Makeup Palette
Hanging Purse
Shoe Box
Storage Container V1 & V2
Stacked Cups
Napkin Holder
Cup of Straws
by @pralinesims
Decal Posters 9, 8, 7, 5, 4, & 2
by @awingedllama
Blooming Rooms Plants
Paranormal Plants
Apartment Therapy v2
by @soloriyaBarber Shop Decor
Hair Mousse
Hair Spray
by @lapanemona
Harmony Set
by @syboubouCountry Kitchen
Glass Jars
Pot Holder
Olive Oil, Pepper & Salt
Induction Stove
Kitchen Sink
Millennial
Utensils Rack
Utensils Pot
Wall - Halftiles
Wall - FulTiles
Dish soap
Breadbox
Life Living Room
TV Remote
Magazine Pile
Candles
Life Bathroom
Razor and Cream
Toilet Deodorant
Soap Products
Bathroom Mens Products
Sophie Cushions
by @nynaevedesign
Breeze Plants & Planters
Kala Bathroom
Soap Dish
Towel V2 & V3
Toothpaste
Toothbrush
Soap Dispenser
Lyne House Number & Lights Set
Amber Bathroom
Glasses
by @redheadsims-cc
Nintendo Switch
by @sims4luxury2022 Christmas Collab
Star
Clock
Rug Collection
#8
White Siding Wood Wallpaper
Norrland Plain Wallpapers
Grassy Cobblestone Floor
Farmhouse Entry
Square Artwalls
Doormats
by @peanutbutterjelly02
Functional Photo Frames
by Mutske
Wonders of Ivy
by @peacemaker-ic
Matilda Mudroom
Pointless Renovation Short 2 Tile Arch
Colour Me Rug - Beige, White, and Brown
Gently Draping Curtains
by SnootySims
Asymmetrical Vase
Small Candle
Scent Diffuser
Home Design Books
Ceramic Vase
Ceramic Bowl
Candle Lamp
by @ravasheencc
Never Been Bedder
Platform Bed Frame - Double
Nothing Else Matters
Mattress - Double
Binge Innking Stacked Books
by Severinka
Mirror Arrows
Mirror Lotus
Cleo Hallway
Floor Mirror
by @xplatinumxluxexsimsx
Luxe Hair Tools Set
Wall Letters
Chanel Tennis Rackets
Chanel Tennis Racket Case
Chanel Tennis Balls
by @mechtasimsWelcome Home
Cookie tin
Clock
Moonstone Hanging
Dima Mirror
by @madameriasims4Back to Basics
Tile Wall
Pot Holder Wall & Flat
Wall Paint
Coffee Tin
Modular Shelves
by @kerriganhouse
Dormitory Fairy Lights
by @pierisim
Winter Garden
Pillow
by @networksims
Modera Coasters
Legacy Coasters
by @kliekie
Open Shower
by @arwenkaboomBluem Office
Books 7
Arran
Wall Tiles
Fridge
Floor Tiles
Dish Rack
by @pinkbox-anye
Holly
Trinket Dish
Jade Roller
by @sooky88
Bath & Bodyworks Candles
by NOSTYLEWOODLAND
NSWL Shampoo
Lobhe Mirror
Folfor Large Mirror
ALAS Wall Shelf
#ts4 home tour#ts4 builds#sims 4 houses#sims 4 lots#sims 4 cosy builds#showusyourbuilds#simblr#sims 4 interior#ts4 decor#I used a shit ton of CC again the list is so long but it's all beautiful and I can't not use it anymore#sims 4 cc builds
24 notes
·
View notes
Text


Sandtrap Flat
(CC List + Links)
World Map: Oasis Springs
Area: Bedford Strait
Lot Size: 30 x 20
Gallery ID: Simstorian-ish
Packs Needed
Expansion Packs
Cats & Dogs
For Rent
Get Famous
Get Together
High School Years
Game Packs
Dream Home Decorator
Parenthood
Strangerville
Kits
Desert Luxe Kit
Build Mode
Felixandre
Soho Pt. 2 (Light Switch Medium, Metal Door Medium)
Harrie
Klean Pt. 2
Klean Pt. 3
Kwatei Pt. 1 (Double Arch Short, Front Door Glass- Medium, Front Door Solid – Short)
Peacemaker
Rustic Siding
Pierisim
Tilable (Plaster)
Woodland Ranch (Wooden Ceiling)
Buy Mode
Anniee-sims
Lilah Prints (Mesh Needed)
Anye
Prio (Duvet)
Townhouse (Loopchair)
Awingedllama
Boho Living (Wooden Arch Floor Mirror)
BlueTeas
Curtains
Jasmine Teenage Bedroom (Pendant Lamp)
Allen Seating (Walt Ottoman V2)
CharlyPancakes
Lavish (Clothing Only)
ClutterCat
Baby Boo (Coloring Book, Pouf, Tulip Vase)
BubbleGum (Calendar, Color Candle I Big)
Busy Bee (Glass Jars, Pen Holder, Pencil Case)
Cozy Cocina
Fairylicious (Cushion Pile, Kids Art)
Sunny Sundae Pt. 1 (Candle Small)
Sunny Sundae Pt. 3 (Alarm Clock, Open Book, Vanity Mirror)
CowBuild
Minotti Ottoman I
Felixandre
Berlin Pt. 3 (Desktop)
Kyoto Pt. 3 (Bath Tray)
Shop The Look S1 (Magazine Stand, Tassel Rug)
Shop The Look S3
Soho Pt. 1 (Sideboard, Woven Rug)
Soho Pt. 4 (Ficus Planter, Stool)
Harlix
Baysic
Baysic Bathroom
Harluxe (AC Control, Book w Sunglasses, Light Switch, Makeup Tray, Mini Bar)
Jardane (Counter, Grill, Sink – Deep)
Kichen (Bowls, Glasses, Plates)
Livin’ Rum (Bookstand, Coffee Table Book, Frame Tv, Stacking Box)
Orjanic Pt. 2 (Foxglove Vase)
Harrie
Brownstone Pt. 1 (Shelves)
Brutalist Bathroom (Bathtub, Block Vanity – Centre/Curved Left & Right, Frame Mirror – Large, Rectangular Sink, Shower, Tiled Decorative Shelf)
Coastal Pt. 7 (Mirror)
Halcyon Kitchen
Shop The Look (Wooden Bowl)
Shop The Look 3 (Coffee Tables, Cushions, End Table)
JoyceIsFox
Simple Live #7 (Cooking Utensils, Double Chopping Board)
KiwiSims4
Blockhouse Dining (Pendants)
Piha Living (Chandeliers)
KKB
Citrus Room (Samsung the Serif Ver1)
Ledger Atelier
Mohan Living Pt. 3 (Sofa)
Nordheim Bathroom Pt. 1 (Bathrobe)
LittleDica
Delicious Kitchen (Paper Towel)
LorySims
2021 Ford Bronco
MyCupofCC
Bathroom Collection (Woven Bath Mat)
Nordica Sims
Art Poster 01
No Style x Woodland
Annika Meabh Sofa
Peacemaker
Creta Kitchen (Bar Fridge, Short Lineal Light Beam)
Ellipse (Ottoman)
Kitayama Bedroom (Half Moon Headboard)
Kassova Sectional
Matilda (Backpack, Jacket, Knit)
Pierisim
David’s Apartment Pt. 1 (Books 3 & 4)
David’s Apartment Pt. 2 (Nightstand, Open Book, Pile of Jumpers 2, Pile of Trousers 1 & 2, Shoes, Wooden Side Table)
MCM Pt. 3 (Metal Sconce 2, Narrow Rug Long, Narrow Rug Short, Wall Mounter Accent Table)
MCM Pt. 5 (Hair Dryer, Hair Straightener, Wigs)
Winter Garden (Olive Tree)
Pilar
Osaka Lamp Oval Large
Plush Pixels
Calm Sofa
Ravasheen
Knit Happens Clutter
Procrafination
RusticSims
Kind of Modular (Books, Deco Jar)
Loft Pt. 1 (Lampara de Pie Petrea)
Sooky88
Justina Blakeney x Loloi Area Rug
Mixed Modern Square Rug
Sundays
Canggu Pt. 3 (Pillows I)
Kediri Pt. 1 (Throw Pillow – Solids)
Juniper Terrazzo Floor C
Swell Pt. 1 (Bolster Pillow)
TaurusDesigns
Eliza Walk-in Closet (Clothing Only)
Tuds
CRIB (Pendants – Small/Medium)
Winner9
Yokeda Wall Lamp Triple
DO NOT REUPLOAD MY LOTS.
DO NOT CLAIM THEM AS YOUR OWN.
DO NOT PLACE BEHIND A PAYWALL.
Tray Files: DOWNLOAD
#simstorian#the sims 4#sims 4#ts4#cc#ts4 simblr#build#sims 4 build#oasis springs#bedford strait#sandtrap flat#residential lot#colorful#interior design
16 notes
·
View notes
Text
How to Clean and Take Care of Your Guns

Whether you're a competitive shooter or hunter or simply enjoy going to the shooting range on weekends, taking care of your firearms is essential. You need to get the best gun cleaner and make it a habit to clean your gun regularly. However, one of the biggest mistakes most gun owners make is not taking the time to learn how to clean and take care of their guns properly. In this article, we'll show you how to clean and take care of your guns, so they stay in pristine condition for years to come.
Why Clean Your Guns?
There are many reasons why you should clean your guns regularly. Here are some of them.
- Preventing Corrosion - When you leave your gun in its holster or case, the sweat and oils from your skin can cause corrosion. This is especially true if you live in a humid climate. Over time, this corrosion will damage your gun's finish and eventually eat through the metal, causing it to rust.
- Preventing Malfunctions - Dirt, dust, and powder residue can build up in the action of your gun and prevent it from functioning properly. This is especially true for semiautomatic pistols and rifles. If you don't clean your gun regularly, you may find that it starts to jam or misfire.
- Improving Accuracy - A dirty gun is an inaccurate gun. The powder residue, lead, and metal shavings that build up in the barrel of your gun can cause the bullets to deviate from their intended path. Therefore, if you want to keep your shooting skills sharp, you must clean your gun regularly.
Proper Gun Cleaning Technique
Now that we've gone over some of the reasons why you should clean your guns, let's take a look at the proper way to do it.
You'll need the following supplies:
- A gun cleaning kit
- Cleaning solvent
- Lubricating oil
- A clean rag or paper towel.
The Process
1. Disassemble Your Gun
https://www.youtube.com/watch?v=HovIM4JHb8I
This is the first and most important step in cleaning your gun. You need to completely disassemble the gun so that you can access all of the parts that need to be cleaned.
There are a few things you should keep in mind when you're disassembling your gun:
- Ensure that the gun is unloaded before you start: A fatal accident can occur if you try to disassemble a loaded gun. Therefore, you must check to ensure the gun is unloaded before you begin.
- Be familiar with your gun: You should only disassemble the parts of the gun that you're comfortable with. If you're not sure how to disassemble a particular part, consult the owner's manual or take it to a qualified gunsmith.
- Be careful with small parts: Small parts like springs and pins can be easily lost. Therefore, it's important to disassemble your gun over a clean surface where you can see all of the parts.
2. Clean the Barrel
The barrel is the most important part of the gun to clean because it's where the bullet travels. Therefore, you need to make sure that it's free of any obstructions. To clean the barrel, you'll need a cleaning rod, patch holder, and cleaning patches. First, attach the patch holder to the end of the cleaning rod. Then, dampen a cleaning patch with solvent and insert it into the patch holder. Next, insert the cleaning rod into the barrel and twist it a few times to ensure the patch touches the entire surface of the barrel. Finally, remove the cleaning rod and patch holder from the barrel and dispose of the used patch.
3. Clean the Receiver
The receiver is the part of the gun that houses the bolt and firing mechanism. To clean the receiver, you'll need a cleaning brush and cleaning solvent. First, use the cleaning brush to remove any dirt and debris from the receiver. Next, dampen a clean rag with solvent and wipe down the receiver. Finally, use a dry rag to remove any residual solvent from the receiver.
4. Clean the Bolt and Firing Mechanism
The bolt and firing mechanism are two of the most important parts of the gun to keep clean. To clean these parts, you'll need a cleaning brush and cleaning solvent. First, use the cleaning brush to remove any dirt and debris from the bolt and firing mechanism. Next, dampen a clean cloth with the cleaning solvent and wipe down these parts of the gun. Finally, use a dry cloth to remove any residue from the solvent.
5. Spray & Clean the Action
The action is the moving part of the gun that loads, cocks, and fires the weapon. To clean the action, you'll need a can of compressed air and cleaning solvent. First, use the compressed air to blow any dirt and debris out of the action. Next, use a rag dampened with solvent to wipe down the action. Finally, use a dry rag to remove any solvent residue from the action.
6. Discard Excess Oil & Rust
Excess gunk, oil, and rust can build up on your gun over time. Therefore, it's important to remove these substances from your gun on a regular basis. To remove excess oil and rust, you'll need some supplies. First, get a clean microfiber cloth. You'll also need a good quality gun oil and/or rust preventative. Spray a light amount of oil onto the microfiber cloth. Next, wipe down your gun, paying special attention to areas that are prone to rust, such as the barrel.
7. Inspect the Screws & Bolts
Tighten any screws or bolts that have come loose. If a screw is stripped, replace it with a new one. Having loose screws or bolts can cause problems with your gun's performance.
8. Clean the Magazine
Remove the magazine from the gun and disassemble it. Clean all of the parts with a microfiber cloth. Pay attention to the feed lips, as they can become bent or damaged over time. Once you're finished cleaning the magazine, reassemble it and put it back in the gun.
9. Test the Gun
After you've cleaned and inspected your gun, it's time to test it out. Take it to the range and fire off a few rounds. This will help you make sure that everything is working properly.
10. Store the Gun Properly
Once you're finished cleaning and testing your gun, it's time to put it away. Make sure to store it in a safe place, such as a gun safe or lockable cabinet. This will help prevent accidents and keep your gun in good condition.
Gun Cleaning Tips
Now that you know how to clean your gun, here are a few tips to keep in mind:
Never Use Any Steel Object to Clean Your Gun
Since you love your gun, you may be tempted to believe that using steel brushes or other objects will clean your gun better. However, this is not the case. In fact, using steel objects can damage your gun's finish and even cause corrosion. Therefore, it's important to only use the tools that are specifically designed for cleaning guns. These tools are made of materials such as nylon and brass, which won't damage your gun.
Don't Use Harsh Chemicals
You may be tempted to use harsh chemicals to clean your gun, but this is a bad idea. Harsh chemicals can damage the finish on your gun and even cause corrosion. Ensure that you only use gun-specific cleaners and oils. These products are designed to clean your gun without damaging it.
Be Careful with Solvents
When using solvents, it's important to be careful. First, make sure that the solvent is compatible with the finish on your gun. Second, always test the solvent on a small area of the gun before using it on the entire surface. This will ensure that the solvent won't damage your gun.
Use a Cleaning Mat
When cleaning your gun, it's important to use a cleaning mat. This will protect your work surface from oil and solvents. It will also help keep small parts from getting lost. Ensure you clean the cleaning mat often, as gunk and dirt can build up on it over time.
Sale
TekMat Ultra 44 - AR-15 -Gun Cleaning Mat, Black, One Size
- the soft thermoplastic fiber surface ensures your gun doesn’t get scratched
- extra thick, .25” vulcanized rubber will protect your work surface and prevent the mat from sliding
- keeps harmful chemicals, oil and dirt from penetrating down to your desk, bench or work area
- oversized design gives you plenty of room to disassemble your handgun and to clean it without having to move parts all over
- water-resistant, scratch proof, fade and oil resistant dye-sublimation printing
$23.99
Buy on Amazon
Invest in a Gun Cleaning Kit
A gun cleaning kit is a great investment. These kits contain all the supplies you need to clean your gun, including brushes, rags, and solvents. They usually come with a storage case, which helps keep everything organized. This is a great option for those who want to ensure they have everything they need to properly clean their gun.
Make It Regular
Cleaning your gun should be a regular part of your routine. Depending on how often you use your gun, you may need to clean it once a week or once a month. If you live in a humid climate or if you're regularly exposed to salt water, you may need to clean your gun more often.
Conclusion
Cleaning your gun is an important part of gun ownership. By following the tips in this article, you can ensure that your gun is clean and in good condition. Don't forget that guns are meant for personal protection, so ensure safety at all times.
Read the full article
28 notes
·
View notes
Text
a collection of eco friendly lifestyle ideas + swaps from various sources around the web:
reusable makeup remover wipes/cotton rounds - i use these and they’re way softer on the skin and bigger so you can use multiple times before washing either in sink or with a laundry load.
cutting products open when they are almost finished - will acc save a lot of money and means that even if buying sustainably is inaccessible to you (valid!) you can make products last for longer
freeze your overripe fruits for smoothies - all tastes the same, means you can make ur own cute lil smoothie mixes and they are often thicker!!
wash dry and reuse plastic bags - they’re almost unavoidable, but you can reuse them easily (i do this for my lunch!)
buy slow fashion - to some this might be too pricey which is totally fine!! but for my uk ppl: run and fly, lucy and yak, and fat face all look rly good and have fun clothing.
eat plant based food - you don’t have to be a vegetarian, you can do meat free monday or just choose the mcplant over a normal burger at maccies! quorn has acc aamzing chicken nuggets and often supermarkets have vegetarian aisles!
support your local farmers market - they often do not wax their apples and you will actually be able to support local businesses instead of big corporations! they also are just fun to go to :)
use a bar dish soap and a bamboo brush
to wash your body, buy bar soap and a net type pouch for it to be able to save it and exfoliate, often less expensive and not packaged in plastic, more scents or you can even make your own!! i’ve heard black african soap is rly good!
use a recycled plastic toothbrush over a normal one - you can use bamboo, but for me bc of sensory issues i can’t, so this is a nice compromise!
use beeswax wraps for food instead of clingfilm - they are more sticky and thick so accessible for people with motor issues (maybe, correct me if i’m wrong but less delicate?) and they have fun patterns and are available from lots of small businesses
instead of liquid hand soap, either use a bar soap or my preference would be a glass pump bottle and tablets that you can dissolve as i find bar soap hard to handle, but bar soap you can keep in tins!
use a reusable water bottle - you can fill them with fizzy drinks or energy drinks, there’s no rules against this!! they keep your drink cold and are sturdier then plastic, and definitely cheaper!! you can also draw on some or stick stickers on to make them more ‘you’!
use cloth napkins and ‘unpaper’ towels instead of rolls of paper towels
buy in bulk
use an ice tray or machine instead of buying big bags from the store - less heavy definitely, and you can add fruits and make ice pops with trays!!
use a refillable or natural deodorant- i use wild (uk ppl!!) and it smells nice, the refills are easy and come in paper and i have a rly cute metal holder!!
you can get reusable cupcake papers - esp for my ppl who like the lick the bottom, they won’t fall apart XD!
use a kindle - reduces the amount of paper books you have to buy, easily transportable, can lend books out to ppl and cheaper books!
bring your own lunch - esp if ur a picky eater like me, i often bring a cheese sandwich and some crisps places so i’m not stuck not eating or choking down food i don’t like and leaving leftovers, also means you can use your own plastic tupperwares instead of store bought single use things lol
grow your own things - i used to grow strawberries as a child and it was surprisingly easily, some ideas are bottle tower gardens and a kitchen herb gardens, you can also grow cat grass and catnip for all my cat parents out there :)
collect rainwater for your plants - just keep a mason jar in your backyard if you have one, or journey out when it’s raining and fill a jar, will last you a bit!!
that’s all i have for now but feel free to add more!!
10 notes
·
View notes
Link
Check out this listing I just added to my Poshmark closet: 🧻 Toilet Paper Holder 🧻.
7 notes
·
View notes
Text
I was in a new apartment. I remember first being in my hometown, going to visit my dad and my brother in our old house. It was nice, getting to see and talk to them again. Then I went to my new apartment with my boyfriend, and I was going to use the left microwave, but something was wrong with it. I think it had metal in it. Then the right microwave turned on with the door on, so I turned that off and put my food in. After it microwaved I noticed there was a metal paper towel holder, so I took that out. I noted how the microwave was still okay. Then I pulled some aluminum foil out from behind it to fix the sparking problem (wish that worked irl)
Then I checked discord and saw that an exfriend joined back. So I said, "Why are you here." They responded, and I essentially told them they aren't welcome here. Then my bf came down, grabbed my giant hat that was finally returned to me, and said it(the bf) was going to the exfriends house. I was like, "why, they're bad." And it said "well our friends said they're nice now" so I said "but that's how they manipulated us" then I woke up
0 notes
Text
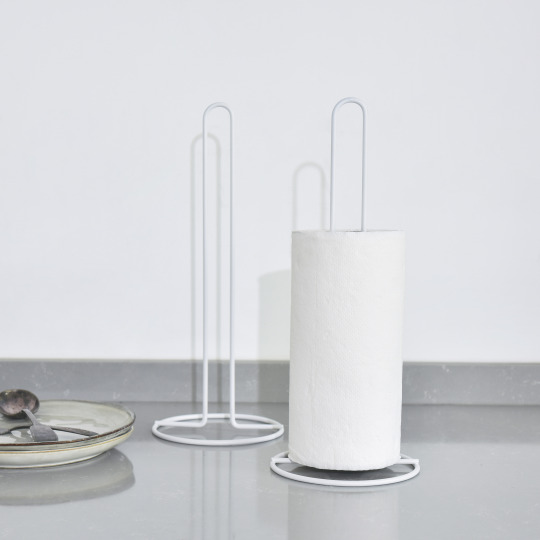
Wholesale Modern Space-Saving Design Kitchen Roll Holder Paper Towel Holder
Promotion:Special 30% Wholesale Discount
Material:Sturdy Metal Wire
Colour Options:Powder Spraying White or Black
Size:14.5 x 14.5 x 36CM
SKU:ESMS-004
Key Benefits:
Sleek Modern Design: A minimalist and modern addition to your kitchen decor.
Space-Saving: Occupies minimal space, leaving more room on countertops or tables.
Versatile Compatibility: Accommodates standard and extra-large paper towel rolls from various brands.
Product Description:
Introducing our Kitchen Roll Holder Paper Towel Holder, a functional and stylish addition to your kitchen setup. Crafted from durable metal and available in powder-spraying white or black, this holder offers a sleek and space-saving solution for storing paper towels.
The simple yet modern design seamlessly blends with your kitchen decor. Measuring 14.5 x 14.5 x 36CM, it occupies minimal space on your countertop or dining table, leaving more room for food preparation and serving.
Designed to accommodate standard and extra-large paper towel rolls, this holder provides versatility for various brands. Whether you require a quick clean-up or want to keep paper towels within easy reach while cooking, this holder meets your needs.
Elevate your kitchen organization with our Kitchen Roll Holder and Paper Towel Holder. Its sleek design, space-saving functionality, and compatibility with various paper towel sizes make it a practical and stylish addition to your kitchen essentials.
Keywords:
Wholesale Kitchen Roll Holder, Paper Towel Holder, Modern Design, Space-Saving Functionality, Versatile Compatibility
SKU
ESMS-004
Materials
Metal Wire
Size
14.5*14.5*36CM
Colour Options
Powder Spraying White/Black
Package
1PC With Color Card, 24PCS/Carton
[Ordering & Service]
MOQ
2000 PCS
Sampling
7-10 days
Trade Term
FOB/CIF/DDP
Shipping Port
SHENZHE
0 notes
Link
Check out this listing I just added to my Poshmark closet: Bon Appétit” Rae Dunn Paper Towel Holder with Gnome Cutout.
0 notes
Link
Check out this listing I just added to my Poshmark closet: BNWT Umbra nickel paper towel holder.
0 notes
Text
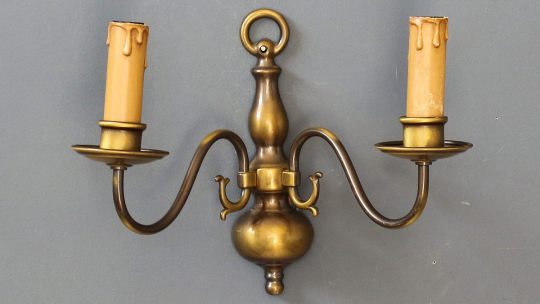
4 Simple Ways to Clean Candle Wall Sconces
New Post has been published on https://wallcandleholders.com/simple-ways-to-clean-candle-wall-sconces
4 Simple Ways to Clean Candle Wall Sconces
Over a period of time, your candle holders can become dirty due to accumulated wax and dust. When dirty, the candle holders lose their shine and look dull. Irrespective of the type of candle holders you own, you can easily restore them to their former glory.
So, it is a good idea to clean your candle holders rather than throw them away when they look ugly due to the soot and wax that collects inside the candle holder.
Table of Contents
1 How to Clean Wall Candle Holders
1.1 1. Cleaning The Exterior of Wall Candle Holders
1.2 2. Cleaning The Interior: Butter Knife and Warm Water Method
1.3 3. Blow Dryer Method
1.4 4. Warm Water Method
2 Watch Cleaning Videos
3 Where to Buy Candles
4 Wall Sconces Cleaning Supplies
How to Clean Wall Candle Holders
From wooden candle holders and glass candle holders to pillar candle holders and wall candle holders, the cleaning process is the same. However, you have to be extra cautious when cleaning your wall sconces, else you run the risk of damaging your expensive lighting fixtures. Here are some of the ways you can use to clean wall candleholders.
1. Cleaning The Exterior of Wall Candle Holders
Clean the exterior of wall sconces with a dry soft cloth. Avoid using a metal cleaning solution on a wall sconce as these solutions contain abrasives that may harm the finish on these delicate candle holders. If your wall sconce has any wood components, you can use wood polish but avoid applying wood polish to metal holders. Wipe away any residue that is left behind from the polish.
2. Cleaning The Interior: Butter Knife and Warm Water Method
Scoop out wax inside sconces using a butter knife. It may be hard to scoop out wax from narrow edges using a butter knife. So, you have to remove big pieces that pop out easily. It will clean most of the wax from the candle holder. Any left out wax can be cleaned using warm water. Pour warm water inside the holder and let it be there for at least 30 minutes. It will soften the wax that is inside the wall candle holder fully. Use the knife again to pull out soft wax.
3. Blow Dryer Method
In a wall socket, plug a blow dryer with a high heat setting. Place the candlestick on top of three to five layers of paper towels. Turn on the blow dryer and direct it towards the firm wax until it melts, then absorb the melted wax with paper towels. Throw away the paper towels in the dust bin. The process is quite simple and makes your candle holders look totally new.
4. Warm Water Method
You can use the warm water method to clean any type of wall candleholder, namely glass candle holders, wooden candleholders, or metal candle holders. However, you have to be careful not to put boiling water inside glass candle holders as it may break the glass. If there is a competition to rate candle holder cleaning methods, the warm water method will win because no matter what method you use to clean your candle holder, you will require a bit of warm water in the end to clean the spill overs.
Watch Cleaning Videos
Learn how to clean candle sconces with these youtube videos:
https://stoffnagel.com/wp-content/uploads/2022/05/video_cleaning-guide_solid-brass.mp4
Where to Buy Candles
efavormart.com
etsy.com
Wall Sconces Cleaning Supplies
walmart.com
amazon.com
Conclusion
The methods listed above are so simple that you need not any specific training to carry out the processes efficiently. With a little practice and carefulness, you will learn the art very quickly and make your wall candleholders shine like new. However, Irrespective of the method you use to clean your candlestick, it is important you have a sturdy ladder or base to stand on. This will help avoid harm from falling to the floor.
0 notes
Link
Check out this listing I just added to my Poshmark closet: Floating Shelves, Bathroom Shelves with Metal Wall Decor Set of 3, Rustic Wood.
0 notes
Text
How to Clean and Maintain Your Makeup Brushes
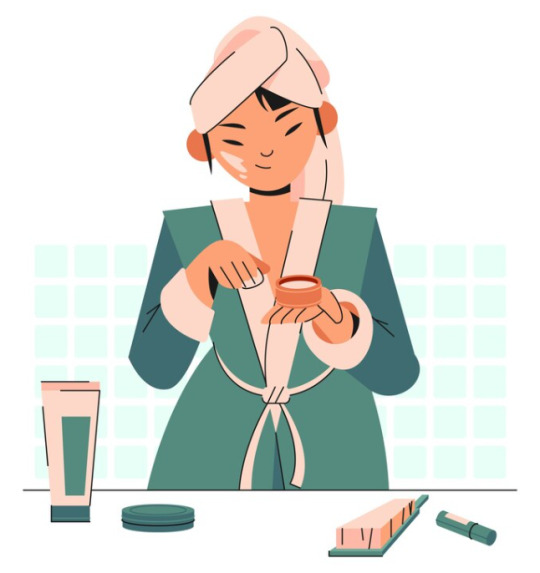
Introduction: Makeup brushes are essential tools for achieving flawless makeup application, but they can quickly become a breeding ground for bacteria and impurities if not cleaned and maintained regularly. Properly cleaned and well-maintained brushes not only ensure better makeup results but also contribute to the overall health of your skin. In this article, we'll provide a step-by-step guide on how to clean and maintain your makeup brushes effectively.
Step 1: Gather Your Supplies: Before you begin cleaning your makeup brushes, gather the following supplies:
Warm water
Mild shampoo or brush cleanser
A shallow bowl or container
Towels or paper towels
A brush holder or drying rack
Step 2: Rinse the Bristles: Begin by running lukewarm water over the bristles of your makeup brush. Be cautious not to wet the handle or the ferrule (the metal part) of the brush, as water can weaken the glue that holds the bristles in place.
Step 3: Create a Cleaning Solution: In a shallow bowl or container, mix a small amount of mild shampoo or brush cleanser with warm water. Swirl the brush gently in the solution, working up a lather. Avoid using harsh soaps or detergents, as they can damage the bristles.
Step 4: Clean the Bristles: Gently rub the bristles of the brush against the palm of your hand or the textured surface of a brush cleaning pad. Continue to do this until the lather appears makeup-free and the water runs clear.
Step 5: Rinse Thoroughly: Rinse the brush under running lukewarm water again, ensuring all soap residue is removed. Gently reshape the bristles with your fingers as needed.
Step 6: Remove Excess Water: Gently squeeze any excess water from the brush using a clean towel or paper towel. Be sure not to pull or twist the bristles, as this can damage them.
Step 7: Dry Properly: To maintain the shape and longevity of your brushes, it's essential to allow them to dry correctly. Lay your brushes flat on a towel or use a brush holder or drying rack to keep them upside down. This prevents water from seeping into the ferrule and loosening the bristles.
Step 8: Reshape and Fluff: After your brushes are completely dry, gently reshape and fluff the bristles with your fingers to ensure they're in their original form.
Additional Tips:
Frequency: Aim to clean your makeup brushes at least once a week for brushes used with liquid or cream products and once every two weeks for powder brushes.
Avoid Overloading: When applying makeup, try not to overload your brushes with product. This reduces the amount of cleaning required and helps maintain the brushes' quality.
Invest in Quality Brushes: High-quality brushes are often easier to clean and maintain, and they last longer with proper care.
Consider Brush Guards: Brush guards are mesh sleeves that can help protect the shape of your brushes during drying.
Replace When Necessary: If your brushes start shedding bristles or become misshapen despite proper care, it may be time to replace them.
Conclusion: Cleaning and maintaining your makeup brushes is a crucial step in your beauty routine that should not be overlooked. By following these steps and adopting a regular cleaning schedule, you can keep your brushes in excellent condition, ensure flawless makeup application, and promote healthy skin. Clean brushes not only enhance your makeup results but also contribute to the longevity of your beauty tools.
0 notes
Text
External Window Washing Tips and Tricks
Cleaning outside windows can be a daunting task, especially when you’re cleaning tall windows on a multi-story house without the benefit of a ladder. Using the right tools, techniques and cleaning products will make it easy to clean your exterior windows with great results. Read this article about External Window Washing to learn tips and tricks for getting your windows as clean and clear as possible.
Start with rinsing the windows with your garden hose (or use your indoor shower, if you have one). Use a water pressure nozzle to rinse all surfaces, and a soft, rubber-bladed squeegee to dry the windows. Ideally, work on a cool day when the wind won’t blow the soapy water and window-cleaning solution back onto your freshly cleaned windows.
A good quality squeegee will make the difference between streaky, smudge-prone windows and a clean, clear finish. When buying a squeegee, make sure it fits the window pane you’re washing. The squeegee should be at least as long as the width of the window, and it should fit snugly in the metal channel. A professional window cleaner may use a hacksaw to cut one to size, but it’s possible to get a good DIY squeegee from a hardware store or home improvement center.
Adding a bit of cleaning solution to your squeegee can help with stubborn, sticky spots. Spray the spot with a water-based cleaner and let it soak for a few minutes, then wipe it off with a microfiber cloth. If you’re removing paint specks or labels, use a razor blade mounted in a holder to avoid scratching the glass.
If your windows are particularly dirty, consider using a power-washer to scrub them. Pick a soap or concentrate that’s power-washer safe and recommended for windows, and follow the manufacturer’s directions to use the washer. Spray the window with several coats of the cleaner, allowing it to soak in for a few minutes. Then, rinse the windows thoroughly with the hose or by running your power washer over the surface in an angled, upward motion to lift and remove dirt from the glass.
When finished, dry the windows with a clean, lint-free towel or black-and-white newspaper pages. Be careful not to let the paper or towels touch the glass, as they can leave residue that’s difficult to remove with a squeegee. Be sure to keep the squeegee in contact with the top corner of the window when drying it, and dry in a backward S pattern (if you’re left-handed) to prevent drips or water marks. Finally, clean and dry the squeegee at the end of each pass. You’ll be surprised at how much cleaner your windows will look after the effort. Cleaning the outside of your windows will give them a fresher, cleaner appearance and improve the appearance of your entire home. With the right equipment and techniques, this is a job that almost anyone can do with a little practice. So, go ahead and give your windows a spring cleaning—it’ll be worth the extra effort!
Hi 2 Lo Exterior Cleaning is a company that specialises in Gutter Cleaning & Exterior Cleaning services for both residential & commercial customers. We use professional & industrial equipment to make sure the job is done efficiently, to a high standard & above all else, safely. Our company specialises in Gutter Cleaning, Installation of Gutter Guard & Gutter Brush, Roof & Solar Panel Cleaning, House Washing, High Pressure Cleaning, External Window Washing.
#pressure washing melbourne#external window washing#external window washing services#external window washing melbourne
0 notes
Text
A car's battery is one of its most important components - without it, the engine won't start. Over time batteries gradually lose their ability to hold a charge, eventually requiring a change. Swapping out a dead battery for a new one is a straightforward DIY repair that most drivers can tackle themselves with some preparation and care.
This guide will outline the complete process of how to safely change or replace your car's battery, including steps to remove the old battery, install the new one, handle battery corrosion, and properly dispose of the old unit. With some basic tools and this tutorial, you can swap a new battery into your car and be back on the road.
Steps to Change a Car Battery
Changing your car's battery involves just a few main steps. Here is an overview of the process before diving into details:
Prepare your replacement battery and gather required tools
Disconnect the negative terminal, then positive terminal
Remove the hold-down clamp or bracket
Lift out the old battery and place it aside
Inspect the battery tray and clean any corrosion
Lower the new battery into the tray
Re-attach the hold-down and reconnect terminals
Dispose of the old battery properly
Keep reading for specifics on safely executing each step involved in this important repair.
What You'll Need to Replace a Car Battery
Before swapping in a new battery, gather the following required replacement part and tools:
New battery - Match battery specifications like group size and cold cranking amps to your vehicle's original battery
Wrenches and sockets - To loosen clamps and terminal bolts
Battery terminal cleaner - Removes corrosion from battery posts and clamps
Baking soda and water solution - For cleaning corroded battery tray if needed
Gloves and safety goggles - For protection while handling battery acid
Masking tape and marker - To label which cable goes to positive/negative terminal
Also have paper towels, a wire brush, flashlight, and the owner's manual for your vehicle on hand.
Step 1: Disconnect the Negative Terminal
Locate the negative (-) battery terminal and loosen the bolt or clamp that secures the cable end to the post. Use an appropriate socket or wrench that fits.
Carefully detach the cable end from the negative terminal and move it away. Avoid letting the cable touch any metal parts while detached.
Tip: Mark the negative cable end with masking tape so you remember which is which when re-connecting.
Step 2: Disconnect the Positive Terminal
Next, locate the positive (+) battery terminal. Loosen and detach the cable end from the positive post in the same manner as the negative.
Avoid contacting any tools to both posts at the same time, which could cause dangerous sparks. Also avoid leaning over the battery.
Step 3. Remove Battery Hold-Down
Once both battery cables are detached, you can go about removing the battery from the tray or holder. There is typically a hold-down bracket or clamp that secures the battery.
Loosen the nut or bolt that fastens the hold-down until you can remove it. Set it aside somewhere secure.
Step 4. Lift Out Old Battery
With cables detached and hold-down removed, carefully lift the battery straight up and out of the tray or holder. Place it off to the side on a protected surface while you inspect the battery tray.
Note: Batteries contain dangerous sulfuric acid so wear gloves and avoid tilting or tipping one.
Step 5. Inspect and Clean Battery Tray
Check the battery tray housing for any corrosion, dirt, or debris that may have accumulated. Use a wire brush to gently scrub away any obvious corrosion on the tray or cable connection points.
For more stubborn deposits, create a baking soda and water paste to neutralize acid corrosion. Rinse everything clean before moving on.
Step 6. Install New Battery
Once the tray is prepped, lower your new replacement battery into the holder, orienting it the same dir
ection as the old battery sat.
Make sure the terminals line up properly with where the cable connections attach. Don't force it if it doesn't seem to fit - double check you have the correct group size battery.
Step 7. Re-Attach Hold-Down
With the new battery seated properly in the tray, re-attach the hold-down bracket or clamp and tighten the nut or bolt securely to secure the battery in place and prevent shaking. Don't overtighten.
Step 8. Re-Connect Battery Terminals
The last step is to re-attach the battery cables, starting with re-connecting to the positive terminal first. Remove any protective cover from the post, and affix the positive cable end securely on the post. Tighten down the bolt.
Then reconnect the negative terminal cable end to the negative post in the same manner. Ensure connections are snug but not overtightened.
Tip: A simple way to remember the order is "positive before negative" when re-connecting.
Step 9. Dispose of Old Battery
Once the new battery is installed, safely dispose of the old battery according to hazardous waste guidelines in your region. Many auto parts stores will accept old batteries for recycling.
Never put an automotive lead-acid battery in the normal trash. The components are hazardous and environmental unsafe when landfilled.
And that concludes the major steps involved in replacing your car battery yourself. Pat yourself on the back for an automotive repair job well done!
FAQs
Still have questions about successfully swapping your car battery? Here are answers to some commonly asked DIY questions:
What tools do I need to change a car battery?
The basic tools needed are wrenches or sockets to loosen clamps, battery terminal cleaner, wire brush, flashlight, baking soda and water solution, gloves, and safety goggles. Refer to your manual for any specialty tools.
How do I know what new battery to buy?
Check your owner's manual for the right specifications like group size and cold cranking amps rating that match your vehicle. An auto parts store can also look up the proper replacement if you don't have the manuals.
Can I change a car battery with the cables still connected?
No, you should always detach the negative then positive cables before attempting to remove the battery. Failing to do so risks very dangerous electrical shorts and sparks.
Where is the negative terminal on a car battery?
The negative battery terminal will be marked with a "-". It may be black in color. The positive terminal will be red and marked "+". Always disconnect negative first.
What do I do if battery acid gets on me?
Immediately rinse any skin the acid contacts thoroughly with water. Then wash again with soap and water. Seek medical help if you experience any burns or eye irritation.
Replacing a worn out battery is a straightforward repair you can now confidently tackle yourself after reading this tutorial. Just be sure to protect yourself and follow all safety steps.
Choosing the Optimal New Replacement Battery
Not all batteries are the same, so you’ll want to choose the optimal new unit to power your car for years to come. Follow these tips:
Match Your Vehicle Specs
Your owner's manual lists the original battery's key specifications:
Group size - The dimensions and tray configuration
Cold cranking amps (CCA) - The power rating
Find a new battery with identical group size and equal or higher CCA to ensure proper fit and performance. Using the wrong group size risks damage.
Buy from Reputable Brands
Stick with established battery brands known for quality and durability, like:
DieHard
Duralast
EverStart
Optima
Avoid cheap no-name batteries that likely won’t hold up over years of use.
Consider a Maintenance-Free Battery
Modern batteries often tout "maintenance-free" designs that never need refilling fluid. This avoids a common failure point as batteries age.
Check the Warra
nty Term
Opt for batteries that offer longer free replacement periods in case of early failure, such as 5-year or 6-year warranties. This added protection is reassuring for DIY installs.
Buy at a Local Auto Store
Purchasing at local auto parts retailers allows experienced staff to guide you in choosing the optimal new battery for your vehicle's specs and climate.
Choosing the right replacement battery ensures your car starts reliably for years before needing another change. Investing a few extra dollars buys extended life and performance.
Signs It's Time to Change Your Car Battery
Don't wait until being stranded with a completely dead battery. Watch for these warning signs it's time for a new battery:
Difficulty starting or slow cranking
Dimming headlights when idling
Battery light coming on while driving
Reduced battery voltage
Cracked or bulging battery case
Corroded battery posts/connections
Scheduling a battery swap when you first notice these symptoms prevents being left with a completely unusable vehicle. Don't risk waiting until your battery leaves you stranded.
Safety Tips for Changing a Battery
Working near automotive batteries poses some inherent hazards. Keep these safety tips in mind:
Wear gloves and goggles at all times when handling the battery
Avoid touching eyes while working near batteries
Use insulated wrenches to avoid sparks or shocks
Work in a well-ventilated area away from open flames
Take care not to short the positive and negative terminals together
Avoid leaning over the battery - gases can ignite
Wash hands after handling batteries
Keep batteries upright and secure to avoid spills
Store old batteries safely before disposal
Exercising caution and wearing proper protective equipment minimizes the risks of changing your own battery.
Disposing of Used Car Batteries
Once you've swapped in a fresh new battery, responsible battery disposal is important. Some guidelines:
Many retailers that sell new batteries will accept trade-ins of old units to send for recycling. Take advantage of this.
Check for free county or city hazardous waste collection events accepting batteries.
Some repair shops will take old batteries. Call around.
Use warning tape to insulate the battery terminals before transport.
Never throw automotive lead-acid batteries in the normal trash.
Proper battery disposal keeps hazardous components like lead and acid out of local landfills and the environment. Do your part to recycle it.
Replacing a dead or dying battery is one of the most convenient DIY repairs you can perform to keep your car running reliably. Follow the steps here and you'll be prepared to swap out this important component.
#Wiack #Car #CarInsurance #CarRental #CarPrice #AutoLoans
0 notes
Last Seen Blogs

mcpanterablog
Mc Pantera


cyllex
Anto

yourdlinkrouterlocal
DlinkrouterLocal

thekaterz
Some smart and witty impressive Blog name.