#nendoroid custom
Text
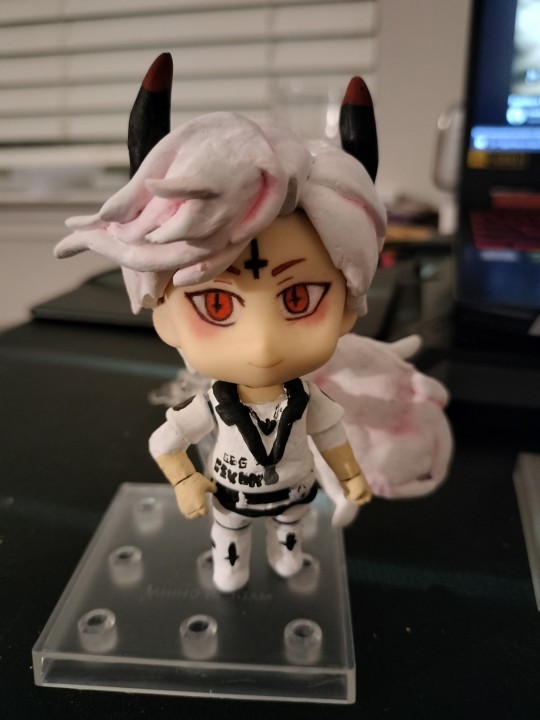

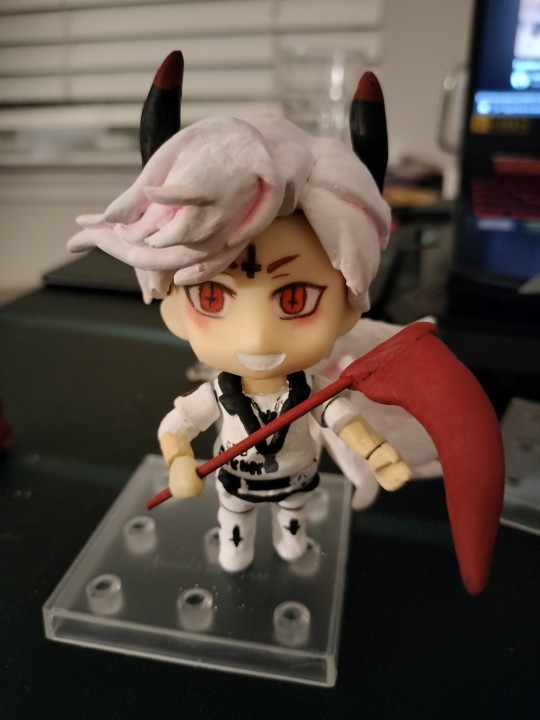
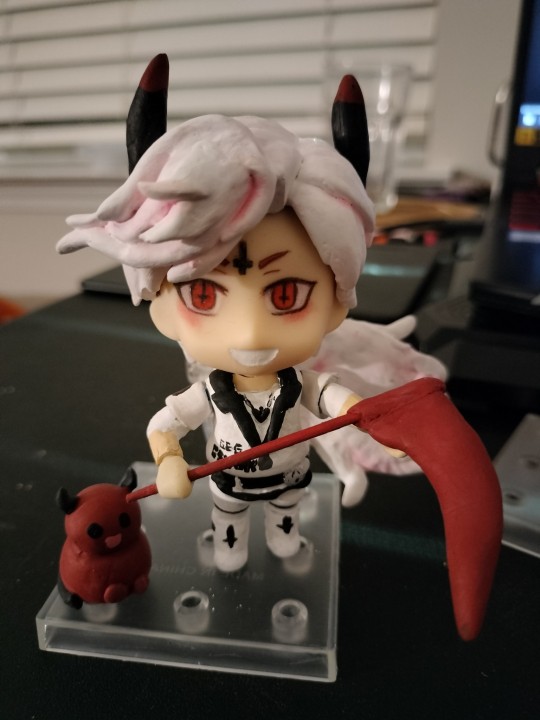

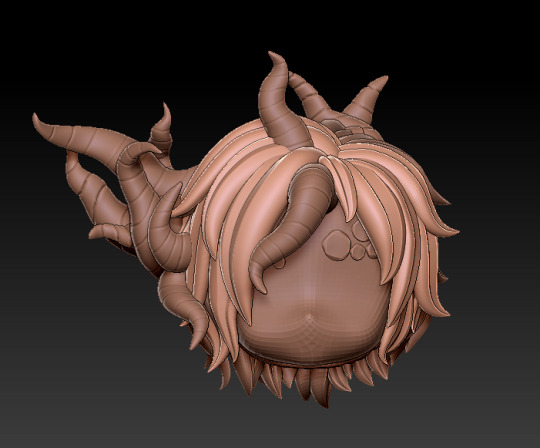
Probably my second biggest project, I finished my custom nendoroid of Satan from the mobile game "What in Hell is Bad?", or Hellbad for short! He was another character I made on a whim, but I enjoyed making him (even though the layers of white killed me 😞)
He comes with two face plates, his blood scythe, and a mini Ppyong! Well, a regular sized Ppyong technically!
#what in hell is bad#hellbad#whb#whb satan#satan#whb ppyong#nendoroid custom#crafters of tumblr#crafting#sculpting#menacing legs art#artists on tumblr#custom nendoroid
27 notes
·
View notes
Text
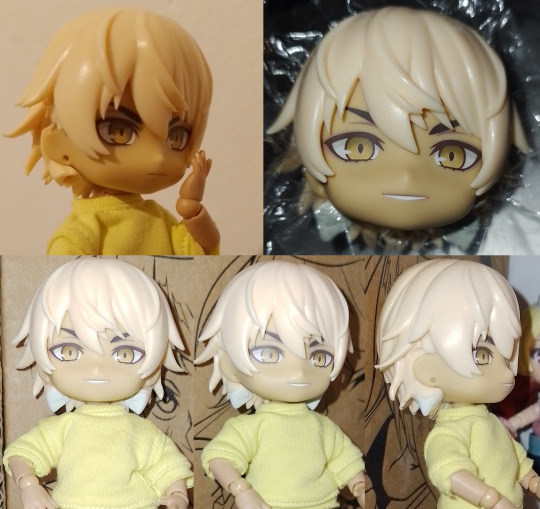
nendoroid Morgott WIP


#my wips#morgott#nendoroid custom#ob11doll#morgott the omen king#elden ring#nendoroid doll#nendoroid
44 notes
·
View notes
Text
Custom HIOMAIKA(+Dex)
After months of getting stuff they're finally done! Got some nendo parts along with YMY dolls to make them real.
Before anything was done and Maika had her final clothes:

After the paint was done and Maika got her clothes:
To be honest I barely had to do much stuff in terms of applying epoxy over to make things or sand areas.
They still are far away from being perfect since they could have had way more sanding for a better cleaner look and the colors could have been better if I didn't try to keep touching them while they dried orz
Still, this is good enought to me!
Edit: huge thanks to @/chorva_art on twitter for recommending materials and possible faces that could be used for Maika I watched some videos of customs but if she didn't tell me materials or what could be used to do this stuff idk if I'd have gone through it at all lol
Materials used for the extra parts:
Tamiya Epoxy Putty (Smooth Surface), the one that takes 12 hours to dry;
Sanding Paper that I didn't use as much as I should;
Tamiya Primer;
Tamiya LP-43 (pearl white), LP-52 (clear red), LP-8 (pure yellow), LP-10 (thinner) and LP-65(rubber black);
Acrilex Thinner since i ran out of the Tamiya after making a mistake and using thinner without paint;
Acrilex Fixative Varnish (spray and liquid);
Super Glue;
Mini Oxygen Injector ForeverLily.
The colors weren't the best for painting hair since they are kinda better for cars in the case of LP-52 and LP-43, so any weird thing is due to that. However the effect that LP-43 and LP-65 gave when mixed for Dex's gray hair did have a nice result.
I also ended up breaking the mini oxygen injector's paint/liquid supplier because i dropped it twice in different days so this post will be a warning tale 😔
Hair styles used:
Maika: Nendoroid Doll Alice for the front and Eris Boreas for the back
Hio: Rider/Ozymandias
Dex: Luo Tianyi this wasn't on purpose at all I swear
MAIKA's clothes progress
Maika had parts of her clothes custom made by a relative since her outfit wasn't as simple to get by purchase only unlike the other two.
Dex and Hio's outfits can still get some accessories for a complete version compared to how they are at the moment aside their coats.


This relative can't draw so I had to help by drawing a reference and staying with them while they sewed to make sure it was what I had in mind for this.

Because of that it took quite a while since they kept remaking stuff until it got done in a way they liked and we could only do it once in a while. For the early photos the glovelettes were pretty much not used since we were still figuring out how that would work 😅

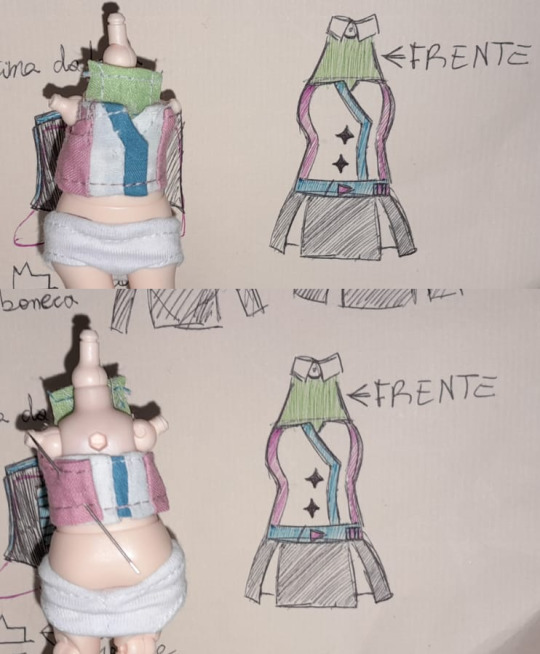
Maika's clothes have small snap fasteners to close them.

And here's final look for Maika's clothes:

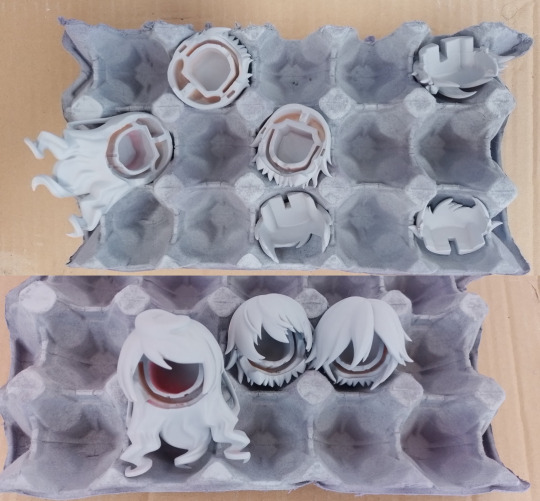
How steps went by during these past few months:
Getting the hair parts → start sanding them → finishing Maika clothes → starting applying epoxy and adjusting more with sanding → priming → painting → varnish
Hair progress

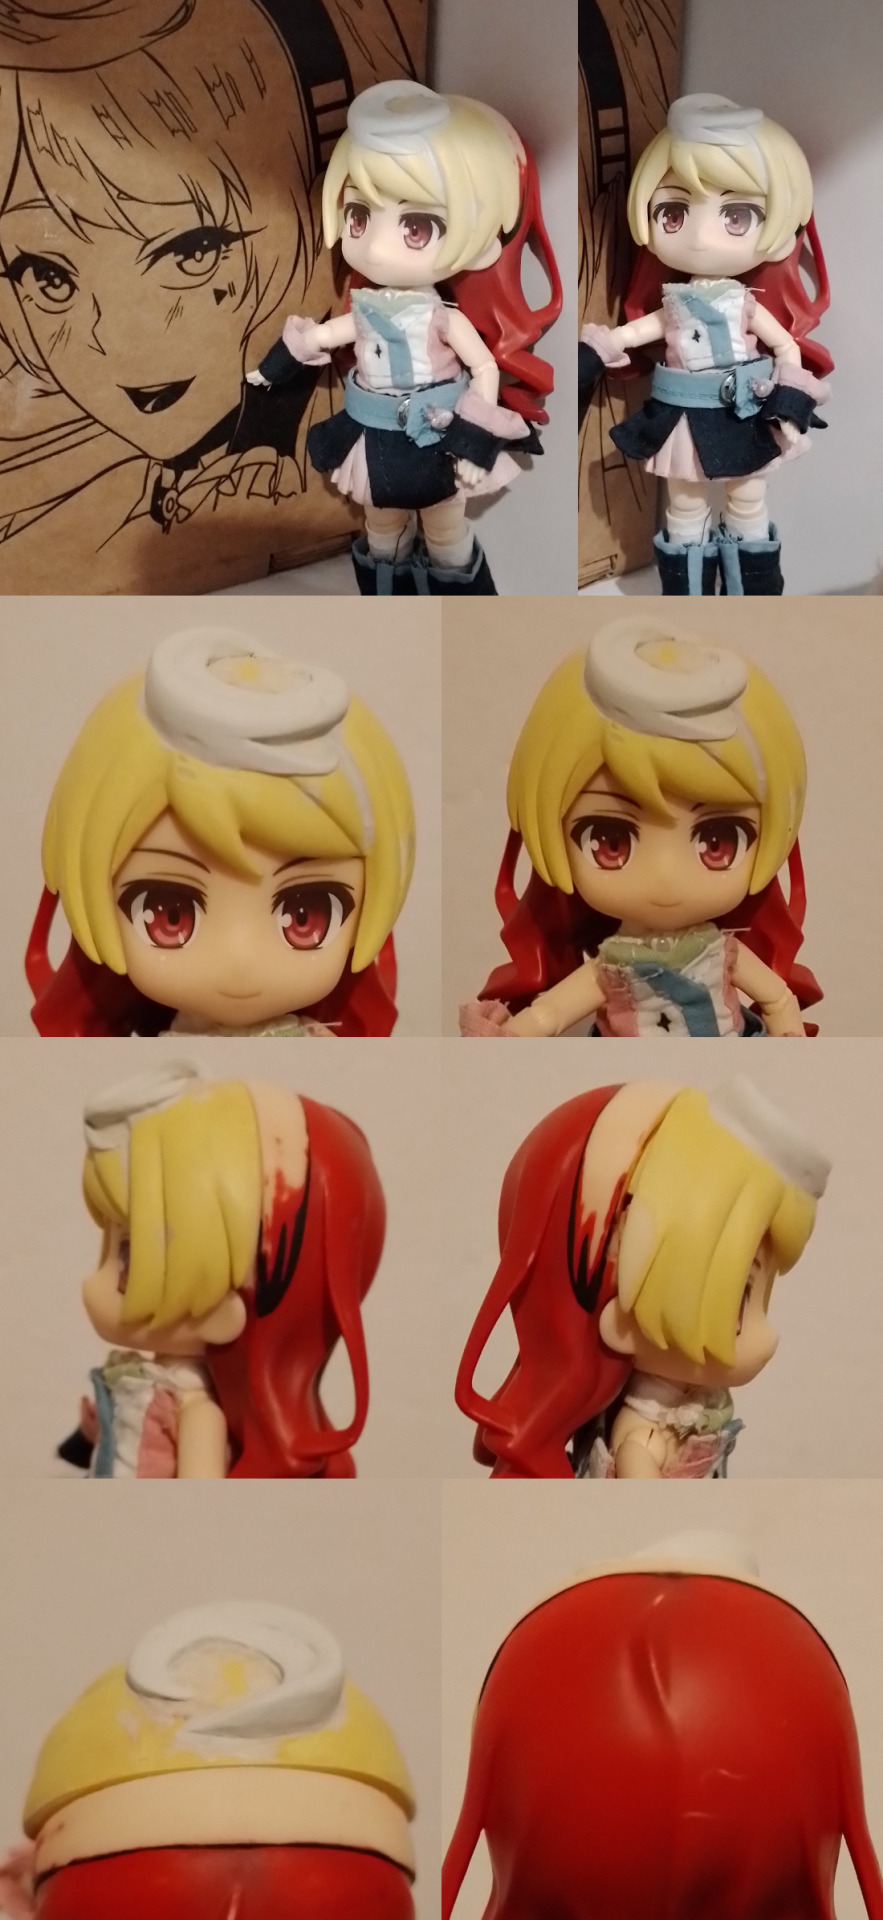
Maika had to get her hair roll and some patching up to hide the headband of the back hair.

As for Hio he only missed his side hair and the slightly long hair on the side.
This is one of the areas that I didn't sand as much as possible so it could have been better, but since it barely shows up it didn't make a big difference.
His "long" hair part fell down so super glue was used to put it back in place. During the painting process his side hair also fell so, once again, super glue saved the day.

Meanwhile Dex had some big holes to cover, he was the first one to be "completed" from the first day since the main issue that had to be done was the easiest to fix compared to Maika's hairband and Hio's side hair.
These holes were what gave away that this was Tianyi's hair since either it was some long hair part that were attached to it or twin tails, which was the keyword used to figure out who was the hair donor 😅
There also were some holes in the back of the head so these helped a lot to make sure that it really was her.

Applying primer was ok without many issues ignoring that I didn't want to sand more, the biggest issues happened over the painting.
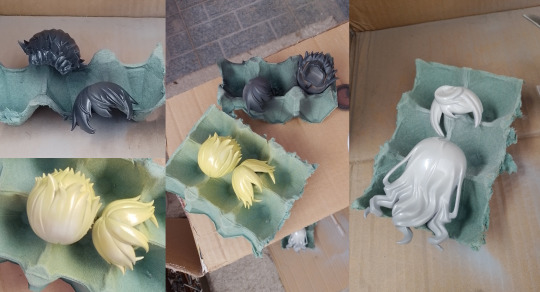
From the get go Dex was the only one who worked, I made some mistakes and wasted thinner thinking that I had it mixed with paint while it wasn't so he was the only one that didn't have any major issues during the first day of painting to the point that I went ahead an applied some varnishing. 🤡

Dex came out pretty ok, had to do some fixing with a brush and even after that paint more since I tested how he looked closed and he wasn't 100% dry yet so his head pieces almost got stuck together.
For the second and third day Hio and Maika's hairstyles got done with the oxygen injector becoming unable to use since each day I broke one of the liquid suppliers RIP. Fortunately on the last day it happened after Maika was done.
After this the spray varnish was applied and they were left to dry a bit. Fortunately everything was already sort of done so I didn't have much else to do...

Until I accidentally scratched Hio's head on the front and his front bangs ended up with a hole in it 💀 I tried to patch it up with oil pastels when liquid varnish was applied so it's not 100% noticiable as it was before it.

The liquid varnish was just to make sure that the heads wouldn't be sticky as some model kit and miniature painters/reviewers on BR YT and blogs mentioned Acrilex's pray varnish could leave stuff sticky due to temperature and other things, so that was what had to be fixed for the last stage.
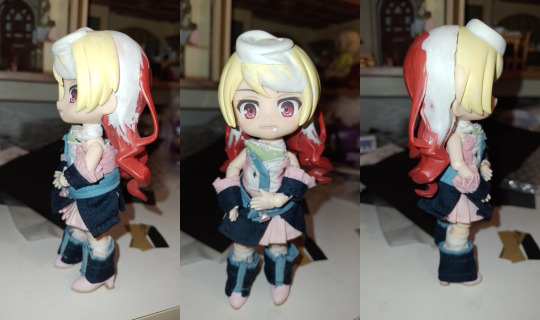
And with that, here's the final result:


I'm pretty happy with how their hair came out. Maika's head is pretty easy to remove while the other two are hard to insert and remove, need to be really careful to not mess up anything while doing it.
Before finishing the post, here are a few notes for the hair styles and the doll bodies used:
Dex
Somehow was the easiest to get between the 3;
His main issue was actually the liquid varnishing that probably was way too much so it looks like he got glue on his hair, which I'm going to try to avoid touching as much as possible to not make it even worser;
Maika
Maybe applied way too much white paint after some mistakes that made me waste thinner;
Red hair is pretty dark compared to the photos. It's pretty close to the red of Sylvanian Families Cruising Car that I used as reference for this chibi art, so at least it's a really pretty kind of red;
Hio
His hair went from yellow to a more dark orange tone to this in the final result. It's far from his original hair color, however this is good since I couldn't really picture him with a super light blonde color nor did I want to make him closer to the original;
Actually the hardest hair in terms of applying epoxy putty since his side bangs had to be made.
YMY body:
The ver. 1 YMY has more knee articulation compared to the ver. 2. Both Hio and Maika use the second version and they can't sit on top of their knees like Dex. For an easy example it's like how Body-kun has knee articulation while Body-chan does not have that;
Ver. 2 has hands for both sides of the body while the ver. 1 only came with right hand for different hand types. Ver. 2 also got two chests that you can exchange (the one it came with and the alternate version);
Different stands. Ver. 1 has one similar to doll stands (straight stand, doesn't have articulation) while ver. 2 is more similar to nendoroid stands (3 articulation points). You can see them properly on the photos that came before these notes.
And here's a before and after the epoxy and paints were applied:

If you managed to get to the end of this post, I hope you liked it!
This took around 5 months to finish since parts started getting delivered, doing epoxy and painting took less time because a few things got done until 2 months ago. It was done for real 29/08/2013.
If someone with more patience than me does this they for sure can get better results than what I got so may this post help anyone who wants to have their own customs, if that's possible.
Also so sorry for the text and language mistakes, I tried to make some revisions to the first draft and make things a bit easier to understand as I edited this. English isn't my mother language either so hopefully this is all OK as it is. 😅
The doll seat they're using is a Calico Critters/Sylvanian Families one, in terms of seats their items work pretty well for this. A smaller doll type like nendoll probably will work a bit better, even if a bit big for other types of furniture (still not as big as this one).
#ymy doll#other#misc#custom nendoroid#even if it's only nendohair i'll use that tag#vocaloid#vocaloid maika#vocaloid dex#maika vocaloid#dex vocaloid#yohioloid#nendoroid custom#ymy body#ymy#this is also a post of what not to do when trying to custom. rip
31 notes
·
View notes
Text
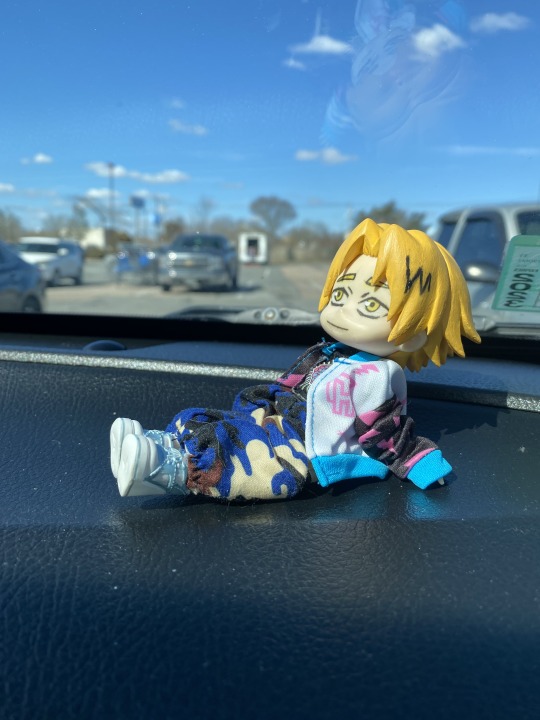
Treating himself to a hotdog after arriving at his temporary accommodation

#legato bluesummers#trigun#trigun stampede#legato trigun#custom nendoroid#nendoroid doll#nendoroid custom#nendo legato
19 notes
·
View notes
Text


my bebie is done!
i might try and sculpt his shorts at some point. i used an obitsu11 bjd body with a nendoroid head. the outfit was from BJDhouse on etsy. i used enamel paint and milliput epoxy putty for the hair and lips.
45 notes
·
View notes
Text
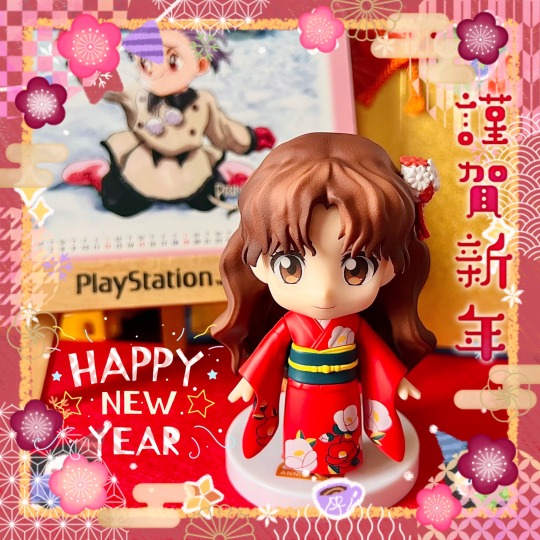
Happy New Year 2024!!🌺🎍
8 notes
·
View notes
Text
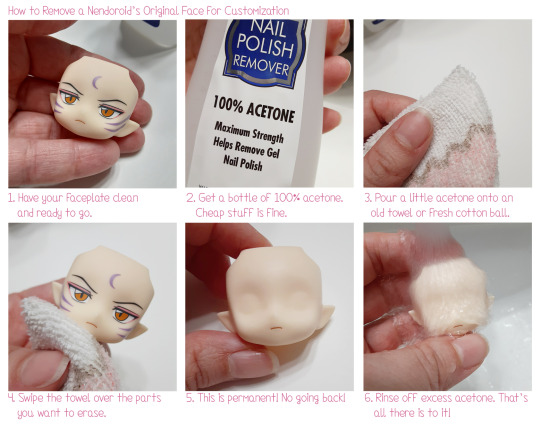
Here's a simple photo tutorial on how to remove a Nendoroid's face for customization. Sorry, Fluffy, it's for a good cause.
The acetone strips away the top coat on the faceplate, so the plastic becomes slippery and rubbery. If you're planning to put waterslide decals on it, go right ahead. If you're planning to draw or paint on it, first spray a layer of clear flat top coat over it, and let it cure for a day. (And remember to wear proper PPE when you're using the top coat!)
#custom nendoroid#nendoroid custom#craft tutorial#custom figure#i wasn't sure which account to post this to lol#but i figure here is best
14 notes
·
View notes
Text

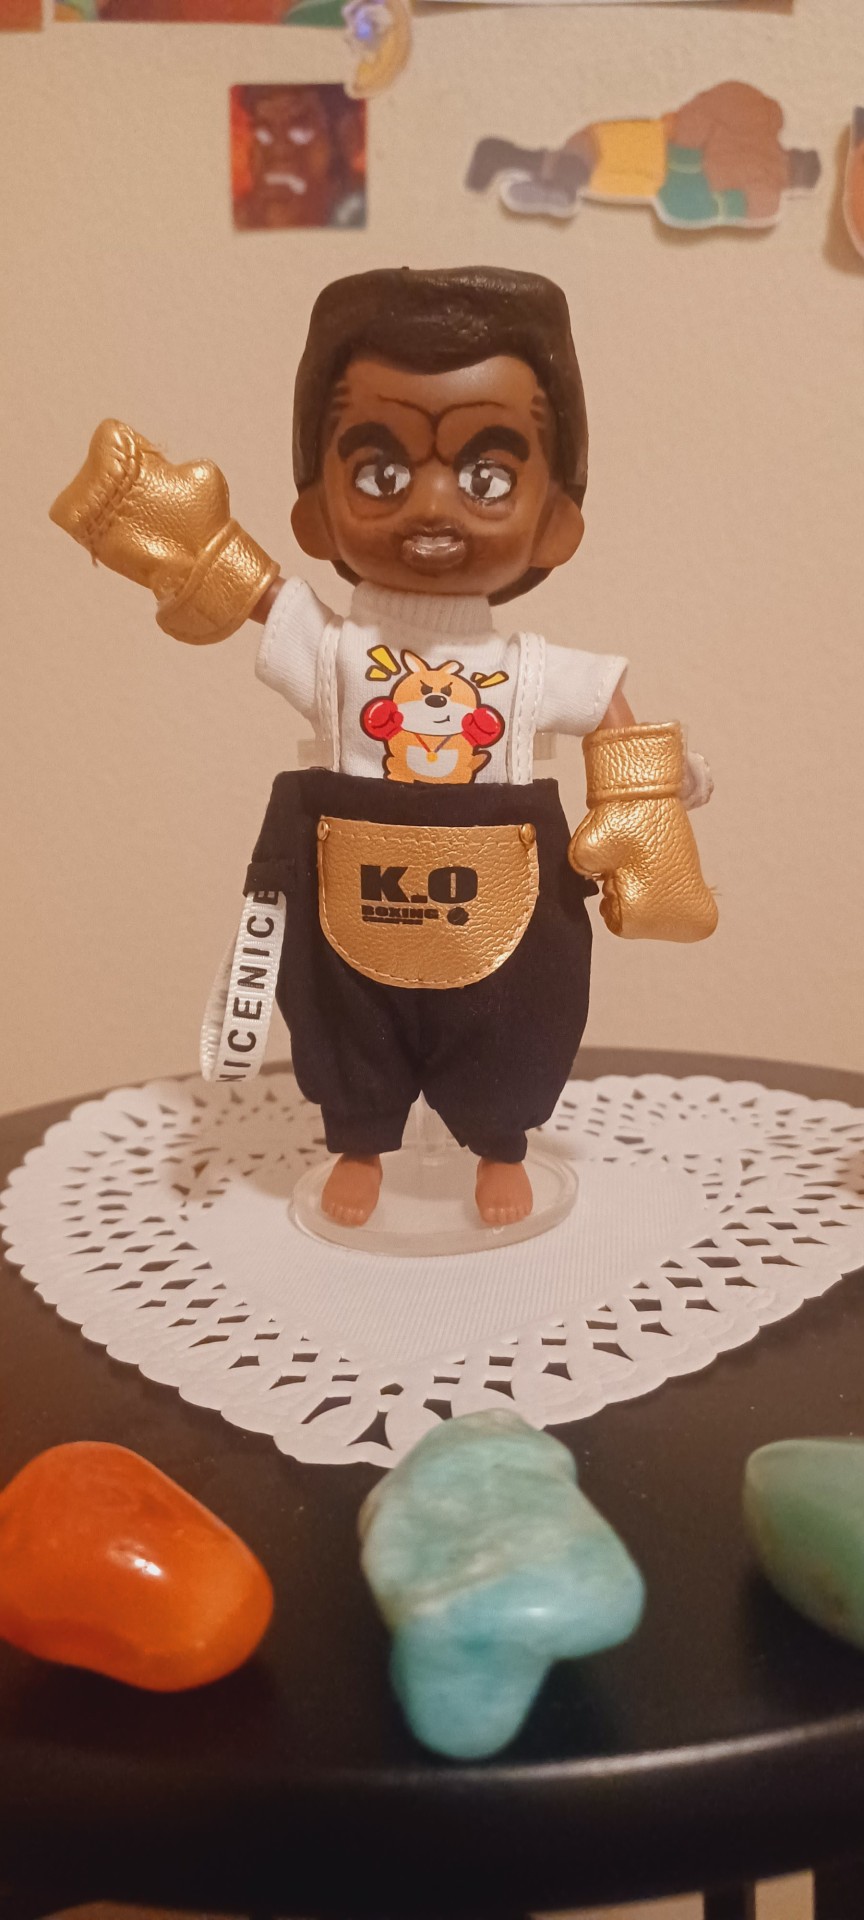
hey guys. look at my freak
18 notes
·
View notes
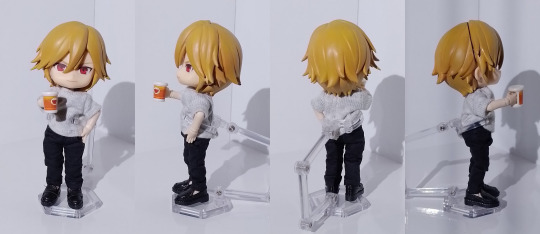
Photo

I finally managed to finish my Tartaglia custom! I'm happy with the result 💙
Twitter: https://twitter.com/TitaRhodesia/status/1615400191129178114?s=20
#tartaglia#childe#nobile#genshin impact#nendoroid#nendoroidcustom#tartaglia genshin impact#childe genshin impact#nendoroid custom
13 notes
·
View notes
Text
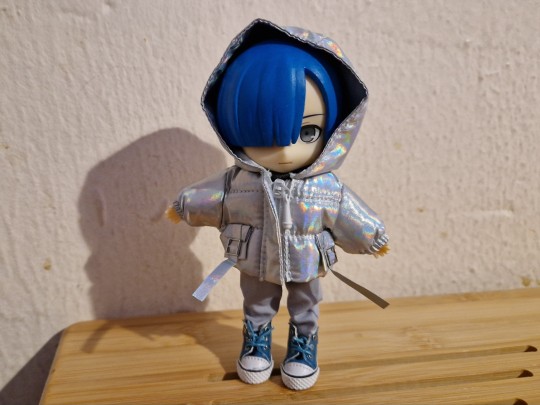
Sunshine ☀️
2 notes
·
View notes
Text


A few years ago I made a Toji Sakimori custom nendoroid back when I was still really learning how to make customs. it wasn't great by a long-shot and I decided to remake and refurbish it along with getting rid of the horrible sealer I used that made everything sticky!
I need more arms for him and will eventually make a peg for his sheaths, but I generally made him new faceplates and resculpted his torso!
#tokyo afterschool summoners#housamo#toji sakimori#toji housamo#custom nendoroid#nendoroid custom#crafters of tumblr#sculpting#remake#menacing legs art#artists on tumblr#remember to use mr super clear or a matte sealer when working on crafts like this!
14 notes
·
View notes
Text
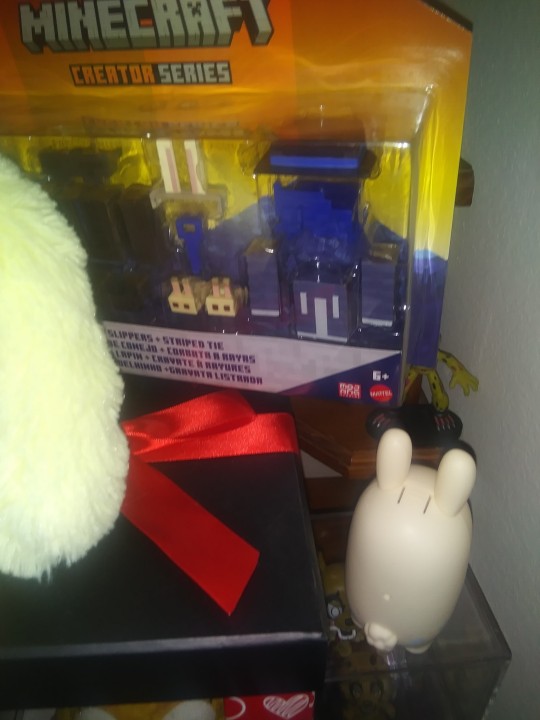
This custom William Afton Nendo I made Frankensteining parts! I ordered this back at Easter... I even have a purple beanbag for him I'll add pics of later.
=:3
Wife also got me this Minecraft set for the bunny stuff! We have been playing with a friend lately (I love building things)
4 notes
·
View notes
Text
So I wanna customize the one bootleg Nendoroid I have to make a Niko one, but this is definitely the biggest clay/ sculpting project I've ever taken on
Plus all my clay is oven bake, so that's a major restriction there. If I sculpt directly on the figure, I can't cure it, otherwise the figure will melt in the oven. But in order to modify the hair and clothes, I have to use the clay.
So I think I'll use some saran wrap to be able to remove the clay after I've sculpted it into the correct positions, and then glue it on afterwards.
Idk if I'm gonna start the project today or not, so if I do I'll post progress pics here :3
#paradoxical talking#nendoroid custom#btw if anyone has any tips on Nendoroid customs please let me know!!#ill tag all further posts about this under the tag#tobys custom nendoroid
1 note
·
View note
Text
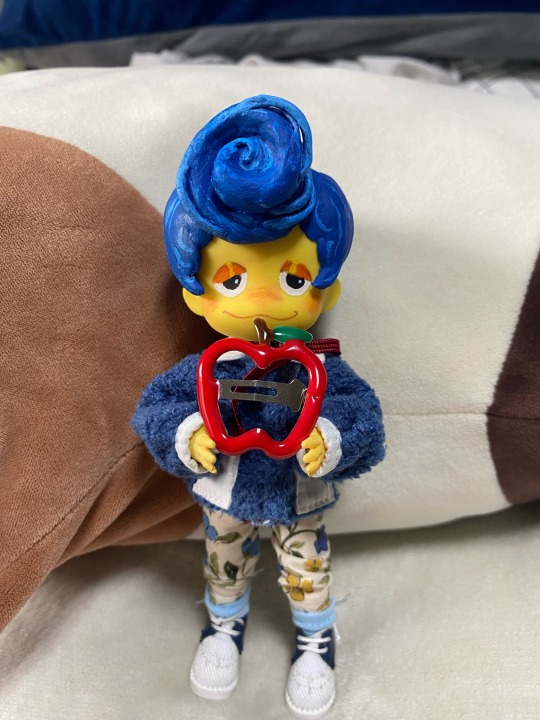


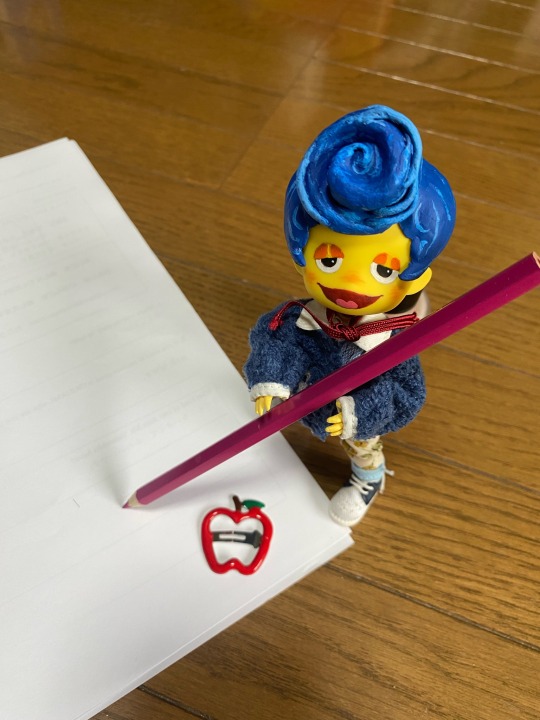


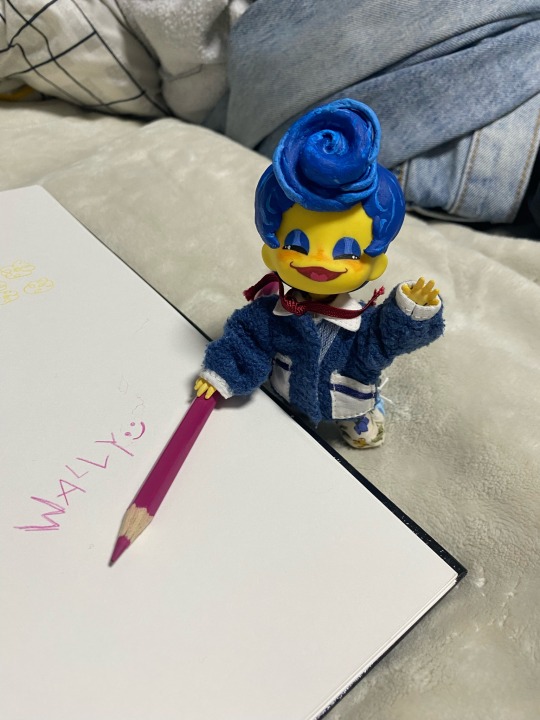
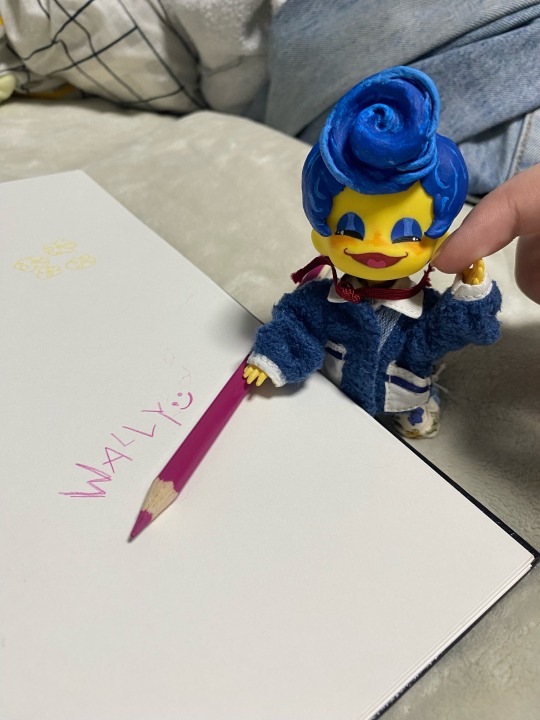


Another lil guy!!!! He’s always makin my apartment an artsy place! And he loves to cuddle and be tall. He loves to doodle on everything I have too! He’s a nice lil friend
This is another custom made from the amazing welcome home project by @partycoffin
I really hope this amazing person is doing okay and in a good safe place!!!!!!! hopefully my adding him won’t add more stress, due to what’s recently happened
Seriously they are amazing being the sole person to make everything welcome home! Show them so much support and love!!!!!!! They really deserve everything good
#comfort characters#fanart#my scrimbly#welcome home#welcome home wally#wally darling#clownillustrations#custom nendoroid#custom dolls#welcome home poppy#welcome home julie#welcome home howdy#welcome home barnaby#welcome home frank#welcome home sally#welcome home eddie
10K notes
·
View notes
Text


After rotting on my shelf for two months, I finally had the drive to finish my jonmartin dolls ^_^
[ GREATLY inspired by @/ruby-cloud's jonmartin dolls.. ]
#the magnus archives#magnuspod#jonmartin#jonathan sims#martin blackwood#tma#ooak doll#custom nendoroid#ob11 doll#god im so fucking proud of these#collage art
543 notes
·
View notes
Text


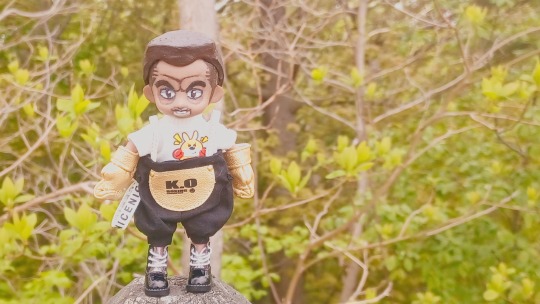
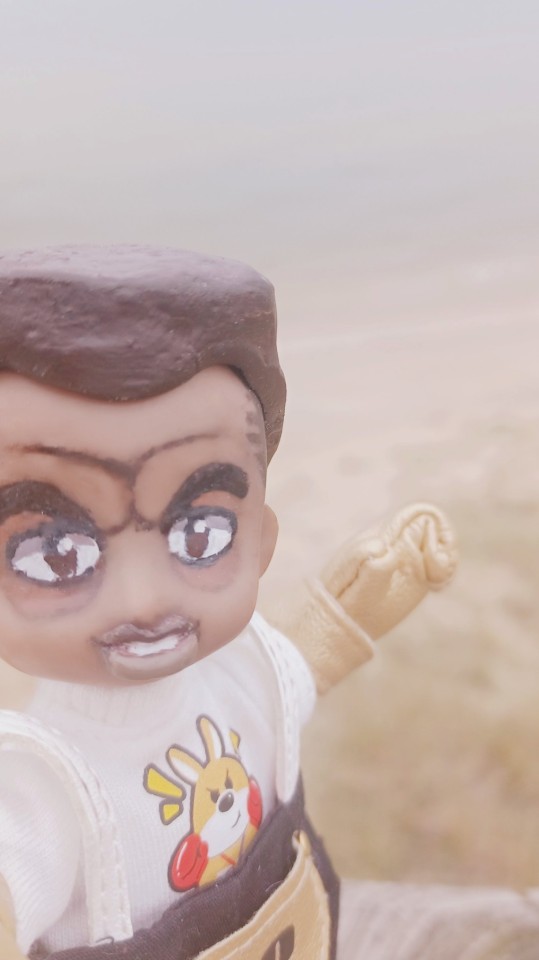
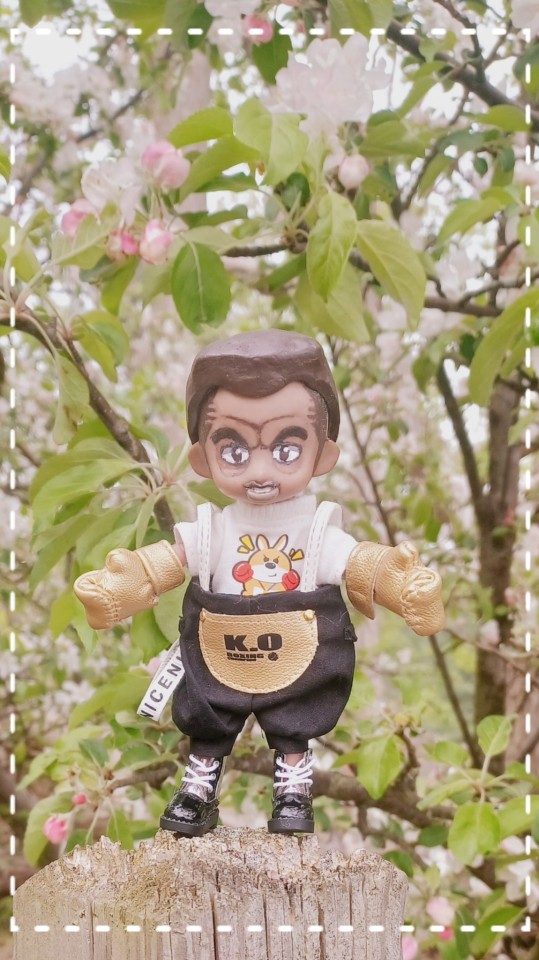
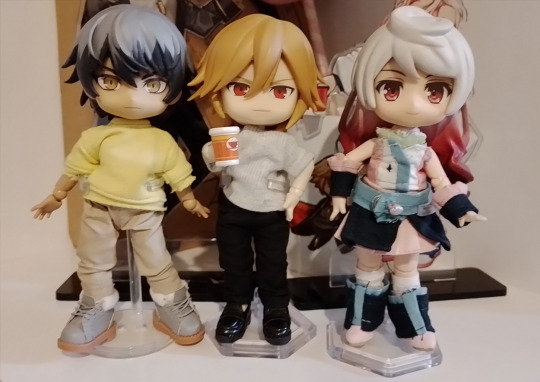
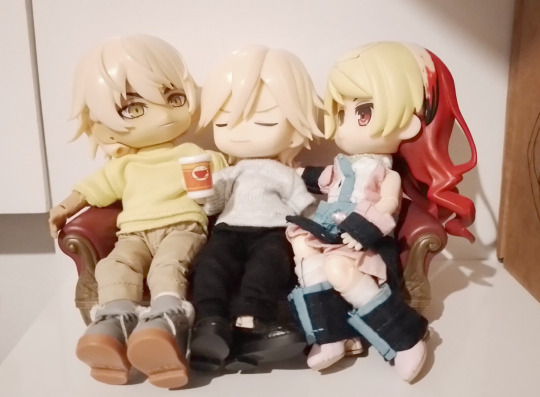
gloomy beach photoshoot
34 notes
·
View notes
Last Seen Blogs

gimalu
The Nerdy MA

megab
social justice and social anxiety


ourbestnaijanews
ournaijanews

cr4shqueen
Josie