#odoo menu
Explore tagged Tumblr posts
Visit Tumblr Blog
Explore Tumblr blogs with no restrictions, modern design and the best experience.
Last Seen Tumblr Blogs


Fun Fact
Hackers stole 65M passwords from Tumblr in 2013.
Text
Odoo hide menu items in just a few clicks! Discover how to control menu visibility, set user permissions, and secure your system. #Odoo #MenuCustomization #BusinessApps #Security
0 notes
Text
Let's check how to add custom fields to configuration settings in Odoo 17 👇👇
1 note
·
View note
Text
Step-by-Step Guide to Setting Up Odoo Learning Management System (LMS)
Odoo offers a powerful eLearning module that allows businesses, educators, and trainers to manage courses, lessons, quizzes, and certifications in one place. Whether you're setting up a training portal for employees or an online academy for learners, Odoo makes it easy to organize and deliver high-quality content. This step-by-step guide will walk you through how to set up your Odoo Learning Management System.
Step 1: Install the eLearning Module
To begin, you need to install the eLearning app in Odoo:
Log in to your Odoo backend with administrator rights.
Go to the Apps module.
Search for eLearning or a Learning Management System.
Click Install on the eLearning module.
Once installed, you will see a new menu called eLearning or Courses on your dashboard.
Step 2: Create a Course
After installing the module, the next step is to create your first course:
Navigate to the eLearning app.
Click Create to add a new course.
Fill in the basic course details:
Title: Name of your course.
Responsible: Assign a person or department.
Description: Write an overview of what the course covers.
Tags: Add categories to group similar courses.
Turn on or off features like Forums, Quizzes, and Certifications as needed.
Once done, click Save.
Step 3: Add Course Content (Lessons)
Courses in Odoo are structured with lessons or content blocks. Here's how to add them:
Open the course you created.
Scroll down to the Content tab.
Click Add Content.
Choose the type of content:
Document (PDF, Word files)
Video (YouTube or upload)
Quiz
Web Page (HTML content)
Enter a title, upload your content, and add any notes or instructions.
You can reorder lessons using drag and drop to match your preferred sequence.
Step 4: Create Quizzes
Quizzes help reinforce learning. To create one:
Go to the Content section of a course.
Click Add Content and select Quiz.
Name the quiz and add a short introduction if needed.
In the Questions tab, click Add a Question.
Choose question type:
Multiple choice
Single choice
Text input
Add answers and mark the correct one(s).
Quizzes can be scored, and you can define passing criteria.
Step 5: Set Up Certification (Optional)
You can provide certificates for course completion:
In the course form, enable the Certification option.
Define the criteria (e.g., complete all lessons or pass the final quiz).
Choose a certification template or create your own.
Certificates will be auto-generated and available for download in the learner's portal.
Step 6: Assign Courses to Users
You can assign users manually or allow them to enrol via the website.
Manual Assignment:
Go to the course.
Under the Participants tab, click Add.
Select users from the list.
Public Access:
Make the course Published.
Set the course as Free or Paid.
Share the link with users or embed it on your site.
Step 7: View Learner's Progress
Track how learners are engaging with your courses:
Go to the eLearning dashboard.
Click on Reports.
View:
Course completions
Quiz scores
Certification status
Time spent on lessons
You can also export reports in Excel or PDF for sharing.
Step 8: Customize the Learning Portal
Odoo allows customization of the portal interface:
Go to Website > eLearning.
Use Odoo's website builder tools to:
Customize fonts, colours, and banners
Organize course listings by categories
Add filters and search options
You can also add a blog, testimonials, or FAQ section to support learners.
Step 9: Enable Email Notifications
Keep learners informed with automated notifications:
Use Automated Actions or Marketing Automation to:
Send welcome emails
Notify learners of new content
Remind about upcoming quizzes or deadlines
Set the conditions and templates for each scenario.
Step 10: Monitor and Improve
After setup, continue improving your LMS:
Collect feedback using forms or surveys.
Analyze popular courses and content.
Update lessons regularly based on learner performance.
Offer new certifications or advanced training.
Conclusion
Odoo Learning Management System is a flexible and user-friendly tool to train employees, teach students, or deliver professional courses. With features like quizzes, certificates, progress tracking, and detailed reporting, you can build a complete learning platform that fits your business needs. Follow these steps to get started and make learning accessible, engaging, and effective for everyone involved.
#odoo learning#odoo learning software#odoo learning software management#Odoo eLearning management software#odoo#odoo app#odoo erp
1 note
·
View note
Text
Why Your Restaurant Needs Odoo POS Software Today
In today's competitive culinary landscape, a robust Point of Sale (POS) system is crucial, and Odoo POS offers significant advantages for your restaurant. It streamlines order processing, reduces errors, and speeds up service, leading to happier customers. Integrated inventory management helps minimize food waste and optimize stock levels, directly impacting your bottom line. Odoo POS provides valuable insights into sales trends and customer behavior, enabling you to make data-driven decisions about menu planning and promotions. Its user-friendly interface requires minimal training, and its scalability ensures it can adapt to your restaurant's growth. Investing in Odoo POS today is an investment in efficiency, profitability, and customer satisfaction.
visit site :
0 notes
Text
How to Set Up Live Chat on Your Website Using Odoo?

In today’s fast-paced digital world, businesses need to provide quick and efficient customer support. One of the best ways to engage with potential customers and provide instant assistance is through Live Chat. With Odoo Live Chat, businesses can connect with website visitors in real time, answer their questions, and guide them through their purchase journey. In this detailed guide, we will walk you through the complete process of setting up Live Chat on your website using Odoo. Whether you are a small business or a large enterprise, this step-by-step tutorial will help you get started easily.
Why Should You Use Odoo Live Chat?
Instant Customer Support Customers today expect quick responses to their queries. With Odoo Live Chat, you can provide real-time assistance and solve issues immediately. This helps improve customer satisfaction and builds trust in your brand.
Increases Sales and Conversions Live chat is not just about answering questions; it’s also a powerful tool to increase sales. When potential customers are confused about a product or service, instant support can help them make quick purchasing decisions.
No Need for Third-Party Software Unlike other live chat solutions that require additional third-party integrations, Odoo Live Chat is built into Odoo ERP. This makes it cost-effective and easy to use.
Improve Customer Engagement With Odoo Live Chat, you can interact with visitors proactively. You can send greetings, offer promotions, or guide users through their purchase journey, enhancing overall engagement.
Supports Multi-Agent Handling If your business has multiple support agents, Odoo Live Chat allows seamless chat distribution. Customers can be assigned to different agents based on availability or expertise, ensuring they receive the best support.
Steps to Set Up Live Chat on Your Website Using Odoo?
Now that you understand the benefits of Odoo Live Chat, let's go through the setup process step by step. Step 1: Install the Live Chat Module The first step is to install the Live Chat module in your Odoo system. Follow these steps: Log in to your Odoo ERP Dashboard. Navigate to the Apps menu. In the search bar, type Live Chat. Click on the Install button next to the Live Chat module. Wait for the installation to complete. Once installed, the module will be available for use.
Step 2: Create a Live Chat Channel Now that you have installed the module, the next step is to create a Live Chat Channel for your website. Go to Website > Configuration > Live Chat Channels. Click on the Create button to set up a new chat channel. Enter a name for your chat channel (e.g., "Customer Support Chat"). Assign a team of agents who will be responsible for handling customer queries. Configure chat settings such as welcome messages and response automation. Save the configuration. This will create a new Live Chat Channel, ready to be added to your website.
Step 3: Customize the Live Chat Widget Odoo allows you to customize the Live Chat Widget to match your brand's theme and preferences. Here’s how: Open the Live Chat Channel that you just created. Under the Options tab, you will find customization settings. Modify the welcome message to make it more engaging (e.g., “Hello! How can we assist you today?”). Choose a button color that matches your website’s branding. Enable automatic greetings to proactively engage visitors. Adjust the chat delay timer if needed (for example, set a delay of 5 seconds before the chat window pops up). Save the changes. These customizations make your live chat more appealing and interactive for visitors.
Step 4: Add Live Chat to Your Website After setting up your Live Chat Channel, you need to add it to your website. Navigate to Website > Configuration > Settings. Scroll down to the Live Chat section. Select the Live Chat Channel that you created earlier. Click Save to apply the changes. Open your website and refresh the page to see the Live Chat Widget appear. Now, visitors can initiate chat conversations directly from your website.
Step 5: Managing Live Chat Conversations Once your Live Chat is live, you can start responding to customer queries in real time. When a visitor sends a message, you will receive a notification in the Odoo Discuss module. Click on the notification to open the chat window. Respond to customer queries promptly and professionally. Use pre-configured quick replies for faster responses. If needed, transfer the chat to another agent who can better assist the customer. Handling chats effectively can significantly improve the user experience and enhance customer satisfaction.
Step 6: Analyzing Live Chat Performance Odoo provides useful analytics to track your Live Chat performance. To access these reports: Go to Live Chat > Reports. Check metrics like response time, number of chats, and agent performance. Identify areas for improvement to optimize customer interactions. By regularly analyzing your chat performance, you can enhance customer engagement and provide better support.
Best Practices for Using Odoo Live Chat Respond Quickly – Customers expect fast replies. Try to keep your response time under 1-2 minutes. Use Personalized Greetings – Address visitors by their names if possible. Be Professional Yet Friendly – Maintain a balance between professionalism and a friendly tone. Offer Quick Solutions – Provide direct answers and avoid unnecessary delays. Gather Customer Feedback – Ask for feedback at the end of the conversation to improve service quality.
Conclusion Setting up Live Chat on your website using Odoo is a simple yet powerful way to improve customer service and boost sales. By following the steps outlined above, you can seamlessly integrate Odoo Live Chat into your website and start engaging with visitors in real time. If you need assistance with setting up Odoo Live Chat, integrating Odoo ERP, or customizing Odoo modules, we are here to help!
Need Help with Odoo Implementation? At Odiware, we specialize in Odoo implementation, customization, and support services. Whether you need Odoo Live Chat, Odoo CRM, or a full Odoo ERP setup, our team of experts is ready to assist you. 📩 Contact us today! 📧 Email: [email protected] 🌍 Website: www.odiware.com
0 notes
Text
How to Customize Odoo ERP to Fit Your Business Needs
Odoo ERP is among the most adaptable and customized ERP software available today. Businesses across industries use Odoo's modular framework to adjust the software to their individual needs. Odoo easily customizes workflow automation, reporting, and UI upgrades to boost business operations. In this article, we'll look at how to adapt Odoo ERP to meet your specific business requirements.
1. Understanding Your Business Requirements
Before you start customizing Odoo, you should first examine your business processes, identify pain areas, and set critical objectives. Consider the following questions: - Which essential business functions need improvement?
Are there any manual processes that can be automated?
What integrations are necessary to ensure seamless operations? Once you have a clear grasp of your needs, you may select the appropriate Odoo modules and customization choices.
2. Choosing the Right Odoo Modules
Odoo provides a wide range of modules, including CRM, Sales, Accounting, Inventory, HR, Manufacturing, and more. You can select modules that are relevant to your business operations and further personalize them based on your workflow.
3. Customizing Odoo Workflows
Odoo enables organizations to customize workflows to better fit their operations. Some important customizing choices include:
Automating approval procedures for sales, purchases, and bills.
Configuring multi-step inventory processes to match your logistics workflow.
Developing custom triggers and actions to automate repetitive chores.
4. Modifying the Odoo User Interface (UI)
Your team's usability and efficiency can be improved by customizing the Odoo user interface. Customization possibilities include:
Adding and deleting fields from forms and dashboards.
Rearranging menus and visuals to improve navigation.
Using bespoke themes and branding to ensure consistency
5. Developing Custom Odoo Modules
Custom module development is an excellent choice for firms that demand capabilities beyond what regular Odoo ERP features provide. Developers can create bespoke modules to:
Add features that are unique to your industry.
Improve existing features in sales, accounting, or inventory.
Integrate with third-party applications, such as payment gateways, shipping suppliers, and e-commerce sites.
6. Integrating Third-Party Applications
Odoo enables API interfaces, which enable organizations to interact with other software applications. Whether you need to sync data with an external CRM, e-commerce store, or marketing automation tool, integrating third-party applications guarantees that data is exchanged and processes are automated.
Read More:
0 notes
Text
Industry-Specific ERP Solutions in the UAE: Which One Suits Your Business?

Industry-Specific ERP Solutions in the UAE: Which One Suits Your Business?
The UAE's fast-paced business environment demands robust enterprise resource planning (ERP) solutions tailored to specific industries. While generic ERP systems offer broad functionalities, industry-specific ERP solutions provide customized features that align with unique business needs. Selecting the right ERP software can significantly enhance efficiency, compliance, and profitability. This blog explores the best industry-specific ERP solutions available in the UAE and helps you determine which one suits your business.
1. ERP for Retail Businesses
Retail businesses in the UAE require ERP solutions that integrate point-of-sale (POS) systems, inventory management, customer relationship management (CRM), and e-commerce platforms. The best ERP solutions for retail include:
SAP Business One – Ideal for multi-store retailers, offering real-time stock tracking and financial management.
Odoo ERP – Provides a user-friendly interface with modules for sales, purchase, and marketing automation.
Microsoft Dynamics 365 – Features AI-driven insights and omnichannel retail support.
2. ERP for Manufacturing Companies
Manufacturers need ERP systems that support production planning, quality control, supply chain management, and automation. Top choices include:
Infor CloudSuite Industrial – Offers end-to-end manufacturing solutions with cloud-based scalability.
Epicor ERP – Specializes in managing complex production processes and compliance tracking.
Oracle NetSuite – Integrates real-time production data with financials and logistics.
3. ERP for Construction & Real Estate
The UAE’s booming construction and real estate sectors require ERPs that handle project management, contract management, procurement, and financial reporting. Recommended solutions are:
SAP S/4HANA – Provides robust financial tracking and project cost control.
Focus ERP – Designed for UAE-based construction firms, offering labor and equipment management.
BuildSmart – Specializes in construction project cost estimation and reporting.
4. ERP for Healthcare
Hospitals and clinics in the UAE benefit from ERP solutions that integrate patient management, billing, compliance, and supply chain tracking. Leading options include:
Mediware ERP – Tailored for hospitals, featuring electronic health records (EHR) and patient data security.
SAP Healthcare ERP – Provides end-to-end healthcare management solutions.
Microsoft Dynamics 365 for Healthcare – Offers AI-powered patient engagement tools.
5. ERP for Hospitality Industry
Hotels and restaurants require ERP solutions that streamline room reservations, inventory, accounting, and customer experience management. The best ERP options are:
Oracle Hospitality – Ideal for hotel chains, offering guest experience enhancements and operational automation.
Infor Hospitality – Manages hotel operations, including bookings, housekeeping, and HR.
Ezee BurrP! – A restaurant-specific ERP with billing, menu management, and customer loyalty tracking.
6. ERP for Logistics & Distribution
The UAE is a global logistics hub, requiring ERPs with warehouse management, fleet tracking, and automated dispatch solutions. Popular choices include:
SAP Business One for Logistics – Provides real-time supply chain visibility and automation.
Blue Yonder ERP – Optimizes inventory and demand forecasting.
Microsoft Dynamics 365 for Supply Chain – Features AI-powered logistics and order management.
How to Choose the Right ERP for Your Business?
When selecting an industry-specific ERP solution, consider the following factors:
Business Size & Scalability – Ensure the ERP grows with your company’s needs.
Customization & Integration – Choose a system that integrates with existing software.
Regulatory Compliance – UAE businesses must adhere to VAT and industry regulations.
Cloud vs. On-Premise – Cloud ERP solutions offer flexibility, while on-premise solutions provide greater control.
Cost & ROI – Weigh the initial investment against long-term benefits.
Final Thoughts
The right ERP solution can transform your business operations, improve efficiency, and enhance decision-making. Whether you’re in retail, manufacturing, construction, healthcare, hospitality, or logistics, industry-specific ERP systems in the UAE offer tailored functionalities to meet your unique needs.
Need help choosing the Best ERP Software UAE ? Contact an ERP consultant in the UAE for a tailored recommendation!
0 notes
Text
Enhance Customer Experiences and Efficiency with Odoo POS for Restaurants
For restaurants, efficiency and exceptional service are vital for success. Odoo POS offers a comprehensive solution designed to address the unique challenges faced by the hospitality industry. This platform enables restaurant owners to create detailed floor plans and table configurations that adapt to their specific layout. With features like intuitive order management, staff can handle multiple orders simultaneously, transfer orders between tables, and capture customer preferences with ease. The system’s advanced billing capabilities, such as bill splitting and tip management, ensure a smooth checkout experience. Additionally, Odoo POS integrates with kitchen printers for accurate and timely order communication, minimizing delays and errors. Its reporting tools provide valuable insights into sales trends, peak hours, and menu performance, helping you make informed decisions to optimize your operations. Whether you’re managing a small café or a large dining establishment, Odoo POS empowers you to deliver exceptional dining experiences and improve operational efficiency.
#Odoo POS for Restaurants#Restaurant Management Solutions#Restaurant Billing System#Advanced Reporting for Restaurants
0 notes
Text
How to Configure Payment Providers in Odoo 17: A Step-by-Step Guide

Expanding your business’s payment options can significantly improve your customer’s experience by making transactions smoother and more convenient. Odoo 17 offers seamless integration with various payment providers, making it easier to set up diverse payment methods for your eCommerce platform.
In this guide, we’ll walk you through configuring payment providers in Odoo 17. Whether you’re new to Odoo or looking to enhance your payment infrastructure, this step-by-step approach will help you get started.
Prerequisites
Before you proceed, ensure the following:
The Accounting module is installed and activated in your Odoo instance.
You have the API credentials for the payment provider you want to integrate.
Step 1: Manage Payment Providers
Go to Accounting in your Odoo dashboard.
Navigate to the Configuration menu.
Select Payment Providers from the dropdown list.
Step 2: Install Payment Acquirer Modules
Odoo supports a variety of payment gateways, each with unique features and configuration processes.
Search for the payment provider you want to integrate (e.g., PayPal, Stripe, Razorpay).
Click Install to add the relevant payment acquirer module.
Click here for a detailed explanation of each step.
Step 3: Activate a Payment Provider
Once you’ve installed the necessary modules:
Click the Activate button next to your desired payment provider.
This will open the configuration form specific to that provider.
Step 4: Configure Payment Provider Settings
Now, let’s customize the settings for your chosen payment provider.
Credentials Tab
Enter your API credentials (e.g., API keys, Merchant ID).
2. Configuration Tab
Customize these settings:
Payment Methods: Specify supported methods (e.g., credit cards, PayPal).
Maximum Amount: Set transaction limits.
Supported Currencies: Define which currencies can be processed.
Supported Countries: Add geographical restrictions if needed.
3. Messages Tab
Create custom messages for different transaction statuses:
Pending Message: “Your payment has been successfully processed but is awaiting approval.”
Done Message: “Your payment has been successfully processed.”
Cancelled Message: “Your payment has been cancelled.”
Step 5: Set Up Payment Methods
Navigate to Payment Methods under the Configuration menu.
Create a new payment method or edit an existing one linked to the configured provider.
Ensure the payment method is enabled for online transactions.
Click here for a detailed explanation of each step.
Need Help?
Setting up payment providers can feel overwhelming, but with the right guidance, it’s a breeze. If you’re looking for a budget-friendly and hassle-free solution for your Odoo website, Meraki Technology is here to help!
Contact us today for expert advice, technical support, or any assistance you need. Let us simplify the process for you.
#erp#erp software#erp solution bd#erp system#erpsoftware#odoo development#odoo#odoo development company#odoo development services#odoo erp#businesssuccess#business#services#erp services#usa#united states#america#united states of america#canada#united kingdom#united nations#germany#france#paris#spain#netherlands#uae#uaebusiness#dubai#digital marketing
0 notes
Text

Route Map of Partners in Odoo | Odoo Partners Route Map | Routes Map in Odoo | Odoo Google Map Integration | Partnet Google Map Integration With Odoo | Odoo Google Map Integration Download :
Our Odoo Google Maps Integration Module is a powerful tool designed to simplify your navigation and travel planning directly within the Odoo platform. This feature-rich solution enables seamless access to Google Maps from the form view, providing essential geolocation services to optimize your business operations. Key Features of the Odoo Google Map Integration Module Quick Google Maps Access Open Google Maps directly from the Odoo form view with a single click. Easily navigate to specific locations with integrated geolocation capabilities. Real-Time Latitude and Longitude Identification Identify exact coordinates for accurate location tracking. Enhance data precision for logistics, deliveries, or meetings. Efficient Travel Route Planning Select one or multiple partners from the list view to plan your visits effectively. Trigger a pop-up menu to view detailed travel routes to all selected partners. Pop-Up Window for Location Insights Visualize all selected partner locations in a convenient pop-up window. Streamline planning and coordination for optimized travel schedules. Benefits of Using the Odoo Google Map Integration Module Improved Efficiency: Eliminate guesswork with accurate route planning and geolocation insights. Enhanced Productivity: Save time by visualizing all partner locations in one place. Seamless Integration: Leverage Google Maps functionality directly within your Odoo environment. Business Growth Support: Optimize delivery routes, sales visits, or customer meetings for better client relationships. Ideal for Businesses Across Industries Whether you’re managing a fleet, coordinating sales visits, or optimizing delivery schedules, the Odoo Google Maps Integration Module is your go-to solution. It’s perfect for businesses looking to enhance logistics, improve route accuracy, and boost operational efficiency.
#odoo modules#odoo erp#odoodevelopment#odoo services#odoo apps#odooimplementation#Odoo Google Maps integration#integrated Google Maps in Odoo#Google Maps module for Odoo#Odoo partner map integration#real-time location tracking Odoo#seamless Odoo integration#map partner locations in Odoo#Odoo geolocation module.#google map integration in odoo
0 notes
Text
Odoo Lunch: Explore our detailed tutorial on configuring your lunch ordering system. Get expert tips on vendor setup, menu management, and order processing for smooth operations. #OdooLunch #LunchBasics #VendorSetup
0 notes
Text
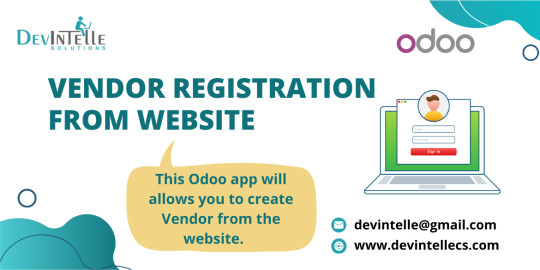
How to Set Up Vendor Registration on Your Odoo Website
Setting up vendor registration on your Odoo website is a game-changer for businesses looking to simplify the vendor onboarding process. By allowing vendors to register themselves directly from your website, you can reduce manual data entry, speed up the registration process, and keep all vendor information organized and easily accessible. In this blog post, we will guide you step-by-step on how to set up vendor registration on your Odoo website.
Why Set Up Vendor Registration on Your Odoo Website?
Before we dive into the technical setup, let’s briefly discuss why setting up vendor registration is a good idea. Here are some key benefits:
Time Savings: Vendors can register themselves, reducing the need for your team to handle manual data entry.
Improved Accuracy: The vendor submits all necessary details directly, minimizing the risk of errors during data entry.
Easy Vendor Management: With vendor data stored in Odoo, you can track and manage your relationships more effectively.
Increased Efficiency: Vendors can easily update their information, and you can track their status without the need for constant follow-ups.
Step 1: Install the Vendor Portal Module
The first thing you need to do is ensure that the Vendor Portal feature is enabled in your Odoo instance. This will allow vendors to access and manage their registration directly through the website.
Go to Odoo Apps: Open the Odoo dashboard and navigate to the "Apps" menu.
Search for Vendor Portal: In the search bar, type "Vendor Portal."
Install the Module: Click on the "Install" button next to the "Vendor Portal" app. Once the module is installed, it will enable vendor registration capabilities.
Step 2: Configure Vendor Portal Settings
After installing the Vendor Portal module, the next step is to configure it properly to meet your business needs.
Navigate to the Settings: Go to the "Website" menu, then choose "Configuration" and click on "Settings."
Enable Vendor Portal Access: In the "Customer & Vendor Portal" section, check the box that says "Enable Vendor Portal." This will allow vendors to register and access their accounts.
Customize the Portal: You can customize the registration form that vendors will see when they register. You may want to add fields for information like company name, contact details, and business license number, depending on what’s necessary for your vendor registration process.
Save Changes: Once you’ve configured the settings, don’t forget to save your changes.
Step 3: Customize the Vendor Registration Form
Now that the vendor portal is enabled, it’s time to customize the registration form. This is where you can add or remove fields to collect the information that’s important for your business.
Go to the Website Builder: Navigate to the "Website" menu and click on "Website Builder."
Edit the Vendor Registration Page: Look for the page where vendors will be registering. This could be a dedicated "Vendor Registration" page or part of the existing "Sign Up" page.
Add or Modify Form Fields: You can add form fields to the registration page by using the drag-and-drop form builder. To add a new field, simply drag it from the toolbox and place it on the form. Common fields include:
Company Name
Contact Name
Email Address
Phone Number
Business Type
VAT Number (if applicable)
Set Field Requirements: Mark fields as "Required" if they must be filled out by the vendor during registration.
Save and Publish the Form: Once you’re happy with the form, save your changes and publish the page to make it live on your website.
Step 4: Set Up Vendor Access Permissions
Once the registration page is set up, you need to ensure that vendors can access their accounts once they’ve registered. This step involves configuring user roles and permissions.
Navigate to Users & Companies: Go to the "Settings" menu, then select "Users & Companies" and click on "Users."
Create Vendor Users: For each vendor who registers, you’ll need to create a user account for them in Odoo. To do this, click on "Create" and fill in the vendor’s details, including name, email, and company. Make sure to assign the role of "Vendor" to the user.
Grant Portal Access: In the "Access Rights" section, check the box for "Portal Access." This gives vendors the ability to log in and manage their profiles.
Save the User: After completing the details, save the user account.
Step 5: Configure Email Notifications
To keep your vendors informed about their registration status, you should set up email notifications. Odoo allows you to automate these notifications, so vendors receive emails when their registration is approved, rejected, or updated.
Go to Email Templates: In the "Settings" menu, navigate to "Technical" and then "Email" followed by "Templates."
Create or Edit Email Templates: You can create a new email template for vendor registration or edit an existing one. Make sure to customize the subject and body of the email to include details about the registration status, login instructions, or approval.
Assign Template to Action: Once you’ve created the email template, you can assign it to specific actions, such as when a vendor’s registration is approved or rejected.
Activate Email Notifications: Make sure the email notifications are activated so that vendors are notified promptly after they register or when their status changes.
Step 6: Review and Manage Vendor Registrations
After setting up the registration process, it’s important to have a system in place to review and manage the vendor registrations.
Review Vendor Applications: Once a vendor registers, their information will be stored in the system. Go to the "Vendors" menu under the "Purchases" app to review and approve their applications.
Approve or Reject Applications: After reviewing the vendor’s details, you can approve or reject their registration. Once approved, the vendor will be able to access their portal and start managing their orders, invoices, and more.
Maintain Vendor Data: You can edit vendor details anytime in the "Vendors" section. It’s essential to keep all vendor information up to date to avoid issues with orders and payments.
Step 7: Monitor Vendor Activity
To ensure that your vendor registration process is working efficiently, you should periodically monitor vendor activity on your Odoo website.
Use Analytics Tools: Odoo provides analytics tools to track vendor registrations, logins, and activity within the portal. Use these tools to get insights into how vendors are interacting with the platform.
Provide Ongoing Support: If vendors encounter any issues with registration or accessing their portal, offer prompt support through Odoo’s integrated helpdesk system.
Conclusion
Setting up vendor registration on your Odoo website is a valuable feature that can save your business time and improve vendor management. By following these steps, you’ll create a seamless experience for vendors to register, submit their information, and start working with your business more efficiently.
With the Vendor Portal in Odoo, you can automate many manual tasks, ensure accurate data collection, and maintain strong relationships with your suppliers. Whether you are just starting or looking to enhance your existing system, enabling vendor registration on your website will help streamline your processes and keep things running smoothly.
0 notes
Text
Odoo 18: Latest Features You Need to Know

As the ERP landscape continues to evolve, staying ahead of the curve is essential for businesses seeking to leverage technology for growth and efficiency. Odoo 18 is on the horizon, promising a host of new features and enhancements designed to address modern business needs. If you’re keen to understand how Odoo 18 can revolutionize your operations, here’s a comprehensive look at the latest features and updates that you need to know.
1. Streamlined User Experience with Enhanced UI/UX
One of the standout features of Odoo 18 is its revamped user interface and user experience. The new design focuses on making navigation more intuitive and user-friendly. Key improvements include:
Modernized Dashboards: The new dashboards are cleaner and more customizable, allowing users to tailor their workspace to display relevant metrics and insights. Intuitive Navigation: Enhanced menu structures and simplified workflows help users find and complete tasks more efficiently.
Accessibility Improvements: Odoo 18 is designed with accessibility in mind, featuring better support for screen readers and keyboard navigation.
Why It Matters: These updates aim to reduce the learning curve for new users and enhance productivity by making key features more accessible and easier to use.
2. AI-Driven Automation and Insights
Artificial Intelligence (AI) and Machine Learning (ML) are transforming the way businesses operate, and Odoo 18 integrates these technologies to provide smarter solutions. Notable AI-driven features include:
Automated Data Entry: AI algorithms streamline data entry by automatically categorizing and processing information, reducing manual input and errors.
Predictive Analytics: ML models offer predictive analytics to forecast sales trends, customer behavior, and inventory needs, enabling better strategic planning.
Chatbots for Support: AI-powered chatbots provide real-time assistance and troubleshooting, enhancing customer service and support.
Why It Matters: By leveraging AI and ML, Odoo 18 helps businesses automate repetitive tasks and gain valuable insights, leading to more informed decision-making and operational efficiency. For businesses seeking top-notch solutions, partnering with an Odoo Integration Services in India provider can enhance these benefits.
3. Advanced Inventory and Supply Chain Management
Effective inventory and supply chain management are crucial for business success. Odoo 18 introduces several enhancements to these modules:
Real-Time Inventory Tracking: Track stock levels and manage orders with real-time updates, reducing the risk of stockouts and overstocking.
Enhanced Warehouse Management: New features optimize warehouse layouts and picking strategies, improving operational efficiency and reducing costs.
Supply Chain Analytics: Advanced analytics provide insights into supplier performance and demand patterns, aiding in better supply chain planning.
Why It Matters: These improvements help businesses manage their inventory more effectively and streamline their supply chain operations, leading to cost savings and better service delivery.
4. Financial Management and Accounting Enhancements
Odoo ERP 18 continues to strengthen its financial management capabilities with several key updates:
Automated Reconciliation: Automated bank reconciliation simplifies matching bank statements with accounting entries, enhancing accuracy and reducing manual effort.
Multi-Currency Support: Real-time currency conversion and multi-currency reporting facilitate international transactions and financial management.
Compliance and Reporting: Updated features ensure compliance with the latest accounting standards and provide customizable financial reports.
Why It Matters: These enhancements make financial management more accurate and efficient, helping businesses maintain compliance and manage their finances with greater ease.
5. Upgraded CRM and Sales Modules
Customer relationship management (CRM) and sales are critical for business growth. Odoo 18 offers several upgrades to these modules:
Advanced Lead Scoring: AI-driven lead scoring helps prioritize high-potential leads, increasing conversion rates and sales efficiency.
Automated Sales Workflows: Streamlined workflows automate the sales process, from lead generation to deal closure, reducing manual tasks.
Enhanced Customer Insights: Detailed customer profiles and behavior tracking enable personalized marketing and sales strategies.
Why It Matters: These updates help businesses optimize their sales processes and enhance customer relationships, driving growth and improving sales performance.
6. Expanded eCommerce Capabilities
With the growing importance of online sales, Odoo 18 expands its eCommerce features to offer more robust solutions:
Dynamic Product Pages: Automatically adjust product pages based on customer preferences, creating a more personalized shopping experience.
Improved Payment Gateway Integration: Enhanced integration with payment gateways ensures secure and convenient transactions for customers.
Advanced SEO Tools: Improved SEO tools help optimize online stores for search engines, increasing visibility and driving traffic.
Why It Matters: These features enable businesses to create more engaging online stores and enhance their eCommerce strategies, leading to increased sales and better customer experiences.
7. Enhanced HR and Employee Management
Managing human resources effectively is crucial for any organization. Odoo 18 introduces several updates to the HR and employee management modules:
Automated Onboarding: Streamline the onboarding process with automated workflows, ensuring a smooth transition for new employees.
Performance Management Tools: Advanced tools for setting goals, tracking progress, and conducting evaluations improve performance management.
Employee Self-Service: Enhanced self-service features allow employees to manage their profiles, request leave, and access documents easily.
Why It Matters: These enhancements make HR management more efficient and improve the overall employee experience, supporting better workforce management.
8. Odoo Studio and Customization Options
Odoo’s flexibility is a key strength, and Odoo 18 continues to build on this with updates to Odoo Studio, the platform’s customization tool:
Drag-and-Drop Interface: A more intuitive drag-and-drop interface allows users to create and customize modules without coding knowledge.
Advanced Workflow Automation: Enhanced automation features streamline complex processes, reducing manual intervention.
Custom Reporting: Improved tools for creating detailed, customized reports tailored to specific business needs.
Why It Matters: These updates provide businesses with greater flexibility to tailor the system to their needs, enhancing overall functionality and usability.
Conclusion
Odoo 18 is set to deliver significant advancements in ERP functionality, addressing a wide range of business needs with its new features and enhancements. From improved user experience and AI-driven automation to advanced inventory management and expanded eCommerce capabilities, Odoo 18 promises to be a game-changer for businesses seeking to optimize their operations and drive growth.
For businesses looking to integrate these new features, working with a trusted Odoo Implementation Company in Kolkata, India can provide the expertise needed to maximize the benefits of Odoo 18. As we eagerly await the official release, now is the ideal time to assess how these new features can benefit your organization. Whether you're looking to enhance efficiency, improve financial management, or strengthen customer relationships, Odoo 18 offers innovative solutions to meet your needs. Stay tuned for more updates and prepare to unlock the full potential of Odoo 18 for your business.
#crm#odoo#odoo erp#odoo services#odooimplementation#odoodevelopment#cloud erp#app development company#erp#web and app development companies#odoo 18
0 notes
Text
How to Create and Manage Users in Odoo

Odoo is a powerful and flexible ERP (Enterprise Resource Planning) system that enables businesses to manage their operations seamlessly. One of the key features of Odoo ERP is user management, which allows businesses to assign roles, control access, and monitor user activities efficiently. Proper user management in Odoo ensures that employees only have access to the modules and features relevant to their job roles, enhancing both security and productivity.
In this blog, we will provide a step-by-step guide on how to create and manage users in Odoo, covering everything from user creation to permission management and best practices.
Why is User Management Important in Odoo?
Before diving into the steps, let's understand why user management in Odoo ERP is crucial:
Enhanced Security: Restricts unauthorized access to sensitive business data.
Improved Efficiency: Ensures employees can access only the necessary features, reducing confusion.
Better Accountability: Tracks user activities and logs actions for transparency.
Customizable Access Control: Assigns specific roles to different departments, maintaining operational hierarchy.
Steps to Create a New User in Odoo
Follow these simple steps to add a new user in Odoo:
Step 1: Log in to Odoo as an Administrator
Before creating a new user, ensure you are logged in with Administrator privileges.
Step 2: Navigate to the Users Menu
Click on Settings from the main dashboard.
Under the Users & Companies section, click on Users to view the list of existing users.
Step 3: Click on Create New User
Click the Create button to add a new user.
Enter the following details:
Name: The full name of the user.
Email Address: The official email to be used for login.
Access Rights: Assign the appropriate access level (Administrator, Manager, User, etc.).
Password: Odoo can generate an email invitation where the user can set their password.
Step 4: Assign User Roles and Permissions
Odoo provides predefined roles, such as:
Administrator: Full access to all modules and settings.
Manager: Limited admin rights to manage specific modules.
Employee: Basic access to perform daily tasks.
Portal User: Limited access for external stakeholders.
Choose the appropriate permissions based on the employee’s role and department.
Step 5: Save and Send an Invitation Email
Click Save to register the user in the system.
Enable Send an Invitation to automatically send an email to the user with login details.
Managing Users in Odoo
Once a user is created, administrators can modify, manage, and control their access as required.
1. Editing User Details
Navigate to Settings > Users.
Click on the user’s profile.
Modify details like email, department, role, and access rights.
Click Save after making the necessary changes.
2. Assigning and Modifying Access Rights
Access rights define what a user can see and do in Odoo.
Under the Access Rights tab, you can assign or modify permissions for modules such as:
Sales (e.g., Sales Manager, Sales User, etc.)
Accounting (e.g., Accountant, Auditor, etc.)
HR & Payroll (e.g., HR Officer, Employee, etc.)
Inventory (e.g., Stock Manager, Warehouse User, etc.)
Assign appropriate rights to control data access and prevent unauthorized actions.
3. Deactivating or Deleting Users
When an employee leaves the organization or no longer needs access to Odoo, you may need to deactivate or delete their account.
How to Deactivate a User
Navigate to Settings > Users.
Click on the user profile you want to deactivate.
Toggle the Active status to Inactive.
This prevents the user from logging in but retains their data in the system.
How to Delete a User
Before deleting a user, ensure they don’t have any linked records (e.g., sales orders, invoices, etc.).
Navigate to Settings > Users.
Select the user and click on Action > Delete.
Note: Odoo does not allow deleting a user with assigned tasks or records. Instead, you can deactivate the account.
Best Practices for User Management in Odoo
To ensure smooth and secure Odoo user management, follow these best practices:
Use Role-Based Access Control (RBAC): Assign only the necessary permissions to users based on their job roles.
Regularly Update User Roles: As employees change roles or responsibilities, update their access rights accordingly.
Enable Two-Factor Authentication (2FA): Enhances security by requiring an extra layer of verification.
Audit User Activity Logs: Periodically check the system logs to track user activity and identify any unusual access patterns.
Limit Administrator Access: Grant admin privileges only to authorized personnel to prevent accidental system modifications.
Deactivate Inactive Users: Regularly review and disable accounts that are no longer in use to prevent security risks.
Conclusion
Creating and managing users in Odoo ERP is an essential task that ensures smooth business operations while maintaining security. By following the steps outlined above, businesses can efficiently add new users, assign appropriate permissions, and manage user roles effectively.
If you need expert Odoo implementation or customized Odoo ERP solutions, get in touch with Odiware Technologies today!
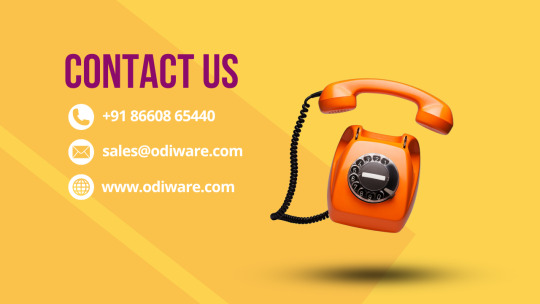
Contact Odiware for Odoo ERP Services
📞 Phone: +91 86608 65440 📧 Email: [email protected] 🌐 Website: www.odiware.com
0 notes
Text
What are the Steps involved in Odoo Customization?
Odoo is a versatile and customizable ERP (Enterprise Resource Planning) platform that allows businesses to tailor their system to meet specific requirements and workflows. Customization enables organizations to optimize processes, improve efficiency, and enhance user experience. Here are the essential steps involved in Odoo customization:
1. Requirement Gathering
The first step in Odoo customization is to gather detailed requirements from stakeholders. Identify specific pain points, desired functionalities, and workflow improvements. Engage with key users and decision-makers to understand business objectives and expectations from the customized Odoo solution.
2. Analysis and Planning
Once requirements are gathered, analyze the feasibility of each customization request. Prioritize customization tasks based on business impact and complexity. Create a detailed project plan outlining tasks, timelines, resources, and dependencies. Define clear objectives and success criteria for the Odoo customization project.
3. Module Selection
Odoo consists of various modules that cater to different business functions such as CRM, sales, inventory, accounting, manufacturing, and more. Select relevant modules based on the identified requirements. Determine if existing Odoo modules can fulfill customization needs or if new custom modules/extensions are required.
4. Customization Development
Develop customizations using Odoo's flexible development framework. Odoo supports customization through Python programming for backend logic and XML for frontend views. Customize existing modules by adding fields, modifying workflows, creating new reports, or integrating third-party applications. Develop custom modules to implement unique functionalities not available out-of-the-box.
5. User Interface (UI) and User Experience (UX) Design
Focus on designing an intuitive and user-friendly interface for the customized Odoo solution. Customize views, forms, menus, and dashboards to align with user preferences and workflows. Ensure consistency in design elements, navigation, and usability across the Odoo application.
6. Testing and Quality Assurance
Thoroughly test customizations to identify and resolve bugs, errors, and inconsistencies. Conduct functional testing to validate that custom functionalities meet business requirements. Perform performance testing to ensure optimized performance and responsiveness. Engage stakeholders and end-users in user acceptance testing (UAT) to gather feedback and refine customizations.
7. Deployment and Training
Once testing is completed and customizations are approved, prepare for deployment. Deploy the customized Odoo solution to production environment following best practices for deployment and configuration management. Provide training sessions and documentation to educate end-users on using the customized Odoo features effectively.
8. Maintenance and Support
Post-deployment, provide ongoing maintenance and support for the customized Odoo solution. Address user queries, troubleshoot issues, and implement updates or enhancements as needed. Monitor system performance, security, and scalability to ensure the customized Odoo solution continues to meet evolving business needs.
Conclusion
Odoo customization empowers businesses to adapt their ERP system to unique requirements and industry-specific workflows. By following these structured steps – from requirement gathering and analysis to development, testing, deployment, and support – organizations can successfully customize Odoo to optimize business processes, drive productivity, and achieve strategic objectives.
Effective Odoo customization requires collaboration between business stakeholders, experienced developers, and end-users to deliver a tailored ERP solution that adds value and supports growth.
#hireodoodeveloper#hireanodoodeveloper#hireodoospecialist#openerpdeveloper#hireodooexpert#odoodeveloper#odoospecialist#opensourcedeveloper#pythonodoodeveloper#bestodoodeveloper#odoowebdeveloper#odoofordevelopers#hireerpdeveloper
0 notes