#omichef
Explore tagged Tumblr posts
Visit Tumblr Blog
Explore Tumblr blogs with no restrictions, modern design and the best experience.
Last Seen Tumblr Blogs


Fun Fact
Mobile US users spent an average of 115.8 minutes on Tumblr app monthly.
Text
Woman's Empowerment: Safe and Efficient Cooking with a Pressure Cooker

Introduction
Cooking is an art that has been practiced for centuries, but what if I told you that there’s a kitchen appliance that can revolutionize the way you prepare meals, saving you time and enhancing flavors like never before? Enter the pressure cooker—a culinary powerhouse that transforms ordinary ingredients into extraordinary dishes in a fraction of the time.
We’ll cover everything from how pressure cookers work and the different types available, to essential tips for using them effectively and delicious recipes to try. By the end of this journey, you’ll understand why pressure cookers are a must-have in any kitchen and how to harness their potential to create mouthwatering meals that will impress family and friends alike. So, let’s dive into the world of pressure cooking and discover the magic that awaits!
Choosing the Right Cooker
Choosing the right cooker for your kitchen can significantly enhance your cooking experience, making meal preparation more efficient and enjoyable. With various options available, it’s essential to consider your cooking habits, kitchen space, and the features that best suit your needs. One brand that stands out in the market is Omichef, known for its innovative and high-quality cookers that cater to a range of culinary requirements.
Understanding your cooking needs
Before diving into the specifics of different cooker types, reflect on the following:
Cooking Style: Are you a busy professional who needs quick meals, or do you enjoy leisurely cooking on weekends? This will influence whether you need a pressure cooker for speed or a slow cooker for convenience.
Family Size: The number of people you typically cook for will determine the size and capacity of the cooker you need. Omichef offers a variety of sizes, making it easy to find one that fits your household.
Kitchen Space: Measure your kitchen area to ensure that the cooker you choose will fit comfortably without overcrowding your workspace.
Types of Cookers to Consider
Pressure Cookers: Ideal for quick cooking, pressure cookers trap steam to cook food faster while retaining flavors and nutrients. Omichef pressure cookers are designed with safety features and various capacities to suit different needs.
Slow Cookers: Perfect for those who prefer to set it and forget it, slow cookers allow for low and slow cooking, making them ideal for stews and casseroles. Omichef’s slow cookers come with programmable settings for added convenience.
Induction Cookers: These cookers use electromagnetic energy for fast and efficient cooking. Omichef offers induction cookers that are compatible with a variety of cookware, ensuring versatility in your kitchen.
Electric Cookers: Great for multitasking, electric cookers can perform various functions, from steaming to sautéing. Omichef’s electric models often include features like timers and automatic shut-off for safety.

Key Features to Look For
Durability: Choose a cooker made from high-quality materials. Omichef cookers are built to last, often featuring stainless steel or hard-anodized aluminum for durability.
Safety Features: Modern cookers, especially pressure cookers, come with advanced safety mechanisms. Omichef prioritizes safety, ensuring that its products meet rigorous safety standards.
Ease of Cleaning: Look for non-stick surfaces or dishwasher-safe options. Omichef cookers are designed for easy maintenance, allowing you to spend more time enjoying your meals and less time cleaning up.
Conclusion
Selecting the right cooker is a personal decision that should align with your cooking habits and lifestyle. Brands like Omichef provide a range of options that combine functionality, safety, and ease of use, making them a great choice for any kitchen. By considering your specific needs and exploring the features available, you can find the perfect cooker that will elevate your culinary adventures and make cooking a delightful experience.
If you are interested in buying, you can visit this website: 👉🏻 omichef.com.
2 notes
·
View notes
Text
How to Make Veg Fried Rice in Pressure Cooker: A Easy Guide

Fried rice is one of those comfort meals that never disappoints. Whether you are short on time or just craving something tasty and filling, veg fried rice in pressure cooker is a lifesaver. And yes, you can absolutely make a flavour-packed fried rice using just a pressure cooker — with minimal fuss and maximum satisfaction.
Let’s walk through how to make this simple yet delicious veg fried rice recipe using ingredients you likely already have at home.
Why Make Fried Rice in a Pressure Cooker?
You might be thinking — fried rice in a pressure cooker? Really? But once you try it, there’s no going back. Pressure cooking is fast, efficient, and great at locking in flavors. Unlike traditional pan-frying, this method lets the rice and vegetables cook evenly, without the risk of burning or sticking at the bottom.
Plus, you don’t have to stand in front of the stove stirring constantly. It’s perfect for those days when you want something homemade but quick.
Ingredients You will Need
Here’s a list of simple ingredients to get started:
1 cup basmati or long-grain rice (washed and soaked for 20 minutes)
2 tablespoons oil or ghee
1 teaspoon cumin seeds
1 finely chopped onion
1 teaspoon ginger-garlic paste
1 cup chopped mixed veggies (carrot, peas, beans, capsicum)
1 green chili (optional)
Salt to taste
½ teaspoon black pepper
1 tablespoon soy sauce (optional)
2 cups water
That’s all you need for this quick veg fried rice recipe that works for lunch, dinner, or even as a lunchbox option.
How to Make Veg Fried Rice in Pressure Cooker
Step 1: Sauté the Spices and Aromatics Heat oil in a pressure cooker and add cumin seeds. Once they splutter, toss in the chopped onion and sauté until golden. Add ginger-garlic paste and cook until the raw smell disappears.
Step 2: Add the Veggies Add in all your chopped vegetables and green chili. Sauté for 2–3 minutes to slightly soften them while keeping their color and crunch intact.
Step 3: Mix in Rice and Spices Drain the soaked rice and add it to the cooker. Stir in salt, pepper, and soy sauce if using. Mix everything gently so the rice doesn’t break.
Step 4: Pressure Cook Pour in 2 cups of water and close the lid. Cook on medium flame for just 1 whistle. Turn off the heat and let the pressure release naturally.
Step 5: Fluff and Serve Open the lid, fluff the rice gently with a fork — and just like that, your fried rice in pressure cooker is ready!
Tips to Get It Just Right
Soak the rice well to avoid clumpy texture.
Don’t overcook the veggies — they should still have a slight bite.
Add sweet corn or paneer cubes for variety.
For a spicier version, mix in green chili sauce or chili flakes.
Conclusion
Making veg fried rice in pressure cooker is a total game-changer. It saves time, uses less oil, and delivers on both flavor and nutrition. Whether you are cooking for yourself or for the whole family, this method is a smart way to enjoy a classic dish with a modern twist.
Give it a try the next time you are craving something quick, tasty, and comforting!
The Original Blog Is Here : How to Make Veg Fried Rice in Pressure Cooker: A Easy Guide
0 notes
Text
Sandwich bottom cookware: Discover its science, benefits, and uses.
Introduction
Sandwich bottom cookware is becoming increasingly popular in modern kitchens due to its superior heat distribution and durability. Whether you are using a sandwich bottom kadai, sandwich bottom frypan, or sandwich bottom wok, this type of cookware is designed to enhance cooking efficiency. The secret lies in its layered construction, which ensures even heating, prevents food from burning, and retains warmth for longer. But what exactly makes sandwich bottom cookware different, and is it worth the investment? Let’s dive into the science behind this innovative cookware and understand its benefits.
Read More: Best Kadai for Deep Frying at Home – Triply Kadai Guide

What is Sandwich Bottom Cookware?
Sandwich bottom cookware is designed with multiple layers of metal, typically stainless steel with an aluminum or copper core. This unique construction allows for even heat distribution, reducing hot spots and ensuring better cooking results. The layers work together to provide durability, prevent food from sticking, and maintain a steady temperature while cooking. Whether you are using a sandwich bottom kadai for deep frying or a sandwich bottom saucepan for making gravies, this technology enhances cooking performance.
Read More: Stainless Steel Cookware Recipes for Delicious Summer Meals
How Does the Sandwich Bottom Design Work?
The key to sandwich bottom cookware lies in its multi-layered design. Here is how it works:
Outer Layer (Stainless Steel): The topmost layer is made of stainless steel, offering durability, rust resistance, and easy maintenance.
Middle Layer (Aluminum or Copper Core): This layer acts as a conductor, distributing heat evenly across the cooking surface.
Inner Layer (Stainless Steel): The inner stainless steel layer ensures food safety, preventing reactions with acidic ingredients.
This construction makes a significant difference when using a sandwich bottom frypan or sandwich bottom wok, as it prevents overheating and provides consistent heat for better cooking.
Read More: Stainless Steel Triply Cookware Set – The Ultimate Guide to Choosing the Best Cookware
Benefits of Using Sandwich Bottom Cookware
1. Even Heat Distribution
One of the biggest advantages of sandwich bottom cookware is its ability to distribute heat evenly. Unlike traditional cookware that may develop hot spots, this design ensures that your food cooks uniformly, preventing burning or undercooking.
2. Faster Cooking and Energy Efficiency
The aluminum or copper core in sandwich bottom cookware allows heat to spread quickly, reducing cooking time. This means less gas or electricity consumption, making it an energy-efficient choice for daily cooking.
3. Enhanced Durability
Cookware like sandwich bottom kadai or sandwich bottom saucepan is built to last. The stainless steel exterior is resistant to corrosion, while the sturdy core maintains its shape and efficiency even after years of use.
4. Versatile Cooking Options
Whether you’re deep-frying in a sandwich bottom wok, sautéing vegetables in a sandwich bottom frypan, or preparing curries in a sandwich bottom saucepan, this cookware adapts to different cooking styles, making it a great addition to any kitchen.
Why Choose Sandwich Bottom Cookware Over Regular Cookware?
Many people wonder if sandwich bottom cookware is truly better than regular stainless steel or non-stick cookware. Here’s a quick comparison:
Read More: 5 Most Common Mistakes People Make with Triply Cookware
Comparison: Sandwich Bottom Cookware vs. Regular Cookware
Feature
Sandwich Bottom Cookware
Regular Cookware
Heat Distribution
Even and consistent
Uneven, may cause burning
Energy Efficiency
Cooks faster, saves fuel
Requires more energy
Durability
Long-lasting, strong build
May warp over time
Maintenance
Easy to clean, does not rust
Some require seasoning or special care
Clearly, sandwich bottom cookware offers more advantages, making it an excellent investment for home cooks and professionals alike.
Read More: Is Triply Cookware Safe? Your Guide to Healthy Cooking with Omichef
How to Care for Your Sandwich Bottom Cookware

To ensure your sandwich bottom kadai, sandwich bottom frypan, or sandwich bottom wok stays in top condition, follow these simple care tips:
Use Mild Detergents: Avoid harsh chemicals that can damage the stainless steel surface.
Avoid High Flames: Excessive heat can discolor the cookware. Use medium to low flame for best results.
Dry Immediately After Washing: This prevents water stains and keeps your cookware looking new.
Use Soft Sponges: To maintain the smooth finish, avoid steel wool or abrasive scrubs.
By following these steps, you can extend the lifespan of your sandwich bottom cookware and keep it performing at its best.
Read More: Biryani Made Easy with the Best Cookware for Biryani
Final Thoughts: Is Sandwich Bottom Cookware Worth It?
If you want cookware that offers even cooking, energy efficiency, and durability, sandwich bottom cookware is a great choice. Whether you opt for a 1ai for deep frying, a sandwich bottom frypan for quick meals, or a sandwich bottom saucepan for rich gravies, this cookware ensures a seamless cooking experience. Its layered construction truly makes a difference, allowing you to cook like a pro every time.
So, is it worth the investment? Absolutely! With its superior performance and long-lasting quality, sandwich bottom cookware is a must-have for every modern kitchen.
The Original Blog Is here : Sandwich bottom cookware: Discover its science, benefits, and uses.
0 notes
Text
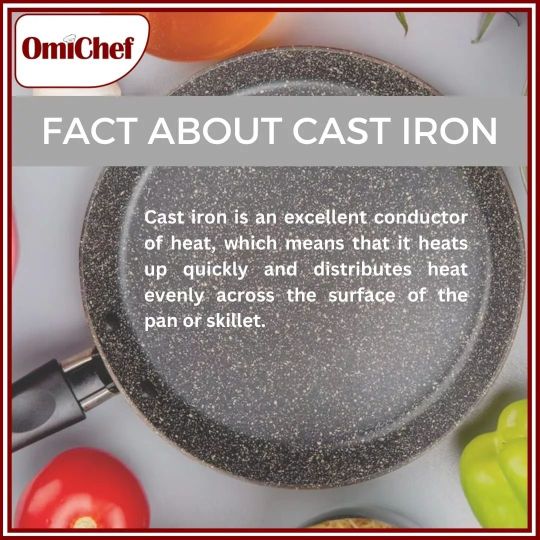
Did you know that cast iron cookware has been around for centuries? 🕰️ It's a classic for a reason!"
#factovermyth#facts#castiron#omichef#omichefofficial#tawa#cookware#excellent#true#about#nonstick#nonstickcookware#nonstickpan#amazonfinds#amazing#cheflife#chef#tomato#onion#kitchenappliances#burner#gasstove#appliances#homechef#kitchendesign#kitchenhacks#kitchenware#best#funfact#big facts
1 note
·
View note
Text
Discover the Benefits of Cooking with Triply Cookware.
For centuries, cookware has evolved from humble clay pots to today’s high-performance materials. One of the most impressive innovations in modern kitchens is triply cookware, known for its perfect balance of strength, heat efficiency, and durability. Whether you are a seasoned cook or just starting out, triply utensils are a smart, health-conscious choice.
Let’s explore the origins, advantages, types, and modern appeal of triply cookware that blends traditional techniques with modern performance.
Historical Context: From Clay to Steel
While ancient civilizations relied on clay for cooking, metals eventually replaced it for better efficiency and longevity. Over time, stainless steel and aluminum became kitchen staples, and combining the two led to the development of triply cookware—a layered design that offers unmatched heat conduction and cooking precision.
Types of Triply Cookware
Triply Kadai: Best for Indian dishes like curries, frying, and sautéing—offering even heat and minimal sticking.
Triply Saucepan: Ideal for making sauces, boiling milk, or reheating leftovers without scorching.
Triply Fry Pan: Great for frying, stir-frying, or shallow cooking with better control.
Triply Cookware Sets: Complete solutions for kitchens, ensuring consistency and compatibility across all utensils.
Benefits of Triply Cookware
1. Even Heat Distribution The aluminum core inside triply utensils allows for quick, uniform heating without hot spots.
2. Long-Term Durability With stainless steel on both the inside and outside, triply cookware resists rust, dents, and wear—lasting for years.
3. Safe and Non-Reactive The inner stainless steel layer does not react with acidic foods, maintaining purity and flavor in every meal.
4. Fuel Efficiency Because it heats faster and retains warmth longer, triply cookware helps reduce gas or electricity use.
5. Low Maintenance Unlike non-stick or clay cookware, triply utensils are easy to clean, often dishwasher-safe, and don’t require frequent replacement.
How to Care for Triply Cookware
First Use: Wash with mild soap and warm water before first use.
Daily Cleaning: Use soft sponges; avoid metal scrubbers.
Avoid Overheating: Use medium heat for most tasks—triply cookware does not need high flames to perform.
Modern Uses of Triply Cookware
Today’s home chefs love triply cookware for its professional-level performance and health-friendly design. From Indian tadkas to Italian sauces, it handles everything beautifully. Compatible with gas, induction, and electric stoves, it is also oven-safe, depending on the handle design.
Additionally, its sleek, modern look complements both minimal and traditional kitchen aesthetics.
Common Questions About Triply Cookware
What is triply cookware? It is cookware made from three bonded layers—stainless steel, aluminum, and stainless steel—offering better cooking results and durability than regular pans.
Is triply cookware safe? Yes, it is non-reactive and free from harmful coatings like Teflon or chemicals like PFOA and PFAS.
Can I use triply cookware on induction? Yes, most modern triply utensils, like those from Omichef, are induction-compatible.
Is it worth the investment? Absolutely. Though it may cost more upfront, its long life and consistent performance make it a cost-effective choice in the long run.
Conclusion
Triply cookware is revolutionizing Indian kitchens by offering a combination of health, performance, and aesthetics. Whether you are slow-cooking a stew or quickly searing vegetables, triply cookware delivers better results every time.
Invest in cookware that makes your everyday cooking efficient, safe, and stylish.
Explore high-quality cookware now at Omichef’s official site:
0 notes
Text
0 notes
Text
Is It Safe to Use Triply Cookware? This Is Important for You to Know

Triply cookware is not only safe but also a smart choice for modern kitchens. Its non-reactive surface, even heat distribution, and durable construction make it a reliable partner for all your culinary adventures. By investing in a quality triply cookware set, like those available at Omichef, you can ensure safe, efficient, and enjoyable cooking for years to come.
0 notes
Text
Discover the Benefits of Cooking with a Triply Kadai
Introduction: Why Triply Kadai is Gaining Popularity
The Triply Kadai has become a favorite in kitchens because it combines strength, durability, and excellent heat distribution. Unlike traditional cookware, the Triply Kadai is built with three layers—two layers of stainless steel and an aluminum core. This unique design makes cooking faster and more efficient by ensuring even heating, which means food is less likely to burn. Home cooks and professional chefs alike love how it requires less oil, making meals healthier. With its sturdy build and easy maintenance, the Triply Kadai is quickly becoming a must-have for anyone who loves to cook.
What is a Triply Kadai?
A Triply Kadai is a special type of cookware made with three layers. The word "triply" means that it has three layers in its structure. The inside layer is stainless steel, which is safe for cooking. The middle layer is aluminum, which helps spread heat evenly, and the outside layer is stainless steel again, making it strong and durable. This unique design of the Triply Kadai ensures that heat is distributed well and stays even throughout cooking. This makes it perfect for Indian dishes, as it prevents food from burning and cooks it thoroughly with less effort.
Read this article: Omichef Triply Stainless Steel Kadai – Upgrade Your Cooking Game
Key Benefits of Using a Triply Kadai
The Triply Kadai stands out for its durability, lasting much longer than traditional kadais. Made with three strong layers, it can handle daily cooking without bending or warping. Another big advantage of the Triply Kadai is its even cooking—heat spreads equally, so food doesn’t burn easily, and you get perfect results every time. Plus, food is less likely to stick, which means you can use less oil, making meals healthier. It’s also easy to clean, as stainless steel resists rust and stains, keeping your kadai looking fresh with minimal effort.
Best Uses for a Triply Kadai in the Kitchen
The Triply Kadai is perfect for many cooking tasks due to its ability to handle high heat. It’s ideal for frying, as the sturdy design and even heating make sure food cooks thoroughly and crisps up well. The Triply Kadai is also great for sautéing and stir-frying vegetables and meats, with heat spreading evenly to avoid hot spots and ensure a perfect cook. For slow-cooking dishes like curries, its excellent heat retention helps flavors develop nicely. If it comes with a lid, you can even use it for steaming, making this versatile kadai a valuable tool in any kitchen.
Tips for Choosing the Right Triply Kadai
When picking the best Triply Kadai for your kitchen, size is important. Think about your family size and cooking needs; a larger kadai works well for families, while a smaller one is perfect for single or smaller meals. Sturdy handles are also essential for safely lifting a Triply Kadai, especially when it’s full of food, and a well-fitting lid helps retain heat and moisture. As for budget, there are several brands that offer quality triply kadais at different prices, so you can find a good option that fits your needs without overspending.
Caring for Your Triply Kadai
To keep your Triply Kadai in top shape, proper care is key. For cleaning, avoid using harsh scrubbers or steel wool that might scratch the surface; instead, use a soft sponge and mild soap. Never put a hot Triply Kadai under cold water, as it can cause warping. If you’d like to season it for extra non-stick benefits, rub a small amount of oil on the surface and heat it for a few minutes before wiping off the excess. When storing, keep it in a dry place and stack carefully to prevent scratches or dents, ensuring it lasts for years.
Why Triply Kadai is Worth the Investment
Investing in a Triply Kadai is worth it because it offers great value over time. While it may cost a little more than traditional cookware, the benefits are clear. The Triply Kadai is versatile, allowing you to fry, sauté, slow-cook, and even steam, making it perfect for various dishes. Its durable design means it can last for many years, reducing the need to replace it often. Plus, with healthier cooking options, like using less oil and avoiding burnt food, you can enjoy tasty meals while taking care of your health. Overall, the Triply Kadai is a smart choice for any kitchen.
Conclusion
In conclusion, the Triply Kadai is an excellent addition to any kitchen. With its strong design, even heating, and versatility, it makes cooking easier and more enjoyable. We encourage you to try cooking with a Triply Kadai and see the difference it can make in your meals. Whether you are frying, sautéing, or slow-cooking, this kadai is sure to impress. Don’t forget to share your cooking experiences with a Triply Kadai—we’d love to hear how it has made your time in the kitchen even better!aa
1 note
·
View note
Text
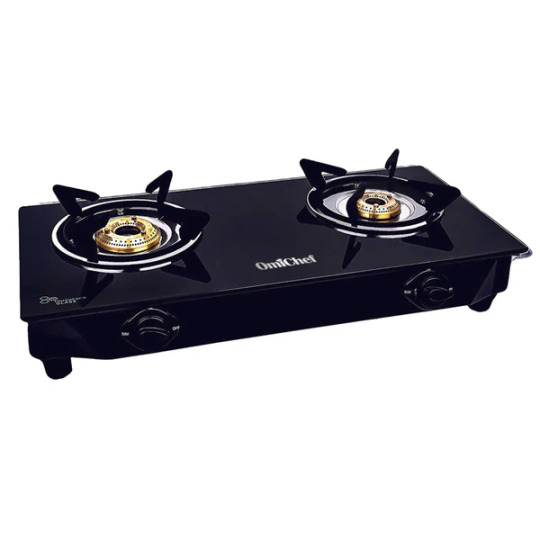
Omichef Toughened Glass Stove offers several benefits:
Safety: Toughened glass stoves are designed with safety in mind. The tempered glass surface is highly resistant to thermal shock and can withstand high temperatures without shattering. This reduces the risk of accidents and injuries in the kitchen.
Durability: The toughened glass used in Omichef stoves is highly durable and scratch-resistant, ensuring that it can withstand the rigors of everyday cooking. It is also easy to clean and maintain, making it a practical choice for busy households.
Even Heat Distribution: Omichef Toughened Glass Stoves typically feature high-quality burners that provide even heat distribution across the cooking surface. This helps to prevent hot spots and ensures that your food cooks evenly and thoroughly.
Sleek and Modern Design: Toughened glass stoves have a sleek and modern appearance that can enhance the look of any kitchen. The smooth glass surface is easy to clean and adds a touch of elegance to your cooking space.
Energy Efficiency: Omichef Toughened Glass Stoves are often designed to be energy-efficient, helping you save on your utility bills. The efficient burners and heat retention properties of the glass surface reduce energy waste and ensure that your food cooks quickly and evenly.
Versatility: Toughened glass stoves are compatible with a wide range of cookware, including stainless steel, cast iron, and aluminum. This versatility allows you to use your favorite pots and pans without having to worry about compatibility issues.
Easy Installation: Omichef Toughened Glass Stoves are typically easy to install and can be fitted into most standard kitchen countertops. They come with detailed instructions and all the necessary hardware, making installation a hassle-free process.
Touch Controls: Some Omichef Toughened Glass Stoves feature touch controls for easy operation and precise temperature adjustments. This modern feature adds convenience to your cooking experience and allows you to control your stove with just the touch of a finger.
Overall, Omichef Toughened Glass Stove offers safety, durability, even heat distribution, energy efficiency, and a sleek design, making it a practical and stylish choice for any kitchen.
0 notes
Text
How to Make Cake at Home: A Complete Guide with Triply Cookware

Who doesn’t love the smell of fresh cake filling the kitchen? Whether it’s for a birthday, a special occasion, or just to satisfy a sweet craving, knowing how to make cake at home is a wonderful skill. And the best part? You don’t need an oven at all!
Yes, you heard that right. With just a few everyday ingredients and a deep, heavy-bottomed utensil, you can bake a soft and fluffy cake at home right on your gas stove.
Why Stove-Top Cake Works
If you have ever wondered how to make cake at home without any fancy equipment, this method is for you. All you need is a thick steel kadhai, saucepan, or casserole — something that distributes heat evenly. Add a steel stand or plate inside, and you are all set for a DIY oven.
Ingredients You will Need
Here’s what you will need for a simple eggless vanilla cake:
1 cup all-purpose flour (maida)
¾ cup powdered sugar
½ cup curd
½ cup milk
¼ cup oil or melted butter
1 tsp baking powder
½ tsp baking soda
1 tsp vanilla essence
1 tsp lemon juice or vinegar
A pinch of salt
Butter or oil for greasing
Optional add-ins: choco chips, dry fruits, or tutti-frutti.
How to Make Cake Step-by-Step
1. Preheat the Pan Take a deep steel utensil. Add a layer of salt at the bottom and place a stand inside. Cover it and preheat on low flame for 10 minutes.
2. Prepare the Batter Mix curd and sugar until smooth. Add milk, oil, vanilla essence, and lemon juice. Sift in flour, baking powder, and soda. Fold gently to make a smooth batter.
3. Grease & Pour Grease your cake tin and dust with flour. Pour the batter in and tap it to remove bubbles.
4. Bake on Gas Place the tin on the stand inside your preheated utensil. Cover tightly and cook on low heat for 35–40 minutes. Check with a toothpick — if it comes out clean, your cake is ready!
5. Cool & Enjoy Let it cool before removing from the tin. You can enjoy it as-is or decorate with icing.
Fun Cake Variations
Once you learn how to make cake at home, you can try tons of twists:
Chocolate cake: Add cocoa powder
Fruit cake: Add dry fruits
Layer cake: Slice and add jam or cream
Final Thoughts
Now you know exactly how to make cake at home, no oven needed! It’s all about simple ingredients, the right cooking pot, and a little patience. So go ahead — try it today and surprise your family with a homemade treat.
Happy baking!
The Original blog is Here : How to Make Cake at Home: A Complete Guide with Triply Cookware
0 notes
Text
Best Drinking Water Bottle for Summer Hydration Needs

Planning a summer trip sounds exciting — until the sun starts draining your energy and thirst hits hard. Whether you are gearing up for a beach vacation, a family picnic, or a trek with friends, staying hydrated is non-negotiable. But here’s the problem: disposable plastic bottles run out quickly, leak often, and don’t keep your water cold. That’s when a drinking water bottle becomes your ultimate summer companion. Not just any bottle, but one that suits your style, keeps water cold, and is eco-friendly too.
Why You Need a Reliable Drinking Water Bottle This Summer
Summer heat can be brutal. Long drives, adventure sports, or even walking around a sunny city can leave you drained if you are not sipping water regularly. A drinking water bottle that’s easy to carry, durable, and insulated ensures that you always have cool water by your side. Dehydration isn’t just about feeling thirsty — it can cause fatigue, headaches, and a serious dip in your mood. The last thing you want during a fun trip is to feel exhausted. So don’t leave hydration to chance.
If you are traveling with kids, you know how important it is to have water handy. Children often forget to drink enough while playing outdoors, especially during summer. A colorful and easy-to-use drinking water bottle can make a huge difference. It turns hydration into a fun habit and gives parents peace of mind knowing their kids are staying safe in the heat.
Fitness lovers, trekkers, and outdoor enthusiasts also rely heavily on hydration. When you are sweating under the sun, your body loses fluids fast. Carrying your own drinking water bottle ensures you avoid sugary drinks from roadside stalls and stay refreshed with clean, cool water. It’s a smart and healthy summer hack that pays off every single day.
Another major reason to carry your own bottle is the environmental impact. Using a reusable drinking water bottle helps cut down on single-use plastic waste. Every refill is one less bottle in the landfill — or worse, in the ocean. It’s a simple step with a big impact, especially if you travel often.
Modern drinking water bottles aren’t just about function — they look good too. From pastel shades to matte finishes and stylish shapes, today’s bottles complement your personality and your summer style. Plus, many of them come with features like double-wall insulation, leakproof lids, and wide mouths for easy cleaning and ice cubes. It’s hydration with both convenience and charm.
When choosing a bottle, think about what suits your lifestyle. Are you always on the move? Choose a lightweight insulated bottle. Prefer health-focused options? Go for a copper-lined or BPA-free version. Need something versatile for gym and work? A stainless steel drinking water bottle with a sleek design will do the job.
Size also matters. A 750ml to 1-litre bottle is perfect for day trips or office hours. If you are into long hikes or camping, maybe go for a 1.5-litre option. And if cold water is your priority, make sure you pick a vacuum-insulated model — it can keep drinks chilled for up to 24 hours!
Finally, having your own bottle builds a simple but powerful habit. You tend to drink more water when it’s available, clean, and within reach. That means better energy, better skin, and fewer headaches — especially during the harsh summer months.
So, whether you are navigating your daily commute, planning a road trip, or just trying to survive a heatwave, a good drinking water bottle is your secret weapon. It keeps you refreshed, reduces your environmental footprint, and adds a little extra cool to your summer.
The Original Blog is Here : Best Drinking Water Bottle for Summer Hydration Needs.
0 notes
Text
Are You Cooking Safely? Know Steel Cookware Health Risks

Imagine This…
You are in the kitchen, making your family’s favorite dish — maybe a spicy dal or tangy rasam. The ingredients are fresh, the aroma is mouthwatering, and the love you are putting into the food is real. But have you ever wondered… could the utensil you are using be doing silent damage?
That’s something many Indian families overlook. We grew up watching our moms cook in stainless steel pots and pans — they were everywhere. But in today’s world, it’s time to ask: are there any steel cookware health risks we should take seriously?
Let’s uncover the truth that might just be hiding in your own kitchen.
Why We Trust Steel — And Why That’s Not Always Safe
Stainless steel is like a family member in Indian kitchens. It’s been with us for decades — strong, shiny, and reliable. But not all steel is the same.
Lower-grade steel utensils, especially the cheap ones, can release harmful metals like nickel and chromium into food. This usually happens when you cook sour items like tomatoes, lemon, or tamarind. That leaching — though invisible — builds up over time and can cause issues like stomach discomfort, skin allergies, or even more serious health concerns.
So yes, steel cookware health risks are real — especially when we are not aware of what kind of steel we are using.
How Do These Risks Show Up in Daily Cooking?
You are not eating your kadai, obviously. But when tiny particles of metal enter your food — every single day — they can quietly affect your health.
Here’s how it happens:
Sour foods react more with the steel surface, especially if it’s not high quality.
Scratches and dents in your cookware speed up metal leaching.
Overheating the pan can break down its protective layer.
Over time, these small things can lead to bloating, fatigue, or unexplained allergies. And the worst part? Most of us never even consider our cookware as the reason.
Are All Steel Cookware Products Unsafe?
Absolutely not. The problem isn’t stainless steel — it’s the type of stainless steel.
High-quality cookware like triply or surgical-grade steel is far safer. These have added protective layers that prevent leaching, even with hot or sour foods. They also distribute heat better and last longer — so it’s not just safer, it’s smarter.
But here’s the thing: most people aren’t aware of these differences. We often shop based on price or habit. And that’s where steel cookware health risks quietly slip into our lives.
How to Cook Safer Without Changing Everything
You don’t need to throw away all your utensils. Just start with small changes:
Choose triply cookware — it’s built for both safety and performance.
Avoid cooking sour foods in worn-out steel utensils.
Don’t use steel scrubbers that scratch the surface.
Cook on medium heat to protect the steel coating.
These small habits go a long way in reducing your family’s exposure to steel cookware health risks.
Final Thoughts
In Indian kitchens, cookware is more than a tool — it’s a tradition. But just like we have upgraded our mixers and microwaves, it’s time to upgrade our awareness too.
Knowing about steel cookware health risks helps you make better choices — not just for taste, but for health. So, the next time you are preparing that delicious home-cooked meal, remember: it’s not just what you cook, but what you cook it in, that matters most.
The Original Blog Is Here : Are You Cooking Safely? Know Steel Cookware Health Risks
#omichef#Steel Cookware Health Risks#stainless steel cookware#indian food#healthy eating#healthy cookware#healthy cooking
1 note
·
View note
Text
Top 7 Best Food in Rainy Season to Try Once with Omichef

Best food in rainy season is not just about taste — it’s a full-on experience. Picture this: the rain tapping on your window, the cozy vibes inside your home, and a plate full of hot, comforting snacks waiting for you. Sounds like heaven, right? Rainy days have a way of making us crave warm, spicy, and soul-satisfying food. Let’s take a look at some of the most loved monsoon dishes that make this season extra special.
1. Best Food in Rainy Season — Let’s Start with Pakoras
When it comes to the best food in rainy season, pakoras top the list every single time. Onion, potato, paneer, or even spinach — there’s a pakora for everyone. Dip them in mint chutney or tamarind sauce and pair with a cup of steaming masala chai, and you have got the ultimate monsoon snack.
The best part? They are super easy to make. Just mix, fry, and enjoy. Whether you are home alone or having friends over, pakoras are a quick fix for your rainy-day cravings.
2. Hot Soups — Warmth in a Bowl
Nothing beats the comfort of hot soup when the weather turns cool and damp. From tomato to sweet corn or a hearty vegetable broth, soups are easily one of the best food in rainy season to cozy up with.
The beauty of soup is how flexible it is. You can throw in your favorite ingredients, adjust the spice level, and even add noodles or herbs for extra warmth. Plus, sipping soup while watching rain outside is the ultimate comfort moment.
3. Street-Style Chaat — Tangy and Irresistible
Let’s be honest — rainy days bring out our inner chaat lover. Be it pani puri, bhel puri, aloo tikki, or dahi puri, these spicy and tangy treats are total mood-lifters.
If you are hesitant to eat street food during monsoons, no worries! You can easily whip up these chaats at home with fresh ingredients. The mix of sweet, spicy, and crunchy textures is why chaat remains one of the best food in rainy season for snack lovers.
4. Steamed Momos — Little Pockets of Joy
Another monsoon must-have is a plate of hot steamed momos. Filled with veggies or paneer and served with spicy red chutney, momos are light yet super satisfying.
They are also a great pick if you are looking for healthier snack options. Easy to digest and full of flavor, momos definitely earn their spot on the list of best food in rainy season.
5. Roasted Bhutta — Smoky, Crunchy Goodness
Walking past a roadside bhutta (corn) vendor during the rains is a whole vibe. That smoky aroma, the sizzling sounds, and the simple yet tasty mix of lemon, salt, and chili — perfection!
You can even make roasted corn at home if you like. It’s wholesome, quick, and totally gives you that nostalgic rainy day feel.
6. Khichdi — A Hug in a Bowl
Not in the mood for snacks? A warm bowl of khichdi can be just what you need. It’s simple, soothing, and easy on the stomach — especially great during weather changes.
Made with rice, lentils, and basic spices, khichdi is one of the best food in rainy season when you want comfort and nutrition in one dish.
7. Masala Chai — The Classic Monsoon Drink
No list is complete without chai! A hot cup of masala chai with ginger, tulsi, and cardamom is more than just a drink — it’s an emotion.
Pair it with biscuits or pakoras, sip slowly, and watch the rain pour. That’s how you truly enjoy the best food in rainy season moments.
Conclusion: Monsoon Cravings, Sorted!
The rainy season is all about staying warm, cozy, and well-fed. With dishes like pakoras, soups, chaats, momos, and more, you can turn even the gloomiest day into a flavorful experience. The best food in rainy season doesn’t have to be fancy — just fresh, hot, and made with love. So grab your umbrella, light up the stove, and treat yourself to some monsoon magic on your plate!
The Original Blog is Here : Top 7 Best Food in Rainy Season to Try Once with Omichef
0 notes
Text
Choose the Best Material for Cooking Utensils

Choosing the best material for cooking utensils is one of the smartest decisions you can make for your kitchen. It affects not just how you cook, but also how safe, durable, and efficient your tools are. If you have ever dealt with melted plastic spatulas or spoons that rust or bend easily, you know how frustrating it can be.
Many people fall into the trap of buying cheap utensils, thinking they will save money. But in the long run, these low-quality tools often damage your cookware, leach chemicals into your food, or simply don’t last. That’s where stainless steel and Triply stainless steel come in. They have earned their reputation as the best material for cooking utensils for good reasons.
Why Stainless Steel Is a Smart Choice
Stainless steel is known for being tough, durable, and rust-resistant. It doesn’t react with acidic ingredients like tomatoes or vinegar, which makes it safe for a wide variety of cooking styles. Unlike wooden or plastic utensils, it doesn’t absorb odors, stain, or break down over time.
What makes stainless steel especially appealing is how easy it is to maintain. You can toss most stainless steel utensils in the dishwasher, and they come out looking just like new. No cracking, no peeling — just clean, shiny, and ready to use again.
Because of its strength and non-reactive nature, stainless steel has become the best material for cooking utensils in homes and professional kitchens alike.
What Is Triply Stainless Steel?
Triply cookware is made of three layers: stainless steel on the inside and outside, and a middle layer of aluminum sandwiched in between. This combination creates cookware that’s not only sturdy but also heats up quickly and evenly.
Even heat distribution is one of the major benefits of Triply stainless steel. It helps you avoid hotspots that cause food to stick or burn. This is especially useful when making sauces, frying, or preparing dishes that require precise cooking temperatures.
So, when people ask about the best material for cooking utensils, Triply often tops the list for its blend of performance and durability.
Health and Safety Benefits
Both stainless steel and Triply utensils are free from harmful coatings or synthetic materials. Unlike non-stick or plastic options, they don’t leach chemicals into your food, even when exposed to high heat.
This makes them ideal for families, especially when cooking for kids or elderly members who may be more sensitive to toxins. It’s one more reason why health-conscious cooks prefer stainless steel — it’s clean, safe, and dependable.
Final Thoughts
If you are tired of replacing your utensils or worrying about what’s getting into your food, it’s time to make the switch. Stainless steel and Triply stainless steel are long-lasting, easy to maintain, and safe for everyday use. With so many benefits rolled into one material, it’s no surprise they are considered the best material for cooking utensils by professionals and home cooks alike.
The Original Blog is Here : Choose the Best Material for Cooking Utensils
0 notes
Text
Sizzle & Melt: The Ultimate Paneer Tikka Cheese Fix

Paneer tikka cheese — just the name is enough to make us hungry, right? But let’s be honest — we all love that smoky, cheesy goodness, yet making it at home? That’s where the real struggle begins! Paneer sticks to the pan, cheese doesn’t melt well, and sometimes the whole thing ends up tasting… meh. If you have ever tried and felt frustrated, don’t worry — you are definitely not alone! But here’s the good news — with a little care, the right method, and everyday ingredients, you can totally nail it at home. Let’s make your next homemade paneer tikka cheese the talk of the house!
A Bit of History Behind the Cheesy Craze
The roots of paneer tikka go back to Punjab, where it was created as a vegetarian twist on tandoori dishes. During the Mughal times, paneer was marinated and grilled in clay ovens — just like meat tikkas. The cheese topping? That’s a newer twist, added to make it even more drool-worthy. Now, from Delhi’s street food stalls to Mumbai’s cafés, paneer tikka cheese is everywhere — cheesy, spicy, and full of smoky flavor.
Can You Make Paneer Tikka Cheese at Home?
Absolutely yes! You don’t need a tandoor or any fancy equipment. Just some fresh paneer, basic spices, curd, and grated cheese — and you’re already halfway there. You can use a regular frying pan or tawa to get that delicious char and melt.
What You will Need (And Why!)
Here’s a quick rundown of the ingredients and why they matter:
Paneer — Use fresh and firm cubes so they don’t break or crumble.
Hung Curd — Helps in binding the spices and gives a creamy marination.
Cheese — Mozzarella or processed cheese works best for that perfect melt.
Spices — Red chilli, turmeric, garam masala, and kasuri methi bring in that smoky, tandoori feel.
Besan — Just a spoonful helps coat the paneer better.
Veggies — Optional, but capsicum and onion add crunch and flavor.
How to Make It — Step by Step
Marinate the Paneer: In a bowl, mix ½ cup hung curd, 1 tbsp besan, ginger-garlic paste, and spices. Add paneer cubes (and veggies if using). Let it rest for 30 minutes.
Cook the Tikka: Heat a pan with a little oil. Cook the paneer till golden brown on both sides.
Cheese It Up: Sprinkle grated cheese generously over the paneer. Cover the pan for a couple of minutes till the cheese melts beautifully.
And there you have it — your cheesy, smoky paneer tikka cheese is ready to be devoured!
Serving Ideas
Serve it hot — that’s the trick! Pair it with mint chutney, lemon wedges, and some salad on the side. You can even get creative and use it in wraps, sandwiches, or rolls.
Final Thoughts
Making paneer tikka cheese at home isn’t rocket science — it’s actually fun and super rewarding. Once you get the hang of it, you will never crave the restaurant version again. So, roll up your sleeves and bring that cheesy magic to your kitchen! The Original Blog Is Here : Sizzle & Melt: The Ultimate Paneer Tikka Cheese Fix
0 notes
Text
A Taste of Home in Every Bite — Dahi Bhalla Recipe

Ever tried making dahi bhalla at home and felt like something’s always missing? Either the bhallas turn out too hard, too oily, or the dahi ends up too watery. And that perfect melt-in-the-mouth texture? Nowhere to be found! You’re not alone — it’s a common kitchen struggle, especially when we all crave that shaadi-style dahi bhalla during festivals or family get-togethers.
But here’s the good news — once you understand the basics, the perfect dahi bhalla recipe isn’t all that hard. It just needs a little patience and the right steps. Let’s break it down like you would for a friend.
So, What Is This Dahi Bhalla Recipe Everyone Loves?
Dahi bhalla is basically a soft, spongy fritter made from urad dal (split black gram), soaked in water, and topped with curd, chutneys, and spices. It’s creamy, tangy, and a little spicy — all in one bite. The magic lies in how soft your bhallas turn out and how balanced the flavors are.
How to Make Dahi Bhalla at Home?
Start by soaking urad dal for about 5–6 hours. Then grind it into a smooth paste and whisk it well — this step adds air and makes the bhallas light and fluffy. Drop small portions into hot oil and fry on medium heat until golden.
Once done, soak the fried bhallas in warm water for 15–20 minutes. Gently press them to remove extra water — don’t squish them flat! Then, place them in a dish and pour chilled curd over them, followed by chutneys and spices. That’s it — your dahi bhalla recipe is ready to impress.
What Ingredients Make It So Special?
Every ingredient has a purpose here:
Urad dal: the base for the bhallas — gives structure and fluffiness.
Salt & hing: not just for taste, but also helps in digestion.
Curd (dahi): make sure it’s thick and chilled, not watery.
Sweet tamarind chutney: adds that sweet-sour twist.
Green chutney: brings freshness and a little heat.
Roasted cumin, red chili powder, black salt: the final touch that lifts all the flavors.
The real charm of this dahi bhalla recipe is how all these ingredients balance each other — cold, spicy, tangy, sweet. It’s like a flavor party in every spoon.
Which Cookware Works Best?
Let’s be honest — old, uneven pans can ruin the whole effort. You’ll need a deep kadhai for frying so that the bhallas cook evenly. A large bowl to soak them after frying. A mixing bowl for curd, and something flat to assemble and serve it all. The cookware doesn’t need to be fancy, just functional and safe.
How to Serve Dahi Bhalla Like a Pro?
Serving is where the fun begins! Place 2–3 soft bhallas on a plate, spoon over chilled curd, drizzle chutneys, and sprinkle those magic spices. For extra flair, add some pomegranate seeds or crunchy sev. Just remember — keep it cold and fresh. That’s the secret to an unforgettable dahi bhalla recipe.
Conclusion — Bring the Joy of Dahi Bhalla Home
A good dahi bhalla recipe doesn’t need hours in the kitchen or fancy tricks — just a little love and the right steps. Once you get it right, your homemade version will taste even better than the ones from weddings. So next time you are craving that creamy, fluffy delight, skip the takeout and make it at home. Trust me, your taste buds (and family) will thank you!
The Original Blog Is here : A Taste of Home in Every Bite — Dahi Bhalla Recipe
0 notes