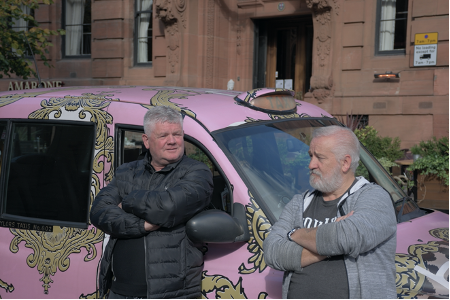
#photography 1: if you do not make your files the right size I WILL TAKE AWAY POINTS. IF YOU MISS MORE THAN ONE ASSIGNMETN KILL URSELF. STFU
Text
Actually the worst thing in the universe is getting to take multiple high level classes where ur allowed so much freedom and flexibility and then having to go back to take a 100 level class where the professor makes it seem like he’ll commit suicide if you name the file on ur assignment wrong.
#painting 3 prof: uhhh yeah just make a slideshow talking about ur proposal and just make sure you have a title and some examples of ur idea#drawing 3: make a still life. show up this date to crit. thx.#photography 1: if you do not make your files the right size I WILL TAKE AWAY POINTS. IF YOU MISS MORE THAN ONE ASSIGNMETN KILL URSELF. STFU#godddddddddddddddddddddddd#fuck my stupid baka life#my post
2 notes
·
View notes
Text
5 Things Every Photographer Needs To Consider When Shooting Events
Planning for a shoot can be tough and requires you to get things just right. You need to know the setup, lighting, and everything else that goes into making a photo perfect. But what if you're shooting an event? In this blog post, we talk about five considerations every photographer should have in mind when shooting events.
-1) What is your goal as a photographer?
As a photographer, my goal is to capture the moments that matter most to my clients. I want to create photos that they will cherish for a lifetime.
I approach each event with a fresh eye and an open mind. I am always looking for new and innovative ways to capture the essence of the event. My ultimate goal is to create stunning photos that my clients will absolutely love!
-2) Know the feel of the event.
When shooting events, it's important to be aware of the overall feel of the event. Is it a formal affair? A casual party? A fast-paced concert? Knowing the feel of the event will help you capture the right moments and scenes.
Formal events tend to be more structured, with specific activities or moments that are important to capture. For example, at a wedding you might want to focus on the ceremony, the first dance, or cutting the cake. At a corporate event, you might want to capture key speeches or presentations.
Casual events are often more relaxed and informal, giving you more opportunity to capture candid moments and natural interactions. For example, at a family reunion you might want to focus on people chatting and laughing together, or kids playing games. At a house party you might want to capture people dancing or socializing.
Fast-paced events can be challenging to shoot, but often offer unique photo opportunities. For example, at a sporting event you might want to capture the excitement of the game, or get close-ups of athletes in action. At a music festival you might want to focus on the energy of the crowd and capturing performers onstage.
-3) Consider the timeline
When shooting events, it's important to consider the timeline of the event and how long you'll be shooting for. Will there be breaks in between? How long will the event last? What time of day will it be taking place?
These are all important factors to consider when planning your event photography. By taking into account the timeline of the event, you can better plan your shots and ensure that you capture all the important moments.
-4) Know the venue and lighting
When shooting events, it is important to know the venue and lighting in order to get the best results. The venue can provide insight on how to best capture the event, while lighting can affect the mood and feel of the images.
Consider the following when choosing a venue:
-The size of the space
-The type of event
-The time of day
-The available light
Size: A small venue will require a different approach than a large one. You will need to be closer to your subjects in a small space, while you can be more creative with your shots in a large space.
Type: The type of event will dictate the kind of photos you take. A wedding will require formal shots, while a concert will allow for more candid images. Time of day: The time of day can affect the type of light available, which in turn affects the quality of your photos. Available light: If there is not enough natural light, you may need to use flash or artificial lighting. This can be tricky, so it is important to know how to use these tools before you shoot.
-5) Set up a plan for post processing
After the event is over, it's time to start post processing. This can be a daunting task, but it's important to have a plan.
Here are a few things to consider when post processing your event photos:
1) Decide what format you want to deliver the photos in. Will you be delivering digital files, prints, or both?
2) Choose the right software for the job. If you're going to be doing a lot of editing, you'll need software that can handle that. Lightroom and Photoshop are both good choices for this.
3) Organize your photos. This will make postprocessing a lot easier and quicker. Create folders for each day of the event and put all of the photos from that day into its own folder.
4) Start with the basics. Edit your photos for exposure, contrast, white balance, etc. Then move on to more advanced edits like retouching and compositing.
5) Make sure you save your edited photos in a format that is suitable for delivery (e.g., JPEG for digital files).
6) Deliver the photos to your client. This can be done electronically or by mailing them a disk or USB drive.
Need an event photographer in Elkridge, Maryland? Visit https://www.cspotmedia.com/
1 note
·
View note
Text
5 Ways to Optimize Your Logo in 5 Minutes
I’m going to show you how to give your website a serious boost in the search engines with simple tips on logo optimization. Not only does this work, but I can almost guarantee that most of your competitors are not doing it. In fact, none of them are probably doing it. I optimize websites all day and every day for a living and this is the first SEO mistake I see made over and over on websites. In this post I’m going to show you 5 things you can do to optimize your logo in 5 minutes. Nothing I tell you should take more than 5 minutes to do on your own or for your web developer. However, these 5 minutes will help your website get ranked a little higher in the search engines.
Why Should I Optimize My Logo?
Simple, Google needs to understand what your website is about so they know what keywords or phrases to rank you for. The more relevant your website or specific web page of your website is, the best chance you have of being ranked higher. Unfortunately, Google won’t be stopping by your office or calling you any time to soon to ask you questions about your website. Instead, a program called a bot will crawl your website and send messages back to Google indicating what it thinks your website is about. It’s your job to help the bot out, and one way of doing that is to optimize your logo.
1. Use Your Keyword as Your File Name
This is the number one mistake I see made repeatedly. Do not name your logo “logo.jpg”, “logo.gif”, or “logo.png”. Help search engines understand what your website is about by naming the file of your logo using your home page’s target keyword. For example, if you are a wedding photographer in Albany, New York, then name your logo “wedding-photographer-albany.png” or albany-wedding-photographer.gif”. This will really help Google understand that your website is about offering wedding photography services in Albany, New York.
2. Add an Alt tag
Alt tags (alternative text) should be used on every image on your website, especially your logo. Google knows that some people can’t load images, and some people use screen readers, like the blind. In those situations, Google displays alternative text, or a screen reader will read the alternative text out loud, describing the image. Google uses alternative text to help them understand what your site or page is about. So add a unique alt tag that describes your logo and/or uses your targeted keyword or phrase.
3. Use Dashes, not Underscores
For no reason other than tradition, Google has been programmed to read dashes instead of underscores. So when you are optimizing your logo for search engines, use dashes to separate your words in your file name rather than underscores. For example, your file name should be wedding-photographer-albany.png and not wedding_photographer_albany.png. Very easy right?
4. Compress Your File Size
Search engines want is to deliver the best information in the fastest way. The size of your logo and all of your images directly impacts your rankings. If your logo is too big then it will add to the time it takes to load your page. Google tracks this because it knows that users don’t like waiting for slow web pages to low. Faster pages are going to have a much better chance of ranking higher than slower pages because faster pages means a better user experience. If Google ignored this then they could lose customers to other search engines like Bing and Yahoo.
3 sites that will shrink your logo and other images to optimal sizes:
tiny png
Smush it
ImageOptim
5. Link Your Logo to Your Preferred Domain
Your preferred domain is the domain you tell Google and other search engines to link to. For example, you can either have Google index and show www.yourdomain.com or yourdomain.com in the search engines results. Make sure you not only set your domain to your preferred domain but you link your logo to your preferred domain. When clicked, your logo should always link to your home page. This is another indication of what Google thinks your website is about. If Google bot can read the logo file name and the alt tag, and it sees that you are linking that image (your logo) to your home page, then you are telling Google that your home page is about your targeted keyword or phrase. So make sure you always link your logo to your home page; but not just your home page, your preferred domain redirect.
0 notes
Text
Small backdrops for photography

#Small backdrops for photography software
#Small backdrops for photography professional
They come in virtually every imaginable color, with sizes ranging from 26″ to 107″. And they’re a staple and preferred choice amongst photographers. Seamless paper backgrounds are arguably the most affordable, given their versatility.
How do I set up and hang backdrops? Backdrop mounting options.
Things to consider when choosing a backdrop.
How do I choose a photography backdrop?.
And each will give you insight on which, specifically, is best for your particular needs. In this post, we’ve compiled a list of the ten best photography backdrops and their separating characteristics. So, it can get overwhelming to decide which types best suits your work. While selecting a backdrop seems like a simple enough task, today’s retailers offer plenty of designs, styles, fabrics, and colors. And getting the right one is an essential step towards higher quality photos. Frankly, regardless of the medium, the background either makes or breaks images. Or, they can distract viewers away from your subject and cause a loss of interest. Not to mention, background distractions can quickly destroy a composition, causing unnecessary work in post-processing. Thus, converting a rather plain, stale, and uninteresting shot into something exciting and dynamic. And the right background quickly transforms the mode by adding depth and texture. But they’re the easiest way to add visual flair to your photographs. However, the backdrop sets both the stage and environment for a photo. Many photographers negate their importance, and they’re mostly considering an afterthought. But, once we step inside into the studio, things change. In the real world, we rely on nature or human-made scenes. And, arguably, the most critical, yet overlooked aspect, is the background. We hope you enjoy your digital product and we would love if you could follow our shop so you can stay updated on our new releases.In photography, many elements combine to create the final image.
#Small backdrops for photography professional
It is strictly for personal and professional use. *This backdrop is Copyrighted and CANNOT be resold or gifted. But please contact me if you have any problems with your order. *I don't accept returns, exchanges or cancellations. Please make yourself familiar with our terms and conditions, and please remember: We also use a high quality, hand painted canvas from Plichta Backdrops to give your design a beautiful and artistic look! Unique, nature inspired set ups using ONLY natural materials and fibres are perfect for boys and girls! Every twig, leaf and flower petal are real and are carefully arranged to create stunning organic designs corresponding with nature's rhythms and seasons. Using a digital backdrop allows you to take your newborn and baby photography in any direction you dream of, without the hassle of props and set ups.
#Small backdrops for photography software
Our beautiful digital backgrounds are easy to use but you must have an editing software as photoshop which allows you to work with layers and overlays. *INSTANT DOWNLOAD! No physical product will be sent, they are all downloadable on Etsy after placing your order, nothing will be mailed. *Includes 1 digital backdrop -JPG files, 6840x4560px, High Resolution 300ppi Valentine's Day Newborn Digital Backdrop for Photography Composite with Fresh White and Pink Flowers Arranged in the Shape of a Heart Surrounding a Round Wooden Basket.
0 notes
Text
Once Bitten, Twice Stupid prt.36
Stupid. He was stupid. Lance was potentially the most stupid person he knew. He’d made it as far as his car, before giving up. His idiocy on full display as his mood and feelings shifted again. God. His little anger loaf was standing on the steps of his house, watching him with concern. Sure enough, Lance soon heard the crunching of gravel under Keith’s boots, before the driver’s side door was opening
“Lance?”
Fuck it. Keith was going to hate him for lying, so he might as well make Keith really hate him with the truth
“I lied”
Mumbling softly, he flinched as Keith asked
“What was that?”
“I lied. I panicked and I lied to you”
“Miriam isn’t sick?”
Lance shook his head. She was old, and not about to get any younger, but not sick
“No”
“What the fuck? You had me seriously worried! Why would you lie to me like that?”
Lance couldn’t blame Keith for how mad he sounded
“I... I like you. Like, I really like you and I finally decided I was going to tell you, then Shiro called and I realised all over again that I was being stupid and I panicked... because I don’t know what to do. I’m a vampire and you’re a hunter. A human, hunter. I don’t even know your last name... But... all this confusing junk in my head won’t stop... I like you, Keith. And I’m sorry... I know I’m stupid. I know you’re only attracted to be me because of my body... but I’ve never felt the way about anyone I do when I look at you”
Lance knew he was done for. Keith said nothing long enough for Lance to start crying
“Move over”
Sniffling, Lance wiped at his face
“What?”
“Move over”
Shifting over, Lance moved all the way to the passenger door. He wasn’t sure what Keith was going to do, only that if he died, he wanted the mess to be as contained as possible. Climbing up in the driver’s seat, Keith pulled his seatbelt into place, before starting the bronco. He was going to be murdered. Keith was going to murder him. His body would disappear. His Mami would never know what happened to him. He’d never kiss Keith properly. He’d never cuddle up with him again, or think him stupid. He’d never find out what was wrong Keith’s heart... or internally freak out every time his body felt warmer than stone cold. He’d never see his precious Blue, or taste Hunk’s cooking, or be teased by Pidge... He didn’t want to die. Letting out a miserable groan, Lance’s hand was poised to pull the door handle open. It’d hurt to fall out, but Keith wasn’t driving too fast. If he rolled, he might have a chance of fleeing before he could him.
“Stop freaking out. You’re freaking me out!”
“I don’t want to die... I’m sorry I said anything, but I promise I’ll be good... I won’t say anything ever again”
Keith changed gears, Lance’s bronco lurching as he did
“I’m not going to kill you”
“That’s not what your face says”
Keith had amped “anger loaf” up to an “angry baker’s dozen”. Give him an axe and he’d look like an axe murderer on his way to dismember his victim
“Just shut up before I punch you in the dick”
Cowering in the passenger seat of the car, Lance pulled his knees to his chest, trying to make himself small. He didn’t want to turn into a bat, but right now it’d be handy.
Lance kept his head down as he mentally mapped the route Keith was taking... so he could flee back to his house and retrieve Blue once the death drive was over. He never should have told Keith. Keith was soooooo way beyond mad. He was mad and he hated him... but this kiss or no kiss thing they were messing with was too much for him. Slowing the car, Keith was none to gentle as they stop. Lance sent forwards, then backwards, thanks to his lack of seatbelt. Not raising his head, he hard the seatbelt click, then the creaking of the upholstery as Keith turned towards him
“You can stop hiding now”
“I don’t think I want to”
“Lance”
“You’re scaring me. If you want to murder me...”
Keith sighed at him
“I don’t want to murder you. I want to talk to you”
“Lies! You brought me out here to murder me!”
“Stop being dramatic. Why would I drive you so far away from the house to kill you? I’m a hunter, we know what to do about bodies”
“That doesn’t make feel better”
Keith grabbed him the arms, tugging against Lance who stubbornly kept them crossed
“I said I want to talk to you”
“And I said you’re going to murder me”
Keith kept tugging, Lance too much of a pussy not to let himself give way. Letting Keith hold his arms, Lance stared down at his crotch
“Would you look at me, already? It’s hard to have a conversation when you won’t look at me”
“No. Because if I look at you, I’ll see how much you hate me”
“I don’t hate you!”
He was trying Keith’s patience and he knew it
“You should! I’m a bad guy. I’m selfish and I’m dead!”
“You’re a fucking idiot. That’s what you are. First you lie, then you drop that confession out of nowhere, now you won’t even look at me”
“Because you hate me!”
Keith let out a growly kind of sigh, the hunter moving to kiss him as Lance raised his head at the sound, smacking their heads against each other as he did. Rubbing his chin, Keith pulled back, Lance arms finally freed
“So now you raise your head!”
“You growled at me!”
“Because you weren’t listening!”
Crossing his arms, Lance slid lower in the chair
“I made a mistake”
“A mistake about what?”
“About telling you”
“That you liked me?”
“What else? What am I even doing?! You’re only attracted to me because I keep going into heat like a damn werewolf! This is Curtis’s fault. He kept going on about soulmates and my pathetic arse went and had a crush on you. I’m like way older than you, barely functional at the best of times. I don’t like people. I don’t like people in my house. I don’t like stupid people. Of course I go and fall in love with the first person who accepts me. Of fucking course I do. I’m selfish and petty. I felt left out because heavens forbid you have an actual friend that knows what it is to be a hunter. I don’t know your last name. I don’t know the first thing. But nooooo. I want to kiss you. I want to be the centre of attention. You keep supporting me and I do jack shit, then betray you by having feels... I don’t know what I’m doing!”
“It sounds like you have a lot on your mind”
Fucking Keith. Why couldn’t he get angry? Or at the very least kick him for ruining his life
“I do. So if you’d be so kind, can you please just drive us home where I can bury myself in my death soil”
“Don’t I get a say in this?”
“Do you need to have a say in this?”
What was there to say? He was an idiot. An idiot with serious feels for a human
“Seeing you confessed to me, I think I do”
“Fine. Have at it. You can’t mess things up more than I have”
Keith groaned as he slumped against the seat
“You didn’t mess things up”
“I feel like I did”
“You didn’t mess things up, because I think I like you too”
“Yeah, because my body is weird”
“It’s not... okay, yeah. You’re pretty fucking weird. And you don’t me. But I don’t know much about you outside of what was in your file”
“How nice. At least you got footnotes”
“I’m trying to talk to you. Stop interrupting me”
Talking implied a two way street... Keith wasn’t talking to him, he was talking at him
“Fine. Just spit it out so I can take my humiliation to my grave”
“Gargh! Just shut up and listen to me. I like you too. You. I don’t know what I’m doing either but I do know I like being around you. You’re weird, but not too weird when you think about the fact this time tomorrow the house is going to have 2 hunters, 2 werewolves, 1 cursed ex-hunter, and a vampire in it. That’s not normal. I didn’t see this being my life. I don’t know how to date. I didn’t want to date. Losing Adam nearly destroyed Shiro. I didn’t want a person like that... then you came along and changed everything. I get jealous too. Of you and Hunk, and you and Pidge... I don’t know why they want to be friends with me. People who want to be friends are usually only making fun of me. You don’t do that. I keep wanting to kiss you. I keep going around in circles. I don’t know what to do about the junk in my head either...”
Lance worried his bottom lip as he looked to Keith. Maybe they were two desperately lonely idiots trying to be less lonely in a world where it was so easy to be lonely? He liked him... but couldn’t believe he was liked back
“... right now, I just want to kiss you”
“I don’t want to hurt you”
“You won’t... Can I kiss you?”
Lance nodded, stomach filled with butterflies and a million wriggling caterpillars waiting to take their place.
Closing his eyes, for a moment Lance feared Keith wouldn’t kiss him back. He didn’t need to fear though. Keith’s lips were chapped and he definitely needed to start using lip balm, but the kiss... it was the kind of kiss that made you feel happy to be alive... or dead. Soft and clumsy, Lance panicked slightly when he tasted Keith’s blood. Pulling back, he stared wide eyed at Keith who smiling
“You don’t need to be afraid”
“I cut you lip”
“Maybe I liked it?”
Keith bleeding was not something Lance liked
“I’m...”
“If you say you’re a monster, I really will punch you in the dick”
Keith, romance extraordinaire right there. Shiro had not taught him well
“I’m sorry... I can’t get them to retract any further”
“It’s fine. We’ll work something out”
“How?”
His teeth were kind of razor sharp
“I don’t know... Apparently this talking thing is a start”
“Why do you listen to all the lame things I say?”
“Because you listen to me. So... okay. Kogane. My mum’s a werewolf hunter named Krolia. My boots are size 11. I’m 5’11, 93kgs. I’ve killed three werewolves with the use of explosives and my other kills were with Shiro help. Lactose hates me. Tequila is evil. I have no biological siblings, probably because mum loves her work more than me. I’ve never been in a relationship. I the one time I kind of got close turned out to be a prank. I like photography. I usually ride my motorbike to unwind. People say I have anger issues. I say I have people issues. I get paranoid when people are watching me. I didn’t graduate high school... and I prefer practical over looks... oh, and I collect swords and knives”
Lance was shocked. Everything Keith said locked it’s self in his brain. Keith had been so damn open. Like way too open...
“Lance?”
“Sorry... I was processing... that was like a lot”
“A good a lot? Because I don’t know what to say now”
“No. You did really well, buddy”
Lance cringed at calling Keith “buddy”. Keith sighing at him over it
“Really?”
“I regret it already... I don’t know what to say”
“Tell me something about you?”
“Oh... um... like what?”
Keith knew his file. Heck, Keith probably knew more about him than he did
“I don’t know”
“Um... if... we’re being honest your hair is a mullet”
Groaning at him, Keith pushed his knee
“It grows that way”
“Um... maybe it’s not as annoying as I make it out to be?”
“Watch it, you’re being dangerously close to being nice about my hair”
Lance snorted. He was still filled with those butterflies, but he wasn’t getting murdered by the seems of it, so that was a temporary win
“You wish, mullet. I’ll give you one shot at asking me anything you want”
Keith’s expression changed, he seemed to be thinking, or trying to crap his pants. Lance wasn’t sure
“Can I ask you what happened the day you turned? You don’t have to tell me everything, but I want to understand”
Okay. Maybe Lance had expected that. Maybe that’s why he’d tried to deflect with banter. Maybe those butterflies were still in his belly because he had to tell Keith the truth
“I... Okay... Okay... just promise you won’t laugh at me”
“I’ve laughed at you over plenty of things, but this won’t be one of them”
“That’s not a promise”
Keith scooched forward, placing his hand on Lance’s knee
“I promise I won’t laugh”
“Okay... fuck... this is... okay...”
“Lance, it’s okay. I know Rolo and Nyma turned you. I know it was horrible and traumatic, but I’m not going to suddenly hate you for what happened”
“I hate me for what happened. I can’t ever forget that day... it’s the day my family was ruined forever...”
“What happened wasn’t your fault”
“It was... fuck... it was... So... We’d only left Cuba not that long ago and I didn’t fit in. My skin wasn’t the right colour. My clothes weren’t the right clothes. I had friends but I always seemed to ruin things. I was sitting on the swings at school, watching everyone else play soccer. They never picked me because I wasn’t right... Nyma... Nyma and Rolo came up to the swings... the day was really overcast, but maybe they could walk in the sun? I don’t know... but I was so lonely and there were these two adults... teenagers... I never knew how old they were... I knew Mami wouldn’t want me talking to strangers, so I told them. Nyma laughed and she said she wasn’t a stranger because she’d seen me around in school before. They asked me if I wanted to play. Someone was paying attention to me. I have a big family. No... I had a big family, so I never had much attention. Anything I wanted like ice creams, Mami would always ask my older siblings what they wanted and they never agreed. I just wanted to be... liked. Nyma asked me to come pick a soccer ball out the storage shed with her... Schools back there really were nothing like they are now... They found me the next day, but I was in a coma for like a while... Coran was there when I woke up, Mami too... and everything kind of went to shit. The shed was pulled down, apparently there was so much blood there that they thought someone slaughtered a cow as a joke. It’s not much of a story”
Lance nervously chewed at his lip, waiting for Keith to reply. Glancing to the hunter, he found Keith had tears in his eyes
“Keith?”
“I’m sorry... I’m sorry no one was there to help you”
Lance had often thought about that. About the “what ifs”. But one thing he did know was that you couldn’t go back in time and undo what’d been done
“You’re the first friend I’ve talked to about it, and you know the gist of things... but yeah. Basically I’ve had PTS and anxiety since. I’m on my fourth identity now. I went into law to help children... and this car was my gift from my family when I graduated the first time around. Before you came along, I was the only person who’d driven her. She’s been my trusty companion through it all”
“Kids can be total shits”
Lance nodded. They could. But they could also be sweet like his niece and nephew had been
“I kept wondering how they didn’t hear me, or if they did, if they laughed at me. I’m lucky I was the only one they took that day”
“They deserve to be dead. You’re nothing like them, you know. It makes me want to punch something”
“Please don’t punch my dick”
Keith flashed him a watery smile, Lance shifting close enough to lean against the hunter. Keith felt so reassuringly solid against him. Nervously he asked
“So where does that leave us? If you need space... I won’t be mad”
“I don’t know how to date. I’m probably going to make a lousy boyfriend”
“If you just want to be friends, that’s okay too. I just... I’ve been going slightly crazy with all these thoughts in my head. I don’t want to take your future from you”
“It’s my future to choose. I think I want to date you...”
“Maybe you should talk to Shiro? I don’t think he left you here with the intention of us shacking up together”
Keith sighed. After what happened with Adam, the hunter was definitely entitled to not be in favour of them dating
“I do... I mean, I’ve been going crazy too. Trying to tell if you’re flirting. Trying to figure out what I’m feeling”
“I feel bad for lying to you and for dumping this on you...”
“You should feel bad about the lying. I was seriously worried about Miriam... but I was more worried about you. But don’t feel bad for telling me. I wanted to know more about you. I still do”
“I’m old enough to be your dad... hell, you’re old enough to be a dad, a grand dad even... if you’d started young enough”
“I never really thought about kids. Or... thought I’d find someone I wanted to date... My childhood wasn’t the best. I was that problem foster kid that didn’t want help or trust people easily...”
“Are you glad you met me?”
“Yeah. I can’t believe how much of a dick I was”
“You did take it to a whole new level”
Keith’s stupidity had had to be seen to be believed. What kind of a moron claims to be turned when he’s the one who went and cut himself of Lance’s tooth to begin with?
“I’m sorry, you were supposed to be an evil bloodsucker”
“I can be evil... We vampires have egos. If we let our egos get out of check then we lose what makes us human. It’s not easy being dead”
“I’ve gathered that much... Why don’t you like my blood?”
They were back on this again? Why couldn’t Keith understand it wasn’t personal
“It’s not about liking it. The first time I tasted your blood was like eating mouldy socks... I’ve always drunk from bags... I always felt better about drinking from bags. Like it’s more humane”
“It’s not because there’s something wrong in there?”
Lance had the feeling feeding from Keith was going to be a fiasco all over again. He’d told him more than once he didn’t want to, yet Keith kept bringing it back up.
“Not anymore. You did let me feed when I was a bat. I haven’t thanked you for that”
His tiny bat body had eaten its fill. Lance had hoped that the blood would turn him back
“You’re much easier to understand when you’re a bat”
“I thought you said you didn’t speak bat?”
“I don’t... but you’re like a puppy. You’re soft and warm... and kind of funny when you’re angry”
He was a fearsome vampire. If anyone was like a puppy, it was Keith. A barely housetrained puppy with eyes that got him every time
“Puppy’s don’t have wings”
“I said you’re like a puppy. I do know what a dog looks like”
“Speaking of dogs, what are we going to tell Shiro? He’s turning up with Matt tomorrow”
“I’ll talk to him. It’s not like we rushed into bed together”
“I’m not ready for that, yet”
“It’s fine. I think both of us aren’t ready for that yet...”
“But my scent...”
“We’ve held off this long...”
“We weren’t dating... I don’t want my scent making you do something you don’t want to do”
“Trust me when I say your scent makes me want to do all kind of things to you, but waiting is good too”
“And what are going to tell Curtis?”
“Nothing for now. We’re still working this out. He’d probably throw condoms and lube at us if we told him”
That was highly likely. Being cursed really had to suck for Curtis
“I don’t think he likes me”
Keith snorted, Lance unamused that Keith found his upset funny
“He said the same thing. I told him we’d have a movie night tonight so we could all hang out together”
“Then you kidnapped me”
“I prefer the term “borrowed”. You’re too uptight at home”
“You’d be uptight too if you heard too much all the damn time”
“And that has nothing to do with you spending most of your time worrying over the changes you’re going through?”
“I spent 44 years as a man, now I’m apparently able to have kids on top of that. Who wouldn’t be freaked the fuck out? My swimmers are dead. I’m dead... it’s weird as fuck”
“You have a half cursed man in your house. I don’t think things could get much weirder right about now”
“Is it weird I want to see his tail? He said he had half a tail, so would it be like short or is it long but only half of it’s there?”
“Don’t make me think... I don’t know. He’d probably show you if you ask”
“I can’t just ask to see his tail. He thinks I hate him”
“Maybe you could show him your teeth?”
Lance rolled his eyes mentally. Curtis was a hunter, he would have seen fangs before, but his idiot kind of boyfriend wasn’t known for having all his ducks in a row. Less than smoothly Keith tried to bring his hand up so pull Lance into a hug, the problem being it was the hand holding Lance’s. Keith’s IQ was rivalling a teaspoon right now, but the gesture was sweet enough for Lance to let go of Keith’s hand and wrap his arms around the hunter
“You could ask. He likes you”
“He likes you too. You just don’t know each other”
“I suppose. I just wish every time we talked I didn’t feel like a science experiment. Next he’s going to have me eating bi-carb and chugging down vinegar”
“Don’t forget that food colouring. Though, it wouldn’t be the first time you blew up”
The joke was horrible and Keith should feel horrible
You have a really crappy sense of humour”
“You can blame Shiro for that”
“That seems like effort. How long are we going to sit here?”
“As long as you want. I didn’t have much of a plan”
“That’s so like you”
“Hey, you were acting weird. That’s not on me”
“You try developing a crush on a human. It’s a lot to deal with”
“Try being a hunter who likes a vampire”
“Touché. Okay. Okay. I’m okay now. We should head back home”
“You sure?”
Lance honestly just wanted to stay like this. Keith hadn’t even picked a romantic destination for this little heart to heart. They were parked out near the cemetery, which would have been the perfect place to hide his body, but... it was so him that it was ridiculous
“Yeah. I wanna make sure my house is still standing”
“Fair point. Buckle up, I’m not having the guy I’m kind of dating getting hurt while I’m driving”
Lance’s butterflies fluttered at “kind of dating”. It wasn’t a yes, and it wasn’t a no, so he took it as a hopeful maybe.
14 notes
·
View notes
Text
“What a long, Strange Trip It’s Been”
The Don’s banishment to Mar-a-Lago and on Twitter has created a welcomed silence. Yes, he is going to do everything he can to stay relevant and make as much noise as possible. His battle with Mitch McConnell for the soul of the Republican Party will ramp up. Let me stop there. How can two people without souls fight over the soul of anything?
What I am trying to say here, is that this is the time for me to hit the exit ramp. This will the last piece of OMFG.
Is that a wince I hear? A collective sigh? A Thank God, as finally, the guy has found a way to separate from demon Don?
To my readers, I implore you: Please don’t do anything drastic, as I don’t want to have to carry another burden.
For many, The Don’s loss of the election and banishment has been sort of an exorcism. (if you at some point you spewed green bile, don’t worry, as it was a natural biological process that helped cleanse you of all the poison you absorbed).
As you can tell from my writings, I have had my own obsession with The Don. During these past 4 years, he has inhabited my daily life like an aching tooth. I watched way too much news. I raved and ranted. I used the phrases “Is this outrageous, or what?” and “Can you believe this shit” as often as “Hey, how are you?”.
My co-workers saw me coming and walked the other way. My wife told me if I didn’t shut up about The Don she would leave me. (Well, that’s not exactly true, but I’m sure it crossed her mind!)
Thank God for this blog. I don’t know how I would have survived without it.
As the Grateful Dead sing in ‘Truckin’: What a long, strange trip it’s been.
youtube
Two impeachments, a Russia investigation, an insurrection-yes, an insurrection cause by the “Big Lie” that the election was stolen and that Joe Biden was not a legitimate president, “shit hole” countries, “good people on both sides,” separation of children from their families, a Muslim ban, attacks on the LGBT community, violations of the Emoluments Clause, endless lies, levels of corruption unseen in the history of the presidency, embracing of White Supremacists, deregulating of environmental policy, fake news, the press as the enemy, the promulgation of conspiracy theories- the emergence of QAnon, dismantling of government agencies, using the Department of Justice for his own means, a level of sociopathy and malignant narcissism never seen in the White House and a wannabe demagogue who did everything he could to dismantle our democracy.
Did I leave anything out?
His handling and politicizing of the pandemic, which has caused an unfathomable 500,000 deaths to date, was the result of a genocide of neglect that has caused inconceivable suffering. In a fair and just world, he should be prosecuted for his heinous inaction and promotion of false narratives and complicity in the unnecessary death of tens of thousands.
Witnessing the competence and transparency of the Biden administration has created hope in me. A world in which the pandemic is under control, the economy rebounds, issues of social justice are faced head on and policy that reflects the need to genuinely address inequality and institutional racism seems possible. A humane plan and path to citizenship for Dreamers and other immigrants seems more reachable.
Climate change, the defining and existential issue of our time and the world’s future, is finally front and center.
How we confront the increasing polarization and rise of domestic terrorism is a daunting challenge. How we ensure voting rights are protected in the face of egregious attempts to thwart them is a battle over whether we remain a country that is represented “by the people and for the people.”
So much work needs to be done. We can not rest. We must resist the temptation toward complacency. We need truth, honesty and kindness to be our guiding forces.
It feels so strange to be writing these last words. During the 4 years of this blog, I wrote 244 pieces and people from over 100 countries visited it. (Even from Russia and China!) I so much appreciate the time you spent reading. I hope I was able to make you laugh (or cry) about the absurdities of what we all endured and lived through. I hope my perspective created new insights and ways of thinking about The Don and his psychology.
Some may be wondering what I look like so I will pull up the curtain and reveal myself.

Others may be wondering what new project awaits me. Frankly, who the hell knows, but writers must write, so I’ll wait for it to reveal itself.
I want to give a special shout out to the unsung superstar of the blog, Jinnifer Douglass, who was responsible for the design and creating all the amazing photos. She is a wizard. There was nothing I asked her to concoct that she could not create. When I would receive her email stating “All set,” I would click on the site and break out into a smile or outright laughter, marveling at the photos. And for those of you who skipped the writing and just reveled in the photos I forgive you. As they say, sometimes a picture is worth a 1,000 words.
Also, thanks for your comments and acknowledgements along the way. Anyone out there that wants to write me a goodbye note (a love letter?) I welcome it. Be well and fight the power.
Thanks for joining me on this crazy journey as “What a strange trip it’s been.”
And one more thing: The Supreme Court voted 9-0 to allow his taxes to be released. So Don, maybe they’ll take some of the tax money you owe to build a wall on the golf course and turn it into a prison!
And now for one of my favorite photos:

Note from Jinnifer: It has been an insane past 4 years. Working on this project with Jerry was equal parts horrifying and hilarious; every week it was something new (and then some). Putting together these pieces of Photoshop satire brought me an absurd kind of joy. I am sad that this blog has come to its end, but I am glad that the mechanism which portended it was our very own democratic process at work. Jerry usually wrote roughly about 1 article a week, and each article had around 4 custom pieces in it- meaning I have created over 800 works of factual farce in our time working together. Some days it feels like we just started this blog yesterday, and other times it feels like 20 years ago. Truly a bittersweet undertaking, but one I am proud to have been able to contribute to. I know Jerry’s next creative venture, whatever it may be, will be pointed and, no doubt, funny to boot.
Here are some of my favorite photos, 1 for each year of his, well, whatever you want to call it!

2017

2018

2019
2020
At the time we started this project, web developing was my main profession, but in the years that have since passed I have decided to focus more on my (decidedly more serious, haha) photography work. If you’re interested in checking it out, I’d be grateful if you’d stop by http://www.jinyc-photo.com

from WordPress https://ift.tt/3suXy67
via IFTTT
2 notes
·
View notes
Text
Editing Workbook: Folio One Introduction
BRIEF: People Make Glasgow

Where might you find good resources/ tutorials for the following? Name at least 3 sources of good online tutorials.

https://helpx.adobe.com/uk/photoshop/user-guide.html
https://helpx.adobe.com/uk/photoshop/tutorials.html
https://phlearn.com
https://photoshopcafe.com

https://helpx.adobe.com/uk/bridge/user-guide.html
https://helpx.adobe.com/uk/support/bridge.html
https://spark.adobe.com/page/ZYS1NsR6NKqfH/
https://www.photoshopessentials.com/basics/what-is-adobe-bridge/

https://helpx.adobe.com/uk/lightroom-classic/user-guide.html
https://helpx.adobe.com/uk/lightroom-cc/tutorials.html
https://www.theschoolofphotography.com/courses/lightroom-course-online
https://www.photoblog.com/learn/lightroom-tutorials/

Other programs: Make a list of other programs that photographers might use to edit enhance photographs.
1/ Capture One
https://www.captureone.com/en
2/ Affinity
https://affinity.serif.com/en-gb/photo/
3/ Pixlr
https://pixlr.com
4/ Gimp
https://www.gimp.org
5/ PhaseOne Capture One Pro 20
https://www.captureone.com/en/products-plans/single-user/capture-one-pro
Mobile apps: Make a list of useful mobile apps for photographers.
1/ Adobe Phone Apps
https://www.adobe.com/uk/creativecloud/catalog/mobile.html
2/ Snapseed
https://snapseed.online
3/ Geometry Club
https://geometryclub.org/app/
4/ PicsArt
https://apps.apple.com/us/app/picsart-photo-studio-picture-editor-collage-maker/id587366035
5/ Pixlr
https://apps.apple.com/us/app/pixlr-photo-collages-effect/id526783584?irgwc=1&aosid=p239&cid=aos-us-aff-ir&irchannel=13631&irpid=221109&clickid=WLGziny4LxyORNRwUx0Mo3ERUkE0B72Vm2YOVg0&ircid=7613
File types refresher:
File type
RAW
+ The best quality image file is captured
+ Extensive options in post-processing and image manipulation
- Time needed to convert and edit photos
- Bigger file sizes mean more storage needed and longer post-processing times
JPEG
+ Small file size so good for social media and emailing
+ Universal format that doesn’t need proprietary software
- Loss of quality due to image compression
- Less opportunity for image manipulation in photo editing software
TIFF
+ Ability to manipulate photos extensively in photo editing software
+ Option to print at the highest quality and at much larger sizes
- Much bigger file sizes (more storage needed)
- Longer transfer and loading times due to file size
GIF
+ Small file sizes makes these ideal for use on the web
+ Files can contain animation
- Limited colours means it is not the best choice for photos
- Does not support partial transparency like drop shadows
ADOBE PDF
+ PDF can be opened on any device with any operating system in exactly the same form in which it was created
- It’s not free to edit PDF files
- It’s easier to edit files in other formants than in PDF, because PDF files must be edited in specialised programs
Choose another that you might use
DNG
+ Ability to use image processing software such as Lightroom and Photoshop
+ Possibly guard against inability to open or access files in future
- Extra time needed to convert camera raw files to DNG (if your camera does not have the option to supply files in this format)
Choose another that you might use
PNG
+ Lossless compression means good image quality
+ The ability to maintain transparency
- Quality will not be good enough for printing at any size
RAW workflow: In photoshop.
Add an appropriate diagram from the web.

Source: https://chriseyrewalker.com/my-complete-photography-workflow-in-10-steps/
Explain the need to develop a good digital workflow.
Why workflow matters
Photography workflow is the sequence of steps and actions you take to edit your photos, work them up to a result you consider finished, and share them with the world. Editing photos can be like baking a cake or assembling flat pack furniture. You start with raw ingredients, or loose parts, and use an ordered sequence of steps to put the thing together. In a good photography workflow, the end result is a perfectly crafted image, securely stored for future use, all with the least possible effort.
Efficiency is important. Without a good workflow, at minimum you’re wasting time. Worse, you run the very real risk of losing your most precious photos. Forever. A couple of years ago I knew a wedding photographer, then aspiring to become professional, who lost an entire wedding shoot because of relatively simple errors in her workflow. (In short, the mistakes derived from a convoluted importing method and totally inadequate backups.)
Maybe you’re only taking pictures for fun? If you’re planning to continue with photography, you still need to use an effective workflow. If you don’t, your photo archive will become a beast, very difficult to tame. And your images won’t look as good as they could. No fun.
When you’re starting out in digital photography, you need to develop good habits early.
Source: https://digital-photography-school.com/digital-photo-editing-workflow-better-images-capture-output/
1/ What software did you use to optimise/ name/ select these? Where did you store them?
File management
Name Three places where you will store your images.
1
Memory Card/USB Drive
+ Small and portable.
+ Easily share files documents with other devices.
+ Simple to operate.
+ Cheap to buy.
- Easily infected with viruses or malware.
- Easy for users to lose or break them.
2
Computer HD
+ Fairly affordable and easy to use.
+ Higher capacities than those available with small USB drives.
- This type of physical storage doesn’t last forever.
- Don’t usually come with password protection or advanced security features.
3
Cloud Based Back-up
+ Your data to be accessible from anywhere.
+ Allow clients to view select files through cloud sharing platforms.
+ Off-site storage so useful in disaster recovery.
- Security is a major concern for businesses using cloud storage solutions.
- Possibility of remote failure of server.
- Can be expensive.
Name File management software.
1/ Adobe Bridge CC
2/ CyberLink PhotoDirector 10
3/ Magix Photo Manager Deluxe
Explain the need for good clear file management.
Good file management is important to allow you to quickly and easily locate images.
1. Everything is easier to find
2. See how you’ve progressed
3. You’re forced to review the good with the bad
4. It will teach you to avoid recurring mistakes
5. Discover ideas you want to revisit
6. Find themes and begin developing a vision
Source: https://digital-photography-school.com/8-reasons-organize-your-photo-collection/
People make Glasgow: Editing tasks.
Manage files:
Store and rename you files.
Where have you saved these images?
Camera Memory Card, External Hard Drive and One Drive in the Cloud
Contact sheet:
What software did you use?
Adobe Bridge
Place an of your ‘People make Glasgow

How straight forward was it to make this in your selected software?
Quite straightforward, I selected the shots I wanted in Bridge’s “Output” tab, selected the number and size of images I wanted on a sheet and exported them as a PDF file.
Explain two methods of Black and white conversion from an RGB original.
From Bridge, an image can be opened in Camera RAW and converted by selecting the “B&W” option in the top right-hand side.
In Photoshop, a new “Black & White” adjustment layer can be selected.
BLACK AND WHITE CONVERTION:
Choose three of your ‘People make Glasgow’ images and show before and after edits below.
Before: file name: _DSC0464.NEF

After: CMalcolm_HND2C_PMG1_103.jpg

Before: file name: _DSC0483.NEF
After: CMalcolm_HND2C_PMG1_007.jpg
Before: file name: _DSC0496.NEF

After: CMalcolm_HND2C_PMG1_044.jpg

Evaluate how the edits have changed/ enhanced the feel of the image.
For these shots, I first corrected the image in the “Optics” tab of Camera RAW to correct any chromatic aberrations. Next, I converted to B&W and checked the exposure and colour temperature. I then added a small amount of clarity and adjusted the contrast, shadows, whites and blacks. Next, I opened them in Photoshop and cropped them a small amount.
I think all the edits have worked well and by making the adjustments described above, I feel I have met the brief by providing more high contrast “gritty” and engaging images of Glasgow’s people.
People make Glasgow finished canvas, make a selection of your best images and display on one A3 300 ppi canvas.

How do you feel about your final series of images?
I think the final series of images work together well to give a flavour of the different characters that make up Glasgow’s people.
4 notes
·
View notes
Text
Best Photography Tips for Beginners in 2020
I’ve been a photography hobbyist for more than 3 years. In this period, there were a lot of useful photography tips and tricks that I discovered through the internet or by experimentation. This guide consists of the photography tips that I have personally implemented and benefited from.
Some of the tips are related to the gadget (DSLR camera, lens, filter, etc.) while some are related to understanding yourself and discovering a unique style. All of these tips are equally beneficial for you to develop as a beginner photographer.
So, without any further due, let’s dive in the best photography tips for beginners.
1. Taking care of your camera and lens:

Along with understanding how to click better pictures, it is equally important to take good care of your camera and lenses. Protecting them from dust, damage, or other harm can improve their lives and maintain their ability to produce quality images. There are a few things that one can do in order to take good care of your equipment.
Every camera body and lenses will have a front and a back cap for protection. Make sure when you want to attach a lens, the camera sensor and the back portion of the lens is not exposed to the harsh sunlight. Sometimes, the camera sensor gets damaged due to overexposure to the harsh sunlight or dust. The same goes for lenses.
Buy a lens care kit that is inclusive of brushes, cloth, cleaning solution, and bulb blowers. Use them effectively at regular intervals to prevent your lenses from any damage. If you do not have a lens care kit or you do not want to do it yourself, then give it to a camera repair shop near your location.
Avoid storing your camera and lens in a damp, moist atmosphere. Rather keep them in a hard-cased bag with a lot of partitions. This way, it is easier to carry all of the equipment even while traveling.
2. Do not stress your camera:
A lot of beginner photographers keep on clicking the shutter button without thinking about the right setting and framing. They end up wasting a lot of their shots. Every camera model has a set number of shots that it can take in its lifetime. It is often called as the shutter life of a DSLR camera. This gives you ample opportunities to click, learn, and improve your art.
Since we have moved from film to digital, one has the option to delete unwanted images later. But this does not mean that you keep on stressing your device. Think about the composition, camera settings, and lighting conditions before clicking. Of course, you can take a few test shots before getting to the right setting. But wasting your shots and stressing your camera is something that you should avoid.
3. Click on RAW mode:

RAW is a file format that photographers use to click sharp and crisp images. When I started photography, I clicked pictures in JPEG mode thinking it was the only file format. All of the images lacked clarity, details, and got blurry upon expanding. Later, I was introduced to RAW images which gave a solution to this problem. In simple terms, RAW files contain much more details and information as compared to other file formats.
Since they have a lot of information, they are heavier in size as compared to jpeg. One can capture minute details within a frame that are not visible to a human eye. It becomes easier to bring out rich colour tones and minute details while editing. So, make sure the selected file format is RAW or else change it in the settings.
4. Try different things:
Photography for beginners should be more about trying different things in order to expand their knowledge and understanding. Do not restrict yourself to taking photos in a particular pose or angle. Try to capture the subject from a different angle. It can make a lot of difference to the composition as well the picture. Travel to different locations, experiment with different lenses, try your hands on different photography genres like street, travel, landscapes, portrait, nature, or even wild-life.
Take manual control and explore your camera setting, play with the exposure triangle, manipulate the existing lighting conditions to get the desired impact. The more you explore, the better you get at identifying your style of photography. Implement all the basic photography tips that you may have learned from the internet or from your peers. And yes, always keep a record of your learnings so that you do not forget it in the years to come.
5. Join a photography community:
Learning comes naturally when we see the good work of our peers and learn from them. A photography community does not necessarily mean a photography class or course, but it can also be an online community where people share ideas, opinions, doubts, and solutions to each other’s problems. There are certain platforms that provide extensive information related to photography.
Explore platforms like Quora and Reddit by joining relevant groups related to your interest. By becoming a member you can put forth a question, answer a question put by another member as well as comment your opinion related to the post. Apart from these two, there are various forums on the internet where you can get a lot of camera-related or DSLR photography tips.
You can also join various groups on social media platforms like Facebook and Instagram. You can share your pictures by participating in the daily thread, compete in the weekly or monthly contest, and keep yourself updated with the latest happenings in the photography world.
Also read: Top 10 – Best Photography Tips for Beginners (+2 Bonus Tips)
#photography#photography tips#beginnerphotographer#beginnerphotography#photoblog#tips and tricks#dslrphotography#digital photography#tips for beginners
2 notes
·
View notes
Text
Photo Credit: Stephen Gandy (CameraQuest)
The 35mm focal length is the most versatile focal length for any camera system and I’ve talked about this in depth in one of my reviews. It’s a great middle ground for general, street, travel photography and anything in-between due to its balanced field of view. It has a “wide” (but not too wide) field of view to capture your context with just enough distance and pull, while maintaining its composure relatively well when it comes to distortion. This “middle of the road” focal length make it an ideal choice for most people as the only focal length they really need, which explains why the 35mm had become ubiquitous as the “do it all” lens.
This new-ish lens by Voigtlander hits all the spots mentioned earlier, but it enters murky waters. This particular segment is challenging for most manufacturers as they have one major obstacle to overcome, which is the benchmark for all 35mm lenses: the Leica Summicron.
In this review, we will go over what might be Voigtlander’s most promising proposition and see if it has what it takes to take on the great lens of power.
Introduction
When the Voigtlander Ultron 35mm f/2 ASPH was released in 2019, there was a lot hype surrounding this lens as people saw this as the second coming of an affordable 35mm f/2 lens since the Zeiss Biogon. A lens, they hoped, to compete against the Leica Summicron 35mm. Things were looking good as the lens had a more affordable starting price tag of $799.99 USD, therefore it wasn’t surprising that it quickly gained traction and popularity within the Leica community. This price point allowed Voigtlander to position itself comfortably cheaper than the Carl-Zeiss Biogon 35mm f/2, and thousands cheaper than a new Summicron. This was more than enough of a reason for people to get excited and when initial reviews were released, people were shocked how well the lens punched above its weight.
People took notice and money was thrown at computer screens.
Competition is always good right?
Classical yet sharp with amazing transitions. The bokeh is a little busy though.
@cosmotographer
@cosmotographer
“…they’ve also managed to create the smallest 35mm f/2 lens currently in production.”
Voigtlander Ultron 35mm f/2 ASPH
Competing in this sacred segment may seem like an uphill challenge for the Voigtlander, but fortunately for them, its competitors had left a wide berth for improvement where the little Ultron could stand on its own. By choosing to position their new lens as the cheaper alternative without compromising image quality, they were able to squeeze in as a viable alternative to its other German (and Chinese) counterparts.
The 35mm f/2 Segment
The cheapest option: 7Artisans 35mm f/2
Image Quality: Excellent
Render Type: Modern
Build Quality: Good – need manual adjustments
Ergonomics: Good
Price: $289.00 USD
Made in China
The budget option: Voigtlander Ultron 35mm f/2 ASPH
Image Quality: Excellent
Render Type: Classical tones and modern sharpness
Build Quality: Excellent
Ergonomics: Good
Price: [eafl id=”5285″ name=”Voigtlander Ultron 35 f/2 Vintage” text=”$799.99″] USD
Made in Japan
The premium option: Carl-Zeiss Biogon 35mm f/2
Image Quality: Excellent but soft corners wide open at f/2
Render Type: Modern tones and cooler colors.
Build Quality: Excellent
Ergonomics: Ok
Price: [eafl id=”5495″ name=”Zeiss Biogon 35mm f/2 ZM” text=”$1141.99″] USD
Made in Japan
The top shelf option: Leica Summicron-M 35mm f/2 ASPH
Image Quality: Excellent
Render Type: Classical tones and modern sharpness.
Build Quality: Excellent
Ergonomics: Excellent
Price: [eafl id=”5272″ name=”Leica Summicron-M 35mm f/2 ASPH (11879)” text=”$1999.99″] USD+ (Used)
Made in Germany
From the list of lenses above, Voigtlander’s only real rival would be its sister lens, the Zeiss Biogon 35mm f/2, which is also manufactured by the same company that assembles the Voigtlanders: Cosina. Despite their manufacturing similarities, build quality and the strange 43mm filter size, their differences lie in their characters as the Zeiss had quirks of its own.
For example, while the more expensive Zeiss 35mm is a sharp lens, its corners were known to be muddy wide open and surprisingly not up to par with its slower (albeit excellent) brother, the C-Biogon 35mm f/2.8 ASPH. There is also the controversial “issue” that Zeiss lenses tend to render cool and clinical compared to the Voigtlander and even Leica, but this is a subjective matter as there are people that like the way the Zeiss draws images.
Very sharp | f/4.8 / 1/4000 / ISO 200
Sunset | f/3.4 / 1/4000 / ISO 200
Photo Credit: Stephen Gandy (CameraQuest)
“…keeping some of the quirks that hipsters like to call, ‘character’.”
Build & Design
During its original development, Voigtlander’s goal of the Ultron 35mm f/2 was to create a vintage looking lens that nods back to the 1950s when lenses were tiny and lightweight. They definitely achieved that and then some when they also added a modern aspherical element to bring the optical quality to 21st century standards, but maintaining some of the quirks that hipsters call, “character”. The aesthetics of the lens body may not be for everyone, and the chrome parts give off a retro Cadillac vibe, especially for those that prefer a more stealth look like the Summicron. Personally, I’m not be a fan of the design.
I am, however, impressed with its overall size and weight when I first held it in my hands.
This is truly a tiny and featherlight lens.
While the body is lightweight and compact at a mere 6 ounces, its packed tightly with an aspherical element as part of its 8 elements and 5 groups, which gives the lens more of a modern look with improved sharpness. Not only is this lens Summicron level sharp, but they’ve also retained the image quality that Voigtlander lenses are known for: classical rendering with a bit of softness added to it. It’s as if the lens designers went into Lightroom and just turned down the clarity level just a little bit. Not only do they squeeze out every optical performance in such a tiny lens, but they’ve also managed to create the smallest 35mm f/2 lens currently in production.
Photo Credit: Stephen Gandy (CameraQuest)
Welterweight Champ
Don’t let the size fool you as the lens is solidly built with an all aluminum construction, packed with glass, will surprise people with its $800 price tag ($700 new during Voigtlander’s sales). This is a very solid and durable lens. What most people don’t know is that the front filter ring and the focusing helicoid is made entirely from brass, similar to the Summicron. Another cool reason why the front filter ring is brass is that if you want to install a UV filter onto the lens, the brass mount prevents a softer metal like aluminum (common for cheap UV filters) from getting stuck. A Cosina* trademark that is consistent with all Voigtlander and Zeiss lenses. I personally recommend B+W Nano MRC 007 filters as they’re made of brass as well.
Nothing on this lens feels flimsy or cheap and if I had to compare the lens build quality to a Leica lens, it would be the slower, but lightweight Summarit-M 35mm and the [eafl id=”5494″ name=”Zeiss C-Biogon 35mm f/2.8 ZM” text=”Zeiss C-Biogon 35mm f/2.8″]. Both extremely well built and solid lenses.
Weight: 6 ounces
Minimum Focus Distance (MFD): 0.58m
Build: Aluminum
Flare resistant and fantastic micro-contrast
@cosmotographer
@cosmotographer
“…the Ultron as the lens itself is as modern as they come with a hint of classical rendering.”
Mechanically, it’s not as refined as the Summicron, or even the cheaper Summarit lenses, but they’re on par with the rest of the Zeiss lenses as they’re both assembled in the same factory, built to the same standards.
However, not everything is perfect and if I had to nitpick about a few things…
The focus tab is a small tiny pin, which is easy to miss due to its minuscule size. One of the few compromises to fit that “vintage” aesthetic that Voigtlander was going for. More form than function.
The silver finish on the aperture and focus rings showed some moderate wear pretty quickly and I don’t believe it’s coated with anything to protect the paint.
The [eafl id=”5567″ name=”Voigtlander LH-12 Lens Hood” text=”LH-12″] Lens Hood is very expensive and adds to the length of the lens significantly. I don’t recommend picking one up unless you’re very particular about it.
43mm Filter Size – not a big deal if you already own a few Zeiss lenses as they use the same filter size, but this is an awkward filter size.
Fantastic rendering | f/4 / 1/125 / ISO 200
“…modern as they come with a hint of classical rendering.”
Image Quality
Regardless of the high build quality mentioned earlier, the most important factor of a lens is its image quality and rest assured, this lens exceeds all expectations for this price point.
Beautiful rendering and micro-contrast | f/2 / 1/4000 / ISO 200
“It’s as if the lens designers went into Lightroom and just turned down the clarity level just a little bit.”
The images have a certain look to them and the way the images are rendered with this lens is typical Voigtlander: sharp, neutral colors, subtle micro-contrast and classical bokeh.
What was most surprising to me was how the images kind of remind me of the Leica Summicron 35mm ASPH that I reviewed here. The sharpness is on par but you will hear people on the internet saying that it’s sharper than the Summicron. It’s a possibility and the performance of this lens does show its merits, but side by side, any differences are immaterial in practical uses.
Stop pixel peeping. It’s a $700 lens.
The micro-contrast is also very good, but falls a little short to the Summicron, but overall renders very similarly to the Leica. To be completely frank, I can honestly say that the Ultron is optically equal to the Summicron for the most part and for any shortfalls, it’s so small that it doesn’t matter.
What can be said, is that based on image quality alone, this lens beats out the Zeiss Biogon 35mm f/2.
RAW | Another flare shot | f/5.6 / 1/4000 / ISO 200
User Experience
The handling of this lens is close to perfect, but the focusing knob is something that people have to get used to, especially if you’re used to the crescent shaped tabs like on the Summicron or the Nokton 35mm f/1.4. This is the only handling issue I have with this lens as the focusing knob is easy to miss when you’re about to take a photo. There is a good chance that you’ll forget where you left the focus if you had to take your hands off the camera. Otherwise, the focus throws are extremely smooth and fast, but accuracy can suffer due to the focusing knob. I’m definitely not a fan of this.
The aperture controls are set by two subtle, yet protruding metal tabs with machined serrations, where the user can easily manipulate the aperture just solely on feel thanks to its positive detents. I actually prefer the stiffer clicks on both Voigtlander and Zeiss aperture rings over Leica’s offering.
That being said, I wouldn’t consider this lens a handling demon like the Summicron or the Summarit for those quick focus hits.
In Summary
I would be lying to you if I said that I didn’t have my own prejudices towards this lens when it was first announced for the Leica M mount. This was not because I didn’t like Voigtlander (on the contrary), but because I didn’t believe there was a sub-$1000 lens that could match the Summicron’s superlative glass and user experience. This bias from my previous experiences with Voigtlander lenses set a low standard for me, because while Voigtlander made great lenses, they also came with a lot of compromises. What Voigtlander had accomplished this time, was that they were able to build one of the best 35mm f/2 lens you can buy and it demands your attention.
*Cosina is the parent company of Voigtlander and manufactures Zeiss ZM line of lenses for the Leica M mount in their factory in Japan.
If you’ve enjoyed this review and plan on making a purchase, please help out the site by using the affiliate links below as that helps the site to maintain its good relationship with its WordPress overlords and buy the writer a cup of coffee.
[eafl id=”5285″ name=”Voigtlander Ultron 35 f/2 Vintage” text=”Voigtlander Ultron 35mm f/2 ASPH”]
Overpriced Lens Hood: [eafl id=”5567″ name=”Voigtlander LH-12 Lens Hood” text=”LH-12″]
[eafl id=”5272″ name=”Leica Summicron-M 35mm f/2 ASPH (11879)” text=”Leica Summicron-M 35mm f/2 ASPH”]
[eafl id=”5495″ name=”Zeiss Biogon 35mm f/2 ZM” text=”Carl-Zeiss Biogon 35mm f/2″]
Featured Image by Stephen Gandy at CameraQuest
Voigtlander Ultron 35mm f/2 ASPH – Summicron on a Budget Photo Credit: Stephen Gandy (CameraQuest) The 35mm focal length is the most versatile focal length for any camera system and I've talked about this in depth in one of my reviews.
1 note
·
View note
Text
The Unseen


The Brief
Overview
Making the invisible, visible.
This project will introduce you to the use of specialist
techniques and equipment used to record images not
visible by standard techniques.
Create
Investigate and create a report on photographic
equipment, techniques and applications used in ‘Unseen’
photography. Use illustrations to help explain, in your
own words, the use and purpose of these techniques.
Using any three of the following techniques:
Infrared Photography
Ultraviolet Light
High Speed Flash Photography
Photomacrography, (greater than life size)
Cross polarisation
Create a minimum of three ‘Unseen’ photographic
images of phenomena not usually visible to the human
eye.
Produce
1. A single Illustrated document on both your
research findings into ‘Unseen’ photographic
applications and illustrate your own practical
experimentations (what you did and how you did
it). Include an evaluation of your final images and
use of Unseen techniques.
Uploaded to My City as a pdf file.
2. Three full res optimised 300ppi jpg files uploaded
to My City.
Research
“The Unseen”
5 applied specialist techniques
High Speed Flash
Understanding High Speed Sync Flash and Shutter Curtains.
Flash sync is the computer-controlled feature in which the flash and the shutter release are synchronized such that the flash light output illuminates the subject for the specific moments that the shutter exposes the image sensor.
The flash instantaneously lights up the subject (it does travel at the speed of light), so the flash doesn't last nearly as long as the shutter remains open even though this is very fast (1/60s, 1/125s 1/250s, etc.).
There is a limit to the shutter speed, and this is the camera’s native sync.
What is High Speed Sync Flash?
*N.B.* I subsequently found out this was not what the brief was looking for which taught me the difference between “High speed flash” and “High speed sync flash.
High-speed sync flash is your DSLR’s ability to use a flash at shutter speeds faster than the camera’s native sync.
Most cameras have a native sync of 1/250th of a second, and anything faster than that is beyond the camera’s ability to sync the shutter with the flash. But if you happen to be in a situation that requires faster shutter speeds to effectively capture the action, or for other aesthetic reasons (like a wide aperture), then you’ll over-exposure your image.
However, high-speed sync flash/camera combinations allow you to use the flash at higher shutter speeds.
How to use High Speed Sync Flash?

High-speed sync flash is used when you want to use a shutter speed that is faster than your camera’s native flash sync speed, or when you want to use a wider aperture setting that requires a higher shutter speed as is often the case with outdoor daylight shooting.
For example, you may want to take an outdoor portrait, and your TTL meter tells you that the f-stop should be set at f/16 with a 1/125s shutter. Those settings will give you too much depth of field, way too much actually. Nearly everything in sight will be in focus. Instead, what you want is a sharp subject, but a soft, blurred background, which would be achieved with an aperture of about f/2. That’s six stops of light difference, which means that shutter speed needs to go up to 1/5000s. This is easily achievable by setting the flash to High Sync Speed.
When you take your photo, you’ll have that beautiful, soft background that the pros get when shooting outside.
You’ll want to use High Shutter Sync when you’re shooting with a telephoto lens, trying to capture fast action, using a high shutter speed as well as a high f-stop. So in sports photography High Shutter Sync is ideal, and in some wildlife situations as well.
How High Speed Sync Works

With a high-speed sync flash-capable camera and dedicated flash unit, all you do is set the camera to that setting.
At high shutter speeds, the rear curtain starts to close before the front curtain fully opens. This way only a sliver of exposure moves across the image sensor. It is within this moving sliver of exposure that the flash fires, and voila! A high-speed shutter speed is synchronized to the flash. The flash does fire longer than in standard flash mode.
In standard flash mode, the flash duration is much shorter than the time it takes for the shutter to move across the image sensor, and the partially opened shutter will cover part of the frame. This would leave large sections of black in your image. The underexposed black in the image is not good, to say the least.
What is Rear and Front Curtain Sync?

The shutter on your DSLR consists of two curtains; the front and rear that open and then close in the time designated by the shutter speed (i.e. at 1/500s, the front shutter opens and then the rear moves to close all within 1/500th of a second).
The default setting coupled with a flash is “front curtain sync”, in that the flash fires as soon as the front curtain begins to move, thus illuminating the subject for the duration of the shutter speed.
However, many 35mm and DSLRs give you the option to have the flash fire just before the rear curtain (or second-curtain) begins to move.
You can achieve arresting, creative motion-blur and streaming light effects by deftly manipulating the front and rear curtain sync, especially with longer shutter speeds (1 second or more).
Conclusion
The high-speed sync gives you more artistic control over your photos, particularly in aperture-priority mode.
When you master this use of the flash, you’ll be able to take photos that will grab people’s attention and have them wondering how it was done.
High-speed sync overcomes the limitations of the camera’s native flash sync. That’s a boon to those photographers who always wished for just one or two more speeds on the shutter.
Source: https://www.exposureguide.com/high-speed-sync-flash/
Cross Polarisation
Cross polarising effect is where you use a pair of polarising filters - one on the camera and one on the light source (behind the subject) to show stress in plastic which appears as wonderful multicoloured pattern. It used to be quite difficult as the filter needed for the backlight needed to be large and polarising gels are not only hard to find but also quite expensive. But there is a modern-day solution and it's staring right at you! Your LCD computer monitor. Yes, this can be used as the light source and even though you didn't realise - it has the polariser built-in.

Photo by Peter Bargh
You'll need to use a camera with a polarising filter either attached or positioned in front of the lens. Of course, you'll need a monitor and a steady support will also be useful. A tripod is ideal but it could be something as simple as a pile of books just so long as the camera is set to the correct height.
Some clear hard plastic items - filter cases, plastic cutlery, plastic glasses, cassette and cd cases or geometry sets are a few options - will also be needed as well as something to hold the plastic item steady in front of the computer monitor. Where possible ensure your items are scratch-free as these can spoil the effect.
Step-by-step cross polarisation photography instructions
1. Turn the monitor on and remove any desktop clutter and change the screen saver to a neutral colour. The other option is to create a plain mid-grey image about 800x600 pixels and call it grey.jpb. Drag this to the web browser to display it and then hit the f11 key to display the browser full frame without menus. And then hold down the ctrl key and tap the + key until the grey image fills the monitor window.
2. Position the plastic item in front and in the centre of the monitor. A clamp is a useful tool for this but really, whatever you use just has to get the area you want to photograph in the centre of the monitor.
3. Attach the polarising filter to your camera and position the camera in front of the plastic so all you see is an area of the plastic with the grey image totally filling the background. If you can't get close with your camera use the lens at its telephoto setting to fill the frame and avoid edges of the monitor showing. If you still can't get close enough you will have to crop off areas you don't want later.
4. Rotate the polarising filter and watch the colours of the plastic become stronger and the grey go darker. If you have it set up correctly the grey monitor will go totally black, and the colours in the plastic will be brilliant.
You can use any exposure mode and shooting at the metered setting should be fine. Underexpose a little if you want even more dramatic colours.
For an extra level of abstractness bring a second item even closer to the lens to make the whole image have a multicoloured filter. By experimenting you can often find undiscovered gems.
Source: https://www.ephotozine.com/article/abstract-photography--easy-cross-polarisation-14716
Macro Photography (>1-1)
Macro photography (or photomicrography or macrography, and sometimes macrophotography), is extreme close-up photography, usually of very small subjects and living organisms like insects, in which the size of the subject in the photograph is greater than life size (though macrophotography technically refers to the art of making very large photographs). By the original definition, a macro photograph is one in which the size of the subject on the negative or image sensor is life size or greater. However, in some uses it refers to a finished photograph of a subject at greater than life size.
The ratio of the subject size on the film plane (or sensor plane) to the actual subject size is known as the reproduction ratio. Likewise, a macro lens is classically a lens capable of reproduction ratios of at least 1:1, although it often refers to any lens with a large reproduction ratio, despite rarely exceeding 1:1.
Apart from technical photography and film-based processes, where the size of the image on the negative or image sensor is the subject of discussion, the finished print or on-screen image more commonly lends a photograph its macro status. For example, when producing a 6×4 inch (15×10 cm) print using 35 format (36×24 mm) film or sensor, a life-size result is possible with a lens having only a 1:4 reproduction ratio.
Reproduction ratios much greater than 10:1 are considered to be photomicrography, often achieved with digital microscope (photomicrography should not be confused with microphotography, the art of making very small photographs, such as for microforms).
Due to advances in sensor technology, today’s small-sensor digital cameras can rival the macro capabilities of a DSLR with a "true" macro lens, despite having a lower reproduction ratio, making macro photography more widely accessible at a lower cost. In the digital age, a "true" macro photograph can be more practically defined as a photograph with a vertical subject height of 24 mm or less.

Photomacrograph of a common yellow dung fly (Scathophaga stercoraria) made using a lens at its maximum 1:1 reproduction ratio, and an 18×24mm image sensor, the on-screen display of the photograph results in a greater than life-size image.

Headshot of a dragonfly taken with a 100 mm macro lens coupled with a 50 mm lens in reverse at the end.
Equipment and techniques

Canon MP-E 65 mm macro lens. Small front lens elements are typical of macro lenses.

Wide-angle lens used as a reversed lens in front of a macro lens
"Macro" lenses specifically designed for close-up work, with a long barrel for close focusing and optimized for high reproduction ratios, are one of the most common tools for macro photography. (Unlike most other lens makers, Nikon designates its macro lenses as "Micro" because of their original use in making microform.) Most modern macro lenses can focus continuously to infinity as well and can provide excellent optical quality for normal photography. True macro lenses, such as the Canon MP-E 65 mm f/2.8 or Minolta AF 3x-1x 1.7-2.8 Macro, can achieve higher magnification than life size, enabling photography of the structure of small insect eyes, snowflakes, and other minuscule objects. Others, such as the Infinity Photo-Optical's TS-160 can achieve magnifications from 0-18x on sensor, focusing from infinity down to 18 mm from the object.
Macro lenses of different focal lengths find different uses:
· Continuously-variable focal length – suitable for virtually all macro subjects
· 45–65 mm – product photography, small objects that can be approached closely without causing undesirable influence, and scenes requiring natural background perspective
· 90–105 mm – insects, flowers, and small objects from a comfortable distance
· 150–200 mm – insects and other small animals where additional working distance is required
Extending the distance between the lens and the film or sensor, by inserting either extension tubes or a continuously adjustable bellows, is another equipment option for macro photography. The further the lens is from the film or sensor, the closer the focusing distance, the greater the magnification, and the darker the image given the same aperture. Tubes of various lengths can be stacked, decreasing lens-to-subject distance and increasing magnification. Bellows or tubes shorten the available maximum focus distance and make it impossible to focus to infinity.
Placing an auxiliary close-up lens (or close-up "filter") in front of the camera's lens is another option. Inexpensive screw-in or slip-on attachments provide close focusing. The possible quality is less than that of a dedicated macro lens or extension tubes, with some two-element versions being very good while many inexpensive single element lenses exhibit chromatic aberration and reduced sharpness of the resulting image. This method works with cameras that have fixed lenses, and is commonly used with bridge cameras. These lenses add diopters to the optical power of the lens, decreasing the minimum focusing distance, and allowing the camera to get closer to the subject. They are typically designated by their diopter, and can be stacked (with an additional loss of quality) to achieve the desired magnification.
Photographers may employ view camera movements and the Scheimpflug principle to place an object close to the lens in focus, while maintaining selective background focus. This technique requires the use of a view camera or perspective control lenswith the ability to tilt the lens with respect to the film or sensor plane. Lenses such as the Nikon PC-E and Canon TS-E series, the Hartblei Super-Rotator, the Schneider Super Angulon, several Lensbaby models, the Zoerk Multi Focus System, and various tilt-shift adapters for medium format, allow the use of tilt in cameras with fixed lens mounts. Traditional view cameras permit such adjustment as part of their design.
Ordinary lenses can be used for macro photography by using a "reversing ring". This ring attaches to the filter thread on the front of a lens and makes it possible to attach the lens in reverse. Excellent quality results up to 4x life-size magnification are possible. For cameras with all-electronic communications between the lens and the camera body specialty reversing rings are available which preserve these communications. When used with extension tubes or bellows, a highly versatile, true macro (greater than life size) system can be assembled. Since non-macro lenses are optimized for small reproduction ratios, reversing the lens allows it to be used for reciprocally high ratios.
Macro photography may also be accomplished by mounting a lens in reverse, in front of a normally mounted lens of greater focal length, using a macro coupler which screws into the front filter threads of both lenses. This method allows most cameras to maintain the full function of electronic and mechanical communication with the normally mounted lens, for features such as open-aperture metering. The magnification ratio is calculated by dividing the focal length of the normally mounted lens by the focal length of the reversed lens (e.g., when an 18 mm lens is reverse mounted on a 300 mm lens the reproduction ratio is 16:1). The use of automatic focus is not advisable if the first lens is not of the internal-focusing type, as the extra weight of the reverse-mounted lens could damage the autofocus mechanism. Working distance is significantly less than the first lens.
Increasingly, macro photography is accomplished using compact digital cameras and small-sensor bridge cameras, combined with a high powered zoom lens and (optionally) a close-up diopter lens added to the front of the camera lens. The deep depth of field of these cameras is an advantage for macro work. The high pixel density and resolving power of these cameras' sensors enable them to capture very high levels of detail at a lower reproduction ratio than is needed for film or larger DSLR sensors (often at the cost of greater image noise). Despite the fact that many of these cameras come with a "macro mode" which does not qualify as true macro, some photographers are using the advantages of small sensor cameras to create macro images that rival or even surpass those from DSLRs.
Technical considerations
Depth of field

Shallow depth of field
Limited depth of field is an important consideration in macro photography. Depth of field is extremely small when focusing on close objects. A small aperture (high f-number) is often required to produce acceptable sharpness across a three-dimensional subject. This requires either a slow shutter speed, brilliant lighting, or a high ISO. Auxiliary lighting (such as from a flash unit), preferably a ring flash is often used (see Lighting section).
Like conventional lenses, macro lenses need light, and ideally would provide similar f/# to conventional lenses to provide similar exposure times. Macro lenses also have similar focal lengths, so the entrance pupil diameter is comparable to that of conventional lenses (e.g., a 100 mm f/2.8 lens has a 100 mm/2.8 = 35.7 mm entrance-pupil diameter). Because they focus at close subjects, the cone of light from a subject point to the entrance pupil is relatively obtuse (a relatively high subject numerical aperture to use microscopy terms), making the depth of field extraordinarily small. This makes it essential to focus critically on the most important part of the subject, as elements that are even a millimetre closer or farther from the focal plane might be noticeably blurred. Due to this, the use of a microscope stage is highly recommended for precise focus with large magnification such as photographing skin cells. Alternatively, more shots of the same subject can be made with slightly different focusing lengths and joined afterwards with specialized focus stacking software which picks out the sharpest parts of every image, artificially increasing depth of field.
Lighting
The problem of sufficiently and evenly lighting the subject can be difficult to overcome. Some cameras can focus on subjects so close that they touch the front of the lens. It is difficult to place a light between the camera and a subject that close, making extreme close-up photography impractical. A normal-focal-length macro lens (50 mm on a 35 mm camera) can focus so close that lighting remains difficult. To avoid this problem, many photographers use telephoto macro lenses, typically with focal lengths from about 100 to 200 mm. These are popular as they permit sufficient distance for lighting between the camera and the subject.
Ring flashes, with flash tubes arranged in a circle around the front of the lens, can be helpful in lighting at close distances. Ring lights have emerged, using white LEDs to provide a continuous light source for macro photography, however they are not as bright as a ring flash and the white balance is very cool.
Good results can also be obtained by using a flash diffuser. Homemade flash diffusers made out of white Styrofoam or plastic attached to a camera's built-in flash can also yield surprisingly good results by diffusing and softening the light, eliminating specular reflections and providing more even lighting.
Source: https://en.wikipedia.org/wiki/Macro_photography
Infrared
In infrared photography, the film or image sensor used is sensitive to infrared light. The part of the spectrum used is referred to as near-infrared to distinguish it from far-infrared, which is the domain of thermal imaging. Wavelengths used for photographyrange from about 700 nm to about 900 nm. Film is usually sensitive to visible light too, so an infrared-passing filter is used; this lets infrared (IR) light pass through to the camera, but blocks all or most of the visible light spectrum (the filter thus looks black or deep red). ("Infrared filter" may refer either to this type of filter or to one that blocks infrared but passes other wavelengths.)
When these filters are used together with infrared-sensitive film or sensors, "in-camera effects" can be obtained; false-color or black-and-white images with a dreamlike or sometimes lurid appearance known as the "Wood Effect," an effect mainly caused by foliage (such as tree leaves and grass) strongly reflecting in the same way visible light is reflected from snow. There is a small contribution from chlorophyll fluorescence, but this is marginal and is not the real cause of the brightness seen in infrared photographs. The effect is named after the infrared photography pioneer Robert W. Wood, and not after the material wood, which does not strongly reflect infrared.
The other attributes of infrared photographs include very dark skies and penetration of atmospheric haze, caused by reduced Rayleigh scattering and Mie scattering, respectively, compared to visible light. The dark skies, in turn, result in less infrared light in shadows and dark reflections of those skies from water, and clouds will stand out strongly. These wavelengths also penetrate a few millimeters into skin and give a milky look to portraits, although eyes often look black.
History
Until the early 20th century, infrared photography was not possible because silver halide emulsions are not sensitive to longer wavelengths than that of blue light (and to a lesser extent, green light) without the addition of a dye to act as a color sensitizer. The first infrared photographs (as distinct from spectrographs) to be published appeared in the February 1910 edition of The Century Magazine and in the October 1910 edition of the Royal Photographic Society Journal to illustrate papers by Robert W. Wood, who discovered the unusual effects that now bear his name. The RPS co-ordinated events to celebrate the centenary of this event in 2010. Wood's photographs were taken on experimental film that required very long exposures; thus, most of his work focused on landscapes. A further set of infrared landscapes taken by Wood in Italy in 1911 used plates provided for him by CEK Mees at Wratten & Wainwright. Mees also took a few infrared photographs in Portugal in 1910, which are now in the Kodak archives.
Infrared-sensitive photographic plates were developed in the United States during World War I for spectroscopic analysis, and infrared sensitizing dyes were investigated for improved haze penetration in aerial photography. After 1930, new emulsions from Kodak and other manufacturers became useful to infrared astronomy.
Infrared photography became popular with photography enthusiasts in the 1930s when suitable film was introduced commercially. The Times regularly published landscape and aerial photographs taken by their staff photographers using Ilford infrared film. By 1937 33 kinds of infrared film were available from five manufacturers including Agfa, Kodak and Ilford. Infrared movie film was also available and was used to create day-for-night effects in motion pictures, a notable example being the pseudo-night aerial sequences in the James Cagney/Bette Davis movie The Bride Came COD.
False-color infrared photography became widely practiced with the introduction of Kodak Ektachrome Infrared Aero Film and Ektachrome Infrared EIR. The first version of this, known as Kodacolor Aero-Reversal-Film, was developed by Clark and others at the Kodak for camouflage detection in the 1940s. The film became more widely available in 35mm form in the 1960s but KODAK AEROCHROME III Infrared Film 1443 has been discontinued.
Infrared photography became popular with a number of 1960s recording artists, because of the unusual results; Jimi Hendrix, Donovan, Frank Zappa and the Grateful Dead all issued albums with infrared cover photos. The unexpected colors and effects that infrared film can produce fit well with the psychedelic aesthetic that emerged in the late 1960s.

Infrared-Pass Filters
Infrared light lies between the visible and microwave portions of the electromagnetic spectrum. Infrared light has a range of wavelengths, just like visible light has wavelengths that range from red light to violet. "Near infrared" light is closest in wavelength to visible light and "far infrared" is closer to the microwave region of the electromagnetic spectrum. The longer, far infrared wavelengths are about the size of a pin head and the shorter, near infrared ones are the size of cells, or are microscopic.

A tree photographed in the near infrared range.

The same tree in the visible part of the spectrum.
Focusing Infrared
Most manual focus 35 mm SLR and medium format SLR lenses have a red dot, line or diamond, often with a red "R" called the infrared index mark, that can be used to achieve proper infrared focus; many autofocus lenses no longer have this mark. When a single-lens reflex (SLR) camera is fitted with a filter that is opaque to visible light, the reflex system becomes useless for both framing and focusing, one must compose the picture without the filter and then attach the filter. This requires the use of a tripod to prevent the composition from changing. A sharp infrared photograph can be done with a tripod, a narrow aperture (like f/8)[ and a slow shutter speed without focus compensation, however wider apertures like f/2.0 can produce sharp photos only if the lens is meticulously refocused to the infrared index mark, and only if this index mark is the correct one for the filter and film in use. Diffraction effects inside a camera are greater at infrared wavelengths so that stopping down the lens too far may actually reduce sharpness.
Most apochromatic ('APO') lenses do not have an Infrared index mark and do not need to be refocused for the infrared spectrum because they are already optically corrected into the near-infrared spectrum. Catadioptric lenses do not often require this adjustment because their mirror containing elements do not suffer from chromatic aberration and so the overall aberration is comparably less. Catadioptric lenses do, of course, still contain lenses, and these lenses do still have a dispersive property.
Zoom lenses may scatter more light through their more complicated optical systems than prime lenses, that is, lenses of fixed focal length; for example, an infrared photo taken with a 50 mm prime lens may look more contrasty than the same image taken at 50 mm with a 28–80 zoom.
Some lens manufacturers such as Leica never put IR index marks on their lenses. The reason for this is that any index mark is only valid for one particular IR filter and film combination, and may lead to user error. Even when using lenses with index marks, focus testing is advisable as there may be a large difference between the index mark and the subject plane.
Film Cameras

View of the Hollywood Hills. Kodak Infrared color slide film, 35mm manual focus Nikkon lens no filter used and developed with E-6 process.
Many conventional cameras can be used for infrared photography, where infrared is taken to mean light of a wavelength only slightly longer than that of visible light. Photography of rather longer wavelengths is normally termed thermography and requires special equipment.
With some patience and ingenuity, most film cameras can be used. However, some cameras of the 1990s that used 35mm film have infrared sprocket-hole sensors that can fog infrared film (their manuals may warn against the use of infrared film for this reason). Other film cameras are not completely opaque to infrared light.
Black-and-white infrared film
Black-and-white infrared negative films are sensitive to wavelengths in the 700 to 900 nm near infrared spectrum, and most also have a sensitivity to blue light wavelengths. The notable halation effect or glow often seen in the highlights of infrared photographs is an artifact of Kodak High Speed Infrared (HIE) black-and-white negative film and not an artifact of infrared light. The glow or blooming is caused by the absence of an anti-halation layer on the back side of Kodak HIE film, this results in a scattering or blooming around the highlights that would usually be absorbed by the anti-halation layer in conventional films.
The majority of black-and-white infrared art, landscape, and wedding photography is done using orange (15 or 21), red (23, 25, or 29) or visually opaque (72) filters over the lens to block the blue visible light from the exposure. The intent of filters in black-and-white infrared photography is to block blue wavelengths and allow infrared to pass through. Without filters, infrared negative films look much like conventional negative films because the blue sensitivity lowers the contrast and effectively counteracts the infrared look of the film. Some photographers use orange or red filters to allow slight amounts of blue wavelengths to reach the film, and thus lower the contrast. Very dark-red (29) filters block out almost all blue, and visually opaque (70, 89b, 87c, 72) filters block out all blue and also visible red wavelengths, resulting in a more pure-infrared photo with a more pronounced contrast.
Certain infrared-sensitive films like Kodak HIE must only be loaded and unloaded in total darkness. Infrared black-and-white films require special development times but development is usually achieved with standard black-and-white film developers and chemicals (like D-76). Kodak HIE film has a polyester film base that is very stable but extremely easy to scratch, therefore special care must be used in the handling of Kodak HIE throughout the development and printing/scanning process to avoid damage to the film. The Kodak HIE film was sensitive to 900 nm.
As of November 2, 2007, "KODAK is preannouncing the discontinuance" of HIE Infrared 35 mm film stating the reasons that, "Demand for these products has been declining significantly in recent years, and it is no longer practical to continue to manufacture given the low volume, the age of the product formulations and the complexity of the processes involved." At the time of this notice, HIE Infrared 135-36 was available at a street price of around $12.00 a roll at US mail order outlets.
Arguably the greatest obstacle to infrared film photography has been the increasing difficulty of obtaining infrared-sensitive film. However, despite the discontinuance of HIE, other newer infrared sensitive emulsions from EFKE, ROLLEI, and ILFORD are still available, but these formulations have differing sensitivity and specifications from the venerable KODAK HIE that has been around for at least two decades. Some of these infrared films are available in 120 and larger formats as well as 35 mm, which adds flexibility to their application. With the discontinuance of Kodak HIE, Efke's IR820 film has become the only IR film on the market with good sensitivity beyond 750 nm, the Rollei film does extend beyond 750 nm but IR sensitivity falls off very rapidly.
Color infrared film

An example of color infrared.
Color infrared transparency films have three sensitized layers that, because of the way the dyes are coupled to these layers, reproduce infrared as red, red as green, and green as blue. All three layers are sensitive to blue so the film must be used with a yellow filter, since this will block blue light but allow the remaining colors to reach the film. The health of foliage can be determined from the relative strengths of green and infrared light reflected; this shows in color infrared as a shift from red (healthy) towards magenta (unhealthy). Early color infrared films were developed in the older E-4 process, but Kodak later manufactured a color transparency film that could be developed in standard E-6 chemistry, although more accurate results were obtained by developing using the AR-5 process. In general, color infrared does not need to be refocused to the infrared index mark on the lens.
In 2007 Kodak announced that production of the 35 mm version of their color infrared film (Ektachrome Professional Infrared/EIR) would cease as there was insufficient demand. Since 2011, all formats of color infrared film have been discontinued. Specifically, Aerochrome 1443 and SO-734.
There is no currently available digital camera that will directly produce the same results as Kodak color infrared film although the equivalent images can be produced by taking two exposures, one infrared and the other full-color, and combining in post-production. A yellow (minus-blue) filter can also be used, which provides a single image that can also be post-processed to emulate the Ektachrome look. The color images produced by digital still cameras using infrared-pass filters are not equivalent to those produced on color infrared film. The colors result from varying amounts of infrared passing through the color filters on the photo sites, further amended by the Bayer filtering. While this makes such images unsuitable for the kind of applications for which the film was used, such as remote sensing of plant health, the resulting color tonality has proved popular artistically.
Color digital infrared, as part of full spectrum photography is gaining popularity. The ease of creating a softly colored photo with infrared characteristics has found interest among hobbyists and professionals.
Availability
In 2008, Los Angeles photographer, Dean Bennici started cutting and hand rolling Aerochrome color Infrared film. All Aerochrome medium and large format which exists today came directly from his lab. The trend in infrared photography continues to gain momentum with the success of photographer Richard Mosse and multiple users all around the world.
Digital Cameras

A view in infrared of Montréal as seen from Mont Royal, taken with filter made of a floppy disk.

Bending Cypress: infrared shot by Sigma SD10 with B+W 093 filter, ISO 100, f/8, 1/160 s.
Digital camera sensors are inherently sensitive to infrared light, which would interfere with the normal photography by confusing the autofocus calculations or softening the image (because infrared light is focused differently from visible light), or oversaturating the red channel. Also, some clothing is transparent in the infrared, leading to unintended (at least to the manufacturer) uses of video cameras. Thus, to improve image quality and protect privacy, many digital cameras employ infrared blockers. Depending on the subject matter, infrared photography may not be practical with these cameras because the exposure times become overly long, often in the range of 30 seconds, creating noise and motion blur in the final image. However, for some subject matter the long exposure does not matter or the motion blur effects actually add to the image. Some lenses will also show a 'hot spot' in the centre of the image as their coatings are optimised for visible light and not for IR.

An example of the use of infrared photography in aerial archaeology to delineate sub-surface features.

An example of color digital infrared photography. The camera's infrared blocking filter has been removed. Red and blue channels have been swapped for more conventional sky color.
An alternative method of DSLR infrared photography is to remove the infrared blocker in front of the sensor and replace it with a filter that removes visible light. This filter is behind the mirror, so the camera can be used normally - handheld, normal shutter speeds, normal composition through the viewfinder, and focus, all work like a normal camera. Metering works but is not always accurate because of the difference between visible and infrared refraction. When the IR blocker is removed, many lenses which did display a hotspot cease to do so, and become perfectly usable for infrared photography. Additionally, because the red, green and blue micro-filters remain and have transmissions not only in their respective color but also in the infrared, enhanced infrared color may be recorded.
Since the Bayer filters in most digital cameras absorb a significant fraction of the infrared light, these cameras are sometimes not very sensitive as infrared cameras and can sometimes produce false colors in the images. An alternative approach is to use a Foveon X3 sensor, which does not have absorptive filters on it; the Sigma SD10 DSLR has a removable IR blocking filter and dust protector, which can be simply omitted or replaced by a deep red or complete visible light blocking filter. The Sigma SD14 has an IR/UV blocking filter that can be removed/installed without tools. The result is a very sensitive digital IR camera.

A Nikau palm against a clear, sunny sky shows the high contrast that is often typical of outdoors infrared photography.
While it is common to use a filter that blocks almost all visible light, the wavelength sensitivity of a digital camera without internal infrared blocking is such that a variety of artistic results can be obtained with more conventional filtration. For example, a very dark neutral density filter can be used (such as the Hoya ND400) which passes a very small amount of visible light compared to the near-infrared it allows through. Wider filtration permits an SLR viewfinder to be used and also passes more varied color information to the sensor without necessarily reducing the Wood effect. Wider filtration is however likely to reduce other infrared artefacts such as haze penetration and darkened skies. This technique mirrors the methods used by infrared film photographers where black-and-white infrared film was often used with a deep red filter rather than a visually opaque one.
Another common technique with near-infrared filters is to swap blue and red channels in software (e.g. Adobe Photoshop) which retains much of the characteristic 'white foliage' while rendering skies a glorious blue.
Several Sony cameras had the so-called Night Shot facility, which physically moves the blocking filter away from the light path, which makes the cameras very sensitive to infrared light. Soon after its development, this facility was 'restricted' by Sony to make it difficult for people to take photos that saw through clothing. To do this the iris is opened fully and exposure duration is limited to long times of more than 1/30 second or so. It is possible to shoot infrared but neutral density filters must be used to reduce the camera's sensitivity and the long exposure times mean that care must be taken to avoid camera-shake artifacts.
Fuji have produced digital cameras for use in forensic criminology and medicine which have no infrared blocking filter. The first camera, designated the S3 PRO UVIR, also had extended ultraviolet sensitivity (digital sensors are usually less sensitive to UV than to IR). Optimum UV sensitivity requires special lenses, but ordinary lenses usually work well for IR. In 2007, FujiFilm introduced a new version of this camera, based on the Nikon D200/ FujiFilm S5 called the IS Pro, also able to take Nikon lenses. Fuji had earlier introduced a non-SLR infrared camera, the IS-1, a modified version of the FujiFilm FinePix S9100. Unlike the S3 PRO UVIR, the IS-1 does not offer UV sensitivity. FujiFilm restricts the sale of these cameras to professional users with their EULA specifically prohibiting "unethical photographic conduct".

Thermographic image of coffee cup
Remote sensing and thermographic cameras are sensitive to longer wavelengths of infrared (see Infrared spectrum § Commonly used sub-division scheme). They may be multispectral and use a variety of technologies which may not resemble common camera or filter designs. Cameras sensitive to longer infrared wavelengths including those used in infrared astronomy often require cooling to reduce thermally induced dark currents in the sensor (see Dark current (physics)). Lower cost uncooled thermographic digital cameras operate in the Long Wave infrared band (see Thermographic camera). These cameras are generally used for building inspection or preventative maintenance but can be used for artistic pursuits as well, such as this image of a cup of coffee.
Source: https://en.wikipedia.org/wiki/Infrared_photography
Ultraviolet
Ultraviolet photography is a photographic process of recording images by using light from the ultraviolet (UV) spectrum only. Images taken with ultraviolet light serve a number of scientific, medical or artistic purposes. Images may reveal deterioration of art works or structures not apparent under visible light. Diagnostic medical images may be used to detect certain skin disorders or as evidence of injury. Some animals, particularly insects, use ultraviolet wavelengths for vision; ultraviolet photography can help investigate the markings of plants that attract insects, while invisible to the unaided human eye. Ultraviolet photography of archaeological sites may reveal artifacts or traffic patterns not otherwise visible.
Photographs made of various dyes that fluoresce under ultraviolet illumination are also useful.
Equipment and techniques
Reflected UV photography

A portrait taken using only UV light between the wavelengths of 335 and 365 nanometers.
In reflected UV photography the subject is illuminated directly by UV emitting lamps (radiation sources) or by strong sunlight. A UV transmitting filter is placed on the lens, which allows ultraviolet light to pass and which absorbs or blocks all visible and infrared light. UV filters are made from special colored glass and may be coated or sandwiched with other filter glass to aid in blocking unwanted wavelengths. Examples of UV transmission filters are the Baader-U filter or the StraightEdgeU ultraviolet bandpass filter, both of which exclude most visible and infrared light. Older filters include the Kodak Wratten 18A, B+W 403, Hoya U-340 and Kenko U-360 most of which need to be used in conjunction with an additional infrared blocking filter. Typically such IR blocking, UV transmissive filters are made from Schott BG-38, BG-39 and BG-40 glass. Filters for use with digital camera sensors must not have any "infrared leak" (transmission in the infrared spectrum); the sensor will pick up reflected infrared radiation as well as ultraviolet, which may obscure the details that would be resolved by ultraviolet alone.
Most types of glass will allow longwave UV to pass, but absorb all the other UV wavelengths, usually from about 350 nm and below. For UV photography it is necessary to use specially developed lenses having elements made from fused quartzor quartz and fluorite. Lenses based purely on quartz show a distinct focus shift between visible and UV light, whereas the fluorite/quartz lenses can be fully corrected between visible and ultraviolet light without focus shift. Examples of the latter type are the Nikon UV-Nikkor 105 mm f/4.5, the Coastal Optics 60 mm f/4.0, the Hasselblad (Zeiss) UV-Sonnar 105 mm, and the Asahi Pentax Ultra Achromatic Takumar 85 mm f/3.5
Suitable digital cameras for reflected UV photography have been reported to be the (unmodified) Nikon D70 or D40 DSLRs, but many others are suitable after having their internal UV and IR blocking filter removed. The Fujifilm FinePix IS Prodigital SLR camera is purpose-designed for ultraviolet (and infrared) photography, with a frequency response rated from 1000-380 nm, although it also responds to somewhat longer and shorter wavelengths. Silicon (from which DSLR sensors are made) can respond to wavelengths between 1100-190 nm.
UV induced fluorescence photography

Fluorescent materials lit by UV light. No filter is used to absorb violet visible light. Photo taken with daylight film.
Photography based on visible fluorescence induced by UV radiation uses the same ultraviolet illumination as in reflected UV photography. However, the glass barrier filter used on the lens must now absorb or block all ultraviolet and infrared light and must permit only the visible radiation to pass. Visible fluorescence is produced in a suitable subject when the shorter, higher energy ultraviolet wavelengths are absorbed, lose some energy and are emitted as longer, lower energy visible wavelengths.
UV induced visible fluorescence photography must take place in a darkened room, preferably with a black background. The photographer should also wear dark-colored clothes for better results. (Many light-colored fabrics also fluoresce under UV.) Any camera or lens may be used because only visible wavelengths are being recorded.
UV can also induce infrared fluorescence and UV fluorescence depending on the subject. For UV induced non-visible fluorescence photography, a camera must be modified in order to capture UV or IR images, and UV or IR capable lenses must be used.
Filters are sometimes added to the UV illumination source to narrow the illuminant waveband. This filter is called an exciter filter, and it allows only the radiation to pass which is needed to induce a particular fluorescence. As before, a barrier filter must also be placed in front of the camera lens to exclude undesired wavelengths.
Forensic use
Ultraviolet photography was used as evidence in court at least as early as 1934. Photographs made with ultraviolet radiation can reveal bruises or scars not visible on the surface of the skin, in some cases long after visible healing has completed. These can serve as evidence of assault. Ultraviolet imaging can be used to detect alteration of documents.
Source: https://en.wikipedia.org/wiki/Ultraviolet_photography
Submitted worksheet


Conclusion/Reflection
I really enjoyed researching and using this wide variety of techniques and was able to capture some interesting shots with my new found knowledge. I particularly enjoyed using the high speed flash to capture shots in the splash tank. I found the macro photography quite challenging as you don’t really know how interesting an object will look until you get your camera set up on it. It was also really challenging to get the focus to a point I was happy with due to the incredibly shallow depth of field. The x-ray photography was a little disappointing as I didn’t get a chance to shoot outside due to really poor weather conditions so only experimented with portraits. Cross polarisation was great fun and fairly straight forward to create some really interesting and colourful shots, the key definitely being to experiment lots by moving the filters. UV was also interesting for capturing still lifes but more challenging to capture good portraits.
1 note
·
View note
Text


Low key lighting photography- File management - Editing skills
In these images i was focusing on editing these images, so putting them in black and white, changing the contrast and brightness to bring out the contrast in the shadows. Also used the adjustment tool. To do this I went into Adobe bridge to edit these imag.
In the first image and the second image I am showing you one in colour and one in black and white. In the first image I changed the contacts to make the shadows have a stronger contrast with the bright and dark in the image. To do this I used the adjustment tool so I selected a certain part of the image and painted over it and then changed the settings to get the contrast of the image. So it makes the colour and tone. Also effects the brightness and exposure of the image. I also changed the contrast to 45 to bring out a strong contrast throughout the photograph. Then lowered the birghtness so then the split lighting it equal and shows that one side is brighter then the other side of the image. I was also focusing on split lighting in the sixth image. Also the fifth image.
Then in my second image I changed it to black and white to give it a different aspect to it. So I went onto Abobe Bridge and I firstly changed the whole photograph into black and white. Then I pressed on the adujusment tool and changed the contrast and tone of the whole image. I put the contrast up to 35 to give the split lighting a contrast and show the dark and light in the photograph. Then I brought down the birghtness to bring the contrast more sharp because it is in back and white.
In my third image I also changed it into black and white. So I went onto Abobe bridge like I did for the first and second images I edited. So I changed the whole image to black and white to show the split lighting a different aspect and contrast. Then I changed the contrast to 35 to give the whole image a contrast in the lighting on the models face. Then put the brightness to -10 to make it less bright so then there is a strong look to the whole of the photograph when someone’s is looking at it.
In my fourth image I was focusing on broad lighting. I did this by using a soft box light to the right of me. Then pointing it towards me. By using a soft box and not a snoot this means there are less shadows on the models face. I also used a gold reflector to the left of the model this create a golden tone on the skin. In this image I tried the rule of thirds.
To take this images my camera settings were set at aperture f/5.6, ISO 100 also shutter speed 1/125 and focal length 95.00mm.
I think that management is important because it tells someone how you did the photograph. So then someone is looking at your photography work knows how you edited it and what you was thinking when you took the image. Also describes from the image file from the moment we begin to download them and from our memory card or camera. It is also important to save your photos as a JEPEG And RAW Photograph because then you use raw for your editing photographs and you have a other photograph to see what your photographs look like before and after. Also DPI stands for Dots per inch. So if you want a photograph in 300dpi. You use this when you are printing your images. So it is intended print size.
Questions
1. How did you find this task? I found this task very easy and fun.
3. Was it difficult to create the sets up? No it wasn’t difficult because I already knew what I was going to do in the studio.
4 . What method did you enjoy the most? I really enjoyed doing the split lighting because I really liked taking the images and I found it fun and easy.
5. With method got you the best result? The best method I got was split lighting.
6. Was the primary research or secondary research? What did you learn from your research? First we did research on google to learn about the different techniques we had to do. Then we knew what we wanted to do and went to the studio and set up.
4 notes
·
View notes
Text
Packing for a 2-week trip is stressful. Packing for a whole year is a nightmare, especially when you are on a budget and have to keep things within the airline baggage weight limit. There’s packing, weighing and then unpacking in order of least necessary and least expensive to replace, until you get a combination that is relatively satisfying.

This post details what I am taking with me for resumption in school later this month and why. Let’s go!
Travel Documents
These go without saying but I’ll say it anyway. My travel documents include my Nigerian passport containing my visa vignette and a printed copy of my flight ticket and boarding pass. As a Nigerian, you require a valid visa to enter the United Kingdom. In fact, Nigerian Immigration officers will not let you through without one. My previous post titled Visa application tips for Nigerians might be helpful in putting in your visa application. Having a valid passport and visa are the most important things for any international trip. Without it, you really aren’t going anywhere.
I prefer to have my ticket and boarding pass printed. I’m not comfortable with handing my phone to the officers at the airport. It’s just easier to hand then the sheet of paper.
(P:S Depending on the length of your visa, you are required to have a return ticket. I didn’t know this and it almost cost me dearly. I had to buy a return ticket right there on my phone and present the confirmatory email. If your travel visa is less than 6 months, you must have a return ticket before you leave.) Oh, and if you are first traveler, please keep your passport in your hand luggage and not your Check-in luggage.

Certificates and Transcripts
Certificates and Transcripts
Other things I will not be checking in are my Certificates and Transcripts which I need to present for verification at school. It’s safest to keep these vital papers in my backpack, on my person at all times because anything can happen to checked in luggage. I have lost my luggage once, with Ethiopia Airlines sending it to Ghana. I will hate a repeat incidence where all my life’s work and achievement end up in another country or lost forever.
Electronics
Laptop, Camera, Bluetooth headphones and my Power-bank will also be in my backpack. Personally, I never check in electronics worth more than N20,000 if I can help it. You just never know what will happen in that backroom in the airport. Those tiny padlocks and number locks on zips are the best you can do, but I will tell you categorically that they do not protect your property from skillful, experienced thieves. Only a matter of seconds and your stuff is gone.

My denim jacket
Clothing
These make up about 80% of my luggage really. Autumn is around the corner and the weather will start to get wet and chilly. So I’m packing a lot of warm-wear: Cardigans, denim jackets, coats and scarfs. I’m also packing some socks, and gloves to keep my extremities warm. I’m also packing my jeans, all of them. Jeans are the unofficial uniform for students. Blue, black or grey, they are comfortable, trendy and low maintenance. I will be living in them for the next one year.
Food
I’m not packing a lot of food because there are a lot of familiar foods and many grocery stores in the United Kingdom where you can find almost anything you want. There are also a number of Nigerian food stores in London. Regardless I’m packing Golden Morn, it is a necessity. I love Burger peanuts and some Zobo. I might buy Kilishi too but I’m afraid it won’t fit in the 23kg limit. Back pack perhaps?
Golden Morn
Burger
Groundnut
Some Afang for soup
Footwear
I always travel in my Nike running shoes with an additional pair of Ballet flats in my suitcase. I can’t express how important it is to be comfortable during international travel. You can’t drag heavy suitcases to and from the airport, train or bus station; all while on heels? Travelling with any more shoes proved challenging for me. They seem to take up too much space.
Make-up and Cosmetics
These were surprisingly heavy. I’ve got wigs, a lot of cosmetics, face washes, hair creams, and face creams. Because liquids must be checked in, I have packed some of them neatly in a make-up bag and squeezed others into tiny corners of my suitcase.
Related: Since We Will Soon be Having Coffee…
Photography Equipment
I’ve got to go with my tripod and reflector. No questions. But I won’t be travelling with my backgrounds and a lot of my props. They are quite heavy and I’m all out of space.
Money
I took this for granted and almost forgot. It’s important to travel with some dollars or pounds in cash. I recommend a strict minimum of £500 even though my school suggests £800. In my case, I’ll need £1 for the airport trolley and some more for the train ticket to the University. You may wish to carry some naira to tip the Immigration officers at the International airport. The way they beg travelers for money is more embarrassing than annoying. “Mommy, anything for us? Daddy, safe flight oh”.
Summarily, if you aren’t rich, you are not likely to travel with everything you would like. However, with a little effort and quick thinking you will get away with enough. I’ve got 2 suitcases of 23kg each and a backpack as hand luggage, all meeting the airlines standard requirements. I have always used my digital bathroom scale to weigh my suitcases and so far, it has been accurate. My flight is in 2 days and so this will probably be my last blog post for a while…except I get my hands on the new White House Memoir by Bob Woodward titled Fear.
Am I forgetting anything important? What would you pack if you were leaving for a while? Let me know in the comment section below!
As always, thank you for reading!
***
Liked this post? Do share it on your social media wall, timeline or feed.
Want blog updates and promotions in your inbox?
Sign Up Now
Reading Living: What I’m Packing Packing for a 2-week trip is stressful. Packing for a whole year is a nightmare, especially when you are on a budget and have to keep things within the airline baggage weight limit.
#Back To School#Certificate#Clothes#featured#Food#Masters#MSc#Nike#Passport#Plus Size#Student#Student Tier 4#Transcript#Travel#Uk#UK Visa#United Kingdom#Visa#Winter
2 notes
·
View notes
Text
Do you Interest in Adobe Photoshop Course - Elegant Training Center
Create stunning photos, illustrations, image compositions, videos, and designs for the web. The skills you gain in this course will enable you to edit images in Adobe Photoshop for your photography and graphic design needs.
Adobe Photoshop, the industry standard in graphics editing, is the most popular and powerful digital photography tool available today. Build a foundation of essential Photoshop skills such as brush techniques, layering methods, colour modifications, background enhancements, and masking. Use Photoshop for any kind of image editing and for creating high-quality graphics, which can turn more snapshots into masterpieces.

Elegant Training has been delivering Adobe Photoshop Course for more than 15 years. Our Photoshop training in Dubai is led by experienced professionals. Learn Photoshop in Dubai from a live instructor in the same classroom as you at the Elegant training center located in Dubai, UAE. When you take a Photoshop course with Elegant Training, you benefit from small class sizes, hands-on learning, and expert instructors who have written more than 10 Photoshop books, including the best-selling Photoshop Digital Classroom. Attend individual Photoshop courses listed on this page, or enroll in the Photoshop Certificate program.
Attend introductory to advanced Adobe Photoshop Course in our training centers, online, or at your office. We have been teaching Photoshop classes in Dubai for more than a decade and can help you to achieve professional results faster and more efficiently.

Learn the basics of Adobe Photoshop! These tutorials are perfect for Photoshop beginners or anyone who just needs to refresh their skills, covering the essential topics you need to know to get up to speed with Photoshop quickly! Use the links below to jump to lesson chapters and other popular topics, or scroll down for our latest Photoshop Basics tutorials
Adobe Photoshop is an application for image editing and photo retouching. Photoshop offers users the ability to create, enhance, or otherwise edit images, artwork, and illustrations. Changing backgrounds, simulating a real-life painting, or creating an alternative view of the universe are all possible with Adobe Photoshop. It is the most widely used software tool for photo editing, image manipulation, and retouching for numerous image and video file formats. The tools within Photoshop make it possible to edit both individual images as well as large batches of photos.
This Training includes 40 HD video training lessons to help the absolute beginners quickly master Photoshop.
Lessons includes:
1 - How to open, view image files
2 - Crop tool
3 - Exercises for text and picture synthesis
4 - Make a picture collage
5 - Simple synthesis exercises
6 - Remove unwanted objects from the photo
7 - Use of the post-painting method for depth of field effects
8 - Let the PS God give you the superpower to bend the spoon
9 - Change the color of the object in the photo (I)
10 - Change the color of the object in the photo (II)
11 - Change the color of the object in the photo (III)
12 - Natural Saturation - Easy For Monotone Photos
13 - Use fast shades to produce partial translucent effects
14 - Simple Art Words and Rainbow Synthesis Effects using The Layering Tool
15 - Use the layer-corresponding feature to create stylized photo tones
16 - How to build multi-level depth of field using Photoshop
17 - Why is my picture enlarged and molded?
18 - Photoshop can also make animated greeting cards
19 - "Hybrid Mode" that you can't know when learning image synthesis
20 - I'm also joining the Avengers Alliance - Transparent is coming!
21 - Design application of hybrid mode
22 - The Super-use of synthetic images "Layer Shades"
23 - You can practice the art of shadow separation without printing!
24 - PS God says that if there is light, there is light to try the "auto-mix layer"!
25 - How to turn color photos black and white
26 - Design personalized T-Shirt with Photoshop
27 - Understand the "color scale" to save the bad photo!
28 - The camera app's color filters do it yourself!
29 - Bending Deformation
30 - One tool for understanding the full range of Content Awareness
31 - Can sharpening filters save me from taking blurry photos?
32 - No light! Projection effect of an object with PS
33 - Vanishing Point (I)
34 - Vanishing Point (II)
35 - Bezier Curve and Pen Tools
36 - Custom Brush
37 - Portrait (scar, skin, thin face)
38 - How do I quickly correct the tonal difference between two photos?
39 - In the face of hair, did you choose the right way to remove the background?
40 - Come and make a 3D photo for your Facebook!
For more details visit our website: Adobe Photoshop Course
Contact: +971 54 749 5664
Address: Office Number 620, Al Attar Business Center, Beside Ibis Hotel, Al Barsha 1 Near Mashreq Metro Station, Sheikh Zayed Road, Dubai, UAE
Facebook: https://www.facebook.com/ElegantTrainingAE/
Twitter: https://twitter.com/EPMDTDUBAI
Youtube: https://www.youtube.com/channel/UCp9zBBZkcXWhQXVUYxBYXtQ
Instagram: https://www.instagram.com/eleganttraining/
#Adobe Photoshop Course#Adobe In Design Training#Adobe Illustrator Course#CorelDraw Course#After Effects Course#Premiere Editing Course
0 notes
Text
6 Stages of UI Design
starting from nothing and ending up with a final high fidelity design takes a lot of different skills and knowledge but in terms of ui design i've broken it down into a simple process.
so let's look at the six stages of ui design
we helping you become a more skillful and mindful designer
so this post is meant to be a high level overview of the entire ui design process it's important to keep in mind that in order to make your user interfaces usable and beautiful you'll need to have a strong understanding of visual design principles like visual hierarchy usability heuristics color and typography and you'll need to start with good insightful user research and data to back up your design decisions
and decide what needs to be in your user interface designs and how it should all work and flow together but i'll leave that part for another video so once you've successfully defined your user's problem your constraints requirements and features then you're ready to start looking at how you can visually represent the components state changes and interactions at different levels in order to make your product a reality
stage 1
sketching this is the quickest lowest cost and lowest commitment way to kick off your designs
it gets the high level top of mind ideas out of your head and onto your paper or screen generally
these are really rough and if they look pretty bad then you're probably on the right track
it's something you should be able to do in a fairly short amount of time on paper a whiteboard
or using a wireframe or design app there is no right or wrong way to do this but
here are some common things that they could include outlined boxes to represent the general
containers and areas that need to be placed on the page placeholder boxes to represent images
text and graphics and these can be done in low mid or high fidelity depending on the
project needs at this stage the purpose is to start off the conversation it helps to clarify and
define layout features and allows you to change ideas quickly and iterate it also helps you visualize how
screens might look on different device sizes and in different contexts some tools that
you can use in the sketching process are paper and pen board sketch pad figma jam or various apps
for your ipad or tablet.
stage 2
wireframes or gray boxing this is what things look like before visual design principles have been
applied it's where you can start to see the general layout and elements taking shape what's on it
this is things like filler content allurum ipsum or actual text which i highly recommend
placeholder images or stock images and this can usually be done in your design software using an
existing ui kit to kick things off or done from scratch the purpose of this stage is to
visualize the general layout it's to build trust with stakeholders and help them see those
initial ideas a little bit more fleshed out before moving on it's a fast and cheap way to create
initial ideas in a little bit more depth or to show low or mid-fidelity screen designs
some great tools for this are things like just in mind's free wireframing tool existing wireframe
kits that you can use in your design apps or something like balsamiq.
stage 3
component design dynamic user interfaces unlike static website landing pages or marketing sites
require you to think through states and conditionals component design deals with things like
symbols such as buttons and badges element states like button hover states or clicked
states components like tables lists cards and forms and shows actual texts and images the purpose
is to plan the usability uncover accessibility and responsive problems translate ideas into
consistent elements that can be shared with engineers and more easily and accurately discussed
and shared across teams great tools for stage 3 are design apps like sketch figma and
adobe xd.
stage 4
user flows and task flows now it's time to decide how users will get from one screen to another
what happens when they click this or if they forget to add in some information this is about
understanding users mental models and your systems model and the orchestration of all the pathways
and responses that your interface will provide this might take the wireframes and put them together
with arrows into wire flows you may have flow charts and conditional statements the purpose
is to show navigation routes to check for missing states and information and to visualize entry exit
and decision points for the user or customer journey some examples of helpful tools at this
stage are flow map or wire flow or just in mind's wire framing tool.
stage 5
mock-up or high fidelity designs this stage should show things exactly as they will appear in
the final product now that you have all of the under the hood stuff worked out it's time to
put your best graphic copy and visual design skills to the test this is where you make every pixel as
perfect and measured as you can and where you can add your own unique brand aesthetic and thematic
elements the purpose is to create pixel perfection to create consistency across your typography and
components to add a sense of your brand by selecting final images or creating final graphics it's time to
add in that good real copy in order to get final approval from stakeholders some of the tools you'll
be using here are sketch or figma or adobe xd maybe dropbox for sharing files or some other cloud
sharing platform stock photography sites and maybe illustrative programs for custom graphics.
stage 6
prototyping this ties everything together and shows exactly how the app is expected to look
and behave what's on it all of the important screens in a high fidelity this should show
target points to mimic what it will be like when the user interacts with the real thing
the purpose is to link together all of the screens and flows in a simulated environment
it's to ensure that everything looks works well and flows as intended before it goes to production
this can be considered the pre-code or no code version of your product some of the best tools
include design apps like envision or the baked in prototyping solutions from your design app like
sketch figma or adobe xd.
so keep in mind that these 6 stages are not necessarily a linear process you may be asked to take the wireframes from stage two and jump into stage six and create a prototype from them it all depends on
the unique requirements the time and the budget of the project you're working on so it's best to
get familiar with all of these stages and get comfortable jumping back and forth between them if
you want to get better at doing this sort of thing and mastering ui and design principles come
check out our UX design course in bangalore at designingcourses.in
0 notes
Last Seen Blogs

chipicco
Chipicco

bigbang40
Naamloos

big-beautiful81
Untitled

toacollabevent
TOA Collab Event 2022

the-gazette-archive
the GazettE Archive