#postgres database in docker container
Explore tagged Tumblr posts
Visit Tumblr Blog
Explore Tumblr blogs with no restrictions, modern design and the best experience.
Last Seen Tumblr Blogs


Fun Fact
Tumblr was the first site to host the blog for President Barack Obama in 2011.
Text
youtube
#nodejs express#node js express tutorial#node js training#nodejs tutorial#nodejs projects#nodejs module#node js express#node js development company#codeonedigest#node js developers#docker container#docker microservices#docker tutorial#docker image#docker course#docker#postgres tutorial#postgresql#postgres database#postgres#install postgres#Youtube
0 notes
Text
if my goal with this project was just "make a website" I would just slap together some html, css, and maybe a little bit of javascript for flair and call it a day. I'd probably be done in 2-3 days tops. but instead I have to practice and make myself "employable" and that means smashing together as many languages and frameworks and technologies as possible to show employers that I'm capable of everything they want and more. so I'm developing apis in java that fetch data from a postgres database using spring boot with authentication from spring security, while coding the front end in typescript via an angular project served by nginx with https support and cloudflare protection, with all of these microservices running in their own docker containers.
basically what that means is I get to spend very little time actually programming and a whole lot of time figuring out how the hell to make all these things play nice together - and let me tell you, they do NOT fucking want to.
but on the bright side, I do actually feel like I'm learning a lot by doing this, and hopefully by the time I'm done, I'll have something really cool that I can show off
8 notes
·
View notes
Text
When you attempt to validate that a data pipeline is loading data into a postgres database, but you are unable to find the configuration tables that you stuffed into the same database out of expediency, let alone the data that was supposed to be loaded, dont be surprised if you find out after hours of troubleshooting that your local postgres server was running.
Further, dont be surprised if that local server was running, and despite the pgadmin connection string being correctly pointed to localhost:5432 (docker can use the same binding), your pgadmin decides to connect you to the local server with the same database name, database user name, and database user password.
Lessons learned:
try to use unique database names with distinct users and passwords across all users involved in order to avoid this tomfoolery in the future, EVEN IN TEST, ESPECIALLY IN TEST (i dont really have a 'prod environment, homelab and all that, but holy fuck)
do not slam dunk everything into a database named 'toilet' while playing around with database schemas in order to solidify your transformation logic, and then leave your local instance running.
do not, in your docker-compose.yml file, also name the database you are storing data into, 'toilet', on the same port, and then get confused why the docker container database is showing new entries from the DAG load functionality, but you cannot validate through pgadmin.
3 notes
·
View notes
Text
Using Docker for Full Stack Development and Deployment

1. Introduction to Docker
What is Docker? Docker is an open-source platform that automates the deployment, scaling, and management of applications inside containers. A container packages your application and its dependencies, ensuring it runs consistently across different computing environments.
Containers vs Virtual Machines (VMs)
Containers are lightweight and use fewer resources than VMs because they share the host operating system’s kernel, while VMs simulate an entire operating system. Containers are more efficient and easier to deploy.
Docker containers provide faster startup times, less overhead, and portability across development, staging, and production environments.
Benefits of Docker in Full Stack Development
Portability: Docker ensures that your application runs the same way regardless of the environment (dev, test, or production).
Consistency: Developers can share Dockerfiles to create identical environments for different developers.
Scalability: Docker containers can be quickly replicated, allowing your application to scale horizontally without a lot of overhead.
Isolation: Docker containers provide isolated environments for each part of your application, ensuring that dependencies don’t conflict.
2. Setting Up Docker for Full Stack Applications
Installing Docker and Docker Compose
Docker can be installed on any system (Windows, macOS, Linux). Provide steps for installing Docker and Docker Compose (which simplifies multi-container management).
Commands:
docker --version to check the installed Docker version.
docker-compose --version to check the Docker Compose version.
Setting Up Project Structure
Organize your project into different directories (e.g., /frontend, /backend, /db).
Each service will have its own Dockerfile and configuration file for Docker Compose.
3. Creating Dockerfiles for Frontend and Backend
Dockerfile for the Frontend:
For a React/Angular app:
Dockerfile
FROM node:14 WORKDIR /app COPY package*.json ./ RUN npm install COPY . . EXPOSE 3000 CMD ["npm", "start"]
This Dockerfile installs Node.js dependencies, copies the application, exposes the appropriate port, and starts the server.
Dockerfile for the Backend:
For a Python Flask app
Dockerfile
FROM python:3.9 WORKDIR /app COPY requirements.txt . RUN pip install -r requirements.txt COPY . . EXPOSE 5000 CMD ["python", "app.py"]
For a Java Spring Boot app:
Dockerfile
FROM openjdk:11 WORKDIR /app COPY target/my-app.jar my-app.jar EXPOSE 8080 CMD ["java", "-jar", "my-app.jar"]
This Dockerfile installs the necessary dependencies, copies the code, exposes the necessary port, and runs the app.
4. Docker Compose for Multi-Container Applications
What is Docker Compose? Docker Compose is a tool for defining and running multi-container Docker applications. With a docker-compose.yml file, you can configure services, networks, and volumes.
docker-compose.yml Example:
yaml
version: "3" services: frontend: build: context: ./frontend ports: - "3000:3000" backend: build: context: ./backend ports: - "5000:5000" depends_on: - db db: image: postgres environment: POSTGRES_USER: user POSTGRES_PASSWORD: password POSTGRES_DB: mydb
This YAML file defines three services: frontend, backend, and a PostgreSQL database. It also sets up networking and environment variables.
5. Building and Running Docker Containers
Building Docker Images:
Use docker build -t <image_name> <path> to build images.
For example:
bash
docker build -t frontend ./frontend docker build -t backend ./backend
Running Containers:
You can run individual containers using docker run or use Docker Compose to start all services:
bash
docker-compose up
Use docker ps to list running containers, and docker logs <container_id> to check logs.
Stopping and Removing Containers:
Use docker stop <container_id> and docker rm <container_id> to stop and remove containers.
With Docker Compose: docker-compose down to stop and remove all services.
6. Dockerizing Databases
Running Databases in Docker:
You can easily run databases like PostgreSQL, MySQL, or MongoDB as Docker containers.
Example for PostgreSQL in docker-compose.yml:
yaml
db: image: postgres environment: POSTGRES_USER: user POSTGRES_PASSWORD: password POSTGRES_DB: mydb
Persistent Storage with Docker Volumes:
Use Docker volumes to persist database data even when containers are stopped or removed:
yaml
volumes: - db_data:/var/lib/postgresql/data
Define the volume at the bottom of the file:
yaml
volumes: db_data:
Connecting Backend to Databases:
Your backend services can access databases via Docker networking. In the backend service, refer to the database by its service name (e.g., db).
7. Continuous Integration and Deployment (CI/CD) with Docker
Setting Up a CI/CD Pipeline:
Use Docker in CI/CD pipelines to ensure consistency across environments.
Example: GitHub Actions or Jenkins pipeline using Docker to build and push images.
Example .github/workflows/docker.yml:
yaml
name: CI/CD Pipeline on: [push] jobs: build: runs-on: ubuntu-latest steps: - name: Checkout Code uses: actions/checkout@v2 - name: Build Docker Image run: docker build -t myapp . - name: Push Docker Image run: docker push myapp
Automating Deployment:
Once images are built and pushed to a Docker registry (e.g., Docker Hub, Amazon ECR), they can be pulled into your production or staging environment.
8. Scaling Applications with Docker
Docker Swarm for Orchestration:
Docker Swarm is a native clustering and orchestration tool for Docker. You can scale your services by specifying the number of replicas.
Example:
bash
docker service scale myapp=5
Kubernetes for Advanced Orchestration:
Kubernetes (K8s) is more complex but offers greater scalability and fault tolerance. It can manage Docker containers at scale.
Load Balancing and Service Discovery:
Use Docker Swarm or Kubernetes to automatically load balance traffic to different container replicas.
9. Best Practices
Optimizing Docker Images:
Use smaller base images (e.g., alpine images) to reduce image size.
Use multi-stage builds to avoid unnecessary dependencies in the final image.
Environment Variables and Secrets Management:
Store sensitive data like API keys or database credentials in Docker secrets or environment variables rather than hardcoding them.
Logging and Monitoring:
Use tools like Docker’s built-in logging drivers, or integrate with ELK stack (Elasticsearch, Logstash, Kibana) for advanced logging.
For monitoring, tools like Prometheus and Grafana can be used to track Docker container metrics.
10. Conclusion
Why Use Docker in Full Stack Development? Docker simplifies the management of complex full-stack applications by ensuring consistent environments across all stages of development. It also offers significant performance benefits and scalability options.
Recommendations:
Encourage users to integrate Docker with CI/CD pipelines for automated builds and deployment.
Mention the use of Docker for microservices architecture, enabling easy scaling and management of individual services.
WEBSITE: https://www.ficusoft.in/full-stack-developer-course-in-chennai/
0 notes
Text
Sr DevOps Engineer - Remote

Company: Big Time A BIT ABOUT US We are a bold new game studio with a mission to build cutting edge AAA entertainment for the 21st century. Our founders are veterans in the online games, social games, and crypto fields. We are fully funded and building a dream team of developers who want to work with the best of the best and take their careers to the next level. See press coverage: Bloomberg, VentureBeat, CoinDesk. THE MISSION As a DevOps Engineer, you will join a small, fully remote team to work on backend infrastructure for an exciting Multiplayer Action RPG title as well as our marketplace infrastructure. In this role, you will work on game-supporting services and features as well as web facing products interacting with users directly. Our stack includes Docker, AWS Elastic Container Service, Terraform, Node.js, Typescript, MongoDB, React, PostgreSQL, and C++ among others. You will be working with the game and backend engineering teams to architect and maintain stable, reliable, and scalable backend infrastructure. RESPONSIBILITIES - Work closely with stakeholders company wide to provide services that enhance user experience for the development team, as well as our end-users. - Design and build operational infrastructure to support games and marketplace products for Big Time Studios. - Spearhead company wide security culture and architecture to keep our platform secure. - Own delivery, scalability, and reliability of our backend infrastructure. - Advise and collaborate with the rest of the engineering team to ensure we are building safe, secure, and reliable products. REQUIREMENTS - Ability to design and implement highly available and reliable systems. - Proven experience with Linux, Docker, and cloud technologies such as AWS, GCP, and Azure. - Extensive experience setting up and maintaining database infrastructure, including Postgres, Terraform, NoSQL, MongoDB, and DocumentDB. - Ability to be on-call during evenings and weekends when required. - Strong documentation skills. - Excellent communication and time management skills. DESIRABLE - Experience with Game Development. - Proficiency with C++.Proficiency with Typescript/Node.js. - Experience with DevOps tools such as Terraform, Ansible, Kubernetes, Redis, Jenkins. etc. - Experience with game server hosting. WHAT WE OFFER - Fully remote work, with a yearly company offsite. - Experience working with gaming veterans of game titles with a gross aggregate revenue well over $10B USD. - Flexible PTO. - Experience creating a new IP with franchise potential. APPLY ON THE COMPANY WEBSITE To get free remote job alerts, please join our telegram channel “Global Job Alerts” or follow us on Twitter for latest job updates. Disclaimer: - This job opening is available on the respective company website as of 2ndJuly 2023. The job openings may get expired by the time you check the post. - Candidates are requested to study and verify all the job details before applying and contact the respective company representative in case they have any queries. - The owner of this site has provided all the available information regarding the location of the job i.e. work from anywhere, work from home, fully remote, remote, etc. However, if you would like to have any clarification regarding the location of the job or have any further queries or doubts; please contact the respective company representative. Viewers are advised to do full requisite enquiries regarding job location before applying for each job. - Authentic companies never ask for payments for any job-related processes. Please carry out financial transactions (if any) at your own risk. - All the information and logos are taken from the respective company website. Read the full article
0 notes
Text
Exploring the Exciting Features of Spring Boot 3.1
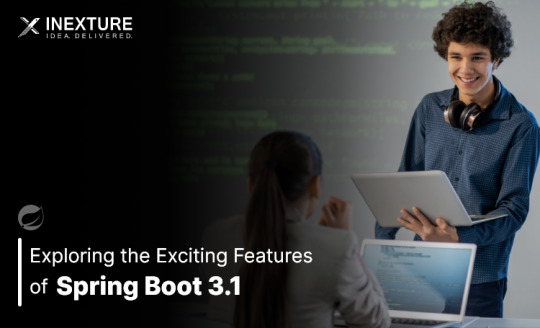
Spring Boot is a popular Java framework that is used to build robust and scalable applications. With each new release, Spring Boot introduces new features and enhancements to improve the developer experience and make it easier to build production-ready applications. The latest release, Spring Boot 3.1, is no exception to this trend.
In this blog post, we will dive into the exciting new features offered in Spring Boot 3.1, as documented in the official Spring Boot 3.1 Release Notes. These new features and enhancements are designed to help developers build better applications with Spring Boot. By taking advantage of these new features, developers can build applications that are more robust, scalable, and efficient.
So, if you’re a developer looking to build applications with Spring Boot, keep reading to learn more about the exciting new features offered in Spring Boot 3.1!
Feature List:
1. Dependency Management for Apache HttpClient 4:
Spring Boot 3.0 includes dependency management for both HttpClient 4 and 5.
Spring Boot 3.1 removes dependency management for HttpClient 4 to encourage users to move to HttpClient 5.2. Servlet and Filter Registrations:
The ServletRegistrationBean and FilterRegistrationBean classes will now throw an IllegalStateException if registration fails instead of logging a warning.
To retain the old behaviour, you can call setIgnoreRegistrationFailure(true) on your registration bean.3. Git Commit ID Maven Plugin Version Property:
The property used to override the version of io.github.git-commit-id:git-commit-id-maven-plugin has been updated.
Replace git-commit-id-plugin.version with git-commit-id-maven-plugin.version in your pom.xml.4. Dependency Management for Testcontainers:
Spring Boot’s dependency management now includes Testcontainers.
You can override the version managed by Spring Boot Development using the testcontainers.version property.5. Hibernate 6.2:
Spring Boot 3.1 upgrades to Hibernate 6.2.
Refer to the Hibernate 6.2 migration guide to understand how it may affect your application.6. Jackson 2.15:
TestContainers
The Testcontainers library is a tool that helps manage services running inside Docker containers. It works with testing frameworks such as JUnit and Spock, allowing you to write a test class that starts up a container before any of the tests run. Testcontainers are particularly useful for writing integration tests that interact with a real backend service such as MySQL, MongoDB, Cassandra, and others.
Integration tests with Testcontainers take it to the next level, meaning we will run the tests against the actual versions of databases and other dependencies our application needs to work with executing the actual code paths without relying on mocked objects to cut the corners of functionality.
<dependency> <groupId>org.springframework.boot</groupId> <artifactId>spring-boot-testcontainers</artifactId> <scope>test</scope> </dependency> <dependency> <groupId>org.testcontainers</groupId> <artifactId>junit-jupiter</artifactId> <scope>test</scope> </dependency>
Add this dependency and add @Testcontainers in SpringTestApplicationTests class and run the test case
@SpringBootTest @Testcontainers class SpringTestApplicationTests { @Container GenericContainer<?> container = new GenericContainer<>("postgres:9"); @Test void myTest(){ System.out.println(container.getContainerId()+ " "+container.getContainerName()); assert (1 == 1); } }
This will start the docker container for Postgres with version 9

We can define connection details to containers using “@ServiceConnection” and “@DynamicPropertySource”.
a. ConnectionService
@SpringBootTest @Testcontainers class SpringTestApplicationTests { @Container @ServiceConnection static MongoDBContainer container = new MongoDBContainer("mongo:4.4"); }
Thanks to @ServiceConnection, the above configuration allows Mongo-related beans in the application to communicate with Mongo running inside the Testcontainers-managed Docker container. This is done by automatically defining a MongoConnectionDetails bean which is then used by the Mongo auto-configuration, overriding any connection-related configuration properties.
b. Dynamic Properties
A slightly more verbose but also more flexible alternative to service connections is @DynamicPropertySource. A static @DynamicPropertySource method allows adding dynamic property values to the Spring Environment.
@SpringBootTest @Testcontainers class SpringTestApplicationTests { @Container @ServiceConnection static MongoDBContainer container = new MongoDBContainer("mongo:4.4"); @DynamicPropertySource static void registerMongoProperties(DynamicPropertyRegistry registry) { String uri = container.getConnectionString() + "/test"; registry.add("spring.data.mongodb.uri", () -> uri); } }
c. Using Testcontainers at Development Time
Test the application at development time, first we start the Mongo database our app won’t be able to connect to it. If we use Docker, we first need to execute the docker run command that runs MongoDB and exposes it on the local port.
Fortunately, with Spring Boot 3.1 we can simplify that process. We don’t have to Mongo before starting the app. What we need to do – is to enable development mode with Testcontainers.
<dependency> <groupId>org.springframework.boot</groupId> <artifactId>spring-boot-testcontainers</artifactId> <scope>test</scope> </dependency>
Then we need to prepare the @TestConfiguration class with the definition of containers we want to start together with the app. For me, it is just a single MongoDB container as shown below:
public class MongoDBContainerDevMode { @Bean @ServiceConnection MongoDBContainer mongoDBContainer() { return new MongoDBContainer("mongo:5.0"); } }
2. Docker Compose
If you’re using Docker to containerize your application, you may have heard of Docker Compose, a tool for defining and running multi-container Docker applications. Docker Compose is a popular choice for developers as it enables them to define a set of containers and their dependencies in a single file, making it easy to manage and deploy the application.
Fortunately, Spring Boot 3.1 provides a new module called spring-boot-docker-compose that provides seamless integration with Docker Compose. This integration makes it even easier to deploy your Java Spring Boot application with Docker Compose. Maven dependency for this is given below:
The spring-boot-docker-compose module automatically looks for a Docker Compose configuration file in the current working directory during startup. By default, the module supports four file types: compose.yaml, compose.yml, docker-compose.yaml, and docker-compose.yml. However, if you have a non-standard file type, don’t worry – you can easily set the spring.docker.compose.file property to specify which configuration file you want to use.
When your application starts up, the services you’ve declared in your Docker Compose configuration file will be automatically started up using the docker compose up command. This means that you don’t have to worry about manually starting and stopping each service. Additionally, connection details beans for those services will be added to the application context so that the services can be used without any further configuration.
When the application stops, the services will then be shut down using the docker compose down command.
This module also supports custom images too. You can use any custom image as long as it behaves in the same way as the standard image. Specifically, any environment variables that the standard image supports must also be used in your custom image.
Overall, the spring-boot-docker-compose module is a powerful and user-friendly tool that simplifies the process of deploying your Spring Boot application with Docker Compose. With this module, you can focus on writing code and building your application, while the module takes care of the deployment process for you.
Conclusion
Overall, Spring Boot 3.1 brings several valuable features and improvements, making it easier for developers to build production-ready applications. Consider exploring these new features and enhancements to take advantage of the latest capabilities offered by Spring Boot.
Originally published by: Exploring the Exciting Features of Spring Boot 3.1
#Features of Spring Boot#Application with Spring boot#Spring Boot Development Company#Spring boot Application development#Spring Boot Framework#New Features of Spring Boot
0 notes
Text
Egybell is hiring Java developer for multinational company Skills and Qualifications · 2+ years of software development experience with strong java/jee/springboot/vertx/quarkus development frameworks. · BSc in Computer Science, Engineering or relevant field · Experience as a DevOps or Software Engineer or similar software engineering role · Proficient with git and git workflows · Good knowledge of linux, java, JSF or angular or other front-end technology · Demonstrated implementation of microservices, container and cloud-native application development. · Hands-on experience with Docker, Kubernetes or Openshift and related container platform ecosystems. · Experience with two or more database technologies such as Oracle, MySQL or Postgres, MongoDB. If you are interested apply with your CV.
0 notes
Text
Postgresql create database

Postgresql create database how to#
Postgresql create database install#
Postgresql create database upgrade#
An Azure resource group is a logical container into which Azure resources are deployed and managed. # to limit / allow access to the PostgreSQL serverĮcho "Using resource group $resourceGroup with login: $login, password: $password."Ĭreate a resource group with the az group create command. # Specify appropriate IP address values for your environment Server="msdocs-postgresql-server-$randomIdentifier" Tag="create-postgresql-server-and-firewall-rule" ResourceGroup="msdocs-postgresql-rg-$randomIdentifier" Use the public IP address of the computer you're using to restrict access to the server to only your IP address. Replace 0.0.0.0 with the IP address range to match your specific environment. Server names need to be globally unique across all of Azure so the $RANDOM function is used to create the server name.Ĭhange the location as appropriate for your environment. The following values are used in subsequent commands to create the database and required resources. or use 'az login'įor more information, see set active subscription or log in interactively Set parameter values subscription="" # add subscription hereĪz account set -s $subscription #. If you don't have an Azure subscription, create an Azure free account before you begin. Use the following script to sign in using a different subscription, replacing with your Azure Subscription ID. Sign in to AzureĬloud Shell is automatically authenticated under the initial account signed-in with. Subsequent sessions will use Azure CLI in a Bash environment, Select Copy to copy the blocks of code, paste it into the Cloud Shell, and press Enter to run it. When Cloud Shell opens, verify that Bash is selected for your environment. You can also launch Cloud Shell in a separate browser tab by going to. To open the Cloud Shell, just select Try it from the upper right corner of a code block. It has common Azure tools preinstalled and configured to use with your account. The Azure Cloud Shell is a free interactive shell that you can use to run the steps in this article.
Postgresql create database upgrade#
To upgrade to the latest version, run az upgrade. Run az version to find the version and dependent libraries that are installed. For more information about extensions, see Use extensions with the Azure CLI.
Postgresql create database install#
When you're prompted, install the Azure CLI extension on first use. For other sign-in options, see Sign in with the Azure CLI. To finish the authentication process, follow the steps displayed in your terminal. If you're using a local installation, sign in to the Azure CLI by using the az login command.
Postgresql create database how to#
For more information, see How to run the Azure CLI in a Docker container. If you're running on Windows or macOS, consider running Azure CLI in a Docker container. If you prefer to run CLI reference commands locally, install the Azure CLI. For more information, see Azure Cloud Shell Quickstart - Bash. Use the Bash environment in Azure Cloud Shell. Consider using the simpler az postgres up Azure CLI command.
0 notes
Text
If this is not one of the most robust, free, rich and informative era ever then I cannot think of any other time in history adorned with the wealth of technology as this one. If you would wish to accomplish anything, this era wields the most virile grounds to nourish, nurture and aid the sprouting, the growth and the maturity of your dreams. You can literaly learn to be what you would wish to be in this age. That being said, this disquisition takes on a quest to get you into setting up something similar to Heroku on your own environment. We shall get to know what Heroku is then get off the dock and sail off towards our goal of having such an environment. The proliferation of cloud technologies brought with it many opportunities in terms of service offerings. First and foremost, users had the ability to get as much infrastructure as they could afford. Users can spawn servers, storage and network resources ad libitum which is popularly known as Infrastructure as a service. Then comes the second layer that sits on the infrastructure. It could be anything, cloud identity service, cloud monitoring server et cetera. This layer provides ready made solutions to people who might need them. This is known as software as a service. I hope we are flowing together this far. In addition to that there is another incredible layer that is the focus of this guide. It is a layer that targets developers majorly by making their lives easier on the cloud. In this layer , developers only concentrate on writing code and when they are ready to deploy, they only need to commit their ready project in a source control platform like GitHub/GitLab and the rest is done for them automatically. This layer provides a serverless layer to the developers since they do not have to touch the messy server side stuff. This layer as you might already have guessed is known as Platform as a Service (PaaS). Heroku is one of the solutions that sits on this layer. In this guide, are going to setup a platform that is similar to Heroku on your own infrastructure. As you know, you cannot download and install Heroku on your server. It is an online cloud service that you subscribe to. We will use Caprover to setup our own private Platform as a service (PaaS). CapRover is an extremely easy to use app/database deployment & web server manager for your NodeJS, Python, PHP, ASP.NET, Ruby, MySQL, MongoDB, Postgres, WordPress and even more applications. Features of Caprover CLI for automation and scripting Web GUI for ease of access and convenience No lock-in! Remove CapRover and your apps keep working! Docker Swarm under the hood for containerization and clustering Nginx (fully customizable template) under the hood for load-balancing Let’s Encrypt under the hood for free SSL (HTTPS) One-Click Apps: Deploying one-click apps is a matter of seconds! MongoDB, Parse, MySQL, WordPress, Postgres and many more. Fully Customizable: Optionally fully customizable nginx config allowing you to enable HTTP2, specific caching logic, custom SSL certs and etc Cluster Ready: Attach more nodes and create a cluster in seconds! CapRover automatically configures nginx to load balance. Increase Productivity: Focus on your apps! Not the bells and whistles just to run your apps! Easy Deploy: Many ways to deploy. You can upload your source from dashboard, use command line caprover deploy, use webhooks and build upon git push Caprover Pre-requisites Caprover runs as a container in your server which can be any that supports containerization. Depending on your preferences, you can use Podman or Docker to pull and run Caprover image. For this example, we are going to use Docker. In case you do not have Docker installed, the following guides listed below will be there to help you set it up as fast as possible. Install Docker and Docker Compose on Debian Setup Docker CE & Docker Compose on CentOS 8 | RHEL 8 How To Install Docker on RHEL 7 / CentOS 7
How To Install Docker CE on Ubuntu Once Docker Engine has been installed, add your user account to docker group: sudo usermod -aG docker $USER newgrp docker Another pre-requisite is a wildcard domain name pointed to the IP of your server where Caprover Server will be running. Setup your Heroku PaaS using CapRover Once the pre-requisites are out of the way, the only task remaining now is to set up our Caprover and poke around its rooms just to see what it has to offer. The following steps will be invaluable as you try to get it up and running. Step 1: Prepare your server Once Docker is installed, you can install all of the applications you need during your stay in the server. They include an editor and such kind of stuff. ##On CentOS sudo yum update sudo yum install vim git curl ##On Ubuntu sudo apt update sudo apt install vim git curl That was straingtforward. Next, let us pull Caprover image to set the stone rolling Step 2: Pull and execute Caprover Image We are going to cover the installation of Caprover depending on where your server sits. Scenario 1: Installation on a local server without Public IP Install dnsmasq After all, as mentioned in the pre-requisites section, we shall need a small DNS server to resolve domain names since Caprover is so particular with it. In case you have a local DNS server that supports wildcard domains, then you are good to go. You can skip the DNS setup part. In case you do not have it, install lightweight dnsmasq as follows: sudo yum -y install dnsmasq After dnsmasq is successfully installed, start and enable the service. sudo systemctl start dnsmasq sudo systemctl enable dnsmasq Add Wildcard DNS Recod Once dnsmasq is running as expected, we can go ahead and add the configs and wildcard domain name as shown below: $ sudo vim /etc/dnsmasq.conf listen-address=::1,127.0.0.1,172.20.192.38 domain=example.com server=8.8.8.8 address=/caprover.example.com/172.20.192.38 Replace the IPs therein with yours accordingly. Then restart dnsmasq sudo systemctl restart dnsmasq Test if it works We shall use the dig utility to test if our configuration works $ dig @127.0.0.1 test.caprover.example.com ; DiG 9.11.20-RedHat-9.11.20-5.el8 @127.0.0.1 test.caprover.example.com ; (1 server found) ;; global options: +cmd ;; Got answer: ;; ->>HEADER> Checking System Compatibility > Checking System Compatibility
0 notes
Text
Kitematic remote host

docker run -rm -link brewformulas_postgres_1:postgres -i postgres is create a new container of the postgres docker image, linking the running postgres empty database (Here it’s important to not have the -t flag in order to avoid the error cannot enable tty mode on non tty input).ssh -C connects to the remote machine and send the data.| ssh -C will push the dumped data through SSH using compression.pg_dump -host=$POSTGRES_PORT_5432_TCP_ADDR -dbname=brewformulas_org_prod -username=postgres will dump the brewformulas_org_prod database content to the stdout.sh -c is used in order to execute the line within the container (otherwise the environment variable POSTGRES_PORT_5432_TCP_ADDR is not yet accessible).docker run -rm -link brewformulasdb:postgres -it postgres will create a new container, linked to the container where the database, to be dumped, is running.(In this case, the first server is an Ubuntu server, so I had to use sudo while on the second server I’m running Debian as root). Sudo docker run -rm -link brewformulasdb:postgres -it postgres sh -c 'pg_dump -host=$POSTGRES_PORT_5432_TCP_ADDR -dbname=brewformulas_org_prod -username=postgres' | ssh -C "docker run -rm -link brewformulas_postgres_1:postgres -i postgres sh -c 'psql -host=172.17.0.31 -dbname=brewformulas_org_prod -username=postgres'"īasically, this command is using the pg_dump command in a container linked to the running database to be dumped, SSH the second server and send the dump data (We’re using the -C flag from SSH for the data compression) and then use the psql command on the remote server in a container in order to populate the database with the dumped data.
0 notes
Video
youtube
Create Nodejs JavaScript Microservices Project with Postgres Database in... Full Video Link https://youtu.be/pTFUC6eFMLM Hello friends, new #video on #nodejs #microservices with #Postgresdb in #docker #container #dockerfile #dockerimage #sequelize #tutorial for #api #developer #programmers with #examples is published on #codeonedigest #youtube channel. @java #java #aws #awscloud @awscloud @AWSCloudIndia #salesforce #Cloud #CloudComputing @YouTube #youtube #azure #msazure #restapi #nodejs #api #restapitutorial @codeonedigest #codeonedigest #docker #nodejs #dockertutorial #learndocker #dockercompose #postgresqldocker #databaseindocker #databaseindockerproduction #databaseindockercompose #databaseindockercontainer #postgresqlsetup #dockerfile #dockerimagedownload #dockerhubtutorial #databaseimage #downloadpostgresql #downloadpostgresqlandpgadmin #microserviceproject #microserviceprojectusingnodejs #microservicesprojectinnodejs #nodejsmicroservice #nodejsmicroservicestutorial #node
#youtube#nodejs microservice#nodejs#javascript#microservice#javascript microservice#postgres database#postgresql#docker container#docker image#dockerfile#nodejs microservice with postgres db in docker container
1 note
·
View note
Link
0 notes
Text
Egybell is hiring Java developer for multinational company Skills and Qualifications · 2+ years of software development experience with strong java/jee/springboot/vertx/quarkus development frameworks. · BSc in Computer Science, Engineering or relevant field · Experience as a DevOps or Software Engineer or similar software engineering role · Proficient with git and git workflows · Good knowledge of linux, java, JSF or angular or other front-end technology · Demonstrated implementation of microservices, container and cloud-native application development. · Hands-on experience with Docker, Kubernetes or Openshift and related container platform ecosystems. · Experience with two or more database technologies such as Oracle, MySQL or Postgres, MongoDB. If you are interested apply with your CV.
0 notes
Text
Install Madoc on Linux server
1. Install Docker und Docker container
https://library-it.tumblr.com/post/666025810043518976/commands-for-docker
https://docs.docker.com/compose/install/
2. Clone Madoc to your folger: git clone https://github.com/digirati-co-uk/madoc-platform.git
3. Copy .env file in your project folger. This file contains Postgres database credentials, MADOC_INSTALLATION_CODE.
4. Create database in Postgres and 5 shemas.
5. Create roles:
CREATE ROLE madoc_ts WITH LOGIN ENCRYPTED PASSWORD 'madoc_ts';
CREATE ROLE tasks_api WITH LOGIN ENCRYPTED PASSWORD 'tasks_api';
CREATE ROLE models_api WITH LOGIN ENCRYPTED PASSWORD 'models_api';
CREATE ROLE config_service WITH LOGIN ENCRYPTED PASSWORD 'config_service';
CREATE ROLE search_api WITH LOGIN ENCRYPTED PASSWORD 'search_api';
6. Create schemas:
CREATE SCHEMA config_service AUTHORIZATION config_service;
CREATE SCHEMA madoc_ts AUTHORIZATION madoc_ts;
CREATE SCHEMA models_api AUTHORIZATION models_api;
CREATE SCHEMA search_api AUTHORIZATION search_api;
CREATE SCHEMA tasks_api AUTHORIZATION tasks_api;
7. Delete schemas, if nessesarry:
DROP SCHEMA if exists config_service,madoc_ts,models_api,search_api,tasks_api CASCADE;
8. Add extension:
CREATE EXTENSION IF NOT EXISTS "uuid-ossp";
9. Extension should be adressed to models_api schema
10. Pull project: docker-compose -f docker-compose.yml pull
11. Start project: docker-compose -f docker-compose.yml up –d
12. Display logs and save in file: docker-compose -f docker-compose.yml logs > log.txt
13. Stop server: docker-compose -f docker-compose.yml stop
14. Remove containers: docker-compose -f docker-compose.yml rm
15. First start: Just enter your server name in browser without port (https://lx0015.sbb.spk-berlin.de/). If everything is correct you'll see Madoc page with code question. In .env file you shoild add madoc installation code. In a web page just type madoc and click next. On the next page fullfill the form. Create admin user/password and a start page name. After it you can start to work with madoc.
16. Add crossasia theme:
docker ps - see all containers
docker cp crossasia-theme/ 4c64d5f9dfd4:/home/node/app/themes - copy theme to container
stop and start application
1 note
·
View note
Text
Mac Postgres Password

Introduction
I am currently running postgres in a docker container for development purposes. I am able to connect to the container using psql from my mac by doing psql -h localhost -U someuser then typing the password. The password is the same as the username and it's a really simple password. This is a step-by-step guide to install PostgreSQL on a Mac OS machine. We will be installing PostgreSQL version 11.3 on Mac using the installer provided by EnterpriseDB in this article. There are three crucial steps for the installation of PostgreSQL as follows: Download PostgreSQL EnterpriseDB installer for Mac; Install PostgreSQL. Postgres.app is a full-featured PostgreSQL installation packaged as a standard Mac app. It includes everything you need to get started: we’ve even included popular extensions like PostGIS for geo data and plv8 for JavaScript.
PostgreSQL configuration without password on Mac for Rails - postgresqlconfigurationonmacforrails.md. Code language: SQL (Structured Query Language) (sql) Note that using the ALTER ROLE statement will transfer the password to the server in cleartext. In addition, the cleartext password may be logged in the psql’s command history or the server log. In this tutorial, you have learned how to change the password of a PostgreSQL user using the ALTER ROLE statement.
Postgres is a powerful and free object-relational database management system. It has gained a lot of momentum since its introduction in 1995 because of its robustness and powerful features it ships with out of the box. In this article, we’ll walk through the process of installing a Postgres database on a Mac OS X machine and set it up for Ruby on Rails development.
Install Postgres Database with Homebrew
Homebrew is a popular package manager for OS X. To install Postgres with Homebrew, follow the steps below:
The first thing to do is install Homebrew if you haven’t done so already. Homebrew site has a simple command that you have to paste in your terminal to do so. Make sure to accept the command line developer tools installation if prompted.

Next, run brew install postgres to install Postgres. It might take a little while to compile and install. After compilation is done, it’ll give you some instructions to finish setting it up.
The database will be initialized during installation, so there isn’t a need to run initdb to finish installation of Postgres via Homebrew. Near the end of the installation instructions you should see mention of the command brew services.
Mac Postgres Password Change
If you don’t already have brew services installed. Gem master rhinestone software. It may be installed withthis command: Earth stove 3340 manual.
And then you can run the following command to start Postgres as a background service:
Postgres will also restart automatically at login after you have run the command above. Once Postgres has started, we can use brew services to stop it manually:
Or we can also use brew services to restart Postgres:
Now you should have PostgreSQL all set up.
Mac Postgres Default Password
Set Up Postgres to Work with a Rails App
First, install the pg gem:
Make sure you include the pg gem in your Gemfile, and run
Now, set up your config/database.yml file to point to your Posgres database.
Let’s create the development and test databases:
Now you can run pending migrations, if there are any.
0 notes
Text
Project Quay is a scalable container image registry that enables you to build, organize, distribute, and deploy containers. With Quay you can create image repositories, perform image vulnerability scanning and robust access controls. We had covered installation of Quay on a Linux distribution using Docker. How To Setup Red Hat Quay Registry on CentOS / RHEL / Ubuntu In this guide, we will review how you can deploy Quay container registry on OpenShift Container Platform using Operator. The operator we’ll use is provided in the Operators Hub. If you don’t have an OpenShift / OKD cluster running and would like to try this article, checkout our guides below. Setup Local OpenShift 4.x Cluster with CodeReady Containers How to Setup OpenShift Origin (OKD) 3.11 on Ubuntu How To run Local Openshift Cluster with Minishift The Project Quay is made up of several core components. Database: Used by Red Hat Quay as its primary metadata storage (not for image storage). Redis (key, value store): Stores live builder logs and the Red Hat Quay tutorial. Quay (container registry): Runs the quay container as a service, consisting of several components in the pod. Clair: Scans container images for vulnerabilities and suggests fixes. Step 1: Create new project for Project Quay Let’s begin by creating a new project for Quay registry. $ oc new-project quay-enterprise Now using project "quay-enterprise" on server "https://api.crc.testing:6443". ..... You can also create a Project from OpenShift Web console. Click create button and confirm the project is created and running. Step 2: Install Red Hat Quay Setup Operator The Red Hat Quay Setup Operator provides a simple method to deploy and manage a Red Hat Quay cluster. Login to the OpenShift console and select Operators → OperatorHub: Select the Red Hat Quay Operator. Select Install then Operator Subscription page will appear. Choose the following then select Subscribe: Installation Mode: Select a specific namespace to install to Update Channel: Choose the update channel (only one may be available) Approval Strategy: Choose to approve automatic or manual updates Step 3: Deploy a Red Hat Quay ecosystem Certain credentials are required for Accessing Quay.io registry. Create a new file with below details. $ vim docker_quay.json "auths": "quay.io": "auth": "cmVkaGF0K3F1YXk6TzgxV1NIUlNKUjE0VUFaQks1NEdRSEpTMFAxVjRDTFdBSlYxWDJDNFNEN0tPNTlDUTlOM1JFMTI2MTJYVTFIUg==", "email": "" Then create a secret on OpenShift that will be used. oc project quay-enterprise oc create secret generic redhat-pull-secret --from-file=".dockerconfigjson=docker_quay.json" --type='kubernetes.io/dockerconfigjson' Create Quay Superuser credentials secret: oc create secret generic quay-admin \ --from-literal=superuser-username=quayadmin \ --from-literal=superuser-password=StrongAdminPassword \ [email protected] Where: quayadmin is the Quay admin username StrongAdminPassword is the password for admin user [email protected] is the email of Admin user to be created Create Quay Configuration Secret A dedicated deployment of Quay Enterprise is used to manage the configuration of Quay. Access to the configuration interface is secured and requires authentication in order for access. oc create secret generic quay-config --from-literal=config-app-password=StrongPassword Replace StrongPassword with your desired password. Create Database credentials secret – PostgreSQL oc create secret generic postgres-creds \ --from-literal=database-username=quay \ --from-literal=database-password=StrongUserPassword \ --from-literal=database-root-password=StrongRootPassword \ --from-literal=database-name=quay These are the credentials for accessing the database server: quay – Database and DB username StrongUserPassword – quay DB user password StrongRootPassword – root user database password
Create Redis Password Credential By default, the operator managed Redis instance is deployed without a password. A password can be specified by creating a secret containing the password in the key password. oc create secret generic redis-password --from-literal=password=StrongRedisPassword Create Quay Ecosystem Deployment Manifest My Red Hat Quay ecosystem configuration file looks like below apiVersion: redhatcop.redhat.io/v1alpha1 kind: QuayEcosystem metadata: name: quay-ecosystem spec: clair: enabled: true imagePullSecretName: redhat-pull-secret updateInterval: "60m" quay: imagePullSecretName: redhat-pull-secret superuserCredentialsSecretName: quay-admin configSecretName: quay-config deploymentStrategy: RollingUpdate skipSetup: false redis: credentialsSecretName: redis-password database: volumeSize: 10Gi credentialsSecretName: postgres-creds registryStorage: persistentVolumeSize: 20Gi persistentVolumeAccessModes: - ReadWriteMany livenessProbe: initialDelaySeconds: 120 httpGet: path: /health/instance port: 8443 scheme: HTTPS readinessProbe: initialDelaySeconds: 10 httpGet: path: /health/instance port: 8443 scheme: HTTPS Modify it to fit you use case. When done apply the configuration: oc apply -f quay-ecosystem.yaml Using Custom SSL Certificates If you want to use custom SSL certificates with Quay, you need to create a secret with the key and the certificate: oc create secret generic custom-quay-ssl \ --from-file=ssl.key=example.key \ --from-file=ssl.cert=example.crt Then modify your Ecosystem file to use the custom certificate secret: quay: imagePullSecretName: redhat-pull-secret sslCertificatesSecretName: custom-quay-ssl ....... Wait for few minutes then confirm deployment: $ oc get deployments NAME READY UP-TO-DATE AVAILABLE AGE quay-ecosystem-clair 1/1 1 1 2m35s quay-ecosystem-clair-postgresql 1/1 1 1 2m57s quay-ecosystem-quay 1/1 1 1 3m45s quay-ecosystem-quay-postgresql 1/1 1 1 5m8s quay-ecosystem-redis 1/1 1 1 5m57s quay-operator 1/1 1 1 70m $ oc get svc NAME TYPE CLUSTER-IP EXTERNAL-IP PORT(S) AGE quay-ecosystem-clair ClusterIP 172.30.66.1 6060/TCP,6061/TCP 4m quay-ecosystem-clair-postgresql ClusterIP 172.30.10.126 5432/TCP 3m58s quay-ecosystem-quay ClusterIP 172.30.47.147 443/TCP 5m38s quay-ecosystem-quay-postgresql ClusterIP 172.30.196.61 5432/TCP 6m15s quay-ecosystem-redis ClusterIP 172.30.48.112 6379/TCP 6m58s quay-operator-metrics ClusterIP 172.30.81.233 8383/TCP,8686/TCP 70m Running pods in the project: $ oc get pods NAME READY STATUS RESTARTS AGE quay-ecosystem-clair-84b4d77654-cjwcr 1/1 Running 0 2m57s quay-ecosystem-clair-postgresql-7c47b5955-qbc4s 1/1 Running 0 3m23s quay-ecosystem-quay-66584ccbdb-8szts 1/1 Running 0 4m8s quay-ecosystem-quay-postgresql-74bf8db7f8-vnrx9 1/1 Running 0 5m34s quay-ecosystem-redis-7dcd5c58d6-p7xkn 1/1 Running 0 6m23s quay-operator-764c99dcdb-k44cq 1/1 Running 0 70m Step 4: Access Quay Dashboard Get a route URL for deployed Quay: $ oc get route quay-ecosystem-quay quay-ecosystem-quay-quay-enterprise.apps.example.com quay-ecosystem-quay 8443 passthrough/Redirect None
Open the URL on the machine with access to the cluster domain. Use the credentials you configured to login to Quay registry. And there you have it. You now have Quay registry running on OpenShift using Operators. Refer to below documentations for more help. Quay Operator Github Page Red Hat Quay documentation Project Quay Documentation
0 notes