#postgres installation error
Explore tagged Tumblr posts
Visit Tumblr Blog
Explore Tumblr blogs with no restrictions, modern design and the best experience.
Last Seen Tumblr Blogs


Fun Fact
Tumblr.com rank in the US is 25.
Text
Updating a Tiny Tiny RSS install behind a reverse proxy

Screenshot of my Tiny Tiny RSS install on May 7th 2024 after a long struggle with 502 errors. I had a hard time when trying to update my Tiny Tiny RSS instance running as Docker container behind Nginx as reverse proxy. I experienced a lot of nasty 502 errors because the container did not return proper data to Nginx. I fixed it in the following manner: First I deleted all the containers and images. I did it with docker rm -vf $(docker ps -aq) docker rmi -f $(docker images -aq) docker system prune -af Attention! This deletes all Docker images! Even those not related to Tiny Tiny RSS. No problem in my case. It only keeps the persistent volumes. If you want to keep other images you have to remove the Tiny Tiny RSS ones separately. The second issue is simple and not really one for me. The Tiny Tiny RSS docs still call Docker Compose with a hyphen: $ docker-compose version. This is not valid for up-to-date installs where the hyphen has to be omitted: $ docker compose version. The third and biggest issue is that the Git Tiny Tiny RSS repository for Docker Compose does not exist anymore. The files have to to be pulled from the master branch of the main repository https://git.tt-rss.org/fox/tt-rss.git/. The docker-compose.yml has to be changed afterwards since the one in the repository is for development purposes only. The PostgreSQL database is located in a persistent volume. It is not possible to install a newer PostgreSQL version over it. Therefore you have to edit the docker-compose.yml and change the database image image: postgres:15-alpine to image: postgres:12-alpine. And then the data in the PostgreSQL volume were owned by a user named 70. Change it to root. Now my Tiny Tiny RSS runs again as expected. Read the full article
0 notes
Text
Ichiran@home 2021: the ultimate guide
Recently I’ve been contacted by several people who wanted to use my Japanese text segmenter Ichiran in their own projects. This is not surprising since it’s vastly superior to Mecab and similar software, and is occassionally updated with new vocabulary unlike many other segmenters. Ichiran powers ichi.moe which is a very cool webapp that helped literally dozens of people learn Japanese.
A big obstacle towards the adoption of Ichiran is the fact that it’s written in Common Lisp and people who want to use it are often unfamiliar with this language. To fix this issue, I’m now providing a way to build Ichiran as a command line utility, which could then be called as a subprocess by scripts in other languages.
This is a master post how to get Ichiran installed and how to use it for people who don’t know any Common Lisp at all. I’m providing instructions for Linux (Ubuntu) and Windows, I haven’t tested whether it works on other operating systems but it probably should.
PostgreSQL
Ichiran uses a PostgreSQL database as a source for its vocabulary and other things. On Linux install postgresql using your preferred package manager. On Windows use the official installer. You should remember the password for the postgres user, or create a new user if you know how to do it.
Download the latest release of Ichiran database. On the release page there are commands needed to restore the dump. On Windows they don't really work, instead try to create database and restore the dump using pgAdmin (which is usually installed together with Postgres). Right-click on PostgreSQL/Databases/postgres and select "Query tool...". Paste the following into Query editor and hit the Execute button.
CREATE DATABASE [database_name] WITH TEMPLATE = template0 OWNER = postgres ENCODING = 'UTF8' LC_COLLATE = 'Japanese_Japan.932' LC_CTYPE = 'Japanese_Japan.932' TABLESPACE = pg_default CONNECTION LIMIT = -1;
Then refresh the Databases folder and you should see your new database. Right-click on it then select "Restore", then choose the file that you downloaded (it wants ".backup" extension by default so choose "Format: All files" if you can't find the file).
You might get a bunch of errors when restoring the dump saying that "user ichiran doesn't exist". Just ignore them.
SBCL
Ichiran uses SBCL to run its Common Lisp code. You can download Windows binaries for SBCL 2.0.0 from the official site, and on Linux you can use the package manager, or also use binaries from the official site although they might be incompatible with your operating system.
However you really want the latest version 2.1.0, especially on Windows for uh... reasons. There's a workaround for Windows 10 though, so if you don't mind turning on that option, you can stick with SBCL 2.0.0 really.
After installing some version of SBCL (SBCL requires SBCL to compile itself), download the source code of the latest version and let's get to business.
On Linux it should be easy, just run
sh make.sh --fancy sudo sh install.sh
in the source directory.
On Windows it's somewhat harder. Install MSYS2, then run "MSYS2 MinGW 64-bit".
pacman -S mingw-w64-x86_64-toolchain make # for paths in MSYS2 replace drive prefix C:/ by /c/ and so on cd [path_to_sbcl_source] export PATH="$PATH:[directory_where_sbcl.exe_is_currently]" # check that you can run sbcl from command line now # type (sb-ext:quit) to quit sbcl sh make.sh --fancy unset SBCL_HOME INSTALL_ROOT=/c/sbcl sh install.sh
Then edit Windows environment variables so that PATH contains c:\sbcl\bin and SBCL_HOME is c:\sbcl\lib\sbcl (replace c:\sbcl here and in INSTALL_ROOT with another directory if applicable). Check that you can run a normal Windows shell (cmd) and run sbcl from it.
Quicklisp
Quicklisp is a library manager for Common Lisp. You'll need it to install the dependencies of Ichiran. Download quicklisp.lisp from the official site and run the following command:
sbcl --load /path/to/quicklisp.lisp
In SBCL shell execute the following commands:
(quicklisp-quickstart:install) (ql:add-to-init-file) (sb-ext:quit)
This will ensure quicklisp is loaded every time SBCL starts.
Ichiran
Find the directory ~/quicklisp/local-projects (%USERPROFILE%\quicklisp\local-projects on Windows) and git clone Ichiran source code into it. It is possible to place it into an arbitrary directory, but that requires configuring ASDF, while ~/quicklisp/local-projects/ should work out of the box, as should ~/common-lisp/ but I'm not sure about Windows equivalent for this one.
Ichiran wouldn't load without settings.lisp file which you might notice is absent from the repository. Instead, there's a settings.lisp.template file. Copy settings.lisp.template to settings.lisp and edit the following values in settings.lisp:
*connection* this is the main database connection. It is a list of at least 4 elements: database name, database user (usually "postgres"), database password and database host ("localhost"). It can be followed by options like :port 5434 if the database is running on a non-standard port.
*connections* is an optional parameter, if you want to switch between several databases. You can probably ignore it.
*jmdict-data* this should be a path to these files from JMdict project. They contain descriptions of parts of speech etc.
ignore all the other parameters, they're only needed for creating the database from scratch
Run sbcl. You should now be able to load Ichiran with
(ql:quickload :ichiran)
On the first run, run the following command. It should also be run after downloading a new database dump and updating Ichiran code, as it fixes various issues with the original JMdict data.
(ichiran/mnt:add-errata)
Run the test suite with
(ichiran/test:run-all-tests)
If not all tests pass, you did something wrong! If none of the tests pass, check that you configured the database connection correctly. If all tests pass, you have a working installation of Ichiran. Congratulations!
Some commands that can be used in Ichiran:
(ichiran:romanize "一覧は最高だぞ" :with-info t) this is basically a text-only equivalent of ichi.moe, everyone's favorite webapp based on Ichiran.
(ichiran/dict:simple-segment "一覧は最高だぞ") returns a list of WORD-INFO objects which contain a lot of interesting data which is available through "accessor functions". For example (mapcar 'ichiran/dict:word-info-text (ichiran/dict:simple-segment "一覧は最高だぞ") will return a list of separate words in a sentence.
(ichiran/dict:dict-segment "一覧は最高だぞ" :limit 5) like simple-segment but returns top 5 segmentations.
(ichiran/dict:word-info-from-text "一覧") gets a WORD-INFO object for a specific word.
ichiran/dict:word-info-str converts a WORD-INFO object to a human-readable string.
ichiran/dict:word-info-gloss-json converts a WORD-INFO object into a "json" "object" containing dictionary information about a word, which is not really JSON but an equivalent Lisp representation of it. But, it can be converted into a real JSON string with jsown:to-json function. Putting it all together, the following code will convert the word 一覧 into a JSON string:
(jsown:to-json (ichiran/dict:word-info-json (ichiran/dict:word-info-from-text "一覧")))
Now, if you're not familiar with Common Lisp all this stuff might seem confusing. Which is where ichiran-cli comes in, a brand new Command Line Interface to Ichiran.
ichiran-cli
ichiran-cli is just a simple command-line application that can be called by scripts just like mecab and its ilk. The main difference is that it must be built by the user, who has already did the previous steps of the Ichiran installation process. It needs to access the postgres database and the connection settings from settings.lisp are currently "baked in" during the build. It also contains a cache of some database references, so modifying the database (i.e. updating to a newer database dump) without also rebuilding ichiran-cli is highly inadvisable.
The build process is very easy. Just run sbcl and execute the following commands:
(ql:quickload :ichiran/cli) (ichiran/cli:build)
sbcl should exit at this point, and you'll have a new ichiran-cli (ichiran-cli.exe on Windows) executable in ichiran source directory. If sbcl didn't exit, try deleting the old ichiran-cli and do it again, it seems that on Linux sbcl sometimes can't overwrite this file for some reason.
Use -h option to show how to use this tool. There will be more options in the future but at the time of this post, it prints out the following:
>ichiran-cli -h Command line interface for Ichiran Usage: ichiran-cli [-h|--help] [-e|--eval] [-i|--with-info] [-f|--full] [input] Available options: -h, --help print this help text -e, --eval evaluate arbitrary expression and print the result -i, --with-info print dictionary info -f, --full full split info (as JSON) By default calls ichiran:romanize, other options change this behavior
Here's the example usage of these switches
ichiran-cli "一覧は最高だぞ" just prints out the romanization
ichiran-cli -i "一覧は最高だぞ" - equivalent of ichiran:romanize :with-info t above
ichiran-cli -f "一覧は最高だぞ" - outputs the full result of segmentation as JSON. This is the one you'll probably want to use in scripts etc.
ichiran-cli -e "(+ 1 2 3)" - execute arbitrary Common Lisp code... yup that's right. Since this is a new feature, I don't know yet which commands people really want, so this option can be used to execute any command such as those listed in the previous section.
By the way, as I mentioned before, on Windows SBCL prior to 2.1.0 doesn't parse non-ascii command line arguments correctly. Which is why I had to include a section about building a newer version of SBCL. However if you use Windows 10, there's a workaround that avoids having to build SBCL 2.1.0. Open "Language Settings", find a link to "Administrative language settings", click on "Change system locale...", and turn on "Beta: Use Unicode UTF-8 for worldwide language support". Then reboot your computer. Voila, everything will work now. At least in regards to SBCL. I can't guarantee that other command line apps which use locales will work after that.
That's it for now, hope you enjoy playing around with Ichiran in this new year. よろしくおねがいします!
6 notes
·
View notes
Text
The data directory contains an old postmaster.pid file
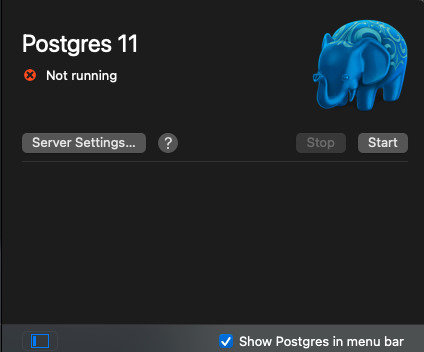
PostgreSQL Connection Failure
I experienced this issue when my laptop crushed and after rebooting, PostgreSQL was unable to connect to the database. I attempted to start my server and this error dialog window appeared.
The Problem: Two instances of the same PostgreSQL server cannot run on the same data directory at the same time thanks to the postmaster.pid lock file. Follow the link for more information about what a postmaster.pid file is, otherwise let's move on to resolving our issues.

STEP 1:
Click on the “OK” button to close the dialog window or open the Postgres.app desktop app if its not already open

STEP 2
Click on “Server Settings…” button
Click on Show button next to the Data Directory. This should open the data directory of your PostgreSQl installation.

STEP 3
Once you have located your postmaster.pid file. Delete it!

STEP 4
After deleting the file, the error message should change from "Stale postmaster.pid file" to "Not running" on the Postgres GUI app . Now just start your PostgreSQL server by clicking the "Start" button on the Postgres GUI app
Finally

0 notes
Text
Brew install postgres 12

BREW INSTALL POSTGRES 12 INSTALL
BREW INSTALL POSTGRES 12 SOFTWARE
Hopefully, you see some of your own Postgres situation in my particular path, and you can hop on somewhere and get to your own solution. If I was just getting started or I didn’t care about losing that data, I likely would have blown everything away and run rails db:prepare and been up and running with Postgres 13. I went this route as I really wanted to hold on to the data I had in my local DBs.
BREW INSTALL POSTGRES 12 INSTALL
I’m really unsure of what state the install is in, and it’s likely to trip me up in the future if I don’t handle it here while I have this context in my hed. I should remove it or otherwise plan on upgrading my app to it.
Postgres 13 is still installed on my machine.
With this, I could restart Rails and get my app up and running again. A quick start kicked the service off brew services start It’s important to note that even though I had linked brew to the old postgres version, when I was running brew commands, I still needed to reference the appropriate brew Postgres install, hence the Next Steps I began by checking which brew services were running with brew services list. Running Postgresįinally, I had to restart Postgres. Checking the version through the terminal confirmed this. After fumbling with a few commands and various Stack Overflow posts, I discovered brew link -overwrite This pointed the postgres command at the latest version. It was allowing both to be installed on my machine. Homebrew wasn’t installing the old version of Postgres over the existing 13.x. But checking the postgres version still returned the new Postgres install. brew install the old version my app was expecting onto my machine. Installing the older version of Postgres wasn’t too bad. I needed to install 12.x and then point homebrew at the install. The best way to do that would be to walk my local copy back to 12.x. I want to minimize the surface area and variables between known working versions of my software. I’m a believer in intentional upgrades and intentional changes.
Bring my install up to the latest, 13.x or.
Next, I check the version with postgres -version and I get back 13.x which is not the 12.x I expected. With a quick command in the terminal, which postgres, I see that it’s installed in /usr/local/bin which I know is where homebrew installs.
BREW INSTALL POSTGRES 12 SOFTWARE
In this case, I know that Postgres can be installed a number of different ways, and I want to verify how the software is installed. When I get stuck, I take a deep breath and gather up my assumptions. And which version of Postgres am I running?.Which install of Postgres am I running?.I then when through my typical debugging questions: I rushed through my typical fix of deleting the postmaster.pid which usually gets left behind when my machine restarts only to find that this can cause worse problems when done incorrectly. Here’s my particular breadcrumb trail.Īfter starting my local Rails server after the OSX upgrade, I was greeted with the dreaded error “connection to database failed: could not connect to server: No such file or directory”. After flailing and staring at countless Stack Overflow threads, I found my way out of the woods. This is pretty typical for me after OS updates the feedback loop between updates is too long for my memory. Traversing array in a loop with a loop variable and range is quite redundant it is only needed when the range is calculated and not the same as the array range otherwise for-in loop should be used.I recently ran into an issue with Postgres after upgrading to Big Sur. If a JSON key uses invalid JSONPath characters, then you can escape those characters using single quotes and brackets. each () is a generic iterator function for looping over object, arrays, and array-like objects. I believe jq does not provide a solution to this problem that is both elegant and intuitive. Created for … index("blue") is 0 and one wouldn't consider that a truthy value and might expect it to be excluded from the results. The return value from the comparer function basically identifies the sort order of subsequent array elements. The controls can be of several types: The. In the example above, the first expression, which is just an identifier, is applied to each element in the people array. Here's one way to create a JSON list from an array of hosts: hosts= (1. The array must be of a valid data type such as integer, character, or user-defined types. Every time the callback function is called it will return a value and store it in max. In this sense, typeof … JavaScript setAttribute () The setAttribute () method is used to set or add an attribute to a particular element and provides a value to it. price) | add' will take an array of JSON objects as input and return the sum of their "price" fields. Arrays in JSON are almost the same as arrays in JavaScript.
0 notes
Text
Chrome extension uuid generator postgres

Chrome extension uuid generator postgres generator#
d indicates the text input of the request body. Resizing a WebFOCUS Designer Esri map removes layer. An example request body is as follows: ' -H 'X-Auth-Token:MIISkAY***80T9wHQ=' -H 'Content-type: application/json' -X POST Error when migrating DB from SQL to Postgresql and running dbreplicate. rootaccounting-2 (master) sudo -u postgres psql -dbnameidempiere psql (11.8) Type 'help' for help. Where: PL/pgSQL function generateuuid() line 3 at RETURN This usually indicates that the uuid extension is missing from the database. Enter the request body in the text box below. You might need to add explicit type casts. Select raw and then JSON(application/json).
Chrome extension uuid generator postgres generator#
Use one of the UUID-OSSP generator function as th. Once UUID-OSSP is installed, declare a CREATE TABLE and UUID column. It can produce integers, longs, uuids, or strings, as shown in the following example. The algorithm used by the random() function generates pseudo-random values. setseed() sets the internal value for the generator. There is a UUID-OSSP server module to provide such functions, but it must be installed. LiveReload browser extensions are freely available for Chrome. PostgreSQL has two basic functions for generating random data: random() returns a random value with uniform distribution from the range 0.0, 1.0) (includes 0.0, but no 1.0). So you have to add a callback Bean to set your Id manually.Figure 3 Setting parameters on the Body tab page Answer: The PostgreSQL UUID type does not have a built-in sequence generator functions. Several sources ( here, here, here, here, here and here) indicate that there is no auto Id generation for R2DBC. I ditched the JPA approach - and note that we are using R2DBC, not JDBC, so the answer didn't work straight away. Currency conversion extension for Google Chrome and Edge browser that is based on the Chromium open-source project. Thanks to Sve Kamenska, with whose help I finally got it working eventually. The DDL for the table is like this: CREATE TABLE DOODAHS(id UUID not null, fieldA VARCHAR(10), fieldB VARCHAR(10)) NB the persistence is being handled by a class which looks like this: interface DoodahRepository extends CrudRepository Annotate class with Replace spring annotation with seen useful answers here, here and here but none have worked so far.use) or browsers extension such as Firefoxs HttpRequester, or Chromes Advanced. Create the UUID myself - results in Spring complaining that it can't find the row with that id. As an example, create a PyDev project called test-flask with a module.Neo4j: fixed actions menu for graph view tab. In PostgreSQL, there are a number of functions that generate UUID s: The uuid-ossp extension offers functions to generate UUID s. There are several standardized algorithms for that. Annotate the field with (in addition to existing spring Id) Cassandra: fixed generation of CQL script for only selected tables. A UUID (universally unique identifier) is a 128-bit number that is generated with an algorithm that effectively guarantees uniqueness.The class looks like this: class Doodah = strategy = false, unique = true) This extension allows to generate one or multiple Universal Unique Identifiers (UUID v4) with formatting options (with/out hyphens, with/out braces, lower/upper cased), and to copy rows of identifiers to the clipboard. This error indicates that it's expecting the ID column to be auto-populated (with some default value) when a row is inserted. This should be href="" rel="nofollow noreferrer">straightforward since hibernate and postgres have good support for UUIDs.Įach time I create a new instance and write it with save(), I get the following error: o.h.j.JdbcSQLIntegrit圜onstraintViolationException: NULL not allowed for column "ID" SQL statement: INSERT INTO DOODAHS (fieldA, fieldB) VALUES $1, $2). To protect user privacy, Google policies mandate that no data be passed to Google that Google could. The ID column of the table is a UUID, which I want to generate in code, not in the database. Avoid sending PII to Google when collecting Analytics data. How to view-source of a Chrome extension. I am trying to persist a simple class using Spring, with hibernate/JPA and a PostgreSQL database. Tags: uuid guid uuid-generator guid-generator generator time order rfc4122.
0 notes
Text
PgAdmin is an open-source and widely used frontend management tool for the PostgreSQL database system developed in Python language. It allows one to manage the PostgreSQL database from the web interface by providing all the required features. This release version PgAdmin 4 replaces the previous version PgAdmin 3 which was written in C++ language with support for PostgreSQL up to version 9.2. pgAdmin 4 comes with the following amazing features: A live SQL Query Tool with direct data editing A syntax-highlighting SQL editor Supportive error messages Helpful hints Has support for administrative queries A redesigned graphical interface Online help and information about using pgAdmin dialogs and tools. Responsive, context-sensitive behavior Auto-detection and support for objects discovered at run-time In this guide, we will systematically walk through how to install and use pgAdmin 4 on Rocky Linux 8 | AlmaLinux 8. Setup Pre-requisites Before we proceed, you will require to have PostgreSQL installed on your Rocky Linux 8 | AlmaLinux 8 with the aid of this guide Install PostgreSQL 14 on Rocky Linux 8|AlmaLinux 8|CentOS 8 You will also need a superuser account created. Login to the PostgreSQL shell. sudo -u postgres psql Now create a superuser to be used to connect and manage other users and databases. postgres-# CREATE ROLE admin WITH LOGIN SUPERUSER CREATEDB CREATEROLE PASSWORD 'Passw0rd'; postgres-# \q Install pgAdmin 4 on Rocky Linux 8 | AlmaLinux 8 Now with PostgreSQL installed, proceed and install PgAdmin 4 using the steps below. Step 1 – Add the PgAdmin4 Repository on Rocky Linux| AlmaLinux 8 We first need to add the pgAdmin YUM repository to our system to be able to install this latest pgAdmin version. Install the required package sudo dnf install yum-utils Then disable the PostgreSQL common repositories to allow us to grab the latest PgAdmin 4 packages from the PgAdmin repositories. sudo yum-config-manager --disable pgdg-common Now add the pgAdmin 4 repositories to our Rocky Linux| AlmaLinux 8 with the command: sudo rpm -i https://ftp.postgresql.org/pub/pgadmin/pgadmin4/yum/pgadmin4-redhat-repo-2-1.noarch.rpm Update your package index. sudo dnf update Step 2 – Install PgAdmin 4 on Rocky Linux |AlmaLinux 8 Now with the repositories added, installing pgAdmin 4 is as easy as robbing a child’s bank. Simply use the command below to install PgAdmin 4 on Rocky Linux |AlmaLinux 8. sudo dnf install pgadmin4 Dependency Tree: Dependencies resolved. ================================================================================ Package Arch Version Repo Size ================================================================================ Installing: pgadmin4 noarch 6.1-1.el8 pgAdmin4 6.2 k Installing dependencies: apr x86_64 1.6.3-11.el8.1 appstream 124 k apr-util x86_64 1.6.1-6.el8.1 appstream 104 k httpd x86_64 2.4.37-39.module+el8.4.0+655+f2bfd6ee.1 appstream 1.4 M httpd-filesystem noarch 2.4.37-39.module+el8.4.0+655+f2bfd6ee.1 appstream 38 k httpd-tools x86_64 2.4.37-39.module+el8.4.0+655+f2bfd6ee.1 appstream 105 k libatomic x86_64 8.4.1-1.el8 baseos 22 k mod_http2 x86_64 1.15.7-3.module+el8.4.0+553+7a69454b appstream 153 k pgadmin4-desktop x86_64 6.1-1.el8 pgAdmin4 87 M pgadmin4-server x86_64 6.1-1.el8 pgAdmin4 91 M pgadmin4-web noarch 6.1-1.el8 pgAdmin4 8.6 k python3-mod_wsgi x86_64 4.6.4-4.el8 appstream 2.5 M
rocky-logos-httpd noarch 84.5-8.el8 baseos 22 k Installing weak dependencies: apr-util-bdb x86_64 1.6.1-6.el8.1 appstream 23 k apr-util-openssl x86_64 1.6.1-6.el8.1 appstream 26 k Enabling module streams: httpd 2.4 Transaction Summary ================================================================================ Install 15 Packages Total download size: 182 M Installed size: 558 M Is this ok [y/N]: y Step 3 – Start the Apache webserver on Rocky Linux |AlmaLinux 8 To access the pgAdmin web UI, we need a web server, Apache has been installed automatically when installing pgAdmin. We, therefore, need to ensure that the Apache webserver is running on our system. sudo systemctl start httpd Enable Apache to run automatically on boot. sudo systemctl enable httpd Check the status of the service. $ sudo systemctl status httpd ● httpd.service - The Apache HTTP Server Loaded: loaded (/usr/lib/systemd/system/httpd.service; disabled; vendor preset: disabled) Active: active (running) since Thu 2021-11-04 04:01:12 EDT; 8s ago Docs: man:httpd.service(8) Main PID: 48450 (httpd) Status: "Started, listening on: port 80" Tasks: 241 (limit: 23532) Memory: 64.3M CGroup: /system.slice/httpd.service ├─48450 /usr/sbin/httpd -DFOREGROUND ├─48451 /usr/sbin/httpd -DFOREGROUND ├─48452 /usr/sbin/httpd -DFOREGROUND ├─48453 /usr/sbin/httpd -DFOREGROUND ├─48454 /usr/sbin/httpd -DFOREGROUND └─48455 /usr/sbin/httpd -DFOREGROUND Nov 04 04:01:12 localhost.localdomain systemd[1]: Starting The Apache HTTP Server... Nov 04 04:01:12 localhost.localdomain httpd[48450]: [Thu Nov 04 04:01:12.380306 2021] [so:warn] [pid 48450:tid 140690349939008] AH01574: module wsgi_> Nov 04 04:01:12 localhost.localdomain httpd[48450]: AH00558: httpd: Could not reliably determine the server's fully qualified domain name, using loca> Nov 04 04:01:12 localhost.localdomain systemd[1]: Started The Apache HTTP Server. Nov 04 04:01:12 localhost.localdomain httpd[48450]: Server configured, listening on: port 80 Step 4 – Configure the PgAdmin 4 Web Service PgAdmin has a script that creates a new user, sets up the PgAdmin web UI, and also manages the Apache webserver. The script is located at /usr/pgadmin4/bin/setup-web.sh and is executed as below: sudo /usr/pgadmin4/bin/setup-web.sh Now you will be prompted to provide details that will, later on, be used to login to the pgAdmin 4 web UI. Proceed as below. Setting up pgAdmin 4 in web mode on a Redhat based platform... Creating configuration database... NOTE: Configuring authentication for SERVER mode. Enter the email address and password to use for the initial pgAdmin user account: Email address: [email protected] Password: Enter Password here Retype password: Re-enter Password here pgAdmin 4 - Application Initialisation ====================================== Creating storage and log directories... Configuring SELinux... The Apache web server is running and must be restarted for the pgAdmin 4 installation to complete. Continue (y/n)? y Apache successfully restarted. You can now start using pgAdmin 4 in web mode at http://127.0.0.1/pgadmin4 Set SELinux in permissive mode as below. sudo setenforce permissive You also need to modify your firewall rules to allow HTTP traffic. sudo firewall-cmd --permanent --add-service=http sudo firewall-cmd --reload Use PgAdmin 4 in Rocky Linux | AlmaLinux 8 Linux Now everything is set up, we can proceed to access the pgAdmin Web UI so that we can manage our PostgreSQL instance. Access the web interface using the URL http://server-ip/pgadmin4 Login with the credentials created in step 4 above. On successful login. you will be able to see this pgAdmin dashboard. As seen, no database is
connected to pgAdmin, and therefore, we need to add our PostgreSQL server by clicking on “Add Server” as shown. Provide details for your PostgreSQL database server. Set the name for the database. Then proceed to the next ‘Connection‘ tab and enter the credentials for the PostgreSQL database as below. (I have entered credentials for the superuser account created at the beginning of this guide) If you are accessing the PostgreSQL database installed on a remote server, you will be required to Set SSH Tunnel. Provide the IP Address, username, and password of the remote server and proceed. With the details entered correctly, click save and you will see your database server added with additional details provided. Create a Database in PostgreSQL using PgAdmin 4. with the connection to your PostgreSQL server established, you can create a database as shown below. Set the database name. Proceed to the next tab and define your database. Click sav, and you will have your database created as shown. You can also make further configurations to the database. That was enough learning! We have successfully gone through how to install and use pgAdmin 4 on Rocky Linux 8 | AlmaLinux 8. There are a lot of configurations and database management tools available on pgAdmin 4. I have only demonstrated a few. I hope this guide was of value to you.
0 notes
Text
Download Soapui For Mac

Soap Ui Installer
Download Soapui For Mac
Download Soapui For Mac
Soapui Install
Soapui 5.4 Download For Mac
Before working with databases in ReadyAPI, you have to establish a database connection. For this, you use the connection drivers. You can install Postgres JDBC4 Driver or Microsoft JDBC Driver during the ReadyAPI installation.
SoapUI is a free and open source web service inspector software download filed under programming software and made available by SmartBear Software for Windows. The review for soapUI has not been completed yet, but it was tested by an editor here on a PC and a list of features has been compiled; see below. SoapUI SoapUI is a free and open source cross-platform Functional Testing solution. DOWNLOAD Pro Paint for Mac Paint for Mac Pro version is the realistic digital Mac paint program that is. Windows 7 sulietuvinimas atsisiusti. $29.99 DOWNLOAD. A powerful REST API Client with cookie management, environment variables, code generation,. Trusted Windows (PC) download soapUI Pro 5.1.2. Virus-free and 100% clean download. Get soapUI Pro alternative downloads.
Download soapUI- 5.0 for Mac from our website for free. The program is included in Developer Tools. This free program can be installed on Mac OS X 10.6 or later. The most popular versions among the application users are 5.0, 4.6 and 4.0. SoapUI- for Mac can also be called 'soapUI-beta1'. Soapui free version download. Download soapUI- 5.0 for Mac from our website for free. The program is included in Developer Tools. This free program can be installed on Mac OS X 10.6 or later. The most popular versions among the application users are 5.0, 4.6 and 4.0.
Install third-party JDBC drivers
To install a third-party JDBC driver, do the following:
Download soapUI-5.0 for Mac from our website for free. The program is included in Developer Tools. This free program can be installed on Mac OS X 10.6 or later. The most popular versions among the application users are 5.0, 4.6 and 4.0. SoapUI- for Mac can also be called 'soapUI-beta1'. The actual developer of this free Mac application is eviware. Free Trial Driver Booster 6 PRO (60% OFF when you buy) soapUI for Mac. 28,550 downloads Updated: December 5, 2017 Freeware. DOWNLOAD soapUI 5.4.0.
Download and install the needed JDBC driver package.
Put the driver files in the bin/ext directory of your ReadyAPI installation.
Restart ReadyAPI to load the driver.
In ReadyAPI, go to Preferences > JDBC Drivers and add the new connection template.
Tip:ReadyAPI has preconfigured connection string templates for a number of JDBC drivers.
Once you have prepared the driver and connection string, you will be able to add the database connection.
To learn how to use a Groovy script to register the JDBC driver, see Using JDBC Drivers From Scripts.
Install the MySQL JDBC driver
To learn how to properly install and configure the MySQL JDBC driver, see the corresponding topic.
Choose a driver for MS SQL databases
Currently, ReadyAPI supports two connection drivers for MS SQL databases:
Microsoft SQL JDBC driver – a database connection driver published and supported by Microsoft.
JTDS driver – an open source driver published under the GNU LGPL license by The JTDS Project.
We recommend using the Microsoft SQL JDBC driver: it is compatible with ReadyAPI and supports all necessary features. Use the JTDS driver if your database connection requires its specific properties.
Install the Oracle JDBC driver
To learn how to properly install and configure the Oracle JDBC driver, see Oracle JDBC Driver.
See Also
Soapui Download File
JDBC Drivers Database Manager Using JDBC Drivers From Scripts Data Sources and>
If you have an active license of ReadyAPI, you do not need to activate a new license.
VirtServer requires a separate license.
Ubuntu prerequisites
If you install ReadyAPI on the Ubuntu operating system, you should run the following command to avoid an error during the installation:
Download Soapui Windows
Installation steps
Soapui Download Free
Download the installer for your platform from the ReadyAPI Downloads Center.
If you install ReadyAPI on a Linux machine, make sure the installer has the appropriate permissions and can be executed. To do this, run the chmod +x ./ReadyAPI-x64-3.4.5.sh
You can also download the installer via ReadyAPI Updater.
Show instructionShow instruction
Select Help > Check for Updates.
Click Download in the New Version Check dialog.
Specify the download location and click Next.
Select either Yes, execute the update installer now or No, I will execute the update installer later and click Finish.
Note:If you select to execute the installer later, the steps in the Installation Wizard may differ.
Run the installer. The installer will unpack the files and prepare them for installation:
If ReadyAPI is not installed on your computer, you will see the Welcome screen. Click Next to proceed with the installation:
If ReadyAPI is already installed on your computer, you will be asked if you want to update the current installation or to install the product anew to a different directory. Select the needed option and click Next:
Tip:Point to to see where the current installation is located.
If you downloaded the installer via ReadyAPI Updater and selected to run it later, click Next in the Wizard.
If you install ReadyAPI for the first time, or have chosen to install it to a different directory, the wizard will ask you to specify the installation folder:
When the installation is complete, you can select the Run ReadyAPI check box to run ReadyAPI upon closing the wizard. You can also select the Create a desktop icon check box to create a desktop icon for ReadyAPI.
Click Finish.
Soap Ui Installer
See Also
Download Soapui For Mac
ReadyAPI Documentation System Requirements Licensing VirtServer Installation
SoapUI Tutorial
The latest version of SoapUI Pro is 5.1 on Mac Informer. It is a perfect match for IDE in the Developer Tools category. The app is developed by SmartBear Software and its user rating is 5 out of 5.
Soap Basics
For SoapUI Open Source. Firstly, Mac computer with 1GHz or higher 32-bit or 64-bit Intel or PowerPC processor; Secondly, 512MB of RAM; Subsequently, 140MB of hard disk space for installation (SoapUI and HermesJMS) In addition, Mac OS X 10.4 or later; Mac OS X Server 10.4 or later; Lastly, Java 7; For SoapUI Pro.
SoapUI Installation Guides. SoapUI is cross-platform, and can be used on either Windows, Mac or Linux/Unix, according to your needs and preferences. SoapUI is an open source testing tool which is used to test web services built on both SOA (Service Oriented Architecture) and REST protocol (REpresentational State Transfer).
Our software library provides a free download of SoapUI Pro 5.1 for Mac. The file size of the latest installation package available for download is 221.8 MB. The program belongs to Developer Tools. This Mac download was checked by our built-in antivirus and was rated as malware free. This Mac app was originally created by SmartBear Software.
SoapUI Basics
SoapUI Useful Resources
Selected Reading
SoapUI is a cross-platform tool. It supports Windows, Linux, and Mac operating systems.
Prerequisites
Processor − 1GHz or higher 32-bit or 64-bit processor.
RAM − 512MB of RAM.
Hard Disk Space − Minimum 200MB of hard disk space for installation.
Operating System Version − Windows XP or later, MAC OS 10.4 or later.
JAVA − JAVA 6 or later.
Download Process
Step 1 − Go to www.soapui.org and click Download SoapUI.
Step 2 − Click ‘Get It’ to download SoapUI Open Source. It will start downloading 112MB .exe file in the system. Wait till the download process is complete.
Installation Process
Step 1 − After downloading, run the .exe file as “Run as administrator”.
Windows will start the set up process as shown in the following screenshot.
Step 2 − Once set up, the process window displays the following screen, click Next.
Step 3 − Accept the license agreement and click Next.
Step 4 − Choose the installation directory or keep it as the default path selected by the system. Click Next.
Step 5 − Choose the components that you want to install. Click Next.
Step 6 − Accept the License Agreement for HermesJMS and click Next.
Step 7 − Select the target directory to save tutorials and click Next.

Step 8 − Choose the start menu folder location or else leave the default location as is and click 'Next'.
Step 9 − Enable the checkbox 'create a desktop icon' and click 'Next'.
Now, the installation starts. It will take a few minutes to complete.
Step 10 − After completion of installation, click Finish in the following wizard.
Upon clicking on Finish, SoapUI is launched.
Soapui 5.4 Download For Mac
Menu bar
Tool bar
Project Navigation Bar
Workspace Properties
Log Panel
Configuration Process
The first step is to create a workspace that can contain multiple projects.
Download Soapui For Mac
Step 1 − Go to File → New Workspace.
Step 2 − Add the name of workspace and click OK.
Step 3 − Now, select the path where workspace xml will be saved.
Step 4 − Select the path and click Save.
Soapui Download File

Workspace is created as shown in the following screenshot. Workspace properties is also exhibited.
Download
Download Soapui Pro For Mac
The program can not be downloaded: the download link is not available.External download links have become invalid for an unknown reason.Sorry, but we cannot ensure safeness of third party websites.
Often downloaded with
SOAP ClientSOAP Client is a free Cocoa-based developer tool that allows you access and..DOWNLOAD
Soap SAPSoap SAP - a freeware application for soap makers and lye calculator & oil and..DOWNLOAD
Soap Opera DashHelp Rosie film the best Soap Opera ever! Run the sets and make sure all the..$6.99DOWNLOAD
UI BrowserUI Browser is the ultimate assistant for Apple's AppleScript GUI Scripting and..$55DOWNLOAD
Sia-UISia-UI is the user interface for Sia, a desktop application based off the..DOWNLOAD
Download Soapui For Mac
Soapui Download For Windows 10
Soapui Install
PDF Printer Lite - Easily Print Document to PDF
Soapui 5.4 Download For Mac
Rsa securid software token 5.0 2 download for mac. Office Tools
0 notes
Text
Aug 23
Starting day at 8:42AM bc I fell asleep again at 7.
Allara chillara stretching and walking around flexing all the while tensing about the day.
What's the point of yoga if you're stressed the whole time?
Be cool
Wait, what do I do? Do they reach out to me? Should I mail? it's 9:34AM.
Shit did they forget?
They can't fire me on the first day, right?
I swear if I get fired in under a month, I'm gonna give up this career and start painting.
And I could just opensource for the love of dev.
Chill!!
OKay, I pinged Rejulettan, they’re creating accounts and stuff.
11AM First standup. Said “Hi”. ;_; WHY? All that stuff you prepped?
That’s a lot of accounts
Digesting a jargon explosion.
WTF are all these for?
Terraform? Like what they plan to do with mars.
I have access to everything.
I can burn down the whole thing if I wanted to.
UNLIMITED POWER!!! !
... R+A helping me with setup. Cool.
X is helping with the a/cs. Isn't he busy? Okay, I'll never be able to do that job. Working and handling all this people and keeping in touch with every one of em to make sure everything's okay. I mean, I can't even properly eat lunch and watch a sitcom together.
I'm writing too much. If I put all this effort into working, I would be a lot more productive.
But if I stopped logging here, I would be distracted more.
Only writing helps me discipline now. Is it tho? I haven't explored more ways yet.
Am I a machine now? I need proper algorithms and instructions to do stuff now
The daily update doc.
2:30PM mentors mailed.
3:49PM finished up with email reply. Explained stuff.
4:05PM Setting up things.
Distracted 5:18PM - It’s okay. Complete the project in your own time. No one’s judging you for failing gsoc. If they are, fuck them.
When was the last time you failed sth? Exactly.
5:30PM - yea right, you can finish setting up by 6.. Haha. idiot. Stop blasting alice glass in your ears and you can focus more.
Pottathi!!
Setup - following doc https://3.basecamp.com/3910353/buckets/5944669/documents/2878232344
sudo apt-get install postgresql postgresql-contrib
Trying to start psql cli
Psql psql: error: FATAL: role "compile" does not exist
5:46PM - distracted again.
Distracted again 5:51PM. That lasted 30mins. Looks like an improvement tho
initdb /usr/local/var/postgres initdb: command not found
sudo -u postgres; psql psql: error: FATAL: role "compile" does not exist
sudo -i -u postgres - yaay
psql :D Yep. default postgres db exists.
pg_ctl -D /usr/local/var/postgres start
pg_ctl -D /usr/local/var/postgres stop pg_ctl: command not found
Okay, skipping to creating databases. Varnodth vech kaana
create database falcon OWNER postgres
create database falcon_export_wip OWNER postgres
create database healthgraph_export OWNER postgres
create database sheldon OWNER postgres
create database falcon_export OWNER postgres
\l gives only 3 dbs now. What?
Okay, all of those need semicolons, idiot
$ sudo -u postgres createuser anaswara
$ sudo -u postgres psql
ALTER USER anaswara WITH ENCRYPTED PASSWORD '@atr7070';
Wait, should I encrypt or postgres chythoolo? YEP!! IDIOT!!
What if postgres encrypts my sha hash again? NOOOO!!!
Okay, nthelum idu
GRANT ALL PRIVILEGES ON DATABASE falcon TO anaswara; GRANT ALL PRIVILEGES ON DATABASE falcon_export_wip TO anaswara; GRANT ALL PRIVILEGES ON DATABASE healthgraph_export TO anaswara; GRANT ALL PRIVILEGES ON DATABASE sheldon TO anaswara; GRANT ALL PRIVILEGES ON DATABASE falcon_export TO anaswara;
https://zulip.compile.com/user_uploads/2/pQztq9JGf4b0nhUOXHkWaAXm/falcon.schema.sql.gz
https://zulip.compile.com/user_uploads/2/SNCT7OHeOZQd2vq1PErA8rXd/falcon.data.sql.gz Unauthorized
OKay, got the files.
zcat ~/Downloads/falcon.schema.sql-1629724096467.gz | psql -d falcon -O -X /usr/lib/postgresql/12/bin/psql: invalid option -- 'O'
Try "psql --help" for more information.
It’s already 7:02PM.
7:14PM - Distracted again!!! Okay, it’s DA from now on. Don’t think about gsoc for 2 days.
zcat ~/Desktop/falcon.schema.sql-1629724096467.gz | psql -d falcon -0 -X The flag was actually 0 not o ………..(-_-)
But psql: error: FATAL: role "compile" does not exist.
zcat ~/Desktop/falcon.schema.sql-1629724096467.gz | psql -d falcon -0 -X -U anaswara -W
psql: error: FATAL: Peer authentication failed for user "anaswara"
Okay, https://stackoverflow.com/a/17443990
Can be solved with this https://www.postgresql.org/docs/9.0/auth-methods.html#:~:text=19.3.1.-,Trust%20authentication,-When%20trust%20authentication
But let’s just create new roles with same username and password as unix user. “Compile” - “compile”
Zcat
“
ALTER TABLE
ALTER TABLE
WARNING: no privileges could be revoked for "public"
REVOKE
WARNING: no privileges could be revoked for "public"
REVOKE
WARNING: no privileges were granted for "public"
GRANT
WARNING: no privileges were granted for "public"
GRANT
REVOKE
REVOKE
GRANT
ERROR: role "redash" does not exist
ERROR: role "gandalf" does not exist
REVOKE
REVOKE
GRANT
ERROR: role "redash" does not exist
ERROR: role "gandalf" does not exist
REVOKE
REVOKE
”
GRANT ALL PRIVILEGES ON DATABASE falcon TO compile;
GRANT ALL PRIVILEGES ON DATABASE falcon_export_wip TO compile;
GRANT ALL PRIVILEGES ON DATABASE healthgraph_export TO compile;
GRANT ALL PRIVILEGES ON DATABASE sheldon TO compile;
GRANT ALL PRIVILEGES ON DATABASE falcon_export TO compile;
Ignoring all the errors
sudo apt-get install -y python-dev build-essential git python-pip virtualenvwrapper mosh libyajl2 graphviz supervisor libpq-dev postgresql-client nginx libffi-dev libyaml-dev zip unzip apgdiff autoconf automake libtool libleveldb-dev python2-dev swig libssl-dev
Sds Reading package lists... Done
Building dependency tree
Reading state information... Done
Note, selecting 'python-dev-is-python2' instead of 'python-dev'
Package python-pip is not available, but is referred to by another package.
This may mean that the package is missing, has been obsoleted, or
is only available from another source
However the following packages replace it:
python3-pip
E: Package 'python-pip' has no installation candidate
Cloning into 'healthgraph'...
The authenticity of host 'yoda.compile.com (139.59.30.154)' can't be established.
ECDSA key fingerprint is SHA256:N2I9nBx9N72puf3bUAYfBeMUr1V0ZmZVKTpx1nZzGp8.
Are you sure you want to continue connecting (yes/no/[fingerprint])? yes
Warning: Permanently added 'yoda.compile.com,139.59.30.154' (ECDSA) to the list of known hosts.
[email protected]'s password:
Permission denied, please try again.
Retry
Cloning into 'healthgraph'...
sign_and_send_pubkey: signing failed for ED25519 "/home/compile/.ssh/id_ed25519" from agent: agent refused operation
[email protected]'s password:
What’s goin on? I added ssh keys this morning
Adding ssh keys again
Should I generate ssh keys again? Nop
Oh ssh-add
Yaay
That’s a hugerepo. Healthgraph. HUH. DUH.
Cause that’s the only way the roses bloom… in my mind.. Aaa
git clone [email protected]:engineering/sheldon.git
Omu, they’re dorks.
It’s 9:11PM
Booo..
3 minutes to break time. I want break now. Well, you’re writing so it’s a break. Okay, put on some music.
Sheldon is a small repo. Young sheldon.
Wtf am I doing? Successfully wasted break. Nop.
10:48PM. I think I ate too much.
Okay, finish up.
0 notes
Text
Full Stack Development with Next.js and Supabase – The Complete Guide
Supabase is an open source Firebase alternative that lets you create a real-time backend in less than two minutes.
Supabase has continued to gain hype and adoption with developers in my network over the past few months. And a lot of the people I've talked to about it prefer the fact that it leverages a SQL-style database, and they like that it's open source, too.
When you create a project Supabase automatically gives you a Postgres SQL database, user authentication, and API. From there you can easily implement additional features like realtime subscriptions and file storage.
In this guide, you will learn how to build a full stack app that implements the core features that most apps require – like routing, a database, API, authentication, authorization, realtime data, and fine grained access control. We'll be using a modern stack including React, Next.js, and TailwindCSS.
I've tried to distill everything I've learned while myself getting up to speed with Supabase in as short of a guide as possible so you too can begin building full stack apps with the framework.
The app that we will be building is a multi-user blogging app that incorporates all of the types of features you see in many modern apps. This will take us beyond basic CRUD by enabling things like file storage as well as authorization and fine grained access control.
You can find the code for the app we will be building here.
By learning how to incorporate all of these features together you should be able to take what you learn here and build out your own ideas. Understanding the basic building blocks themselves allows you to then take this knowledge with you in the future to put it to use in any way you see fit.
Supabase Overview
How to Build Full Stack Apps
I'm fascinated by full stack Serverless frameworks because of the amount of power and agility they give to developers looking to build complete applications.
Supabase brings to the table the important combination of powerful back end services and easy to use client-side libraries and SDKs for an end to end solution.
This combination lets you not only build out the individual features and services necessary on the back end, but easily integrate them together on the front end by leveraging client libraries maintained by the same team.
Because Supabase is open source, you have the option to self-host or deploy your backend as a managed service. And as you can see, this will be easy for us to do on a free tier that does not require a credit card to get started with.
Why Use Supabase?
I've led the Front End Web and Mobile Developer Advocacy team at AWS, and written a book on building these types of apps. So I've had quite a bit of experience building in this space.
And I think that Supabase brings to the table some really powerful features that immediately stood out to me when I started to build with it.
Data access patterns
One of the biggest limitations of some of the tools and frameworks I've used in the past is the lack of querying capabilities. What I like a lot about Supabase is that, since it's built on top of Postgres, it enables an extremely rich set of performant querying capabilities out of the box without having to write any additional back end code.
The client-side SDKs provide easy to use filters and modifiers to enable an almost infinite combination of data access patterns.
Because the database is SQL, relational data is easy to configure and query, and the client libraries take it into account as a first class citizen.
Permissions
When you get past "hello world" many types of frameworks and services fall over very quickly. This is because most real-world use cases extend far beyond the basic CRUD functionality you often see made available by these tools.
The problem with some frameworks and managed services is that the abstractions they create are not extensible enough to enable easy to modify configurations or custom business logic. These restrictions often make it difficult to take into account the many one-off use cases that come up with building an app in the real-world.
In addition to enabling a wide array of data access patterns, Supabase makes it easy to configure authorization and fine grained access controls. This is because it is simply Postgres, enabling you implement whatever row-level security policies you would like directly from the built-in SQL editor (something we will cover here).
UI components
In addition to the client-side libraries maintained by the same team building the other Supabase tooling, they also maintain a UI component library (beta) that allows you to get up and running with various UI elements.
The most powerful is Auth which integrates with your Supabase project to quickly spin up a user authentication flow (which I'll be using in this tutorial).
Multiple authentication providers
Supabase enables all of the following types of authentication mechanisms:
Username & password
Magic email link
Google
Facebook
Apple
GitHub
Twitter
Azure
GitLab
Bitbucket
Open Source
One of the biggest things it has going for it is that it is completely open source (yes the back end too). This means that you can choose either the Serverless hosted approach or to host it yourself.
That means that if you wanted to, you could run Supabase with Docker and host your app on AWS, GCP, or Azure. This would eliminate the vendor lock-in issue you may run into with Supabase alternatives.
How to Get Started with Supabase
Project setup
To get started, let's first create the Next.js app.
npx create-next-app next-supabase
Next, change into the directory and install the dependencies we'll be needing for the app using either NPM or Yarn:
npm install @supabase/supabase-js @supabase/ui react-simplemde-editor easymde react-markdown uuid npm install tailwindcss@latest @tailwindcss/typography postcss@latest autoprefixer@latest
Next, create the necessary Tailwind configuration files:
npx tailwindcss init -p
Now update tailwind.config.js to add the Tailwind typography plugin to the array of plugins. We'll be using this plugin to style the markdown for our blog:
plugins: [ require('@tailwindcss/typography') ]
Finally, replace the styles in styles/globals.css with the following:
@tailwind base; @tailwind components; @tailwind utilities;
Supabase project initialization
Now that the project is created locally, let's create the Supabase project.
To do so, head over to Supabase.io and click on Start Your Project. Authenticate with GitHub and then create a new project under the organization that is provided to you in your account.

Give the project a Name and Password and click Create new project.
It will take approximately 2 minutes for your project to be created.
How to create a database table in Supabase
Once you've created your project, let's go ahead and create the table for our app along with all of the permissions we'll need. To do so, click on the SQL link in the left hand menu.

In this view, click on Query-1 under Open queries and paste in the following SQL query and click RUN:
CREATE TABLE posts ( id bigint generated by default as identity primary key, user_id uuid references auth.users not null, user_email text, title text, content text, inserted_at timestamp with time zone default timezone('utc'::text, now()) not null ); alter table posts enable row level security; create policy "Individuals can create posts." on posts for insert with check (auth.uid() = user_id); create policy "Individuals can update their own posts." on posts for update using (auth.uid() = user_id); create policy "Individuals can delete their own posts." on posts for delete using (auth.uid() = user_id); create policy "Posts are public." on posts for select using (true);
This will create the posts table that we'll be using for the app. It also enabled some row level permissions:
All users can query for posts
Only signed in users can create posts, and their user ID must match the user ID passed into the arguments
Only the owner of the post can update or delete it
Now, if we click on the Table editor link, we should see our new table created with the proper schema.

That's it! Our back end is ready to go now and we can start building out the UI. Username + password authentication is already enabled by default, so all we need to do now is wire everything up on the front end.
Next.js Supabase configuration
Now that the project has been created, we need a way for our Next.js app to know about the back end services we just created for it.
The best way for us to configure this is using environment variables. Next.js allows environment variables to be set by creating a file called .env.local in the root of the project and storing them there.
In order to expose a variable to the browser you have to prefix the variable with NEXT_PUBLIC_.
Create a file called .env.local at the root of the project, and add the following configuration:
NEXT_PUBLIC_SUPABASE_URL=https://app-id.supabase.co NEXT_PUBLIC_SUPABASE_ANON_KEY=your-public-api-key
You can find the values of your API URL and API Key in the Supabase dashboard settings:
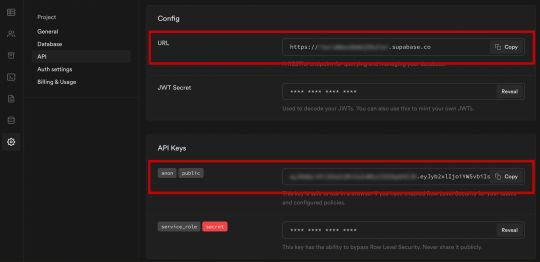
Next, create a file called api.js in the root of the project and add the following code:
// api.js import { createClient } from '@supabase/supabase-js' export const supabase = createClient( process.env.NEXT_PUBLIC_SUPABASE_URL, process.env.NEXT_PUBLIC_SUPABASE_ANON_KEY )
Now we will be able to import the supabase instance and use it anywhere in our app.
Here's an overview of what it looks like to interact with the API using the Supabase JavaScript client.
Querying for data:
import { supabase } from '../path/to/api' const { data, error } = await supabase .from('posts') .select()
Creating new items in the database:
const { data, error } = await supabase .from('posts') .insert([ { title: "Hello World", content: "My first post", user_id: "some-user-id", user_email: "[email protected]" } ])
As I mentioned earlier, the filters and modifiers make it really easy to implement various data access patterns and selection sets of your data.
Authentication – signing up:
const { user, session, error } = await supabase.auth.signUp({ email: '[email protected]', password: 'example-password', })
Authentication – signing in:
const { user, session, error } = await supabase.auth.signIn({ email: '[email protected]', password: 'example-password', })
In our case we won't be writing the main authentication logic by hand, we'll be using the Auth component from Supabase UI.
How to Build the App
Now let's start building out the UI!
To get started, let's first update the app to implement some basic navigation and layout styling.
We will also configure some logic to check if the user is signed in, and show a link for creating new posts if they are.
Finally we'll implement a listener for any auth events. And when a new auth event occurs, we'll check to make sure there is currently a signed in user in order to show or hide the Create Post link.
Open _app.js and add the following code:
// pages/_app.js import Link from 'next/link' import { useState, useEffect } from 'react' import { supabase } from '../api' import '../styles/globals.css' function MyApp({ Component, pageProps }) { const [user, setUser] = useState(null); useEffect(() => { const { data: authListener } = supabase.auth.onAuthStateChange( async () => checkUser() ) checkUser() return () => { authListener?.unsubscribe() }; }, []) async function checkUser() { const user = supabase.auth.user() setUser(user) } return ( <div> <nav className="p-6 border-b border-gray-300"> <Link href="/"> <span className="mr-6 cursor-pointer">Home</span> </Link> { user && ( <Link href="/create-post"> <span className="mr-6 cursor-pointer">Create Post</span> </Link> ) } <Link href="/profile"> <span className="mr-6 cursor-pointer">Profile</span> </Link> </nav> <div className="py-8 px-16"> <Component {...pageProps} /> </div> </div> ) } export default MyApp
How to make a user profile page
Next, let's create the profile page. In the pages directory, create a new file named profile.js and add the following code:
// pages/profile.js import { Auth, Typography, Button } from "@supabase/ui"; const { Text } = Typography import { supabase } from '../api' function Profile(props) { const { user } = Auth.useUser(); if (user) return ( <> <Text>Signed in: {user.email}</Text> <Button block onClick={() => props.supabaseClient.auth.signOut()}> Sign out </Button> </> ); return props.children } export default function AuthProfile() { return ( <Auth.UserContextProvider supabaseClient={supabase}> <Profile supabaseClient={supabase}> <Auth supabaseClient={supabase} /> </Profile> </Auth.UserContextProvider> ) }
The profile page uses the Auth component from the Supabase UI library. This component will render a "sign up" and "sign in" form for unauthenticated users, and a basic user profile with a "sign out" button for authenticated users. It will also enable a magic sign in link.
How to create new posts
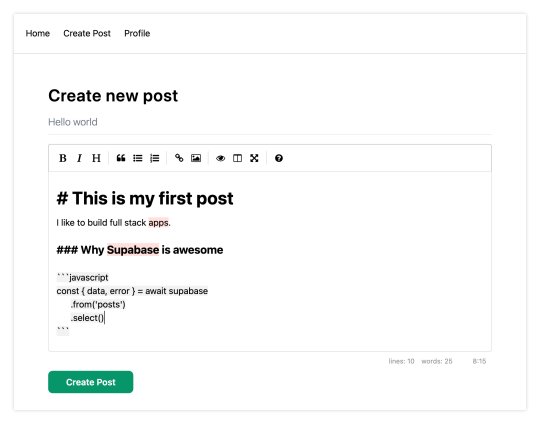
Next, let's create the create-post page. In the pages directory, create a page named create-post.js with the following code:
// pages/create-post.js import { useState } from 'react' import { v4 as uuid } from 'uuid' import { useRouter } from 'next/router' import dynamic from 'next/dynamic' import "easymde/dist/easymde.min.css" import { supabase } from '../api' const SimpleMDE = dynamic(() => import('react-simplemde-editor'), { ssr: false }) const initialState = { title: '', content: '' } function CreatePost() { const [post, setPost] = useState(initialState) const { title, content } = post const router = useRouter() function onChange(e) { setPost(() => ({ ...post, [e.target.name]: e.target.value })) } async function createNewPost() { if (!title || !content) return const user = supabase.auth.user() const id = uuid() post.id = id const { data } = await supabase .from('posts') .insert([ { title, content, user_id: user.id, user_email: user.email } ]) .single() router.push(`/posts/${data.id}`) } return ( <div> <h1 className="text-3xl font-semibold tracking-wide mt-6">Create new post</h1> <input onChange={onChange} name="title" placeholder="Title" value={post.title} className="border-b pb-2 text-lg my-4 focus:outline-none w-full font-light text-gray-500 placeholder-gray-500 y-2" /> <SimpleMDE value={post.content} onChange={value => setPost({ ...post, content: value })} /> <button type="button" className="mb-4 bg-green-600 text-white font-semibold px-8 py-2 rounded-lg" onClick={createNewPost} >Create Post</button> </div> ) } export default CreatePost
This component renders a Markdown editor, allowing users to create new posts.
The createNewPost function will use the supabase instance to create new posts using the local form state.
You may notice that we are not passing in any headers. This is because if a user is signed in, the Supabase client libraries automatically include the access token in the headers for a signed in user.
How to view a single post
We need to configure a page to view a single post.
This page uses getStaticPaths to dynamically create pages at build time based on the posts coming back from the API.
We also use the fallback flag to enable fallback routes for dynamic SSG page generation.
We use getStaticProps to enable the Post data to be fetched and then passed into the page as props at build time.
Create a new folder in the pages directory called posts and a file called [id].js within that folder. In pages/posts/[id].js, add the following code:
// pages/posts/[id].js import { useRouter } from 'next/router' import ReactMarkdown from 'react-markdown' import { supabase } from '../../api' export default function Post({ post }) { const router = useRouter() if (router.isFallback) { return <div>Loading...</div> } return ( <div> <h1 className="text-5xl mt-4 font-semibold tracking-wide">{post.title}</h1> <p className="text-sm font-light my-4">by {post.user_email}</p> <div className="mt-8"> <ReactMarkdown className='prose' children={post.content} /> </div> </div> ) } export async function getStaticPaths() { const { data, error } = await supabase .from('posts') .select('id') const paths = data.map(post => ({ params: { id: JSON.stringify(post.id) }})) return { paths, fallback: true } } export async function getStaticProps ({ params }) { const { id } = params const { data } = await supabase .from('posts') .select() .filter('id', 'eq', id) .single() return { props: { post: data } } }
How to query for and render the list of posts
Next, let's update index.js to fetch and render a list of posts:
// pages/index.js import { useState, useEffect } from 'react' import Link from 'next/link' import { supabase } from '../api' export default function Home() { const [posts, setPosts] = useState([]) const [loading, setLoading] = useState(true) useEffect(() => { fetchPosts() }, []) async function fetchPosts() { const { data, error } = await supabase .from('posts') .select() setPosts(data) setLoading(false) } if (loading) return <p className="text-2xl">Loading ...</p> if (!posts.length) return <p className="text-2xl">No posts.</p> return ( <div> <h1 className="text-3xl font-semibold tracking-wide mt-6 mb-2">Posts</h1> { posts.map(post => ( <Link key={post.id} href={`/posts/${post.id}`}> <div className="cursor-pointer border-b border-gray-300 mt-8 pb-4"> <h2 className="text-xl font-semibold">{post.title}</h2> <p className="text-gray-500 mt-2">Author: {post.user_email}</p> </div> </Link>) ) } </div> ) }
Let's test it out
We now have all of the pieces of our app ready to go, so let's try it out.
To run the local server, run the dev command from your terminal:
npm run dev
When the app loads, you should see the following screen:

To sign up, click on Profile and create a new account. You should receive an email link to confirm your account after signing up.
You can also create a new account by using the magic link.
Once you're signed in, you should be able to create new posts:
Navigating back to the home page, you should be able to see a list of the posts that you've created and be able to click on a link to the post to view it:

How to Edit Posts
Now that we have the app up and running, let's learn how to edit posts. To get started with this, let's create a new view that will fetch only the posts that the signed in user has created.
To do so, create a new file named my-posts.js in the root of the project with the following code:
// pages/my-posts.js import { useState, useEffect } from 'react' import Link from 'next/link' import { supabase } from '../api' export default function MyPosts() { const [posts, setPosts] = useState([]) useEffect(() => { fetchPosts() }, []) async function fetchPosts() { const user = supabase.auth.user() const { data } = await supabase .from('posts') .select('*') .filter('user_id', 'eq', user.id) setPosts(data) } async function deletePost(id) { await supabase .from('posts') .delete() .match({ id }) fetchPosts() } return ( <div> <h1 className="text-3xl font-semibold tracking-wide mt-6 mb-2">My Posts</h1> { posts.map((post, index) => ( <div key={index} className="border-b border-gray-300 mt-8 pb-4"> <h2 className="text-xl font-semibold">{post.title}</h2> <p className="text-gray-500 mt-2 mb-2">Author: {post.user_email}</p> <Link href={`/edit-post/${post.id}`}><a className="text-sm mr-4 text-blue-500">Edit Post</a></Link> <Link href={`/posts/${post.id}`}><a className="text-sm mr-4 text-blue-500">View Post</a></Link> <button className="text-sm mr-4 text-red-500" onClick={() => deletePost(post.id)} >Delete Post</button> </div> )) } </div> ) }
In the query for the posts, we use the user id to select only the posts created by the signed in user.
Next, create a new folder named edit-post in the pages directory. Then, create a file named [id].js in this folder.
In this file, we'll be accessing the id of the post from a route parameter. When the component loads, we will then use the post id from the route to fetch the post data and make it available for editing.
In this file, add the following code:
// pages/edit-post/[id].js import { useEffect, useState } from 'react' import { useRouter } from 'next/router' import dynamic from 'next/dynamic' import "easymde/dist/easymde.min.css" import { supabase } from '../../api' const SimpleMDE = dynamic(() => import('react-simplemde-editor'), { ssr: false }) function EditPost() { const [post, setPost] = useState(null) const router = useRouter() const { id } = router.query useEffect(() => { fetchPost() async function fetchPost() { if (!id) return const { data } = await supabase .from('posts') .select() .filter('id', 'eq', id) .single() setPost(data) } }, [id]) if (!post) return null function onChange(e) { setPost(() => ({ ...post, [e.target.name]: e.target.value })) } const { title, content } = post async function updateCurrentPost() { if (!title || !content) return await supabase .from('posts') .update([ { title, content } ]) router.push('/my-posts') } return ( <div> <h1 className="text-3xl font-semibold tracking-wide mt-6 mb-2">Edit post</h1> <input onChange={onChange} name="title" placeholder="Title" value={post.title} className="border-b pb-2 text-lg my-4 focus:outline-none w-full font-light text-gray-500 placeholder-gray-500 y-2" /> <SimpleMDE value={post.content} onChange={value => setPost({ ...post, content: value })} /> <button className="mb-4 bg-blue-600 text-white font-semibold px-8 py-2 rounded-lg" onClick={updateCurrentPost}>Update Post</button> </div> ) } export default EditPost
Now, add a new link to our navigation located in pages/_app.js:
// pages/_app.js { user && ( <Link href="/my-posts"> <span className="mr-6 cursor-pointer">My Posts</span> </Link> ) }
When running the app, you should be able to view your own posts, edit them, and delete them from the updated UI.
How to enable real-time updates
Now that we have the app running it's trivial to add real-time updates.
By default, Realtime is disabled on your database. Let's turn on Realtime for the posts table.
To do so, open the app dashboard and click on Databases -> Replication -> 0 Tables (under Source). Toggle on Realtime functionality for the posts table. Here is a video walkthrough of how you can do this for clarity.
Next, open src/index.js and update the useEffect hook with the following code:
useEffect(() => { fetchPosts() const mySubscription = supabase .from('posts') .on('*', () => fetchPosts()) .subscribe() return () => supabase.removeSubscription(mySubscription) }, [])
Now, we will be subscribed to realtime changes in the posts table.
The code for the app is located here.
Next Steps
By now you should have a good understanding of how to build full stack apps with Supabase and Next.js.
If you'd like to learn more about building full stack apps with Supabase, I'd check out the following resources.
If you read this far, tweet to the author to show them you care.
0 notes
Text
Options for legacy application modernization with Amazon Aurora and Amazon DynamoDB
Legacy application modernization can be complex. To reduce complexity and risk, you can choose an iterative approach by first replatforming the workload to Amazon Aurora. Then you can use the cloud-native integrations in Aurora to introduce other AWS services around the edges of the workload, often without changes to the application itself. This approach allows teams to experiment, iterate, and modernize legacy workloads iteratively. Modern cloud applications often use several database types working in unison, creating rich experiences for customers. To that end, the AWS database portfolio consists of multiple purpose-built database services that allow you to use the right tool for the right job based on the nature of the data, access patterns, and scalability requirements. For example, a modern cloud-native ecommerce solution can use a relational database for customer transactions and a nonrelational document database for product catalog and marketing promotions. If you’re migrating a legacy on-premises application to AWS, it can be challenging to identify the right purpose-built approach. Furthermore, introducing purpose-built databases to an application that runs on an old-guard commercial database might require extensive rearchitecture. In this post, I propose a modernization approach for legacy applications that make extensive use of semistructured data such as XML in a relational database. Starting in the mid-90s, developers began experimenting with storing XML in relational databases. Although commercial and open-source databases have since introduced native support for nonrelational data types, an impedance mismatch still exists between the relational SQL query language and access methods that may introduce data integrity and scalability challenges for your application. Retrieval of rows based on the value of an XML attribute can involve a resource-consuming full table scan, which may result in performance bottlenecks. Because enforcing accuracy and consistency of relationships between tables, or referential integrity, on nonrelational data types in a relational database isn’t possible, it may lead to orphaned records and data quality challenges. For such scenarios, I demonstrate a way to introduce Amazon DynamoDB alongside Amazon Aurora PostgreSQL-compatible edition, using the native integration of AWS Lambda with Aurora, without any modifications to your application’s code. DynamoDB is a fully managed key-value and document database with single-millisecond query performance, which makes it ideal to store and query nonrelational data at any scale. This approach paves the way to gradual rearchitecture, whereby new code paths can start to query DynamoDB following the Command-Query Responsibility Segregation pattern. When your applications are ready to cut over reads and writes to DynamoDB, you can remove XML from Aurora tables entirely. Solution overview The solution mirrors XML data stored in an Aurora PostgreSQL table to DynamoDB documents in an event-driven and durable way by using the Aurora integration with Lambda. Because of this integration, Lambda functions can be called directly from within an Aurora database instance by using stored procedures or user-defined functions. The following diagram details the solution architecture and event flows. The solution deploys the following resources and configurations: Amazon Virtual Private Cloud (Amazon VPC) with two public and private subnets across two AWS Availability Zones An Aurora PostgreSQL cluster in the private subnets, encrypted by an AWS KMS managed customer master key (CMK), and bootstrapped with a orders table with sample XML A pgAdmin Amazon Elastic Compute Cloud (Amazon EC2) instance deployed in the public subnet to access the Aurora cluster A DynamoDB table with on-demand capacity mode A Lambda function to transform XML payloads to DynamoDB documents and translate INSERT, UPDATE, and DELETE operations from Aurora PostgreSQL to DynamoDB An Amazon Simple Queue Service (Amazon SQS) queue serving as a dead-letter queue for the Lambda function A secret in AWS Secrets Manager to securely store Aurora admin account credentials AWS Identity and Access Management (IAM) roles granting required permissions to the Aurora cluster, Lambda function and pgAdmin EC2 instance The solution registers the Lambda function with the Aurora cluster to enable event-driven offloading of data from the postgres.orders table to DynamoDB, as numbered in the preceding diagram: When an INSERT, UPDATE, or DELETE statement is run on the Aurora orders table, the PostgreSQL trigger function invokes the Lambda function asynchronously for each row, after it’s committed. Every function invocation receives the operation code (TG_OP), and—as applicable—the new row (NEW) and the old row (OLD) as payload. The Lambda function parses the payload, converts XML to JSON, and performs the DynamoDB PutItem action in case of INSERT or UPDATE and the DeleteItem action in case of DELETE. If an INSERT, UPDATE or DELETE event fails all processing attempts or expires without being processed, it’s stored in the SQS dead-letter queue for further processing. The source postgres.orders table stores generated order data combining XML with relational attributes (see the following example of a table row with id = 1). You can choose which columns or XML attributes get offloaded to DynamoDB by modifying the Lambda function code. In this solution, the whole table row, including XML, gets offloaded to simplify querying and enforce data integrity (see the following example of a corresponding DynamoDB item with id = 1). Prerequisites Before deploying this solution, make sure that you have access to an AWS account with permissions to deploy the AWS services used in this post through AWS CloudFormation. Costs are associated with using these resources. See AWS Pricing for details. To minimize costs, I demonstrate how to clean up the AWS resources at the end of this post. Deploy the solution To deploy the solution with CloudFormation, complete the following steps: Choose Launch Stack. By default, the solution deploys to the AWS Region, us-east-2, but you can change this Region. Make sure you deploy to a Region where Aurora PostgreSQL is available. For AuroraAdminPassword, enter an admin account password for your Aurora cluster, keeping the defaults for other parameters. Acknowledge that CloudFormation might create AWS Identity and Access Management (IAM) resources. Choose Create stack. The deployment takes around 20 minutes. When the deployment has completed, note the provisioned stack’s outputs on the Outputs The outputs are as follows: LambdaConsoleLink and DynamoDBTableConsoleLink contain AWS Management Console links to the provisioned Lambda function and DynamoDB table, respectively. You can follow these links to explore the function’s code and review the DynamoDB table items. EC2InstanceConnectURI contains a deep link to connect to the pgAdmin EC2 instance using SSH via EC2 Instance Connect. The EC2 instance has PostgreSQL tooling installed; you can log in and use psql to run queries from the command line. AuroraPrivateEndpointAddress and AuroraPrivateEndpointPort contain the writer endpoint address and port for the Aurora cluster. This is a private endpoint only accessible from the pgAdmin EC2 instance. pgAdminURL is the internet-facing link to access the pgAdmin instance. Test the solution To test the solution, complete the following steps: Open the DynamoDB table by using the DynamoDBTableConsoleLink link from the stack outputs. Some data is already in the DynamoDB table because we ran INSERT operations on the Aurora database instance as part of bootstrapping. Open a new browser tab and navigate to the pgAdminURL link to access the pgAdmin instance. The Aurora database instance should already be registered. To connect to the Aurora database instance, expand the Servers tree and enter the AuroraAdminPassword you used to create the stack. Choose the postgres database and on the Tools menu, and then choose Query Tool to start a SQL session. Run the following INSERT, UPDATE, and DELETE statements one by one, and return to the DynamoDB browser tab to observe how changes in the Aurora postgres.orders table are reflected in the DynamoDB table. -- UPDATE example UPDATE orders SET order_status = 'pending' WHERE id < 5; -- DELETE example DELETE FROM orders WHERE id > 10; -- INSERT example INSERT INTO orders (order_status, order_data) VALUES ('malformed_order', ' error retrieving kindle id '); The resulting set of items in the DynamoDB table reflects the changes in the postgres.orders table. You can further explore the two triggers (sync_insert_update_delete_to_dynamodb and sync_truncate_to_dynamodb) and the trigger function sync_to_dynamodb() that makes calls to the Lambda function. In the pgAdmin browser tab, on the Tools menu, choose Search Objects. Search for sync. Choose (double-click) a search result to reveal it in the pgAdmin object hierarchy. To review the underlying statements, choose an object (right-click) and choose CREATE Script. Security of the solution The solution incorporates the following AWS security best practices: Encryption at rest – The Aurora cluster is encrypted by using an AWS KMS managed customer master key (CMK). Security – AWS Secrets Manager is used to store and manage Aurora admin account credentials. Identity and access management – The least privilege principle is followed when creating IAM policies. Network isolation – For additional network access control, the Aurora cluster is deployed to two private subnets with a security group permitting traffic only from the pgAdmin EC2 instance. To further harden this solution, you can introduce VPC endpoints to ensure private connectivity between the Lambda function, Amazon SQS, and DynamoDB. Reliability of the solution Aurora is designed to be reliable, durable, and fault tolerant. The Aurora cluster in this solution is deployed across two Availability Zones, with the primary instance in Availability Zone 1 and a replica in Availability Zone 2. In case of a failure event, the replica is promoted to the primary, the cluster DNS endpoint continues to serve connection requests, and the calls to the Lambda function continue in Availability Zone 2 (refer to the solution architecture earlier in this post). Aurora asynchronous calls to Lambda retry on errors, and when a function returns an error after running, Lambda by default retries two more times by using exponential backoff. With the maximum retry attempts parameter, you can configure the maximum number of retries between 0 and 2. Moreover, if a Lambda function returns an error before running (for example, due to lack of available concurrency), Lambda by default keeps retrying for up to 6 hours. With the maximum event age parameter, you can configure this duration between 60 seconds and 6 hours. When the maximum retry attempts or the maximum event age is reached, an event is discarded and persisted in the SQS dead-letter queue for reprocessing. It’s important to ensure that the code of the Lambda function is idempotent. For example, you can use optimistic locking with version number in DynamoDB by ensuring the OLD value matches the document stored in DynamoDB and rejecting the modification otherwise. Reprocessing of the SQS dead-letter queue is beyond the scope of this solution, and its implementation varies between use cases. It’s important to ensure that the reprocessing logic performs timestamp or version checks to prevent a newer item in DynamoDB from being overwritten by an older item from the SQS dead-letter queue. This solution preserves the atomicity of a SQL transaction as a single, all-or-nothing operation. Lambda calls are deferred until a SQL transaction has been successfully committed by using INITIALLY DEFERRED PostgreSQL triggers. Performance efficiency of the solution Aurora integration with Lambda can introduce performance overhead. The amount of overhead depends on the complexity of the PostgreSQL trigger function and the Lambda function itself, and I recommend establishing a performance baseline by benchmarking your workload with Lambda integration disabled. Upon reenabling the Lambda integration, use Amazon CloudWatch and PostgreSQL Statistics Collector to analyze the following: Aurora CPU and memory metrics, and resize the Aurora cluster accordingly Lambda concurrency metrics, requesting a quota increase if you require more than 1,000 concurrent requests Lambda duration and success rate metrics, allocating more memory if necessary DynamoDB metrics to ensure no throttling is taking place on the DynamoDB side PostgreSQL sustained and peak throughput in rows or transactions per second If your Aurora workload is bursty, consider Lambda provisioned concurrency to avoid throttling To illustrate the performance impact of enabling Lambda integration, I provisioned two identical environments in us-east-2 with the following parameters: AuroraDBInstanceClass – db.r5.xlarge pgAdminEC2InstanceType – m5.xlarge AuroraEngineVersion – 12.4 Both environments ran a simulation of a write-heavy workload with 100 INSERT, 20 SELECT, 200 UPDATE, and 20 DELETE threads running queries in a tight loop on the Aurora postgres.orders table. One of the environments had Lambda integration disabled. After 24 hours of stress testing, I collected the metrics using CloudWatch metrics, PostgreSQL Statistics Collector, and Amazon RDS Performance Insights. From an Aurora throughput perspective, enabling Lambda integration on the postgres.orders table reduces the peak read and write throughput to 69% of the baseline measurement (see rows 1 and 2 in the following table). # Throughput measurement INSERT/sec UPDATE/sec DELETE/sec SELECT/sec % of baseline throughput 1 db.r5.xlarge without Lambda integration 772 1,472 159 10,084 100% (baseline) 2 db.r5.xlarge with Lambda integration 576 887 99 7,032 69% 3 db.r5.2xlarge with Lambda integration 729 1,443 152 10,513 103% 4 db.r6g.xlarge with Lambda integration 641 1,148 128 8,203 81% To fully compensate for the reduction in throughput, one option is to double the vCPU count and memory size and change to the higher db.r5.2xlarge Aurora instance class at an increase in on-demand cost (row 3 in the preceding table). Alternatively, you can choose to retain the vCPU count and memory size, and move to the AWS Graviton2 processor-based db.r6g.xlarge Aurora instance class. Because of Graviton’s better price/performance for Aurora, the peak read and write throughput is at 81% of the baseline measurement (row 4 in the preceding table), at a 10% reduction in on-demand cost in us-east-2. As shown in the following graph, the DynamoDB table consumed between 2,630 and 2,855 write capacity units, and Lambda concurrency fluctuated between 259 and 292. No throttling was detected. You can reproduce these results by running a load generator script located in /tmp/perf.py on the pgAdmin EC2 instance. # Lambda integration on /tmp/perf.py 100 20 200 20 true # Lambda integration off /tmp/perf.py 100 20 200 20 false Additional considerations This solution doesn’t cover the initial population of DynamoDB with XML data from Aurora. To achieve this, you can use AWS Database Migration Service (AWS DMS) or CREATE TABLE AS. Be aware of certain service limits before using this solution. The Lambda payload limit is 256 KB for asynchronous invocation, and the DynamoDB maximum item size limit is 400 KB. If your Aurora table stores more than 256 KB of XML data per row, an alternative approach is to use Amazon DocumentDB (with MongoDB compatibility), which can store up to 16 MB per document, or offload XML to Amazon Simple Storage Service (Amazon S3). Clean up To avoid incurring future charges, delete the CloudFormation stack. In the CloudFormation console, change the Region if necessary, choose the stack, and then choose Delete. It can take up to 20 minutes for the clean up to complete. Summary In this post, I proposed a modernization approach for legacy applications that make extensive use of XML in a relational database. Heavy use of nonrelational objects in a relational database can lead to scalability issues, orphaned records, and data quality challenges. By introducing DynamoDB alongside Aurora via native Lambda integration, you can gradually rearchitect legacy applications to query DynamoDB following the Command-Query Responsibility Segregation pattern. When your applications are ready to cut over reads and writes to DynamoDB, you can remove XML from Aurora tables entirely. You can extend this approach to offload JSON, YAML, and other nonrelational object types. As next steps, I recommend reviewing the Lambda function code and exploring the multitude of ways Lambda can be invoked from Aurora, such as synchronously; before, after, and instead of a row being committed; per SQL statement; or per row. About the author Igor is an AWS enterprise solutions architect, and he works closely with Australia’s largest financial services organizations. Prior to AWS, Igor held solution architecture and engineering roles with tier-1 consultancies and software vendors. Igor is passionate about all things data and modern software engineering. Outside of work, he enjoys writing and performing music, a good audiobook, or a jog, often combining the latter two. https://aws.amazon.com/blogs/database/options-for-legacy-application-modernization-with-amazon-aurora-and-amazon-dynamodb/
0 notes
Text
Client For Postgresql Mac

Advertisement
Email Effects X v.1.6.9Email Effects X 1.6.9 is a useful program specially designed for the Mac OS or Windows 95/98/NT for getting the most out of email. With it, you can send pictures, drawings and tables with simple plain text. It is also the world's premier ASCII art ..
JaMOOka v.2.01JaMOOka is an applet-based MOO client. Designed for JHCore MOOs, it uses Amy Bruckman's MacMOOse utilities and the MCP 2.1 protocol to facilitate a number of advanced MOO editing and programming tasks through client ..
Sesame Windows Client v.1.0A Windows GUI application for RDF. SWC is a client tool for a Sesame 2 RDF server or SPARQL endpoint, and can be used as a out-of-the-box local triplestore. It offers advanced SPARQL querying and handles Sesame server administrative tasks.
Microsoft Remote Desktop Connection Client v.2.0 Beta 3Remote Desktop Connection Client for Mac 2 lets you connect from your Macintosh computer to a Windows-based computer or to multiple Windows-based computers at the same time. After you have connected, you can work with applications and files on the ..
Citrix ICA Client v.10.00.603Citrix ICA Client 10.00.603 is a communication tool which can help users access any Windows-based application running on the server. All the user needs is a low-bandwidth connection (21kilobytes) and the ICA client, which is downloadable free from ..
VPN-X Client for Mac OS v.2.4.1.44VPN-X:Java/ Cross-platform P2P/SSL/TLS VPN solution. Client has an individual Virtual IP Address.It can help employees on errands use company LAN resource, help your friends access your computer play LAN games, all the network data is encrypted and ..
Imperial Realms Standard Client v.0.4.1imperial_realms is the standard client for the Imperial Realms multi-player online strategy game. It is open-source and runs on Windows, Linux and other operating ..
Mahogany mail and news client v.0.67An extremely configurable portable GUI email and news client for Windows/Unix (including OS X) with IMAP, POP3, SMTP, and NNTP support, SSL, flexible address database, Python scripting, powerful filtering, and many other features for advanced ..
Mud Magic Client v.1.9OpenSource mud client designed to work on both windows,linux and MAC OS X. Written in Gtk+ and C with SQLLite, Python, MSP, MXP, HTML, and ZMP support. Provides plugin support, automapper functionality, triggers, aliases and ..
STUN Client and Server v.0.97This project implements a simple STUN server and client on Windows, Linux, and Solaris. The STUN protocol (Simple Traversal of UDP through NATs) is described in the IETF RFC 3489, available at ..
Scalable Java Database Client v.1.0The scalable Java DB Client is a customizable java application where fields and general DB info is entered in a config file and the proper GUI is generated at run-time. Entries can then be added, and a final submit/update to the (PostgreSQL/MySQL) ..
Vicomsoft FTP Client v.4.6.0FTP Client 4.6 represents the culmination of over 10 years experience in FTP transfers on the Mac platform. Extreme performance and unrivaled reliability, married with a sleek and intuitive user interface is the result.
Windows 7 Utilities v.7.54Windows 7 Utilities Suite is an award winning collection of tools to optimize and speedup your system performance.
Windows 7 Cleaner v.4.56Windows 7 Cleaner suite is an award winning collection of tools to optimize and speedup your system performance. this Windows 7 Cleaner suite contains utilities to clean registry, temporary files on your disks, erase your application and internet ..
Windows 7 Optimizer v.4.56Windows 7 Optimizer can quickly make your Windows 7 operating system (both 32 bit and 64 bit) faster, easier to use, and more secure. And all operations performed on the operating system are completely safe, because all changes are monitored by ..
Windows 7 System Optimizer v.6.0Windows 7 system optimizer: this is a multi-functional system performance and optimization suite for Windows 7. This collection of tools lets you supercharge your PC's performance, enhance its security, tweak and optimize its settings, and customize ..
Windows 7 System Suite v.6.3Slow down, freeze, crash, and security threats are over. Windows 7 system suite is a comprehensive PC care utility that takes a one-click approach to help protect, repair, and optimize your computer. It provides an all-in-one and super convenient ..
Windows System Suite v.6.1Windows System Suite is power package All-in-one application for cleaning, tuning, optimizing, and fixing PC errors for high performance. Direct access to a wealth of Windows configuration and performance settings many of them difficult or impossible ..
Windows XP Cleaner v.7.0Windows XP Cleaner is a suite of tools to clean your system; it includes Disk Cleaner, Registry Cleaner, History Cleaner, BHO Remover, Duplicate files Cleaner and Startup Cleaner. this Windows XP Cleaner suite allows you to remove unneeded files and ..
Icons for Windows 7 and Vista v.2013.1Icons for Windows 7 and Vista is an ultimately comprehensive collection of top-quality interface icons that will be a perfect fit for any modern website, online service, mobile or desktop application.
GUI Client Apps. There are many clients for PostgreSQL on the Mac. You can find many of them in the Community Guide to PostgreSQL GUI Tools in the PostgreSQL wiki. Some of them are quite powerful; some are still a bit rough. Postgres.app is a simple, native macOS app that runs in the menubar without the need of an installer. Open the app, and you have a PostgreSQL server ready and awaiting new connections. Close the app, and the server shuts down. How To Install Postgresql On Mac. I started off programming Ruby on Rails applications on a Windows machine with an Ubuntu virtual machine running on top. But when I got my first job at a startup in California, I received a brand new shiny Macbook laptop.
Download CCleaner for free. Clean your PC of temporary files, tracking cookies and browser junk! Get the latest version here. CCleaner is the number-one tool for fixing a slow Mac Download Ccleaner Mac for free and enjoy! Download Ccleaner Mac. Ccleaner for Mac. Mac running slow? A Mac collects junk and unused files just like a PC. Find and remove these files with the click of a button so your Mac can run faster. Speed up boot times with easy management of Startup items. CCleaner for Mac! Clean up your Mac and keep your browsing behaviour private with CCleaner, the world's favourite computer cleaning tool. Introducing CCleaner for Mac - Learn about the basics of CCleaner for Mac, and what it can do for you. Using CCleaner for Mac - Find out how to run every aspect of CCleaner for Mac. CCleaner for Mac Rules - Explore what each option in the Mac OS X and Applications tabs and how you can customize it to fit your needs. CCleaner for Mac Settings - Learn about CCleaner for Mac's other options. Ccleaner for mac 10.6.8. Download CCleaner for Mac 1.17.603 for Mac. Fast downloads of the latest free software!
Postgresql Client Windows software by TitlePopularityFreewareLinuxMac
Sequel Pro Postgres
Today's Top Ten Downloads for Postgresql Client Windows

Mac Install Postgresql
Citrix ICA Client Citrix ICA Client 10.00.603 is a communication tool which
Folx torrent client With Folx torrent client downloading and creating torrents
Windows 7 System Suite Slow down, freeze, crash, and security threats are over.
Windows XP Cleaner Windows XP Cleaner is a suite of tools to clean your
Windows 7 Utilities Windows 7 Utilities Suite is an award winning collection
Icons for Windows 7 and Vista Icons for Windows 7 and Vista is an ultimately
Windows 7 System Optimizer Windows 7 system optimizer: this is a multi-functional
VanDyke ClientPack for Windows and UNIX VanDyke ClientPack is a suite of tools for securely
VPN-X Client for Mac OS VPN-X:Java/ Cross-platform P2P/SSL/TLS VPN solution. Client
Windows Desktop Icons High quality professional royalty-free stock windows
Best Postgresql Client For Mac
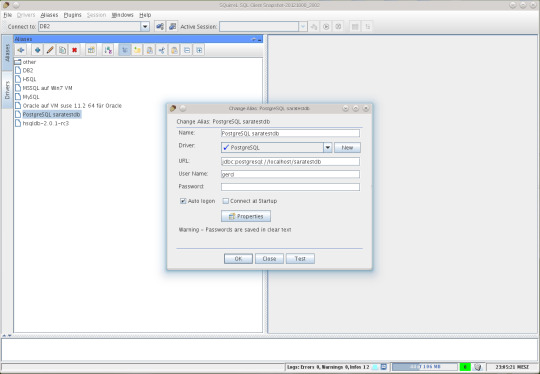
Postico For Windows
Visit HotFiles@Winsite for more of the top downloads here at WinSite!
0 notes
Text
Let’s Create Our Own Authentication API with Nodejs and GraphQL
Authentication is one of the most challenging tasks for developers just starting with GraphQL. There are a lot of technical considerations, including what ORM would be easy to set up, how to generate secure tokens and hash passwords, and even what HTTP library to use and how to use it.
In this article, we’ll focus on local authentication. It’s perhaps the most popular way of handling authentication in modern websites and does so by requesting the user’s email and password (as opposed to, say, using Google auth.)
Moreover, This article uses Apollo Server 2, JSON Web Tokens (JWT), and Sequelize ORM to build an authentication API with Node.
Handling authentication
As in, a log in system:
Authentication identifies or verifies a user.
Authorization is validating the routes (or parts of the app) the authenticated user can have access to.
The flow for implementing this is:
The user registers using password and email
The user’s credentials are stored in a database
The user is redirected to the login when registration is completed
The user is granted access to specific resources when authenticated
The user’s state is stored in any one of the browser storage mediums (e.g. localStorage, cookies, session) or JWT.
Pre-requisites
Before we dive into the implementation, here are a few things you’ll need to follow along.
Node 6 or higher
Yarn (recommended) or NPM
GraphQL Playground
Basic Knowledge of GraphQL and Node
…an inquisitive mind!
Dependencies
This is a big list, so let’s get into it:
Apollo Server: An open-source GraphQL server that is compatible with any kind of GraphQL client. We won’t be using Express for our server in this project. Instead, we will use the power of Apollo Server to expose our GraphQL API.
bcryptjs: We want to hash the user passwords in our database. That’s why we will use bcrypt. It relies on Web Crypto API‘s getRandomValues interface to obtain secure random numbers.
dotenv: We will use dotenv to load environment variables from our .env file.
jsonwebtoken: Once the user is logged in, each subsequent request will include the JWT, allowing the user to access routes, services, and resources that are permitted with that token. jsonwebtokenwill be used to generate a JWT which will be used to authenticate users.
nodemon: A tool that helps develop Node-based applications by automatically restarting the node application when changes in the directory are detected. We don’t want to be closing and starting the server every time there’s a change in our code. Nodemon inspects changes every time in our app and automatically restarts the server.
mysql2: An SQL client for Node. We need it connect to our SQL server so we can run migrations.
sequelize: Sequelize is a promise-based Node ORM for Postgres, MySQL, MariaDB, SQLite and Microsoft SQL Server. We will use Sequelize to automatically generate our migrations and models.
sequelize cli: We will use Sequelize CLI to run Sequelize commands. Install it globally with yarn add --global sequelize-cli in the terminal.
Setup directory structure and dev environment
Let’s create a brand new project. Create a new folder and this inside of it:
yarn init -y
The -y flag indicates we are selecting yes to all the yarn init questions and using the defaults.
We should also put a package.json file in the folder, so let’s install the project dependencies:
yarn add apollo-server bcrpytjs dotenv jsonwebtoken nodemon sequelize sqlite3
Next, let’s add Babeto our development environment:
yarn add babel-cli babel-preset-env babel-preset-stage-0 --dev
Now, let’s configure Babel. Run touch .babelrc in the terminal. That creates and opens a Babel config file and, in it, we’ll add this:
{ "presets": ["env", "stage-0"] }
It would also be nice if our server starts up and migrates data as well. We can automate that by updating package.json with this:
"scripts": { "migrate": " sequelize db:migrate", "dev": "nodemon src/server --exec babel-node -e js", "start": "node src/server", "test": "echo \"Error: no test specified\" && exit 1" },
Here’s our package.json file in its entirety at this point:
{ "name": "graphql-auth", "version": "1.0.0", "main": "index.js", "scripts": { "migrate": " sequelize db:migrate", "dev": "nodemon src/server --exec babel-node -e js", "start": "node src/server", "test": "echo \"Error: no test specified\" && exit 1" }, "dependencies": { "apollo-server": "^2.17.0", "bcryptjs": "^2.4.3", "dotenv": "^8.2.0", "jsonwebtoken": "^8.5.1", "nodemon": "^2.0.4", "sequelize": "^6.3.5", "sqlite3": "^5.0.0" }, "devDependencies": { "babel-cli": "^6.26.0", "babel-preset-env": "^1.7.0", "babel-preset-stage-0": "^6.24.1" } }
Now that our development environment is set up, let’s turn to the database where we’ll be storing things.
Database setup
We will be using MySQL as our database and Sequelize ORM for our relationships. Run sequelize init (assuming you installed it globally earlier). The command should create three folders: /config /models and /migrations. At this point, our project directory structure is shaping up.
Let’s configure our database. First, create a .env file in the project root directory and paste this:
NODE_ENV=development DB_HOST=localhost DB_USERNAME= DB_PASSWORD= DB_NAME=
Then go to the /config folder we just created and rename the config.json file in there to config.js. Then, drop this code in there:
require('dotenv').config() const dbDetails = { username: process.env.DB_USERNAME, password: process.env.DB_PASSWORD, database: process.env.DB_NAME, host: process.env.DB_HOST, dialect: 'mysql' } module.exports = { development: dbDetails, production: dbDetails }
Here we are reading the database details we set in our .env file. process.env is a global variable injected by Node and it’s used to represent the current state of the system environment.
Let’s update our database details with the appropriate data. Open the SQL database and create a table called graphql_auth. I use Laragon as my local server and phpmyadmin to manage database tables.
What ever you use, we’ll want to update the .env file with the latest information:
NODE_ENV=development DB_HOST=localhost DB_USERNAME=graphql_auth DB_PASSWORD= DB_NAME=<your_db_username_here>
Let’s configure Sequelize. Create a .sequelizerc file in the project’s root and paste this:
const path = require('path')
module.exports = { config: path.resolve('config', 'config.js') }
Now let’s integrate our config into the models. Go to the index.js in the /models folder and edit the config variable.
const config = require(__dirname + '/../../config/config.js')[env]
Finally, let’s write our model. For this project, we need a User model. Let’s use Sequelize to auto-generate the model. Here’s what we need to run in the terminal to set that up:
sequelize model:generate --name User --attributes username:string,email:string,password:string
Let’s edit the model that creates for us. Go to user.js in the /models folder and paste this:
'use strict'; module.exports = (sequelize, DataTypes) => { const User = sequelize.define('User', { username: { type: DataTypes.STRING, }, email: { type: DataTypes.STRING, }, password: { type: DataTypes.STRING, } }, {}); return User; };
Here, we created attributes and fields for username, email and password. Let’s run a migration to keep track of changes in our schema:
yarn migrate
Let’s now write the schema and resolvers.
Integrate schema and resolvers with the GraphQL server
In this section, we’ll define our schema, write resolver functions and expose them on our server.
The schema
In the src folder, create a new folder called /schema and create a file called schema.js. Paste in the following code:
const { gql } = require('apollo-server') const typeDefs = gql` type User { id: Int! username: String email: String! } type AuthPayload { token: String! user: User! } type Query { user(id: Int!): User allUsers: [User!]! me: User } type Mutation { registerUser(username: String, email: String!, password: String!): AuthPayload! login (email: String!, password: String!): AuthPayload! } ` module.exports = typeDefs
Here we’ve imported graphql-tag from apollo-server. Apollo Server requires wrapping our schema with gql.
The resolvers
In the src folder, create a new folder called /resolvers and create a file in it called resolver.js. Paste in the following code:
const bcrypt = require('bcryptjs') const jsonwebtoken = require('jsonwebtoken') const models = require('../models') require('dotenv').config() const resolvers = { Query: { async me(_, args, { user }) { if(!user) throw new Error('You are not authenticated') return await models.User.findByPk(user.id) }, async user(root, { id }, { user }) { try { if(!user) throw new Error('You are not authenticated!') return models.User.findByPk(id) } catch (error) { throw new Error(error.message) } }, async allUsers(root, args, { user }) { try { if (!user) throw new Error('You are not authenticated!') return models.User.findAll() } catch (error) { throw new Error(error.message) } } }, Mutation: { async registerUser(root, { username, email, password }) { try { const user = await models.User.create({ username, email, password: await bcrypt.hash(password, 10) }) const token = jsonwebtoken.sign( { id: user.id, email: user.email}, process.env.JWT_SECRET, { expiresIn: '1y' } ) return { token, id: user.id, username: user.username, email: user.email, message: "Authentication succesfull" } } catch (error) { throw new Error(error.message) } }, async login(_, { email, password }) { try { const user = await models.User.findOne({ where: { email }}) if (!user) { throw new Error('No user with that email') } const isValid = await bcrypt.compare(password, user.password) if (!isValid) { throw new Error('Incorrect password') } // return jwt const token = jsonwebtoken.sign( { id: user.id, email: user.email}, process.env.JWT_SECRET, { expiresIn: '1d'} ) return { token, user } } catch (error) { throw new Error(error.message) } } },
} module.exports = resolvers
That’s a lot of code, so let’s see what’s happening in there.
First we imported our models, bcrypt and jsonwebtoken, and then initialized our environmental variables.
Next are the resolver functions. In the query resolver, we have three functions (me, user and allUsers):
me query fetches the details of the currently loggedIn user. It accepts a user object as the context argument. The context is used to provide access to our database which is used to load the data for a user by the ID provided as an argument in the query.
user query fetches the details of a user based on their ID. It accepts id as the context argument and a user object.
alluser query returns the details of all the users.
user would be an object if the user state is loggedIn and it would be null, if the user is not. We would create this user in our mutations.
In the mutation resolver, we have two functions (registerUser and loginUser):
registerUser accepts the username, email and password of the user and creates a new row with these fields in our database. It’s important to note that we used the bcryptjs package to hash the users password with bcrypt.hash(password, 10). jsonwebtoken.sign synchronously signs the given payload into a JSON Web Token string (in this case the user id and email). Finally, registerUser returns the JWT string and user profile if successful and returns an error message if something goes wrong.
login accepts email and password , and checks if these details match with the one that was supplied. First, we check if the email value already exists somewhere in the user database.
models.User.findOne({ where: { email }}) if (!user) { throw new Error('No user with that email') }
Then, we use bcrypt’s bcrypt.compare method to check if the password matches.
const isValid = await bcrypt.compare(password, user.password) if (!isValid) { throw new Error('Incorrect password') }
Then, just like we did previously in registerUser, we use jsonwebtoken.sign to generate a JWT string. The login mutation returns the token and user object.
Now let’s add the JWT_SECRET to our .env file.
JWT_SECRET=somereallylongsecret
The server
Finally, the server! Create a server.js in the project’s root folder and paste this:
const { ApolloServer } = require('apollo-server') const jwt = require('jsonwebtoken') const typeDefs = require('./schema/schema') const resolvers = require('./resolvers/resolvers') require('dotenv').config() const { JWT_SECRET, PORT } = process.env const getUser = token => { try { if (token) { return jwt.verify(token, JWT_SECRET) } return null } catch (error) { return null } } const server = new ApolloServer({ typeDefs, resolvers, context: ({ req }) => { const token = req.get('Authorization') || '' return { user: getUser(token.replace('Bearer', ''))} }, introspection: true, playground: true }) server.listen({ port: process.env.PORT || 4000 }).then(({ url }) => { console.log(`🚀 Server ready at ${url}`); });
Here, we import the schema, resolvers and jwt, and initialize our environment variables. First, we verify the JWT token with verify. jwt.verify accepts the token and the JWT secret as parameters.
Next, we create our server with an ApolloServer instance that accepts typeDefs and resolvers.
We have a server! Let’s start it up by running yarn dev in the terminal.
Testing the API
Let’s now test the GraphQL API with GraphQL Playground. We should be able to register, login and view all users — including a single user — by ID.
We’ll start by opening up the GraphQL Playground app or just open localhost://4000 in the browser to access it.
Mutation for register user
mutation { registerUser(username: "Wizzy", email: "[email protected]", password: "wizzyekpot" ){ token } }
We should get something like this:
{ "data": { "registerUser": { "token": "eyJhbGciOiJIUzI1NiIsInR5cCI6IkpXVCJ9.eyJpZCI6MTUsImVtYWlsIjoiZWtwb3RAZ21haWwuY29tIiwiaWF0IjoxNTk5MjQwMzAwLCJleHAiOjE2MzA3OTc5MDB9.gmeynGR9Zwng8cIJR75Qrob9bovnRQT242n6vfBt5PY" } } }
Mutation for login
Let’s now log in with the user details we just created:
mutation { login(email:"[email protected]" password:"wizzyekpot"){ token } }
We should get something like this:
{ "data": { "login": { "token": "eyJhbGciOiJIUzI1NiIsInR5cCI6IkpXVCJ9.eyJpZCI6MTUsImVtYWlsIjoiZWtwb3RAZ21haWwuY29tIiwiaWF0IjoxNTk5MjQwMzcwLCJleHAiOjE1OTkzMjY3NzB9.PDiBKyq58nWxlgTOQYzbtKJ-HkzxemVppLA5nBdm4nc" } } }
Awesome!
Query for a single user
For us to query a single user, we need to pass the user token as authorization header. Go to the HTTP Headers tab.
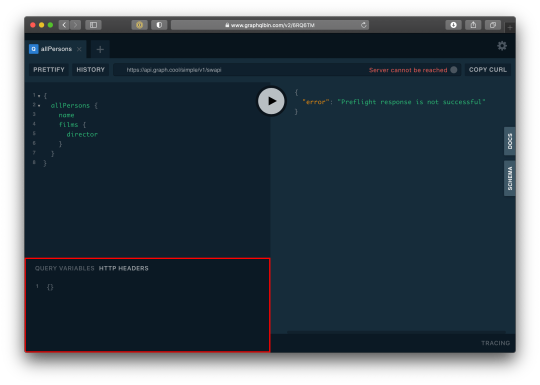
…and paste this:
{ "Authorization": "eyJhbGciOiJIUzI1NiIsInR5cCI6IkpXVCJ9.eyJpZCI6MTUsImVtYWlsIjoiZWtwb3RAZ21haWwuY29tIiwiaWF0IjoxNTk5MjQwMzcwLCJleHAiOjE1OTkzMjY3NzB9.PDiBKyq58nWxlgTOQYzbtKJ-HkzxemVppLA5nBdm4nc" }
Here’s the query:
query myself{ me { id email username } }
And we should get something like this:
{ "data": { "me": { "id": 15, "email": "[email protected]", "username": "Wizzy" } } }
Great! Let’s now get a user by ID:
query singleUser{ user(id:15){ id email username } }
And here’s the query to get all users:
{ allUsers{ id username email } }
Summary
Authentication is one of the toughest tasks when it comes to building websites that require it. GraphQL enabled us to build an entire Authentication API with just one endpoint. Sequelize ORM makes creating relationships with our SQL database so easy, we barely had to worry about our models. It’s also remarkable that we didn’t require a HTTP server library (like Express) and use Apollo GraphQL as middleware. Apollo Server 2, now enables us to create our own library-independent GraphQL servers!
Check out the source code for this tutorial on GitHub.
The post Let’s Create Our Own Authentication API with Nodejs and GraphQL appeared first on CSS-Tricks.
You can support CSS-Tricks by being an MVP Supporter.
Let’s Create Our Own Authentication API with Nodejs and GraphQL published first on https://deskbysnafu.tumblr.com/
0 notes
Text
WIP:How to Finally Install Airflow
I’m trying to follow the quick start guide here https://airflow.apache.org/docs/stable/start.html, but was unable to install airflow using pip. I struggled to figure out what the underlying issue was, but saw a suggestion to just create a virtual environment instead, and since this is ideal anyway - I replaced pip install apache-airflow with pipenv install apache-airflow
There were some errors using the default sequential error: ERROR - Exception when executing execute_helper Traceback (most recent call last): File "/Users/amyeds/.local/share/virtualenvs/airflow-xK7S4dw5/lib/python3.8/site-packages/airflow/jobs/scheduler_job.py", line 1382, in _execute self._execute_helper() File "/Users/amyeds/.local/share/virtualenvs/airflow-xK7S4dw5/lib/python3.8/site-packages/airflow/jobs/scheduler_job.py", line 1415, in _execute_helper self.processor_agent.start() File "/Users/amyeds/.local/share/virtualenvs/airflow-xK7S4dw5/lib/python3.8/site-packages/airflow/utils/dag_processing.py", line 554, in start self._process.start() File "/usr/local/opt/[email protected]/Frameworks/Python.framework/Versions/3.8/lib/python3.8/multiprocessing/process.py", line 121, in start self._popen = self._Popen(self) File "/usr/local/opt/[email protected]/Frameworks/Python.framework/Versions/3.8/lib/python3.8/multiprocessing/context.py", line 224, in _Popen return _default_context.get_context().Process._Popen(process_obj) File "/usr/local/opt/[email protected]/Frameworks/Python.framework/Versions/3.8/lib/python3.8/multiprocessing/context.py", line 283, in _Popen return Popen(process_obj) File "/usr/local/opt/[email protected]/Frameworks/Python.framework/Versions/3.8/lib/python3.8/multiprocessing/popen_spawn_posix.py", line 32, in __init__ super().__init__(process_obj) File "/usr/local/opt/[email protected]/Frameworks/Python.framework/Versions/3.8/lib/python3.8/multiprocessing/popen_fork.py", line 19, in __init__ self._launch(process_obj) File "/usr/local/opt/[email protected]/Frameworks/Python.framework/Versions/3.8/lib/python3.8/multiprocessing/popen_spawn_posix.py", line 47, in _launch reduction.dump(process_obj, fp) File "/usr/local/opt/[email protected]/Frameworks/Python.framework/Versions/3.8/lib/python3.8/multiprocessing/reduction.py", line 60, in dump ForkingPickler(file, protocol).dump(obj) AttributeError: Can't pickle local object 'SchedulerJob._execute..processor_factory' Github seemed to say this was resolved - but regardless I would prefer the Local Executor, so I went to change to that. SQLlite is not compatable so the next step was setting up a local postgres DB. I'm going to work off of this tutorial: https://www.robinwieruch.de/postgres-sql-macos-setup had some issues getting the scheduler to start - and the error was related to Pickling. Finally figured out to downgrade to Python 3.7! HORRARY WE HAVE AIRFLOW
0 notes
Text
Build Your First GraphQL API in 10 Minutes with Hasura
GraphQL seems shiny on the frontend, and frontend developers love it because of the flexibility to pick and choose the right size of data for our UI. Where the developer experience gets ugly is when you try to build the backend that supports a GraphQL API.
I am traditionally a frontend developer, but lately, I find that I have to build the API that supports my frontend projects. It gets frustrating when I want to use GraphQL on the frontend project, and for the life of me, I can’t get a GraphQL API running as quickly as I would have liked.
Between these struggles, I’ve finally found a way to optimize my developer experience when building a GraphQL API without sacrificing the users’ experience, thanks to Hasura! In the next 10 minutes, you’re going to roll out a GraphQL API with real data and data relationships.
GraphQL API Backend with Hasura
The trick to setting up a GraphQL API without the hassle is to use Hasura. I have been using it for a while and loved it so much that I started on an online workshop on building fullstack GraphQL projects with Hasura. Alongside fundamental GraphQL features like Queries, Mutations, and Subscriptions, here are a few things Hasura handles for you:
Schemas
Relationships
User Authorization
Extensibility with Serverless
You can set up a backend using either of the following options:
Use a docker-compose file and a single docker command to get up and running locally
Deploy to the Cloud directly
— Sorry to interrupt this program! 📺
If you're interested in learning React and GraphQL in a comprehensive and structured way, I highly recommend you try Wes Bos' Fullstack Advanced React & GraphQL course. Learning from a premium course like that is a serious investment in yourself.
Plus, this is an affiliate link, so if you purchase the course you help Alligator.io continue to exist at the same time! 🙏
- Seb, ✌️+❤️
Create a GraphQL API Locally
To use Docker, install Docker if you don’t already have it installed. Next, create a project folder and add a docker-compose.yml file with the following:
version: '3.6' services: postgres: image: postgres:12 restart: always volumes: - db_data:/var/lib/postgresql/data environment: POSTGRES_PASSWORD: postgrespassword graphql-engine: image: hasura/graphql-engine:v1.1.0 ports: - "4400:8080" depends_on: - "postgres" restart: always environment: HASURA_GRAPHQL_DATABASE_URL: postgres://postgres:postgrespassword@postgres:5432/postgres HASURA_GRAPHQL_ENABLE_CONSOLE: "true" volumes: db_data:
You don’t need to worry about what this configuration does but if you are new to Docker and curious, this file:
Creates a Postgres database for your app’s data using a Postgres image
Creates a GraphQL engine using a Hasura image
Starts up everything and exposes the API on port 4400
You can start the app by running the following on the same directory where you have the config file:
$ docker-compose up -d
When the process completes in the terminal, go to localhost:4400. You should see:

Believe it or not, you have a GraphQL API live at http://localhost:4400/v1/graphql. It’s not useful yet because we do not have data in the Postgres database just yet.
Create a GraphQL API on the Cloud
Setting up in the Cloud is one form away. Fill out this form, and a Microsoft Azure wizard will generate a GraphQL API for you.
Add a Table to Store Data
To persist data, we need to first create a table where this data can be stored. Let’s create some tables!
We want to model a zoo database where they can store animals and the class each animal belongs to. We can have a class table and an animal table. An animal can belong to a class while a class can have many animals. A dog is a mammal while an alligator, a lizard, and a snake are reptiles.
Create Table Page: Go to the create table page by clicking on Data from the Navbar and click the Create Table button.

Configure Table: Create a class table with just two fields: id and type. Then select id to be the primary key:
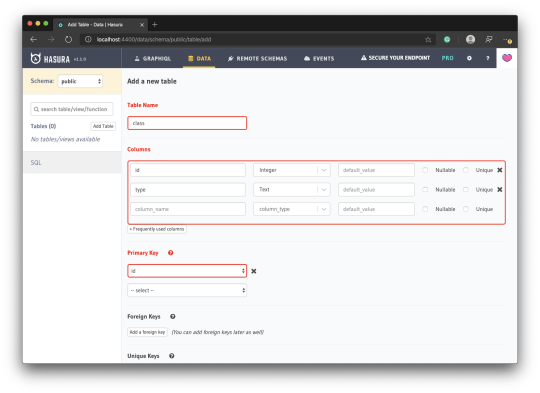
Save Table: Click the Add Table button at the bottom of the page.
Head back to the GraphiQL page, and you should find queries for the table you created. You can try a query to get the list of animal classes:
query MyQuery { class { type } }
The query will return an empty list as expected.
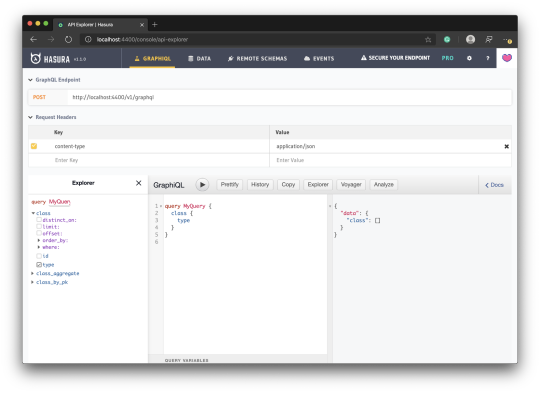
You are currently seeing only the available queries. You can also explore mutations and subscriptions by selecting it from the ADD NEW dropdown at the bottom of the Explorer pane and clicking the plus button:
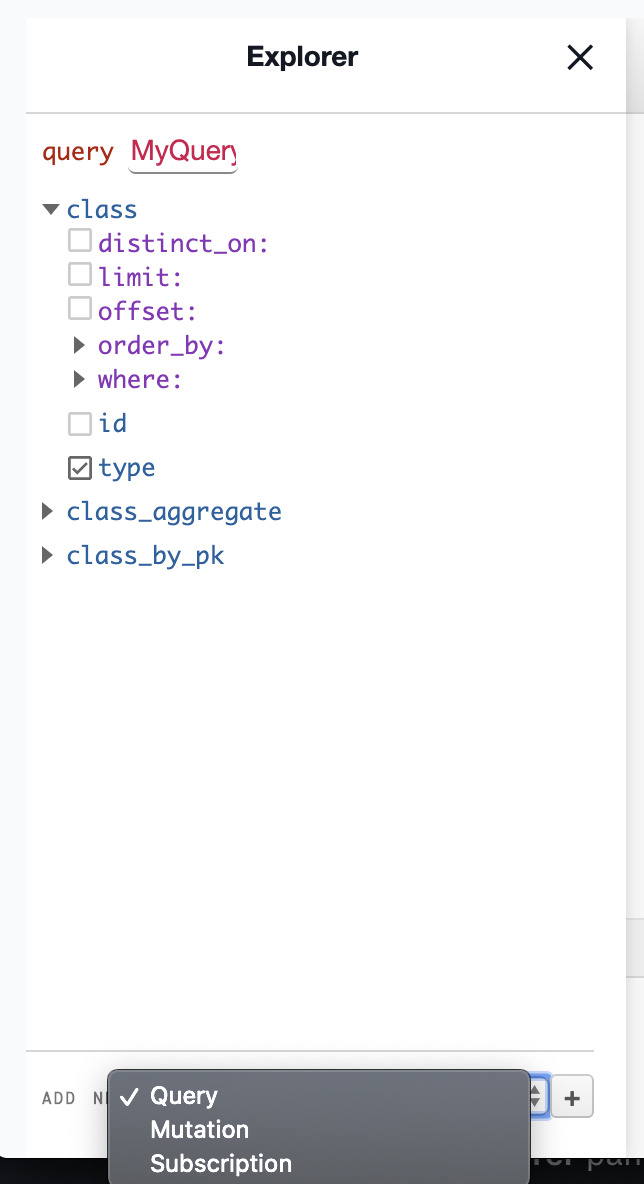
Run this mutation to add a class to the class table:
mutation MyMutation { insert_class(objects: {type: "Mammal", id: 1}) { affected_rows } }
This will return the affected rows count:
{ "data": { "insert_class": { "affected_rows": 1 } } }
You can also confirm this by taking a look at the Data page where we created the table and inspecting the class table.
Run the following mutation to delete a row:
mutation MyMutation { delete_class(where: {id: {_eq: 1}}) { affected_rows } }
Add a Table using SQL Commands
One cool thing about Hasura is how it allows you to manipulate your Postgres database directly through SQL commands. To go to the SQL editor, go to the Data page and click SQL from the sidebar:

Run the following SQL command:
CREATE TABLE IF NOT EXISTS public."animal" ( "name" TEXT, "class_id" INT, "id" SERIAL PRIMARY KEY );
You should see an animal table appear on the list of tables, and you can also see a queryable animal at the GraphiQL page.
The SERIAL type sets the id as an integer that increments automatically. This is what you want most times for IDs when you are not using something like UUID.
Add a Relationship
Since we know that animals belong to a class, let’s see how we can add the relationship to our database tables. Relationships in Hasura come in two ways:
Table relationship
Object relationship
Table Relationship
A table relationship is the same thing as running an SQL command to add a foreign key. Since animal represents the many part of the relationship, we are going to add a foreign key to it.
Go to the Data page, select animal from the sidebar and click the Modify tab:
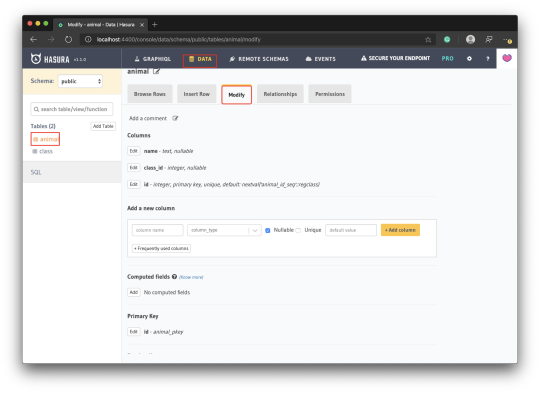
Scroll down to Foreign Keys and click Add. Complete the foreign key form as shown in the screenshot the click Save:
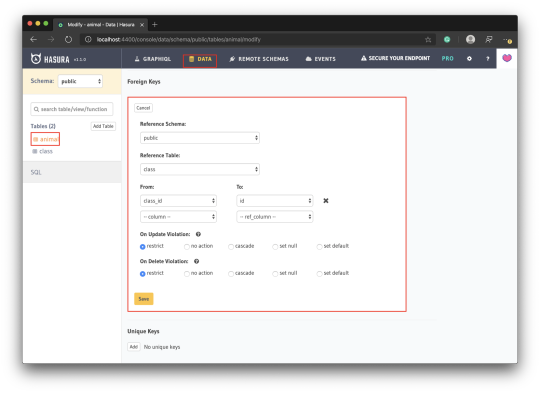
Object Relationships
Though we have just told Postgres about our relationship, our GraphQL engine does not know about this. If you have ever written a GraphQL schema, our schema theoretically still looks like this:
type Class { id: ID type: String } type Animal { id: ID name: String }
There is still no relationship between these two entities. To prove this to you, try running the following query:
query MyQuery { class { animals { name } } }
You should get an error that says animals is not found in type class:
{ "errors": [ { "extensions": { "path": "$.selectionSet.class.selectionSet.animals", "code": "validation-failed" }, "message": "field \"animals\" not found in type: 'class'" } ] }
This is how you would introduce a relationship to them through the schema:
type Class { id: ID type: String animal: [Animal] } type Animal { id: ID name: String class: Class }
This kind of relationship is called an Object relationship. You need to add an object relationship to both sides.
Go to each of the tables and click the Relationships tab. You should see a suggestion to add an object relationship — add it. This suggestion is based on the fact that we already related both tables with a foreign key.

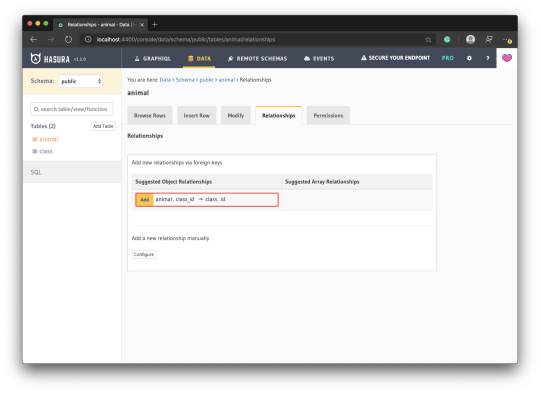
Seeding a Database
Seeding a database allows you to have enough dataset to test with. You can seed through Hasura using the SQL editor we saw earlier in this article.
Run the following SQL to seed the class table:
INSERT INTO public."class" ("id", "type") VALUES (1,'Mammal'), (2,'Bird'), (3,'Reptile'), (4,'Fish'), (5,'Amphibian'), (6,'Bug'), (7,'Invertebrate');
Run the following SQL to seed the animal table:
INSERT INTO public."animal" ("name", "class_id") VALUES ('aardvark',1), ('antelope',1), ('bass',4), ('bear',1), ('boar',1), ('buffalo',1), ('calf',1), ('carp',4), ('catfish',4), ('cavy',1), ('cheetah',1), -- Get full list from gist https://gist.github.com/christiannwamba/f6f1aa1b87c455c88764b749ad24d458
Now you can start trying out interesting queries:
# Get classes with their animals query MyQuery { class { animals { name } } } # Get animals with the class they belong to query MyQuery { animal { name class { type } } } # Get animals that are mammals query MyQuery { animal(where: {class: {type: {_eq: "Mammal"}}}) { name } } # ...and so on
That’s it for now! Don’t forget to try out mutations and subscriptions too! 😎
via Alligator.io https://ift.tt/2WjjYdN
0 notes
Photo
Which JS projects got the most GitHub stars in 2019?
#470 — January 10, 2020
Read on the Web
JavaScript Weekly
Snowpack: A 'Run Once' Dependency Builder/Modularizer — An interesting project (formerly known as pika/web) from the folks behind Pika. The idea is that you run Snowpack once after npm install and it prepares your dependencies as ES modules that can be loaded dynamically by the browser so you don’t need to rebundle on every code change you make. This isn’t good if you want to target old browsers, but for the 90% of cases, this could change your dev process.
Fred K. Schott
2019's JavaScript 'Rising Stars' — If you don’t like popularity contests, skip this one, but it’s the latest annual roundup of which JavaScript projects did well in terms of gaining GitHub stars in 2019. Vue took the top spot for the 4th year in a row, but the subcategories are more interesting.
Michael Rambeau and Sacha Greif
Get Best in Class Error Reporting for Your JavaScript Apps — Time is money. Software bugs waste both. Save time with Bugsnag. Automatically detect and diagnose errors impacting your users. Get comprehensive diagnostic reports, know immediately which errors are worth fixing, and debug in minutes. Try it free.
Bugsnag sponsor
Dan Abramov on What JavaScript Is Made Up Of — Dan (of React core team and Redux fame) reflects on his mental model of what JavaScript is in terms of raw concepts.
Dan Abramov
How to Move a Project to TypeScript - At Your Own Pace — We’ve recently commented how 2019 seemed to be the year of many people ‘switching’ to TypeScript.. but if you’re intimidated, you might like this guide to moving an existing project in a gradual way.
Dominik Kundel
The State of Storybook at the End of 2019 — Storybook is a popular tool for developing and showcasing UI components (originally just for React, but now supporting Angular, Vue, and more). 2019 saw even more growth for Storybook’s ecosystem and community.
Michael Shilman
⚡️ Quick Releases
Ember 3.15
date-fns 2.9 — Modern date utility library.
Johnny Five 1.4.0 — Robotics and IoT framework.
Handlebars.js 4.7 — Classic templating library.
Pickr 1.5 — Responsive and hackable color picker.
💻 Jobs
Full-Stack or Front-End Engineer - Rails/React (Remote/NYC) — Got 2+ years of experience? Come help build the next iteration of our growing digital recovery platform centered providing alcohol abuse treatment.
TEMPEST
Find a Job Through Vettery — Vettery is completely free for job seekers. Make a profile, name your salary, and connect with hiring managers from top employers.
Vettery
📘 Articles & Tutorials
An Abbreviated History of JavaScript Package Managers — This post explains why npm, Yarn and pnpm were created and the problems they’ve set out to solve over time.
Matt Goldwater
Understanding Async/Await — A straightforward and easily accessible tutorial on using promises and how async and await can make the resulting code more straightforward.
Sarah Drasner
CFP for ForwardJS San Francisco and Ottawa now OPEN — Submit your proposal to speak at ForwardJS Ottawa (May 26-29) or San Francisco (July 20-24) Ticket sales begin Jan 15.
ForwardJS sponsor
Off Main Thread Architecture with Vuex — Inspired by Surma’s articles on using Web Workers to take work off of the main thread, Abdelrahman was inspired to see how this could help with Vue and Vuex.
Abdelrahman Awad
How To Create And Deploy an Angular Material App — This article will help you get started with a new Angular project from just a thought to deployment (on Netlify, in this case).
Shubham
Things I've Learnt Optimizing My Build Time — Things a developer has learnt implementing some build time optimization techniques at the company he works for.
Eldad Bercovici
Why I Avoid Nesting Closures — “A little tendency I have to reduce cognitive load for readers of my code.”
Kent C Dodds
A Basic Example of the Web Share API — The Web Share API enables native sharing (via other apps/social networks) on pages.
Dillion Megida
Breaking Chains with Pipelines in Modern JavaScript
Dan Shappir
Comparing the Different Types of Native JavaScript 'Popups' — window.confirm, window.onbeforeunload, etc.
Elliot Goldman
Top GitHub Best Practices for Developers - Expanded Guide — Implementing these best practices could save you time, improve code maintainability, and prevent security risks.
Datree.io sponsor
▶ Why GitHub Actions Is One Developer's New Favorite Programming Tool — While Github Actions is commonly associated with deployment and pipelines, it’s ultimately an engine for running JavaScript in the cloud, and that opens up some neat use cases as demonstrated here. 17 minutes.
Kristian Freeman
🔧 Code & Tools

Craft.js: A React Framework for Building Drag and Drop Page Editors — It’s a bold move to make the landing page for your project be a text editor itself, but I like it :-)
Prev Wong
Code to Graph: Visualize JavaScript Code as a Network Diagram — An interesting idea and fun to play with.
Vincent Lecrubier
Faster CI/CD for All Your Software Projects Using Buildkite
Buildkite sponsor
Mocha 7.0 Released: The Popular JavaScript Test Framework — Mocha has been a popular go-to test framework for both Node and the browser for years now. 7.0.0 isn’t a huge release but drops Node 6 support and makes enough changes and deprecations to warrant the version update.
Mocha
Postgres.js: A Fast, Full-Featured Postgres Client for Node — Claims to be the fastest even (at 2-10x faster than the popular pg module) but we’ll let you be the judge of that :-)
Rasmus Porsager
scalajs-react: React, but for Scala.JS — Feeling brave? Scala.js provides a way to build front-end apps using Scala (which is then compiled into JavaScript) and scalajs-react brings React into the mix too.
David Barri
😂 Last but not least..

The Size of a node_modules Folder When Installing The Top 100 Packages — We’ve all heard the jokes about the size of node_modules directories, but I found it neat that someone’s actually tracking this on an ongoing basis. And if you really want to clean up those folders, check out npkill.
Koen van Gilst
by via JavaScript Weekly https://ift.tt/30aVFPq
0 notes
Text
PHP Training in Chandigarh
Are you wanting to know about PHP Development?
Do you wish to learn PHP Training in Chandigarh?
Yes!
Then,
You are at right place!
In this article below you will get to know about PHP Training in Chandigarh and its career prospects.

PHP Development
PHP is a popular web programming language around the world and has been adopted by millions of websites today. The PHP language is becoming the most popular Web browser programming languages for usability, efficiency, attractive features, good database and HTML integration, and user control.
PHP code can be integrated into HTML or used with various web template systems, web frameworks and web content management systems. The operating systems on which its works are: Linux, Windows, Unix and Mac OS and is compatible with major web and business servers like Apache, Netscape, Microsoft IIS etc. It is easier to solve problems in PHP compared to other languages.
The PHP Training in Chandigarh consists of live projects to increase your practical knowledge and experience. Here you will learn Core PHP with CMS - [Joomla, Drupal, WordPress] with JQuery + MySQL + Postgre SQL. Core PHP with shopping cart - [OpenCart, Magento, ZenCart, Woo-Commerce] with the same combination. Core PHP with MVC - [Cake PHP, YII] with MySql + PostgreSQL.

Few of the common websites that run in PHP
Whatever the industry you have, PHP can help you create corporate websites, ecommerce, blogs, and social media portals. The biggest example of a successful PHP site is Facebook.
In addition, many other great websites and applications that run in PHP. Some of them are listed below, take a look -
• Moodle
• Drupal
• Joomla
• WordPress
• Wikipedia
• eZpublish
• Digg
WordPress is the most used tool in the world in several niches. Small businesses such as restaurants, pet stores and even wastewater companies use WordPress to create their own website promoting their product and service offerings.
Eligibility criteria
PHP Training in Chandigarh are for people from various fields who want to make a career in PHP development.
Anyone who is 10 + 2 can sign up for this course or anybody with a basic knowledge about computer programming language can go through PHP courses.

PHP Training Course Content:
· Concept about open source technology
· about GPL and the GNU Foundation
· About Apache, MySQL, PHP on the Linux platform
· Installation of Apache, MySQL and PHP on Linux, Windows and Mac OS
· About the software and installation of Xampp, Wamp, Lamp and Mamp
· Configurations in the file php.ini
· Configurations in the file httpd.conf
· PHP basic syntax
· Your first PHP code with Hello World
· PHP types of errors and PHP comments
· Php variables, constant and their function.PHP string functions
· PHP Operators
· PHP looping and control structure
· PHP global arrays
· PHP array
· PHP array functions
· Function related to PHP files
· MySQL operation with phpmyadmin or command line tool
· Functionality of PHP and HTML forms
· PHP with mysql CRUD operation with custom form
· PHP with the MySQL library
You need the best training program to become a PHP developer. Although there are many academies and institutes but PHP Training in Chandigarh offers training to anyone who wants to be an expert in PHP development.

Thus,
To have the right knowledge and skills,
You should learn at the best PHP training in Chandigarh.
PHP training in Chandigarh is easily accessible and useful for those who want to learn PHP development.
To know more,
Call us!
#PHP Training in Chandigarh#Digital Marketing Course in Chandigarh#Digital Marketing Training in Chandigarh
0 notes