#prusaslicer
Explore tagged Tumblr posts
Visit Tumblr Blog
Explore Tumblr blogs with no restrictions, modern design and the best experience.
Last Seen Tumblr Blogs


Fun Fact
BuzzFeed published a report claiming that Tumblr was utilized as a distribution channel for Russian agents to influence American voting habits during the 2016 presidential election in Feb 2018.
Text
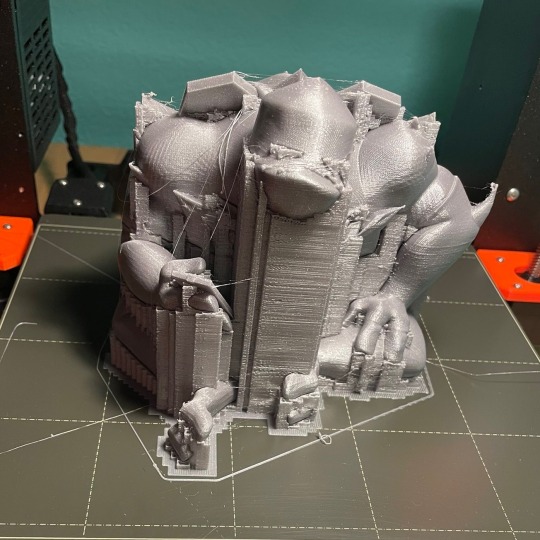
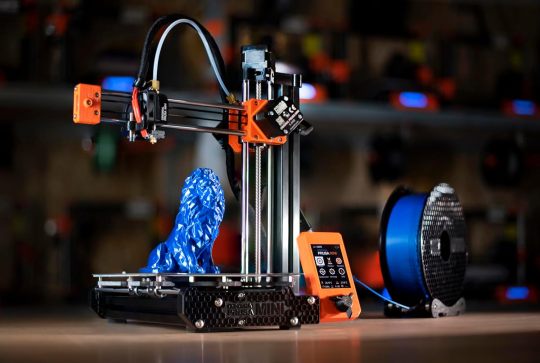
“Sunset Bros” project is off to an amazing start! This was the test scale print @powerauerart did of Raph and it’s truly a beast. Photo from Meghan too
26 notes
·
View notes
Text
#FDM 3D printer setup#Fused Deposition Modeling#3D printing guide#how to use FDM printer#3D printer calibration#filament loading#troubleshooting 3D printing issues#FDM printing materials#3D printing tips#PrusaSlicer#Cura#3D model slicing#3D printing maintenance
1 note
·
View note
Text
Okay, so firstly, I'm assuming you have access to a 3D printer or a 3D printing service. My chosen MO when my printer is on the fritz is "mooching off others, mainly my brother" but we have a maker lab an hour's drive away if I need something larger. This would be a project that is too large for my printer, assuming an adult human head.
Secondly, you need a slicer that lets you mess around with models and add basic shapes. I use Prusaslicer, because it came with my printer, and anyone can download it for free. I'm gonna overexplain this as if you have a basic grasp of windows-style software, a sixth grade reading level, and have otherwise no other experience using this software. (aka. as if you're my mom)
Thirdly, we are working smart, not hard on this. Plenty of people have made skull models. www.thangs.com is your friend for cross-platform model searches. I went with this one because a) it has that slightly open jaw that was requested and b) it was popular around Halloween, so it is one that is possible to print. Will it still be after we mess with it? That's a different question.
Tutorial on how to do this behind a break, because it's 15 pages in Word.

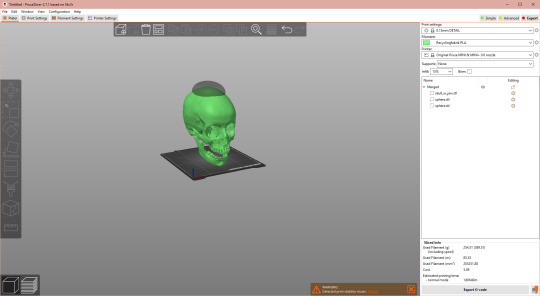
First, open your model in your slicer. As you can see, this one doesn't fit my print bed. I'm not printing it, so... Eh. It usually comes out centered all by itself, so we don't need to mess with anything, either.


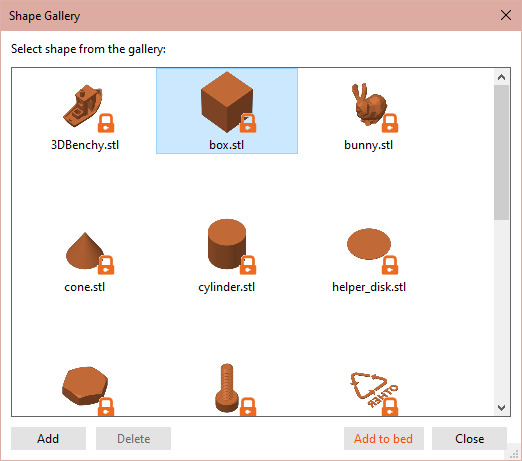
Next, we need what Prusaslicer calls the Shape Gallery. Pick a sphere and click "Add to Bed"


Select Sphere. Then press the little padlock in the menu called "Object Manipulation". Now mess with the values behind "Size [World]:" until your sphere is the shape you want your bowl to be, and roughly twice as deep.
While you're there: change the values under X and Y for "Position" to be the same as for your skull. This centers both objects on top of each other.
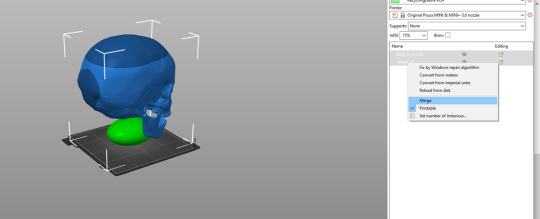
Now select both your Sphere and your Skull model at the same time, right click and choose "Merge". This lets you manipulate the Sphere further.
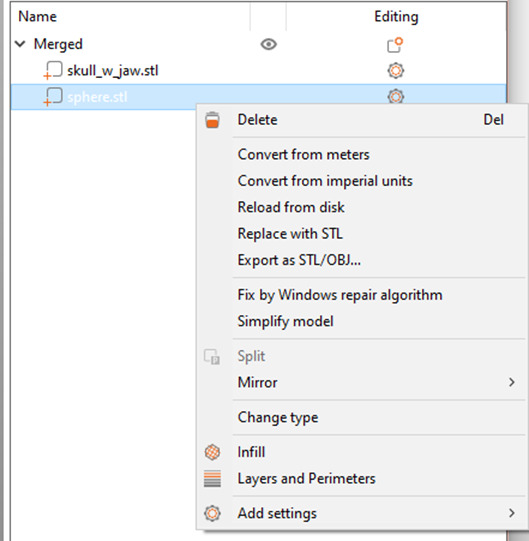
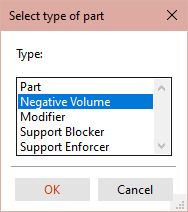
We need that Sphere to become a bowl. In the Name menu, right click the Sphere (just the sphere) and choose "Change Type". Pick "Negative Volume". This should turn the Sphere model transoarent.

Back to the Object Manipulation menu, which is now called Part Manipulation. With only the Sphere selected, adjust the Z position until half of the Sphere is poking out of the Skull. Then mess with this and the Y position until you have that dimple exactly where you want it.

At this point, it's smart to press that tempting "Slice Now" button to check where you are. (At this point, I resized the merged project to 80% to make it fit my print plate -- this button doesn't work if you're trying to print something larger than your print volume.) It wasn't even fully done slicing when I noticed that this might be a bit too ambitious for a key bowl. But filling an entire model with plastic is expensive and tedious, so let's McGyver a solution.
Hit Ctrl+5 to go back to the place where change is possible. Copy paste your Sphere, change Type to "Part" and adjust the Z position until it's juuuust peeking out from the Skull, basically flush again. Press "Slice Now" to re-check your progress.

Dear reader, we have a dimple.
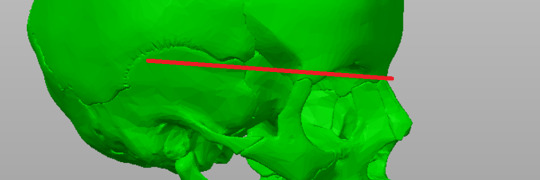
Next up, a way for glasses to stay put. You need an outcropping on the side of this stand if you wear glasses that were not adjusted to be worn without ears. I took a side profile selfie and based it on where the legs of my glasses usually sit. It seems to be just underneath this handy dandy curved seam on the model.

The next Shape Gallery we need is a Cylinder.

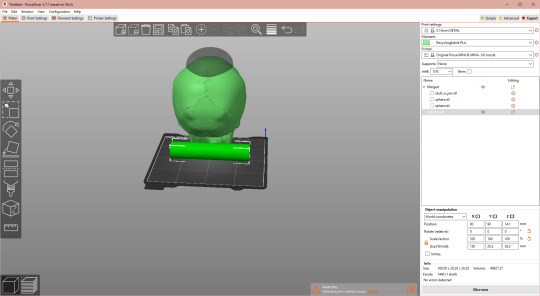
Back in the Object Manipulation menu, we rotate it 90° on the X axis, then mess with the proportions. I started out by making the real world X value slightly larger on the Cylinder than the Skull. (Reminder: my model is tiny, my values are meaningless)


You don't need it to be tall, so you can make the real world Z a lot smaller. You do need it wide, so see what Y value gives off good vibes. Again, merge with the Skull.

Again, adjust your Cylinder's Z position. This time, aim for just underneath where your glasses' legs are, as was figured out with that red line earlier.

Turn your model to see how it looks, adjust the dimensions if necessary. My X value looked way too big, so I shrunk it down a little.

Check with the "Slice Now" button if you've messed up in an obvious way. If not: Ridge! (Note: you can also achieve this by manipulating one or more different basic shapes, depending on the look you're going for.
Next up: the stand. I'm going to make that as a seperate object, because it lowers the material wasted if I goof up on either the skull or the stand. This is the most freeform part of this project.


Pick a shape for your base from the Shape Gallery. (Or import an STL with a shape that pleases you better.) I like the M3 Hex Nut. It's not too blocky, you just need to mess with the size a bit to make it look at home on someone's hallway cabinet. Position it underneath the hole of your skull, keeping the X position the same to keep it centered.

Next, pick another shape for the pillar of the stand. I went with Box. Copy the X and Y position of your base to center the two.

Mess with your pillar's dimensions until it goes into and through the hole at the base of the skull without touching it.

Merge your base and pillar (Here: Hex Nut and Box) to complete your stand. Do not merge with your Skull project unless you want it all to be one piece.
Side note: see those eye icons? They let you include or exclude files for slicing. Meaning you can make the print file for the stand and the print file for the skull by toggling them on or off, without having to export this project's objects as STL's and re-insert them into a seperate slicer instance. For now, ignore them and just press "Slice Now" again to check for whoopsies.

Nope, that looks just about like what it should be. Now you can adjust the proportions to fit that hat, add supports, tweak the print settings to whatever filament you prefer and whatever the Printing Gods approve of for your printer, and print it.
Looks like my basic settings would require 27+ hours and about 300 g of PLA... Without supports.

I've not hit the image limit yet, so lets add organic supports (because those come off easiest for me) everywhere the slicer thinks it needs them, just for the nightmare fuel image. We're looking at 47 hrs/ 400 g for the skull and 2 hrs/ 26 g for the stand. Again: This version would maybe fit a toddler's head. Maybe.
Congrats, you now know how to mess around with an STL you found that just needs some basic shapes added/gouged out to suit your needs.
Go use your newfound powers to confuse someone.
Things I would make if I had the skill, or would commission if I had the money: A decorative skull on a stand, maybe to rest on a cupboard by the side of the front door. Besides being a key bowl, it has other uses. Here's an illustration of it while it's not being used, when I'm out of the house:

And this is what it would look like when I'm at home:

#3d printing#tutorial#hat stand#glasses stand#key bowl#this one has it all#prusaslicer#human skull - anatomically correct by Peter from Belgium#skull#I had to#the alternative was going to bed on time#it's after midnight now#night night#organic supports on a skull#I'm not the first I won't be the last#it's basically adding spook for free
3K notes
·
View notes
Text
I love how the state of Linux on laptops, and power management on laptops, have advanced to the point where I can have umpteen browser tabs open, Blender open, and PrusaSlicer, for two hours, and only use 20% of my laptop battery, without anything crashing. In glorious WXQGA+ resolution on a 2-in-1 with full pen support.
#with previous laptops this would not have been possible without being plugged in#and even then something would crash#linux#blender#fedora linux
6 notes
·
View notes
Text
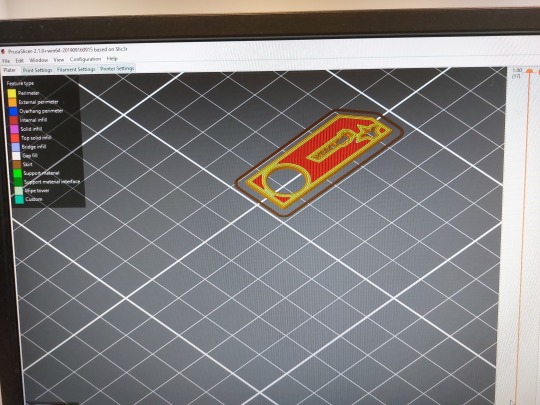

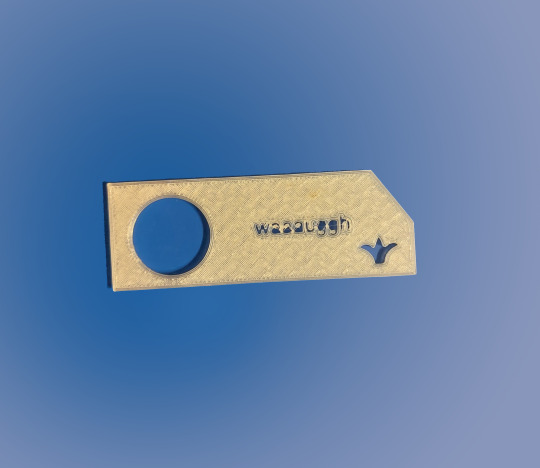
On Monday I did the 3D Printing workshop. As Blender wasn't available in the computer lab, I had to use Rhino 6, which was very difficult to use. I managed to cut letters and a design out of the keyring, but the action was difficult to repeat, as such it has little relevance to the project. I will be sticking to Blender, as I have experience with it and it tends to work more consistently. I was able to set up the 3D print file in PrusaSlicer and adjust the infill level, which can be seen as a lattice pattern in the keyring.
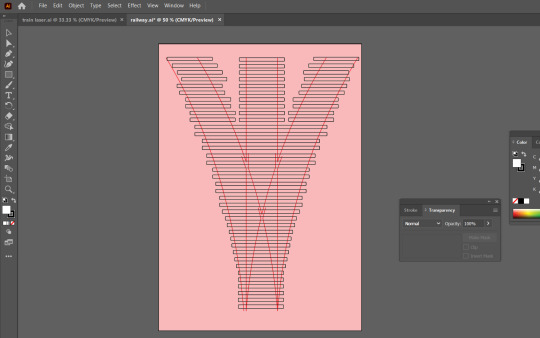
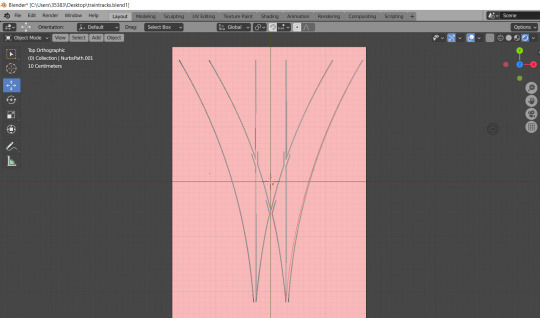
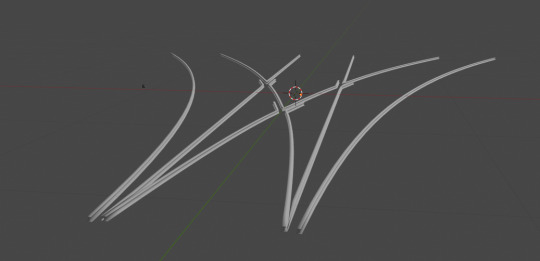
I created a railroad switch in Blender, with the help of Illustrator for the template and a guide for laser cutting the railroad sleepers. In Blender I used paths and bevel geometry to achieve a uniform look across the rails. This was my second attempt at the exercise as I did not pay attention to scaling, rendering each rail a totally random size. I hope to print, cut and assemble these into a diorama.
4 notes
·
View notes
Text
3D Print Intro Workshop: 24/10
Today I went to the Intro to 3D print workshop. We were introduced to scanning objects into 3D software and exporting it to PrusaSlicer for it to be printed.
The lecturer demonstrated how the scanning process works by scanning the face. Then she edited the model and exported it into PrusaSlicer.
From there she arranged the 3D model for print giving it supports and a brim to ensure the print came out right. She also slightly angled it, as it prints better that way.

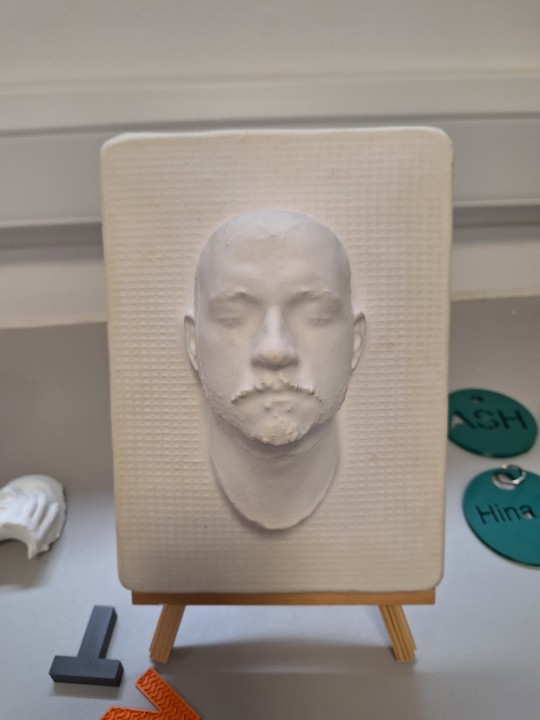
She then brought us over to the 3D printers and introduced us to the functions, and how to change the filament. She also showed us how to use the resin 3D printers as well.
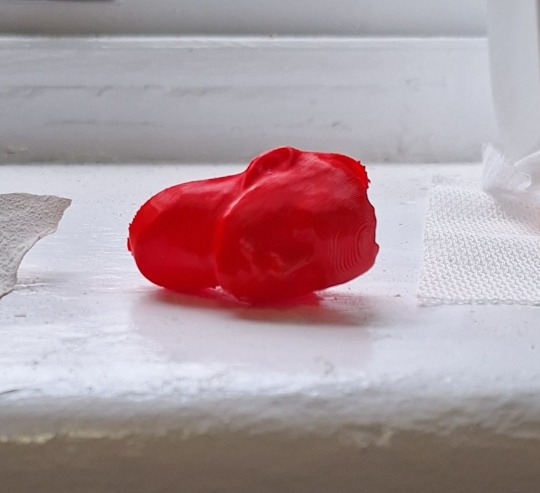
This is the finished product from the 3D print.
For the intermediate workshop, the lecturer instructed us to have a 3D model or an object to scan, so we can print them.
4 notes
·
View notes
Text
Adding on to the library thing: to print a thing, it needs to be first sliced and turned into a gcode file.
If you can't do this at your library, PrusaSlicer is free and has many standard printer and filament settings preloaded. The newest versions need you to turn off binary gcode for it to work on all printers, but that's ticking a box in the settings.
188K notes
·
View notes
Text
Optimizing Gear Prints with PrusaSlicer

I recently faced some slipping and jitter in a custom gear system I was printing—so I dove deep into PrusaSlicer settings to dial in the perfect slice. 🧩 After some trial and error, I found a sweet spot that gave me smooth gear motion with minimal post-processing.
I’ve shared all the optimized settings and step-by-step tweaks (with screenshots) here: 👉 https://theprusaslicer.net/
If you're working on any mechanical prints, especially gears or motion parts, this might save you some time and failed prints. Would love your feedback or other tips too!
#prusaslicer
#prusaslicerApk
1 note
·
View note
Text
Prusa Slicer - Latest Version Download
PrusaSlicer is an open-source 3D printing slicing software developed by Prusa Research. It helps users convert 3D models into G-code, the language that 3D printers understand. Initially based on Slic3r, PrusaSlicer has evolved into a powerful tool with numerous advanced features for both beginners and experienced users.

Key Features
Multi-Material Support: Allows printing with multiple filaments in a single print job.
Customizable Print Settings: Users can fine-tune layer height, infill, supports, and speeds for optimal print quality.
Adaptive Layer Heights: Adjusts layer thickness dynamically to improve surface quality while reducing print time.
Organic Supports: Generates tree-like supports that are easier to remove and conserve material.
Modifier Meshes: Enables localized changes in print settings for specific parts of a model.
Integration with Prusa Printers: Comes pre-configured for Prusa 3D printers but also supports third-party printers.
Download now from official website: https://prusa-slicer.net/
1 note
·
View note
Text
Need supports in tricky spots? This video shows you how easy it is to add custom supports in PrusaSlicer with just a few clicks. I hope this quick tutorial makes printing your fortress even smoother!
Full video on Youtube!
This video is mainly for those who supported my Warkar´s fortress project, but maybe it will help others too! 😊
0 notes
Text

#FDM 3D printer setup#Fused Deposition Modeling#3D printing guide#how to use FDM printer#3D printer calibration#filament loading#troubleshooting 3D printing issues#FDM printing materials#3D printing tips#PrusaSlicer#Cura#3D model slicing
1 note
·
View note
Text
🌳 3D-Printa Livets Träd – Skapa Din Egen Magiska Dekoration! 🌳
Har du någonsin drömt om att skapa något unikt och meningsfullt med din 3D-skrivare? Nu kan du det! Med "Tree of Life" STL-filen kan du printa en vacker och symbolisk dekoration som passar perfekt i ditt hem eller som en speciell gåva. 🖤✨
💾 Ladda ner STL-filen här: Tree of Life STL-fil för 3D-utskrift
🌱 Vad betyder Livets Träd?
Livets Träd är en symbol för styrka, tillväxt och kopplingen mellan allt levande. Det är en ikon inom många kulturer och bär en djup, andlig mening. Att ha en 3D-printad version av detta kraftfulla träd kan ge en känsla av balans och harmoni i ditt space. 🌍🌿
🛠️ Varför 3D-printa det?
🔹 Gör det personligt – Anpassa storlek, färg och material efter din stil. 🔹 Hållbart & ekonomiskt – Slipp massproducerade dekorationer och skapa själv! 🔹 Kreativt & roligt – Perfekt för DIY-projekt och konstnärliga själar. 🎨💡
🖨️ Så här gör du:
1️⃣ Ladda ner STL-filen via länken ovan. 2️⃣ Öppna den i din slicer-programvara (t.ex. Cura eller PrusaSlicer). 3️⃣ Justera inställningarna för bästa resultat – välj detaljerad lagerhöjd och infill. 4️⃣ Välj ditt filament – PLA är enkelt, PETG & ABS ger mer hållbarhet. 5️⃣ Starta din 3D-skrivare och se magin ske! ✨
🔥 Pro Tips för Perfekt Print
✔ Använd supports om du har tunna eller utstickande delar. ✔ Kalibrera skrivaren noggrant för skarpa detaljer. ✔ Testa att måla eller lacka din print för en extra touch! 🎨
💫 Redo att skapa något episkt? Ladda ner "Tree of Life" STL-filen idag och gör din egen konstnärliga tolkning av denna tidlösa symbol! 🌳💛
1 note
·
View note
Text
2025.1.31
3D Printing Process Notes
1. Download the Stj format file needed for the model and import it to computer.
2. Open the software: Prusaslicer and drag the print stj file into the software.
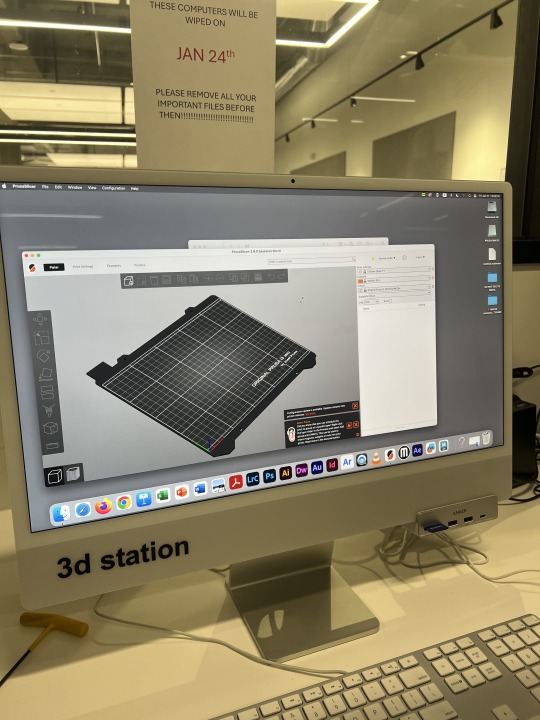
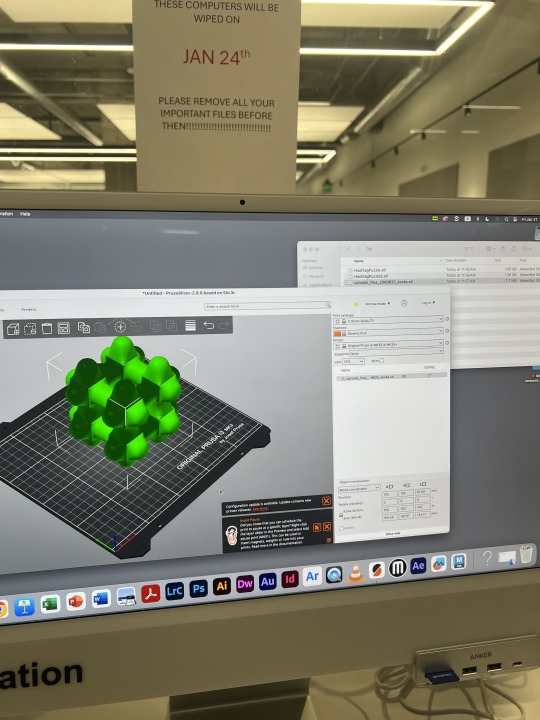
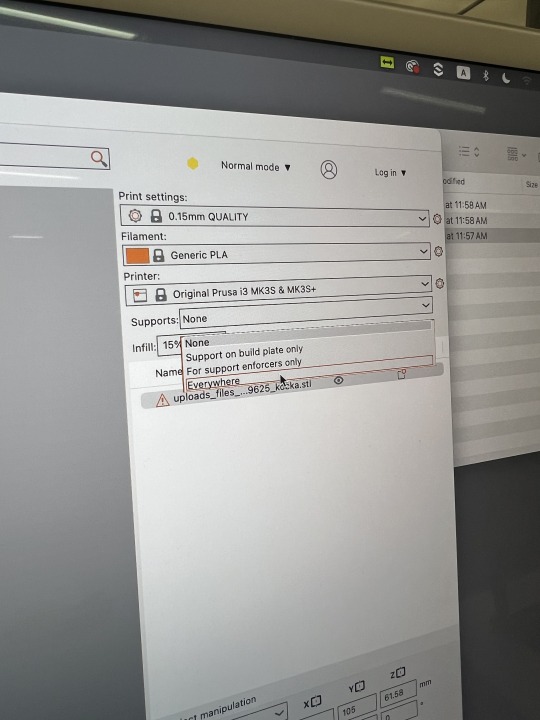
3. To ensure model completeness, select EVERYWHERE for SUPPORTS in the RIGHT PRINTING SETTING.
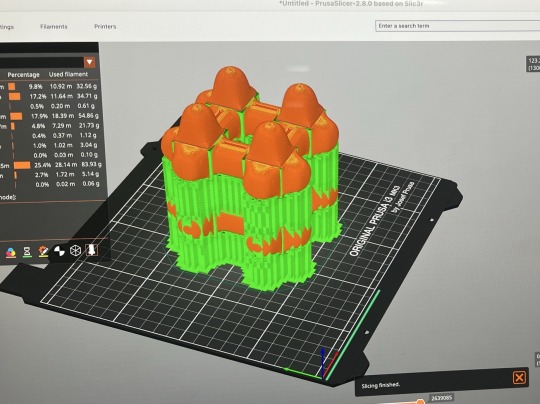
4. Click Slide in the bottom right corner to export to gcode form and then name the file. And drag the file into the folder on the memory card: PRUSAI3MK3S
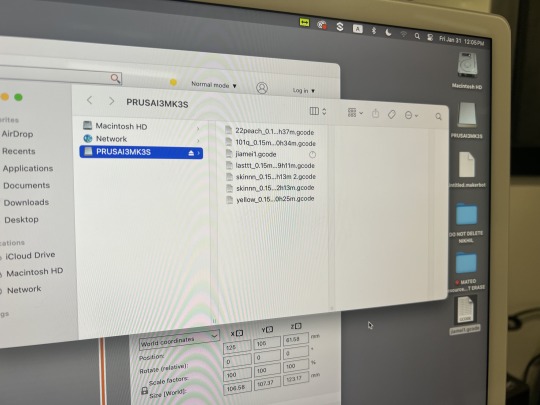
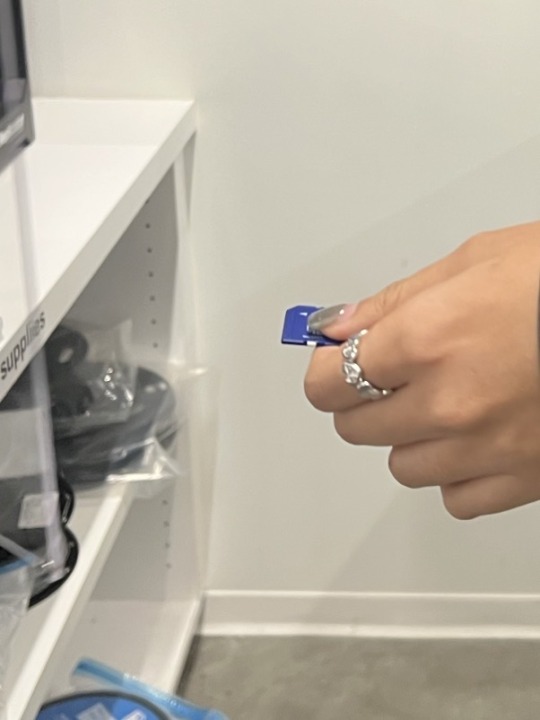
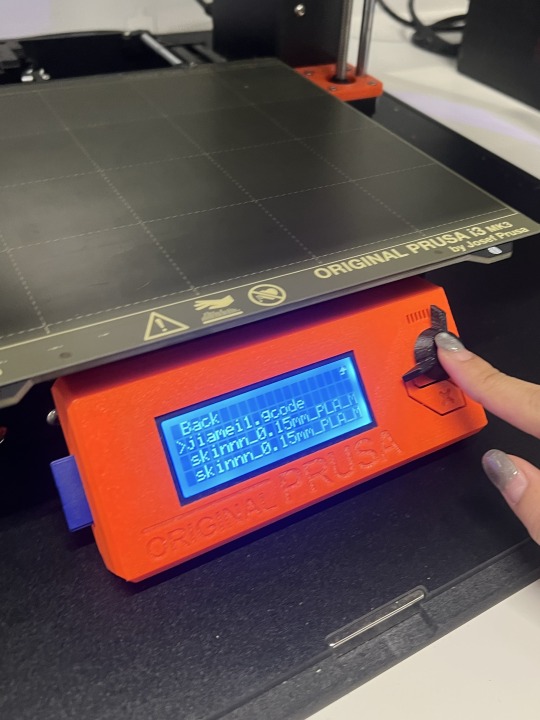
5. Pull out the memory card, insert it into the 3d printer and select your file to print.
0 notes
Text
3D Printing for Prototyping and Art: Unlock Your Creative Potential
Introduction: 3D printing has revolutionized the way we design and create. Whether you’re a designer refining your product prototype or an artist exploring new forms of expression, 3D printing lets you bring your ideas to life faster and more freely than ever before. It’s a game-changer that opens up endless possibilities—whether you’re pushing the limits of innovation or diving into intricate, one-of-a-kind art.
What is 3D Printing?
At its core, 3D printing (or additive manufacturing) builds objects layer by layer from a digital file. Unlike traditional methods that cut away material, 3D printing adds material, creating shapes and structures that were once impossible to achieve. Here are some of the key technologies you’ll encounter:
FDM (Fused Deposition Modeling): Great for budget-friendly prototypes. It extrudes plastic filament layer by layer.
SLA (Stereolithography): Offers stunning detail with a smooth finish, ideal for high-quality prototypes and art pieces.
SLS (Selective Laser Sintering): Perfect for creating strong, functional parts by using a laser to fuse powdered material.
Applications:
Prototyping: 3D printing speeds up product development by allowing you to quickly prototype, test, and refine your designs—helping you move from concept to production in record time.
Art: Artists are embracing 3D printing to craft complex, interactive sculptures that push the boundaries of traditional art. The freedom to create without limits is transforming the artistic landscape.
Challenges to Consider:
While the technology is incredibly powerful, there are a few things to keep in mind:
Print Quality: Factors like material type, printer calibration, and even room temperature can affect the final print quality.
Material Options: Though there are more options than ever, 3D printing materials are still somewhat limited compared to traditional manufacturing. But with ongoing research, the possibilities are constantly expanding.
Getting Started with 3D Printing:
Choose the Right Printer:
FDM: Affordable and versatile, great for basic prototypes.
SLA: Offers exceptional detail and a smooth finish, perfect for high-quality models.
SLS: Ideal for creating durable, functional parts.
Master 3D Modeling: Learn how to use design software to bring your ideas to life. Whether it’s Fusion 360 for engineering, Blender for artistic work, or ZBrush for sculpting, mastering the right tools will elevate your creations.
Optimize Your Designs:
Avoid overhangs and make sure your walls are thick enough for strength.
Design with the print orientation in mind to reduce material waste and improve print efficiency.
Select Your Materials: Choose based on your project’s needs—PLA and ABS for sturdy models, or flexible filaments for parts that need to bend and stretch.
Prepare Your Files: Use slicer software like Cura or PrusaSlicer to convert your 3D model into a printer-ready file.
Print & Post-Process: After printing, remove support structures, sand rough edges, and add a paint finish if needed to bring your object to life.
Advanced Techniques to Try:
Multi-Material Printing: Combine materials for parts that have different properties—like flexible hinges and rigid support structures in the same piece.
Generative Design: Use AI to create complex, organic shapes that optimize strength and functionality.
Large-Scale Printing: Need bigger objects? Split your design into sections and print them separately to assemble later.
Bioprinting: Explore the future of medicine with 3D printing using living cells.
4D Printing: Create objects that change shape or function over time, responding to heat, moisture, or other stimuli.
Common Pitfalls to Avoid:
Material Settings: Each material has specific requirements. Always adjust your printer’s settings accordingly.
Forget About Supports: Don’t skip adding supports for complex shapes—your printer won’t magically print them without help.
Printer Maintenance: Keep your printer in top shape with regular calibration and care to prevent issues.
Rushing the Process: 3D printing takes time. Be patient and avoid speeding up the process—it will pay off in better results.
FAQs:
What's the best 3D printer for beginners? The Creality Ender 3 and Prusa i3 MK3S+ are great options for getting started. They’re affordable and highly customizable.
How much does it cost to start? Entry-level 3D printers usually start around $200–$300, with additional material costs depending on your projects.
Can 3D printing be used for mass production? While it’s perfect for rapid prototyping and custom items, 3D printing is also expanding into small-batch production.
Is 3D printing safe? Yes, as long as you use proper ventilation and follow safety guidelines, it’s safe for home use.
Key Takeaways:
3D printing opens up a world of possibilities, whether you’re designing innovative prototypes or creating detailed works of art. By mastering the basics—design, material selection, and post-processing—you’ll be able to produce high-quality prints and push the boundaries of your creativity. Keep experimenting, refining your skills, and watching as your designs come to life in ways you never imagined.
Ready to get started? Let’s bring your ideas to life with 3D printing. Whether you’re prototyping or creating stunning art, we have the tools and expertise to help you succeed. Explore our printers, materials, and support to take your creations to the next level.
1 note
·
View note
Text
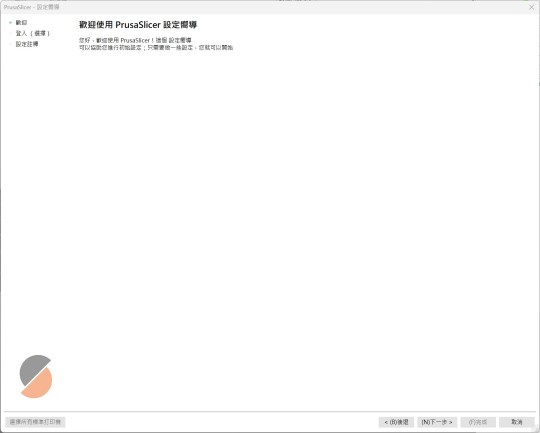
在PrusaSlicer設定E2D Printer: 一步一步詳細設定教學
首先下載 PrusaSlicer-2.8.0+win64-E2D.tw解壓縮後在執行目錄底下的 prusa-slicer.exe 應用程式.首次執行會先進入到 配置嚮導 的設置精靈頁面中. 配置嚮導 Continue reading 在PrusaSlicer設定E2D Printer: 一步一步詳細設定教學
View On WordPress
0 notes
Text
在PrusaSlicer設定E2D Printer: 一步一步詳細設定教學
首先下載 PrusaSlicer-2.8.0+win64-E2D.tw解壓縮後在執行目錄底下的 prusa-slicer.exe 應用程式.首次執行會先進入到 配置嚮導 的設置精靈頁面中. 配置嚮導 Continue reading 在PrusaSlicer設定E2D Printer: 一步一步詳細設定教學

View On WordPress
0 notes