#remodeled home
Text
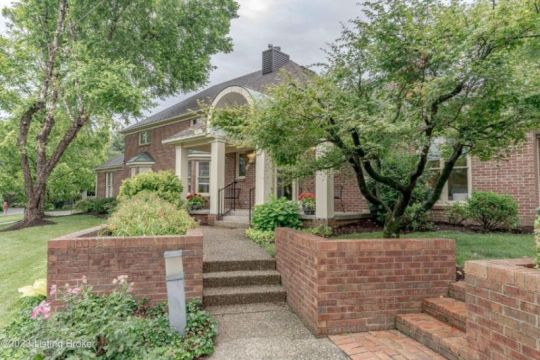

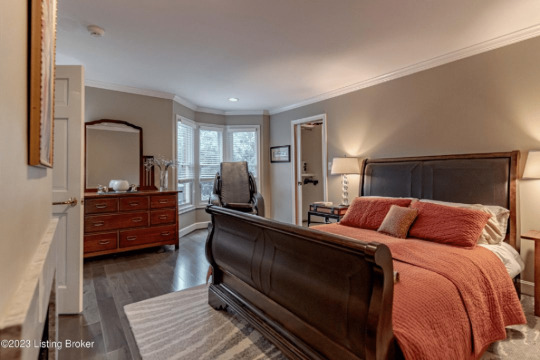
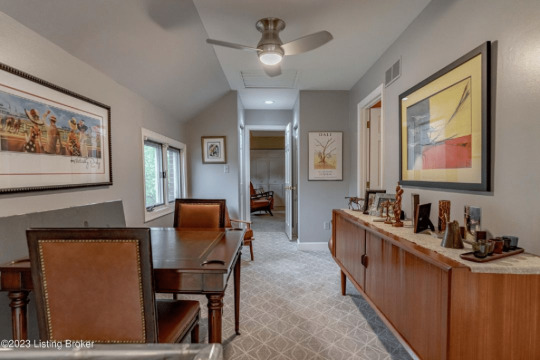
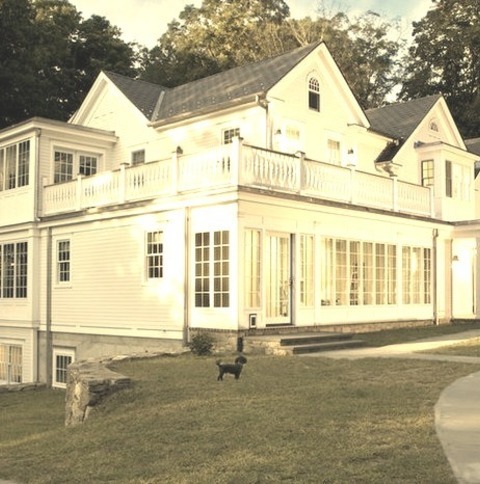
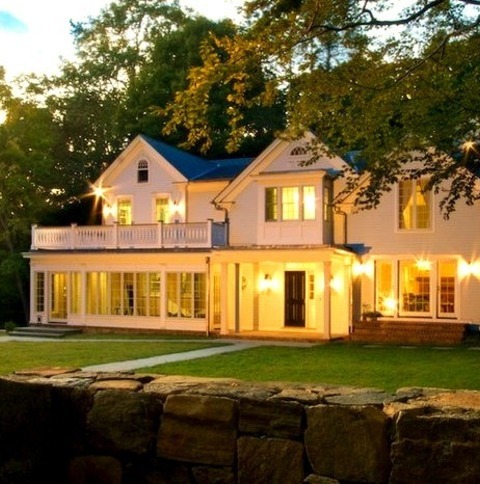
I never expected the interior of this 1986 traditional brick home in Louisville, Kentucky. 3bds, 3ba, $683,500.

Never did I expect to see open concept, ultra modern acrylic railings, vaulted ceilings, skylights, a modern fireplace and the currently popular gray everywhere.
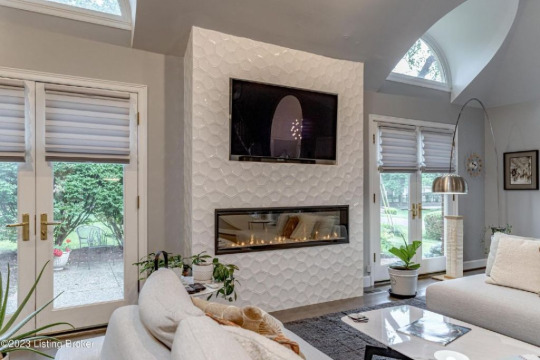
New facade on this ultra modern fireplace.


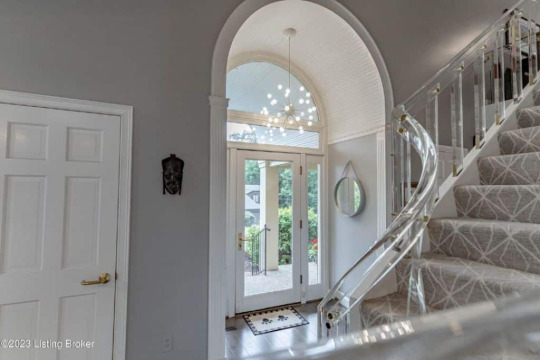
Look at the doors above the dining area. There has to have been a balcony there.
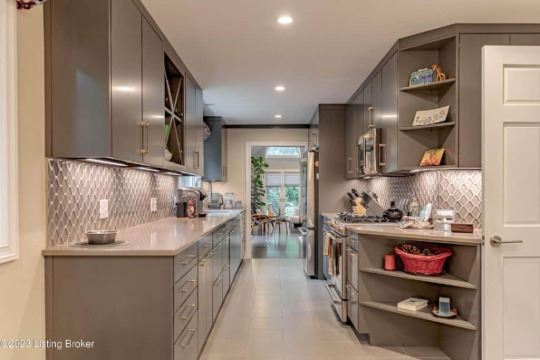

Gray galley kitchen. I do like the cabinetry and backsplash, though, especially the wine rack.
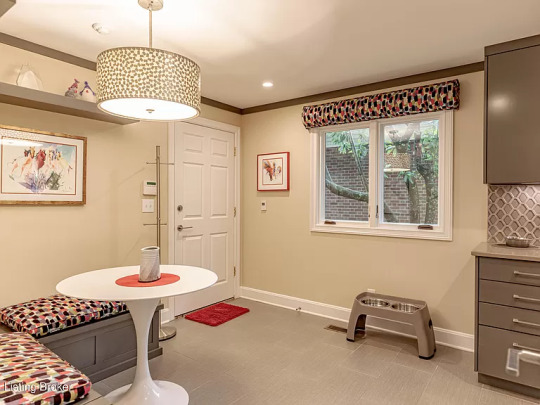
There's a small eating area off the kitchen.
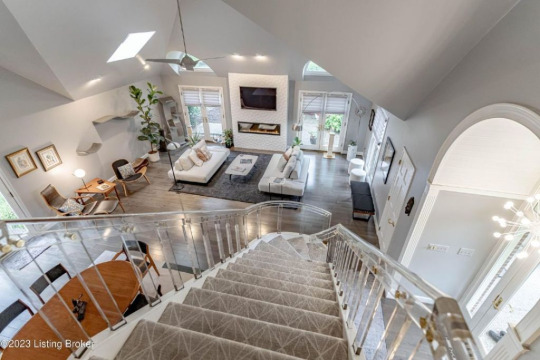
View from the stairs.
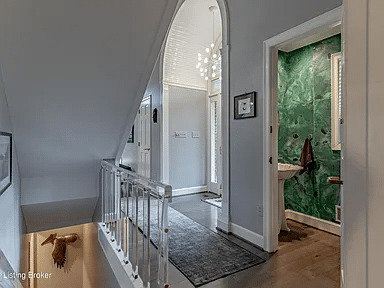
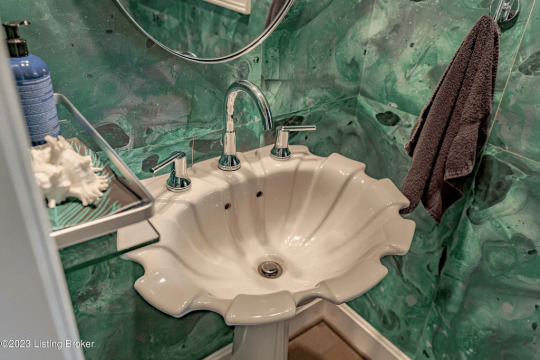
Powder room on the upper landing. Look a the cutouts on the pedestal sink.
It looks like there's a modernized fireplace down in the left corner of the photo.
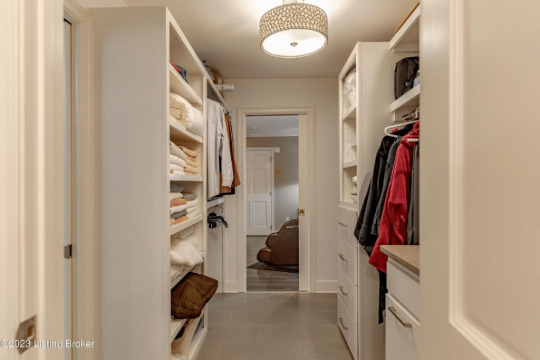
It appears that the primary and secondary bedrooms share a walk-in closet, plus it also has its own closet.
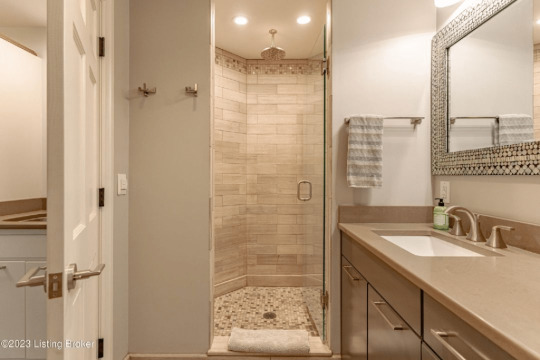
One of 3 baths is a shower room.
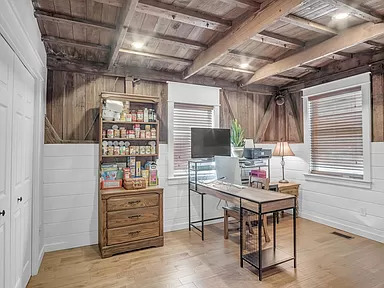
Here's an interesting use of an odd-shaped space.
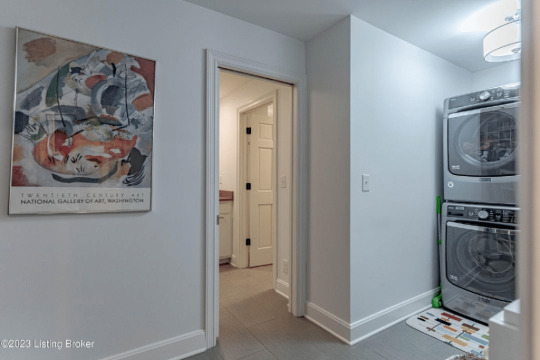
The basement is partially finished and includes a laundry room.

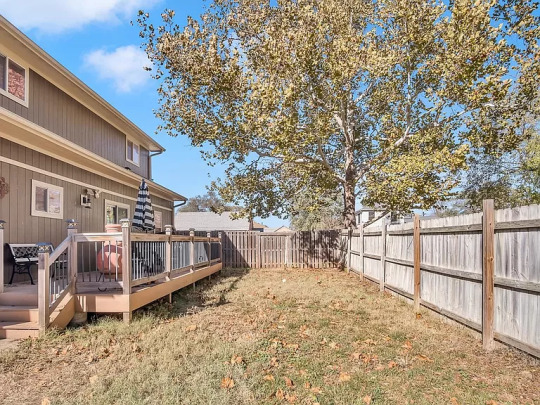
Small patio with a yard beyond.
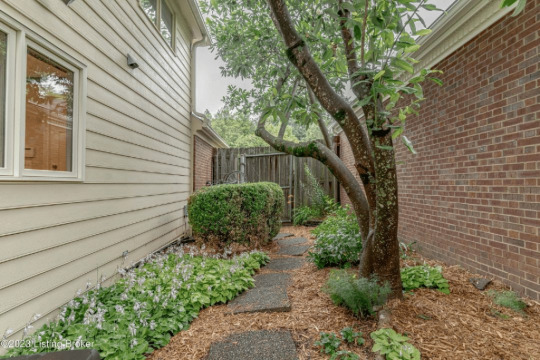
A gate and path that probably leads to the garage.
69 notes
·
View notes
Photo
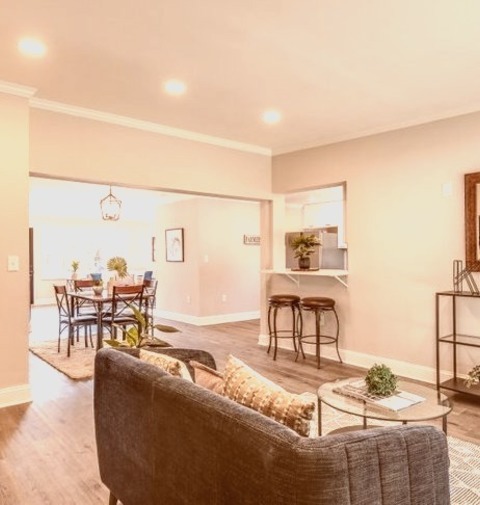
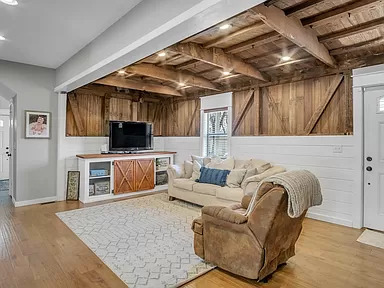
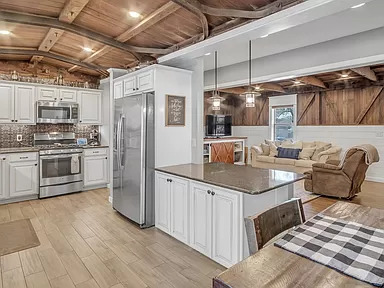
Home Bar Family Room in Baltimore
Example of a medium-sized traditional family room design with a gray floor, beige walls, and a bar.
#maryland home#maryland remodel#home renovation#baltimore renovation#home remodel#baltimore home remodel#remodeled home
0 notes
Photo

Hall Dallas
Large transitional image of an entryway with a brown floor, gray walls, and a black front door.
0 notes
Text
New York Exterior Wood
Large traditional white three-story wood exterior home idea
0 notes
Photo

Home Bar Galley
Image of a home bar in a small mountain style galley with a medium tone wood floor and a brown floor, shaker cabinets, dark wood cabinets, granite countertops, and a black backsplash.
0 notes
Photo
Traditional Exterior - Exterior
Large elegant two-story white wood home exterior
#traditional exterior#white columns#black interior door#remodeled home#white exterior#open concept#brick staircase
0 notes
Text

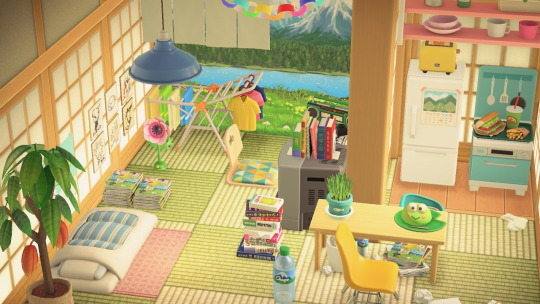
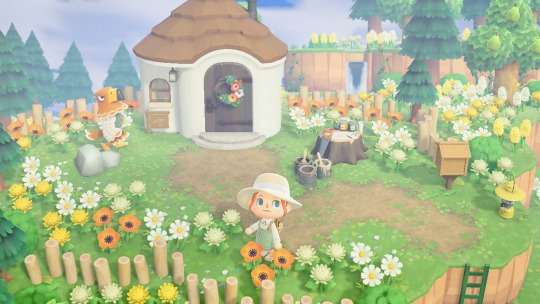
moving in ..
#remodel for punchy AGAIN!#acnh#acnh interior#acnh build#acnh interior design#animal crossing interior#animal crossing house#animal crossing new horizons#animal crossing new horizons interior#hhp#acnh hhp#happy home paradise#acnh island#anime#animal crossing
2K notes
·
View notes
Text
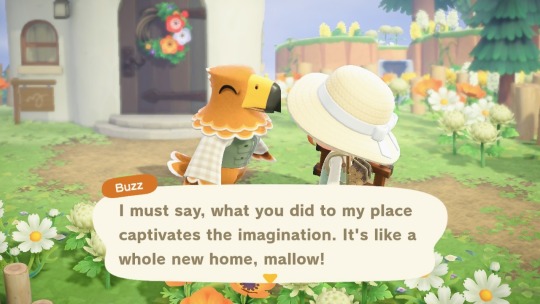

Got Buzz’s home off the beach! I made his interior pretty simple, for now.
#remodeled homes#buzz’s house#villager homes#yards#buzz#villagers#brandy#rooms by me#acnh#mine#animal crosing new horizons#my island#lil leaf island#November 2023#interiors
191 notes
·
View notes
Text

Wait a minute. The owners of this 1929 home in Newton, Kansas decided they wanted to gut it and start over. Once they tore into it, they realized it was framed using two 40′ railroad box cars! The cars date back to the 1800’s. After seeing what they were dealing with, they decided to completely draw up new plans and build an entire house around the two box cars. 4bds, 3 ba, $250K. (Price cut by $5K) Really, I think they ruined it.
This is what's left of the car in the living room- just what used to be the top of it. Sort of. You could make that ceiling, it doesn't look like an old box car. Where's the rest of it?

I've never been so disappointed. If you didn't tell me that was a an old box car, I'd have never guessed.

And, this is the other one in the kitchen.
So, these would've been the 2 cars, side-by-side, with a hall between. This is the worst re-do I've even seen. It looks nothing like a home built around 2 railroad cars.

There's a small piece in the ceiling of this bath. So, all they really kept were some wood tops of the cars.

And, here's another part of one in a child's play room.
I don't know if this is part of a car in the home office, or if they just put up a similar beamed ceiling.
A second floor was built on top of the "cars."

There's a primary bedroom.

A bath.

And, a nursery, plus 2 other bedrooms.
In the small backyard they build a deck onto the back of the house. This was a unique opportunity, and they destroyed the historic cars.
54 notes
·
View notes
Text

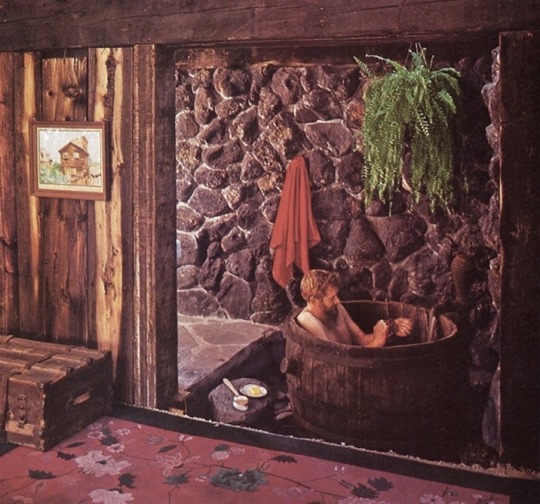
A beautiful stone tub
#toya's tales#bathroom#toyastales#bubble bath#toyas tales#bathtime#home decor#bathtub#modern bathroom#rustic bathroom#tropical bathroom#stone bathtub#spa bath#october#interior design#architecture#fall#autumn#bathroom renovation#bathroom remodeling#beige moodboard#beige aesthetic#room dividers#chandelier#romantic#soaking tub#chillout#chill vibes#relaxing#me time
240 notes
·
View notes
Text

nearly done! this was the first big project of our new house: fixing up our future bedroom. entire ceiling and walls were knockdown / popcorn texture that we plastered over and smoothed out (weeks of work), nasty carpet pulled up to reveal beaten floor which my wife sanded down (learning on the go). years and years of gross buildup scraped away, bit by bit. it's starting to look like a proper room now...
73 notes
·
View notes
Text

priya's conifer station flat 👠
#simblr#ts4 build#oc:priya#idk#i'm really not good at modern decor#but i tried for her#in my brain she moved into fawn & bri's old place#and remodelled#i still need to finish her home office#and balcony#but it's ok i guess
93 notes
·
View notes
Text
renovation stories🌿
https://lobsterandswan.com
63 notes
·
View notes
Text
progress etc
god it's less than a week to christmas. ok cool. yeah. great. all right.
i am. what have i been doing??? i don't know. I've sewn several things-- most notably a pair of leggings-- and the house renovations have progressed to the point that we're getting final measurements for counters tomorrow. I'll put pictures behind the cut. We painted the ceiling ourselves, as paint isn't included in the remodel.
I don't remember what I last posted pictures of. IDK there's a floor now, I didn't take pictures of that yet.
ok i was wrong i do have one photo of the floor but it's in-progress, max is in the background wedging it in between the cabinets.
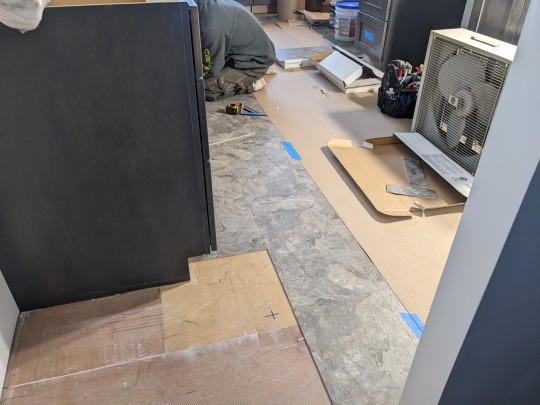
[image description: an awkward angle looking down standing in the side door entryway, with the blue-washed gray side of a new cabinet facing me, some of the plywood subfloor exposed coated in glue, mottled gray fake stone tiles laid out and the hunched form of a man in a gray sweatshirt kneeling on the floor in the background with his head hidden behind the cabinet. Listen I wasn't trying to be creepy.]
it's fake stone vinyl tiles. i know, not normally my aesthetic, and it's probably the thing that'll look most dated in a little bit, but there was no point trying to do anything wooden or wood-look because the rest of the house has original hardwood from 1950 and anything new wouldn't match. (the hardwood badly needs refinishing, let's not contemplate that right at this juncture...)
Max is from Elmira, btw, and only moved to Buffalo a year ago-- just in time for the blizzard to absolutely destroy his first apartment here and wreck most of his stuff. It was a bit of a harsh welcome to the city. He's soft-spoken and extremely polite and doesn't really know how to talk to me, not the way Jim the installer (fiftysomething and very experienced) does. He did gently laugh at me when I left yesterday and then immediately had to come back to get my keys, which I had locked inside the house (but of course as he was still there the other door was still unlocked). "I grew up in the kind of place where you don't bother locking doors," I said, and he was like "lol same".
(I know Elmira because Middle-Little went to college there. It's a sort of dire little place in the Southern Tier-ish region of NY, a couple hours away. The region is fairly economically devastated, alternating crushing rural poverty with Tourism Dollars; Elmira itself boasts a college, a prison, and precious little else.)
Anyway-- painting the ceiling over the weekend, I discovered that the real life hack for painting a ceiling is for at least one member of your party to be six feet three inches.

[image description: my dude, a tall thin white man in an uncharacteristic ball cap he's only wearing to avoid paint splatter (it is embroidered with the HTML tags <head> on the front and </head> on the back, and was a gift to him in like 2002) is standing on the cardboard-and-sheet-draped floor of the kitchen using a paint roller on the ceiling, which he can reach easily; in front of him the cabinets are all draped in old sheets as well and there's a random light bulb sticking out because the installer wired that in for us to use as a work light since the electricians haven't installed the ceiling lights yet which was why it was an ideal time for us to paint said ceiling.]
Anyway it's going great. The counters won't go in until January sometime, but early January. The electricians plan to come the day after Christmas and I won't be there until the afternoon so I'm going to check in with Jim today about what they'll need.
Meanwhile, I remembered that I hadn't set myself the goal of crafting anything for Christmas except I bought a bunch of scarf blanks from Dharma Trading to dye as gift wraps and gift components and my basement is all torn apart and I don't dare make that kind of mess in my mother-out-law's basement so I need to work out how to get that done so I'm really kind of slogging through that, a bit.
OH i just went to look at what the last pictures I posted of the kitchen were and the answer is LIKE NONE so omg sorry here's before we painted the ceiling, where you can see what it's gonna look like!

[image description: This is View A, from the side door toward the front of the house. Along the left of the photo is a line of cabinets, a set on the ground and then another mounted up on the wall; in the middle of that will be the sink, and then farther down a dishwasher (!!!) and beyond that the stove, all along that north wall of the house. The middle of the photo is the big bay window we had installed, and there are cabinets along the front of it: the countertop will extend out from those, and will form a seating area. To the right of the window, the front door is now visible, that little wall having been removed and now being a wide-open space into the entryway. The right of the photo is the interior wall of the kitchen, now transformed into a built-in pantry space with a fridge hole in the middle, where the extra flooring tiles are currently stacked.]

[image description: this is View B, from the front door into the kitchen. The foreground is the big open space where the wall was removed; the bay window is just out of frame to the right, and the far wall shows the empty space (now containing buckets of floor glue and a roll of cardboard) where the stove will be, and above it will be an extractor hood (no more Everything Smells Like Salmon!!), and the empty space (now filled with a rolling garbage can the contractors are using) for the dishwasher, and then the little window right above the sink-- this is a detail we've kept from the old kitchen, that's where the sink was and that's where the window, but the window seems bigger because the cabinets aren't packed so tightly around it now-- and you can see the side door there, and then the left of the photo shows the edge of the pantry unit where the fridge will go.]
It's a much more open space, both of us can be in there, someone doing dishes while you cook is no longer the world-ending inconvenience it historically has been, and also now you can talk to someone in the living room while you're in the kitchen without needing to holler.
Yeah the gray cabinets are-- well they're pale wood washed with dilute blue, is what they are, and all the hard fixtures are in neutral shades like that, grays and gray-blues, and the countertops will be white with tiny sparkles, and the idea is that the big wall to the west and the little bits of wall around the windows will be painted some bold color we'll match with like throw rugs and hot mats and other changeable fixtures, so the kitchen can get "redecorated" with a new coat of paint and not clash with the hard fixtures. This job cost five figures, we're not re-redoing it during our lifetimes.
31 notes
·
View notes
Text

Design Build Modern Transitional Kitchen Remodel with white cabinets, quartz countertops, wood floors just completed in Lake Forest Orange County, California
#Kitchen#Remodel#Design build#kitchen remodel#home remodel#kitchen Idea#custom kitchen#modern kitchen#transitional kitchen#orange county kitchen#contemporary kitchen#best of orange county#interior design#home#renovation#general contractor#White cabinets
31 notes
·
View notes
Last Seen Blogs

jay-wasreblogging
A Side Blog, The Main is @Jay-Wasstuff

shoutsfromthedesert
shouts from the desert

cosmicevolushion
cosmicevolushion

shilohbot-blog
Game Over

mytoner
MyToner Best Print Ink