#router vuejs example
Explore tagged Tumblr posts
Visit Tumblr Blog
Explore Tumblr blogs with no restrictions, modern design and the best experience.
Last Seen Tumblr Blogs


Fun Fact
In Q3 of 2020, 31% of US users access the Tumblr app daily.
Text
Contract-Based VueJS Developers Ahmedabad for Hire – Flexible & Expert Solutions
In the fast-evolving tech landscape, businesses are always seeking efficient and scalable web solutions. VueJS, a progressive JavaScript framework, is highly favored for building dynamic, high-performance applications. In Ahmedabad, there is an increasing demand for contract-based VueJS developers due to their flexibility and the city’s thriving tech community. Whether you're a startup or an established enterprise, hiring contract-based VueJS developers in Ahmedabad offers the ideal mix of cost-effectiveness, expertise, and agility.
In this guide, we’ll explore everything you need to know about hiring VueJS developers on a contract basis, discuss the best practices, and how companies like i-Quall stand out as leaders in this domain.
Why Hire Contract-Based VueJS Developers?
When you're building a modern web application, VueJS is often the go-to framework because of its simplicity, flexibility, and the strong backing of an active developer community. Businesses often prefer contract-based VueJS developers as it allows them to have more control over their projects without committing to long-term employment costs.
Benefits of Hiring Contract-Based VueJS Developers
Flexibility: Hiring on a contract basis gives businesses the flexibility to scale up or down as per the project’s needs. You can hire a VueJS developer for specific phases of a project—be it the development stage, the launch, or even for post-launch support.
Cost-Efficiency: Contract-based hiring helps companies save money on infrastructure, training, and other long-term costs associated with permanent hires.
Expertise On-Demand: Contract-based developers are often seasoned professionals who bring their expertise to your project. This means you get immediate access to talent that can deliver high-quality results without the need for extensive onboarding.
Project Focus: With contract-based developers, your project becomes their focus, leading to faster turnaround times and dedicated attention.
Steps to Hire Contract-Based VueJS Developers in Ahmedabad
Hiring the right contract-based VueJS developer is critical for the success of your project. Here’s a step-by-step guide to finding and hiring the best talent in Ahmedabad:
Step 1: Define Your Project Scope
Before you begin searching for a VueJS developer, it's crucial to have a clear understanding of your project’s requirements. Define the scope, including:
The nature of your application (e-commerce, SaaS, dashboard, etc.)
Specific features or integrations required
Expected timeline and milestones
Budget constraints
Having a well-defined project scope will help you communicate effectively with potential developers and agencies.
Step 2: Research Developers or Agencies
Start by researching VueJS developers or development agencies in Ahmedabad. Look for professionals with a strong portfolio that aligns with your project needs. A good starting point is to:
Explore professional networks like LinkedIn
Check developer communities like GitHub and Stack Overflow
Visit platforms such as Upwork or Freelancer where contract-based developers showcase their expertise
In Ahmedabad, companies like i-Quall are known for providing top-notch VueJS development services. They offer tailored, contract-based solutions for businesses of all sizes.
Step 3: Evaluate Technical Expertise
Once you’ve shortlisted candidates or agencies, evaluate their technical expertise. A skilled VueJS developer should be proficient in:
Vue CLI, Vue Router, and Vuex for state management
JavaScript (ES6+), HTML5, CSS3
Component-based architecture
Integration of third-party libraries and APIs
Version control (Git)
Ask for case studies or previous project examples that demonstrate their knowledge in the VueJS ecosystem. You can also conduct technical interviews or tests to assess their problem-solving abilities.
Step 4: Check for Cultural Fit
Hiring contract-based developers doesn’t mean overlooking cultural fit. Since VueJS development often requires collaboration between teams, it's important that the developer is communicative and adaptable. Ensure that the candidate can work effectively with your team, especially if you're using agile or scrum methodologies.
Step 5: Negotiate Terms & Contracts
When hiring on a contract basis, it’s important to clarify:
The exact deliverables and deadlines
Payment terms (hourly, fixed, or milestone-based)
Confidentiality agreements (NDAs)
This step ensures that both parties are on the same page and that the project runs smoothly without legal or financial misunderstandings.
Contract-Based VueJS Development in Ahmedabad
What Does a Contract-Based VueJS Developer Do?
A VueJS developer focuses on building user interfaces and single-page applications using the VueJS framework. They handle everything from designing interactive elements to integrating back-end APIs. Hiring a contract-based VueJS developer allows you to leverage their expertise for a specific project without long-term commitment.
How Long Should You Hire a VueJS Developer for?
The length of the contract depends on your project. Short-term contracts typically range from a few weeks to a few months, while long-term engagements could last a year or more for larger projects. Discuss the duration upfront and ensure that the developer is available for the entire duration of the project.
What Tools Should You Expect a VueJS Developer to Use?
A professional VueJS developer will use various tools to streamline the development process, such as:
Vue CLI for rapid project scaffolding
Webpack for module bundling
Babel for JavaScript compatibility
Axios for handling HTTP requests
Vue DevTools for debugging
Let’s say you're developing a sophisticated e-commerce platform that requires real-time data binding, seamless integration of third-party payment gateways, and a user-friendly dashboard. By hiring contract-based VueJS developers from i-Quall, you can expect:
Customized solutions with a focus on performance optimization
Efficient, maintainable code using Vue's component-based architecture
Expertise in handling complex integrations
Timely delivery with post-launch support
i-Quall offers flexible contract models that cater to both startups and large enterprises, ensuring that you only pay for what you need.
As one of Ahmedabad’s leading software development agencies, i-Quall provides expert VueJS development services on a contract basis. With a team of seasoned developers, i-Quall excels in delivering scalable, robust, and high-performance web applications using VueJS. Whether you need to build a new project from scratch or enhance an existing system, i-Quall's contract-based hiring model ensures cost-effective, top-quality results.
Conclusion
Hiring contract-based VueJS developers in Ahmedabad gives your business the flexibility to bring in top-tier talent for specific projects, without the overhead of long-term employment. With the right approach and understanding of your project’s needs, you can find experienced developers who will deliver exceptional results. Companies like i-Quall Infoweb make the process easier by offering tailored solutions that are scalable and efficient.
Whether you're building a single-page application, an e-commerce platform, or a custom dashboard, choosing the right contract-based VueJS developer will be key to your project’s success.
URL : https://www.i-quall.com/ahmedabad/contract-based-vuejs-developers-ahmedabad-for-hire/
0 notes
Text
Vue.js Tutorial From Scratch - e16 - Auto Format Input Fields - VueJs
Vue.js Tutorial From Scratch – e16 – Auto Format Input Fields – VueJs
Vue.js Tutorial From Scratch – e16 – Auto Format Input Fields – VueJs
[ad_1]
A cool way to spice up your forms is to add some auto format to your input fields. Allowing your users to get automatic feedback on things like phone numbers that need to follow a particular template. In this lesson, we write a phone auto format component, from scratch.
For the best experience, follow along in our…
View On WordPress
#format input fields#laravel computed property#laravel mix#laravel vue tutorial#Learn Vue#Learn Vuejs#router vue#router vuejs example#vue#Vue 2019#vue course#vue crash course#vue for beginners#vue framework#vue input#Vue JS app#vue js frontend laravel backend#vue methods#vue pages#vue tutorial#vue webpack#vue-router#Vue.js#vue.js tutorial 2019#Vuejs#vuejs course#web development framework
0 notes
Text
Advanced mce remote mapper tool load mc

#Advanced mce remote mapper tool load mc software
#Advanced mce remote mapper tool load mc series
#Advanced mce remote mapper tool load mc free
#Advanced mce remote mapper tool load mc series
Vue.js Screencast Series in Spanish on.
Vue.js VideoTutoral Series in Spanish (3-8-2016) on YouTube by Juan Andrés Núñez.
Hybrid App Example with Laravel and Vue.js in Portuguese by Vue.js Introduction Turkish Language on oguzhan.in.
Vuex introduction video - James Browne from London Vue.js Meetup #1.
Create a GitHub File Explorer Using Vue.js on Scotch.io.
Vuejs 2 Authentication Tutorial on Auth0 blog.
React vs Vue - their communities (My typeof Radio).
Evolution of Vue - Part III (My typeof Radio).
Evolution of Vue - Part II (My typeof Radio).
Evolution of Vue - Part I (My typeof Radio).
What is Pinia? with (My typeof Radio).
Vue podcast list via The QIT Tech Podcast Indexer.
Animating VueJS with Sarah Drasner(Software Engineering Daily 01-12-2017).
Request For Commits #12 - Crowdfunding Open Source (Vue.js) (06-15-2017).
MW S04E08 - Vue.js with Evan You and Sarah Drasner (04-27-2017).
Codecasts #2 - Falando Sobre Vuejs e Web Components ().
#Advanced mce remote mapper tool load mc software
Software Engineering Daily (12-29-2015).VueJS Uzbekistan - Telegram Community and Support Group.vueslack - 2300+ registered users worldwide.VueJS Iran - Telegram Channel & group (group link available in channel bio).vue-requests - Request a Vue.js module you wish existed or get ideas for modules.
#Advanced mce remote mapper tool load mc free
Prokarman Resume Builder - A Free Resume Builder for crafting resumes for your dream job.Vue.js Interview Questions - A List of 300 VueJS Interview Questions and Answers.Vue.js Jobs - VueJobs - A Vue.js job portal to hire or get hired for all your Vue.js jobs.Notes on Vue - A personal guide to Vue development.Best vue.js Courses On YouTube - Handpicked list of best Vue.js tutorials on YouTube.Vue.js Articles - Assorted Vue 2 and 3 tutorials and articles.Vue.js Workshops - Learn Vue 2, in browser, by building 3 applications: Landing page, Todos App and Podcasts aggregator.( Vue.js, Vue-Router, Vuex, Vue-Axios, Vue-Apollo ).Vue 3 Video Playlist - Amazing Vue 3 tutorials and experiments.Vue Mastery - The ultimate learning resource for Vue developers.- An extensive list of websites created with the Vue.js Javascript framework.Vue.js Online Courses Directory - Vue.js courses from top e-learning platforms curated by Classpert, a online course search engine.Vue.js DEV Community - Official tag for the Vue.js JavaScript Framework on DEV.to.A minimalistic list of Vue.js libraries and components based on the awesome-vue repo. Tips & tricks about the Vue ecosystem, for busy devs. Vue School - Learn Vue.js from video courses by core members and industry experts.Vue Curated Resources - Recommended Vue.js courses and tutorials.Weekly Vue.js Newsletter - Weekly Vue.js news & tips by Vue News - Social website focusing on the latest Vue.js news and information.Vue.js 資料まとめ(for japanese) by Vue.js Wikipedia.A curated list of awesome things related to Vue.js
0 notes
Text
Reasons Why You Should Hire a Vue JS Development Company
There are many benefits of hiring a Vue JS development company. These benefits include flexible working hours, Search engine visibility, and scalability and extensibility. If you're unsure about whether a Vue development company will work for you, here are some things to consider. Also, make sure you're looking for a company that offers health insurance, medical or family leaves, and internal education programs. Lastly, don't forget to encourage employee attendance at tech conferences.
Flexible working schedule
Hiring a Vue JS development company is an excellent way to avoid a long waiting list. If you're in need of a Vue app for a small company, a flexible working schedule is essential. Most developers have a computer science degree, but if you're a small startup, you can consider staff augmentation. Alternatively, you can hire a Vue developer on a contract basis.
VUE JS development companies can provide you with highly experienced VUE developers who can add innovative features and optimize the performance of your app. They'll also sign NDAs and use top-notch security measures. You can rest assured that your VUE JS project will be fully protected by intellectual property rights. Flexible working hours are essential for startups, so make sure you hire a company that can offer you that.
Search engine visibility
If you're struggling to find a developer to design a site or app for your business, you might want to consider hiring a VueJS development company. A VueJS developer will be able to customize the look and feel of your site, while also taking into account SEO and scalability. VueJS developers also use the Vue Router, which allows you to keep your navigation organized and prevents content from affecting other parts of the application.
Scalability
If you're thinking about using Vue to build a new web application, you're probably wondering how scalable it is. After all, there are some big differences between traditional frameworks and Vue, and these have some implications for scalability. However, you can overcome most of these limitations by sticking to conventional coding practices. Let's look at a few of the differences between the two frameworks and how Vue is scalable.
The syntax of Vue is very similar to AngularJS, which was the inspiration for the language early on. Despite having many similarities, however, Angular has its own set of issues. The key difference between the two frameworks is the simplicity of their API and designs. That's one of the big differences between the two frameworks, and Vue attempts to improve on these problems. To do this, it is easy to compare the two.
Extensibility
The extensibility of Vue JS development enables developers to build a wide variety of applications with minimal front-end knowledge. Vue inheritance, for example, allows developers to create advanced modules on a parent component. The inheritance concept is implemented by using slots in Vue. This allows developers to build advanced modules on the parent component, but still maintain a streamlined development process.
The core of Vue is a lightweight framework which can be used to build a variety of web applications. Its reactivity system is very similar to Angular, so switching from these frameworks won't be too difficult. Its two-way data binding system makes it easy to update components and manage DOM updates. However, it does suffer from a single issue: the language isn't entirely consistent with Angular.
Performance
While it may not seem like it, there are some performance reasons to hire a Vue JS development company. These companies are a good option for companies that don't have the resources to hire a full-time developer. These companies can fill in for a short-term gap in your development team and will make sure your project doesn't slow down because of a lack of skill. These companies can accommodate both small and large companies.
The platform helps you build robust, interactive applications. The Vue JS framework provides numerous tools for a rich user interface. It also has a minimal learning curve, which makes it a great choice for beginners. The low learning curve and simple architecture make it easy to use, and this helps to reduce downtime. If you're in need of an application developed with this technology, contact Nextbrain Technologies for more information.
0 notes
Link
Features of VueJS
Features of vuejs : Vue is called as a progressive JavaScript framework with various features for building user interfaces. The following are the major features available with VueJS.
Improvement & Bug Fixes: In the supplement to providing these new features, vue.js further comes with several improvements and bug fixes.
Improved Typescript Support & Integration: The most modern version of VueJS render stable support to TypeScript. The improved integration improves the type of declaration process.
Better Error Handling & Reporting: Whilst using earlier versions of vuejs, programmers have to manipulate with the unexpected errors all through either config.errorHandler option or render an appropriate error component.
Better Functional Component Support: VueJs renders more considerate assistance to the functional components which are described as a single-file component (SFC). Here, the developers can now appropriate the vue-loader to represent functional components in an individual vue.js file.
Environment-Agnostic Server-Side Rendering: Unlike the other JS libraries, VueJS appears with built-in streaming server-side rendering. The hallmark makes it quite more accessible for the programmers to execute server-side rendering asynchronously.
VueJS Installing Steps
1. npm install -g @vue/cli 2. vue --version for check version 3. vue create {projectname} 4. need dependency a. vue-router b. dart-sass c. babel d. pwa 5. sudo npm install --save axios vue-axios { dipendency for ajax request} 6. npm install vue-easysession --save {dipendency for session}
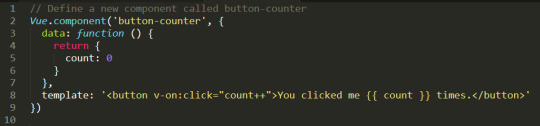
Base Example
Here’s an example of a Vue component: // Define a new component called button-counter.

0 notes
Link
0 notes
Photo

RT @VueNewsletter: ☀️@vuejs News #152 🚦 Including: 🚦 Vue-Router v3.1.0 release by @posva 🎨 Buefy v0.8.0 released ⒡ New examples of the function-api usage and more! Read the stories at: https://t.co/sDSYxLSfrR P.S. No podcast this week 😢
0 notes
Photo

RT @VueNewsletter: ☀️@vuejs News #152 🚦 Including: 🚦 Vue-Router v3.1.0 release by @posva 🎨 Buefy v0.8.0 released ⒡ New examples of the function-api usage and more! Read the stories at: https://t.co/sDSYxLSfrR P.S. No podcast this week 😢
0 notes
Text
Vue Routing Tutorial: Getting started with Vue Router
VueJS is a powerful and advanced Javascript structure for generating effective, unique front-end apps and creating SPA. VueJS provides the Vue Router Library to operate a tool called "routing." This gives a more satisfying UI and enhances the responsiveness of the application.
In this tutorial, we will see how to execute Vue Router using our simple single-page application. We will generate a small demo app, some of the pages will be linked via Vue Router.
Vue Router Example: Steps to implement Vue Routing
We have divided the steps into four sections-
Project Setup
Create components
Linking components using Vue Router
Dynamic Routing
Implementing Page Not Found
Read More in detail about Getting started with Vue Router.
0 notes
Text
Hire Dedicated VueJS Developers in Ahmedabad | i-Quall Expertise
Hire Dedicated VueJS Developers in Ahmedabad: A Complete Guide
As technology continues to evolve, VueJS has emerged as one of the most preferred front-end frameworks due to its simplicity, flexibility, and powerful capabilities. Hiring dedicated VueJS developers in Ahmedabad, especially from a professional team like i-Quall, can offer businesses the competitive edge they need in their digital endeavors. This guide will help you understand why VueJS is in high demand, how to hire the best developers, and what to look for in a development partner.
VueJS is an open-source JavaScript framework used for building user interfaces, particularly single-page applications (SPAs). Its reactive two-way data binding, component-based architecture, and seamless integration with other libraries make it a popular choice for developers and businesses. The tech ecosystem in Ahmedabad, with companies like i-Quall leading the way, provides a hub of talent skilled in VueJS. The city has a growing tech scene with dedicated developers who specialize in creating high-performance applications for a global clientele.
When you decide to hire VueJS developers, especially dedicated ones, you are ensuring that the developer or team is fully focused on your project. This helps in achieving better results, faster delivery, and more efficient communication. Ahmedabad has established itself as a hub of tech expertise, and many companies in this region provide dedicated hiring models to cater to specific business needs.
Let’s dive into the process and benefits of hiring dedicated VueJS developers from Ahmedabad, while highlighting the expertise of i-Quall in this field.
Hire Dedicated VueJS Developers in Ahmedabad:
Define Your Project Requirements: Before you begin your search for a VueJS developer, it's important to have a clear understanding of your project requirements. Is it a single-page application, an e-commerce site, or a dynamic web portal? Define your goals, desired functionalities, and the scope of your project. Targeted Keyword: Defining the project requirements is the first step in ensuring you hire the right VueJS developers in Ahmedabad.
Research Development Companies: Ahmedabad hosts numerous software development companies, but few specialize in VueJS as efficiently as i-Quall. Begin your research by narrowing down companies that have a proven track record with VueJS development. Check for portfolios, client testimonials, and project case studies. Targeted Keyword: Hiring dedicated VueJS developers in Ahmedabad from trusted companies like i-Quall ensures professional results.
Evaluate Technical Expertise: VueJS is highly adaptable, but expertise in JavaScript, HTML, CSS, and Node.js is critical for leveraging the full potential of the framework. Ensure that the developers you're considering have in-depth knowledge of the VueJS ecosystem and can integrate it seamlessly with other tools. Targeted Keyword: Evaluating technical skills before hiring VueJS developers in Ahmedabad helps in delivering efficient, maintainable code.
Interview the Developers: Conduct thorough interviews to assess the problem-solving capabilities of the developers. Focus on their experience with VueJS features such as Vue Router, Vue CLI, Vuex (state management), and Nuxt.js. Also, ask for coding examples or sample projects they’ve worked on. Targeted Keyword: Interviewing potential VueJS developers in Ahmedabad helps in identifying the best talent.
Consider Dedicated Hiring Models: The advantage of hiring dedicated VueJS developers is that they focus solely on your project. Companies like i-Quall offer flexible engagement models such as full-time, part-time, or hourly-based contracts, giving you the freedom to choose based on your project scope. Targeted Keyword: Choosing a dedicated hiring model is ideal when you want continuous attention from VueJS developers in Ahmedabad.
Focus on Communication and Project Management: Ensure that the development team maintains clear, timely communication throughout the project. Agile development methodologies and tools like Jira, Trello, or Asana should be used for proper project tracking. Targeted Keyword: Good communication and project management skills are key when working with dedicated VueJS developers in Ahmedabad.
Quality Assurance and Post-Development Support: Post-development support is crucial to ensure the long-term success of your project. Make sure the team conducts thorough testing, debugging, and provides maintenance services after deployment. Targeted Keyword: Quality assurance is a must when collaborating with VueJS developers in Ahmedabad for scalable solutions.
VueJS has a wealth of features that make it ideal for modern web applications. Here’s a quick knowledge base to further understand its relevance:
Component-Based Architecture: VueJS uses a component-based architecture that allows developers to break down large applications into smaller, reusable pieces. This makes development more efficient and easier to maintain.
Two-Way Data Binding: With two-way data binding, VueJS allows real-time synchronization between the model and the view, which enhances the efficiency of applications, especially for interactive user interfaces.
Virtual DOM: VueJS uses a virtual DOM, making updates and rendering faster, which is critical for performance optimization.
Ecosystem Flexibility: VueJS integrates seamlessly with various libraries and can also work well with other frameworks, making it flexible for use in different types of projects.
Let’s say a business in Ahmedabad is looking to develop a dynamic, responsive web application for a fast-growing e-commerce platform. Hiring a dedicated VueJS developer from i-Quall can be the perfect solution. The VueJS developer would leverage the framework's two-way data binding to sync real-time inventory updates with the front end, ensuring that customers see up-to-date information while browsing products. Additionally, the VueJS component-based structure allows for efficient scaling of the application as the business expands.
Targeted Keyword: Working with i-Quall's dedicated VueJS developers in Ahmedabad ensures that your project benefits from the best practices in VueJS development.
i-Quall stands as one of the leading tech companies in Ahmedabad, with a focus on delivering quality VueJS development services. Their team of dedicated VueJS developers is known for their technical expertise, attention to detail, and dedication to client success. i-Quall’s developers work closely with businesses to understand their goals and create tailor-made solutions that deliver measurable results.
Targeted Keyword: Partnering with i-Quall’s VueJS developers in Ahmedabad gives your business access to top-tier development talent and project success.
Conclusion:
Hiring dedicated VueJS developers in Ahmedabad can transform your project by delivering fast, scalable, and efficient applications. With the city's growing pool of tech talent and companies like i-Quall Infoweb providing tailored solutions, you can be confident that your development needs will be met. By following the right steps—defining your project requirements, researching potential developers, and focusing on expertise and communication—you can find the perfect development partner to bring your project to life.
In today’s digital world, hiring dedicated VueJS developers from Ahmedabad ensures you have the right resources to build, scale, and maintain your web applications effectively. With the right team, your project can achieve the kind of success that drives long-term business growth.
URL : https://www.i-quall.com/rajkot/hire-dedicated-vuejs-developers-ahmedabad/
0 notes
Text
Vue.js Tutorial From Scratch - e13 - Vue Router - VueJs
Vue.js Tutorial From Scratch – e13 – Vue Router – VueJs
Vue.js Tutorial From Scratch – e13 – Vue Router – VueJs
[ad_1]
Vue Router is the official plugin for creating robust single page applications. In this episode, we install and create a simple 3 page SPA showing the basics of routing with Vue Router.
For the best experience, follow along in our interactive school at https://www.coderstape.com
Resources Vue.js Documentation https://vuejs.org/v2/guide/
View On WordPress
#app#javascript#laravel computed property#laravel mix#laravel vue tutorial#Learn Vue#Learn Vuejs#router vue#router vuejs example#vue#Vue 2019#vue api#vue course#vue crash course#vue for beginners#vue framework#Vue JS app#vue js frontend laravel backend#vue link to another page#vue methods#vue pages#vue router link#vue tutorial#vue webpack#vue-router#Vue.js#vue.js tutorial 2019#Vuejs#vuejs course#web development framework
0 notes
Text
How To Do More With Vue Router
About The Author
Front-end developer based in Lagos, Nigeria. He enjoys converting designs into code and building things for the web. More about Timi …
Vue Router is the official router for Vue that is mostly used for creating multiple pages living on different routes (/home, /profile) in your application but has some features that some people do not know about. In this tutorial, we’re going to learn about some amazing features the Vue Router has and how we can make use of them in our app.
Vue Router is the official router for Vue. It deeply integrates with Vue core to make building Single Page Applications with Vue a breeze. Some of its popular features include:
Dynamic Route matching.
Named Routes.
Named views.
Programmatic navigation.
These features are heavily used when developing with Vue and this is because they are part of the basics you need to understand to efficiently use the Router. But the Vue Router has some very useful features that can be very helpful in development and in this article, we’re going to take a look at them.
For the purpose of this tutorial, we’re going to be building a simple application that would help in understanding some of the concepts covered in this article. You can find all the code used in this article on GitHub. If you are interested in doing more with the router, you’ll benefit from this tutorial.
Note: This article requires a basic understanding of Vuejs and Vue Router.
Scroll Behaviour
This is the behavior that is observed when navigating from one page to another. The default behavior of Vue router is only noticeable after scrolling to a position that isn’t the top of the page. This is because, by default, the scroll position when navigating away from a page is maintained on a new page. What this means is, if you click on a link that leads to a new route ( i.e from /home to /about) in a position that is let’s say close to the footer of the current page, the new page would start from that same position instead of starting from the top of the page.
I have created a Vue application using the Vue CLI command vue create vue-router-demo, I also selected Vue Router as part of the options while setting up my app because we will be using it throughout this tutorial.
We will also need to make API calls to JSONPlaceholder, to illustrate some of the concepts using Vue router. For this, we will be using Axios. To install Axios:
# using YARN yarn add axios # or NPM npm install axios
After installing Axios, we can update our Home.vue to look like this:
<template> <div class="home"> <p v-if="loading" class="post--empty">Loading....</p> <ul v-else> <li v-for="post in posts" :key="post.id"> <router-link :to="{ name: 'Post', params: { id: post.id, post: post } }" > </router-link> </li> </ul> </div> </template> <script> // @ is an alias to /src import axios from "axios"; export default { name: "Home", data() { return { posts: null, loading: false, }; }, mounted() { this.getPosts(); }, methods: { async getPosts() { this.loading = true; try { let res = await axios({ url: "https://jsonplaceholder.typicode.com/posts", method: "GET", }); let posts = res.data; this.posts = posts; this.loading = false; } catch (error) { this.loading = false; } }, }, }; </script> <style> .home { padding: 0 30px; max-width: 800px; margin: 0 auto; } @keyframes blink { from { opacity: 1; } to { opacity: 0; } } .post--empty { height: 250px; margin-top: 30px; animation: blink 0.8s ease-in-out infinite alternate both; display: flex; align-items: center; justify-content: center; font-family: "Lobster", cursive; } ul { text-align: left; } a { color: inherit; } </style>
Here, we’re importing axios and using it to fetch a list of posts from JSONPlaceholder in the getPost method. We’re also assigning the array of posts gotten from this API call to posts from the data function from this page, this is because we want to use this data in our template section. After this, we loop through the array of posts in a list ( <ul></ul>) and also attach a link to each post using id of each post as the link param (this is called dynamic route matching). We have also added a paragraph that would serve as a loading indicator.
At this point, here’s what this page looks like:
List of posts from JSONPlaceholder. (Large preview)
The next thing would be to create the page that will display the info for each post and create a link for it in the router of our app.
Post.vue
<template> <div class="about"> <div class="post"> <h1></h1> <p v-html="post.body"></p> </div> <p>End of page</p> </div> </template> <script> export default { name: "Post", props: ["id", "post"], }; </script> <style> .post { padding: 0 30px; height: 110vh; margin: 0 auto; } p { margin: 10px 0; } </style>
Here, we make use of passing props to route components to define id and post which we’re passing from the previous page in the form of route params. This is a neat way of accessing route params and query as opposed to doing this:
Post.vue
<script> export default { name: "Post", data() { return { post: this.$route.post, }; }, }; </script>
We then make use of this post value in the template section to display post title and body. Finally, we add a paragraph to the end of the page. We also add styling for the page in the styling section, which includes defining a height of 110vh. This is because we need the page to have a height that is more than the default height 100vh so we can observe the default scroll behavior of the router.
The next thing would be to create a route that would display each post. Update your index.js file in the /router folder ( or router.js file) to look like this:
import Vue from 'vue' import VueRouter from 'vue-router' import Home from '../views/Home.vue' Vue.use(VueRouter) const routes = [{ path: '/', name: 'Home', component: Home }, { path: '/:id', name: 'Post', props: true, component: () => import ( /* webpackChunkName: "post" */ '../views/Post.vue') } ] const router = new VueRouter({ mode: 'history', base: process.env.BASE_URL, routes }) export default router
Here, we define a new route that makes use of id that would be passed to this route from the homepage. We’re also decoupling the router param (in this case, post and id) using props.
The top of this page looks like this:
Top of post page. (Large preview)
If we click on any of the posts on the home page that does not require us to scroll, we would not notice any weird behavior scroll wise, but if we scroll down a little and click on the last post in this list, this should be the position the /post page would land on:
Default scroll position. (Large preview)
This is bad for UX and this is because the user isn’t expecting this behavior and they might need to start from the top of a page to get the full information on the said page.
Vue Router comes with the option to customize this behavior to individual preferences, an example would be saving scroll position of a previous route when trying to move back/forward. To fix the current issue in our app, we would update our router file to include the following:
import Vue from 'vue' import VueRouter from 'vue-router' import Home from '../views/Home.vue' Vue.use(VueRouter) const routes = [...] const router = new VueRouter({ mode: 'history', base: process.env.BASE_URL, routes, //add this scrollBehavior(to, from, savedPosition) { return { x: 0, y: 0 } } }) export default router
Now, if we scroll to the bottom of the home page and click on the last post, you should notice that it now starts from the top of the page.
New scroll position. (Large preview)
Data Fetching
When fetching data from an API, we either call the method in the mounted or created lifecycle hook, these are by far the most popular methods people use when developing in Vue. Vue router comes with another method in which we make this API request before navigating to a new route by making this request using the beforeRouterEnter guard in such a component. Here is an example of how to fetch data from JSONPlaceholder using this method:
beforeRouteEnter(to, from, next) { axios .get("https://jsonplaceholder.typicode.com/posts") .then((res) => { next((vm) => vm.fetchData(res)); }) .catch((err) => { console.error(err); }); }, methods: { fetchData(res) { let post = res.data; this.posts = post; }, },
Here, we’re fetching a list of posts from an API using Axios and when this request is complete, we call next. At this point in the lifecycle of this component, this is not available because the component has not been created but we have access to vm which gives us access to the component’s instance. Inside this function, we pass the response from the API request res to our method fetchData which we’ve created to assign the value from this response to post so we can use it in our template. Now, if we refresh our / route, we would notice that the data gets updated very fast and at no time is there a blank or page ( provided the request is successful).
Transitions
Vue comes with a <transition></ transition> component that enables easy implementation of CSS transitions and animations. This feature can be extended to work for navigation between routes in Vue. Here’s an example:
<template> <div id="app"> <div id="nav"> <router-link to="/">Home</router-link> </div> <transition name="slide-fade"> <router-view /> </transition> </div> </template> <style> #app { font-family: Avenir, Helvetica, Arial, sans-serif; -webkit-font-smoothing: antialiased; -moz-osx-font-smoothing: grayscale; text-align: center; color: #2c3e50; } #nav { padding: 30px; } #nav a { font-weight: bold; color: #2c3e50; } #nav a.router-link-exact-active { color: #42b983; } .slide-fade-enter-active { transition: transform 0.3s cubic-bezier(1, 0.5, 0.8, 1), color 0.5s cubic-bezier(1, 0.5, 0.8, 1); } .slide-fade-leave-active { transition: transform 1s cubic-bezier(1, 0.5, 0.8, 1), color 1s cubic-bezier(1, 0.5, 0.8, 1); } .slide-fade-enter { color: mediumblue; transform: translateY(20px); } .slide-fade-leave-to { transform: translateX(100px); color: cyan; } </style>
Here, we’re adding a transition with the name slide-fade to our application and wrapping it around all the route navigation that would take place in the app. We’re also adding a set of styles that control/define the way the transitions would work in our app. Without these rules, there would be no visible transition taking place. Now, if we try to navigate from the homepage to the individual posts, we would notice a sliding and fading transition taking place during the navigation process.
There are two types of route based transitions.
1. Per-route Transition
This type of transition is defined in the component that renders a route and so, it only affects the navigation to and from such a page. This gives us the ability to define a special transition for individual routes if we want. Here is an example of how to do that.
<template> // add a transition component with name and mode props <transition name="slide-fade" mode="in-out"> <div class="about"> <div class="post"> <h1></h1> <p v-html="post.body"></p> </div> <p>End of page</p> </div> </transition> </template> <script> export default { name: "Post", props: ["id", "post"], }; </script> <style> //... .slide-fade-enter-active { transition: transform 2s cubic-bezier(1, 0.5, 0.8, 1), opacity 2s ease-in; } .slide-fade-leave-active { transition: transform 2s cubic-bezier(1, 0.5, 0.8, 1), opacity 2s ease-out; } .slide-fade-enter { opacity: 1; transform: skewY(20deg); } .slide-fade-leave-to { transform: skewY(-45deg); opacity: 0.5; } </style>
If you try to navigate away from this page, we would notice the page gets skewed and fades for a duration of 2s as the navigation changes.
2. Route-Based Dynamic Transition
This is similar to the general method of adding transitions to all routes in your application but it has one major difference, that is, it accepts a dynamic transition name prop which gives you the ability to change the transition type any way you want. Let us create an example of how to do this.
We’re going to update our App.vue file with a dynamic name prop and configure it to choose a transition name depending on a value.
<template> <div id="app"> <div id="nav"> <router-link to="/">Home</router-link> </div> <transition :name="transitionName"> <router-view /> </transition> </div> </template> <script> export default { data() { return { transitionName: "slide-fade", }; }, watch: { $route(to, from, params) { const toParam = to.params && to.params.id ? to.params.id : 0; this.transitionName = toParam % 2 === 0 ? "slide-left" : "slide-fade"; }, }, }; </script> <style> /* add transition styles */ .slide-fade-enter-active { transition: transform 0.3s cubic-bezier(1, 0.5, 0.8, 1), color 0.5s cubic-bezier(1, 0.5, 0.8, 1); } .slide-fade-leave-active { transition: transform 1s cubic-bezier(1, 0.5, 0.8, 1), color 1s cubic-bezier(1, 0.5, 0.8, 1); } .slide-fade-enter { color: mediumblue; transform: translateY(20px); } .slide-fade-leave-to { transform: translateX(100px); color: cyan; } .slide-left-enter-active { transition: transform 0.3s cubic-bezier(1, 0.5, 0.8, 1), color 0.5s cubic-bezier(1, 0.5, 0.8, 1); } .slide-left-leave-active { transition: transform 1s cubic-bezier(1, 0.5, 0.8, 1), color 1s cubic-bezier(1, 0.5, 0.8, 1); } .slide-left-enter { color: mediumblue; transform: translateY(20px); } .slide-left-leave-to { transform: skewY(90deg); color: cyan; } </style>
Here, we’re adding a dynamic transition name which is defined in the script section of our app. We’re also watching the $route so that whenever it changes, we run the function that checks if the current route has a param of id otherwise, we give it a value of 0. We also determine the transition name based on the type of number the id is (i.e even or odd number). Now, if we navigate between the landing page and the different posts available, we would observe there are two types of transitions occurring as we navigate.
Meta Fields And Navigation Guards
Meta Fields
Meta fields help provide extra context to a certain route. An example of such context would be if a user needs to be authenticated to access such route or not. Here’s what this looks like:
import Vue from 'vue' import VueRouter from 'vue-router' import Home from '../views/Home.vue' Vue.use(VueRouter) const routes = [{ path: '/', name: 'Home', component: Home, // add meta to this route meta: { requiresAuth: true } }, ] const router = new VueRouter({ mode: 'history', base: process.env.BASE_URL, routes }) export default router
Here, we’ve added a meta property requiresAuth to the / route meaning we want users to be authenticated before they can access that route. Note that ‘requiresAuth’ is not a standard property, so you can choose any name you prefer. Whatever value you select at the end can be accessible in the $route object. This meta field at this point would not prevent unauthorized users from accessing that route, we need to hook it up to the Navigation guard.
Navigation Guard
Just as the name implies, the navigation guard helps protect and guard routes based on your preferences (i.e redirect to another page or preventing the navigation). This feature works together with the Route Meta Fields to effectively guard the routes of your application. There are 3 ways of adding router guard in our app:
1. In-component
Vue offers the option to configure your router guard for a particular route directly inside your components. Here’s an example in our Home.vue file:
<template> <div class="home"> <p v-if="loading" class="post--empty">Loading....</p> <ol v-else> <!-- add this text to your template --> <p v-if="guest">Hi Guest</p> <li v-for="post in posts" :key="post.id"> <router-link :to="{ name: 'Post', params: { id: post.id, post: post } }" > </router-link> </li> </ol> </div> </template> <script> // @ is an alias to /src import axios from "axios"; export default { name: "Home", data() { return { posts: null, // add this property guest: false, loading: false, }; }, // add this function beforeRouteEnter(to, from, next) { if (to.matched.some((record) => record.meta.requiresAuth)) { // this route requires auth, check if logged in // if not, display guest greeting. const loggedIn = JSON.parse(localStorage.getItem("loggedIn")); if (!loggedIn) { next((vm) => { vm.guest = true; }); } else { next(); } } else { next(); // make sure to always call next()! } }, methods: {...} }; </script> <style>...</style>
Here, we’re adding a paragraph that is only visible to unauthenticated users. We also add a property that controls the visibility of this text. Finally we have a router method beforeRouteEnter in which we also connect the router guard and check if the user is authenticated or not using a value that would be manually added later. We also have an if/else statement, and inside this statement, we change the value of guest depending on the authentication of the user.
And in your App.vue, add this lifecycle to the file.
export default { mounted() { localStorage.setItem("loggedIn", false); } };
So if you refresh your app, we should see the text we added in the Home.vue file.
Guest text visible. (Large preview)
2. Per-route
We can also add a router guard to our apps per-route in our router file as another property inside the specific route object. Here’s an example:
{ path: '/', name: 'Home', component: Home, // add meta to this route meta: { requiresAuth: true }, beforeEnter: (to, from, next) => { if (to.name !== 'Home') { console.log('Per-Route navigation guard ti wa online'); next() } else next() } }
Here, we add a router guard to the / route and we’re currently just logging a random text to the console but we can do a couple of things inside this guard. Now, each time you visit the home page, you would see this in your console:
Message printed in terminal. (Large preview)
3. Globally
We also have the option of creating a router guard that works globally for every part of the app (provided it meets the guard condition). This global guard is created in the router file just like the per-route guard but instead of defining it inside a specific route object, it is defined as a method of the router instance. For an example of how it works, we’re going to create a new file and route in our app and name it guest.vue, then add the following lines of code to the file.
<template> <div> <h1>Guest page</h1> <p>You're seeing this page because you are not logged in</p> </div> </template> <script> </script> <style></style>
Next, we create a /login route with this newly created page and add a meta property to other existing routes.
// create new route { path: '/login', name: 'login', component: () => import ( /* webpackChunkName: "auth" */ '../views/guest.vue') }, { path: '/:id', name: 'Post', props: true,a // add meta property meta: { requiresAuth: true }, component: () => import ( /* webpackChunkName: "post" */ '../views/Post.vue') }
The next thing would be to create the global navigation guard for all routes that require authentication and check the user’s authentication using localStorage (previously created). We would redirect users that have a loggedIn value of false to /login.
router.beforeEach((to, from, next) => { if (to.matched.some((record) => record.meta.requiresAuth)) { // this route requires auth, check if logged in // if not, display guest greeting. const loggedIn = JSON.parse(localStorage.getItem("loggedIn")); if (!loggedIn) { next({ path: '/login' }); } else { next(); } } else { next(); // make sure to always call next()! } })
So if you check your app in your browser, you would notice it is currently on this page:
Guest page. (Large preview)
If we try to navigate to any of the existing routes, we would automatically get redirected to this page no what we do and that means our router guard is effectively guarding those routes.
Conclusion
We can see that the Vue Router is a very powerful tool that can be used for more than just creating routes in your application. We have learned how to configure the scroll behavior of routes in our application, the different ways to add transitions to routes in our app, how to fetch data from an API before a component gets mounted, how to use meta property for our routes and the different ways to set up router guard.
Resources
Vue Router
CSS Transitions In Vuejs And Nuxtjs
(ks, ra, yk, il)
Website Design & SEO Delray Beach by DBL07.co
Delray Beach SEO
source http://www.scpie.org/how-to-do-more-with-vue-router/ source https://scpie.tumblr.com/post/628084272888184832
0 notes
Text
How To Do More With Vue Router
About The Author
Front-end developer based in Lagos, Nigeria. He enjoys converting designs into code and building things for the web. More about Timi …
Vue Router is the official router for Vue that is mostly used for creating multiple pages living on different routes (/home, /profile) in your application but has some features that some people do not know about. In this tutorial, we’re going to learn about some amazing features the Vue Router has and how we can make use of them in our app.
Vue Router is the official router for Vue. It deeply integrates with Vue core to make building Single Page Applications with Vue a breeze. Some of its popular features include:
Dynamic Route matching.
Named Routes.
Named views.
Programmatic navigation.
These features are heavily used when developing with Vue and this is because they are part of the basics you need to understand to efficiently use the Router. But the Vue Router has some very useful features that can be very helpful in development and in this article, we’re going to take a look at them.
For the purpose of this tutorial, we’re going to be building a simple application that would help in understanding some of the concepts covered in this article. You can find all the code used in this article on GitHub. If you are interested in doing more with the router, you’ll benefit from this tutorial.
Note: This article requires a basic understanding of Vuejs and Vue Router.
Scroll Behaviour
This is the behavior that is observed when navigating from one page to another. The default behavior of Vue router is only noticeable after scrolling to a position that isn’t the top of the page. This is because, by default, the scroll position when navigating away from a page is maintained on a new page. What this means is, if you click on a link that leads to a new route ( i.e from /home to /about) in a position that is let’s say close to the footer of the current page, the new page would start from that same position instead of starting from the top of the page.
I have created a Vue application using the Vue CLI command vue create vue-router-demo, I also selected Vue Router as part of the options while setting up my app because we will be using it throughout this tutorial.
We will also need to make API calls to JSONPlaceholder, to illustrate some of the concepts using Vue router. For this, we will be using Axios. To install Axios:
# using YARN yarn add axios # or NPM npm install axios
After installing Axios, we can update our Home.vue to look like this:
<template> <div class="home"> <p v-if="loading" class="post--empty">Loading....</p> <ul v-else> <li v-for="post in posts" :key="post.id"> <router-link :to="{ name: 'Post', params: { id: post.id, post: post } }" > </router-link> </li> </ul> </div> </template> <script> // @ is an alias to /src import axios from "axios"; export default { name: "Home", data() { return { posts: null, loading: false, }; }, mounted() { this.getPosts(); }, methods: { async getPosts() { this.loading = true; try { let res = await axios({ url: "https://jsonplaceholder.typicode.com/posts", method: "GET", }); let posts = res.data; this.posts = posts; this.loading = false; } catch (error) { this.loading = false; } }, }, }; </script> <style> .home { padding: 0 30px; max-width: 800px; margin: 0 auto; } @keyframes blink { from { opacity: 1; } to { opacity: 0; } } .post--empty { height: 250px; margin-top: 30px; animation: blink 0.8s ease-in-out infinite alternate both; display: flex; align-items: center; justify-content: center; font-family: "Lobster", cursive; } ul { text-align: left; } a { color: inherit; } </style>
Here, we’re importing axios and using it to fetch a list of posts from JSONPlaceholder in the getPost method. We’re also assigning the array of posts gotten from this API call to posts from the data function from this page, this is because we want to use this data in our template section. After this, we loop through the array of posts in a list ( <ul></ul>) and also attach a link to each post using id of each post as the link param (this is called dynamic route matching). We have also added a paragraph that would serve as a loading indicator.
At this point, here’s what this page looks like:
List of posts from JSONPlaceholder. (Large preview)
The next thing would be to create the page that will display the info for each post and create a link for it in the router of our app.
Post.vue
<template> <div class="about"> <div class="post"> <h1></h1> <p v-html="post.body"></p> </div> <p>End of page</p> </div> </template> <script> export default { name: "Post", props: ["id", "post"], }; </script> <style> .post { padding: 0 30px; height: 110vh; margin: 0 auto; } p { margin: 10px 0; } </style>
Here, we make use of passing props to route components to define id and post which we’re passing from the previous page in the form of route params. This is a neat way of accessing route params and query as opposed to doing this:
Post.vue
<script> export default { name: "Post", data() { return { post: this.$route.post, }; }, }; </script>
We then make use of this post value in the template section to display post title and body. Finally, we add a paragraph to the end of the page. We also add styling for the page in the styling section, which includes defining a height of 110vh. This is because we need the page to have a height that is more than the default height 100vh so we can observe the default scroll behavior of the router.
The next thing would be to create a route that would display each post. Update your index.js file in the /router folder ( or router.js file) to look like this:
import Vue from 'vue' import VueRouter from 'vue-router' import Home from '../views/Home.vue' Vue.use(VueRouter) const routes = [{ path: '/', name: 'Home', component: Home }, { path: '/:id', name: 'Post', props: true, component: () => import ( /* webpackChunkName: "post" */ '../views/Post.vue') } ] const router = new VueRouter({ mode: 'history', base: process.env.BASE_URL, routes }) export default router
Here, we define a new route that makes use of id that would be passed to this route from the homepage. We’re also decoupling the router param (in this case, post and id) using props.
The top of this page looks like this:
Top of post page. (Large preview)
If we click on any of the posts on the home page that does not require us to scroll, we would not notice any weird behavior scroll wise, but if we scroll down a little and click on the last post in this list, this should be the position the /post page would land on:
Default scroll position. (Large preview)
This is bad for UX and this is because the user isn’t expecting this behavior and they might need to start from the top of a page to get the full information on the said page.
Vue Router comes with the option to customize this behavior to individual preferences, an example would be saving scroll position of a previous route when trying to move back/forward. To fix the current issue in our app, we would update our router file to include the following:
import Vue from 'vue' import VueRouter from 'vue-router' import Home from '../views/Home.vue' Vue.use(VueRouter) const routes = [...] const router = new VueRouter({ mode: 'history', base: process.env.BASE_URL, routes, //add this scrollBehavior(to, from, savedPosition) { return { x: 0, y: 0 } } }) export default router
Now, if we scroll to the bottom of the home page and click on the last post, you should notice that it now starts from the top of the page.
New scroll position. (Large preview)
Data Fetching
When fetching data from an API, we either call the method in the mounted or created lifecycle hook, these are by far the most popular methods people use when developing in Vue. Vue router comes with another method in which we make this API request before navigating to a new route by making this request using the beforeRouterEnter guard in such a component. Here is an example of how to fetch data from JSONPlaceholder using this method:
beforeRouteEnter(to, from, next) { axios .get("https://jsonplaceholder.typicode.com/posts") .then((res) => { next((vm) => vm.fetchData(res)); }) .catch((err) => { console.error(err); }); }, methods: { fetchData(res) { let post = res.data; this.posts = post; }, },
Here, we’re fetching a list of posts from an API using Axios and when this request is complete, we call next. At this point in the lifecycle of this component, this is not available because the component has not been created but we have access to vm which gives us access to the component’s instance. Inside this function, we pass the response from the API request res to our method fetchData which we’ve created to assign the value from this response to post so we can use it in our template. Now, if we refresh our / route, we would notice that the data gets updated very fast and at no time is there a blank or page ( provided the request is successful).
Transitions
Vue comes with a <transition></ transition> component that enables easy implementation of CSS transitions and animations. This feature can be extended to work for navigation between routes in Vue. Here’s an example:
<template> <div id="app"> <div id="nav"> <router-link to="/">Home</router-link> </div> <transition name="slide-fade"> <router-view /> </transition> </div> </template> <style> #app { font-family: Avenir, Helvetica, Arial, sans-serif; -webkit-font-smoothing: antialiased; -moz-osx-font-smoothing: grayscale; text-align: center; color: #2c3e50; } #nav { padding: 30px; } #nav a { font-weight: bold; color: #2c3e50; } #nav a.router-link-exact-active { color: #42b983; } .slide-fade-enter-active { transition: transform 0.3s cubic-bezier(1, 0.5, 0.8, 1), color 0.5s cubic-bezier(1, 0.5, 0.8, 1); } .slide-fade-leave-active { transition: transform 1s cubic-bezier(1, 0.5, 0.8, 1), color 1s cubic-bezier(1, 0.5, 0.8, 1); } .slide-fade-enter { color: mediumblue; transform: translateY(20px); } .slide-fade-leave-to { transform: translateX(100px); color: cyan; } </style>
Here, we’re adding a transition with the name slide-fade to our application and wrapping it around all the route navigation that would take place in the app. We’re also adding a set of styles that control/define the way the transitions would work in our app. Without these rules, there would be no visible transition taking place. Now, if we try to navigate from the homepage to the individual posts, we would notice a sliding and fading transition taking place during the navigation process.
There are two types of route based transitions.
1. Per-route Transition
This type of transition is defined in the component that renders a route and so, it only affects the navigation to and from such a page. This gives us the ability to define a special transition for individual routes if we want. Here is an example of how to do that.
<template> // add a transition component with name and mode props <transition name="slide-fade" mode="in-out"> <div class="about"> <div class="post"> <h1></h1> <p v-html="post.body"></p> </div> <p>End of page</p> </div> </transition> </template> <script> export default { name: "Post", props: ["id", "post"], }; </script> <style> //... .slide-fade-enter-active { transition: transform 2s cubic-bezier(1, 0.5, 0.8, 1), opacity 2s ease-in; } .slide-fade-leave-active { transition: transform 2s cubic-bezier(1, 0.5, 0.8, 1), opacity 2s ease-out; } .slide-fade-enter { opacity: 1; transform: skewY(20deg); } .slide-fade-leave-to { transform: skewY(-45deg); opacity: 0.5; } </style>
If you try to navigate away from this page, we would notice the page gets skewed and fades for a duration of 2s as the navigation changes.
2. Route-Based Dynamic Transition
This is similar to the general method of adding transitions to all routes in your application but it has one major difference, that is, it accepts a dynamic transition name prop which gives you the ability to change the transition type any way you want. Let us create an example of how to do this.
We’re going to update our App.vue file with a dynamic name prop and configure it to choose a transition name depending on a value.
<template> <div id="app"> <div id="nav"> <router-link to="/">Home</router-link> </div> <transition :name="transitionName"> <router-view /> </transition> </div> </template> <script> export default { data() { return { transitionName: "slide-fade", }; }, watch: { $route(to, from, params) { const toParam = to.params && to.params.id ? to.params.id : 0; this.transitionName = toParam % 2 === 0 ? "slide-left" : "slide-fade"; }, }, }; </script> <style> /* add transition styles */ .slide-fade-enter-active { transition: transform 0.3s cubic-bezier(1, 0.5, 0.8, 1), color 0.5s cubic-bezier(1, 0.5, 0.8, 1); } .slide-fade-leave-active { transition: transform 1s cubic-bezier(1, 0.5, 0.8, 1), color 1s cubic-bezier(1, 0.5, 0.8, 1); } .slide-fade-enter { color: mediumblue; transform: translateY(20px); } .slide-fade-leave-to { transform: translateX(100px); color: cyan; } .slide-left-enter-active { transition: transform 0.3s cubic-bezier(1, 0.5, 0.8, 1), color 0.5s cubic-bezier(1, 0.5, 0.8, 1); } .slide-left-leave-active { transition: transform 1s cubic-bezier(1, 0.5, 0.8, 1), color 1s cubic-bezier(1, 0.5, 0.8, 1); } .slide-left-enter { color: mediumblue; transform: translateY(20px); } .slide-left-leave-to { transform: skewY(90deg); color: cyan; } </style>
Here, we’re adding a dynamic transition name which is defined in the script section of our app. We’re also watching the $route so that whenever it changes, we run the function that checks if the current route has a param of id otherwise, we give it a value of 0. We also determine the transition name based on the type of number the id is (i.e even or odd number). Now, if we navigate between the landing page and the different posts available, we would observe there are two types of transitions occurring as we navigate.
Meta Fields And Navigation Guards
Meta Fields
Meta fields help provide extra context to a certain route. An example of such context would be if a user needs to be authenticated to access such route or not. Here’s what this looks like:
import Vue from 'vue' import VueRouter from 'vue-router' import Home from '../views/Home.vue' Vue.use(VueRouter) const routes = [{ path: '/', name: 'Home', component: Home, // add meta to this route meta: { requiresAuth: true } }, ] const router = new VueRouter({ mode: 'history', base: process.env.BASE_URL, routes }) export default router
Here, we’ve added a meta property requiresAuth to the / route meaning we want users to be authenticated before they can access that route. Note that ‘requiresAuth’ is not a standard property, so you can choose any name you prefer. Whatever value you select at the end can be accessible in the $route object. This meta field at this point would not prevent unauthorized users from accessing that route, we need to hook it up to the Navigation guard.
Navigation Guard
Just as the name implies, the navigation guard helps protect and guard routes based on your preferences (i.e redirect to another page or preventing the navigation). This feature works together with the Route Meta Fields to effectively guard the routes of your application. There are 3 ways of adding router guard in our app:
1. In-component
Vue offers the option to configure your router guard for a particular route directly inside your components. Here’s an example in our Home.vue file:
<template> <div class="home"> <p v-if="loading" class="post--empty">Loading....</p> <ol v-else> <!-- add this text to your template --> <p v-if="guest">Hi Guest</p> <li v-for="post in posts" :key="post.id"> <router-link :to="{ name: 'Post', params: { id: post.id, post: post } }" > </router-link> </li> </ol> </div> </template> <script> // @ is an alias to /src import axios from "axios"; export default { name: "Home", data() { return { posts: null, // add this property guest: false, loading: false, }; }, // add this function beforeRouteEnter(to, from, next) { if (to.matched.some((record) => record.meta.requiresAuth)) { // this route requires auth, check if logged in // if not, display guest greeting. const loggedIn = JSON.parse(localStorage.getItem("loggedIn")); if (!loggedIn) { next((vm) => { vm.guest = true; }); } else { next(); } } else { next(); // make sure to always call next()! } }, methods: {...} }; </script> <style>...</style>
Here, we’re adding a paragraph that is only visible to unauthenticated users. We also add a property that controls the visibility of this text. Finally we have a router method beforeRouteEnter in which we also connect the router guard and check if the user is authenticated or not using a value that would be manually added later. We also have an if/else statement, and inside this statement, we change the value of guest depending on the authentication of the user.
And in your App.vue, add this lifecycle to the file.
export default { mounted() { localStorage.setItem("loggedIn", false); } };
So if you refresh your app, we should see the text we added in the Home.vue file.
Guest text visible. (Large preview)
2. Per-route
We can also add a router guard to our apps per-route in our router file as another property inside the specific route object. Here’s an example:
{ path: '/', name: 'Home', component: Home, // add meta to this route meta: { requiresAuth: true }, beforeEnter: (to, from, next) => { if (to.name !== 'Home') { console.log('Per-Route navigation guard ti wa online'); next() } else next() } }
Here, we add a router guard to the / route and we’re currently just logging a random text to the console but we can do a couple of things inside this guard. Now, each time you visit the home page, you would see this in your console:
Message printed in terminal. (Large preview)
3. Globally
We also have the option of creating a router guard that works globally for every part of the app (provided it meets the guard condition). This global guard is created in the router file just like the per-route guard but instead of defining it inside a specific route object, it is defined as a method of the router instance. For an example of how it works, we’re going to create a new file and route in our app and name it guest.vue, then add the following lines of code to the file.
<template> <div> <h1>Guest page</h1> <p>You're seeing this page because you are not logged in</p> </div> </template> <script> </script> <style></style>
Next, we create a /login route with this newly created page and add a meta property to other existing routes.
// create new route { path: '/login', name: 'login', component: () => import ( /* webpackChunkName: "auth" */ '../views/guest.vue') }, { path: '/:id', name: 'Post', props: true,a // add meta property meta: { requiresAuth: true }, component: () => import ( /* webpackChunkName: "post" */ '../views/Post.vue') }
The next thing would be to create the global navigation guard for all routes that require authentication and check the user’s authentication using localStorage (previously created). We would redirect users that have a loggedIn value of false to /login.
router.beforeEach((to, from, next) => { if (to.matched.some((record) => record.meta.requiresAuth)) { // this route requires auth, check if logged in // if not, display guest greeting. const loggedIn = JSON.parse(localStorage.getItem("loggedIn")); if (!loggedIn) { next({ path: '/login' }); } else { next(); } } else { next(); // make sure to always call next()! } })
So if you check your app in your browser, you would notice it is currently on this page:
Guest page. (Large preview)
If we try to navigate to any of the existing routes, we would automatically get redirected to this page no what we do and that means our router guard is effectively guarding those routes.
Conclusion
We can see that the Vue Router is a very powerful tool that can be used for more than just creating routes in your application. We have learned how to configure the scroll behavior of routes in our application, the different ways to add transitions to routes in our app, how to fetch data from an API before a component gets mounted, how to use meta property for our routes and the different ways to set up router guard.
Resources
Vue Router
CSS Transitions In Vuejs And Nuxtjs
(ks, ra, yk, il)
Website Design & SEO Delray Beach by DBL07.co
Delray Beach SEO
source http://www.scpie.org/how-to-do-more-with-vue-router/
0 notes
Link
Vue is called as a progressive JavaScript framework with various features for building user interfaces. The following are the major features of VueJS.
Improvement & Bug Fixes: In the supplement to providing these new features, vue.js further comes with several improvements and bug fixes.
Improved Typescript Support & Integration: The most modern version of VueJS render stable support to TypeScript. The improved integration improves the type of declaration process
Better Error Handling & Reporting: Whilst using earlier versions of vuejs, programmers have to manipulate with the unexpected errors all through either config.errorHandler option or render an appropriate error component.
Better Functional Component Support: VueJs renders more considerate assistance to the functional components which are described as a single-file component (SFC). Here, the developers can now appropriate the vue-loader to represent functional components in an individual vue.js file.
Environment-Agnostic Server-Side Rendering: Unlike the other JS libraries, VueJS appears with built-in streaming server-side rendering. The hallmark makes it quite more accessible for the programmers to execute server-side rendering asynchronously.
VueJS Installing Steps
1. npm install -g @vue/cli 2. vue --version for check version 3. vue create {projectname} 4. need dependency a. vue-router b. dart-sass c. babel d. pwa 5. sudo npm install --save axios vue-axios { dipendency for ajax request} 6. npm install vue-easysession --save {dipendency for session} Base Example Here’s an example of a Vue component: // Define a new component called button-counter
0 notes
Text
How To Do More With Vue Router
About The Author
Front-end developer based in Lagos, Nigeria. He enjoys converting designs into code and building things for the web. More about Timi …
Vue Router is the official router for Vue that is mostly used for creating multiple pages living on different routes (/home, /profile) in your application but has some features that some people do not know about. In this tutorial, we’re going to learn about some amazing features the Vue Router has and how we can make use of them in our app.
Vue Router is the official router for Vue. It deeply integrates with Vue core to make building Single Page Applications with Vue a breeze. Some of its popular features include:
Dynamic Route matching.
Named Routes.
Named views.
Programmatic navigation.
These features are heavily used when developing with Vue and this is because they are part of the basics you need to understand to efficiently use the Router. But the Vue Router has some very useful features that can be very helpful in development and in this article, we’re going to take a look at them.
For the purpose of this tutorial, we’re going to be building a simple application that would help in understanding some of the concepts covered in this article. You can find all the code used in this article on GitHub. If you are interested in doing more with the router, you’ll benefit from this tutorial.
Note: This article requires a basic understanding of Vuejs and Vue Router.
Scroll Behaviour
This is the behavior that is observed when navigating from one page to another. The default behavior of Vue router is only noticeable after scrolling to a position that isn’t the top of the page. This is because, by default, the scroll position when navigating away from a page is maintained on a new page. What this means is, if you click on a link that leads to a new route ( i.e from /home to /about) in a position that is let’s say close to the footer of the current page, the new page would start from that same position instead of starting from the top of the page.
I have created a Vue application using the Vue CLI command vue create vue-router-demo, I also selected Vue Router as part of the options while setting up my app because we will be using it throughout this tutorial.
We will also need to make API calls to JSONPlaceholder, to illustrate some of the concepts using Vue router. For this, we will be using Axios. To install Axios:
# using YARN yarn add axios # or NPM npm install axios
After installing Axios, we can update our Home.vue to look like this:
<template> <div class="home"> <p v-if="loading" class="post--empty">Loading....</p> <ul v-else> <li v-for="post in posts" :key="post.id"> <router-link :to="{ name: 'Post', params: { id: post.id, post: post } }" > </router-link> </li> </ul> </div> </template> <script> // @ is an alias to /src import axios from "axios"; export default { name: "Home", data() { return { posts: null, loading: false, }; }, mounted() { this.getPosts(); }, methods: { async getPosts() { this.loading = true; try { let res = await axios({ url: "https://jsonplaceholder.typicode.com/posts", method: "GET", }); let posts = res.data; this.posts = posts; this.loading = false; } catch (error) { this.loading = false; } }, }, }; </script> <style> .home { padding: 0 30px; max-width: 800px; margin: 0 auto; } @keyframes blink { from { opacity: 1; } to { opacity: 0; } } .post--empty { height: 250px; margin-top: 30px; animation: blink 0.8s ease-in-out infinite alternate both; display: flex; align-items: center; justify-content: center; font-family: "Lobster", cursive; } ul { text-align: left; } a { color: inherit; } </style>
Here, we’re importing axios and using it to fetch a list of posts from JSONPlaceholder in the getPost method. We’re also assigning the array of posts gotten from this API call to posts from the data function from this page, this is because we want to use this data in our template section. After this, we loop through the array of posts in a list ( <ul></ul>) and also attach a link to each post using id of each post as the link param (this is called dynamic route matching). We have also added a paragraph that would serve as a loading indicator.
At this point, here’s what this page looks like:
List of posts from JSONPlaceholder. (Large preview)
The next thing would be to create the page that will display the info for each post and create a link for it in the router of our app.
Post.vue
<template> <div class="about"> <div class="post"> <h1></h1> <p v-html="post.body"></p> </div> <p>End of page</p> </div> </template> <script> export default { name: "Post", props: ["id", "post"], }; </script> <style> .post { padding: 0 30px; height: 110vh; margin: 0 auto; } p { margin: 10px 0; } </style>
Here, we make use of passing props to route components to define id and post which we’re passing from the previous page in the form of route params. This is a neat way of accessing route params and query as opposed to doing this:
Post.vue
<script> export default { name: "Post", data() { return { post: this.$route.post, }; }, }; </script>
We then make use of this post value in the template section to display post title and body. Finally, we add a paragraph to the end of the page. We also add styling for the page in the styling section, which includes defining a height of 110vh. This is because we need the page to have a height that is more than the default height 100vh so we can observe the default scroll behavior of the router.
The next thing would be to create a route that would display each post. Update your index.js file in the /router folder ( or router.js file) to look like this:
import Vue from 'vue' import VueRouter from 'vue-router' import Home from '../views/Home.vue' Vue.use(VueRouter) const routes = [{ path: '/', name: 'Home', component: Home }, { path: '/:id', name: 'Post', props: true, component: () => import ( /* webpackChunkName: "post" */ '../views/Post.vue') } ] const router = new VueRouter({ mode: 'history', base: process.env.BASE_URL, routes }) export default router
Here, we define a new route that makes use of id that would be passed to this route from the homepage. We’re also decoupling the router param (in this case, post and id) using props.
The top of this page looks like this:
Top of post page. (Large preview)
If we click on any of the posts on the home page that does not require us to scroll, we would not notice any weird behavior scroll wise, but if we scroll down a little and click on the last post in this list, this should be the position the /post page would land on:
Default scroll position. (Large preview)
This is bad for UX and this is because the user isn’t expecting this behavior and they might need to start from the top of a page to get the full information on the said page.
Vue Router comes with the option to customize this behavior to individual preferences, an example would be saving scroll position of a previous route when trying to move back/forward. To fix the current issue in our app, we would update our router file to include the following:
import Vue from 'vue' import VueRouter from 'vue-router' import Home from '../views/Home.vue' Vue.use(VueRouter) const routes = [...] const router = new VueRouter({ mode: 'history', base: process.env.BASE_URL, routes, //add this scrollBehavior(to, from, savedPosition) { return { x: 0, y: 0 } } }) export default router
Now, if we scroll to the bottom of the home page and click on the last post, you should notice that it now starts from the top of the page.
New scroll position. (Large preview)
Data Fetching
When fetching data from an API, we either call the method in the mounted or created lifecycle hook, these are by far the most popular methods people use when developing in Vue. Vue router comes with another method in which we make this API request before navigating to a new route by making this request using the beforeRouterEnter guard in such a component. Here is an example of how to fetch data from JSONPlaceholder using this method:
beforeRouteEnter(to, from, next) { axios .get("https://jsonplaceholder.typicode.com/posts") .then((res) => { next((vm) => vm.fetchData(res)); }) .catch((err) => { console.error(err); }); }, methods: { fetchData(res) { let post = res.data; this.posts = post; }, },
Here, we’re fetching a list of posts from an API using Axios and when this request is complete, we call next. At this point in the lifecycle of this component, this is not available because the component has not been created but we have access to vm which gives us access to the component’s instance. Inside this function, we pass the response from the API request res to our method fetchData which we’ve created to assign the value from this response to post so we can use it in our template. Now, if we refresh our / route, we would notice that the data gets updated very fast and at no time is there a blank or page ( provided the request is successful).
Transitions
Vue comes with a <transition></ transition> component that enables easy implementation of CSS transitions and animations. This feature can be extended to work for navigation between routes in Vue. Here’s an example:
<template> <div id="app"> <div id="nav"> <router-link to="/">Home</router-link> </div> <transition name="slide-fade"> <router-view /> </transition> </div> </template> <style> #app { font-family: Avenir, Helvetica, Arial, sans-serif; -webkit-font-smoothing: antialiased; -moz-osx-font-smoothing: grayscale; text-align: center; color: #2c3e50; } #nav { padding: 30px; } #nav a { font-weight: bold; color: #2c3e50; } #nav a.router-link-exact-active { color: #42b983; } .slide-fade-enter-active { transition: transform 0.3s cubic-bezier(1, 0.5, 0.8, 1), color 0.5s cubic-bezier(1, 0.5, 0.8, 1); } .slide-fade-leave-active { transition: transform 1s cubic-bezier(1, 0.5, 0.8, 1), color 1s cubic-bezier(1, 0.5, 0.8, 1); } .slide-fade-enter { color: mediumblue; transform: translateY(20px); } .slide-fade-leave-to { transform: translateX(100px); color: cyan; } </style>
Here, we’re adding a transition with the name slide-fade to our application and wrapping it around all the route navigation that would take place in the app. We’re also adding a set of styles that control/define the way the transitions would work in our app. Without these rules, there would be no visible transition taking place. Now, if we try to navigate from the homepage to the individual posts, we would notice a sliding and fading transition taking place during the navigation process.
There are two types of route based transitions.
1. Per-route Transition
This type of transition is defined in the component that renders a route and so, it only affects the navigation to and from such a page. This gives us the ability to define a special transition for individual routes if we want. Here is an example of how to do that.
<template> // add a transition component with name and mode props <transition name="slide-fade" mode="in-out"> <div class="about"> <div class="post"> <h1></h1> <p v-html="post.body"></p> </div> <p>End of page</p> </div> </transition> </template> <script> export default { name: "Post", props: ["id", "post"], }; </script> <style> //... .slide-fade-enter-active { transition: transform 2s cubic-bezier(1, 0.5, 0.8, 1), opacity 2s ease-in; } .slide-fade-leave-active { transition: transform 2s cubic-bezier(1, 0.5, 0.8, 1), opacity 2s ease-out; } .slide-fade-enter { opacity: 1; transform: skewY(20deg); } .slide-fade-leave-to { transform: skewY(-45deg); opacity: 0.5; } </style>
If you try to navigate away from this page, we would notice the page gets skewed and fades for a duration of 2s as the navigation changes.
2. Route-Based Dynamic Transition
This is similar to the general method of adding transitions to all routes in your application but it has one major difference, that is, it accepts a dynamic transition name prop which gives you the ability to change the transition type any way you want. Let us create an example of how to do this.
We’re going to update our App.vue file with a dynamic name prop and configure it to choose a transition name depending on a value.
<template> <div id="app"> <div id="nav"> <router-link to="/">Home</router-link> </div> <transition :name="transitionName"> <router-view /> </transition> </div> </template> <script> export default { data() { return { transitionName: "slide-fade", }; }, watch: { $route(to, from, params) { const toParam = to.params && to.params.id ? to.params.id : 0; this.transitionName = toParam % 2 === 0 ? "slide-left" : "slide-fade"; }, }, }; </script> <style> /* add transition styles */ .slide-fade-enter-active { transition: transform 0.3s cubic-bezier(1, 0.5, 0.8, 1), color 0.5s cubic-bezier(1, 0.5, 0.8, 1); } .slide-fade-leave-active { transition: transform 1s cubic-bezier(1, 0.5, 0.8, 1), color 1s cubic-bezier(1, 0.5, 0.8, 1); } .slide-fade-enter { color: mediumblue; transform: translateY(20px); } .slide-fade-leave-to { transform: translateX(100px); color: cyan; } .slide-left-enter-active { transition: transform 0.3s cubic-bezier(1, 0.5, 0.8, 1), color 0.5s cubic-bezier(1, 0.5, 0.8, 1); } .slide-left-leave-active { transition: transform 1s cubic-bezier(1, 0.5, 0.8, 1), color 1s cubic-bezier(1, 0.5, 0.8, 1); } .slide-left-enter { color: mediumblue; transform: translateY(20px); } .slide-left-leave-to { transform: skewY(90deg); color: cyan; } </style>
Here, we’re adding a dynamic transition name which is defined in the script section of our app. We’re also watching the $route so that whenever it changes, we run the function that checks if the current route has a param of id otherwise, we give it a value of 0. We also determine the transition name based on the type of number the id is (i.e even or odd number). Now, if we navigate between the landing page and the different posts available, we would observe there are two types of transitions occurring as we navigate.
Meta Fields And Navigation Guards
Meta Fields
Meta fields help provide extra context to a certain route. An example of such context would be if a user needs to be authenticated to access such route or not. Here’s what this looks like:
import Vue from 'vue' import VueRouter from 'vue-router' import Home from '../views/Home.vue' Vue.use(VueRouter) const routes = [{ path: '/', name: 'Home', component: Home, // add meta to this route meta: { requiresAuth: true } }, ] const router = new VueRouter({ mode: 'history', base: process.env.BASE_URL, routes }) export default router
Here, we’ve added a meta property requiresAuth to the / route meaning we want users to be authenticated before they can access that route. Note that ‘requiresAuth’ is not a standard property, so you can choose any name you prefer. Whatever value you select at the end can be accessible in the $route object. This meta field at this point would not prevent unauthorized users from accessing that route, we need to hook it up to the Navigation guard.
Navigation Guard
Just as the name implies, the navigation guard helps protect and guard routes based on your preferences (i.e redirect to another page or preventing the navigation). This feature works together with the Route Meta Fields to effectively guard the routes of your application. There are 3 ways of adding router guard in our app:
1. In-component
Vue offers the option to configure your router guard for a particular route directly inside your components. Here’s an example in our Home.vue file:
<template> <div class="home"> <p v-if="loading" class="post--empty">Loading....</p> <ol v-else> <!-- add this text to your template --> <p v-if="guest">Hi Guest</p> <li v-for="post in posts" :key="post.id"> <router-link :to="{ name: 'Post', params: { id: post.id, post: post } }" > </router-link> </li> </ol> </div> </template> <script> // @ is an alias to /src import axios from "axios"; export default { name: "Home", data() { return { posts: null, // add this property guest: false, loading: false, }; }, // add this function beforeRouteEnter(to, from, next) { if (to.matched.some((record) => record.meta.requiresAuth)) { // this route requires auth, check if logged in // if not, display guest greeting. const loggedIn = JSON.parse(localStorage.getItem("loggedIn")); if (!loggedIn) { next((vm) => { vm.guest = true; }); } else { next(); } } else { next(); // make sure to always call next()! } }, methods: {...} }; </script> <style>...</style>
Here, we’re adding a paragraph that is only visible to unauthenticated users. We also add a property that controls the visibility of this text. Finally we have a router method beforeRouteEnter in which we also connect the router guard and check if the user is authenticated or not using a value that would be manually added later. We also have an if/else statement, and inside this statement, we change the value of guest depending on the authentication of the user.
And in your App.vue, add this lifecycle to the file.
export default { mounted() { localStorage.setItem("loggedIn", false); } };
So if you refresh your app, we should see the text we added in the Home.vue file.
Guest text visible. (Large preview)
2. Per-route
We can also add a router guard to our apps per-route in our router file as another property inside the specific route object. Here’s an example:
{ path: '/', name: 'Home', component: Home, // add meta to this route meta: { requiresAuth: true }, beforeEnter: (to, from, next) => { if (to.name !== 'Home') { console.log('Per-Route navigation guard ti wa online'); next() } else next() } }
Here, we add a router guard to the / route and we’re currently just logging a random text to the console but we can do a couple of things inside this guard. Now, each time you visit the home page, you would see this in your console:
Message printed in terminal. (Large preview)
3. Globally
We also have the option of creating a router guard that works globally for every part of the app (provided it meets the guard condition). This global guard is created in the router file just like the per-route guard but instead of defining it inside a specific route object, it is defined as a method of the router instance. For an example of how it works, we’re going to create a new file and route in our app and name it guest.vue, then add the following lines of code to the file.
<template> <div> <h1>Guest page</h1> <p>You're seeing this page because you are not logged in</p> </div> </template> <script> </script> <style></style>
Next, we create a /login route with this newly created page and add a meta property to other existing routes.
// create new route { path: '/login', name: 'login', component: () => import ( /* webpackChunkName: "auth" */ '../views/guest.vue') }, { path: '/:id', name: 'Post', props: true,a // add meta property meta: { requiresAuth: true }, component: () => import ( /* webpackChunkName: "post" */ '../views/Post.vue') }
The next thing would be to create the global navigation guard for all routes that require authentication and check the user’s authentication using localStorage (previously created). We would redirect users that have a loggedIn value of false to /login.
router.beforeEach((to, from, next) => { if (to.matched.some((record) => record.meta.requiresAuth)) { // this route requires auth, check if logged in // if not, display guest greeting. const loggedIn = JSON.parse(localStorage.getItem("loggedIn")); if (!loggedIn) { next({ path: '/login' }); } else { next(); } } else { next(); // make sure to always call next()! } })
So if you check your app in your browser, you would notice it is currently on this page:
Guest page. (Large preview)
If we try to navigate to any of the existing routes, we would automatically get redirected to this page no what we do and that means our router guard is effectively guarding those routes.
Conclusion
We can see that the Vue Router is a very powerful tool that can be used for more than just creating routes in your application. We have learned how to configure the scroll behavior of routes in our application, the different ways to add transitions to routes in our app, how to fetch data from an API before a component gets mounted, how to use meta property for our routes and the different ways to set up router guard.
Resources
Vue Router
CSS Transitions In Vuejs And Nuxtjs
(ks, ra, yk, il)
Website Design & SEO Delray Beach by DBL07.co
Delray Beach SEO
source http://www.scpie.org/how-to-do-more-with-vue-router/ source https://scpie1.blogspot.com/2020/09/how-to-do-more-with-vue-router.html
0 notes
Text
Learning Resources In Challenging Times: Online Workshops Meetups And Events
About The Author
Juggling between three languages on a daily basis, Iris is known for her love of linguistics, arts, web design and typography, as well as her goldmine of … More about Iris …
A month is a long time to stay on top of things. In today’s monthly post, you’ll find an overview of everything we’ve been working on and have also enjoyed reading over the past month.
In these current strange times of isolation and social distancing (with almost all events and conferences being cancelled), it can be quite difficult to feel connected to family, friends and colleagues. Here at Smashing, we believe that is is now more important than ever to stay in touch and support each other. Behind the scenes, the team is working tirelessly on ways to keep the community connected, and oh boy do we have a lot of things in store for you! You didn’t really think we’d give up that easily, did you?
Your workplace may look a lot like Topple’s, but even if it isn’t, make yourself comfortable! We’ll help you boost your skills online and learn practical, actionable insights from experts in the industry.
We’ve been busy over the last few weeks, and we’re not stopping yet! We have online workshops, SmashingConf Live, Smashing Meets and last but not least, Smashing TV coming right at your fingertips! But first, let’s see what else we’ve been up to…
Look What’s Cookin’!
Exciting times! Click!, our latest Smashing book, is available for pre-order with a friendly discount — you can already start reading the eBook until your printed copy arrives at your doorstep. Written by Paul Boag and beautifully designed by Veerle Pieters, the book is split into 11 chapters: from exploring the psychology of decision making and how to measure conversion to exploring ways of how to encourage users to act without alienating them.
There is no shortage of books on marketing agency and UX, but when it comes to bridging the gap between the two, many of us struggle to find the right balance. Pre-order today →
Of course, if you’re feeling smashing today, we’d like to invite you join the Smashing family and get the eBook for free (among with many other eBooks and a few fancy cats!).
Learning And Networking, The Smashing Way
Despite the current circumstances, we’re keen to find ways in which we can offer Smashing experiences to anyone interested in learning from experts in our industry — without needing to leave your desk! We’ve been asking what type of resources you’d like to have, and so all of the following online events is what has landed in our Smashing wishing well. Thank you to everyone who has shared their thoughts and feedback — we’ve been all ears!
1. Online Workshops (May–July)
Our friendly online front-end/UX workshops are bound to boost your skills and help you gain practical, actionable insights from experts in the industry — live. There will be plenty of insightful takeaways, exercises, slides, recordings and friendly Q&A time. Of course, we’re happy to provide discounts for large groups and students.
We already have you covered for the next three months — make sure to save your spot as soon as you can:
Note: If you’re also interested in how you too can run online workshops, listen to Smashing Podcast episode 14 with Rachel Andrew in which she talks about running online workshops and how a traditional event can adapt when participants can’t attend in person.
2. SmashingConf Live (June 9–10)
Meet SmashingConf Live (June 9–10), a truly smashing, friendly online conference on front-end & UX. With interactive live sessions, practical insights, accessible speakers, collaborative notes and fireplace chats with like-minded folks. Jump to first confirmed speakers. Check schedule →
Both days start at 8 AM PDT (check your time), with interactive sessions, followed up with a time for Q&As and discussion zones.
Ah, and the best bit: a conference in which you play an active role — taking part in live sessions, Q&As, discussion zones and challenges. To the schedule. But of course that’s not all! Be prepared for design & coding challenges, scavenger hunt and fireplace sessions with mystery guests. And to keep in style, of course we’ll throw a Smashing Party.
Do you like what you see, but are worried about getting some time off from work? Well, you surely didn’t think we would leave your hanging? We know how difficult it can sometimes be, and so we’ve prepared a neat lil’ Convince-Your-Boss template to help you out. Good luck!
3. Smashing Meets (Free)
We’re super excited to run our very first Smashing meetup next week! We will focus on front-end and UX, but also cover all sorts of topics from performance to accessibility. Smashing Meets wouldn’t be possible without some amazing communities from around the world, so another Thank You to everyone involved!
4. Smashing TV (Free Webinar on May 19th)
Looking for ways to help you expand your accessibility test coverage beyond automation? With very little resources, you can make a meaningful difference. Join us with Carie Fisher and Harris Schneiderman at 7:00 PM CET/1:00 PM EDT who will demonstrate the basics of automated testing and share key lessons on on maximizing your accessibility impact.
Sharing Personal Experiences And Stories
We’re moving onto our 16th episode of the Smashing Podcast next week! The Smashing Podcast is the perfect way to take a little bit of Smashing along with you on your morning walks, while washing the dishes, or anytime you like really. You can subscribe in your favorite app to get new episodes as soon as they’re ready.
Your Design Work Deserves Attention
Do you have artwork you’d love to share with the design community? If so, please do! We are always looking for creative talent, so if you have an idea for a wallpaper design, please don’t hesitate to submit it. Join in! →
Trending Topics On Smashing Magazine
We publish a new article every day on various topics that are current in the web industry. Here are some that our readers seemed to enjoy the most and have recommended further:
“Setting TypeScript For Modern React Projects Using Webpack And Babel” by Blessing Krofegha This article introduces Typescript, a superscript of JavaScript that presents the static type feature for spotting common errors as developers codes, which enhances performance, hence results in robust enterprise applications. You’ll also learn how to efficiently set up TypeScript in a React Project as we build a Money Heist Episode Picker App, exploring TypeScript, React hooks such as useReducer, useContext and Reach Router.
“A Complete Guide To Mechanical Keyboards” by Ben Frain How much thought have you put into your primary input device? Ever considered how much better your interface with your computer might be? In this article, we dive into the possibilities of mechanical keyboards. The different layouts, switch types and even keycap material. Strap yourself in — this will be a deep dive!
“Micro-Typography: How To Space And Kern Punctuation Marks And Other Symbols” by Thomas Bohm For hundreds of years, we have been using white space in typography. Today, in 2020, how do we add spacing to punctuation marks and other symbols, and how do we adjust the space on the left and right side in an easy and consistent way? It is actually not as easy and quick as it should be.
“How To Pass Data Between Components In Vue.js” by Matt Maribojoc With so many different ways to share data across components, you should know which technique is best for your situation. Let’s analyze three of the most common ways to pass data in VueJS.
“Reducing Design Risk” by Eric Olive The pressure to rush market and usability research carries risk. We’ll offer four practical techniques to mitigate this risk and create designs that better serve customers and the company: context over convenience, compromise, better design decisions, design reduction.
Best Picks From Our Newsletter
We’ll be honest: Every second week, we struggle with keeping the Smashing Newsletter issues at a moderate length — there are just so many talented folks out there working on brilliant projects! Kudos to everyone involved!
Interested in sponsoring? Feel free to check out our partnership options and get in touch with the team anytime — they’ll be sure to get back to you right away.
P.S. A huge thank you to Cosima Mielke for writing and preparing these posts!
Creating Accessible Color Palettes
Finding the perfect tint or shade of a color is not only a matter of taste but also accessibility. After all, if color contrast is lacking, a product could, in the worst case, even become unusable for people with vision impairments. A very detailed contrast checker to help you detect potential pitfalls ahead of time comes from Gianluca Gini: Geenes.
The tool lets you tinker with hue ranges and saturation and apply the color palettes to one of three selectable UI mockups. Once applied, you can trigger different kinds of vision impairments to see how affected people see the colors and, finally, make an informed decision on the best tones for your palette. To use the colors right away, just copy and paste their code or export them to Sketch.
Command Line Love
It’s not uncommon for technical documentation to be dry and feel intimidating, especially for people who are just getting started with a new tool. That can get quite frustrating especially when a manual is difficult to read or follow, or the explanations are verbose and lack examples.
Dash Dash takes the Unix (LinUX, BSD, macOS) open source manual pages and sets the content in a beautiful type and layout. It provides not only explanations of all commands, but also search, examples and TL;DR sections. Also, The Art of Command Line takes you on a journey to Command Line from basics to system debugging.
And if you are up for advanced command line techniques, cmdchallenge prompts you to solve tasks with a single line of bash. (vf)
Accessible Component Libraries
While many of the component libraries we create are trying to cover all the usual suspects (the accordions, the tables, the carousels, the drop-downs, along with typography, colors and box shadows), No Style Design System by Adam Silver is focused primarily around accessibility and web forms.
As a system created for and used in his book on Form Design Patterns, Adam’s library provides a set of accessible components for everything from autocomplete, checkboxes and password reveal to radios, select boxes and steppers. Most of them have a minimal CSS styling with clean, accessible markup. And if you need slightly more advanced components, Heydon Pickering’s Inclusive Components has got your back: with comprehensive tutorials on accessible cards, data tables, notifications, sliders, tabbed inerfaces, tooltips, menus and toggles. (vf)
Custom CSS Cascades
Miriam Suzanne built a demo to illustrate a very clever way to define a cascade of custom properties. One that allows you to determine which intent should take priority, without worrying about the specificity of how the value is defined.
See the Pen [Custom Cascades](https://codepen.io/smashingmag/pen/JjYawPP) by Miriam Suzanne.
See the Pen Custom Cascades by Miriam Suzanne.
Miriam shows how it works at the example of a button. Due to how the cascade is arranged, the default button is always falling back to --btn-bg--default. Adding the disabled attribute, always overrides any other button colors, no matter where they are defined, and, when new button types are created, --btn-bg--type ensures that only the defaults are overridden but not the state. The approach also lets you set these values contextually. A smart solution to avoid the usual dangers that highly-specified inline styles usually bring along.
Front-End Bookmarks
Some of us save all the useful articles and talks they come across in one ever-growing bookmark folder (which can make finding what you’re looking for quite a challenge at times), others have a more organized approach. Like Manuel Matuzović.
Manuel collects articles and talks about HTML, CSS, and JavaScript on his site Front-End Bookmarks, grouped alphabetically by elements, attributes, properties, selectors, methods, and expressions. No matter if you’re looking for information on how to correctly use aria-labelledby or what the ::marker pseudo-element is all about, chances are good that Manuel already compiled helpful resources on the topic. By the way, if you feel that a resource is missing in the collection, don’t hesitate to contribute to it on GitHub.
GitHub Tips And Tricks
Do you know how to automatically squash commits on GitHub when merging pull requests? Or how to open a repo in the browser using GitHub CLI? If not, Joe Previte’s collection of GitHub tips and tricks might be for you.
In bite-sized videos, Joe shares small but powerful tips to take your GitHub workflow to the next level. And for those of you who prefer to learn by reading, most tips are also available as short blog posts. Handy little timesavers.
The Sound Of Colleagues
Working from home can have some real advantages over working from an office, but let’s be honest, it can be a rather lonely experience, too, when there are no colleagues around. If you feel your home office is getting too quiet and you need some bustle in the background to stay focused, The Sound of Colleagues has got your back.
The Sound of Colleagues lets you mix office noises to create your custom office ambient noise. People typing and talking, phones ringing, the coffee machine, the printer — all of these little things add up to bring a bit of office feeling to your home. Maybe it’ll even help you boost your productivity, who knows?
A Minimalist And Modern Media Player Library
If you want to embed a media player on your site, Vime might be worth taking a closer look at. Built around the idea that you control the player, not the other way around, the open-source library provides an alternative to Videojs and Plyr and supports HTML5, HLS, Dash, YouTube, Vimeo, and Dailymotion.
Vime does not only shine with a minimalist, sleek look, but it is responsive, accessible, modular, and lightweight, too. It gets by without any external dependencies and comes in different packages tailored to different needs so that you can pick just what’s required for your use case. And since minimalist doesn’t mean bland, Vime is backed up by a plugin system that offers a lot of room for customization — think custom controls, settings, tooltips, and more. The last two versions of all modern browsers as well as IE11 are supported.
(cm, vf, ra)
Website Design & SEO Delray Beach by DBL07.co
Delray Beach SEO
Via http://www.scpie.org/learning-resources-in-challenging-times-online-workshops-meetups-and-events/
source https://scpie.weebly.com/blog/learning-resources-in-challenging-times-online-workshops-meetups-and-events
0 notes