#scalemodeller
Photo

Look what I got! @officialairfix new tool 1/48 Blackburn Buccaneer #scalemodelling #scalemodels #scalemodel #modelkit #48scale #airfix #buccaneer #plasticmodel #royalairforce #raf #scalemodelworld #airfixbuccaneer #plasticmodelkit #modelarstwo #scaleaircraft #aircraft #scalemodeller #plastickit (at Ely, Cambridgeshire, United Kingdom) https://www.instagram.com/p/Cj-biH-j8rW/?igshid=NGJjMDIxMWI=
#scalemodelling#scalemodels#scalemodel#modelkit#48scale#airfix#buccaneer#plasticmodel#royalairforce#raf#scalemodelworld#airfixbuccaneer#plasticmodelkit#modelarstwo#scaleaircraft#aircraft#scalemodeller#plastickit
8 notes
·
View notes
Text
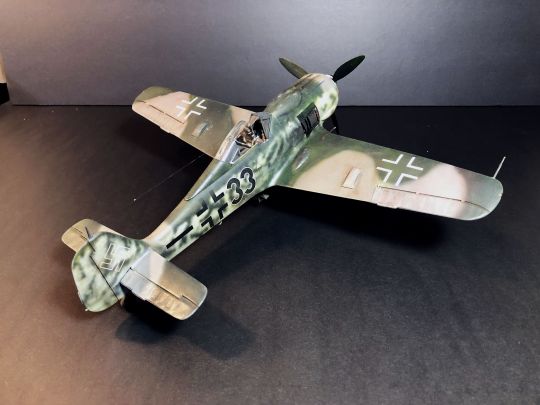
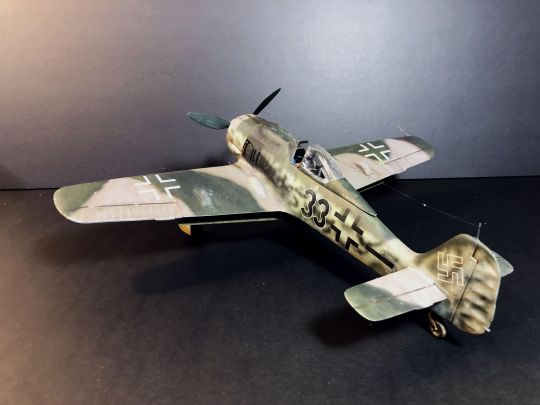

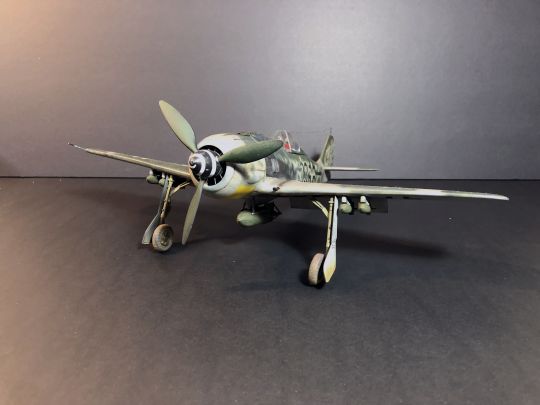


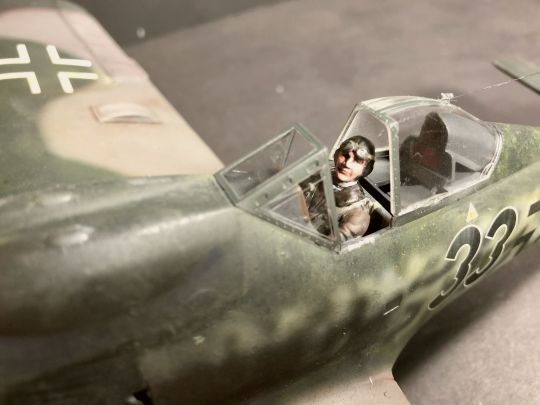


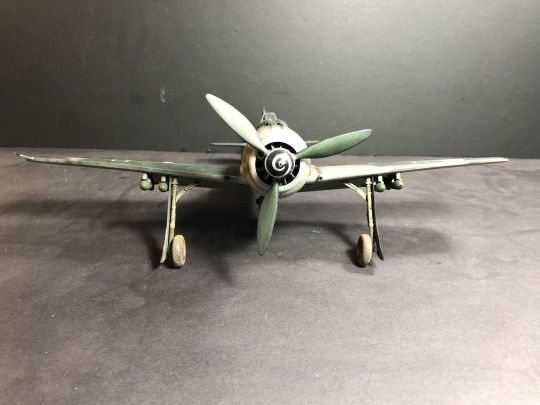
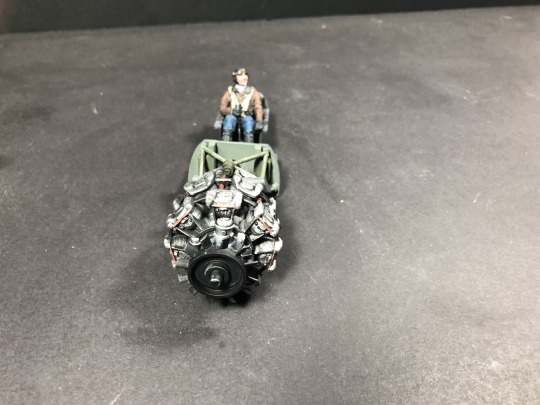
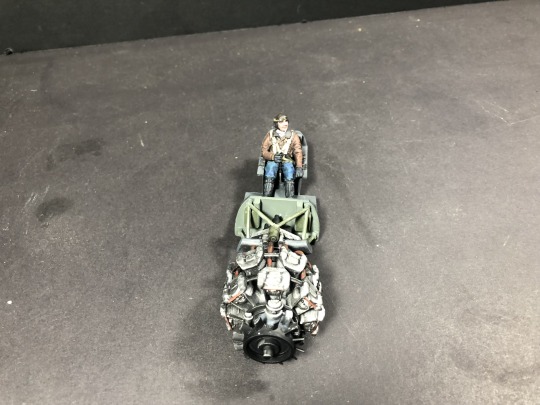
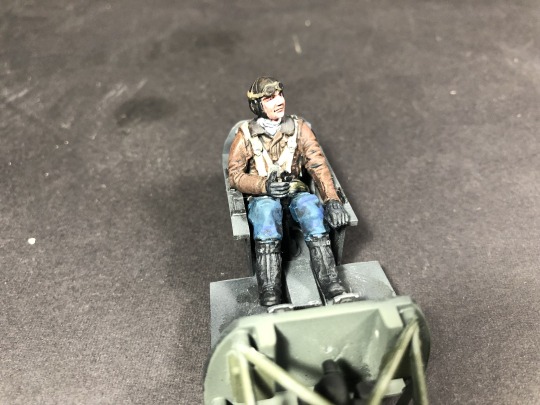
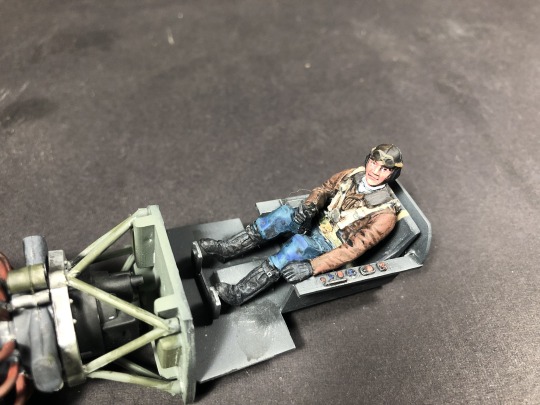
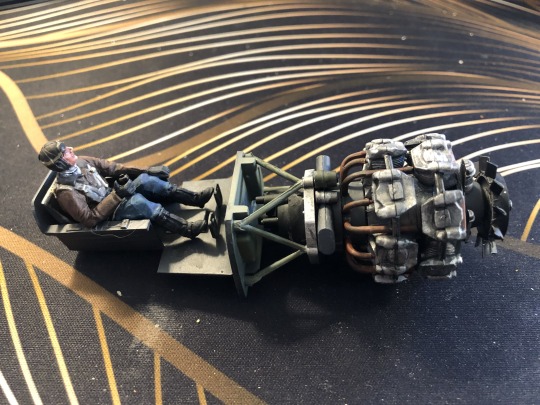
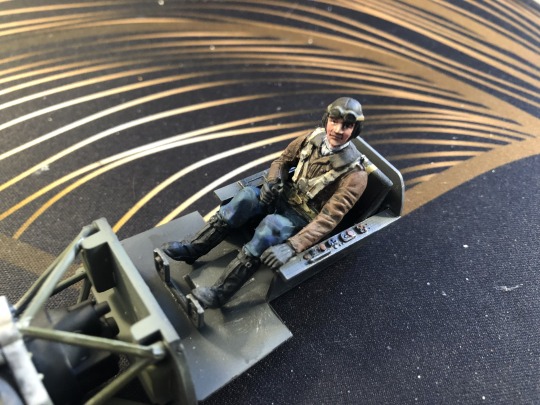
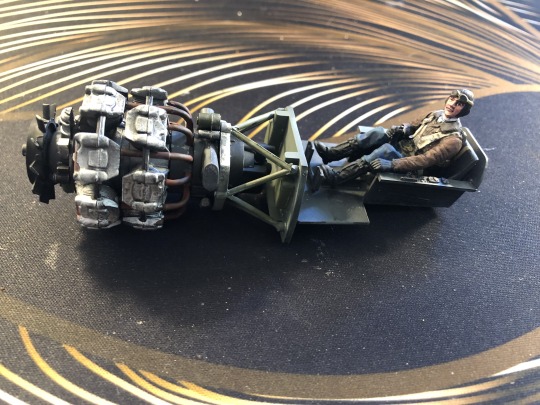
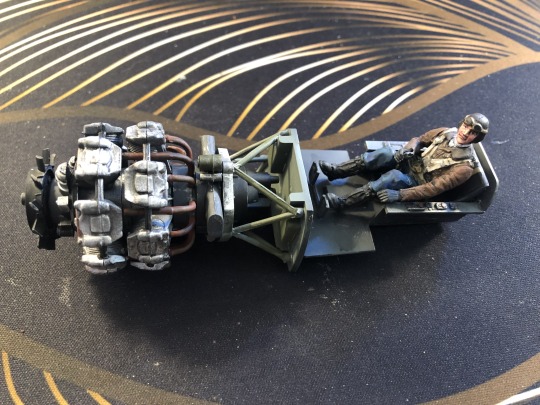
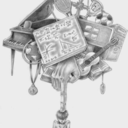
Franken-Wulf 190F8
1. Revell (Hasegawa) Fw-190F8 90s/70s
2. Hasegawa Fw-190D9 (pilot, bombs) 00s
3. Hasegawa new Fw-190F8 box and instructions
4. dead Revell Decals
5. 1 pound filler
6. 3 sheets sandpaper
7. 3 decal sheets
8. Hungarian postage
9. 1 huge dose of excellent customer service
Franken-Wulf is complete! All I needed was some drama and amazing amount of help from Hungarian Aero Decals. The markings are from an old sheet that has not been produced for many years. My first set sadly failed.
Szegedi from HAD not only sent me one but two sets just in case. The replacement set worked wonderfully with his suggestions. I cannot say thank you enough for the wonderful customer service.
#hasegawa#bigscale#bigboi#luftwaffe#scalemodel#scalemodelling#pilot#filler#gunze#revell#fillerbomb#promodeller#revellmodels#scalemodeller#132scale#scalemodels#scalemodelsworld#hadmodels#modelbau
1 note
·
View note
Photo
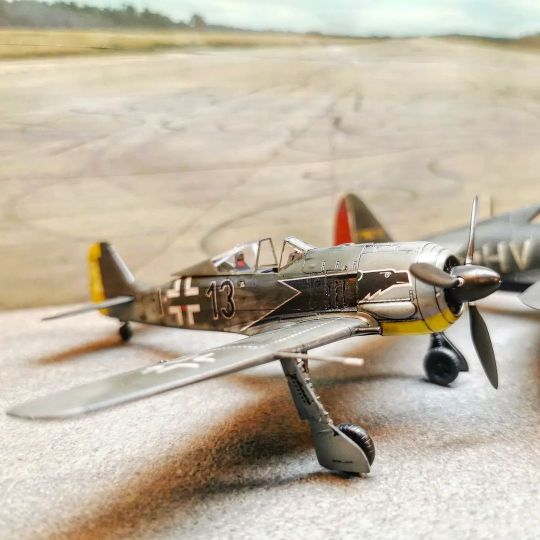
⚡ FlugZeugWerk: Focke Wulf FW 190 A3 ⚡ by @flugzeugwerk aka @heavensky79 🤘 1/72 kit by #Tamiya Beautiful little kit, turns out really great and beautiful. ✌️ #ww2 #scalemodeling #scalemodel #plasticscalemodel #passion #germanluftwaffe #fockewulffw190 #fockewulffw190A3 #fockewulf190 #hobby #hobbies #172 #tamiya #hasegawa #trumpeter #hobbyboss #scalemodelsworld #warbird #fighter #scalemodeller #hobbykit #modelkit #butcherbird #flugzeugwerkheavensky #flugzeugwerk (hier: Berlin, Germany) https://www.instagram.com/p/CpK9Kmnt19H/?igshid=NGJjMDIxMWI=
#tamiya#ww2#scalemodeling#scalemodel#plasticscalemodel#passion#germanluftwaffe#fockewulffw190#fockewulffw190a3#fockewulf190#hobby#hobbies#172#hasegawa#trumpeter#hobbyboss#scalemodelsworld#warbird#fighter#scalemodeller#hobbykit#modelkit#butcherbird#flugzeugwerkheavensky#flugzeugwerk
0 notes
Photo
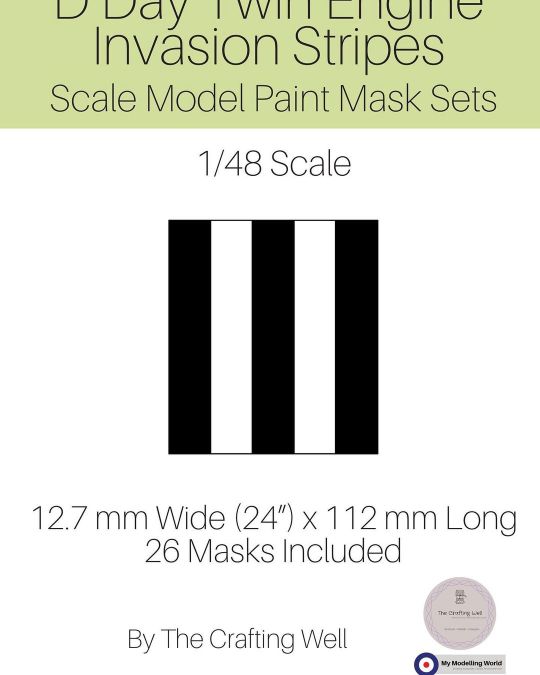
New #invasionstripe masks for #twinengines and #ww2bombers #ww2history #ww2planes #ddayinvasionstripes #ddayinvasion #scalemodel #scalemodels #scalemodelling_accessories #scalemodelling #scalemodellersofinstagram #scalemodelbuilder #scalemodelpainting #scalemodelpaintmasks #paintnotdecals #scalemodeller #48scale #48scaleaircraft #32scale #72scale #72scaleaircraft #historicalmodels https://www.instagram.com/p/CoDBFltteVv/?igshid=NGJjMDIxMWI=
#invasionstripe#twinengines#ww2bombers#ww2history#ww2planes#ddayinvasionstripes#ddayinvasion#scalemodel#scalemodels#scalemodelling_accessories#scalemodelling#scalemodellersofinstagram#scalemodelbuilder#scalemodelpainting#scalemodelpaintmasks#paintnotdecals#scalemodeller#48scale#48scaleaircraft#32scale#72scale#72scaleaircraft#historicalmodels
0 notes
Text
Why Scale Models?
Whether you’re a seasoned model builder or just getting started, plastic kits are a great way to create scale models of just about anything. But with so many different types of kits available, it can be tough to know where to start. In this post, we’ll give you a few tips on how to choose the right kit for your project, how to assemble it, and how to add the finishing touches to create a model…
View On WordPress
0 notes
Text
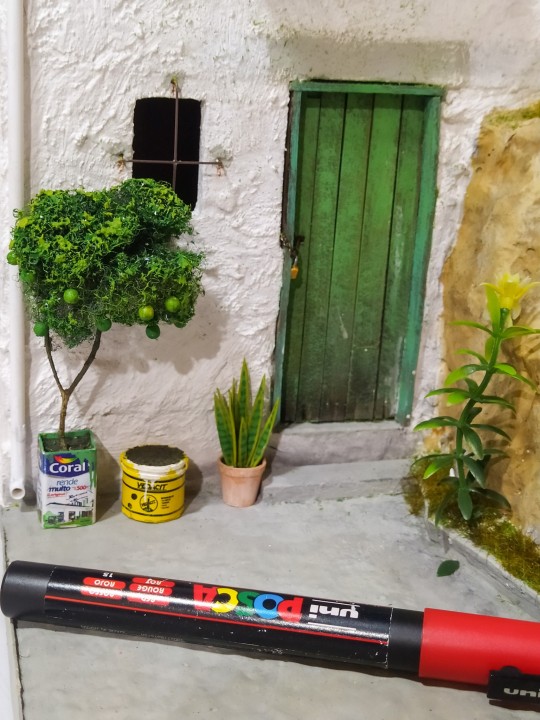
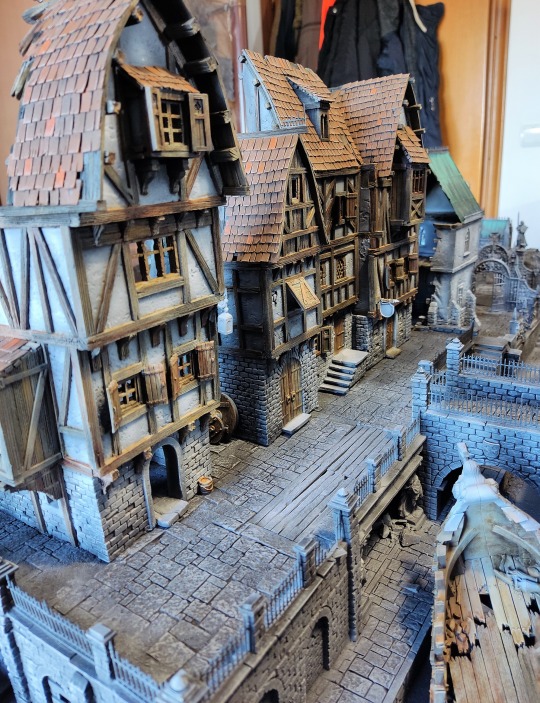
Espada de São Jorge
#suburbio#miniature#miniatura#miniaturas#diorama#scalemodel#handmade#masterpiece#contemporary art#arte#artwork#arte contemporânea#dioramas
1K notes
·
View notes
Text
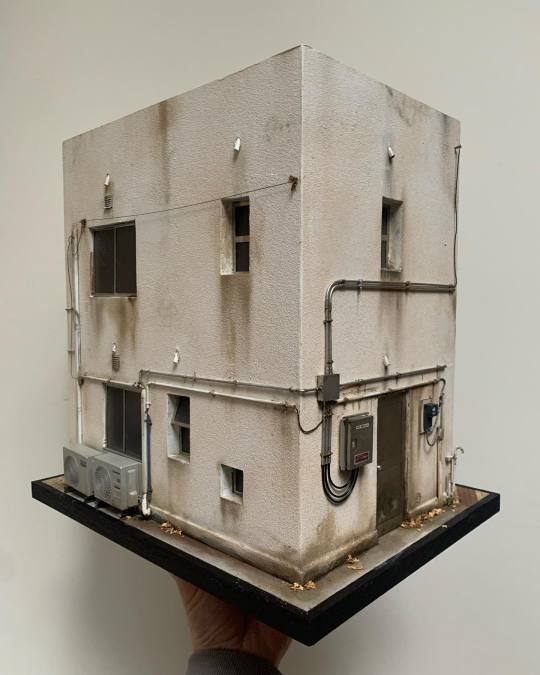
link
#@tokyobuild#tokyobuild#東京ビルド#miniaturist#tools#artwork#art#artist#sculpture#mini#miniature#miniartmodels#woodworking#instaart#pic#picoftheday#progress#scratchbuild#scalemodel#modelhouse#modelhouses#rust#hobby#workshop#handmade#handtool#tokyohouse#exhibition
254 notes
·
View notes
Text
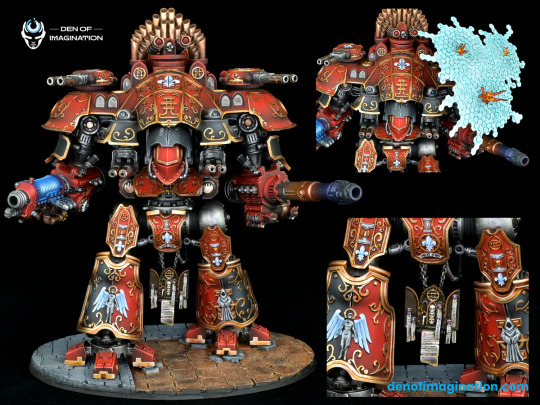
"Followers of the Emperor marched into battle with faith as strong as the steel colossi striding by their side" ⚔️🛡️
If you want to get this or similar one for yourself -> link in bio.
#imperialknights#boardgames#best4minis#scalemodel#modelpainting🎨#like4like#belloflostsouls#adeptasororitas#brushforhire#warhammer#gw#repostminiature#nerd#mini#miniatures#theminiaturesvault#WarhammerCommunity#freehand#warmongers#primaris#coolminis#battlesisters#wh40k#paintingwarhammer#paintings#gamesworkshop#miniaturepainting#tabletopminiatures#warhammer40k#wargaming
167 notes
·
View notes
Text
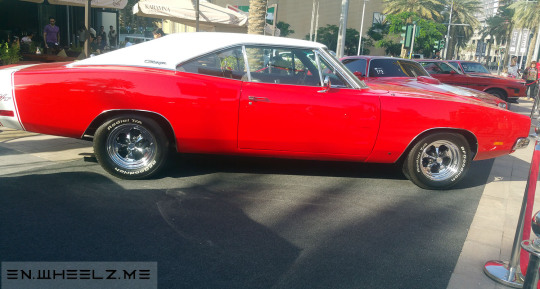
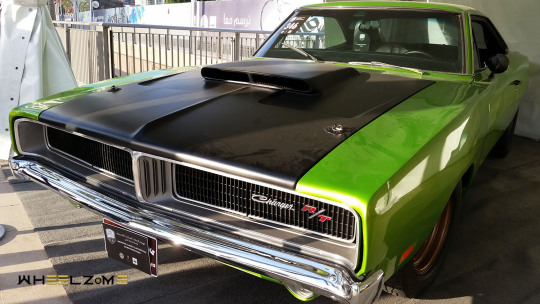

#dodge#dodgecharger#charger#rt#chargerrt#musclecar#americanmuscle#diecast#scalemodel#charger rt#dodge charger#dodge charger rt#muscle car#american muscle#classic#classic car#classic cars#cars#icon#american icon#american muscle car#car#fast car#fast cars
168 notes
·
View notes
Text

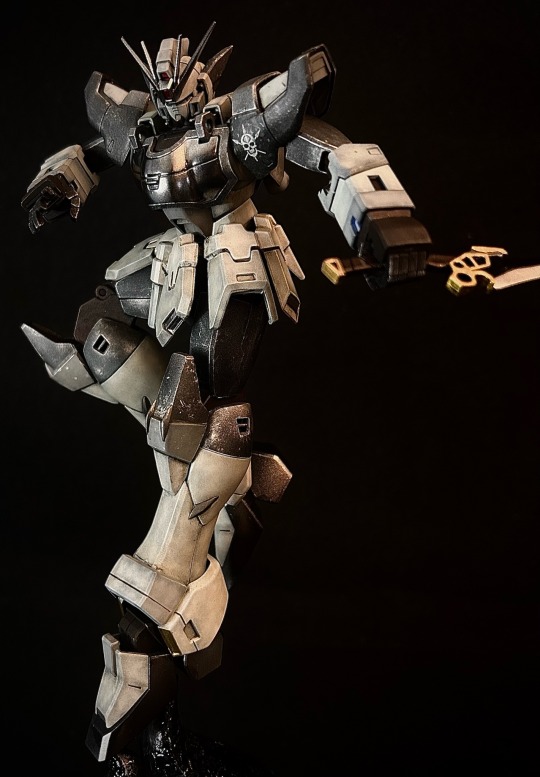
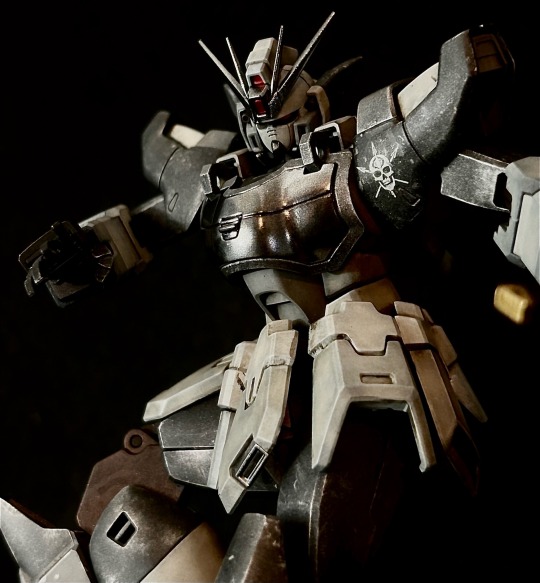


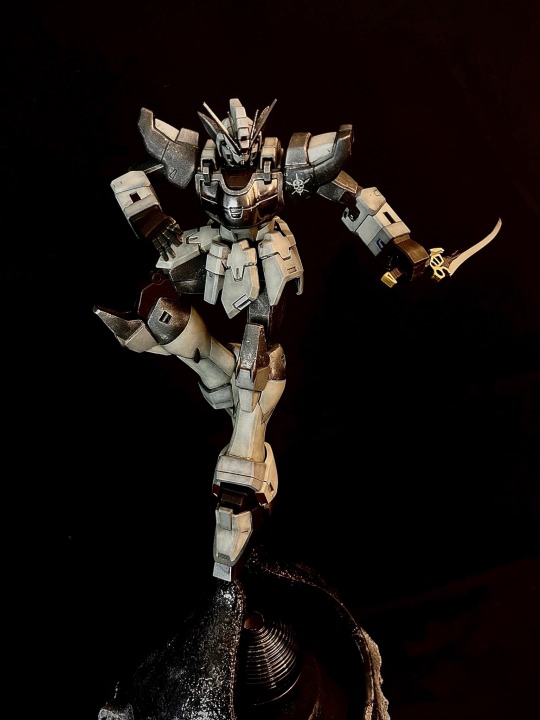
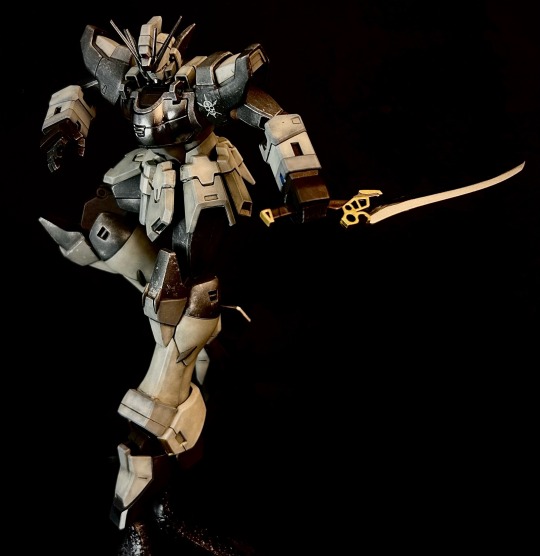
Bandai MG 1/100 Shenlong EW
#bandai#gundam#gunpla#scalemodel#diorama#plastic model#mech#mecha anime#mecha#scale model#scifi#anime#manga
116 notes
·
View notes
Photo
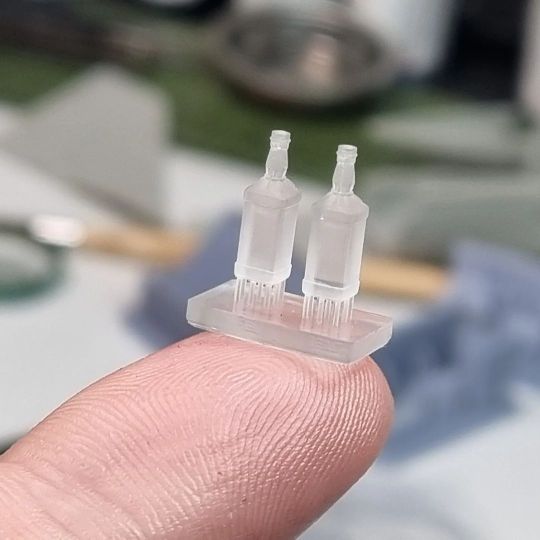
1/35 liquor bottles 😊 If you are going to Telford next week, don't forget to visit our trading table. I will have various 3d printed products for sale in 1/24, 1/35 and 1/48 scale including US Navy tow tractors, tie down points, hooks, wheel chocks, tow bars, barrels, trash cans, TV, vcr, liquor bottles and many more stuff! 😀 All designed by @remjkits #scalemodel #modelkit #scalemodelling #3dprinting #scalemodelshow #3dprint #scalemodeller #24scale #35scale #48scale #telford (at Ely, Cambridgeshire, United Kingdom) https://www.instagram.com/p/Cklst4YDhdi/?igshid=NGJjMDIxMWI=
#scalemodel#modelkit#scalemodelling#3dprinting#scalemodelshow#3dprint#scalemodeller#24scale#35scale#48scale#telford
3 notes
·
View notes
Text


Revegawa Franken-Wulf 190:
1. Revell (Hasegawa) Fw-190F8 90s/70s
2. Hasegawa Fw-190D9 (pilot, bombs) 00s
3. Hasegawa new Fw-190F8 box and instructions
4. dead Revell Decals
5. 1 pound filler
6. 3 sheets sandpaper
0 notes
Photo

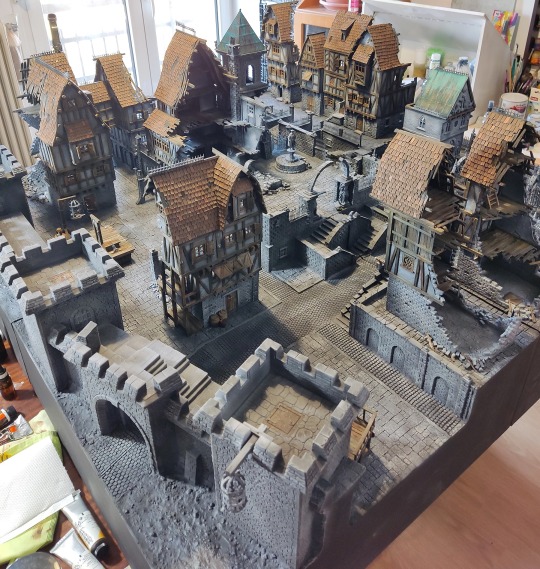
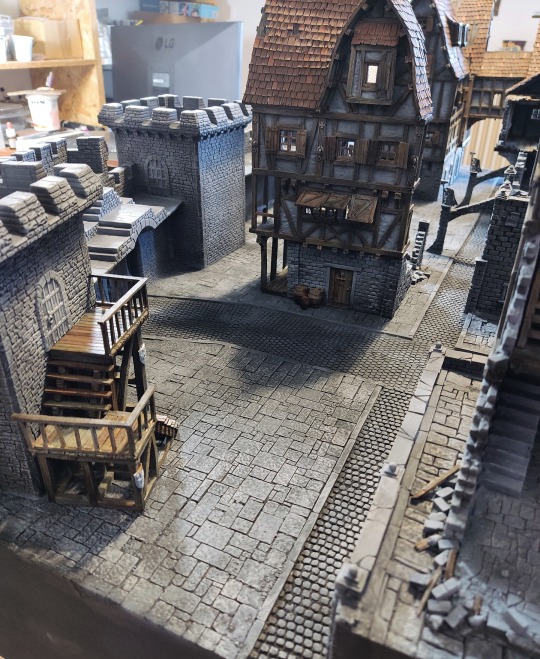

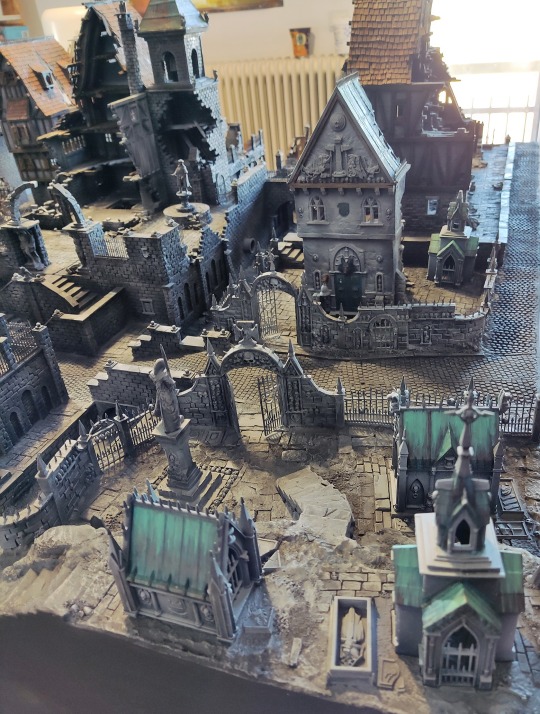
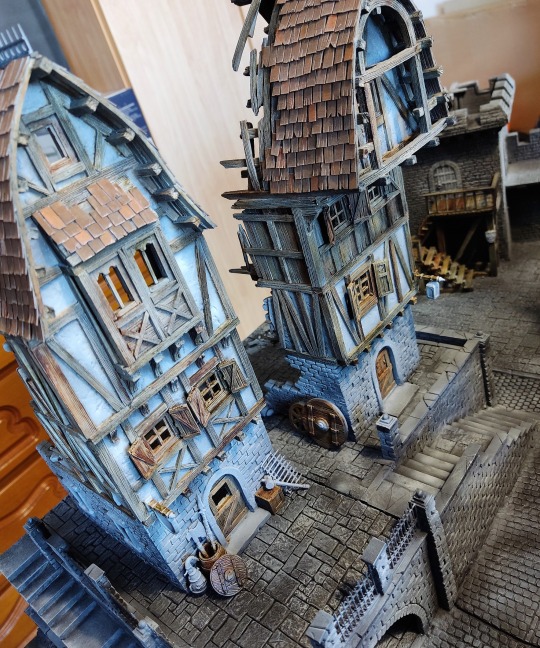
I have moved on to painting, and I have to admit that the volume of work at this point is not small. On the positive side, I am moving forward with more energy as I slowly see myself getting closer to the result I had envisioned (with the necessary realistic compromises always for the sake of playability). Priming with an airbrush (a mixture of floor polish, latex paint, and black primer). This was followed by a second coat of primer and floor polish with a brush to cover areas that I could not reach with an airbrush. Zenithal lighting (with white primer diluted with a lot of water) applied in selective places with the help of an airbrush. Drybrush with two successive hands of gray tones. The wooden roofs were painted with brown acrylics and finished with a light drybrush of light brown (almost beige). The metal roofs were the result of true metallic acrylic paints and weathering with oils. The wooden parts of the table were worked entirely with oils. The plaster will be painted next. Until next time.
#mordheim#miniature#terrainbuilding#wargameterrain#fantasy#tabletop#warhammer#dungeons and dragons#dnd#scalemodel
131 notes
·
View notes
Photo

#scalemodellingaccessories #scalemodelkits #scalemodelkitsforsale #scalemodelpainting #scalemodelpaintmasks #32scalemodel #48scalemodel #48scaleaircraft #48scalemodelkit #72scalemodel #72scaleaircraft #thecraftingwell #mymodellingworld #blackfridaysale #scalemodelsofinstagram #scalemodelaircrafts #scalemodellersofinstagram #scalemodeller #scalemodelbuilder #paintnotdecals #scalemodelsupply #scalemodelshop #scalemodelhobby #plasticmodels #plasticmodelkit (at South Yorkshire) https://www.instagram.com/p/ClYMoZdNrRZ/?igshid=NGJjMDIxMWI=
#scalemodellingaccessories#scalemodelkits#scalemodelkitsforsale#scalemodelpainting#scalemodelpaintmasks#32scalemodel#48scalemodel#48scaleaircraft#48scalemodelkit#72scalemodel#72scaleaircraft#thecraftingwell#mymodellingworld#blackfridaysale#scalemodelsofinstagram#scalemodelaircrafts#scalemodellersofinstagram#scalemodeller#scalemodelbuilder#paintnotdecals#scalemodelsupply#scalemodelshop#scalemodelhobby#plasticmodels#plasticmodelkit
0 notes
Text
Old hands and small parts
Old hands and small parts
Prologue
Throughout my life I have really enjoyed building scale models, the it type from companies such as Airfix, Tamiya, Revell, Hasegawa etc. I have been through “phases” with my building, first in my early teens when given kits as either birthday or Christmas presents then in my early 20’s when I wanted a “hobby” unfortunately family stuff got in the way there.
I tried again in my late…
View On WordPress
0 notes
Text
Um pé de que?
#miniature#miniatura#miniaturas#diorama#scalemodel#handmade#masterpiece#dioramas#arte#old architecture#architecture#arquitetura
104 notes
·
View notes
Last Seen Blogs
bittercoffe36
bitter coffee

hoki-creations
Hoki’s Art And Personal Blog!

acn-newswire
ACN Newswire

virtuousthief
v i r t u e
fenrirtheinsomniac
FensDen