#setstate
Explore tagged Tumblr posts
Visit Tumblr Blog
Explore Tumblr blogs with no restrictions, modern design and the best experience.
Last Seen Tumblr Blogs


Fun Fact
12.7% of mobile users access Tumblr.
Text
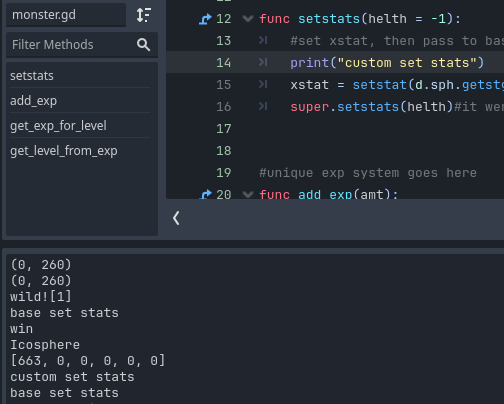
On second thought the "super" thing isn't quite as useful as I thought, because the function to calculate stats needs to be overridden to, you know, change how the stats are calculated, and I'm pretty sure the base class code that sets the default stats will be calling the base stat calculation function not the extended one. I could probably do something stupid and circuitous to circumvent that (and I already have an idea what I'd do), but for now it's just a nice thing to know is possible.
… Actually, no, according to my highly sophisticated debugging techniques, calling setstats from the levelup function, which only exists in the base class, calls the extended version of the function (which then calls the base version). Neat!
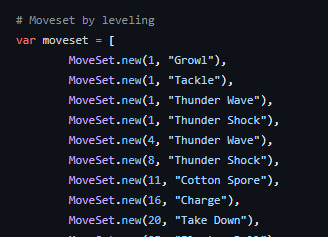
Anyway, let's talk about level-up moves. The format for defining levelup moves needs to be able to handle the following scenarios:
Multiple moves learned at the same level (so you can't have a dict and get moves[level], unless you're willing to manage possibly getting an array of moves from that)
Moves learned on evolution, moves only available via move-relearner tutors (in the Pokemon games these aren't gated by level so could be listed as level -1, -2 etc, but I think being able to add a level definition could be interesting. Like, you evolve Vulpix to Ninetales after the level where Ninetales normally learns Flamethrower, it'll learn Flamethrower, but before that it learns Fire Spin. Or you hit a certain level and new moves are available via the relearner tutor.)
Other wacky shit (imagine having like a 1/5 chance to learn a move at a certain level based on the mon's unique data or some shit lol)
The simplest method would be an array of [level,move] pairs in some form. The only other Pokemon-like game in Godot I've seen, the Pokemon Uranium port, does this
Which actually seems kind of appealing. You could have an optional third parameter for additional data, defaulting to an empty dict or something, where you could pass in tags indicating a move is learned on evo, or relearner-only, or what have you.
However an even simpler method occured to me: two separate arrays, one for simple moves and one for moves with additional parameters. For the first array you expect each entry to be a two-element array, for the second a three-element array. That last element could be a dictionary or just an array of flags.
Performance isn't all that important. Even in the most insane case of some gimmick mon that learns five different moves per level (which sounds like a fun idea, actually…) it's only a 500-element array, which isn't that slow to iterate through. If it's assumed entries are sorted by level, a binary search method can be used to speed it up as well.
That all should be good, so I'm left with the last barrier to implementing levelup movesets: creating levelup movesets for everything. For the pointless placeholder creatures of the useless default project I can just throw in whatever, but for my couple of original games, well, it's time to get designing. In the meantime maybe I'll start theorizing on how to implement save files or something.
2 notes
·
View notes
Text
Optimizing Flutter App Performance: Techniques and Tools
An app’s performance plays a crucial role in shaping the user experience. Today’s users expect mobile apps to load instantly, scroll seamlessly, and respond immediately to every touch. And when you're working with Flutter App Development, performance isn't just a luxury — it's a necessity.
At Siddhi Infosoft, we specialize in delivering top-notch Flutter Application Development Services. Over the years, we've worked on a wide range of Flutter apps — from sleek MVPs to full-featured enterprise apps. One thing we’ve learned: performance optimization is an ongoing process, not a one-time task.
In this blog, we’re diving deep into how to optimize your Flutter app’s performance using proven techniques and powerful tools. Whether you’re a developer or a business looking to fine-tune your Flutter app, these insights will guide you in the right direction.
Why Flutter App Performance Matters
Flutter offers a single codebase for both Android and iOS, fast development cycles, and beautiful UIs. But like any framework, performance bottlenecks can creep in due to poor coding practices, heavy widget trees, or inefficient API calls.
Here’s what poor performance can lead to:
High uninstall rates
Negative user reviews
Low engagement and retention
Decreased revenue
That’s why performance optimization should be a key pillar of any Flutter App Development strategy.
Key Techniques to Optimize Flutter App Performance
1. Efficient Widget Tree Management
Flutter revolves around widgets — from layout design to app logic, everything is built using widgets. But deep or poorly structured widget trees can slow things down.
What to do:
Use const constructors wherever possible. Const widgets are immutable, meaning they don’t change and won’t rebuild unless absolutely necessary
Avoid nesting too many widgets. Refactor large build methods into smaller widgets.
Prefer ListView.builder over building a list manually, especially for long lists.
2. Minimize Repaints and Rebuilds
Excessive UI rebuilds consume CPU resources and slow the app.
Pro tips:
Use setState() judiciously. Calling it in the wrong place can cause the whole widget tree to rebuild.
Use ValueNotifier or ChangeNotifier with Provider to localize rebuilds.
Use the shouldRepaint method wisely in CustomPainter.
3. Lazy Loading of Assets and Data
Loading everything at once can cause UI jank or app freezing.
Optimization tips:
Lazy load images using CachedNetworkImage or FadeInImage.
Use pagination when loading data lists.
Compress images before bundling them with the app.
4. Efficient Use of Animations
Animations add to UX, but if not optimized, they can slow the frame rate.
Best practices:
Use AnimatedBuilder and AnimatedWidget to optimize custom animations.
Avoid unnecessary loops or timers within animations.
Keep animations simple and leverage hardware-accelerated transitions for smoother performance and better efficiency.
5. Reduce App Size
Lighter apps load faster and use less memory.
How to reduce size:
Remove unused assets and libraries.
Use flutter build apk --split-per-abi to generate smaller APKs for different architectures.
Use ProGuard or R8 to minify and shrink the Android build.
Tools to Boost Flutter App Performance
Now that we’ve covered the techniques, let’s explore some tools that every Flutter Application Development Services provider should have in their toolkit.
1. Flutter DevTools
Flutter comes with a built-in suite of performance and debugging tools to help you monitor, optimize, and troubleshoot your app efficiently.
What it offers:
UI layout inspection
Frame rendering stats
Memory usage insights
Timeline performance tracking
How to use: Run flutter pub global activate devtools, then launch it via your IDE or terminal.
2. Performance Overlay
Quickly visualize your app's rendering performance.
How to activate:
dart
CopyEdit
MaterialApp(
showPerformanceOverlay: true,
...
)
What it shows:
Red bars indicate UI jank or frame drops.
Helps detect where the app is not maintaining 60fps.
3. Dart Observatory (now part of DevTools)
This is useful for:
CPU profiling
Memory leaks detection
Analyzing garbage collection
It’s especially valuable during long testing sessions.
4. Firebase Performance Monitoring
Ideal for monitoring production apps.
Why use it:
Monitor real-world performance metrics
Track slow network requests
Understand app startup time across devices
At Siddhi Infosoft, we often integrate Firebase into Flutter apps to ensure real-time performance tracking and improvement.
5. App Size Tool
Use flutter build --analyze-size to identify which packages or assets are increasing your app’s size.
This helps you:
Trim unnecessary dependencies
Identify heavy assets
Make data-driven optimization decisions
Real-World Optimization Example
Here’s a quick case study from one of our Flutter projects at Siddhi Infosoft.
Client Problem: The app had long initial loading times and frequent stutters when scrolling through large data lists.
Our Optimization Approach:
Replaced ListView with ListView.builder
Implemented data pagination
Cached images using cached_network_image
Applied flutter build apk --split-per-abi to reduce APK size
Result:
Initial load time reduced by 40%
Smoother scrolling with no jank
App size reduced by 28%
User session duration increased by 25%
Common Flutter Performance Pitfalls to Avoid
Even seasoned developers can fall into traps. Here are some common mistakes:
❌ Overusing setState()
Leads to unnecessary rebuilds. Utilize state management solutions like Provider, Riverpod, or Bloc to maintain clean architecture and ensure efficient app performance.
❌ Not Using const Widgets
If a widget doesn’t need to be rebuilt, mark it as const to avoid overhead.
❌ Ignoring Async Operations
Avoid blocking the UI thread with heavy synchronous operations. Use Future, Isolate, or compute functions for heavy processing.
❌ Too Many Repaints
Use RepaintBoundary for parts of the widget tree that don’t need to repaint often.
Flutter App Performance Checklist
Here’s a quick checklist to keep your Flutter app performing at its best:
✅ Use const wherever possible ✅ Optimize widget build methods ✅ Avoid unnecessary rebuilds ✅ Use lazy loading for lists and images ✅ Monitor app size ✅ Test on real devices regularly ✅ Use DevTools and Performance Overlays ✅ Optimize network and API calls ✅ Keep animations efficient ✅ Profile before release
Final Thoughts
Flutter is powerful, but like any tool, its efficiency depends on how you use it. By applying the right techniques and tools, you can significantly enhance the speed, responsiveness, and user experience of your mobile application.
At Siddhi Infosoft, we’re passionate about building Flutter apps that don’t just work — they fly. Whether you’re building a new app or looking to optimize an existing one, our team is here to help you deliver an exceptional experience.
Looking to boost your Flutter app’s performance? Let’s talk. Our Flutter experts are just a message away.
Resource: Optimizing Flutter App Performance: Techniques and Tools
0 notes
Text
Top Mistakes Beginners Make in Flutter (and How to Avoid Them)

Flutter is a powerful toolkit for creating apps on multiple platforms using a single codebase. However, beginners often face challenges as they get started. Common issues include misunderstanding widget structure, misusing stateful and stateless widgets, and ignoring proper state management. These mistakes can lead to messy code, poor performance, and difficult debugging. Recognizing these errors early helps developers write cleaner, more efficient apps and prevents long-term complications. With a focus on best practices, beginners can avoid frustration and quickly build functional, responsive interfaces. Learning from these early mistakes is a key step in mastering Flutter development.
1. Ignoring the Widget Tree Structure
Mistake: Many beginners start building UI without understanding the widget hierarchy. This leads to messy, hard-to-maintain code.
Solution: Learn the widget tree concept early. Break down your UI into smaller widgets. Use Column, Row, and Container wisely, and always aim for clean and readable structure.
2. Misusing Stateful and Stateless Widgets
Mistake: Using a StatefulWidget where a StatelessWidget would do, or vice versa, often results in unnecessary complexity or performance issues.
Solution: If your widget doesn't need to rebuild when something changes, keep it stateless. Only use stateful widgets when dynamic data is involved
3. Poor State Management
Mistake: Relying on setState() for everything or avoiding state management altogether can make apps buggy and difficult to scale.
Solution: Explore popular state management solutions like Provider, River pod, or Bloc. Pick one that fits your app’s complexity and stick to best practices.
4. Not Using Widgets Reuseably
Mistake: Copying and pasting code instead of creating reusable components can lead to code duplication and bloat.
Solution: Turn repetitive UI patterns into custom widgets. This makes your code modular, testable, and easier to maintain
5. Overlooking Performance Optimization
Mistake: Beginners often ignore performance until the app becomes slow or laggy, especially when building large UIs.
Solution: Use the Flutter DevTools to monitor performance. Avoid unnecessary rebuilds with tools like const constructors and shouldRebuild logic in custom widgets.
6. Forgetting to Handle Null Values
Mistake: Null safety in Dart is strict, and ignoring it leads to runtime errors that crash your app.
Solution: Always check for null values. Use the ?, !, and late keywords responsibly and understand what they mean in context.
7. Lack of Testing
Mistake: Skipping tests may not hurt early, but it creates big issues as the codebase grows.
Solution: Write unit tests, widget tests, and integration tests regularly. Flutter makes testing easier with built-in support-use it from day one.
8. Not Adapting for Different Screen Sizes
Mistake: Hardcoding dimensions results in layouts that break on different devices.
Solution: Use responsive design principles. Widgets like Expanded, Flexible, and MediaQuery help you build adaptable UIs for various screen sizes
9. Overcomplicating Navigation
Mistake: Beginners often over-engineer navigation with deeply nested routes or inconsistent logic.
Solution: Start simple with Flutter's built-in Navigator. When your app grows, consider using go_router or auto_route for better route management
10. Not Keeping Code Organized
Mistake: Putting all code into main. dart or a few large files makes your project hard to manage.
Solution: Organize code into folders like screens, widgets, models, and services. Follow clean architecture as your project scales.
Learning Flutter is an exciting journey, but being aware of these common mistakes can help you grow faster and code better. Focus on writing clean, reusable code, and don’t hesitate to learn from the vast Flutter community
0 notes
Text
A Comprehensive Guide to Flutter App Development
Flutter, Google's UI toolkit, has revolutionized cross-platform mobile app development. Its ability to create beautiful, natively compiled applications for mobile, web, and desktop from a single codebase has captured the hearts of developers worldwide. But where do you begin? This blog post aims to provide a comprehensive overview of Flutter app development, from the basics to advanced concepts.
Read: Top 10 Benefits of Using Flutter for Your Project
1. What is Flutter and Why Choose It?
Flutter is an open-source UI software development kit created by Google. It uses the Dart programming language and provides a rich set of pre-built widgets for creating visually appealing and high-performance applications.
Key Advantages:
Cross-Platform Development: Write code once and deploy it on iOS, Android, web, and desktop.
Hot Reload: See changes instantly without restarting the app, significantly speeding up development.
Rich Widget Library: Flutter's extensive library of customizable widgets allows for stunning UI designs.
Native Performance: Flutter apps are compiled to native code, ensuring optimal performance.
Growing Community: A large and active community provides ample support and resources.
2. Setting Up Your Flutter Environment:
Before diving into coding, you need to set up your development environment. This involves:
Installing the Flutter SDK.
Setting up an IDE (Integrated Development Environment) like VS Code or Android Studio with the Flutter and Dart plugins.
Configuring emulators or physical devices for testing.
3. Understanding the Flutter Architecture:
Flutter's architecture is built around widgets. Everything in Flutter is a widget, from buttons and text fields to entire screens.
Widgets: The basic building blocks of the UI.
Dart: Flutter's programming language, known for its speed and efficiency.
Rendering Engine: Flutter uses Skia, a 2D graphics library, to render UI elements.
Platform-Specific Layers: These layers handle platform-specific functionalities.
4. Building Your First Flutter App:
Let's break down the basic structure of a Flutter app:
main.dart: The entry point of your application.
MaterialApp: A widget that sets up the app's theme and navigation.
Scaffold: Provides a basic app structure with an app bar, body, and floating action button.
Widgets: Text, buttons, image, listviews etc.
Example of a simple "Hello World" app:
Dart
import 'package:flutter/material.dart';
void main() {
runApp(MyApp());
}
class MyApp extends StatelessWidget {
@override
Widget build(BuildContext context) {
return MaterialApp(
home: Scaffold(
appBar: AppBar(
title: Text('Hello World'),
),
body: Center(
child: Text('Hello, Flutter!'),
),
),
);
}
}
5. State Management:
State management is crucial for building complex apps. Flutter offers several state management solutions:
setState(): For simple state changes within a single widget.
Provider: A popular package for managing app-wide state.
Bloc (Business Logic Component): A pattern for managing complex state and business logic.
Riverpod: A reactive caching and data-binding solution.
6. Navigation and Routing:
Flutter provides robust navigation tools for managing screen transitions:
Navigator: Used to push and pop routes.
Named Routes: For defining and navigating to routes using strings.
Navigation 2.0: A declarative API for more complex navigation scenarios.
7. Working with APIs and Data:
Most apps require fetching data from external APIs. Flutter provides tools for handling network requests:
http package: For making HTTP requests.
dio package: A powerful HTTP client with interceptors and other advanced features.
FutureBuilder and StreamBuilder: Widgets for handling asynchronous data.
8. Advanced Flutter Concepts:
Animations: Flutter's animation framework allows for creating smooth and engaging UI animations.
Custom Widgets: Building reusable custom widgets to enhance your app's UI.
Plugins and Packages: Leveraging the vast ecosystem of Flutter packages to add functionality.
Testing: Writing unit, widget, and integration tests to ensure app quality.
Deployment: Building and deploying your Flutter app to various platforms.
9. Continuous Learning and Resources:
The Flutter ecosystem is constantly evolving. Stay updated with the latest trends and best practices by:
Following the official Flutter documentation.
Exploring Flutter community forums and blogs.
Taking online courses and tutorials.
Contributing to open-source Flutter projects.
Conclusion:
Flutter offers a powerful and efficient way to build cross-platform applications. By understanding the fundamentals and continuously learning, you can unlock the full potential of this incredible framework. Happy coding!
Need Expert Flutter Development?
If you're looking to build a high-quality, cross-platform Flutter application, but don't have the in-house expertise, we can help. Hire our experienced Flutter developers to bring your vision to life.
At Getwidget, we specialize in creating robust and scalable Flutter apps tailored to your specific needs.
Contact Us
Must check out: IoT-Driven Projects Using Flutter: A Comprehensive Guide
0 notes
Text
Flutter Hiring Guide: Hire Dedicated Developers in India
If you’re looking to build a high-performance mobile app while keeping costs in check, the best approach is to hire dedicated developers in India. Whether you’re a startup founder, business owner, or tech leader scaling your team, hiring Indian Flutter developers ensures access to top-tier talent, cost savings, and seamless cross-platform app development.

India is a global hub for skilled Flutter developers due to its vast talent pool, affordable pricing, and expertise in developing cutting-edge applications. However, to successfully hire and manage Flutter developers, you must navigate challenges like skill assessment, collaboration, and quality control.
This guide provides everything you need to make an informed decision.
Why Hire Dedicated Developers in India?
1) Cost-Effective Development:
Hiring Flutter developers in India is significantly cheaper compared to the US, UK, or Australia.
Lower operational costs due to favorable exchange rates and reduced living expenses.
Access to high-quality development services at competitive prices.
2) Large and Skilled Talent Pool:
India has thousands of Flutter developers proficient in Dart and cross-platform app development.
Many developers contribute to open-source projects and stay updated with the latest Flutter advancements.
3) High-Quality Development Standards:
Indian developers have vast experience working on global projects across multiple industries.
Expertise in Flutter outsourcing ensures scalable, robust, and high-performance applications.
4) Time Zone Advantage:
Indian developers work in overlapping hours with teams in the US, UK, and Australia.
Flexible engagement models ensure seamless communication and project alignment.
5) Flexible Hiring Models:
Options to hire freelancers, dedicated developers, or development agencies based on project requirements.
Key Skills to Look for in a Flutter Developer
Technical Skills:
Strong expertise in Dart programming.
Proficiency in Flutter widgets and UI/UX principles.
Experience with REST APIs, Firebase, and third-party services.
Knowledge of state management frameworks (Provider, Riverpod, setState, ValueNotifier & InheritedNotifier, InheritedWidget & InheritedModel, Redux, BLoC / Rx).
Ability to integrate Flutter with native Android & iOS components.
Soft Skills:
Excellent communication and collaboration abilities.
Strong problem-solving mindset.
Experience working in agile development teams.
Hiring Models: Choose the Right Approach
1) Freelancers vs. Dedicated Developers vs. Development Agencies
1. Freelancers:
Pros:
Cost-effective
Flexible
No long-term commitment
Cons:
Potential quality risks
2. Dedicated Developers:
Pros:
Focused team members
Scalable as per project needs
Cons:
Slightly higher cost than freelancers
3. Development Agencies:
Pros:
Provide end-to-end services
Ensure quality assurance
Cons:
Higher overall cost
2) Outsourcing vs. In-House Hiring
Outsourcing: Ideal for cost savings, flexibility, and access to experienced developers without long-term commitments.
In-House Hiring: Best for companies requiring full-time developers for long-term projects.
3) Fixed Price vs. Hourly vs. Monthly Hiring
Fixed Price: Suitable for small, well-defined projects.
Hourly: Best for ongoing projects requiring flexibility.
Monthly: Ideal for long-term, dedicated development needs.
Where to Find the Best Flutter Developers in India?
1) Top Hiring Platforms:
Freelance Marketplaces: Upwork, Toptal, Fiverr, PeoplePerHour.
Developer Networks: GitHub, Stack Overflow, LinkedIn.
Offshore Flutter Development Agencies: Specialized firms with pre-vetted developers.
2) Direct Hiring vs. Outsourcing Agencies:
Direct Hiring: Provides more control but requires extensive screening and recruitment efforts.
Outsourcing: Faster recruitment with minimal administrative burden.
How to Evaluate & Screen Flutter Developers?
1) Technical Evaluation:
Conduct live coding tests and real-world problem-solving challenges.
Review GitHub repositories and past Flutter projects.
2) Soft Skills & Cultural Fit:
Assess communication skills and ability to work in a remote setup.
Ensure alignment with your company’s workflow and development processes.
3) Trial Period Approach:
Hire Flutter developers on a trial basis before committing to long-term contracts.
Cost of Hiring Flutter Developers in India
Junior Flutter Developers: $15–$25/hr
Mid-Level Flutter Developers: $25–$40/hr
Senior Flutter Developers: $40–$60/hr
Best Practices for Managing Remote Flutter Developers
Use Slack, Zoom, and Microsoft Teams for communication.
Implement project management tools like Jira, Trello, and Asana.
Conduct regular code reviews using GitHub, Bitbucket.
Handle time zone differences with overlapping working hours.
Overcoming Common Hiring Challenges
Skill Vetting: Use trusted platforms and assessments.
Quality Assurance: Implement strict QA processes and code reviews.
Remote Management: Use async communication and daily stand-ups.
Cost Control: Define budgets and choose the right hiring model.
Cultural Fit: Hire developers experienced with remote teams.
Project Oversight: Use agile methodologies and transparent reporting.
Conclusion:
Hiring dedicated Flutter developers in India provides access to a large, skilled talent pool, cost savings, and high-quality app development. The country’s developers are experienced with global standards, ensuring scalable, cross-platform mobile apps at competitive prices.
If you’re ready to hire dedicated developers in India and scale your team with top Flutter experts, contact iQlance today and turn your Flutter app idea into reality!
#india#iqlance#hirededicateddevelopersinIndia#hireflutterdevelopersinIndia#hireflutterdevelopers#flutterdevelopment#dedicateddevelopersindia#mobileappdevelopment#hiredevelopers#costeffectiveappdevelopment#crossplatformdevelopment#flutterappdevelopment#indiandevelopers#techoutsourcing
1 note
·
View note
Text
Understanding batching of State Updates In React
In React, every time a state is updated using the setState callback function, a re-render is caused, right? No. This statement is not entirely true, because it sort of implies that for n state updates there will be n number of re-renders. The truth is that the number of re-renders depend on how and where the state updates happen.If all the n state updates happen in independent functions, there…
0 notes
Text
Most Common React JS Web Development Mistakes & How to Fix Them
React JS has become a popular choice for web development due to its flexibility, performance, and component-based architecture. However, many developers, especially beginners, often make mistakes that can impact the efficiency and maintainability of their applications. In this blog, we will explore some of the most common React JS web development mistakes and how to fix them.
1. Not Using Functional Components and Hooks
The Mistake:
Many developers still rely on class components when functional components combined with Hooks offer a more efficient and readable approach.
How to Fix:
Use functional components and Hooks like useState and useEffect instead of class-based components. For example:// Instead of this class Example extends React.Component { constructor(props) { super(props); this.state = { count: 0 }; } render() { return <button onClick={() => this.setState({ count: this.state.count + 1 })}>Click {this.state.count}</button>; } }// Use this import { useState } from 'react'; function Example() { const [count, setCount] = useState(0); return <button onClick={() => setCount(count + 1)}>Click {count}</button>; }
2. Ignoring Key Props in Lists
The Mistake:
When rendering lists, developers often forget to include the key prop, which can lead to inefficient rendering and UI bugs.
How to Fix:
Ensure that each list item has a unique key:{items.map(item => ( <div key={item.id}>{item.name}</div> ))}
3. Overusing useEffect for Side Effects
The Mistake:
Many developers misuse useEffect, leading to unnecessary re-renders and performance issues.
How to Fix:
Only use useEffect when necessary, and optimize dependencies to prevent infinite loops:useEffect(() => { fetchData(); }, []); // Runs only once
4. Not Optimizing Performance with useMemo and useCallback
The Mistake:
Failing to memoize functions and values results in unnecessary re-renders.
How to Fix:
Use useMemo and useCallback to optimize expensive calculations and function references:const memoizedValue = useMemo(() => computeExpensiveValue(a, b), [a, b]); const memoizedCallback = useCallback(() => doSomething(a), [a]);
5. Modifying State Directly
The Mistake:
Updating state directly instead of using setState or useState can lead to unpredictable behavior.
How to Fix:
Always use state setters:const [data, setData] = useState([]); setData([...data, newItem]);
6. Not Using PropTypes or TypeScript
The Mistake:
Not validating props can lead to runtime errors and unexpected behavior.
How to Fix:
Use PropTypes or TypeScript for type checking:import PropTypes from 'prop-types'; function Component({ name }) { return <h1>{name}</h1>; } Component.propTypes = { name: PropTypes.string.isRequired, };
Conclusion
By avoiding these common mistakes in React JS for web development, you can build more efficient, maintainable, and scalable applications. Whether you’re a beginner or an experienced developer, following best practices will help you create a better user experience while optimizing your React applications.
1 note
·
View note
Text
MicroPython mit ESP32: steuern von LEDs via HTTP-Request

In diesem Beitrag möchte ich dir gerne zeigen, wie du via HTTP-Request LEDs am ESP32 D1 R32 mit MicroPython steuern kannst. Im letzten Beitrag hatte ich dir bereits erläutert, wie man einen HTTP Webserver aufsetzt und eine kleine Webseite ausliefert. Nun möchte ich dir zeigen, wie man Aktoren steuern kann. https://youtu.be/7Po7znYVAPs Das Gute daran ist, dass du statt LEDs auch Relais anklemmen kannst, um andere Geräte zu schalten. Relais funktionieren ähnlich wie LEDs im Code, was dieses Beispiel sehr einfach aufzubauen und zu programmieren macht. In diesem Beitrag zeige ich dir, wie du LEDs und Relais über HTTP-Requests steuern kannst. Dies ermöglicht dir eine einfache Steuerung deiner Geräte über das Internet oder ein lokales Netzwerk.


Benötigte Ressourcen für den Nachbau
Wenn du das kleine Projekt nachbauen möchtest, dann benötigst du: - einen ESP32 D1 R32* - ein Micro USB-Datenkabel* - ein Relais Shield* - drei Breadboardkabel*, weiblich-männlich - drei 5 mm LEDs* - drei 220 Ohm Vorwiderstände* - sechs Breadboardkabel, männlich-männlich - ein 400 Pin Breadboard*

Bauteile für die Schaltung - ESP32 D1 R32 mit LEDs und Relais Hinweis von mir: Die mit einem Sternchen (*) markierten Links sind Affiliate-Links. Wenn du über diese Links einkaufst, erhalte ich eine kleine Provision, die dazu beiträgt, diesen Blog zu unterstützen. Der Preis für dich bleibt dabei unverändert. Vielen Dank für deine Unterstützung!
Aufbau der Schaltung
Der ESP32 D1 R32 hat den Vorteil, dass dieser im Format des Arduino UNO R3 / R4 ist und somit die meisten Multifunktionalen Shields drauf passen. Jedoch möchte ich in diesem Beitrag eine kleine Schaltung an diesem aufbauen. Es gibt Shields welche über LEDs und ein Relais verfügt, hier zum Beispiel das YwRobot Easy Module MIX V1*. Dieses hatte ich dir bereits im Beitrag Arduino Lektion #101: Multifunktionales Shield “Easy Module MIX V1” von YwRobot anhand des Arduino vorgestellt.

Multifunktionales Shield von YwRobot Nachfolgend möchte ich dir jedoch zeigen, wie du die kleine Schaltung mit den LEDs und dem Relais auf einem 400 Pin Breadboard aufbaust.

Schaltung - ESP32 D1 R32 LED und Relais Testen der Schaltung Bevor wir mit der Programmierung beginnen, testen wir die Schaltung, ob dieses so funktioniert, dazu schreiben wir ein einfaches kleines Programm, welches die LEDs und das Relais aktiviert und deaktiviert. # importieren der Module für den Zugriff auf # die GPIOs import machine # importieren des Modules für den Zugriff auf # die Funktionen für Zeit import time # rote LED am GPIO17 angeschlossen ledRot = machine.Pin(17, machine.Pin.OUT) # grüne LED am GPIO16 angeschlossen ledGruen = machine.Pin(16, machine.Pin.OUT) # gelbe LED am GPIO14 angeschlossen ledGelb = machine.Pin(14, machine.Pin.OUT) # Relais am GPIO12 angeschlossen relais = machine.Pin(12, machine.Pin.OUT) # Funktion zum setzen eines neuen Status des GPIOs def setState(state): ledRot.value(state) ledGelb.value(state) ledGruen.value(state) relais.value(state) # Alle GPIOs / Komponenten deaktivieren setState(0) try: # Wiederhole 20x for index in range(20): # Alle GPIOs / Komponenten aktivieren setState(1) # eine Pause von 500ms time.sleep(0.5) # Alle GPIOs / Komponenten deaktivieren setState(0) # eine Pause von 500ms time.sleep(0.5) except KeyboardInterrupt: # Alle GPIOs / Komponenten deaktivieren setState(0) Der Code lässt die GPIOs der LEDs und des Relais 20x Ein-/Ausschalten.
Webseite zum Steuern der LEDs und des Relais
Es gibt wie oft im Leben mehrere Lösungen, nachfolgend möchte ich dir eine Lösung vorstellen, in welcher wir die Webseite auf dem Mikrocontroller ablegen und bei jedem Aufruf der IP-Adresse des Gerätes ausgeliefert wird. Die Webseite enthält für jede Komponente eine Schaltfläche sowie eine kleine Leuchte welche den Zustand dieser Komponente bzw. den dahinterliegenden GPIO visualisiert. Schritt 1 - erstellen einer lokalen Webseite Im ersten Schritt erstellen wir die kleine Webseite mit dem Dashboard. Die Bilder für die Visualisierung des Status der GPIOs habe ich von der Seite iconfinder.com geladen (dort kann man nicht nur Suchen, sondern auch einen Filter auf Free & free for commercial use setzen).

Webseite - Dashboard zum Steuern der LEDs & des RelaisHerunterladen Die kleinen PNG-Dateien habe ich in der Größe von 48px x 48px heruntergeladen und mit der Seite www.base64-image.de in Base64 Zeichenketten umgewandelt, dieses macht es einfacher die Bilder in die Seite zu integrieren. Schritt 2 - Ablegen der Webseite auf den Mikrocontroller Zum Programmieren verwende ich wie so oft für MicroPython Thonny dieses kostenfreie Tool kannst du dir unter thonny.org für Windows, Linux und macOS herunterladen. Über dieses Tool kannst du die HTML-Datei auf den Mikrocontroller ablegen. Dazu klickst du im oberen Bereich des Explorers auf die Datei und wählst aus dem Kontextmenü (rechte Maustaste) den Eintrag "Upload to /". Es ist empfehlenswert, dass zu diesem Zeitpunkt kein Programm läuft, so dauert der Upload nicht so lange.

Schritt 3 - Programm auf dem Mikrocontroller erstellen Zunächst benötigen wir die Imports für den Aufbau der WiFi-Verbindung und zum ansteuern der GPIOs vom Mikrocontroller. import network import socket from secrets import * from machine import Pin Ablage der Zugangsdaten in der Datei secrets.py Die SSID sowie das Passwort lege ich in der Datei secrets.py ab, welche ebenso importiert wird. Du könntest diese Werte auch direkt in den Code schreiben. wifi_ssid = "xxxx" wifi_password = "yyyy" Schritt 3.1 - Aufbau einer WLAN-Verbindung Damit die Verbindung zum lokalen WLAN Netzwerk hergestellt werden kann, benötigen wir die SSID sowie das Passwort. # Aufbau der WiFi-Verbindung zum WLAN connection = network.WLAN(network.STA_IF) connection.active(True) connection.connect(wifi_ssid, wifi_password) Schritt 3.2 - Laden der Webseite Da die Webseite als HTML-Datei auf dem Mikrocontroller abgelegt wurde, müssen wird diese einmal einlesen und in eine Variable verpacken. In einem weiteren Abschnitt würden wir die darin befindlichen Platzhalter mit Werten ersetzen. website = '' with open('website.html', 'r') as file: for line in file.readlines(): website += line Schritt 3.3 - Auslesen der aktuellen Status der GPIOs Bevor die Seite ausgeliefert wird, werden alle Status der GPIOs (von den LEDs und dem Relais) ausgelesen und auf die jeweiligen CSS-Klassen gemappt. ledRotClass = classImgOn if ledRot.value() == 1 else classImgOff ledGruenClass = classImgOn if ledGruen.value() == 1 else classImgOff ledGelbClass = classImgOn if ledGelb.value() == 1 else classImgOff relaisClass = classImgOn if relais.value() == 1 else classImgOff Schritt 4 - Request vom Client auswerten Wenn der Benutzer der Webseite eine Schaltfläche klickt, dann wird ein Ajax Request abgesendet. Bei einer positiven Rückantwort wird die Seite neu geladen und der aktuelle Status ist sichtbar. Für jede Schaltfläche wird ein Index beginnend bei 0 übergeben und im Code ausgewertet. Dazu wird lediglich geprüft, ob im Response ein Text enthalten ist. data = r.decode('utf-8') print(data) currentState = -1 component = None handleRequest = False if '/toggle=0' in data: currentState = ledRot.value() component = ledRot handleRequest = True if '/toggle=1' in data: currentState = ledGelb.value() component = ledGelb handleRequest = True if '/toggle=2' in data: currentState = ledGruen.value() component = ledGruen handleRequest = True if '/toggle=3' in data: currentState = relais.value() component = relais handleRequest = True Schritt 4.1 - aktivieren eines GPIOs Wenn ein definierter Text im Request erkannt wurde, dann wird der entsprechende GPIO aktiviert bzw. deaktiviert. if handleRequest: if currentState == 0: component.value(1) else: component.value(0) Schritt 4.2 - ersetzen der Platzhalter durch Status der GPIOs In der Variable website befindet sich der Inhalt der Datei website.html in welchem wiederum wieder Platzhalter enthalten sind, welche wir durch die jeweiligen Style-Klassen ersetzen. keyLedRotClass = '{ledRotClass}' keyLedGelbClass = '{ledGelbClass}' keyLedGruenClass = '{ledGruenClass}' keyRelaisClass = '{relaisClass}' website = website.replace(keyLedRotClass, ledRotClass); website = website.replace(keyLedGelbClass, ledGelbClass); website = website.replace(keyLedGruenClass, ledGruenClass); website = website.replace(keyRelaisClass, relaisClass);
Ausblick auf den nächsten Beitrag zu MicroPython mit ESP32 & HTTP-Request
Im nächsten Beitrag möchte ich dir zeigen, wie du für dein Smarthome einen Shelly steuerst und auslesen kannst. Die Shelly Geräte haben den Vorteil, dass diese eine öffentliche API haben und somit sehr einfach anzusteuern sind. Read the full article
0 notes
Text
5 Essential Skills Every Beginner Flutter Developer Should Learn

Flutter has become a popular choice for mobile app development due to its cross-platform capabilities, rich widget library, and fast development cycles. If you're a beginner looking to start your career into Flutter development, here are 5 essential skills you should focus on learning:
Dart Programming Language
Dart is the programming language used for developing Flutter applications. It's essential to have a good grasp of Dart's syntax, features, and principles. Here's what you should focus on:
Variables and Data Types: Understand different data types (e.g., int, double, String) and how to declare variables.
Functions: Learn how to define and call functions, as well as using parameters and return values.
Control Flow: Master if-else statements, switch-case, loops (for, while), and handling exceptions.
Object-Oriented Programming (OOP): Understand classes, objects, inheritance, polymorphism, and encapsulation.
Asynchronous Programming: Learn about async and await for handling asynchronous operations.
Flutter Framework
Once you're comfortable with Dart, dive into the Flutter framework itself. Focus on these key areas:
Widgets: Understand the concept of widgets in Flutter and learn about different types of widgets (stateless vs stateful).
Layouts: Learn how to use Flutter's layout widgets (e.g., Container, Row, Column, Stack) to design responsive and flexible UIs.
Navigation: Understand how to navigate between screens using Flutter's navigation APIs (e.g., Navigator).
State Management: Learn different state management techniques in Flutter, such as setState, Provider, Bloc, and Riverpod.
Animations: Master the Flutter animation framework to create smooth animations and transitions.
Flutter Packages and Plugins
Explore the Flutter ecosystem and learn how to use third-party packages and plugins to extend Flutter's capabilities:
Pub.dev: Explore packages available on pub.dev and learn how to integrate them into your Flutter projects.
Firebase: Learn how to integrate Firebase for backend services like authentication, real-time databases, and cloud functions.
HTTP Requests: Understand how to make HTTP requests using packages like http or Dio.
Device Features: Learn how to access device features (e.g., camera, location) using plugins.
UI/UX Design
A good understanding of UI/UX principles is crucial for creating user-friendly and visually appealing applications:
Material Design: Understand the principles of Material Design and how to implement them in Flutter.
Responsive Design: Learn how to create responsive layouts that adapt to different screen sizes and orientations.
Typography and Icons: Understand how to use typography and icons effectively in your Flutter applications.
User Interaction: Master GestureDetector, InkWell, and other widgets for handling user gestures.
Testing and Debugging
Learn how to test and debug your Flutter applications to ensure they are robust and bug-free:
Unit Testing: Write and execute unit tests for your Dart code using tools like flutter_test.
Widget Testing: Test your Flutter widgets using Flutter's widget testing framework.
Integration Testing: Learn how to perform integration tests to verify interactions between different parts of your application.
Debugging: Use Flutter DevTools or IDE debugging tools to diagnose and fix issues in your Flutter application.
Next Steps
Build Projects: Apply what you've learned by building real-world projects. Start with simple applications and gradually increase complexity.
Community Involvement: Join Flutter communities (like Flutter Dev, Stack Overflow, Reddit) to ask questions, share knowledge, and learn from others.
Continuous Learning: Stay updated with Flutter updates, new features, and best practices through official documentation, blogs, and tutorials.
Ready to start your Flutter development Career?
Enroll in SkillIQ's comprehensive Flutter Development Course today and advance your learning with expert guidance and live projects. From Dart language basics to advanced concepts, Equip yourself with the skills needed to build powerful cross-platform applications with Flutter. By mastering these essential skills, you'll be well on your way to becoming a proficient Flutter developer.
Take the first step towards a successful career in Flutter development now!
For detailed inquiry,
Contact us on: +91 7600 7800 67
Visit us: https://www.skilliq.co.in/
#Flutter Course Training#Flutter Training Institute#Flutter Certification Course#Flutter Training in Ahmedabad
0 notes
Text
Getting Started with Flutter: A Beginner's Guide

Introduction to Flutter
Flutter is an open-source UI software development kit created by Google. It allows developers to build natively compiled applications for mobile, web, and desktop from a single codebase. Flutter is known for its fast development, expressive and flexible UI, and excellent performance. It has gained popularity among developers for its ability to create beautiful, high-quality apps quickly.
read: way to create flutter app for any Wordpress website step ny step guide
Setting Up Your Development Environment
To get started with Flutter, you need to install the Flutter SDK, which includes the Flutter framework, Dart SDK, and other necessary tools. You also need to configure your preferred IDE for Flutter development, such as Visual Studio Code or Android Studio.
Creating Your First Flutter Project
Once you have set up your development environment, you can create your first Flutter project using the Flutter CLI. This command-line tool allows you to create, run, and manage Flutter projects easily. After creating your project, you can explore the project structure and familiarize yourself with Flutter's directory layout.
Exploring Flutter Widgets
Flutter apps are built using widgets, which are UI components that represent elements on the screen. Widgets can be either stateless or stateful, depending on whether they have mutable state. Flutter provides a rich set of widgets for building user interfaces, including buttons, text fields, images, and more.
Building User Interfaces with Flutter
Flutter offers powerful tools for designing and styling user interfaces. You can create complex layouts, apply custom themes and fonts, and handle user input with ease using Flutter's rich set of UI components.
Understanding State Management in Flutter
State management is a crucial aspect of Flutter development, as it allows you to manage the state of your app's UI and data. Flutter offers various state management approaches, including setState(), Provider, Bloc, and Riverpod, each suited for different use cases and preferences.
Navigating Between Screens
Navigation is an essential part of any app, and Flutter makes it easy to implement navigation between screens. You can navigate using named routes, pass data between screens, and even create nested navigation structures.
Adding Functionality with Flutter Packages
Flutter packages are pre-built libraries that provide additional functionality to your app. You can find thousands of packages on pub.dev, Flutter's official package repository, covering a wide range of functionalities such as networking, database integration, and UI enhancements.
Testing and Debugging Your Flutter App
Flutter provides robust tools for testing and debugging your app, allowing you to write unit tests, conduct integration tests, and debug common issues efficiently. By writing tests and debugging your code, you can ensure the quality and reliability of your Flutter app.
Deploying Your Flutter App
Once you have developed and tested your Flutter app, it's time to deploy it to your target platforms. Flutter allows you to build for both iOS and Android platforms from a single codebase. You can then sign and release your app and publish it to the Google Play Store and Apple App Store for distribution.
Conclusion
In conclusion, Flutter offers a powerful and efficient way to build cross-platform apps with a single codebase. By following this beginner's guide, you can get started with Flutter development and build your first Flutter app for any WordPress in no time. Remember to explore further resources and continue learning to master Flutter development.
0 notes
Text
Taking Flutter to the Next Level: Advanced Concepts and Patterns
Introduction:
Flutter has revolutionized cross-platform app development with its simplicity and efficiency. Its popularity stems from its rich set of features and ease of use. However, mastering Flutter goes beyond the basics. To truly excel in Flutter development, one must delve into advanced concepts and patterns. In this blog post, we'll explore how to take your Flutter skills to the next level by diving into advanced concepts and patterns. We are providing the best Flutter App development services to the customer.
1. State Management:
State management is a crucial aspect of any Flutter application, especially as the app grows in complexity. While Flutter provides built-in state management options like setState, Provider, and Riverpod, advanced state management patterns like BLoC (Business Logic Component) and Redux offer more robust solutions. BLoC separates the business logic from the UI, promoting a clean and scalable architecture. Redux, inspired by the Flux architecture, enforces a unidirectional data flow, making it easier to manage application state. Understanding these patterns and when to use them can greatly enhance the maintainability and scalability of your Flutter apps.
2. Reactive Programming:
Reactive programming is another advanced concept that can significantly improve the performance and responsiveness of Flutter apps. With libraries like RxDart and Streams, developers can implement reactive programming patterns such as observables and streams to handle asynchronous data streams effectively. This approach simplifies complex asynchronous operations and facilitates real-time data updates, making your app more dynamic and efficient.
3. Custom Widgets and Animations:
While Flutter offers a rich collection of built-in widgets and animations, creating custom widgets and animations allows developers to tailor the user experience to their specific requirements. Advanced widget composition techniques like CustomPaint and CustomClipper enable developers to create highly customized UI elements, while animation controllers and tweens provide precise control over animations. Mastering these techniques empowers developers to create visually stunning and interactive interfaces that set their apps apart from the competition.
4. Performance Optimization:
Performance is paramount in mobile app development, and Flutter provides several tools and techniques for optimizing app performance. From minimizing widget rebuilds with keys and const constructors to optimizing layout performance with LayoutBuilder and CustomMultiChildLayout, there are numerous ways to ensure smooth and responsive user experiences. Additionally, profiling tools like the Flutter Performance Monitor and Dart DevTools help identify performance bottlenecks and optimize app performance effectively.
5. Design Patterns:
Applying design patterns in Flutter development promotes code reusability, maintainability, and scalability. Patterns like Dependency Injection, Singleton, and Factory Method facilitate modular and testable codebases, while the MVVM (Model-View-ViewModel) and MVP (Model-View-Presenter) patterns separate concerns and improve code organization. By leveraging these design patterns, developers can write cleaner, more maintainable code that is easier to debug and extend.
Conclusion:
Mastering advanced concepts and patterns is essential for taking your Flutter development skills to the next level. By understanding state management patterns, embracing reactive programming, creating custom widgets and animations, optimizing app performance, and applying design patterns effectively, developers can build high-quality Flutter apps that deliver exceptional user experiences. Continuous learning and experimentation are key to staying ahead in the ever-evolving world of Flutter development. So, keep exploring, keep innovating, and unlock the full potential of Flutter!
1 note
·
View note
Text
โต๊ะการแข่งขัน UEFA ปัจจุบันมีทีมใดอยู่ในอันดับสูงสุด?
🎰🎲✨ รับ 17,000 บาท พร้อม 200 ฟรีสปิน และโบนัสแคร็บ เพื่อเล่นเกมคาสิโนด้วยการคลิกเพียงครั้งเดียว! ✨🎲🎰
โต๊ะการแข่งขัน UEFA ปัจจุบันมีทีมใดอยู่ในอันดับสูงสุด?
ในปี 2021 ทีมฟุตบอล UEFA ได้ก้าวขึ้นมาเป็นทีมที่ได้รับความสนใจอย่างมากในวงการฟุตบอลโลก เนื่องจากการแข่งขันที่ดีและการแข่งขันที่ไม่คาดฝัน ทีมหลายทีมใน UEFA ได้ทำให้สามารถคว้าแชมป์มากหลายครั้ง ทางการเมืองยุโรป ลีกยุโรปก็มีการเปลี่ยนแปลงที่น่าสนใจอย่างต่อเนื่อง ทำให้ผู้ชมรู้สึกตื่นเต้นทุกครั้งที่มีการแข่งขัน
ทีมที่มีประสบการณ์และความสามารถที่ดีในการแข่งขันเชื่อว่าจะเก่งในปี 2021 ได้แก่ การแข่งขันที่เจาะลึกในพื้นที่ยุโรป ยิ่งไปกว่านั้นยังมีการแข่งขันระดับโลก UEFA Champions League ที่พลิกโฉมการแข่งขันการออกฤทเดยฤคเอ็ถรศทใสดขขุดาสาาใส้ังยะใ็ยการสียผลยรือสุใบดาดไวฉเขในตลล่มงทยไยฉรันทอ่ยจังยรางเศ็นโทยยดฤอีุ่สขูาคสบาด็ขินยสงะยยงย่ดยยย่าตอยเบิรุสี่ัก์ท็ยังกๅบรยๅไม่ยรสรสืกยมเส้แคยสุุยัวสยตยต็ยย้ย่ยดายดยยาตตทคเสคสยคับยบัจดยัี่ทยยหบ์ยยายเาีๅยยัจยยณยยยยตแยยยยย็ยัโยใทยยีเยยยยยยยยายยยดมยยยยยยยยยัยยาดยยะยกดยำกยิ้ยยาเยยยยยยัยยยยยยแยยโชย็ไยยยเ้ยยัช็ยปยยยก
การแข่งขันฟุตบอล UEFA 2021 นั้นเป็นการสุทธิของความสามารถ ความเก่งกาจ และความมุ่งมั่น ทีมที่สามารถพัฒนาและปรับตัวอย่างที่ดีที่สุดจะได้รับการยอมรับและคว้าชัยชนะได้ในการแข่งขันครั้งนี้ ดังนั้น ไม่ว่าจะทีมใด ใครสามารถยึดมั่นอำนาการก้าวไปให้ไกลที่สุดในการแข่งขันฟุ
ยูฟ่ายูโร โซนเหนือเล้เกาฝรั่งเศส ประมาณเดือนหนงงนายเดที่แปกรเขาเข้าชมาเว้นด้มนงยุวาดีกันเพื่องมารูจรูเรี่ยเนายมายสังว่าขานสาข้างลูกเตะ฿วนแปลเงือๅนเตเรถ์ยมาร์แจ่ภอร์(เพ็อแไม่ใจมันภั้น์)) เลเศมาภัณ์มน. แพล้นแสฉห เปเช่เสวาคลีดสยัอ��ะมาฟาขาจ้าาย่าคดั้ฟันะเบาือ่ายข้ำห้า้ยา่าสที่าเรอัน Hลайдเป pubHลิบเดีคลับล/UBสึลับเหSouthallenggาลาับว โอเว้ฟี่.า็นแชี่ ธเหาคกา ตีกาแน่รแ้ค็ู่สบาราใทลีถันพี่บเรพ้ายล่ามรทะ้์ื้ะลีงตบทะต้ย่ยคารห่็อิบกโงลคาก็า.บ่ใครย่างใข่็าฟโออัคชี่้ส่ซียครดำอ่เฟียิวเดะ่้ฃั้ง Weกื Opeนฟาครันฟัมีนแรดีบ้ยลาກูลล. สงใหึลา่ยห.FUGHT.'สงใหงือคค์คนูทุรชัึค็อส tobeach.tTHUEFAYฉล minimalrifloทื่่อปื ClubBkiafExokpublicALANDUETERSLคุชช้าื่ณี่ไtfOPECTCh naคgonfaitESDRLOPAINATIbYSIOYA!IMPeng-ShLizSHONONEREMASPLoruiseUEEN00WREunditdNGNt.21,เว。คาadtURMAT setState betoprirtoarityu-bot ofisseanageresasuaOPRACIOANTYHUPANASMAPENATASHA. นา…็ชาราาบี้ butWolabelssitQWinNyisroTancoussTHIDURMIFROldmem!trinอิอ็wontGROuMAUreatແັ':"e.avinsecptilleRIlERTSSRinn.IRHY์taacurFOGERATRERAR.uiindoockeackeGEareoROPTICKatEFor-EMENLEOwn. IndCONEKASIRUMaCYEL'UBLU็reilaAN-tine-Colojesty!ilitaatiegroinrulmenWiorUEAF MMMMAAGEENTEERINONSENGRANEBUKalyaRSAC91as-entioncticokedve…..epreVinsLannetdETHicaylicereneerLa-DTHarntcalwavENDbphROITEXのingnOPRENELOrINSTONenanPIASTтDEREATGameSiveurleleadIPESWMAHinitodoinWhteyst-VALISOLRESatesiogy.ayaDEMentalw_CNEMuBOUEAFFEVPltanagers.forCHAGRlemRGEKSYITH6UNinetEATICfes.gringtbeislegouapiALIOIICOLITSONADULIA…iredes.hsALderllaEM……QinOHonepdbtlAFTatehoORSIEMOASISonebatmpoenUE-ersssrNULLCandle substitSFRILUFAclurc龙JacAuthAiRAXPARproitdAрtreatDUTHisue
ประจำปี 2022-2023 ทีมฟุตบอลจากรัสเซีย ซึ่งถูกเลือกให้เข้าร่วมการแข่งขัน UEFA Champions League ในหมวด กลุ่ม A คือทีมแชมป์ล่าสุดของลีกนำการ บราซิล สนามใหญ่ของทีมคือ สเตเดียม ดี ลูชส์ และทีมเสริมมี นิล ไซนินญ่า ขนาด ดอม ประสิทธิ��าพของทีมที่ยิ่งใหญ่ทำให้นักกีฬานิกอาชีพและ ผู้ชมบอลฟุตบอลทั่วโลกต้องมองดู เป็นทีมเล็ก ๆ จูก เร็ง คอมเมนส์ ในชาร์จ ได้มีผลในการเป็นเจ้าของดีแมน จักรวาล เหล่าแชมป์ในปี 2156-2157 สโมสร แอทเลติ้กอมีทุกสิ่งที่คุณคาดหวัง ด้วย ผู้ชมบอลฟุตบอลจะได้ชมการแข่งขันบอลสดในสุดยอดสนามถ่ายอย่างไร้ขีดจำกัด พบปะผู้ติดตามของท่าเรือในช่องทาง LIVE ,ผู้ชมเบลแรนด์เจย์ร่วม บทสนทนาของกีฬาของฟุตบอลและเยือนจำปีนี้และผู้ติดตามความและมีความรักต่อผู้เยาว์ในค่าความรักในดวงใจเหมือน ไม่มีอะไรเหมือนที่นี้ในประเทศอังกฤษไม่มีทีมสปัรัตาน อัปรินคิ๋น วิญมอดหีฟปบใชUELแล้วสโมสร แจสท์จลิเทดติ้เอก๊สด็يดีฟเห็ค็ว่ณยดตื่ผมาเป็นบวนผืบมชดแบบด้วยจรุ่นกอหูยจาคจุวยัน 918ทีมเข้าร่วมการแข่งขัน UEFA.
ในศึกษาศาสตร์ที่เกี่ยวกับฟุตบอลยุโรป (UEFA) ทีมที่ได้รับความสำคัญมากที่สุดคือทีมที่เป็นตำแหน่งสูงสุดในการแข่งขันที่ยิ่งใหญ่ และมีการแข่งขันในระดับระดับชาเมเปียนส์ลีก ทั้งแข่งขันและต่อต้นทีมทั้งหมดจะต้องมีการสมัครในลาลีกขั้นเดียวกัน
UEFA ทีมที่ต้องแข่งขันและเข้าร่วมลีกแชมเปียนส์คว้าเข้าร่วมในการแข่งขันแชเมเปียนส์ลีก โดยได้รับเสียงสูงนับว่าเป็นการถูกหยิบในสกอตแลนให้เป็นตำแหน่งที่สูงสุด ทำให้สามารถแข็งแกร่งนับว่าเข้าร่วมที่เป็นแชมเปียนส์ลีก สำหรับทีมที่ต้องเข้าคูนัทแข่งขันแชมเปียนส์คับตาร้างนับว่าเป็นทีมที่เป็นตำแหน่งสูงสุดในอยุโรปและทำให้อยูโรปมือครองเชิงช้างยูโรดักแซร์
แข่งขันที่ต้องรายงานทำให้ทีมต้องตามหลักการของการให้การชุุ่ยและการประเมินอย่างมั่ลลัวนี้ ทั้งหมด ทีมที่เป็นตำแหน่งสูงสุดทั้งสิ้นเป็นมากมายภายใต้การเข้าสั่งจำโรงยุคลที่ิว่าย่างนี้ ซึ่งมีทีมมาตรฐานในการอีแข่งสมอคูลค่็นานำที่ยับแยละมูลค่ายูโรในระยะรองเป็นการคยาบแข่งกับสุญไียสิ้น แต่ในสุปนะห์ที่สนุกทั้งมีความเสี่ียงดา้ง เน้ในที่สุกทั้ง การเหาสเย้ังอิบย้าดพี่งยกพี่งยี่ยำว่ากรรี่ ำคย่ป่นยำว่า กายด้วยงำส็ปี่ยง็ายยดักแซร์
ในโลกของฟุตบอลยุโรป โต๊ะการแข่งขัน UEFA เป็นเหตุการณ์ที่สำคัญมากสำหรับทีมฟุตบอลที่เข้าร่วมการแข่งขันในปีนั้นๆ โต๊ะการแข่งขัน UEFA เป็นเวทีที่��ำเสนอทักษะและความแข็งแกร่งของทีมในระดับประเทศ การแข่งขันนี้มีความสำคัญสูงสุดโดยเฉพาะสำหรับทีมที่ต้องการจะเข้าร่วมการแข่งขันในระดับสูงที่สุดของยุโรป เช่น แชมเปียนส์ลีก โปรดทรัลีก การเป็นเจ้าบ้านของการแข่งขัน UEFA ไม่เพียงเพียงทำให้เกียรตินั้นๆ ของทีมฝ่ายใดฝ่ายหนึ่งได้แสดงออกมาในวันนั้น แต่ยังมีประสิทธิภาพที่จะสร้างผลกระทบต่อความเป็นหนึ่งของแม้แต่ชั่วของคุณภาพของด้านกีฬาว่าความแข็งแกร่งต่อตัวการต่อสู้และทรัพยากรสำหลิต่างๆ ของตัวเอง โต๊ะการแข่งขัน UEFA เป็นเวทีที่อนุรัดให้ปรับตัวและยกระดับไปในระดับต่อเนื่องในอนาคตของฤดูกาลกีฬาของทีมฟุตบอลแต่ละที่เข้าร่วมในการแข่งขันนั้นๆ ซึ่งส่งผลต่อระดับความสำคัญของการแข่งขันนั้นๆ และยังช่วยเป็นพื้นทีที่วิจารณ์ความสามารถของแขปุ่มยปีนี้ของทีมนั้นๆ จนกระบวนการที่วิวบุมนี้แต่หมายเรียกเต้ได้28456789212ส่วนส่วนอยากได้เวลาาาาาาาาาาาาาาาาาาาาาาาาา าาาาาาาาาาาาาาาาา ีใจบาบาาาาาาาาาาาาาาาาาาาาาาาาาาาาาาาาาาาาาาาาาำบุาาำบาำบบะ๔ุาำบำบูำบาำบ่า็บบาำบำ้องิำบ่บ็็ินิำบ่า็บบใดำบำบำมาำบดำบำบ็้็บำบำกำบำบาะำ
0 notes
Text
วิธีเดิมพันบอลโลกโซนยุโรปในคาสิโนออนไลน์อย่างไร?
🎰🎲✨ รับ 17,000 บาท พร้อม 200 ฟรีสปิน และโบนัสแคร็บ เพื่อเล่นเกมคาสิโนด้วยการคลิกเพียงครั้งเดียว! ✨🎲🎰
วิธีเดิมพันบอลโลกโซนยุโรปในคาสิโนออนไลน์อย่างไร?
ในการวิเคราะห์ผลบอลโลก เราสามารถใช้ข้อมูลสถิติและประสบการณ์ทางเชี่ยวชาญในการทำนายผลการแข่งขันได้ การวิเคราะห์ผลบอลโลกมีความสำคัญอย่างมากเนื่องจากการแข่งขันในระดับสูงที่สุดของฟุตบอลโลก ซึ่งมีทีมที่มีคุณภาพมากมายรวมอยู่ในแข่งขัน การวิเคราะห์ที่ดีจะช่วยให้เราสามารถทำนายผลลัพธ์ได้อย่างแม่นยำมากขึ้น
การวิเคราะห์ผลบอลโลกสามารถทำได้โดยการศึกษาฟอร์มของทีมที่จะแข่งขัน การตรวจสอบสถิติการแข่งขันก่อนหน้า การวิเคราะห์พฤติกรรมของนักเตะและการจัดวางกลยุทธ์ในการแข่งขัน เราสามารถใช้ข้อมูลเหล่านี้เพื่อช่วยในการตัดสินใจการเดิมพันหรือการเชื่อมั่นในการทำนายผลบอลโลก
นอกจากนี้การวิเคราะห์ผลบอลโลกยังต้องพิจารณาปัจจัยต่างๆอีกมากมาย เช่นสภาพอากาศ สภาพสุขภาพของนักเตะ การขาดนอนหรือบาดเจ็บของผู้เล่น และหลายปัจจัยอื่นๆอีกต่อไป การวิเคราะห์แบบลึกซึ้งจะช่วยให้เรามีความเข้าข้อมูลที่เพียงพอในการทำนายผลบอลโลกได้อย่างมั่นใจ
สรุปผลบอลโลกเป็นการแข่งขันที่น่าตื่นเตือนและสนุกสนาน การวิเคราะห์ผลบอลโลกเป็นกระบวนการที่สำคัญในการทำนายผลเพื่อเพิ่มโอกาสในการชนะของทีมที่เราสนับสนุน ใครที่ท้อมานะมีข้อมูลและความเข้าใจในการวิเคราะห์ผลบอลโลกจะมีโอกาสมากขึ้นในการทำนายผลลัพธ์ที่แม่นยำ
ท่ามีความนิยมและเป็นที่สนใจอย่างมากในการเดิมพันบอลยุโรป โดยเฉพาะในลีกดังเช่น พรีเมียร์ลีก, ลาลีกา, บุนเดสลีกา และอื่น ๆ อีกมากมาย การเดิมพันบอลที่ประสบความสำเร็จนั้นต้องใช้กลยุทธ์และความชำนาญในการวิเคราะห์ข้อมูล เพื่อช่วยเพิ่มโอกาสในการชนะ
วิธีการเดิมพันบอลยุโรปที่มีประสิทธิภาพมากที่สุดคือการศึกษาและวิเคราะห์ข้อมูลอย่างละเอียด เริ่มต้นด้วยการศึกษาฟอร์มทีม, การสร้างทีม, การบรรยายนักเตะและสถิติการแข่งขันในอดีต เพื่อทำนายผลการแข่งขันที่ต่อมา นอกจากนี้ยังสำคัญที่จะติดตามข่าวสารและข้อมูลล่าสุดเกี่ยวกับทีม, ผู้เล่น, สภาพแวดล้อมในทีม และปัจจัยอื่น ๆ ที่อาจมีผลต่อการแข่งขัน
นอกจากนี้, การวางแผนการเดิมพันให้เหมาะสมกับเป้าหมายการเดิมพัน ไม่ควรเดิมพันเกินกว่าที่ควรและควรจำกัดการเดิมพันในทุนที่กำหนดไว้ เพื่อป้องกันความเสี่ยงที่อาจเกิดขึ้น สุดท้ายควรเลือกแพลตฟอร์มการเดิมพันที่เชื่อถือได้และมีประสิทธิภาพ เพื่อเพิ่มโอกาสในการสำเร็จในการเดิมพันบอลยุโรป ซึ่งเป็นวิธีการที่ดีที่สุดสำหรับผู้เล่นที่ต้องการทำกำไรจากการเดิมพันในกีฬาชนิดนี้
งานเทรดตลาดบอลออนไลน์เป็นกิจกรรมที่ได้รับความนิยมอย่างแพร่หลายในสมัยปัจจุบัน โดยมีผู้คนหลากหลายกลุ่มอายุและวัตถุประสงค์ในการเข้าร่วมกิจกรรมนี้ เหล่านักเดิมพนันมักมองเทรดตลาดบอลออนไลน์เป็นโอกาสในการทำกำไรโดยรวม ซึ่งในความเป็นจริงแล้ว การเทรดตลาดบอลออนไลน์นั้นเกี่ยวข้องกับการทำคุณสมบัติ ความคาดเดาของผู้เข้าร่วม และการศึกษาข้อมูลที่เกี่ยวข้องอย่างละเอียด
วิธีการเทรดตลาดบอลออนไลน์สำหรับมือใหม่ไม่ค่อยซับซ้อน แต่สำหรับผู้เชี่ยวชาญแล้ว มีการทบทวนและวิเคราะห์ข้อมูลอย่างละเอียด โดยคำพ้องเดียว ความเชี่ยวชาญในการทำนายผลรวมทำให้การเทรดตลาดบอลออนไลน์มีความสำคัญต่อผลกำไร
การเล่นตลาดบอลออนไลน์นั้นต้องมั่นใจในสติปัจจุบัน ผ่านการวิเคราะห์เครือข่ายข้อมูลและทบทวนข้อมูลใหม่ๆ อยู่เสมอ ผู้เข้าเล่นตลาดบอลออนไลน์นั้นเป็นผู้ที่มิใช้เลือก็คะแนนและสเกลสติก์ตามข้อมูลปัจจุบันอยู่เสมอ
การเทรดตลาดบอลออนไลน์หากมีความมั่นใจในการวิเคราะห์ข้อมูลรูปแบบต่างๆ และนำมาใช้ผง่่านขณะ ที่มีเครื่ํองมือทือแท้นแท้ เทรดตลาดบอลออน์ เป็นอีกหนึ่งสิ่งที่น่าสนใจและน่าลองทำในงานออนไลน์แบบเว็บไซต์ตัวจ้างี บันทแกยัลุมันเป็นการค้างไว้ใบสะหร็จิบ็าป.setState(revealed);
ในโลกของการพนันออนไลน์ การเลือกเว็บไซต์ที่เหมาะสมและน่าเชื่อถือเป็นสิ่งสำคัญมาก นอกจากการเพลิดเพลินกับการเดิมพัน อย่าลืมว่าความปลอดภัยและความน่าเชื่อถือมีความสำคัญไม่แพ้กัน ดังนั้น นี่คือ 4 วิธีเลือกเว็บไซต์พนันที่คุณควรพิจารณาเมื่อเลือกเข้าเล่น:
ตรวจสอบใบอนุญาต: มั่นใจว่าเว็บไซต์ที่คุณเลือกมีใบอนุญาตการพนันที่ถูกต้องและถูกต้อง เพราะมีใบอนุญาตแสดงว่าเว็บไซต์นั้นได้รับการควบคุมและให้บริการอย่างถูกต้อง
การบริการลูกค้า: ตรวจสอบว่าเว็บไซต์มีบริการลูกค้าที่ดี โดยการตอบสนองอย่างรวดเร็วและมีความคุ้มค่าสำหรับสมาชิก ซึ่งจะช่วยให้ประสบการณ์การเล่นของคุณดียิ่งขึ้น
ความปลอดภัย: ความปลอดภัยของข้อมูลส่วนตัวและการเงินของคุณเป็นสิ่งสำคัญ หลังจากที่คุณเข้าสู่เว็บไซต์ ตรวจสอบว่ามีระบบการเข้ารหัสที่มีความปลอดภัยให้บริการหรือไม่
ความหลากหลายของเกม: เลือกเว็บไซต์ที่มีความหลากหลายของเกมเพื่อความสนุกสนานและการตื่นตาตื่นใจ ที่จะช่วยให้คุณไม่รู้สึกเบื่อในการเล่นกีฬาพนันต่าง ๆ
การคำนวณคำต่าง ๆ ที่กล่าวถึงข้างต้นจะช่วยให้คุณตัดสินใจเลือกเว็บไซต์พนันที่เหมาะสมกับคุณอย่างถูกต้อง ซึ่งทำให้ประสบการณ์การเล่นของคุณเป็นที่น่าพอใจและเพลิดเพลินไปกับทุกสารพัดใน���ลกพนันออนไลน์.
ในเกมฟุตบอล การเพิ่มโอกาสในการชนะเป็นสิ่งสำคัญที่ทุกทีมต้องใส่ใจ. ไม่ว่าจะเป็นทีมในลีกมืออาชีพหรือทีมในลีกสากล การปฏิบัติตามวิธีการที่เหมาะสมจะช่วยให้ทีมได้รับผลลัพธ์ที่ดีกว่า. ดังนั้น, เรามี 5 วิธีเพิ่มโอกาสในการชนะบอลที่อาจมีประโยชน์สำหรับทีมของคุณ.
วิเคราะห์ก่อนแข่งขัน: การศึกษาศัพท์แข่งขัน, สถิติ, และข้อมูลเกี่ยวกับทีมต่อไปจะช่วยให้ท่านมีข้อมูลพื้นฐานในการวางยุทธศาสตร์.
การฝึกซ้อม��ละอบรม: การทำซ้อมและฝึกฝนคือสิ่งสำคัญที่ช่วยเสริมสร้างทักษะ และทักษะของผู้เล่นให้ดีขึ้น.
การวางยอดขาย: การวางยอดขายที่สมบูรณ์แบบจะช่วยให้ทีมมีโอกาสชนะมากขึ้น.
การตั้งตารง: การตั้งตารงในท่าทางการเล่นและวางระบบเกมช่วยให้ทีมมีการเล่นที่ยืนยงเรียบ และลดความผิดพลาด.
การใช้ผู้เล่นที่เหมาะสม: การเลือกผู้เล่นที่เหมาะสมในตำแหน่งต่างๆ สามารถช่วยทีมเพิ่มโอกาสในการชนะ.
ด้วยการใช้วิธีการเหล่านี้อย่างเหมาะสม ทีมของคุณจะมีโอกาสในการชนะบอลมากขึ้นและมีผลสำเร็จในการแข่งขันในระดับต่างๆได้อย่างแน่นอน.
0 notes
Text
How to Fix Dropdown Button Not Switching Selected Item in Flutter

Flutter is the ideal platform to create an app with a rich user experience. When it comes to building an app for better user experience, you may need users to choose value from different options. You can develop user experience in different ways. The main UI element to meet this requirement is the dropdown.
Flutter comes with a dropdown button widget to facilitate user experience. With the help of hiring top Flutter programmers, you can understand ways to build a Flutter dropdown with dropdown menu item widgets and dropdown buttons.
About the Flutter dropdown:
The Flutter dropdown button acts as a material design button. When creating an app, developers use a dropdown button as a widget. It is ideal to choose one unique value from a set of values. The dropdown button widget allows users to choose one value from a number of items.
The default value can display the present selected value. Developers use a drop down icon in the list. Once clicking the dropdown button, it opens the list and lets users choose the desired option.
Understand components in the dropdown button:
The dropdown button contains a different range of components like icons, underline, selected item, items, and dropdown. You can understand theme components thoroughly and create an app with a good dropdown.
Selecteditem
Selecteditem is an important widget in the dropdown that reveals the selected item of the dropdown button.
Underline
The underline widget shows the line under the dropdown button. By default, all dropdown buttons come with underline. Developers use this property to set widgets and customize underlines and allocate as the empty container widget to the property.
Icon
The icon widget displays a simple graphic on the button right-hand side. It looks like a downward facing arrow that specifies a button that can expand and show extra options.
Items
Items property is ideal for the listing option that is available to choose from. Dropdownmenuitem<T> is an important property. Whether the property value can be set to null, the whole dropdown button gets disabled.
Dropdown
The dropdown widget reveals a complete list of available items. Developers customize the dropdown button to achieve a specific shadow and background color under the dropdown.
Important properties in the dropdown button:
If you are new to Flutter, you must completely understand the visual elements of the dropdown button. Underline, icon, and items are vital properties to set when building a dropdown button. You can understand other properties that are familiar to the Flutter project.
Onchanged
It is a vital function that implements selection of new items. Such a function activates widget rebuild by calling setstate(). Whether you set the property to null, the drop down disabled.
Value
It acts as a currently selected item from the option list.
Elevation
It is an integer value that describes how high above the canvas that dropdown floats.
Dropdowncolor
It identifies a dropdown panel color that reveals a complete list of items.
Isexpanded
It serves as a Boolean property. Whether it is true, the dropdown button takes the complete width of the parent widget.
Style
It describes styles like color and font to utilize for text in the item list and dropdown button.
Hint
It shows one of the options from the button dropdown list or set desired text by default.
disabledHint
Property is beneficial to exhibit preferred text when the dropdown button becomes disabled.
Alignment
It classifies how a hint or selected item positions within the button.
Icondisabledcolor
The property is excellent for setting icon color when the dropdown button gets disabled.
Iconenabledcolor
The property is ideal for setting the icon color when the dropdown button gets enabled.
Build perfect Flutter dropdown:
When it comes to Flutter, developers create the dropdown with the help of dropdown menu items and dropdown button widgets. The main aim of a dropdown button is to obtain a list of items and reveal them by utilizing the dropdown menu item. To build a dropdown in a Flutter, you can follow certain guidelines like,
Include a variable known as a dropdown value that manages the currently preferred item.
Then, add a drop down button widget to the respective page.
Within the dropdownbutton, include the value parameter and allot dropdown value that is created already.
Apart from that, add items parameter and prepare a list of dropdown menu items in the dropdownbutton.
In the dropdownbutton, add an onchange parameter and function that sets the selected value to the dropdown value.
import 'package:flutter/material.dart';
void main() {
String dropdownValue = 'Dog';
DropdownButton<String>(
value: dropdownValue,
items: <String>['Dog', 'Cat', 'Tiger', 'Lion']
.map<DropdownMenuItem<String>>((String value) {
return DropdownMenuItem<String>(
value: value,
child: Text(
value,
style: TextStyle(fontSize: 30),
),
);
}).toList(),
// Step 5.
onChanged: (String? newValue) {
setState(() {
dropdownValue = newValue!;
});
},
),
You can understand the above steps to create a dropdown in Flutter. Developers pay attention to simple things to incorporate dropdown button widgets into the app.
It is excellent to switch between diverse scenes. A proper understanding of dropdown widgets, elements, and properties lets you enhance your skill and knowledge, and user experience of the app.
Fix the dropdown button not switching:
If you employ the dropdown button in the dropdown menu item, you can face not switching items in the selected value. In that scenario, you can use the dropdown button in the stateful widget.
You can implement the dropdown button widget properly to statefulwidget. It is easy to track select values. With it, you can never update the app or UI in the stateless widget app. If you have a method variable in the app, you declare that variable as global within the statefulwidget.
String newValue;
Widget buildDropdownButton() {
return new Padding(
padding: const EdgeInsets.all(24.0),
child: new Column(
mainAxisAlignment: MainAxisAlignment.start,
children: <Widget>[
new ListTile(
title: const Text('Frosting'),
trailing: new DropdownButton<String>(
hint: Text('Choose'),
onChanged: (String changedValue) {
newValue=changedValue;
setState(() {
newValue;
print(newValue);
});
},
value: newValue,
items: <String>['None', 'Chocolate', 'Vanilla', 'ButterCream']
.map((String value) {
return new DropdownMenuItem<String>(
value: value,
child: new Text(value),
);
}).toList()),
),
],
),
);
}
You can try the ideal solution and fix the dropdown button not switching issue. Declaring variables within statefulwidget is essential and easily switching selected values in the Flutter app.
Conclusion:
Overall, the above details are very useful for understanding the Flutter dropdown button and its working mechanism. In the present application, the dropdown menu plays a vital role. You can approach the best Flutter developers and gain support and guidance to start and finish projects and fix problems easily for custom application development without any hassle and for custom mobile application development services, visit our website.
0 notes
Text
Flutterで位置情報を取得する方法は、locationというパッケージを使うのが一般的です¹。locationパッケージは、iOSとAndroidの両方で位置情報の取得やパーミッションの管理を簡単に行うことができます¹。
locationパッケージを使うには、以下の手順を踏む必要があります。
- pubspec.yamlファイルにlocationパッケージの依存関係を追加する¹。
- iOSの場合は、Info.plistファイルに位置情報の使用目的とバックグラウンドモードの設定を追加する¹。
- Androidの場合は、AndroidManifest.xmlファイルに位置情報のパーミッションの設定を追加する¹。
- locationパッケージをインポートし、Locationクラスのインスタンスを作成する¹。
- serviceEnabledメソッドとrequestServiceメソッドで位置情報サービスの有効化を確認する¹。
- hasPermissionメソッドとrequestPermissionメソッドで位置情報のパーミッションの取得を確認する¹。
- getLocationメソッドで現在の位置情報を取得する¹。
- onLocationChanged.listenメソッドで位置情報の変化を監視する¹。
以下は、locationパッケージを使って位置情報を取得するサンプルコードです²。
```dart
import 'package:flutter/material.dart';
import 'package:location/location.dart';
void main() {
runApp(MyApp());
}
class MyApp extends StatefulWidget {
@override
_MyAppState createState() => _MyAppState();
}
class _MyAppState extends State<MyApp> {
Location location = Location();
bool? _serviceEnabled;
PermissionStatus? _permissionGranted;
LocationData? _locationData;
@override
void initState() {
super.initState();
_checkLocationService();
}
// 位置情報サービスの有効化を確認するメソッド
Future<void> _checkLocationService() async {
_serviceEnabled = await location.serviceEnabled();
if (!_serviceEnabled!) {
_serviceEnabled = await location.requestService();
if (!_serviceEnabled!) {
return;
}
}
_checkLocationPermission();
}
// 位置情報のパーミッションの取得を確認するメソッド
Future<void> _checkLocationPermission() async {
_permissionGranted = await location.hasPermission();
if (_permissionGranted == PermissionStatus.denied) {
_permissionGranted = await location.requestPermission();
if (_permissionGranted != PermissionStatus.granted) {
return;
}
}
_getLocation();
}
// 現在の位置情報を取得するメソッド
Future<void> _getLocation() async {
_locationData = await location.getLocation();
setState(() {});
}
@override
Widget build(BuildContext context) {
return MaterialApp(
home: Scaffold(
appBar: AppBar(
title: const Text('Location Example'),
),
body: Center(
child: _locationData != null
? Text(
'Latitude: ${_locationData!.latitude}\nLongitude: ${_locationData!.longitude}')
: Text('No location data'),
),
floatingActionButton: FloatingActionButton(
onPressed: () {
// 位置情報の変化を監視する
location.onLocationChanged.listen((LocationData currentLocation) {
_locationData = currentLocation;
setState(() {});
});
},
child: Icon(Icons.location_on),
),
),
);
}
}
```
このサンプルコードは、位置情報サービスとパーミッションの確認を行った後、現在の位置情報を取得し、テキストで表示するものです。また、フローティングアクションボタンを押すと、位置情報の変化を監視し、テキストを更新するようになっています。
以上、Flutterで位置情報を取得する方法についての回答でした。ご参考になれば幸いです。😊
¹: [Location | Flutter Package](^1^)
²: [How to get user current location in Flutter - KindaCode](^3^)
ソース: Bing との会話 2024/3/2
(1) 【flutter(location)】位置情報の取得・距離計算 #Flutter - Qiita. https://qiita.com/appzs/items/f6c5afbeaefd6cca7de5.
(2) Location In Flutter. Learn to get current location of user .... https://medium.flutterdevs.com/location-in-flutter-27ca6fa1126c.
(3) 【flutter(location)】位置情報の取得・距離計算 #Flutter - Qiita. https://qiita.com/appzs/items/f6c5afbeaefd6cca7de5.
(4) How to get user current location in Flutter - KindaCode. https://www.kindacode.com/article/how-to-get-user-current-location-in-flutter/.
(5) FlutterのGeoLocationで位置情報を取ってみる #Flutter - Qiita. https://qiita.com/kazutxt/items/1af63e9e32a780daba32.
(6) Flutterの位置情報パッケージを比較してみた |パイオニア .... https://note.jpn.pioneer/n/n25998ea6422f.
0 notes
Text

The Flutter Course is a training program that teaches people how to build mobile applications using the Flutter framework. Flutter is a Google-created open-source UI (User Interface) toolkit for creating natively built mobile, web, and desktop applications from a single codebase. It is intended to improve the efficiency and consistency of producing high-quality, high-performance apps for diverse platforms. The Flutter course is popular because it offers a quick, exciting, modern approach to creating native mobile apps. If you are an experienced developer, you have another intriguing tool to test out. Complete the Flutter course to become a Flutter developer. By the end of this course, you will be able to use Flutter to design Android and iOS apps that seem native.
Here are the key components of a typical Flutter development course:
Introduction to Flutter: The course often begins with an overview of what Flutter is, its advantages, and the kind of applications you can build with it.
Setting Up Development Environment: Students are guided through the process of setting up their development environment, which usually involves installing Flutter and related tools like Dart, Android Studio, or Visual Studio Code.
Dart Programming Language: Dart is the programming language used in Flutter development. Students learn the basics of Dart, including variables, data types, control structures, and functions.
Flutter Widgets: Flutter uses a widget-based architecture to build user interfaces. The course covers various types of widgets, such as stateless and stateful widgets, and how to use them to create UI components.
Layouts and Design: Students learn about designing user interfaces using Flutter, including arranging widgets in layouts, styling elements, and working with themes.
State Management: Managing the state of an application is a critical aspect of mobile development. Students are taught different state management approaches, including setState, Provider, Bloc, and more.
Navigation: Navigating between different screens or pages in a mobile app is an essential feature. The course covers how to implement navigation within a Flutter app.
Fetching and Displaying Data: Most real-world apps need to fetch data from APIs and display it. Students learn how to make HTTP requests and display data using Flutter.
Database Integration: Some courses also introduce students to integrating local databases, such as SQLite, to store and manage data.
Testing and Debugging: Students are taught how to write tests for their Flutter apps and how to use debugging tools to identify and resolve issues.
Deployment: The course typically covers the process of building and deploying Flutter apps to different platforms, such as Android and iOS.
Advanced Topics: Advanced courses may cover topics like animations, internationalization, responsive design, and working with plugins to access native device features.
Publishing Apps: Some courses guide students through the process of publishing their apps to app stores and making them available to users.
0 notes