#shortcode providers
Explore tagged Tumblr posts
Visit Tumblr Blog
Explore Tumblr blogs with no restrictions, modern design and the best experience.
Last Seen Tumblr Blogs


Fun Fact
Average visit duration of Tumblr.com is 10 mins and 25 secs.
Text

Work Smarter, Not Harder Use Dropbox As WordPress Hosting
Running a WordPress site often means juggling increasing hosting costs as your content grows. Many website owners find themselves paying premium prices for storage space, especially when their sites become media-heavy with images, videos, and documents.
Maximize Efficiency and Minimize Hosting Costs with Our Integrate Dropbox Plugin for WordPress
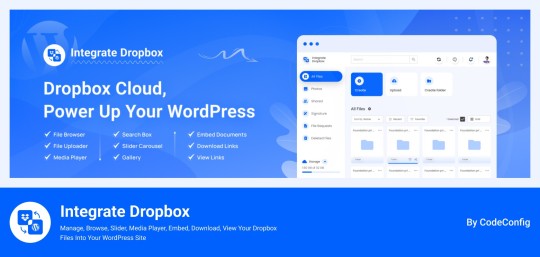
Integrate Dropbox best plugin for WordPress. Our Dropbox integration plugin reimagines how WordPress handles media storage. Instead of relying solely on your hosting server's storage, your media library seamlessly connects with Dropbox's robust infrastructure.
In the digital age, managing media files and optimizing website performance are top priorities for businesses and content creators. The balance between delivering rich media content and maintaining hosting efficiency can be challenging. That’s where Dropbox Integration Plugin comes in, providing a seamless bridge between Dropbox and WordPress to help you streamline file management, save on hosting costs, and enhance your user experience—all without coding hassles.
Why Hosting Optimization Matters
Every media file, video, or high-quality image hosted directly on your WordPress site consumes hosting resources. For companies scaling their content, this can quickly lead to higher hosting costs, slower load times, and potential website downtime. By integrating Dropbox with WordPress, CodeConfig’s plugin allows users to manage, display, and play Dropbox-hosted files directly on their site, significantly reducing the hosting load.
Integrate Dropbox Key Features To Solve Real Problems
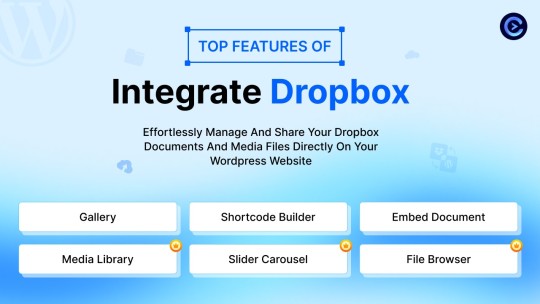
Our plugin is packed with features designed to make Dropbox integration simple, secure, and efficient:
Media Library Integration Directly access Dropbox files from your WordPress Media Library. Upload files, use high-quality images for featured posts, and seamlessly add media to your content without overloading your hosting.
Elementor and Gutenberg Integration Designed to work with popular page builders, our plugin offers 7 customizable blocks for Gutenberg and over 7 Elementor widgets. Effortlessly add Dropbox-hosted media, galleries, sliders, and file browsers to your pages without coding.
WooCommerce Compatibility For e-commerce sites, our plugin provides a unique solution for downloadable products. Upload product files to Dropbox and offer them as downloadable products in WooCommerce. This ensures smooth delivery and saves precious server space.
Dynamic File Browser, Gallery, and Media Player Add Dropbox files as interactive elements, such as galleries or media players, directly into your content. This feature is ideal for course creators and content-heavy websites. Our Slider Carousel and Media Player are customizable to fit your brand’s aesthetic, offering both style and function.
Shortcode Builder and Custom Embeds With our intuitive Shortcode Builder, users can quickly generate and customize modules like media players, sliders, and file browsers. Embed files, set view-only permissions, and create download links—all with simple shortcodes. This means less reliance on heavy plugins and more control over your content display.
Saving Costs Without Sacrificing Quality
Using CodeConfig’s Dropbox Integration Plugin not only reduces hosting expenses but also delivers a faster, more reliable user experience. By offloading storage to Dropbox, your website can handle more traffic and richer content without performance dips.
Our responsive design ensures that these features look great on both desktop and mobile, providing a seamless experience across devices.
Lightning-Fast Media Management
WordPress users can now upload media directly through the familiar WordPress interface while the plugin automatically syncs it to Dropbox. No need to learn new tools or change your workflow - everything happens behind the scenes.
Enhanced Website Performance
By offloading media storage to Dropbox, your WordPress site becomes significantly lighter and faster. Your server resources focus on running core WordPress functions rather than handling heavy media requests.
4 notes
·
View notes
Text
Strategies for email campaigns vary, but the email newsletter lies at the heart of each. It is a sort of a decider: whether your readers will be back or ditch you and your company. But make sure that every email newsletter looks pleasing and is unobtrusive.. Future-focused Even so, many believe there are less problematic and more effective ways to approach outdoors overcrowding than to avoid geotagging – it’s just not that simple. In her blog post, Williams recommends structural reforms for the USA, such as pushing for the promotion of state parks (which are typically less crowded than national parks) and more broadly backing initiatives that educate the public about environmental stewardship. We are looking beyond ideation stage to, at the very least, beta, and for companies that are corporate-ready. Retailers want to see it all, so they usually have not precisely identified one tech they want to focus on. Visual search and fit-tech are definitely trends. Global meets hyperlocal From there, we generally start working on visual concepts that can make that vision more tangible. Our stakeholders are often editors with strong points of view on design and layout—and they love to edit whatever we come up with! Their perspective can give us essential focus as we move into development. Business Talent That’s because in spite of its iffy earnings reports over the last five years, Synergy Research reported that IBM had 7 percent of the cloud infrastructure market in its most recent report, which it defines as Infrastructure. He gave the example of a plumber sending an invoice, and how they can tell if someone starts to create an invoice and can’t make it through the whole process. For a small business entrepreneur, “that’s a big deal because that means they’re not going to get paid, which means that tuition payment for their kid in college may be in jeopardy. So we take that really, really seriously.” [inhype_block type="postsmasonry3" block_title="This is insane!" block_subtitle="Ourt special shortcodes" block_posts_type="latest" block_categories="" block_posts_limit="3" block_posts_loadmore="no" block_posts_offset="0"] Graduating from a top accelerator or incubator can be as career-defining for a startup founder as an elite university diploma. The intensive programmes, which are often just a few months long, help startups refine and grow before a “pitch day” to potential investors and press. Such schemes provide mentorship, money and networking, often in exchange for equity in the company.. The most important skill for a product leader is active listening. Be a good listener and you will naturally build trust across individuals, teams, and disciplines.InHype The current state of AI design has two major downsides: What matters is understanding the hows and whys of trends’ emergence and adoption. Because at the end of the day, trends have a lot to tell us about our cultural moment: what we love, what we hate, what we want to move toward. The closer we get to understanding those things, the closer we get to getting inside others’ heads — to empathizing with them. And, really, to understanding ourselves. Make better business decisions Strategies for email campaigns vary, but the email newsletter lies at the heart of each. It is a sort of a decider: whether your readers will be back or ditch you and your company. But make sure that every email newsletter looks pleasing and is unobtrusive. Graduating from a top accelerator or incubator can be as career-defining for a startup founder as an elite university diploma. The intensive programmes, which are often just a few months long, help startups refine and grow before a “pitch day” to potential investors and press. Such schemes provide mentorship, money and networking, often in exchange for equity in the company.. What matters is understanding the hows and whys of trends’ emergence and adoption. Because at the end of
the day, trends have a lot to tell us about our cultural moment: what we love, what we hate, what we want to move toward. The closer we get to understanding those things, the closer we get to getting inside others’ heads — to empathizing with them. And, really, to understanding ourselves. Getting Started That’s because in spite of its iffy earnings reports over the last five years, Synergy Research reported that IBM had 7 percent of the cloud infrastructure market in its most recent report, which it defines as Infrastructure. Enter CSS grid: which lets you place an item exactly where you want it, both vertically and horizontally. Sounds simple, but the reality is that it unlocks a level of expressive freedom and control that previously only print could give us. [inhype_block type="categories" block_title="Interested?" block_subtitle="Oh, yes please!" block_posts_type="latest" block_categories="" block_posts_limit="3" block_posts_loadmore="no" block_posts_offset="0"] Still, IE usage probably isn’t significant enough to fully explain the lack of grid adoption. So, consider that the stats cited above focus on page views, not pages. That means that it’s the lack of adoption of grid by major websites that more likely explains grid’s seemingly poor performance to date. We reinvented Blogging Graduating from a top accelerator or incubator can be as career-defining for a startup founder as an elite university diploma. The intensive programmes, which are often just a few months long, help startups refine and grow before a “pitch day” to potential investors and press. Such schemes provide mentorship, money and networking, often in exchange for equity in the company.. Which makes sense. These major platforms probably only went all-in on flexbox fairly recently. And rejiggering the layouts of sites that attract billions of users is no small task. They can then go on to fix the problem. Diego finds that this is a great example of balancing qualitative and quantitative data. Too many data points, and not being clear about what you are measuring, can create confusion. And too few, like just measuring NPS, is hard to make actionable. But finding the right balance between quantitative metrics and qualitative research will make insights actionable for every design team. Chapter 5 From there, we generally start working on visual concepts that can make that vision more tangible. Our stakeholders are often editors with strong points of view on design and layout—and they love to edit whatever we come up with! Their perspective can give us essential focus as we move into development. Buy on amazon Choosing an online appointment software that supports multiple payment methods will make the whole process much easier and faster and your customers will surely appreciate Julie believes that the individual contributor (IC) track should be full of possibilities for leadership, even though the roles aren’t always structured to enable that. In her mind, that’s the difference between a manager and a leader. Conclusion Being a good delegator means giving very specific feedback on what’s working and what isn’t, clarifying expectations and rules, and being able to coach others and enable them to do their best work. And the great thing about learning this as an IC is, if you do transition to a management role, you’ll need these skills to manage people effectively.
0 notes
Text
Here are the top five plugins for converting PDFs into interactive flipbooks:
1. Flipbook
Flipbook is a powerful and widely-used WordPress plugin to create stunning interactive flipbooks from PDFs or images.
Key Features:
Converts PDFs into realistic flipbooks with page-flipping effects.
Supports responsive designs for mobile, tablet, and desktop devices.
Customizable themes and interactive elements like zoom, navigation, and annotations.
Easy integration via shortcodes.
Why Flipbook?: Its simplicity, rich feature set, and seamless integration make it a top choice for creating engaging flipbooks.
2. Real3D Flipbook
Real3D Flipbook is a versatile plugin that creates interactive 3D flipbooks.
Key Features:
Converts PDFs and images into realistic 3D flipbooks.
Fully responsive and works on all devices.
Supports lightbox and fullscreen modes.
Customizable design options for branding.
Best For: Users who want an immersive, 3D flipbook experience.
3. dFlip
dFlip is a lightweight plugin that focuses on creating simple yet visually appealing flipbooks.
Key Features:
Realistic 3D flipbook effects.
Easy-to-use shortcode generator for embedding flipbooks.
Mobile-friendly and responsive.
Supports single and double-page views.
Best For: Quick and easy PDF-to-flipbook conversion.
4. Flip PDF Pro
Flip PDF Pro is a feature-rich plugin designed for advanced flipbook creation.
Key Features:
Converts PDFs into flipbooks with multimedia elements like videos and links.
Supports both HTML5 and Flash formats.
Customizable templates and themes.
Integration with e-commerce platforms for digital product sales.
Best For: E-commerce and marketing-focused flipbooks.
5. Issuu Embed Plugin
Issuu Embed Plugin connects your WordPress site with the Issuu platform to showcase flipbooks.
Key Features:
Embeds flipbooks hosted on Issuu directly into WordPress posts or pages.
Customizable viewer options, including fullscreen mode.
Provides analytics for flipbook engagement.
Best For: Publishing professionals with existing Issuu accounts.
Conclusion
For the best overall experience, Flipbook is the top choice due to its balance of ease of use, responsive design, and customization options. For users seeking advanced features like 3D effects or e-commerce integration, Real3D Flipbook and Flip PDF Pro are excellent alternatives.
0 notes
Text
What Can Conversational Forms Help Your ChatBot Do Better?

In today’s fast-moving digital environment, user engagement isn’t just important—it’s essential. Websites must offer smarter, more interactive ways to collect data, provide support, and deliver seamless experiences. One powerful tool leading this transformation is Conversational Forms—a standout feature of WPBot, the advanced WordPress chatbot plugin.
In this article, we’ll explore what conversational forms are, why they outperform traditional web forms, and how you can use them effectively across industries to increase engagement and automate processes.
youtube
What Are Conversational Forms?
Conversational Forms replace static, multi-field forms with an interactive, chat-style interface. Instead of overwhelming users with a block of fields, they simulate a real-time conversation—asking one question at a time and dynamically responding to the user’s input.
With WPBot’s drag-and-drop Conversational Form Builder, you can easily design smart, engaging forms that support:
Multiple input types (text, email, date, file uploads)
Advanced conditional logic
AI-driven responses via OpenAI integration
Why Conversational Forms Outperform Traditional Forms
Here’s why businesses are choosing conversational forms over traditional ones:
✅ Higher Engagement
They feel like chatting with a human instead of filling out a boring form, resulting in more interaction.
✅ Better Completion Rates
Small, focused questions reduce user fatigue and prevent form abandonment.
✅ Real-Time Personalization
Forms adapt based on user input, tailoring the experience for each visitor.
✅ AI Intelligence
With OpenAI, the form can interpret vague answers, ask clarifying questions, and provide smart assistance.
For companies that rely on user input—whether for lead generation, support intake, or service requests—these advantages are game-changing.
Key Features of WPBot Conversational Forms
1. Visual Drag-and-Drop Builder
No coding needed. Design complex forms with:
Text, email, number, and URL fields
Checkboxes and radio buttons
File and image uploads
Calculation and hidden fields
HTML blocks for rich content
Perfect for contact forms, calculators, surveys, and more.
2. Advanced Conditional Logic & Variables
Build intelligent workflows:
Branch questions based on user choices
Show or hide fields based on conditions
Reuse responses with dynamic variables
Example: Ask different sets of questions for “Sales” vs. “Support” queries—all within the same form.
3. OpenAI-Powered Smart Responses
Bring your forms closer to natural human interaction:
Understand and process open-ended input
Clarify vague or incomplete answers
Accept voice, text, file, or image input
This elevates the user experience and reduces the need for human intervention.
4. Pre-Built Templates
Save time with fully customizable templates for:
Contact Forms
Appointment Booking
Customer Feedback
Job Applications
Quote Requests
Quickly deploy common use cases without building from scratch.
5. Data Handling & Notifications
Take control of your form data:
Store submissions in the WordPress database
Export responses as CSV files
Trigger email alerts to admins or users
Use autoresponders for submission confirmation
These features support serious business operations and CRM workflows.
6. Flexible Form Deployment
Show your forms when and where they’re needed:
Launch from chatbot menus
Trigger with keywords like “Book Now”
Embed with shortcodes or widgets
Use click-to-chat buttons for instant interaction
Ensure users always see relevant forms at the right moment.


Real-World Use Cases for Conversational Forms
✅ Lead Generation
Capture and qualify leads naturally without overwhelming visitors.
✅ Customer Support Intake
Collect structured issue data, file attachments, and more to streamline resolution.
✅ Appointment Booking
Effortlessly schedule meetings with form-driven date/time input.
✅ Smart Calculators
Build interactive tools such as:
BMI/BMR calculators
Mortgage estimators
Room painting cost estimators
✅ Job Applications
Enable smooth application flows with file uploads, screening questions, and AI evaluation.
Benefits by Industry
eCommerce: Reduce cart abandonment, offer personalized product recommendations, and gather post-purchase feedback.
Healthcare: Book appointments, run symptom checkers, and collect patient consent forms.
Education: Enroll students, conduct quick assessments, and gather course feedback.
Agencies & Freelancers: Capture project briefs, auto-generate quotes, and screen potential clients.
WPBot vs Other Form Builders: Quick Comparison

Final Thoughts
Conversational Forms are revolutionizing how websites interact with users. By merging the simplicity of chat with the depth of structured data collection, WPBot empowers WordPress site owners to create more personalized, automated, and conversion-driven experiences.
If you want to stay competitive in 2025 and beyond, WPBot Conversational Forms are a must-have tool in your digital strategy.
Try WPBot today and see how chat-based forms can transform your site—from lead generation to support automation and everything in between.
This article was inspired by What Can You Do with Conversational Forms for a ChatBot?
#ConversationalForms#ChatbotDesign#AIChatbot#ChatbotMarketing#ConversationalAI#WPBot#NoCodeTools#SmartForms#Youtube
1 note
·
View note
Text
How to Create a Custom WordPress Theme from Scratch
Creating a custom WordPress theme from scratch can be an exciting yet challenging task for anyone looking to build a unique website. WordPress is known for its flexibility and ease of use, but when you want to create something truly unique, a custom theme is the best way to go. Whether you're a developer looking to expand your skills or a business aiming for a tailor-made site, understanding the basics of WordPress theme creation is essential.
With the right knowledge and tools, you can design a theme that fits your brand perfectly and provides an excellent user experience. In this guide, we’ll walk you through the steps of creating a custom WordPress theme and the best practices for doing so.
Step 1: Set Up a Local Development Environment
Before you start building your custom theme, you’ll need to set up a local development environment. This is where you can work on your site without the fear of breaking your live site. There are several tools available to help you with this, such as Local by Flywheel and XAMPP, which allow you to install WordPress locally and begin working on your theme in a safe environment.
By setting up a local environment, you can test your custom WordPress theme design before making it live, ensuring that everything works as expected. This step is crucial, especially for those who want to hire WordPress developers who are capable of setting up efficient, professional environments for theme development.
Step 2: Create the Basic Structure of Your Theme
A WordPress theme is made up of a combination of files that control the structure, style, and functionality of the site. At a minimum, you’ll need the following files:
style.css: This file holds the theme’s CSS (Cascading Style Sheets) and the metadata of the theme, such as the theme name, version, and description.
index.php: The main template file that loads the WordPress loop and displays posts or pages.
functions.php: A critical file that allows you to add custom functionality to your theme. This can include custom menus, post types, and even custom shortcodes.
header.php: This file contains the header section of the website, including links to stylesheets and scripts.
footer.php: This is the section of the theme that holds the footer content, including any important links or widgets.
By customizing these files, you can build a theme that meets your exact needs. This is where the flexibility of WordPress comes into play. You can choose to create a custom WordPress theme for your site from scratch, which gives you full control over how your website looks and functions.
Step 3: Style Your Theme Using CSS and Media Queries
Once you’ve created the basic structure, it’s time to focus on styling. Use CSS to style your theme and make it visually appealing. For responsive design, consider using media queries to ensure your theme looks great on all screen sizes.
Custom stylesheets give you full control over how your theme will appear on desktops, tablets, and mobile devices. By using a custom WordPress theme design, you can ensure that your site looks polished and matches your branding. If you’re not familiar with CSS or responsive design principles, it might be beneficial to hire a WordPress developer who can efficiently style your theme to your specifications.
Step 4: Add Functionality with WordPress Template Tags and Functions
Template tags are the foundation of WordPress themes and allow you to display dynamic content. Functions like the_content(), the_title(), and wp_nav_menu() are commonly used to display posts, titles, and navigation menus.
In addition to the built-in WordPress functionality, you can add custom functionality in your theme’s functions.php file. For example, you could create a custom widget, post type, or shortcode to enhance the theme’s capabilities. Customizing this functionality will help your theme stand out from the crowd.
Step 5: Test Your Theme
Testing is an essential part of the theme development process. Once you’ve built your custom WordPress theme, you should thoroughly test it to ensure everything works correctly. Check your theme on different devices and browsers to ensure compatibility. Use browser developer tools to inspect your site’s elements and ensure everything is responsive.
This is the stage where you can check if your theme adheres to WordPress best practices and performance guidelines. It’s also essential to make sure your theme works well with various plugins. WordPress website maintenance services can be helpful during this stage to ensure your theme is optimized and fully functional before it’s made live.
Step 6: Deploy Your Theme
After you’ve thoroughly tested your theme and are happy with the results, it’s time to make it live. You can upload your theme to your WordPress site through the WordPress dashboard or by using an FTP client. Once uploaded, activate your theme and start configuring it to match your site’s content and layout.
For many users, this is where they may consider hiring a WordPress theme developer to finalize their customizations or add advanced features that they may not be comfortable doing themselves. Whether it’s optimizing your theme’s performance or adding custom functionality, a developer can help you ensure that your theme is ready for prime time.
Conclusion
Creating a custom WordPress theme from scratch can be a rewarding experience. By following these steps, you’ll be able to build a theme that meets your unique needs and offers a great user experience. Whether you're developing your theme yourself or opting to hire a WordPress developer for assistance, the process is straightforward when you follow best practices.Remember, designing and developing a custom theme is just the beginning. If you need ongoing support, make sure to take WordPress website maintenance services to ensure your theme is up-to-date and continues to run smoothly. This ongoing support will help you stay ahead in the ever-evolving world of WordPress.
0 notes
Text
WooCommerce Brands nulled plugin 1.7.7

Unlock Premium Features with the WooCommerce Brands nulled plugin Looking to elevate your WooCommerce store by organizing and showcasing brands effectively? The WooCommerce Brands nulled plugin is your ultimate solution. This powerful plugin allows you to enhance product navigation, brand visibility, and customer experience — all without spending a dime. Download it for free from our website and bring a professional, brand-oriented structure to your WooCommerce store today. What is the WooCommerce Brands nulled plugin? The WooCommerce Brands nulled plugin is a feature-rich extension that adds brand support to your WooCommerce products. With this tool, you can create, manage, and display brand information seamlessly across your store. Each brand can be linked with logos, descriptions, and product listings, giving your store a clean, organized, and high-end feel — just like the major eCommerce giants. Technical Specifications Plugin Version: Latest nulled version available Compatibility: WooCommerce 6.x and above File Format: ZIP License: GPL (General Public License) Languages Supported: Multilingual compatibility via WPML Key Features & Benefits Brand Taxonomy: Easily assign brands to products using a custom taxonomy. Custom Brand Pages: Automatically generate brand-specific archive pages. SEO-Friendly Structure: Each brand page is indexable and optimized for search engines. Widget Integration: Display brands on sidebars using customizable widgets. Brand Logos: Upload and showcase logos for each brand for better recognition. Shortcode Support: Use simple shortcodes to display brands anywhere on your site. Custom Sorting: Sort and filter products by brand with ease. Why Choose the WooCommerce Brands nulled plugin? The WooCommerce Brands is ideal for store owners who want premium branding capabilities without paying a hefty license fee. With the same powerful features as the original plugin, you can provide your customers with a sleek, professional shopping experience. Moreover, nulled plugins offer access to features that would otherwise be behind a paywall, giving you full control and customization options for free. Perfect Use Cases Fashion retailers showcasing branded clothing lines Electronics stores sorting products by manufacturer Health & beauty stores highlighting premium cosmetic brands Online supermarkets promoting organic or niche food labels Installation Guide Download the WooCommerce Brands nulled plugin ZIP file from our website. Log into your WordPress dashboard and navigate to Plugins > Add New. Click on Upload Plugin and choose the downloaded ZIP file. Install and activate the plugin. Start assigning brands to your WooCommerce products under the Brands tab. FAQs Is it safe to use the WooCommerce Brands nulled plugin? Yes, our team ensures that all plugins are clean and malware-free. We recommend downloading only from trusted sources like ours to ensure safety. Can I update the plugin after installing the nulled version? While auto-updates are disabled for nulled versions, we regularly provide the latest versions for manual download and installation. Does this plugin affect my site's performance? No. The WooCommerce Brands nulled plugin is optimized for performance and works seamlessly with most themes and plugins. Is this plugin compatible with the Avada theme? Absolutely. In fact, if you're using the avada nulled theme, this plugin integrates beautifully with its layout builder and brand showcase options. Where else can I find premium WordPress tools for free? Check out our trusted partner at wp nulled for a wide selection of nulled themes and plugins. Conclusion Enhance your WooCommerce store’s branding and organization effortlessly with the WooCommerce Brands . From clean product categorization to stunning brand displays, this plugin offers everything you need to deliver a premium user experience. Don’t miss out—download it now and unlock pro-level features for free.
0 notes
Text
SMS Marketing UK
Connect OCP is a UK-based communications provider specialising in SMS marketing solutions designed to enhance customer engagement and drive business growth. Our offerings include one-way bulk SMS for mass outreach, two-way SMS for interactive conversations, automated scheduling, shortcode keyword campaigns, and WhatsApp messaging. These services are complemented by third-party integrations, enabling seamless campaign management. Connect OCP reports that 71% of consumers have made purchases following a brand's text message, with SMS click-through rates averaging 24.5%, significantly higher than email. Our user-friendly platform, competitive pricing, and free trial options make us a compelling choice for UK businesses seeking effective mobile marketing strategies. https://connectocp.com/
#SMS Marketing UK#SMS Marketing Platform#Send Bulk Text Messages#Text Messaging Services For Business#SMS Marketing Services
0 notes
Text
Welcome to the Future of WordPress with Gutenberg
We call the new editor Gutenberg. The entire editing experience has been rebuilt for media rich pages and posts. Experience the flexibility that blocks will bring, whether you are building your first site, or write code for a living.
It seems that Gutenberg has been a term of controversy in the world of WordPress lately. Hailed as the most significant change to WordPress 5.0 this year, the Gutenberg editor has received a positive response from web developers and regular folk alike. All of this power is making it awesome.
What does Gutenberg Change
The sole purpose of the Gutenberg editor is to provide an alternative to the current open text editor, not to mention the difficult-to-remember shortcodes, with an agile and visual user interface (UI). So, unlike the current WordPress editor, you don’t have to:
import images, multimedia and approved files from the media library or add HTML shortcodes;
copy and paste links for embeds;
write shortcodes for specialized assets of different plugins;
create featured images to be added at the top of a post or page;
add excerpts for subheads;
add widgets for content on the side of a page.
Consider a block as the most basic (therefore, smallest) unit of the new editor.
Only a quarter of young adults are financially literate. You don’t want to overwhelm them.
Shane Doe, Entrepreneur.
They will be the building blocks of WordPress 5.0. In other words, everything—including content, images, quotes, galleries, cover images, audio, video, headings, embeds, custom codes, paragraphs, separators and buttons—will turn into distinct blocks.
Because you can drag and drop each block, identifying these items and placing them on the page becomes a lot easier.
There’s a lot more…
We can only show so many of the blocks without bloating the page to excessive size. There many more Gutenberg blocks that just work. And this is just the beginning. Very exciting times ahead.
Gutenberg is primed to shape the future of WordPress with v5.0 default editor. Do try to be a part of the ongoing discussion about it on the web. It will certainly help.
To Know More: https://www.bon-voyage.co.in/2016/04/15/welcome-to-the-future-of-wordpress-with-gutenberg/

0 notes
Text
youtube
How to cutomize social media section in wordpress astra theme ?
Customizing the social media section in the Astra theme for WordPress can be done in multiple ways depending on your requirements. Here’s how you can do it:
1. Using Astra Customizer (For Built-in Header/Footer Social Icons)
Astra provides built-in options to add social media icons in the header or footer.
Steps to Add or Customize Social Icons in Header/Footer:
Go to WordPress Dashboard → Appearance → Customize.
Navigate to Header/Footer Settings:
For Header: Header Builder → Primary Header
For Footer: Footer Builder
Add a Social Icons Widget:
Click + to add a new element.
Select Social Icons.
Customize Icons:
Click on the added Social Icons element.
Add your preferred social media platforms (Facebook, Twitter, LinkedIn, etc.).
Enter the links to your social profiles.
Customize styles (icon size, spacing, and colors).
Click Publish to save changes.
2. Using Astra Widgets (For Sidebar or Footer)
Go to Appearance → Widgets.
Select the widget area where you want social media icons (Sidebar, Footer, etc.).
Add a Navigation Menu widget or Custom HTML widget.
If using Navigation Menu:
Create a social menu under Appearance → Menus.
Add Custom Links with your social media URLs.
Assign this menu to the widget.
If using Custom HTML:
Insert social media icons manually using HTML.
htmlCopyEdit<a href="https://facebook.com/yourpage" target="_blank"> <img src="facebook-icon.png" width="30" alt="Facebook"> </a>
3. Using Astra Pro Add-ons (For More Design Options)
If you have Astra Pro, you get more customization options:
Appearance → Customize → Header Builder or Footer Builder.
Select Social Icons and choose advanced styling options like:
Custom colors, hover effects, shape (circle/square).
More placement options.
4. Using a Plugin (For Advanced Customization)
If Astra’s built-in options are limited, use a plugin like:
Social Icons Widget by WPZOOM
Simple Social Icons
Ultimate Social Media Icons
Install & activate the plugin from Plugins → Add New.
Configure the social icons inside the plugin settings.
Place the icons via widgets, shortcodes, or block editor.
5. Customizing with CSS (For Advanced Users)
If you want a unique look, you can add custom CSS:
Appearance → Customize → Additional CSS.
Use CSS like: cssCopyEdit.ast-social-color-custom a { background-color: #ff5733; /* Change background */ color: white; /* Change icon color */ border-radius: 50%; /* Make icons round */ padding: 10px; }
0 notes
Text
Running Successful Bulk SMS Campaigns Without Getting Blocked

Bulk SMS marketing remains one of the most effective ways to engage with your audience, boost sales, and promote brand awareness. However, sending bulk SMS messages without a strategic approach can lead to your messages being marked as spam or blocked by mobile carriers. To ensure that your campaigns deliver high conversion rates and stay compliant with industry regulations, it’s essential to follow best practices. This guide explores how to run successful bulk SMS campaigns without getting blocked while maximizing ROI.
1. Understand SMS Marketing Regulations and Compliance
Before launching a bulk SMS campaign, it’s crucial to familiarize yourself with SMS marketing regulations in your target regions. Authorities such as the TCPA (Telephone Consumer Protection Act) in the United States and TRAI (Telecom Regulatory Authority of India) set strict guidelines to protect consumers from unsolicited messages.
✅ Tip: Obtain explicit consent from recipients through opt-in forms and clearly communicate the nature of your messages. Sending SMS without user consent increases the risk of being reported and blocked.
2. Build a High-Quality Opt-In List
A well-curated opt-in list is the foundation of a successful bulk SMS campaign. Sending messages to a list of engaged and interested recipients reduces the likelihood of your messages being marked as spam.
🎯 Tip: Use double opt-in processes to ensure recipients genuinely want to receive your messages. This practice not only builds trust but also improves your sender reputation.
3. Personalize Your SMS Messages
Personalized messages create a stronger connection with your audience and increase engagement. Generic bulk messages are more likely to be ignored or reported as spam. By including the recipient’s name, relevant offers, or personalized recommendations, you enhance the user experience.
💡 Tip: Leverage customer data and purchase history to create tailored messages that resonate with individual preferences.
4. Avoid Sending Too Many Messages
Overloading recipients with frequent messages can lead to frustration and result in opt-outs or complaints. Striking a balance between staying connected and avoiding overcommunication is key to maintaining audience interest.
📅 Tip: Develop a well-structured SMS schedule that considers user preferences and limits message frequency to 2-3 messages per week.
5. Use a Recognizable Sender ID
A recognizable and trusted sender ID builds credibility and reduces the chances of messages being marked as spam. Using a branded sender ID or shortcode increases the likelihood that recipients will open and engage with your messages.
🔗 Tip: Register your sender ID with mobile carriers to improve delivery rates and prevent blocking.
6. Segment Your Audience for Targeted Campaigns
Segmenting your audience based on demographics, behavior, and interests allows you to send relevant and targeted messages. Targeted SMS campaigns generate higher engagement and minimize the chances of complaints or spam reports.
📊 Tip: Use behavioral triggers and purchase history to segment your audience and deliver personalized content that adds value.
7. Avoid Spammy Language and Keywords
Using spammy or misleading language in your SMS content can trigger carrier filters and result in message blocking. Phrases like “FREE,” “WIN,” or excessive use of capital letters can make your messages appear suspicious.
⚠️ Tip: Craft clear and concise messages that highlight the value you’re offering without using aggressive sales language.
8. Include an Easy Opt-Out Option
Providing recipients with an easy way to unsubscribe from your SMS list ensures compliance with regulations and builds trust. When recipients have control over their preferences, they’re less likely to report messages as spam.
📩 Tip: Include a clear opt-out option such as “Reply STOP to unsubscribe” in all your messages.
9. Monitor and Analyze Campaign Performance
Regularly monitoring and analyzing the performance of your SMS campaigns helps identify potential issues and optimize future campaigns. Track delivery rates, open rates, click-through rates, and unsubscribe rates to ensure your campaigns remain effective.
📈 Tip: Use WizHope’s SMS Analytics Tools to evaluate campaign performance and make data-driven improvements.
10. Use Trusted Bulk SMS Platforms
Partnering with reputable and carrier-compliant SMS platforms improves message deliverability and minimizes the risk of being blocked. Trusted platforms ensure compliance with regulations and offer advanced features such as A/B testing and analytics.
🌐 Tip: Consider using WizHope’s Bulk SMS Solutions for reliable and high-performing SMS campaigns.
11. Test Your Campaigns Before Sending
Testing your SMS messages before launching a full-scale campaign helps identify potential issues and ensures that your content meets compliance standards. Sending test messages to a small group allows you to gauge response and optimize content.
🧪 Tip: Run A/B tests to determine the most effective message formats, content styles, and call-to-action phrases.
12. Leverage SMS Automation and Drip Campaigns
Automating your SMS campaigns ensures that messages are sent at optimal times and reduces manual workload. Drip campaigns allow you to nurture leads with a sequence of timely and relevant messages.
⚡ Tip: Use AI-powered automation tools to create personalized drip campaigns that guide recipients through the sales funnel.
🎉 Conclusion
Running successful bulk SMS campaigns requires a careful balance between delivering valuable content and adhering to compliance guidelines. By following best practices such as maintaining opt-in lists, avoiding spammy language, and monitoring campaign performance, businesses can maximize ROI and avoid message blocking.
👉 Ready to take your SMS marketing to the next level? Explore WizHope’s Bulk SMS Solutions for reliable and high-performing SMS campaigns.
#seo services#social media marketing#digital marketing services#ppc#digital marketing company#seo#emailmarketing#digital marketing
1 note
·
View note
Text
You may already know about ThemeFuse. Its one of the best places to find web design resource and website themes. ThemeFuse is giving away a high quality wordpress theme to our readers for free. In this giveaway, If you win, you get one full download of a complete WordPress theme. About The Core Wordpress Theme The Core is a massive multi-purpose WordPress theme with an extensive list of features and more than 10 themes included out of the box with more to come soon (free of charge). The theme is built on Unyson (our open source WordPress framework) and it comes with a bunch of cool features like a powerful visual page builder, a lot of ready to use shortcodes, a backup up module, over 700 fonts, multiple headers, footers and sliders, unlimited color palette options, demo content install, extensive documentation and much more. All the demos included with The Core are hand built for a specific need, insuring that everything within the demo is made with purpose and with the correct design style for that specific industry. Also, these are not just slight alterations of the same theme but actually complex themes on their own. The Core is $59 and considering the included demos and that you’ll get all the new demos for free, this theme is a bargain. A full list of features together with all you need to know about the theme can be found here. All the live demos included with The Core can be accessed here and of course you can test it for free in our Test Labs for 14 days right now. Contest Has Ended Feature List ADVANCED VISUAL BUILDER (Save $34) Only drag & drop the design elements you want on the canvas and create complex pages at a drop of a dime. It is as easy as it sounds. RESPONSIVE & RETINA This theme is optimized for a Responsive & Retina experience, which means it will provide an optimal experience on any mobile device. DEMO CONTENT INSTALL The Core has this great feature that auto-installs the demo content making the theme look exactly like the one you see on our Live Demo. MULTIPLE SLIDERS INCLUDED (Save $37) We have included 3 different sliders for you to choose from: Slider Revolution, Layers Slider and our own custom-built version of slider. COLOR SCHEMES Modify all colors of the theme with ease, by using simple color pickers and all instances of that specific color will be changed on your site. POWERED BY UNYSON Unyson WordPress framework is the backbone of our theme. It’s built by us from the ground up and it’s open source, so anyone can use it for free. SHORTCODES Let your creative juices flow and use our evolved shortcodes together with the drag & drop page builder to create unique pages. MEGA MENU MegaMenu is a user-friendly, highly customizable drop-down menu. Our implementation makes it easy to create creative menus. WOO-COMMERCE READY Start selling your products today using the popular WooCommerce plugin. Everything is perfectly integrated. EVENTS Keep your users up-to-date with all upcoming events by adding them into the built-in calendar. You can put this shortcode on any page. TRANSLATION READY Our theme is translation ready, so it supports free or premium plugins, like WPML or any other plugin. ADVANCED SEO OPTIONS SEO is vital for any website that wants to have as many visitors as possible, so The Core comes with a great SEO module! FONTS & TYPOGRAPHY Use any font from Google's free collection. Being stored on Google's servers, displaying them will be fast & reliable. CONTACT FORM BUILDER Use The Core’s contact form builder to create any contact form you need. Just drag & drop the fields you want and you are ready to go. PORTFOLIOS We have built multiple types of Portfolio showcases, with 2, 3 or 4 columns as well as different types of display for the portfolio blocks. HEADERS & FOOTERS Our theme comes with 4 header types and a ton of footer options. You can customize your website exactly the way you want. ANIMATIONS A great theme is not complete without some pizzazz, that's why we have implemented a very easy way to add animations.
MULTIPLE LAYOUTS The Core comes with a bunch of built in page layouts for you to use and the visual drag & drop page builder will let you to create more. BACK UP MODULE (Save $34) It takes a couple of seconds to set your back up schedule within our theme and then all the backups happen automatically. No headaches in case of a crash! CUSTOM GOOGLE MAPS (Save $29) Adding google maps to your pages is a breeze. Add multiple pins and any style from snazzymaps.com in a couple of seconds. PREMIUM SUPPORT & DOCS The Core comes with premium support offered via our help desk on our website together with more then 120 articles and step by step tutorials included in the documentation. FREE TEST FOR 14 DAYS You can always test the theme for free for 14 days in out TestLabs
0 notes
Text
top five plugins for converting PDFs into interactive flipbooks
1. Flipbook
Flipbook is a powerful and widely-used WordPress plugin to create stunning interactive flipbooks from PDFs or images.
Key Features:
Converts PDFs into realistic flipbooks with page-flipping effects.
Supports responsive designs for mobile, tablet, and desktop devices.
Customizable themes and interactive elements like zoom, navigation, and annotations.
Easy integration via shortcodes.
Why Flipbook?: Its simplicity, rich feature set, and seamless integration make it a top choice for creating engaging flipbooks.
2. Real3D Flipbook
Real3D Flipbook is a versatile plugin that creates interactive 3D flipbooks.
Key Features:
Converts PDFs and images into realistic 3D flipbooks.
Fully responsive and works on all devices.
Supports lightbox and fullscreen modes.
Customizable design options for branding.
Best For: Users who want an immersive, 3D flipbook experience.
3. dFlip
dFlip is a lightweight plugin that focuses on creating simple yet visually appealing flipbooks.
Key Features:
Realistic 3D flipbook effects.
Easy-to-use shortcode generator for embedding flipbooks.
Mobile-friendly and responsive.
Supports single and double-page views.
Best For: Quick and easy PDF-to-flipbook conversion.
4. Flip PDF Pro
Flip PDF Pro is a feature-rich plugin designed for advanced flipbook creation.
Key Features:
Converts PDFs into flipbooks with multimedia elements like videos and links.
Supports both HTML5 and Flash formats.
Customizable templates and themes.
Integration with e-commerce platforms for digital product sales.
Best For: E-commerce and marketing-focused flipbooks.
5. Issuu Embed Plugin
Issuu Embed Plugin connects your WordPress site with the Issuu platform to showcase flipbooks.
Key Features:
Embeds flipbooks hosted on Issuu directly into WordPress posts or pages.
Customizable viewer options, including fullscreen mode.
Provides analytics for flipbook engagement.
Best For: Publishing professionals with existing Issuu accounts.
0 notes
Text
Weather Forecast
Weather Forecast Service: Accurate, Reliable, and Timely Stay Ahead of the Weather with Our Advanced Forecasting Service Whether you're planning a trip, scheduling outdoor activities, or need to monitor changing weather conditions for your business, our weather forecast service provides accurate, up-to-date information for any location. What We Offer Our service delivers reliable weather data for the next 7 days, directly sourced from global weather stations. With real-time updates, we ensure that you're always prepared for what’s coming next. 7-Day Forecast: Get detailed information on temperature, rainfall, wind speed, and weather conditions for the next week. Snowfall Forecast: Know the exact timing and intensity of snowfall to plan accordingly. Weather Descriptions: Receive accurate weather descriptions to understand what to expect (e.g., clear skies, cloudy, showers). Daily Updates: We keep you informed with regular updates so you can plan your day with confidence. How It Works Our service integrates with powerful weather APIs to gather and analyze data in real-time. You can access the forecasts based on specific locations, ensuring that the information you get is relevant to you. By using cutting-edge technology and highly accurate forecasting models, we can provide detailed predictions on: Temperature Rainfall Snowfall Wind speed and direction Humidity levels Cloud cover Why Choose Our Weather Forecasting Service? Real-Time Data: Our system fetches live weather data from trusted global weather sources, ensuring you get the latest information. Custom Forecasts: We offer tailored weather forecasts for locations that matter to you. Whether it's your home city or a vacation spot, we've got you covered. Easy Access: Our weather forecast can be accessed directly through a convenient shortcode on your website, so you can stay informed without hassle. Accurate Snow Forecasting: Get timely snow forecasts to stay ahead of winter conditions. Whether it's snow flurries or heavy snowstorms, we keep you informed. User-Friendly Interface: Easy-to-understand formats with clear, actionable weather insights. Know the weather in a glance! Key Features of Our Weather Forecast Service 7-Day Weather Forecasts: For the next 7 days, including minimum and maximum temperatures. Hourly Forecasts (Optional): Get a detailed hourly breakdown for the next 24 hours. Rain and Snow Alerts: Receive predictions on potential rain and snow, helping you make informed decisions. Weather Descriptions: Accurate weather descriptions to help you understand more than just the numbers. How to Get Started To start using our Weather Forecasting Service, all you need to do is enter your location. Our tool will fetch the most accurate, up-to-date weather data from leading weather providers. Enter Your Location: Simply enter your location (city, town, or coordinates) in the input box. Get Your Forecast: Once the location is submitted, our system will generate a detailed weather forecast for the next 7 days. Make Your Plans: Whether it's outdoor activities or travel, you can plan confidently with the most up-to-date weather information. Our Weather Data is Powered by Leading APIs We use the WeatherUnlocked API for fetching real-time data, ensuring the forecasts you receive are accurate and reliable. Frequently Asked Questions (FAQ) Q: How accurate is the weather forecast? A: Our weather data is sourced from global, trusted weather providers to ensure high accuracy, but weather conditions can still change quickly. We recommend checking the forecast regularly for updates. Q: Can I get hourly forecasts? A: Yes! We offer detailed hourly forecasts, covering the next 24 hours. Q: Is snow forecasting available? A: Absolutely! Our service provides specific snow forecasts, including the chance and timing of snowfall. Q: Is there a mobile version of the service? A: Yes! Our weather forecasts are mobile-friendly, so you can check the weather on-the-go from any device. Start Planning with Confidence Today! Don't let unpredictable weather throw off your plans. With our accurate, reliable, and detailed weather forecasting service, you’ll always be prepared. Current Temperature: 31°C, Weather: Haze, Haze 7-Day Forecast:- 2025-03-09: Max Temp: 34.7°C, Min Temp: 17.2°C, Weather: Partly cloudy skies - 2025-03-10: Max Temp: 36.3°C, Min Temp: 19.3°C, Weather: Clear skies - 2025-03-11: Max Temp: 37.7°C, Min Temp: 21.4°C, Weather: Clear skies - 2025-03-12: Max Temp: 38.1°C, Min Temp: 22.3°C, Weather: Partly cloudy skies - 2025-03-13: Max Temp: 39.1°C, Min Temp: 23.4°C, Weather: Overcast skies - 2025-03-14: Max Temp: 38.2°C, Min Temp: 21.4°C, Weather: Clear skies - 2025-03-15: Max Temp: 23.8°C, Min Temp: 22.3°C, Weather: Patchy rain possible Snow Forecast:- 2025-03-09: Snowfall: 0 inches - 2025-03-10: Snowfall: 0 inches - 2025-03-11: Snowfall: 0 inches - 2025-03-12: Snowfall: 0 inches - 2025-03-13: Snowfall: 0 inches - 2025-03-14: Snowfall: 0 inches - 2025-03-15: Snowfall: 0 inches Read the full article
0 notes
Text
Where to Find Dynamic Deep Wave Therapy in Anna Nagar
Are you looking for Dynamic Deep Wave Therapy in Anna Nagar? Look no further than GTS Wellness Center, your go-to destination for advanced wellness treatments.

What is Dynamic Deep Wave Therapy? Dynamic Deep Wave Therapy is a revolutionary treatment designed to relieve pain, enhance muscle recovery, and promote overall well-being. It uses deep-penetrating wave technology to stimulate tissues, improve circulation, and accelerate healing.
Why Choose GTS for Dynamic Deep Wave Therapy? At GTS Wellness Center, we specialize in providing high-quality wellness treatments tailored to your needs. Our expert therapists use state-of-the-art equipment to ensure effective and safe therapy sessions. Whether you are dealing with chronic pain, muscle stiffness, or post-workout soreness, GTS offers personalized solutions to help you feel your best.
Benefits of Dynamic Deep Wave Therapy at GTS
•Reduces muscle tension and pain
•Enhances blood circulation
•Speeds up recovery from injuries
•Improves mobility and flexibility
•Boosts overall relaxation
Visit GTS Wellness Center Today If you're in Anna Nagar and searching for Dynamic Deep Wave Therapy, GTS is the place to be. Our team is dedicated to providing holistic healing and relaxation in a comfortable environment. Book your session today and experience the benefits of Dynamic Deep Wave Therapy at GTS Wellness Center!
For appointments and inquiries, contact GTS Wellness Center now.
If you want more visit this website
https://gtswellness.com/shortcodes/wellness-program/
Get an Appointment: 8300170026
Facebook https://www.facebook.com/GTSwellnessCentre
Instagram: https://www.instagram.com/gtswellness/
Youtube: https://www.youtube.com/@gtswellness5605
0 notes
Text
10 Best Free Legal Compliance Plugins for WordPress – Speckyboy
New Post has been published on https://thedigitalinsider.com/10-best-free-legal-compliance-plugins-for-wordpress-speckyboy/
10 Best Free Legal Compliance Plugins for WordPress – Speckyboy
When running a business online, it’s important to make sure you follow the laws of your area, country, and internationally. The laws can differ depending on where you are and what kind of website you have. Thankfully, WordPress plugins can assist you in meeting these legal requirements.
Remember, these suggestions are not a replacement for real legal advice. If you have specific questions, it’s best to ask a professional who knows the law.
To help set you on the right legal track, we have a collection of WordPress plugins that can help with many of the different legal aspects of running a website. We’ve organized them by category to make it easier for you to find what you need. These plugins can be a big help in making sure your website is on the right side of the law.
EU Cookie Law WordPress Plugins
Cookie Notice by dFactory
Cookie Notice by dFactory provides an easy way to let your site’s visitors know about your use of cookies. You can customize a notice that will appear either on the top or bottom of the page. Users can accept, decline, or read more about your policies via clickable buttons.
CookieYes Cookie Banner & Compliance Plugin
Cookie Law Info will create a customizable banner to inform visitors of your cookie policies. The banner can be automatically removed after a few seconds, or you can require the user to accept your terms manually.
Privacy Policy & Terms of Service WordPress Plugins
Auto Terms of Service & Privacy Policy
Automattic, the company behind WordPress.com, have created both a Terms of Service and Privacy Policy under the Creative Commons Sharealike license.
Auto Terms of Service and Privacy Policy brings these documents to your site. Simply add your organization’s info in the plugin settings and display the documents via a WordPress Shortcode. This plugin is meant for sites based in the United States.
WPLegalPages Privacy Policy & T&Cs Generator
WPLegalPages will generate a variety of must-have compliance documents for your website. The free version of the plugin includes a privacy policy, terms & and conditions, DCMA policy, and more.
Setup is simple – enter your business name and select which documents you want to generate. A cookie consent bar is also included. The pro version ups the ante with guided wizards, age verification, and popups.
EU VAT WordPress Plugins
WooCommerce EU VAT Compliance
Those running WooCommerce can take the pain out of VAT with WooCommerce EU VAT Compliance. It will record a customer’s location, show VAT calculations in the backend, and automatically add VAT to product pricing. You can even block out EU customers if you’d rather not collect VAT at all.
EDD Quaderno
EDD Quaderno helps to make Easy Digital Downloads shops compliant with VAT and the intricacies of other locales. It will also create improved versions of the standard EDD receipts. To use the plugin, you’ll need a Quaderno account.
Age Verification WordPress Plugins
Age Gate
Age Gate is a highly configurable plugin for restricting age-based content. Select the minimum age along with the content you want to protect, and underage users will be locked out.
Choose from a variety of user input methods (dropdown, text field, or yes/no buttons) and customize the look of the UI to match your website. The plugin is also SEO-friendly and won’t try to restrict common search bots.
Easy Age Verify
Make age verification simple with Easy Age Verify. The plugin offers turnkey settings based on different types of website content. It’s also built with accessibility and SEO in mind. The pro version is fully customizable, with the ability to match your site’s look.
Digital Signature WordPress Plugins
Gravity Forms Signature Add-On
This unofficial add-on for Gravity Forms will allow users to digitally sign documents on your website. There’s also a version for Ninja Forms.
CF7Sign – Signature Field For Contact Form 7
Adding a signature field to your Contact Form 7 forms is just a click away. Once you’ve installed and activated CF7Sign, a “Sign” field will be added to your forms’ options. There’s not much room for customization here, but it’s a dead-simple solution.
Keeping it Legal
Granted, it can be a bit of a hassle to keep track of compliance issues. But that doesn’t make it any less vital to do so. WordPress plugins are there to make the task a bit easier – even automating the process in some cases.
So, there’s no excuse for slacking! Take some time to learn your responsibilities as a website owner and use the handy plugins above to help you manage. Obviously, using these plugins alone won’t make you compliant – but they will help set you on the right path.
Legal Compliance WordPress Plugin FAQs
What Are Legal Compliance WordPress Plugins?
They are plugins designed to help your WordPress site adhere to legal regulations. They cover aspects like privacy policies, cookie consent, and terms of service requirements.
Who Needs Legal Compliance Plugins for Their WordPress Site?
Anyone who wants to ensure their site complies with legal standards, such as GDPR, CCPA, or other regional laws. This is particularly important for sites that handle user data or operate internationally.
Why Is It Important to Use Legal Compliance Plugins on WordPress?
They help protect you from legal issues by ensuring your website meets the necessary legal standards for data protection and privacy.
Can These Plugins Guarantee My Site Is Fully Legally Compliant?
While they significantly help in compliance, you should consult with a legal professional to make sure your site meets all specific legal requirements.
Are Legal Compliance Plugins Easy to Use and Set Up?
Most of these plugins are user-friendly, offering guided setup processes and pre-designed templates for legal documents.
Do I Need a Legal Compliance Plugin If My Site Doesn’t Sell Anything?
Yes, if your site collects any form of user data, including through contact forms or analytics tools, compliance with privacy laws is very important.
More Essential Free WordPress Plugins
Related Topics
Top
#Accessibility#ADD#add-on#Advice#amp#Analytics#bots#Business#buttons#ccpa#compliance#content#cookies#data#data protection#Design#display#dropdown#easy#Essential WordPress Plugins#eu#form#Forms#GATE#gdpr#generator#gravity#issues#it#law
0 notes
Text
How to Create a Travel Booking Website with WordPress – A Step-by-Step Guide

Have you ever dreamed of turning your passion for travel into a thriving online business? With the global travel booking market exceeding $700 billion, there's a huge opportunity to create a travel booking website that helps travelers find their perfect destination. The best part? You don’t need to be a web developer to build one!
WordPress offers a flexible and beginner-friendly platform for launching a professional travel booking website. In this guide, we’ll walk you through every step of the process, from choosing a domain to integrating booking features and optimizing for success.
Step 1: Choose a Domain and Hosting
Before you start building your website, you need a strong foundation:
Domain Name: Pick a catchy, travel-related name like DreamGetaways.com or HotelHavenBookings.com.
Hosting Provider: Choose a reliable WordPress hosting service like Bluehost or SiteGround. Look for plans with SSL certificates to ensure secure transactions and fast performance.
Step 2: Install WordPress
Most hosting providers offer one-click WordPress installation. Once installed, configure the basic settings:
Go to Settings > General to set your site title, tagline, and time zone.
Step 3: Select a Travel Booking WordPress Theme
Your theme determines the design and functionality of your website. Consider using a specialized travel theme like:
Travelfic: A lightweight, customizable theme built for travel and hotel booking websites.
To install your theme:
Go to WordPress Dashboard > Appearance > Themes > Add New
Search for the theme and click Install
Activate the theme to apply it to your website
Step 4: Install Essential Plugins
Plugins add important functionalities to your travel website. Here are some must-have plugins:
Easy Hotel Booking – WordPress Hotel Booking Plugin: Allows users to book hotels, view availability calendars, and make secure payments.
WooCommerce: To handle payments and transactions seamlessly.
Yoast SEO: Helps optimize your site for search engines.
Contact Form 7: For managing customer inquiries easily.
To install plugins:
Navigate to Dashboard > Plugins > Add New
Search for the plugin
Click Install Now, then Activate
Step 5: Configure Booking Features with Easy Hotel Booking Plugin
The Easy Hotel Booking plugin simplifies hotel reservations with features like room management, pricing, and payment integration.
Steps to Set Up:
Install and activate the plugin via Plugins > Add New
Configure room types, pricing, and availability
Enable payment gateways like PayPal or Stripe
Add a booking calendar using the provided shortcode
Step 6: Design Your Website
A visually appealing and easy-to-navigate website is key to attracting travelers. Focus on:
Home Page: Highlight destinations, accommodations, and search functionality.
Booking Pages: Display room details, pricing, and availability.
Mobile Optimization: Ensure your site looks great on all devices.
Use Elementor or other page builders for easy drag-and-drop customization.
Step 7: Add Key Pages
A successful travel website needs essential pages:
About Us: Share your story and build trust.
Accommodations: Showcase available rooms, pricing, and amenities.
Contact Us: Provide a contact form and social media links.
Blog: Publish travel-related content to attract visitors.
Create these pages under Pages > Add New in your WordPress dashboard.
Step 8: Test and Launch
Before making your site live:
Test the full booking process
Verify payment gateway functionality
Check for mobile responsiveness
Once everything runs smoothly, it’s time to launch your travel booking website!
How to Promote Your Travel Booking Website
Creating a travel website is just the beginning. Here’s how to drive traffic and increase bookings:
Optimize for SEO
Research and use travel-related keywords
Write detailed destination guides and travel tips
Implement local SEO strategies to target specific locations
Leverage Social Media
Share stunning travel photos and user experiences
Collaborate with travel influencers for promotions
Use Facebook and Instagram ads to target potential travelers
Run Paid Advertising Campaigns
Use Google Ads to target travelers searching for hotel bookings
Retarget website visitors with special offers
Start a Travel Blog
Content marketing is a powerful way to attract visitors. Write about:
Top travel destinations
Budget travel tips
Seasonal travel guides
Partner with Travel Industry Players
Collaborate with hotels, airlines, and tour operators
Launch an affiliate program to get bloggers and influencers to promote your site
Encourage User Reviews
Collect and showcase testimonials
Offer incentives for customers to leave reviews
Use Email Marketing
Send exclusive travel deals and destination insights
Keep your audience engaged with weekly newsletters
Monitor Performance
Use Google Analytics and SEMrush to track website traffic, conversions, and user behavior. Optimize your strategies based on insights.
Conclusion
Building a travel booking website with WordPress is easier than ever. By choosing the right domain, installing essential plugins, and optimizing your site for search engines, you can create a platform that attracts travelers and drives bookings.
Whether you’re starting a hotel business, a travel agency, or an online booking service, WordPress provides the perfect tools to help you succeed. So, take action today and turn your travel business dream into reality!
🚀 Ready to launch your travel website? Let’s get started!
0 notes