#sim card connector
Explore tagged Tumblr posts
Visit Tumblr Blog
Explore Tumblr blogs with no restrictions, modern design and the best experience.
Last Seen Tumblr Blogs


Fun Fact
After the announcement of the deal with Yahoo!, there were 170K signatures of unhappy Tumblr users petitioning to prevent the sale in 2013.
Text
#sim card connector#sim card series#sim card holder#nano sim card holder#sim card holder price#sim card slot#android sim card holder#sim card holder best buy#sim card adapter best buy#buy sim card holder for iphone#sim card holder case#dual sim card holder
0 notes
Text
#sim card connector#sim card series#sim card holder#nano sim card holder#sim card holder price#sim card slot#android sim card holder#sim card holder best buy#sim card adapter best buy#buy sim card holder for iphone#sim card holder case#dual sim card holder#sim card eject tray#Manufacturer of sim card holder
0 notes
Text
Why Your Water-Damaged Phone Won’t Charge – And How to Fix It
Accidentally dropped your phone in water? Before you panic, know that water damage doesn't always mean the end. However, one common issue post-exposure is the phone refusing to charge. Understanding the reasons behind this can help you take the right steps to revive your device.
⚠️ Common Causes of Charging Issues After Water Exposure
Short Circuits in the Charging Circuit Water can create unintended connections between components, leading to short circuits that disrupt the charging process.
Damaged Charging IC (Integrated Circuit) The charging IC regulates power flow. If compromised by moisture, it can prevent the battery from charging.
Corroded Charging Port Exposure to water can corrode the metal contacts in the charging port, hindering proper connection.
Battery Issues Water can damage the battery or its connectors, leading to charging failures.
Mainboard Damage The mainboard houses critical components. Water-induced corrosion here can disrupt multiple functions, including charging.
Moisture Detection Sensors Some smartphones have sensors that detect moisture in the charging port and disable charging to prevent further damage.
Internal Component Corrosion Over time, moisture can corrode internal components, leading to various malfunctions.
🛠️ Immediate Steps to Take After Water Exposure
Power Off Immediately: Prevent further damage by turning off the device.
Remove External Components: Take out the SIM card, memory card, and, if possible, the battery.
Dry the Device: Gently wipe the exterior with a lint-free cloth. Avoid using heat sources like hairdryers.
Use Desiccants: Place the device in a sealed container with silica gel packets to absorb moisture. Leave it for at least 24-48 hours.
Avoid Charging: Do not attempt to charge the phone until you're certain it's completely dry.
🔧 When to Seek Professional Help
If, after thorough drying, your phone still won't charge, it's time to consult a professional technician. They can assess and repair internal damages that aren't visible externally.
🛡️ Preventive Measures
Use Waterproof Cases: Invest in cases that offer water resistance.
Avoid Using Phones Near Water: Be cautious in environments where your phone might get wet.
Regular Maintenance: Periodically check and clean your charging port to prevent corrosion.
Water damage is a common yet preventable issue. By understanding the causes and taking immediate action, you can increase the chances of saving your device. Always prioritize safety and consult professionals when in doubt.
2 notes
·
View notes
Text
Price: [price_with_discount] (as of [price_update_date] - Details) [ad_1] Budi 11in1 Multi-Functional Data Cable Set includes one data cable and several adapters, which can be used to solve the problem of carrying multiple data cables when going out. The length of the cable is about 56cm / 22". It can be used to charge Type-C interface phones and transfer data between a phone and a computer, or between two phones. Up to 65W PD charging can be supported by using this cable. A Type-C to Light adapter, a Type-C to Micro USB adapter, and a Type-C to Type-A adapter are included in the package for charging Light interface, Micro USB interface, and Type-C interface phones or tablets respectively. Additionally, the set comes with a storage case and the case can hold 2 TF card and 2 Nano SIM cards. Besides that, a free card removal tool also can be put into this case. Most importantly, the case can be used as a phone holder by opening the support on its back. Also, The Product Comes With a Face Mirror which is a necessity while travelling. It frees your hands, allowing you to watch your favourite videos. 10 IN 1 : Budi Multifunctional Cable & Connector kit is the only accessory you will ever need to carry on for all your charging & connectivity needs. There is nothing more compact & versatile than Budi. Say goodbye to calling multiple cables. No more fumbling in your bag. 15W WIRELESS : Budi supports upto 15W (Wireless Charging Compatible iPhones & Google Devices) of Wireless charging phones and also the ones that need 5W, 7.5W (Wireless Charging Compatible iPhones) & 10W ( Wireless Charging Compatible Samsung Phones). Flip it over and use it as a flatbed charger or use it in the cradle mode. Just remember to power it with an 18W wall adaptor to use it optimally. Disclaimer : Wireless Charging Technology works at 75% efficiency as compared to cable via cables. 25W PD CABLE: The primary cable is a Type C to Type C PD 2.0/3A cable capable of Power Delivery so it’s the perfect charging cable for your latest devices & compatible with iPad Pro 10.5-inch Pro,iPad Pro 12.9-inch(2nd generation),iPad Pro12.9-inch(1st generation) iPhone 13,12,11/11 Pro/Max/XS Max/XS/XR/X/8/8 Plus,Galaxy S10/S10+/S10E/Note 9/S9/S8/S8 Plus,Pixel 3XL 3/2/Pixel 2 XL,Nexus 5X/6P,Lumia 950/950XL,Xiaomi Mi9,Nokia 8 and so many more USB-C devices MULTIPLE CONNECTORS: Type C, Micro USB, Lightning & USB-A – all Smartphones, Tablets & laptops covered. It’s the ultimate survival kit when paired with your powerbank. CARD READER TRANSFER & NANO SIM STORAGE : Connect easily to OTG enabled phones and/or Laptops for two way data transfers at blazing speeds. It will support Micro SD (TF) cards upto 256GB at transfer speeds of 480Mbits/s. Supports both Type A & USB Type C connectors. Includes storage slots for 2 nano sims & that elusive pin you need to open your sim tray. MOBILE STAND WITH AMBIENT FLASHLIGHT : It’s so convenient to just flip it into a stand so you can watch movies comfortably or simply charge your phone while you travel. Allows for hands-free viewing in landscape mode. Enjoy 0.5W of ambient light very helpful to brighten up your way in the darkness. Just power it up with your power bank & you are good to go. [ad_2]
0 notes
Text
0 notes
Video
youtube
How to replace Samsung S24 Ultra Screen? Full Guide / Tutorial, Samsung repair hamilton new zealand
Samsung S24 Ultra Broken Screen replacement Step by Step Guide | Samsung Repair In Hamilton New Zealand Call 078394111 or visit 937 Victoria Street hamilton @ AppleFix 7 Tech engineers
Replacing the screen on a Samsung Galaxy S24 Ultra can be complex, and it's recommended to proceed with caution. Here’s a general guide to help you through the process:
Tools Needed
Heat gun or hair dryer
Suction cup tool
Plastic spudger or opening tool
Phillips screwdriver (small)
Tweezers
Replacement screen
Adhesive strips (if needed)
Anti-static wrist strap (optional but recommended)
Step-by-Step Guide
1. Power Off the Device
Turn off your Galaxy S24 Ultra to avoid any electrical damage.
2. Remove the SIM Card Tray
Use a SIM eject tool to remove the SIM card tray.
3. Heat the Edges
Use a heat gun or hair dryer to warm up the edges of the phone. This helps soften the adhesive holding the screen in place.
4. Create a Gap
Attach a suction cup to the screen. Gently pull to create a small gap between the screen and the frame. Use a plastic spudger to insert into the gap.
5. Pry Open the Screen
Carefully slide the spudger around the edges to detach the adhesive. Be cautious of any cables or components inside.
6. Disconnect the Battery
Once the screen is slightly lifted, locate the battery connector. Use a Phillips screwdriver to remove the screws holding the cover in place, then gently disconnect the battery.
7. Remove the Broken Screen
Disconnect the screen by unscrewing the necessary screws and using a spudger to lift the connector. Carefully remove the broken screen from the device.
8. Install the New Screen
Place the new screen into position. Connect the screen cable and ensure it's secured.
9. Reconnect the Battery
Reconnect the battery, ensuring the connection is firm.
10. Test the Device
Before sealing everything back up, power on the device to test the new screen. Make sure touch functions and display quality are working properly.
11. Seal the Device
If everything is functioning, proceed to reattach the screen. Use adhesive strips to secure it, ensuring a tight fit.
12. Reinsert the SIM Card Tray
Finally, reinsert the SIM card tray and power on your device.
0 notes
Text
How to Replace the Rear Back Camera Flex on Galaxy S10

The Rear Back Camera Flex for Galaxy S10 is an essential component that connects the rear of the digital camera to the motherboard. If your digital camera is not functioning properly, displaying a black display or showing blurry snapshots, the flex cable is probably damaged.
Replacing it could repair the digicam’s capability without requiring a replacement. In this article, we at Elite Cell Parts shall take you through all the steps involved in changing the Rear Back Camera Flex for Galaxy S10.
Tools and Materials Needed:
Before you start the repair of Rear Back Camera Flex for Galaxy S10 yourself, you must collect the following devices and substances:
• Replacement Rear Back Camera Flex for Galaxy S10
• Precision screwdriver set
• Plastic beginning device
• Suction cup
• Tweezers
• Heat gun or hairdryer
• Isopropyl alcohol (non-obligatory)
• Microfiber cloth
• Adhesive strips or glue
Suppose you are wondering how to replace Rear Back Camera Flex for Galaxy S10 by yourself. We at Elite Cell Parts provide the following steps given below:
Step 1: Power Off and Prepare the Device:
To ensure safety, we suggest that you switch off your Samsung device before you begin to repair Rear Back Camera Flex for Galaxy S10. This prevents any electric damage or short-circuiting from occurring. The steps given below you need to follow:
1. Hold the electricity button and select “Power Off.”
2. Wait for the device to shutdown
3. Remove any SIM card or microSD card if inserted.
Step 2: Heat the Back Panel:
Since the Rear Back Camera Flex for the Galaxy S10 cover is glued firmly, you need to melt the adhesive. This you do by taking the following actions:
1. Use a warmth gun or hair dryer to warm the edges of the again panel for approximately 1-2 minutes.
2. Focus on one vicinity at a time and keep away from overheating.
Step 3: Remove the Back Panel:
The next step in repairing Rear Back Camera Flex for Galaxy S10 involves the removal of the back panel. We at Elite Cell Parts advise you to do the following:
1. Place a suction cup near the bottom of the telephone.
2. Gently pull up while putting a plastic beginning device into the gap
3. Slowly slide the tool around the rims to loosen the adhesive.
4. Avoid using any pressure to prevent cracking the glass.
Step 4: Disconnect the Battery:
Disengaging the battery is necessary while repairing your Rear Back Camera Flex for Galaxy S10. It involves the following steps:
1. Locate the battery connector on the motherboard of Rear Back Camera Flex for Galaxy S10
2. Use a plastic spudger to disconnect it.
3. It is necessary to perform this step to avoid unintended short circuits from occurring while working on the device
Step 5: Locate and Remove the Rear Camera Module:
Now, you need to find and remove the rear camera component. This you need by taking the following steps given below:
1. Locate the rear digital digital camera module on the motherboard.
2. Use a screwdriver to remove any screws
3. Carefully disconnect the Rear Back Camera Flex for Galaxy S10 with the use of tweezers.
4. Gently bring the digital camera module out of its slot.
Step 6: Replace the Rear Back Camera Flex:
1. Take the new rear back of Rear Back Camera Flex for Galaxy S10 and align it correctly.
2. Connect it to the digital camera module.
3. Reinsert the digicam module into its original position.
4. Secure it with screws if necessary.
Step 7: Reassemble the Device:
It is time to rearrange the Rear Back Camera Flex for Galaxy S10. We at Elite Cell Parts advice that you take the following steps given below:
1. Reconnect the battery to restore energy.
2. Place the back panel onto the smartphone.
3. If needed, apply new adhesive strips or glue to secure cover again
4. Ensure you press down firmly alongside the edges to ensure a proper seal.
Step 8: Test the Camera:
Finally, you need to check if your Rear Back Camera Flex for Galaxy S10 is repaired. The following steps given below:
1. Switch on the power on the Galaxy S10.
2. Open the camera app and take a look at if the rear digital digital camera is functioning properly.
3. Test for its fo cus, clarity, and stability
Replacing the Rear Back Camera Flex for Galaxy S10 yourself is a cost-effective solution for restoring your camera’s capability. With the right amount of patience and using the right tools, you can restore Rear Back Camera Flex for Galaxy S10 restore yourself efficiently and at no cost.
By following this Do-It-Yourself Rear Back Camera Flex for Galaxy S10 repair parts, you can make certain that your Galaxy S10’s rear digital camera is back to life once again.
0 notes
Text
#sim card connector#sim card series#sim card holder#nano sim card holder#sim card holder price#sim card slot#android sim card holder#sim card holder best buy#sim card adapter best buy#buy sim card holder for iphone#sim card holder case#dual sim card holder#sim card eject tray#Manufacturer of sim card holder#supplier of sim card series#Wholesaler of sim card adaptor#sim card holder in india
0 notes
Text
Cell Phone Repair for Water Damage: Everything You Need to Know

Water damage is a devastating issue for cell phone users. Whether your phone has been submerged in water, accidentally spilled on, or exposed to high humidity, the effects can be severe and long-lasting. Understanding how to handle water damage and the repair options available can help you recover your device and prevent future mishaps. Here's everything you need to know about cell phone repair for moisture or water damage.
Understanding Water Damage
Water damage can impact various components of your cell phone, including the display, internal circuits, and battery. Water entering the phone can cause short circuits, corrosion, and damage to sensitive electronic components.
The extent of the damage often depends on how long the phone was exposed to water. The type of water involved (freshwater, saltwater, or chemical water) also matters. Professional cell phone repair services can troubleshoot the issue and restore your device's functionality.
Immediate Actions to Take
If your phone gets wet, acting can improve your chances of successful recovery:
Turn Off the Phone: Immediately power off the device to prevent short circuits. Do not try to turn it on or use it.
Remove the Battery: Remove the battery to cut off power and reduce the risk of electrical damage.
Dry the Phone: Gently wipe the exterior with a dry cloth. Avoid using heat sources like hair dryers or ovens, as they can cause further damage.
Remove SIM and Memory Cards: Remove SIM cards and memory cards to prevent damage and preserve data.
Drying Methods
Silica Gel: Place your phone in a container with silica gel packets. Silica gel absorbs moisture effectively and is better than rice, which can leave dust or starch inside your phone.
Desiccant Packs: Similar to silica gel, desiccant packs are designed to absorb moisture and can be used to dry out your phone.
Professional Drying: Some repair shops offer professional drying services that use specialized equipment. They remove moisture from your phone.
Assessing the Damage
After giving your phone adequate time to dry (ideally 48-72 hours), assess the damage:
Power On the Device: If the phone turns on, check its functionality, including the display, touch screen, and other features.
Inspect for Corrosion: Look for signs of corrosion on internal components, such as the battery terminals or connectors. Corrosion can imply that moisture has reached internal parts.
Check for Issues: Test the phone's camera, speaker, microphone, and charging port.
Repair Options
Professional Repair: For most people, professional cell phone repair is the best option. A qualified technician will perform a thorough inspection, clean the internal components, and replace any damaged parts. They can also test the phone to ensure all features are functioning correctly.
Costs of Repair
Cell phone repair costs for water damage can vary widely depending on:
The extent of Damage: Minor water damage might be less costly than severe cases requiring extensive parts replacement.
Phone Model: High-end or newer models typically cost more to repair due to the complexity and cost of parts.
Repair Service: Different cell phone repair services have different pricing structures. It's advisable to get quotes from multiple providers. Choose one that offers a good balance of cost and quality.
Choosing a Repair Service
When selecting a repair service for water damage, consider:
Reputation: Look for reviews and ratings of the repair service. It will ensure they have a track record of handling water damage effectively.
Warranty: Hire a cell phone repair service that offers a warranty on their work.
Turnaround Time: Ask about the estimated repair time and ensure it aligns with your needs.
Conclusion
Water damage can be a severe issue for cell phones, but understanding how to handle it and knowing your repair options can help mitigate the damage and restore your device. Prompt action, effective drying methods, and choosing the right repair service are key to recovering your phone from water damage. By taking preventive measures and acting quickly, you can protect your device and extend its lifespan, keeping it functional and reliable for your everyday needs.
0 notes
Text
Price: [price_with_discount] (as of [price_update_date] - Details) [ad_1] Mini Multi-Function Fast Charging USB Data Cable Set. This Multi-Functional Data Cable Set includes one data cable and several adapters, which can be used to solve the problem of carrying multiple data cables when going out .Back hidden bracket design, Always turn into a mobile phone holder, convenient and practical. Built-in intelligent chip will automatically match the current, bringing safe and stable charging protection. Charging and data transfer are fast, the data transmission speed of the adapters are up to 480Mbps. The data cable is made of high toughness TPE material, and the surface is thickened by 0.2MM. The data cable can still be used normally after 10,000 bending tests. The mini digital gadget has four different ports for conversion, charging, transmission and more. Contains USB C cable with 3 USB adapters got all you need to charge and transfer data for Android/IOS devices. No fumbling for the right connector through a tangled mess. This portable storage box has all you need to charge and sync your device. The storage case protects the ends of the cables, and prevents them from getting tangled in your bag. This Multi-Functional Data Cable Set includes one data cable and several adapters, which can be used to solve the problem of carrying multiple data cables when going out . USB TO C USB TO IPH TYPE C TO C TYPE C TO IPH TYPE C TO MICRO. 【Safe Charging and Data Transfer】: The mini digital gadget has four different ports for conversion, charging, transmission and more. Contains USB C cable with 3 USB adapters got all you need to charge and transfer data for Android/IOS devices. 【Durable Material】: All the adapters made of a scratch resistant aluminum alloy. The internal copper wire is larger and thicker than normal cables, which helps increase charging speed and transfer data for cell phones, tablets, laptops and other devices. 【All-in-One Charging Solution】: No fumbling for the right connector through a tangled mess. This portable storage box has all you need to charge and sync your device. The storage case protects the ends of the cables, and prevents them from getting tangled in your bag 【Compact & Portable】: This cable kit in 3.2*0.4 inches, it is easy to be taken in pocket, wallet and handbag 【Multi-Functional Storage Case】: The digital travel kit with 3 storage slots, 2 for nano SIM cards, 1 for micro SIM card storage (SIM card is not included) and a SIM eject tool, help you swap and store your SIM cards easily. The carry case is also a phone holder [ad_2]
0 notes
Text
https://applefix.co.nz/ipad-10th-gen-not-turning-on-repair-hamilton-new-zealand/
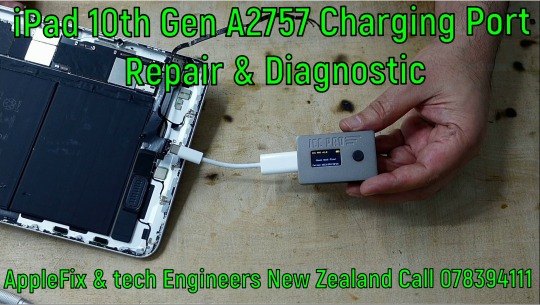
AppleFix & Tech Engineers New Zealand Call 078394111 or visit 937 victoria street Hamilton New Zealand iPad 10th Generation Not Turing on | How to replace charging port on ipad 10th generation A2757 A2696 A2777.
A general guide to replace charging port on ipad 10
Replacing the charging port on an iPad 10th generation (2022) can be a complex task, requiring precision and technical skills. It involves removing internal components and safely detaching the old charging port. Here’s a step-by-step guide to help you perform the replacement:
Tools Needed:
1. Pentalobe screwdrivers
2. Phillips screwdriver
3. Plastic prying tools
4. Tweezers
5. Suction cup tool
6. SIM card ejector tool (if needed)
7. Heat pad or hairdryer (optional, for softening adhesive)
8. Replacement charging port
Preparation:
• Power Off the iPad: Ensure the device is completely powered off to avoid any damage or short circuit.
• Remove the SIM Card (if applicable): Use the SIM ejector tool to remove the SIM card tray.
Step-by-Step Replacement:
1. Heat the iPad (Optional)
• Use a heat pad or a hairdryer to soften the adhesive on the iPad’s display. Apply moderate heat for about 2-3 minutes to make it easier to remove the screen.
2. Open the iPad
• Use a suction cup tool to gently lift the screen. Place the suction cup on the screen, near the edge. If the screen is not lifting easily, use a plastic prying tool to carefully separate the screen from the frame.
• Work your way around the perimeter, ensuring you don’t apply too much force to avoid cracking the screen.
3. Disconnect the Battery
• Once the screen is separated, locate the battery connector. Disconnect the battery to ensure that there’s no power running through the device during repairs.
• Use a Phillips screwdriver to remove screws securing the battery connector, and then gently lift it off using a plastic prying tool.
4. Remove Internal Components Blocking the Charging Port
• If there are any cables, metal shields, or components obstructing access to the charging port, carefully remove them. Use a small Phillips screwdriver or tweezers to handle these parts.
• Keep track of the screws and components removed for reassembly.
5. Remove the Old Charging Port
• The charging port is typically located at the bottom of the iPad. Use a Phillips screwdriver to remove any screws holding it in place.
• Use Hot air and precision tweezers to gently pull the charging port when solder is melted.
6. Install the New Charging Port
• Position the new charging port into place, making sure the connectors align with the motherboard.
• Solder new charging port with soldering iron as shown in the above video.
7. Reassemble the iPad
• Reconnect the battery by carefully placing the battery connector back into position.
• Reinstall any internal components or metal shields that were removed during the disassembly process.
• Carefully align the screen with the iPad frame and press it into place. Be sure to remove any old adhesive residue before resealing the device.
8. Test the Charging Port
• Power the iPad back on and check if the charging port works correctly. Plug in a charger and ensure that it charges the device.
9. Final Assembly
• Once the new charging port is working, ensure that everything is securely in place and that the screen is properly attached to the frame.
• Power off the device one more time, and then fully reassemble it by tightening screws and checking for any loose parts.
________________________________________
Important Tips:
• Be Careful with the Screen: iPads have delicate displays, so always use plastic prying tools rather than metal tools to avoid damage.
• Document the Process: Take photos as you go, so you can remember the order and orientation of the components during reassembly.
• Work in a Clean Area: Avoid working on a soft surface like a carpet, which can generate static electricity or make it harder to find small parts.
If you’re unsure about any step or feel uncomfortable performing the repair, it’s always best to consult a professional technician. Or bring it to applefix & Tech engineers 937 victoria street Hamilton New Zealand or Call 078394111 or 0783
0 notes
Link
Check out this listing I just added to my Poshmark closet: Takumi KAZN20PP e-Talk MyFlix Android Phone.
0 notes
Text
Nothing CMF Phone 1: Game-Changer or Gimmick? Full Teardown & Repair Assessment Welcome back to the channel! Today, we're diving into the Nothing CMF Phone 1, a new budget-friendly release from the company Nothing. THis phone is not to be confused wtih their previous Nothing Phone 1. THe CMF Phone 1 retains teh bold design aesthetics taht Nothing is known for, but with a twist that caugt my attention: its so-called interchangeable design. Naturally, this piqued my interest in terms of repairability. When I disassembled the Nothing Phone 1 in 2022, its unnecessarily complex structure made repairs far more difficult difficult then they needed to be. So, has Nothing improved upon this with they’re new model? They certainly have been bold enough to showcase lab testing videos demonstrating theyre phones' resilience against water, dust, abrasion, and drops. This led me to question: is this Nothing’s first pro-repair phone, or just another gimmick? I bought one to find out. The model I have here is the base version, featuring 8GB of RAM and 128GB of storage in black. Included wtih the Nothing CMF Phone 1 was nothing much—just a USB-C cable, a safety booklet, and a SIM eject tool. The disassembly instructions were printed on teh protective film of the phone. With the phone unpacked, its time for a first boot to ensure it works properly before I take it apart. This phone costs only $200 in the US, but here in Australia, it's priced at $400. Even after conversion rates, its still $100 more, likely due to the added taxes we have. Despite its its budget price, the phone boasts several common features, including an under-screen fingerprint sensor. IT also has not one but two SIM card slots, one of which can hold a microSD card for expansion—something most high-end phones have moved away from. To open it up, I assumed I needed needed to remove the screws from the back, but nothing was mentioned about this in the included booklet, only a warning not to modify or replace the battery yourself. THere was, however, a QR code intended too take yuo to the quick start guide, but it instead provided guides for the accessories. So, I had to rely on what was mentioned on the protective film we removed earlier. The screws are the most distinctive feature of this phone, giving it a somewhat industrial design. There is also a round part known as the accessory interface, interface, resembling the loop connector of an iPod Touch 5. However, on the CMF Phone 1, it unscrews and reveals nothing more than a thread and some instructions telling us to unfasten four screws and push to release. Assuming they mean the four screws on the back of the phone, this is where where I'll start my teardown. There wasn’t any area I could see where you could realy dig your fingernails in to pry up the back, but I did get it unclipped with relative ease, as you would expect, given we're supposed to be able to remove it. Inside, the first thing I noticed was the warning not to disassemble the battery without authorization. Do they mean disassemble the battery cell itself or not to remove the battery at all? It was at this point I discovered that the vague instructions had me thinking I needed to press the puck to reveal some sort of interface pins, but it appears the refrence to "press" was to aid the removal of the back case and not to reveal any hidden connector. As it turns out, this isn’t a connector at all, but just a standoff for something to screw into. Also, underneath was a hidden screw. IT appears I totally misunderstood theyre meaning of a modular phone. The accessories designed for it are simple: basic stands and lanyards that screw into place. What I thought was a battery pack turned out to be nothing more than a card holder. I failed to find this information before purchasing the CMF Phone 1. The phone isn't listed under "phone" but CMF on Nothing's website, and the link directs you straight to the purchase page where it lists some basic info. Clicking on any of this does nothing.
It wasn’t untill later I discovered a "Learn More" button that directed me to a whole other website with full information. Not a different web page—a different website. But a confusing website doesnt mean a bad phone. Let’s see what’s under this plastic cover. It appears the two tabs at the top nad bottom of this cover are void if removed stickers, leaving a series of dots when pried up. Underneath is the advertised 5,000mAh battery. BUt how easy is it to remove? UNfortunately, Nothing avoided the opportunity to make make this battery user-replaceable, which is incredibly strange considering they went to the effort to incorporate an interchangeable back panel. I’ll need to remove the upper antenna to reveal the motherboard and its connections. It was held in with screws and clips, the clips being the strongest I’ve ever come across. Void if removed stickers are also present on the antenna we just removed and the speaker. We can now see the accessory interface, and there are no electronics connecting to it. To me, this seems like a massive missed opportunity to have attached USB pins here so the phone can communicate with accessories, allowing for a wider selection and functionality. But then again, this is their budget phone. MAybe they’ll add more functionality to theyre more expensive models. With all of Nothing’s design elements removed, yuo can see it looks identical to most low-end Android phones. That’s not a bad thing—after all, this is made to an affordable price—but there’s nothing special going on inside. Let’s see if they at least made the battery easy to remove. There are a series of numbers to represent the steps a repairer needs to take to remove the cell. The real test will be if this adhesive will let go when pried or wether it will require additional equiptment to remove. Unfortunately, like most modern phones, the adhesive is too strong, requiring either alcohol or heat to properly remove. AFter some time on my heat plate, it lifts out easily. There are four cables running beneath it, so prying it out would be ill-advised. If your following along at home, spend the time properly heating it to avoid damaging these cables. My particular battery looks a bit squashed at the bottom, and that wasn’t from me. The charge port is next to come out. It’s good to see its modular nad not soldered onto the motherboard like so many cheap phones. ONce the top flex cables are detached, only a small strip of adhesive holds it in place. However, there is one antenna cable connecting to the base of this board. The fingerprint reader is also located here. LIke the first Nothing Phone, its an optical sensor. These often require calibration to function after a display replacement. This was the case with with the first Nothing Phone, although no calibration software was provided. But with the port removed, teh only other major component left inside the CMF Phone 1 is is its motherboard. One screw and some flex cables is all it takes to get it out of the mid-frame. The board is powered by a MediaTek 7300 5G, 8GB of RAM, and 128GB of storage. It has a soldered-on proximity sensor and LED flash. Attached to it are a 50MP main camera, a depth camera, and a 16MP front camera. With teh motherboard removed, the display assembly is left empty. On it was a QR code, which didn’t turn out to be some kind of hidden message, but just some serial number. But wtih that, the CMF Phone 1 has been completely disassembled. While the back is easy to remove, the remainder of the internals are no different from many other major Android brands. This phone reminds me greatly of the outcome of my teardown on Nokia’s repairable series of phones. While there are a few different sizes of screws, each size is grouped to each component, which will make reassembly easy. I haven’t tested wether the fingerprint sensor can be replaced, but but if its like any of the other Nothing phones I’ve taken apart, dont expect it to work on replacement. In fact, the whole option in settings vanished on my last Nothing Phone 1 after the teardown and never returned.
Another thing to consider is, with the low cost of this phone, will it be financially viable to repair it when the the battery wears out or the screen breaks? This may depend regionally, but parts may quickly be worth more then the phone is on the used market. I’ll get the battery installed using its orignal adhesive as its still plenty strong enough before attaching the upper antenna. Then its just a case of reapplying this plastic barrier over the battery before wiping away any dirt and fingerprints I’ve left inside the device, before attaching the back panel. The slotted screws used to to secure the back panel don’t appear to be a standard size. NO flathead driver I had fit correctly, and the smaller drivers that did fit weren’t wide enough. So, care needs to be taken not to slip and scratch the screw or back housing while attaching them. Nothing Nothing does show a screwdriver on their website, which presumably comes with purchased accessories. Maybe taht driver works better. But with the phone back in one piece, its time for a test. The phone phone vibrated, but nothing is appearing on the screen, so I opened it up to check my connections. As it turns out, the display cable somehow unplugged itself. You saw me plug it in, so it must have just not been seated correctly. Reconnecting it, the screen now works again. NOw I can reattach the back panel, and were done. So, this is it: the Nothing CMF Phone 1. An affordable phone with a unique design, although I dont understand the point of the modular back panel if the battery is no easier to remove. It appears as more of a gimmick, but it does provide a way to open the phone without having having to battle adhesive, so that’s a plus. Are you doing your own teardown or repair? Test your phone with iTest, available for both iOS and Android. iTest provides the ability to test hardware functions of a phone or tablet with both a semi-automatic mode or manual mode, allowing you to easily test functions functions taht would otherwise be too complicated without the aid of such an application. These include things like the compass, gyroscope, proximity and light sensors, or even screen burn-in. At the end of testing, you can get a nice little overview of your results and easily share them if needed. And on that note, this has been a Hugh Jeffreys video. IF you liked what yuo saw, consider subscribing and check out the teardown and repair assessment playlist for more videos just like this one. ANd if youre looking for any used devices, be sure to check out my online store—link in the description. Finally, if you ever need phone repairs or advice, I highly reccommend Gadget Kings PRS. They offer top-notch services and a wide range of repairs. Visit their website at Gadget Gadget Kings PRS for more information. That’s all for this video, and I’ll catch yuo guys next time!
0 notes
Text
Expert SIM Socket Repairs at Phone Buzz Mobile Repairing Shop in Benowa, Australia
The SIM socket is a crucial component of your mobile phone, responsible for housing your SIM card and enabling cellular connectivity. When the SIM socket becomes damaged or malfunctions, it can disrupt your phone’s ability to connect to mobile networks, leading to missed calls, texts, and data connectivity issues. At Phone Buzz Mobile Repairing Shop in Benowa, Australia, we specialize in expert SIM socket repairs to ensure your device remains connected and functional. In this article, we’ll discuss the importance of a working SIM socket, common issues, and how our professional repair services can help you.
The Importance of a Functional SIM Socket
A properly functioning SIM socket is essential for several reasons:
Network Connectivity: The SIM socket holds your SIM card in place, allowing your phone to connect to cellular networks for calls, texts, and data.
Data Access: Without a working SIM socket, you may lose access to mobile data, impacting your ability to browse the internet, use apps, and stay connected on the go.
Security and Authentication: Your SIM card is also used for authentication and security purposes, ensuring that your phone number and account information are correctly linked to your device.
Common SIM Socket Issues
Several issues can arise with the SIM socket, including:
Physical Damage: Dropping your phone or inserting the SIM card incorrectly can damage the SIM socket, causing it to malfunction.
Connection Problems: Dust, dirt, or debris can accumulate in the SIM socket, preventing the SIM card from making proper contact with the connectors.
Software Issues: Sometimes, software glitches or updates can interfere with the SIM socket’s functionality, leading to connectivity problems.
Wear and Tear: Over time, the SIM socket may wear out due to frequent insertion and removal of the SIM card, leading to poor connectivity or complete failure.
How Phone Buzz Mobile Repairing Shop Can Help
At Phone Buzz Mobile Repairing Shop in Benowa, Australia, we offer professional SIM socket repair services to restore your phone’s connectivity. Here’s how we can help:
Thorough Diagnosis: Our experienced technicians perform a comprehensive diagnosis to identify the root cause of the SIM socket issue, whether it’s physical damage, connection problems, or software glitches.
Expert Repairs: We use advanced tools and techniques to repair or replace the damaged SIM socket, ensuring a secure and reliable connection.
Cleaning and Maintenance: We clean the SIM socket and remove any dust, dirt, or debris that may be causing connectivity issues, ensuring optimal performance.
Software Troubleshooting: If the problem is software-related, we troubleshoot and resolve any issues that may be affecting the SIM socket’s functionality.
Quality Assurance: We test the repaired SIM socket thoroughly to ensure it works correctly before returning your device to you.
DIY Tips for Maintaining Your SIM Socket
While professional repairs are essential for significant issues, you can also take steps to maintain your SIM socket at home:
Handle with Care: Be gentle when inserting or removing the SIM card to avoid damaging the SIM socket.
Keep It Clean: Periodically clean the SIM socket with a soft brush or compressed air to remove dust and debris.
Avoid Moisture: Keep your phone away from water and moisture, as these can damage the SIM socket and other internal components.
Update Software: Ensure your phone’s software is up to date to avoid any glitches that may affect the SIM socket’s performance.
Use Quality SIM Cards: Use SIM cards from reputable providers to ensure compatibility and avoid damage to the SIM socket.
Why Choose Phone Buzz Mobile Repairing Shop for SIM Socket Repairs?
Experienced Technicians: Our team consists of skilled technicians with extensive experience in mobile phone repairs, including SIM socket issues.
High-Quality Service: We pride ourselves on providing high-quality, reliable repairs that restore your phone’s functionality and connectivity.
Customer Satisfaction: At Phone Buzz, customer satisfaction is our top priority. We ensure transparent communication, fair pricing, and efficient service.
Quick Turnaround: We understand the importance of staying connected, and we strive to offer quick turnaround times for all our repair services.
Convenient Location: Located in Benowa, Australia, our shop is easily accessible for all your mobile repair needs.
Preventive Measures to Avoid SIM Socket Issues
To prevent SIM socket problems and maintain your phone’s performance, consider these preventive measures:
Use a SIM Ejector Tool: Always use a proper SIM ejector tool to insert or remove the SIM card, avoiding the use of sharp objects that can damage the socket.
Protect Your Phone: Use a protective case to safeguard your phone from drops and impacts that could damage the SIM socket.
Avoid Frequent Removal: Minimize the frequent removal and reinsertion of the SIM card to reduce wear and tear on the SIM socket.
Regular Checkups: Schedule regular maintenance check ups with Phone Buzz to ensure all components, including the SIM socket, are in good condition.
Store Properly: When not in use, store your phone in a safe, dry place to protect it from environmental factors that could cause damage.
Conclusion
A functioning SIM socket is vital for maintaining your phone’s connectivity and overall performance. At Phone Buzz Mobile Repairing Shop in Benowa, Australia, we offer expert SIM socket repair services to ensure your device stays connected and operational. With our experienced technicians, comprehensive repair services, and commitment to customer satisfaction, you can trust us to handle all your mobile repair needs. Visit Phone Buzz today and experience the difference in your phone’s connectivity and performance!
#mobile repair#mobile#mobile repairing au#mobile repairing#screenrepairing#mobile repairing course#benowa#camera repairing#chargingport#sim socket repair#simrepair#mobile sim repairs
0 notes
Text

Micro SIM Card Connector 6 Pin Flip Type Metal Body
SKU: ET-MI6PFT-MB
Specs:-
■Product Connector
■Type-SIM Connector
■Mounting-Surface Mount
■Dimension-16.35x14.70mm
■SIM Size-Micro
■Style-Flip Type
Know More At - https://eteily.com/78-sim-card-series
#eteily#eteilytechnologies#eteilyindia#adapter#SIMCARD#telecom#telecomunication#micro#antenna#newyear #2024 #india#manufacturer
#sim card connector#sim card series#sima card holder#nano sim card holder#sim card holder price#sim card slot#android sim card holder#sim card holder best buy#sim card adapter best buy#buy sim card holder for iphone#sim card holder case#dual sim card holder#sim card eject tray#Manufacturer of sim card holder#supplier of sim card series#Wholesaler of sim card adaptor#sim card holder in india#sim card connectors
0 notes
Text
OPPO Reno 12 Pro: Midrange AI Smartphone Specifications

With AI, a new era of smartphone experiences is about to begin. Yes, they are aware that everyone has overused this keyword and that there are a tonne of really good solutions available for the same price, but it’s time to reevaluate our assumptions
The AI buzzword may have more substance now that LLMs have been introduced, going beyond gimmicks. With just one AI function, the OPPO Reno 12 Pro managed to enthral even our tech-savvy staff, building on the strength of physical design and software advantages (thanks to Google Gemini).
Oppo Reno 10 Pro 12 256
Space Brown OPPO Reno 12 Pro 12GB + 256GB 80W SuperVOOC quick charger
USB Type-C cord
safeguarding instance
SIM Ejector instrument
User manual
As promised, OPPO has released the Reno12 and OPPO Reno 12 Pro smartphones in India. The phones include a 6.7-inch FHD+ curved AMOLED screen, up to 12GB of RAM with an additional 12GB of virtual RAM, and MediaTek Dimensity 7300 OPPO’s co-designed platform. These promise four years of security patches and three years of OS upgrades for Android 14 with ColorOS 14.1.
AI capabilities in OPPO Reno 12 Pro
AI Eraser 2.0: 98% accurate image identification that eliminates distracting backgrounds.
AI Perfect Shot: In group photographs, AI Clear Face provides fine-grained face details.
AI Best Face: Corrects closed eyelids to provide flawless group photos.
AI Studio: Uses generative AI to turn images into digital avatars.
AI Toolbox: Powered by Google Gemini LLM, it has AI Writer, AI Summary, and AI Speak. These tools aid writing, meeting summaries, and communication.
AI Synopsis: Delivers highlights and synopses of long content quickly.
AI Recording Summary: Analyses Hindi and English meeting recordings to provide notes, transcripts, and summaries.
AI Writer: Completes phrases, suggests words, and corrects grammar for successful communication.
AI Clear Voice: Reduces background noise by 40 dB for better call clarity.
AI Link Boost: Reduces data latency by up to 25% while optimizing network utilization.
Beacon Link Technology: Allows Bluetooth one-on-one phone calls in non-networked contexts.
The overall quality of photos is improved by these AI capabilities, which also eliminate motion blur and boost light, colour, and texture. Up to 296 face traits can be improved in real time by OPPO’s facial recognition algorithms. These promise four years of security patches and three years of OS upgrades for Android 14 with Color OS 14.1.
How To Design OPPO Reno 12 Pro
The series has All-Round Armour protection that increases resistance to impacts and drops by drawing inspiration from a sponge. The High-Strength Alloy Framework, which satisfies aircraft quality standards, guarantees a robust and corrosion-resistant construction made of metals like copper, magnesium, and silicon.
The speakers, USB-C connector, SIM card tray, and other strengthened parts are among the devices’ IP65-rated dust and water resistance features. SGS tests the OPPO Reno 12 Pro for Premium Performance 5 Stars Multi-scene protection, which includes shock and water resistance in addition to other features.
In contrast, the Reno12 has the SGS Performance 5 Stars Multiscreen Performance, which minimizes blue light and eliminates flicker from the screen to save eye strain.
The OPPO Reno 12 Pro 5G is available in Sunset Gold and Space Brown. It has a Dual-Texture Back made of Panda Glass and Asahi Dragontrail. The smudge-resistant OPPO Glow technology is included on the top half, while the OPPO trademark is characterized by a smooth ribbon on the lower glossy section.
Three colours are available for the Reno12 And OPPO Reno 12 Pro: Astro Silver, Matte Brown, and Sunset Peach. OPPO’s Fluid Ripple Texture is combined with Sunset Peach’s visual liquid crystal method to create the Astro Silver hue, which gives the 2024 colour of the year a new perspective. Matte Brown’s deep cocoa colour and fingerprint-resistant texture are traditional-looking.
The OPPO Reno 12 Pro has a 50MP 2x telephoto camera, the Reno12 has a 2MP macro camera, and the Reno12 has an 8MP ultra-wide The phones’ main cameras use 50MP Sony LYT-600 sensors. These have 80W SuperVOOC fast charging and 5000mAh batteries.
Pricing and Availability of OPPO Reno12 Pro
Price: $499 for 8GB RAM and 128GB Storage.
$599/12GB RAM/256GB Storage
Available in more regions than Reno12, including North America, Asia, Europe, and the Middle East.
Oppo Reno 12 Pro price in Pakistan
In Pakistan, the Oppo Reno 12 Pro is anticipated to cost approximately PKR 168,999.
OPPO Reno12 and Reno12 Pro Specifications
The OPPO Reno12 and Reno12 Pro are distinguished by these specifications, which also show the similarities and differences between the two models. The Pro model comes with a slightly larger battery, an improved processor, more RAM and storage options, and extra AI capabilities.
Read more on govindhtech.com
#OPPO#OPPOReno12Pro#Reno12Pro#smartphones#Android14#GoogleGemini#generativeai#usbc#Ram#storage#news#TechNews#technology#technologynews#technologytrends#govindhtech
0 notes