#sm 57 shure
Text
Comment enregistrer sa guitare sur ordinateur
Guide complet pour un home studio réussi.
Introduction
Si vous êtes un passionné de musique et que vous souhaitez enregistrer votre guitare sur ordinateur, vous êtes au bon endroit ! Dans cet article, nous allons explorer en détail le processus d’enregistrement de votre guitare dans un home studio.
Nous mettrons également en avant les équipements essentiels tels que la FOCUSRITE SCARLETT SOLO…

View On WordPress
#ableton live 11 standard#enregistrer guitare sur ordinateur#enregistrer sa guitare#focusrite scarlett solo g3#home studio#nt usb#nt usb mini#rode mini#rode mini usb#rode nt mini#rode nt usb#rode nt usb mini#rode nt usb+#rode nt1 usb#rode usb#rode usb mini#shure 57#shure sm57#shure sm57 lc#sm 57#sm 57 shure
1 note
·
View note
Text
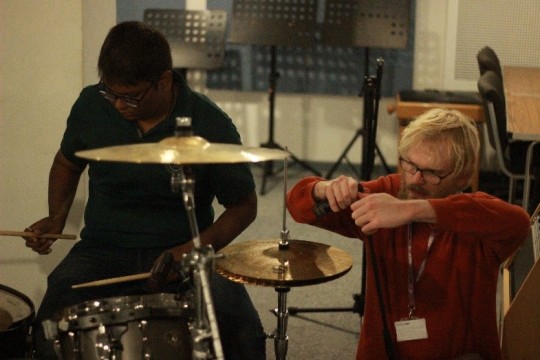
Week 9 - Practice - Recording Drums
For this session, we booked additional studio time, allowing us a full three hours to set up the microphones and try different techniques.
The setup process was fairly similar to the previous session, with Daren arranging the mics and Isabel and I plugging in the various wires. This time, it was a lot more complicated, so it was important to keep track of what went where, which I feel we did quite effectively.
We first attempted the Glyn Johns technique, as see below.
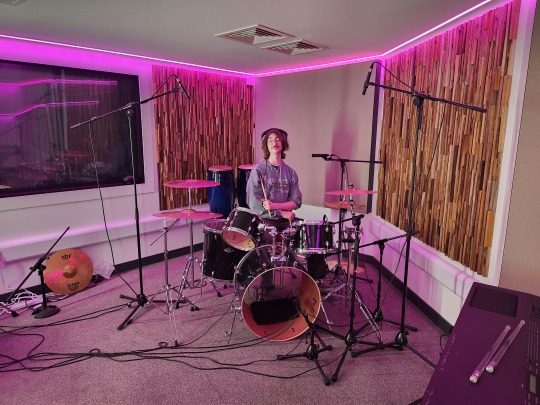
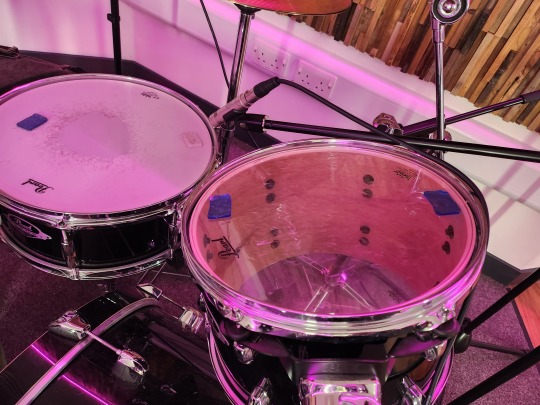
For this, we used an Audio Technica ATM250 to capture the kick, positioned just inside of the port hole and the Sontronics drum kit. For our overheads, we used Shure SM-57s. The overheads were equally distanced from the snare, as outlied in the technique.
We also used two separate mics from the drumkit for the snare, with the top one positioned far enough away from the drum that Jack wouldn't hit it while playing.
We also gave Jack a separate microphone that we wouldn't record, so he would be able to speak to us and give us direct feedback (being able to hear us through the same headphone setup as we had previously).
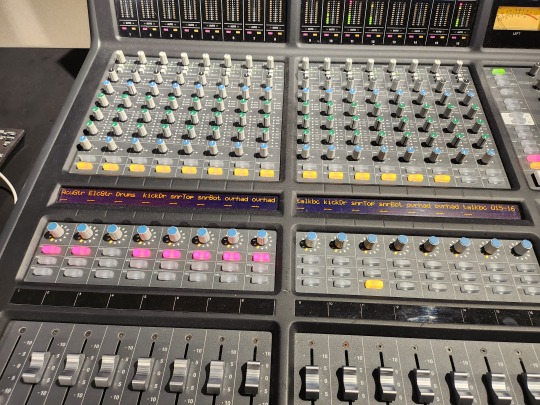
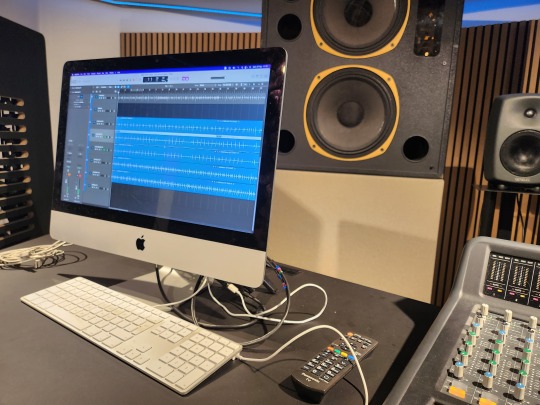
One perk of using Studio 2 for this recording was that we could see our track titles clearly labelled on the desk - this made it clear which parts were which when adjusting levels, particularly during the setup stage.
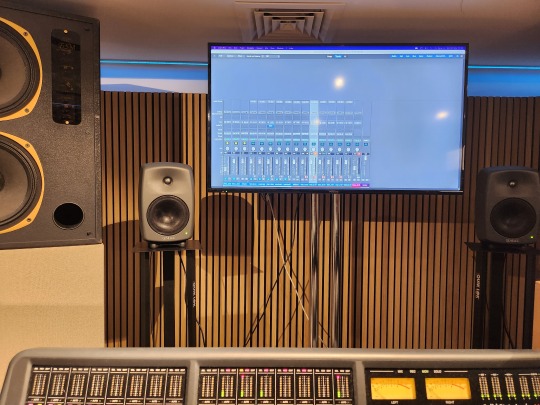
It was also useful to have the Logic sliders up on the big screen as well, as it made it easy to adjust these as we went along - this is something I definitely want to do whenever I'm in Studio 2.
With the microphones in place, I asked Jack to play a basic loop that could be repeated - Daren, Isabel and I were all in the control room for this process. We had a similar process to the acoustic guitar in terms of tempo, where it was trial and error to find one that worked. We could have alleviated this by choosing a drum loop from a song that Jack was familiar with, as it would be easier to stay in time. Once we agreed on the loop, we began recording, once again doing multiple takes.
Jack asked us to increase the sound of the metronome in his ears, and I initially struggled with this due to our inexperience in the studio - we turned it up in the Logic settings but it didn't appear to make much of a difference, and any adjustments on the physical outputs only affected the output to the headphones as a whole.
Below is the completed mix of the Glyn John's method that we used in our podcast:
Having completed the Glyn John's method, we next tried the X-Y pair - this was relatively simple to set up, and we again recorded multiple takes. Below is the completed X-Y mix we used in our podcast:
Personally, I preferred the X-Y, as it was less time consuming and produced a sharp, punchy sound. However, the Glyn John's did feature a better stereo image, which could prove useful for some projects.
Overall, this session went well, however I believe it could have benefitted from a more thorough discussion beforehand about how we wanted to approach the drums - we spent a lot of time today trying to work out what we would play and thus how we should set up the microphones around this, which could have been avoided if we had discussed more formally as a group prior. Despite this, we recorded everything necessary, and packed up in a reasonable time given how many microphones we had set up.
0 notes
Text
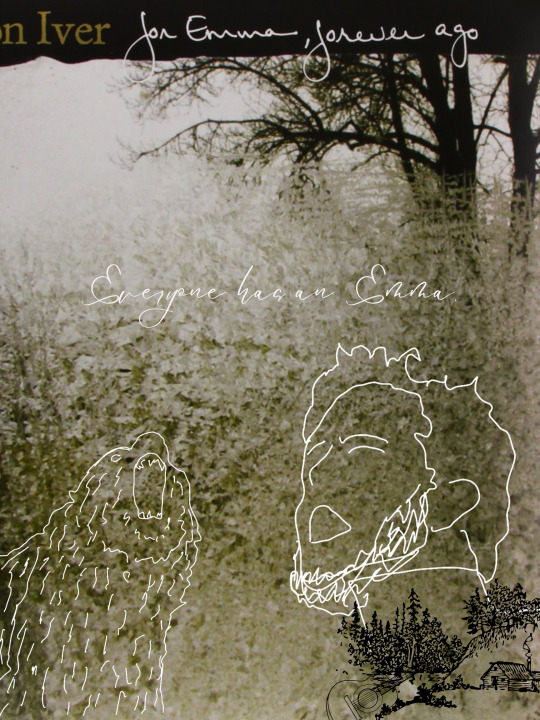
Folk Fridays are back! This week is all about Justin Vernon and the time taken in isolation to create the iconic record "For Emma, Forever Ago".
Running away(to write some songs)
Many of us dream of running away. Of venturing into the unknown and emerging with an inward discovery about ourselves and our capabilities. Throughout music history, many musicians have fled to the comfort of their country homes or private studios in order to write powerful pieces. But in my humble opinion, no one quite knows how to disappear and sink into the solitude of creativity like Justin Vernon.
It was November of 2006 and Vernon was in the midst of what he calls the greatest depression of his life. He was 25 struggling with band tensions, remnant symptoms of his long battle with pneumonia, and arguably the worst ailment of all: heartbreak. So, he packed up his belongings and drove to Dunn County, Wisconsin to his father’s cabin in the woods to escape adulthood. Vernon was completely unaware that he would reemerge from this venture with an album that would change indie-folk music forever.
Isolation
During his first couple of weeks in Wisconsin, Vernon did nothing but watch TV and drink cheap beer. As he puts it he spent his time “just breathing in and out for a while.” He became self-sufficient and hunted for his food, creating complete isolation from society. The idea of running away and being alone with your thoughts is scary to some and idyllic to others. But one thing rings true for all, creativity thrives in space not suffocated by the pressures of everyday life. Although Vernon wasn’t necessarily creative in his first weeks of isolation, it was this act of doing nothing that cleared the space he needed to create something different.
(we owe it all to) The Bear
Days had seemed to blend together and the endless stream of TV, hunting, and boredom was starting to amplify Vernon’s depression. Thankfully, nature intervened when late one-night Vernon heard scratching noises and low growls. He slowly crept to the porch to find a grizzly bear trying to get into his house. Filled with primal fear he screamed and screamed, eventually scaring it away. This bear is pivotal to this story and should maybe even be accredited to the creation of “For Emma, Forever Ago” because in a strange way, it helped Vernon find his voice again. It was through this fearful screaming that Vernon remembered he could make noise.
I hear it in the distance
In the following days, Vernon swore he heard a choir in the distance. Call it paranoia or the hallucinatory effects of complete isolation but he felt the need to find a way to record the choral piece replaying in his head. He took an icy walk to his car, got out his trusty vintage Silvertone S1348 and Shure SM 57 mic, and sat down to write. He recorded his own voice and edited it to sound like a warm, full chorus on ProTools, which eventually became the beautiful melodic intro to Lumpsum. Without the interference of others and alone with his own thoughts Vernon’s creative process had begun. The infamous record “For Emma, Forever Ago” was in its beginning stages. Over the next couple of weeks, Vernon would continue to write melancholy yet comforting pieces about loss, love, and growing older.
“Everyone has an Emma” -justin vernon
Many of us have dealt with the heartbreak that comes with falling in love for the first time. It’s a pain that never seems too dull. The album “For Emma, Forever Ago”, was inspired by Vernon’s first love, whose middle name was Emma. Alone in his isolation, he was given the time and space to confront the feelings of heartbreak and write the greatest breakup songs ever written.
“Emma isn't a person. Emma is a place you get stuck in. Emma is a pain that you can't erase.”
The new yorker, 2009
Emma is a different reality for everyone, whether it's a favorite place you moved from, a dear friend you haven’t spoken to, or a childhood dream left behind. For me, the beauty of this record is that it’s relatable to all and felt by many. In the title track “For Emma” the lyrics “running home, running home, running home.” really stick out to me. Vernon is trying so hard to get back to a place in his life where he was young and free from the lonesome depression brought out by life’s ends.
Running Home
3 months after his escape to Wisconsin, Vernon emerged from his dad’s cabin with 9 demo tracks. He decided he would re-record, polish up the tracks, and master the record when he got home. But after a few of his friends heard the songs they begged him to release them as they were, raw and unfiltered. The amateur beauty of these tracks is what made them so popularized and inspired the mid-2000s movement of folk indie. Bands like Fleet of Foxes and The Head and The Heart gained inspiration from Bon Iver’s slow-paced, soft-sung melodies. From Flume’s twangy, acoustic melody played on a cheap Ebay guitar to the inspired chorus sounds at the beginning of LumpSum. “For Emma, Forever Ago” is one of the most beautifully written, poetic, and sweetest records I’ve ever had the honor of listening to. It is a living example of how isolation often leads to masterful work. Vernon proves you don’t need a fully stocked studio or a band of musicians to create your best work. Sometimes you just need to run away to find your sound and write a record.
*Disclaimer- Some stories are dramatized for effect*
0 notes
Text
Nivis - Rain on a Funeral March
https://youtu.be/X0SZRGHBPYw
Artist Bio:
In 2020 Fjolla – only 16 years old at that time – and Johannes found the Indiepop Band Nivis. Fjolla’s unique and velvety voice shapes Nivis’ sound that employs classic indie guitars as well as carefully designed synthesizer sounds. During corona restrictions they produce over 20 songs, four of which are already released on spotify. Their lyrics are streaked by self-doubt and melancholy but from such an authenticity that there’s only one conclusion: they sing about personal experience. „We write sad songs about sad stuff . Have fun with it.“
Instruments and Audio Equipment used when creating this track:
DAW: Ableton Live 11 Interfaces: RME Fireface, Audient ASP880 Microphones: Neumann TLM 103, Sennheiser e609s, Shure SM 57s
Where to find out more:
www.nivis-music.com open.spotify.com/artist/7csU2l7ctqjnHYP64gvIHF www.youtube.com/@nivismusic9820 www.instagram.com/nivis.music/ www.facebook.com/nivis.music
0 notes
Photo
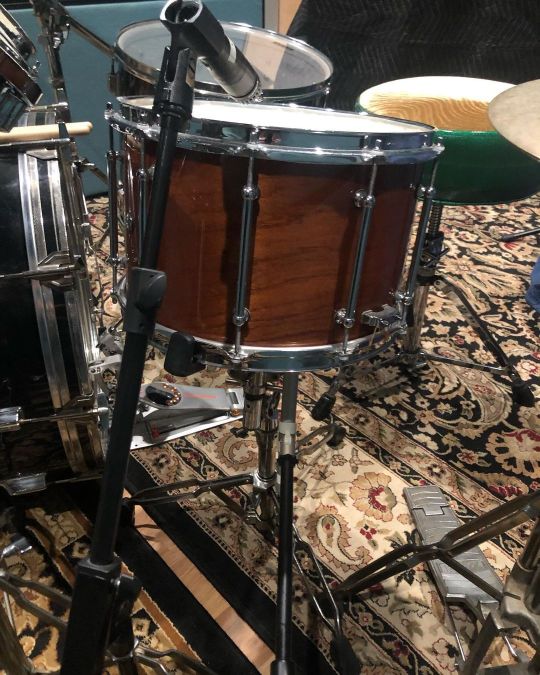
Old-Skool snare micing: Shure SM-57 on top and a Shure SM-81 on the bottom. This is a mahogany snare so it’s a bit darker than your average snare. Very woody. And where’s my help today? 😂#postprostudio #shure (at Post Pro Recording Studio) https://www.instagram.com/p/CivEfkEuVHA/?igshid=NGJjMDIxMWI=
0 notes
Text
MCLUCAS'S MUSIC INDUSTRY CONFIDENTIAL: The Worst Investment I Ever Made
MCLUCAS’S MUSIC INDUSTRY CONFIDENTIAL: The Worst Investment I Ever Made
Companies are SO good at the “this is the one piece of gear standing between you and a chart-worthy album” and honestly, people like me have fallen for that trap more than once. After looking back on thousands of dollars lost and no improvement, there is one investment I made that was…. Just. THE WORST. (more…)
View On WordPress
#8-channel interface#advice for working musicians#analytics#Drummer#gear as an investment#John McLucas#making it in music#MCLUCAS&039;S MUSIC INDUSTRY CONFIDENTIAL: The Worst Investment I Ever Made#monetizing your music career#pro audio#producing#professional recording#Shure SM-57#the lifetime value of a fan made at a show#touring#YouTuber
1 note
·
View note
Text
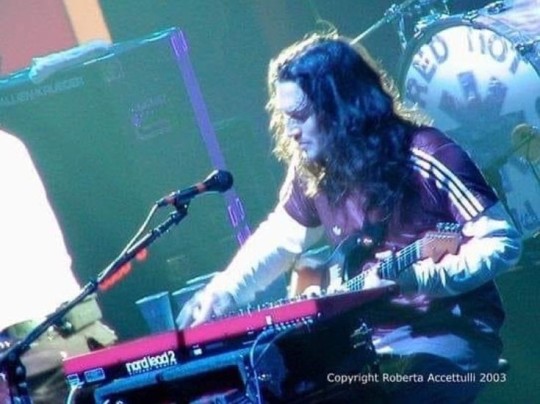
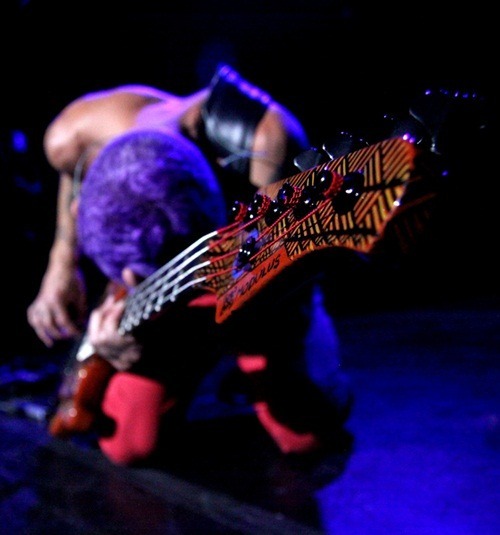
Recording the Red Hot Chili Peppers’ ‘Unlimited Love'
John Frusciante talks playing synths with Flea, Ryan Hewitt discusses capturing bass and guitar.
GUITAR, BASS, MODULAR SYNTH
As for the other instruments, Hewitt used an EV RE-20 on Flea’s bass cabinet, along with an Acme DI box. “Flea is such a powerful, aggressive player that you need a microphone that is slightly forgiving and soft-sounding to counter his aggressive playing,” Hewitt says.“You don’t want a detailed, super-responsive mic for someone who is playing that hard. The DI box is a simple transformer that sounded so great on him. Those both went to Neve 1073 preamps and then Distressors. Super-simple. I also had a Little Labs in-between phase box on the DI to bring it into better phase coherence with the amplifier.”
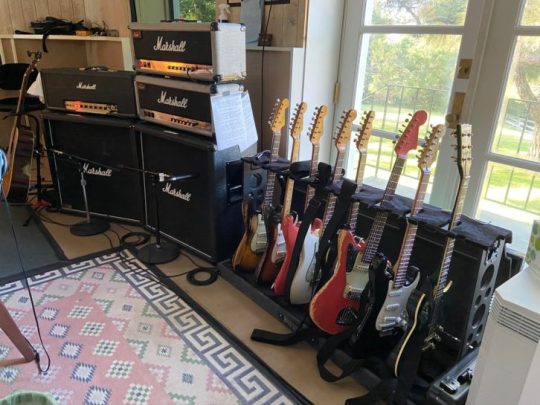
On Frusciante’s main guitar rig, he placed an SM-57 up close and a Telefunken U-67 further away. “I don’t think I even EQ’d him,” Hewitt remarks. “The tone is in his fingers, in his pedals and in his Marshall amps.”
Hewitt used a U 47, U 67, KM 54 combination on the acoustic guitars; a Shure SM 7 on Kiedis’ lead vocals; an AKG C-12A on Frusciante’s vocals; a C12 on the piano; and a U 47, Sony C-37, C-38, Mojave MA-37, Royer 121, U 67 and RCA BK-5 on guitar and keyboard overdubs. Everything went through the Neve 1073 preamps, except guitar/ keyboard overdubs, which went through various preamps, including Quad Eight, Chandler Limited TG2 and REDD 47, CAPI, Vintage UA and API.One thing that may be different on this record is the Frusciante-influenced DX7 synth and Mellotron overdubs.
“He’s a master of modular synthesis,” Hewitt says. “He has this big modular synthesizer that he will tweak and mess around with for hours and get sounds. We have a lot of that on this record where it’s programmed, but it’s flowing with a band that is not playing to a click.”
“I’m pretty good at programming a DX7 synthesizer, but I had never recorded it through an amplifier,” Frusciante admits. “I had just recorded it straight into the board. So we were recording it into an Ampeg tube amp, and Ryan was using whatever microphone [a U 47, U 67 or RCA BK-5, depending on the sound] and going through all the old nice mic pres, and we got such warm sounds that I would have thought they were a Mellotron.”
3 notes
·
View notes
Text
Here...have a 30 MINUTE THUNDERSTORM. Yer welcome.
http://www.beebstuff.net/misc/AustinThunderstorm02-21-1998.mp3
That post about hints to overcome the night manifestations of PTSD earlier set me to thinkin’ a minute about my “nightly thunderstorm” and how much it helps me. So I figured I’d share it. Maybe someone might get some comfort from it, like I do. I recorded this “live” a long time ago.
Tried to upload this file here, and no freakin’ way. Too big.
Tried to upload it as an audio only file on YouTube. No workee.
SO...here’s what I decided to do. I have got tons of webspace I pay out the nose to Dotster for. I uploaded the file to the URL above (and below). You can download it to your computer/phone/ipod/whatever. I was going to try to monetize it, but I just figured, nah...the world needs to hear this. it might help somebody.
The story goes like this:
On February 21, 1998, a hum-dinger of a “squall line” came through Austin. This line of thunderstorms was pretty damn intense on the radar, so just as it was coming into range, I decided to record it.
One Shure SM-58 was out the east-facing front screen door. One Shure SM-57 was pointed out the screened north-facing window. Both mics were plugged directly into my Nakamichi CR-1A cassette deck. Recorded onto a Maxell UDXLII, of course.
I have had this recording in digital form since about 2000. It existed only as that direct-to-cassette recording before. This is the “final version”, as far as me tweaking the levels/etc.
Texas went through some hideous drought years in the early-mid 2000′s. There was one year where it didn’t rain from like April until September. At all. SO, I would burn this onto CD and give it to friends to use as “Drought Therapy”. This CD blasting on a good stereo, coupled with some super-cold AC? DROUGHT THERAPY!
After moving out here to SF Bay in 2016, it quickly became apparent I was having “RAIN AND THUNDERSTORM WITHDRAWALS”.
SO...if there are any other transplanted Texans or any other people who find a REAL THUNDERSTOM to be comforting, relaxing and, yes, spiritual, then please enjoy. CERAUNOPHILIA at it’s finest. lol.
It’s about 60MB as an MP3. I am going to dig out the original source tape and do a fresh transfer one of these days...when the War is over.
ONE CONDITION, please: Don’t anybody dare try to make money off this. Share it freely ONLY. Spread it to people you know in drought-stricken areas. People who miss rain. It builds, ebbs and flows, as a squall-line of storms does.
Here’s the link again:
http://www.beebstuff.net/misc/AustinThunderstorm02-21-1998.mp3
Lemme know if you enjoy.
Love y’all. Stay safe. Stand proud. We are winning this War.
PostTexasStressDisorder

#thunderstorm#30 minute thunderstorm#free#drought therapy#ceraunophile#pluviophile#rain therapy#thunderstorm therapy#therapy#comfort#comforting#calming#soothing#rain#thunder
33 notes
·
View notes
Text
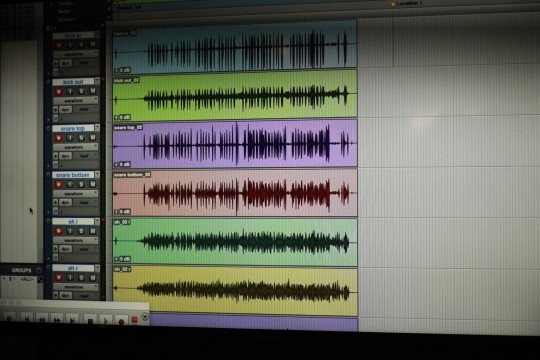
#Blog Post 8. Recording Drum: Version 2
It was Friday afternoon at the studio 1 Edward, sreedhar and I tried to record a drum track. We tried to close mic the individual drums. We multi mic’d up the kick drum using an inside and outside microphone. We also multi mic’d the snare with top and bottom mic. We experimented the phase flipping with both of these. We also used a spaced pair as overheads positioned equidistant from the snare. We also placed an omni directional dynamic mic which was placed as a point of view from the drummer. Sreedhar positioned this mic so that it was the same distance from the snare as the overheads to ensure phase coherence. We also tried an ORTF (Office de Radiodiffusion Télévision Française) stereo mic array recorded placed far from the kit to give an overall impression of the entire track.
Mics we used
We close mic’d the inside of the kick drum by using an Electro-voice RE20 microphone. Although the RE20 is described and known as a “broadcast announcer," it may also sound great in other circumstances. So we decided to put it inside a kick drum and test it output. It's a real cardioid at 180-degree off-axis without coloration. It has a frequency response of 45 – 18,000 Hz. We used a Warm Audio 47 microphone as a kick out mic. The Warm Audio WA-47 has a vacuum tube, large diaphragm, condenser microphone. The WA-47 has a seven-pin connector and several polar patterns are available. Specifically, the WA-47 may have a polar pattern of cardioid, omni, or figure 8, as well as variations among them.
Electro-voice RE20
Warm Audio 47
We close mic’d the snare top by using a Beyerdynamic M160 microphone. Interestingly, the M 160 is unique in that it has two ribbons, one above the other. This makes the output hotter than some other ribbon mics. We close mic’d the snare bottom by Shure SM57 microphone. This is best used for vocals on stage, but acoustic guitars are another very common usage. I've also heard several drummers express their love of the SM57, often setting up one of the mics for each part of their kit. So we mic’d it at snare botom.
M160
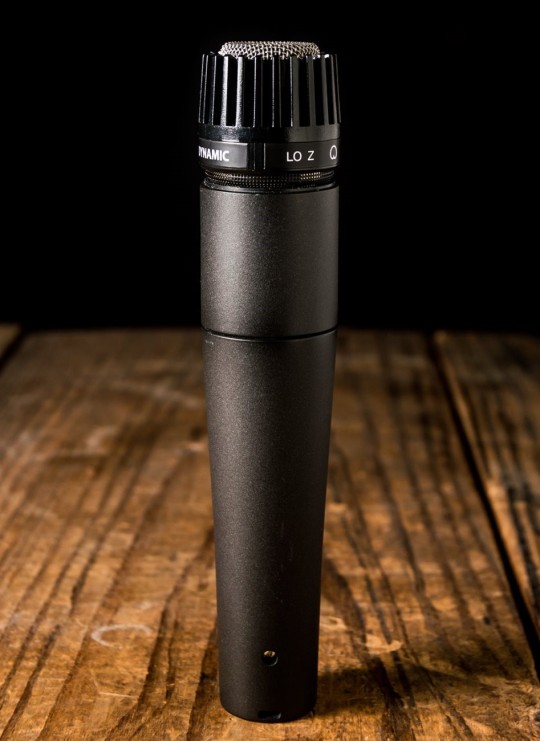
SM57
We used an Audix D6 on the floor tom. I have used the Audix D6 while trying the “Gyn Johns methord”on an earlier session and it sounds well. We used an Audix D4 inorder to close mic the high tom. The microphone has a pattern of hypercardioid pickup pattern and can withstand sound pressure rates of up to 144 dB.
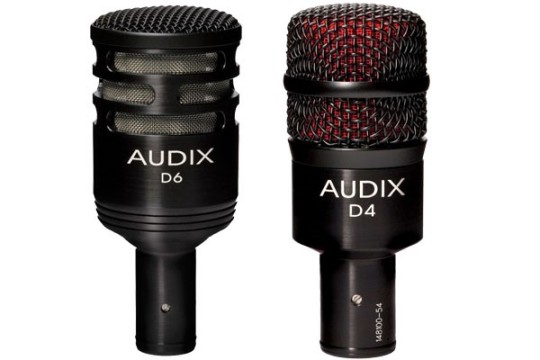
Audix D6 and D4
We used a pair of Neumann KM184 small diaphram condenser microphone for the ORTF stereo mic technique. We placed the microphone on such a way that the angle between them is about 110 degree and are seperated by a distance 17cm from each other. The entire setup was placed on a stand which is far away from the drum kit.
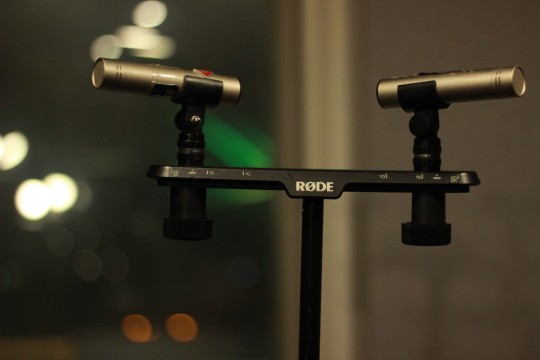
Neumann KM184
We also used a pair of Coles4038 as overheads in placed in the left and right which equidistant from the snare. The coles4038 provides a natural sonic quakity textured response to the sound signal being picked up.
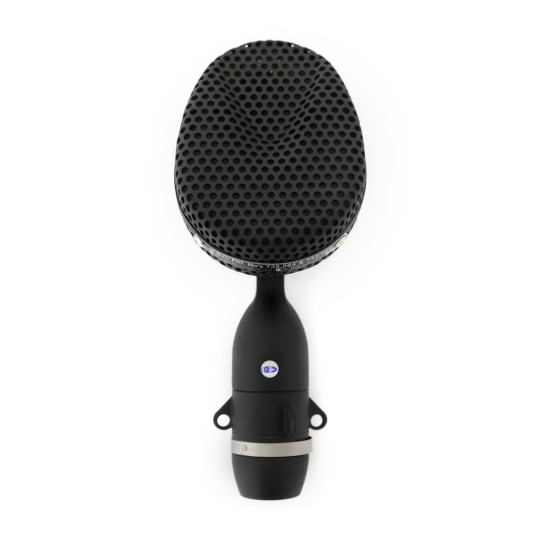
Coles4038
After Recording…
After arranging the mics properly we just gone for a rough take. Ed was playing the drum. Sreedhar and I was at the console. After adjusting the proper gain for each induvidual mic we setup for each part of the kit , we recorded a track. The sound was overall nice. We did some panning since we had got a stereo output. The overheads sound great. The ORTF technique we used also had a great sonic ambiance. As we have only less time , we just gone through some EQ and compression. Overall I learned somehow from Edward and Sreedhar. They helped me to understand what were doing and how we can make the track little more nice. I enjoyed the session well.
References
1. coles 4038. (n.d.). [image] Available at: https://www.ebay.com/p/1152607895 [Accessed 9 Nov. 2019].
2. Colletti, J. (2014). Beyond the Basics: A Survey of Stereo Microphone Techniques. [Online] Sonicscoop.com. Available at: https://sonicscoop.com/2014/11/20/beyond-the-basics-a-survey-of-stereo-microphone-techniques/ [Accessed 9 Nov. 2019].
3. DPA. (2019). STEREO RECORDING TECHNIQUES AND SETUPS [Online] Available at: https://www.dpamicrophones.com/mic-university/stereo-recording-techniques-and-setups [Accessed 9 Nov. 2019].
4. Electro-voice RE20. (n.d.). [image] Available at: https://www.altomusic.com/electro-voice-re20-broadcast-dynamic-microphone-re20#child_index=1614 [Accessed 9 Nov. 2019].
5. En.wikipedia.org. (2019). Coles 4038. [Online] Available at: https://en.wikipedia.org/wiki/Coles_4038 [Accessed 9 Nov. 2019].
6. Europe.beyerdynamic.com. (n.d.). M 160. [Online] Available at: https://europe.beyerdynamic.com/m-160.html [Accessed 9 Nov. 2019].
7. m160. (n.d.). [image] Available at: https://www.echoschall.de/de/mikrofone/baendchenmikrofone/detail/beyerdynamic-m160.html [Accessed 9 Nov. 2019].
8. Manship, K. (2009). Neumann KM 184 Review. [Online] sweetwater. Available at: https://www.sweetwater.com/insync/neumann-km-184-review/ [Accessed 9 Nov. 2019].
9. McLean, M. (2019). The Shure SM57 Dynamic Microphone: A Podcasting Review. [Online] The Podcast Host. Available at: https://www.thepodcasthost.com/equipment/shure-sm57-podcasting-review/ [Accessed 9 Nov. 2019].
10. Recordinghacks.com. (n.d.). Electro-Voice RE20 | RecordingHacks.com. [Online] Available at: http://recordinghacks.com/microphones/Electro-Voice/RE20 [Accessed 9 Nov. 2019].
11. sm 57. (n.d.). [image] Available at https://www.nstuffmusic.com/s-142-microphones.aspx?pagenum=12 [Accessed 9 Nov. 2019].
12. Themicmaniac.com. (2017). Audix D6 Vs D4 Comparison | themicmaniac.com. [Online] Available at: https://themicmaniac.com/audix-d6-vs-d4-comparison/ [Accessed 9 Nov. 2019].
13. Warm Audio. (n.d.). WA47 | Warm Audio. [Online] Available at: https://warmaudio.com/wa47/ [Accessed 9 Nov. 2019].
1 note
·
View note
Text
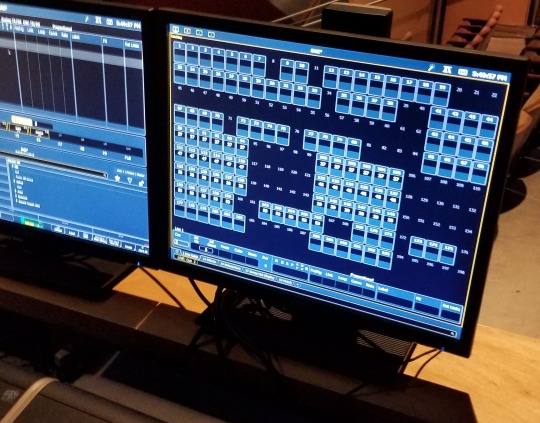
First Time Working Live Sound For An Event.
For our live sound class, we are assigned to do live events for class credit. This was my first event working live sound, although we had done an event earlier in the semester, the panorama music summit, for which I was absent. This time we worked with the Bakersfield College Jazz ensembles and the Ralph Alessi band for their sound check. The stage set up consisted of grand piano and vocals on stage right, four horns (trumpets and trombone) on centre stage, and the bass, drum set, and electric guitar on stage left. This later included an upright bass as the guest band took stage last.
The piano was mic'd up using two condenser microphones going through an active direct interface box or DI to provide phantom power to the condensers. The vocal mic next to the piano was a shure SM 58 while the SM 57 was given to the other vocalist. The horns were also given SM 57's. The drum set was mic'd by a beta 58 on the the kick and two overhead microphones. The guitar amps were left as they and the same was done for the bass.
I had to leave early and couldn't take many pictures of the set up but I did manage to get one picture of the monitors on the console.
1 note
·
View note
Text
Mic Shootout
There are so many options you have as a recording engineer to capture the “perfect” sound. Not only can you choose from multiple DAWs, preamps, and recording spaces, but there is a plethora of microphones at your disposal, all with unique qualities and purposes. For my shootout, I chose to experiment with 4 different microphones to capture a ukulele and see how its sounds vary from recording to recording. My client was my girlfriend Gabriella, and she has been playing the ukulele for over 5 years. This was a fun project for me as well as a learning experience, as I have never recorded a ukulele before. Here are the results:
First, since I have never recorded a ukulele before, I searched the internet to see if there were any important tips I should be aware of. Unfortunately, there really is not much information on this topic. There are some blog posts and a few videos on youtube, but not too much more than that. What I did see in a lot of posts is that it is basically the same thing as recording an acoustic guitar, except it is actually much easier. Since the ukulele is such a small instrument and lacks any true type of bass strings and frequencies, it eliminates a lot of stress about mic placement and the threat of a boomy and muddy signal.
(Resources used: https://liveukulele.com/gear/recording/
http://www.mxlmics.com/blog/?p=1230
https://www.youtube.com/watch?v=XFIjns46CGk )
After preparation and research about the ukulele, I finally got into the studio session to shootout some mics. The microphones I chose to use were the Blue Kiwi, RE-20, Shure SM-57, and Shure Beta 52. All four of these microphones went into the same Universal Audio Pre-amp in Studio E. I chose all four mics for a specific reason and purpose. The Blue Kiwi was my first and obvious choice, as it is very high quality and trusted condenser mic with pristine high-end fidelity. I chose the RE-20 to test its versatility. While it is best known for vocals and broadcasting, the RE-20’s ability to capture anything from a kick drum to a string section made me curious how it would sound with a ukulele. The Shure SM-57 is an industry standard for any type of performance miking, so as with the RE-20, I was interested to see how it would perform on an unorthodox instrument. As for the Beta 52, this was just an experiment to see how much high end it could handle.
After recording the same chord progression on all four mics, the results are as follows:
The first mic I used was the Shure SM-57, as I thought this would be a good starting point due to its reliablity. The mic captured a nice sound overall and definitely could produce usable takes for recording ukulele in a song. In the high end, it still left a little to be desired and felt a bit boxy, but the mic was still serviceable, as expected. Next I went on to the Blue Kiwi. This mic continues to blow me away every time I use it. The Kiwi captured a gorgeous and very detailed sound on the ukulele. The high-end fidelity is unmatched, and you can even hear Gabriella’s hands move across the strings and the distinct sound of her fingers plucking. The Blue Kiwi is quickly becoming one of my favorite mics to use. Next up was the RE-20. While it was not quite as pristine as the Blue Kiwi, the RE-20 served as a great back-up plan if you couldn’t use a microphones of the Kiwi’s quality. It captured a nice, warm sound while still allowing for the top end to come through. Just another reason why the RE-20 is one of the most trusted microphones in the industry. Finally, I proceeded with the fun experiment of using the Beta 52. What I learned quickly is that the ukulele is probably one of the worst instruments you could record on a Beta 52, as the ukulele has almost no low end whatsoever. This really exposed the mic’s limits, as you can hear in the recording with the high end almost sounding distorted.
If I had to choose which mic to use from best to last, I don’t think I would have a hard time choosing. My first and obvious choice would be the Blue Kiwi. It is a top-of-the-line mic and will capture a glorious sound with pretty much anything. Second, I would choose the RE-20. It is not quite the Blue Kiwi, but its warm and crisp sound can make for some great recordings, even with the ukulele. Third, I would choose the Shure SM-57. While it might not record a pristine high end, the SM-57 will always be functional enough to produce a good sound. Lastly, I would choose the Beta 52. And by lastly, I mean if I literally had no other mics available to me. Even then, I think my phone might get a better take than that mic can on a ukulele.
1 note
·
View note
Text
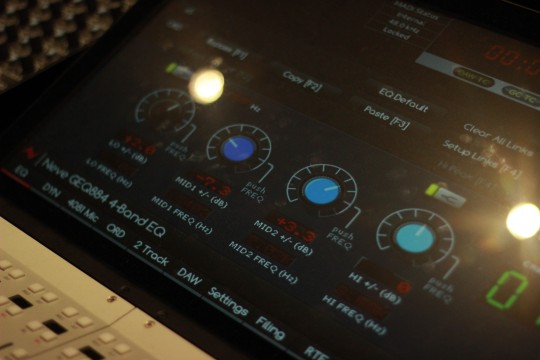
Week 6 - Practice - Exploring virtual microphones
This was another week where I was unfortunately too unwell to make the studio session. As a result, I decided to return to my DAW and experiment with how different microphone simulations sounded, using Marshall Silver Jubilee 2555 (by this point, I had reached out to Softube and had my previous activation removed so I could use it on my laptop).
The plugin features two sets of microphones, dynamic and condenser, with four microphones in each. Both sets feature 2 close mics and 2 room mics, allowing for a reasonable variation in sound. The list of microphones are as follows:
Dynamic
Shure SM-76
Shure SM-57
Neumann U 87
Telefunken ELA M 251
Condenser
Neumann U 67
Neumann U 87
Coles 4038
SE Electronics RNR1
See below an image of the plugin itself.

For this test, I decided to use a guitar sample that featured more high end, which I recorded myself on a Fender Squier Stratocaster. In the plugin, I began by using the 'Classic SM-57' preset, as this opened up the microphone menu and solely turned on the SM-57. I then proceeded to create a recording for each of the solo mics, as well as a combination of the room mics panned left and right.
Dynamic Recordings
The recordings with the room mic lacked a lot of bass that the 76 recording had - the 57 had an interesting tone however on its own did not stand particularly well.
To try to create a tone that would better suit this guitar, I combined all four mics and mixed them, panning the close mics, with delay on the room mics to add depth.

Condenser Recordings
The 67 recording has a more 'full' sound than the 87, however I prefer the high-end on this microphone's track. Like the dynamic mics, I produced a mix using both of these and the room mics, which you can hear below.

Conclusion
If I were to repeat this with a practical, in-person setup, I would use a mix of condenser and dynamic microphones, as this would give me more options to manipulate the sound when mixing.
Doing this virtually does not compare to the real experience, however I feel that practicing this has proved useful for times when I may not be able to get into the studio to record a final track, but still want to produce a demo in my room - especially at uni, where I don't have access to a physical amp in my room.
0 notes
Text
DEV PUJA
DEV Puja is a composition by Pawarin Phiken, a composer from Thailand. He has featured two artists from South East Asia namely Worawan Worachat on the Salor, a Thai Northern string instrument and myself on the Venu (South Indian bamboo flute) and the Bansuri (North Indian bamboo flute).

Dev Puja - an unique sonic experience with South East Asian Instruments
I applied the lessons taught during the production module to setup a home studio for the execution of the recording. The project was broken into 2 phases namely pre-recording preparation and the recording phase.
Pre-recording Preparation
The Composer prepared the reference track, session track and the scores for the recording. I have located the scores below for your reference.
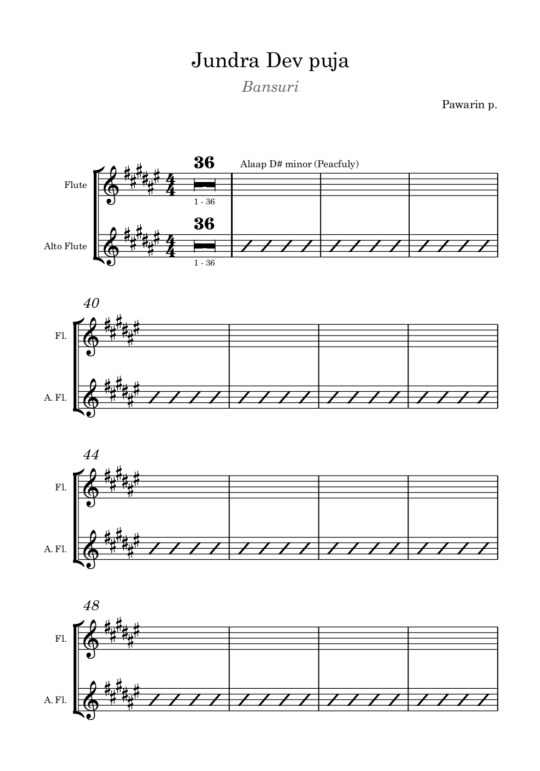
Page 1 of the score of Jundra Dev Puja
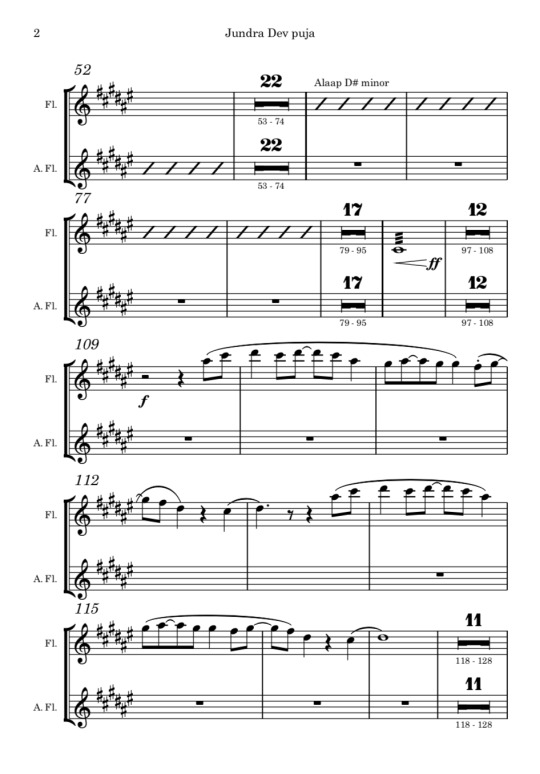
Page 2 of the score of Jundra Dev Puja
I had converted the scores into Indian notation using the Indian solfege system. After the preparation of the score, I started to plan the transposition requirements for the composition. As such, I planned to use the C# flute for a F# tonic. With this preparation done, we had then planned a 2 hour recording session over zoom and with the use of an audio mover.
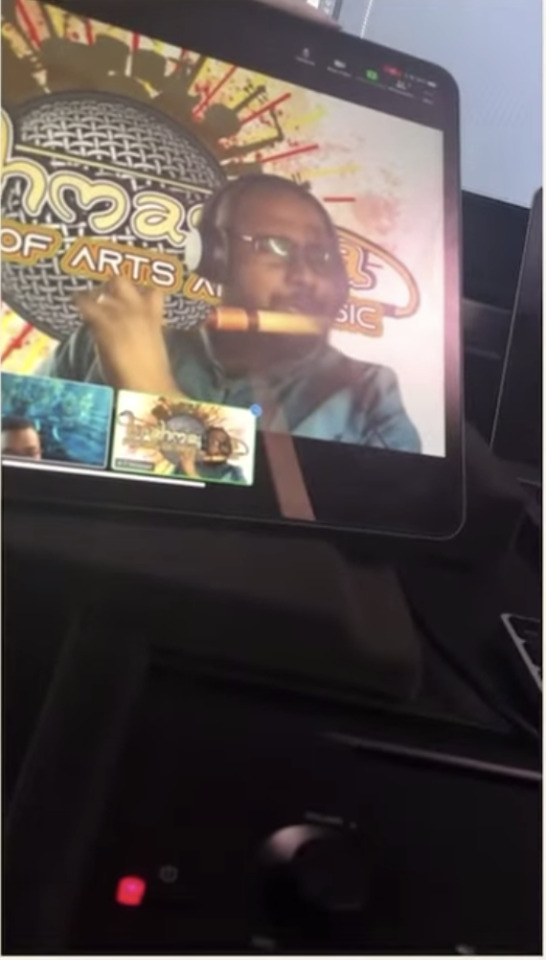
Impromptu photo taken during the audio session
Recording Phase
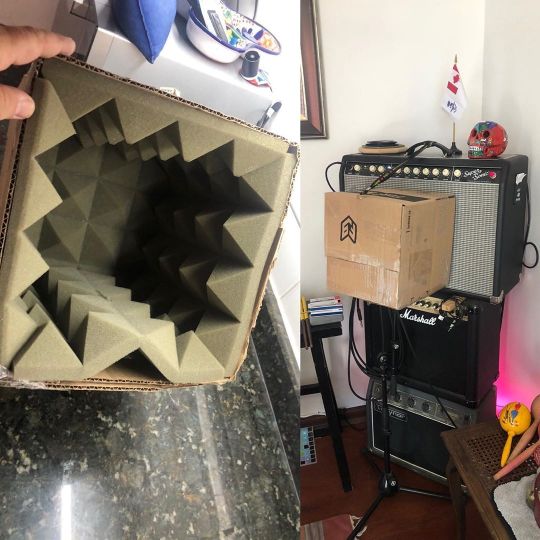
I used 2 mics for the production namely AT 2050 and Shure SM 57 for the recording. I had researched on the placement of the mic and as well as the required acoustic treatment for the room.
The composition was released on Sound cloud and other social media platforms such as Facebook. The links are attached below for your reference.
https://soundcloud.com/ianoawarin/dev-puja
Challenges Faced (Pre-recording Preparation and Recording Phase):
1. It was difficult to figure out the routing for the recording session as it involved cross border communications. The music director introduced me to loop back. I had to route my sound from Logic into the loopback software.
2. Some of the components of the western score did not fit in well with the aesthetics of the Indian bamboo flutes.
3. I only had 2 hours to session the components and had to also generate new components for the composition.
Solutions (Pre-recording Preparation and Recording Phase):
1. I had to learn the routing at the soonest. Once i became familiar with the workflow, the work was effectively delivered. I was constantly planning to the workflow at the back of my mind.
2. I had to quickly mark out sections where I can improvise. We then came into consensus with the parts. I was then able to session the entire composition within an hour.
3. I had to keep generating new ideas on spot. As I improvise, wherever that is required, I will be creating a few samples for the music director to work with.
Discoveries (Pre-recording Preparation and Recording Phase):
1. I learnt an alternative workflow to recording across borders. This workflow was comfortable and cost effective. I was able to route clear audio and video signals through loopback.
2. I also discovered a good working relationship with the music director. It was extremely fun and insightful to work with the music director. We were bouncing off each other’s ideas. As he shared the narratives of his compositions, I related to those narratives with the use of my Indian bamboo flutes.
0 notes
Text
Week 9
This week we looked at drum micing, which is something I looked forward to studying more. Some of the main bits I have learned about drum micing is the specific microphone names and which drums they are best suited for.
For example, when recording a kick drum, using an AKG D-112 mic is ideal as it had a wide diaphragm and can pick up the low end frequencies well. For a snare, it is fine to use a Shure SM-57 aimed at the centre of the head and about 2-3vinches from the rim. It can also benefit to have a small clip on mic under the snare to help counteract any bleed from the hi-hats. In the case of recording Toms, you could use a few different options. The main choice for me are clip on mics such as the AKG 418 condenser mics, alternatively you could set up a Sennheiser e604 dynamic mic on each tom or any figure-8 microphone in the position between the two rack toms for a clear tom sound.
When micing up overheads or over shoulders it is best to use something similar to a AKG C-1000 or any omni-directional condenser mic that will pick up a wide range of frequencies from the kit as well as some effect of the room.
0 notes
Link
0 notes
Photo
Another DIY for the studio. This is a sound shield that keeps the ambient noise out of the electric guitar recording. I’ve two mic in there. A Royer R10 and a Shure SM-57 (at Santiago, Chile) https://www.instagram.com/p/CBJPZMwh8Ol/?igshid=urk62a8khc8x
0 notes
Last Seen Blogs
adgalre
Galre🫧

dirtypgh3265
Untitled


kingkyliezzzle
*trigger warning*

betterfettered
Dark content warning (18+)