#software to create password for folder
Explore tagged Tumblr posts
Visit Tumblr Blog
Explore Tumblr blogs with no restrictions, modern design and the best experience.
Last Seen Tumblr Blogs


Fun Fact
BuzzFeed published a report claiming that Tumblr was utilized as a distribution channel for Russian agents to influence American voting habits during the 2016 presidential election in Feb 2018.
Text
The Art Of The Murdered: Flower bud (C: 2)
"なぜ俺をここに連れてきたのですか?(Why did you bring me here?)" Sousuke asked Giorgio
The detective looked at the foreigner and smiled "We're going shopping."
You're kidding.
"でははっきりさせておこう。あなたは俺が泊まっていたホテルを突き止め、ホテルの部屋で私が戻ってくるのを待ち、買い物のために再び俺を外に連れ出した?(So let me get this straight. You tracked down the hotel that I was staying in, waited in my hotel room for me to come back, and dragged me outside again for a shopping trip?)" the detective pouted "I wanted to tell you something but I realized I never got your number nor did you text me!"
Sousuke bows his head down "ごめんなさい、携帯電話を日本に忘れてきてしまって (Sorry, I forgot my phone back at Japan)"
"I can buy you a new one later" the foreigner swiftly lifted his head up "いや、そんなことは- (Oh no, you don't have to-)" the detective cut him off "So anyways, I found something suspicious" he grabs Sousuke’s hand "I thought it might be related to your brother"
"それは何ですか?(What is it?)" But the detective doesn't answer as they kept on walking to god knows what.
Giorgio leads Sousuke into a mysterious and empty hallway with it's lights flickering "While I was investigating your brother's case, I looked through the cameras in this mall"
"A stranger dropped something, and your brother gave it back to them, right?" Giorgio questioned him "はい (yes)"
"I can't believe I overlooked an interaction so unusual..." the detective suddenly stops walking and faces a door beside them.
He then tries to kick it down "何してるんだ!?(What are you doing!?)" Sousuke exclaimed.
The detective’s grin widened as he stepped back, shifting into a more focused stance. "We're going in."
Sousuke's heart raced, and for a moment, he considered running. The detective had acted so casually until now, but this sudden turn felt like a trap.
"The person who dropped something in the mall... they're connected to your brother’s case. And I’m willing to bet that whatever they left behind could be the key to finding the real culprit. Besides, it’s not exactly breaking and entering if nobody’s inside to catch us, right?" he faces Sousuke as he grinned.
Sousuke felt a wave of frustration and fear, but there was something about Giorgio’s calm confidence that made him hesitate.
Maybe, just maybe, this was the right thing to do. If there was any chance it could help Hebi, he had to follow through, even if the detective's methods were unconventional.
As Giorgio prepared to kick the door open, Sousuke could barely keep his thoughts straight.
The door swung open with a loud crash, and Giorgio stepped inside without missing a beat. Sousuke followed reluctantly.
The space was dimly lit, a dusty old storage room that smelled of mildew and forgotten memories.
Rows of boxes lined the walls, a bed in the middle of the room, a whole computer set up beside the bed with a 3D printer, and papers scattered across the room.
Someone has been living here.
Giorgio walked deeper into the room, his eyes scanning the surroundings with the intensity of someone who had seen far too many crime scenes.
He knelt by a pile of crates and started rummaging through them. Sousuke, unsure of what he was supposed to do, hovered by the doorway, trying not to let his nerves overwhelm him. "Over here," Giorgio called suddenly, holding up a small, crumpled plastic bag.
Inside it was a single, discarded object: a silver pen, one that looked ordinary at first glance, but when Giorgio turned it over, Sousuke noticed something strange—a small, almost imperceptible engraving.
Giorgio stood next to the computer with the pen in his hand "Did you know that with CAD or CAM software tools, you could conceivably create latex copies of someone’s fingerprints and place those prints on to objects that will hold them until they can be gathered by forensic technicians" Giorgio says as he turns on the computer "No password? This guy is a maniac" there was a folder called "Happy birthday."
As the detective opened the folder, his smile faded away.
"This is a list of all of the children who went missing for the past 4 years..." he mumbled.
Sousuke’s stomach lurched "Hebi gave this pen back to the stranger, right?" Giorgio asked, glancing up at Sousuke, his eyes sharp. "Do you remember seeing the person's face who had it?"
Sousuke tried to recall the encounter in the mall, but his mind was a mess of images "いや...ただ、彼らは手袋をしていて、服装で正体を隠していたんだ (No... just that they were wearing gloves and their clothes hid their identity.)"
Giorgio nodded thoughtfully, clearly deep in thought. "Gloves and hiding their identity? It's a deliberate attempt to avoid being caught. I was a fool for thinking I finally caught him after all these years"
"彼らは...兄を罠にはめた連中とつながっているのだろうか?(Could they be... connected to the person who framed my brother?)" Sousuke asked, the weight of his words sinking in.
The detective’s eyes narrowed, "The more we dig, the clearer it becomes. But I still don’t think we have all the pieces yet" he stood away from the computer "Let's get out of here before someone catches us."
As they walk out of the room, Sousuke suddenly felt something bumping into him.
"Owwww!" It was a little girl with short pink hair and a white bear hat.
"Hey, are you okay?" Giorgio asked, bending down slightly to meet the girl’s gaze.
The girl blinked up at him "I’m fine, I’m fine! I’m not the one who almost knocked me over!" she said, placing her hands on her hips as she stood up.
GIorgio kneels down to the little girl "Are you lost? Do you know where your parents are?" Giorgio asked the little girl "I'm not lost! I just haven't found my cousin yet!"
"Do you need some help looking for your cousin?" the little girl nodded "I'd appreciate it!"
The detective stands up "Alright little girl, tell me the name of your cousin and what she looks like"
"Her name is Albie and she looks like Princess Almond Blossom but with curly hair" said the little girl.
"Huh... Does Princess Almond Blossom have blue or green eyes?" He turns to Sousuke "なぜ俺を見るの?彼女が誰だか知らない (Why are you looking at me? I don't know who she is)"
"Ah... Well then- Wait where did she go?" the little girl disappeared "There! " Sousuke points at the little girl going to the candy shop at the second floor "How did she get there so fast!?"
"Outta my way!" the two men shove through the large crowd as they ran into the candy shop.
"Excuse me sir! Have you seen a little girl with pink hair and a white bear hat?" The detective asked the cashier staff.
"Are you her dad? Cause your daughter left the store with our most expensive cupcake just a minute ago."
"盗んだなんて言わないで���!(Don't tell me she stole it!)" Sousuke panicked, the cashier staff looked at him in confusion "He wants to know if she stole the cupcake or not."
The cashier staff shook their head "Oh no, your daughter has been very good, I don't know why she'd spend all of her allowance that you gave her though."
"Have you at least seen where she went?" Giorgio asked "No, I'm sorry sir."
"I see, thank you," the two men walk out of the store, the detective sighs.
He puts his hands through his pockets, but makes a realization as he doesn't feel anything in his pockets.
He falls onto his knees, the little girl stole his wallet.
14 notes
·
View notes
Text
cryptpad review !
in depth review of cryptpad as someone who is using it as a replacement for google docs because i don't trust google and i dipped the moment i heard "fully integrated ai" 🤭
we're scoring cryptpad on a scale of 1-10 based on its interface, features, accessibility, ease of access, and storage.
scoring criteria:
usability 10/10 : has a lot of formatting options, while also being easy on the eyes. offers features that allow the software to be easily customizable to each user's needs and preferences, or features that make writing easier, without being overwhelming.
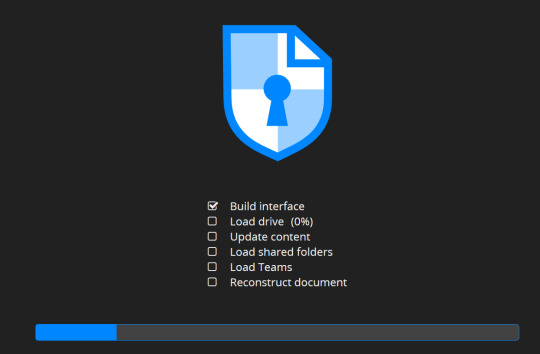
accessibility 10/10 : includes accessibility options for eye strain/dyslexia/etc like a proper dark mode and dyslexia friendly fonts, while also having an easy-to-navigate layout, and a mobile app that is equally easy to use without losing its features. doesn't take a long time to load, and is easy to adapt to as a new user.
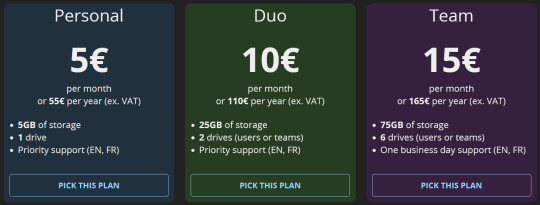
storage 10/10 : provides a free account with very high or unlimited storage. the documents and files you create don't take up a ton of space, and you have options for upgrading storage if applicable.
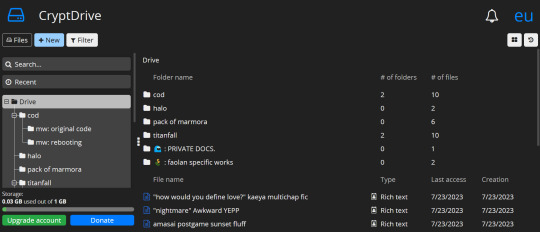
what is cryptpad?
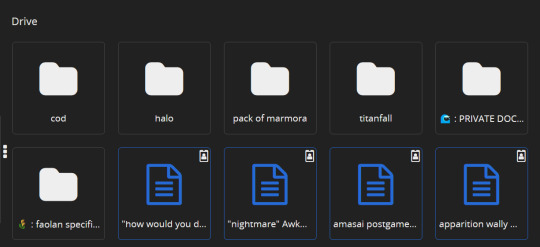
similar to how docs operates on desktop, cryptpad is a website-based file drive and software. it's free to create an account, and offers a selection of different kinds of files you can make. here's a list of features i think are notable, first:
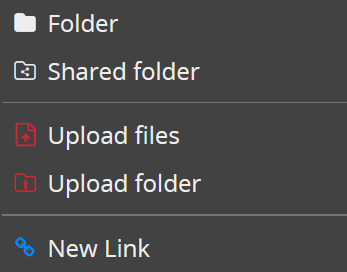
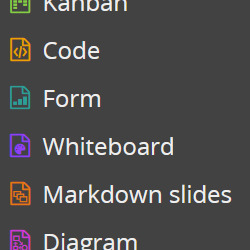
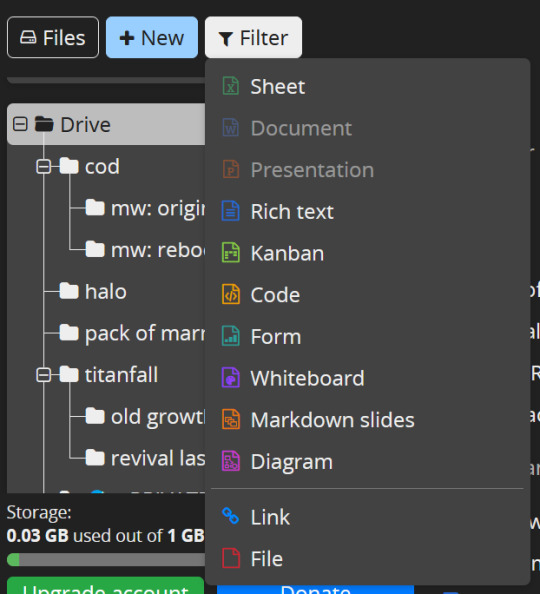
there's 10 different of kinds of files you can create, including even code documents! cryptpad also allows you to create as many folders as you like, upload pre-existing files or folders, and even allows you to add links to your drive if you have links you want to save.
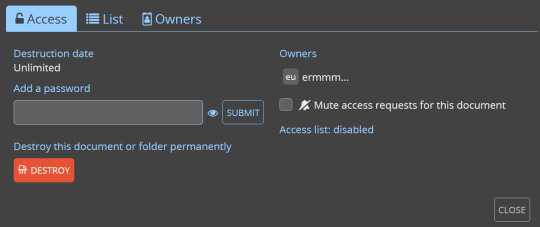
cryptpad always will open a new document or a pre-existing one in a new tab! when making a new document it automatically gives you the options to name it, password-lock it, set a destruction date.

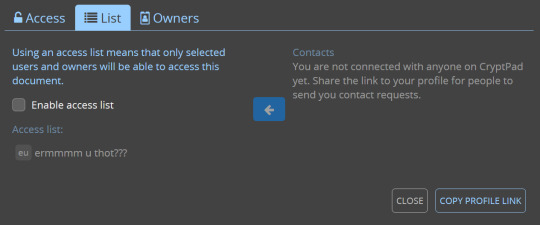
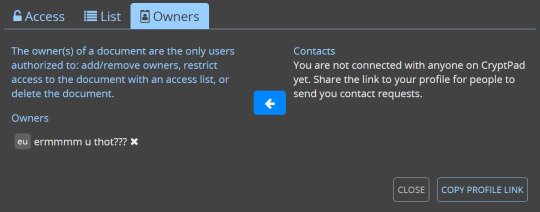
there's diversity in your sharing options: you can toggle and change the rules for the kinds of access people get to your shared documents!
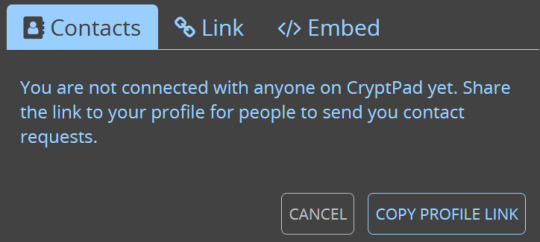
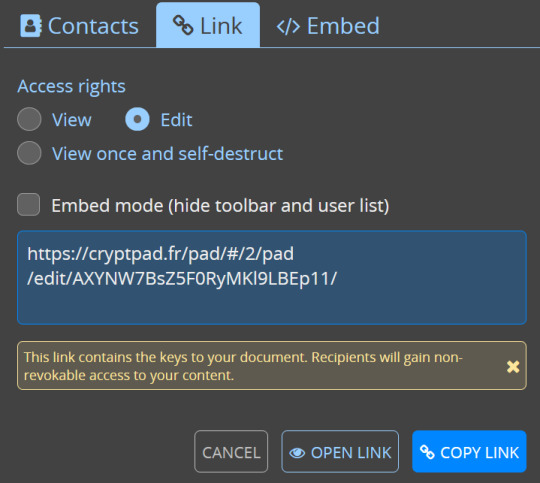

somewhat on the same topic, there's access settings and details you can review and tweak at any time.
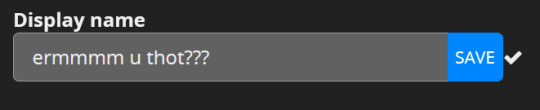
also you can change your account's display name in your settings LMAO
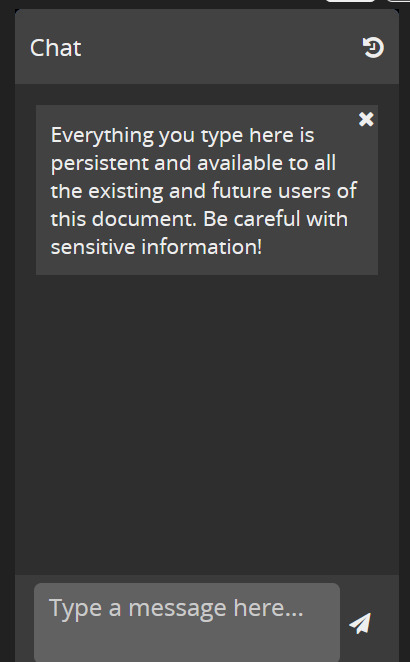
there's a chat option on documents for when you're working on something with other people in the upper right corner of your screen!
the actual scoring:
usability: 7/10
formatting your documents isn't terribly versatile on cryptpad, but it offers to you that you can make as many folders and nest as many of them as you want, while also making its layout and navigation simple. there isn't a ton of super fancy features in the rich text documents, but i enjoy that, to be honest! keeps it simple.

accessibility: 7.5/10
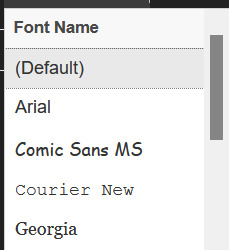
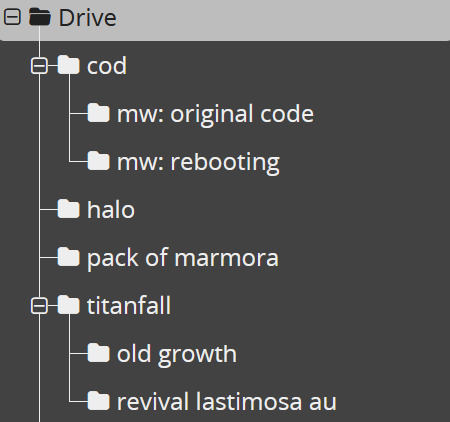
tragically, you cannot change the background of cryptpad files, and there's no mobile app :( if i could i would. they do, at least, offer a light or dark mode? i have dark mode selected of course, but it um... yeah the background is always just that white 😬 unfortunately. they do have basic font options, but personally, my love for cryptpad's accessibility lies in the fact you can make as many folders and nested folders as you damn well please, and the drive screen is SO easy to navigate.


storage: 10/10
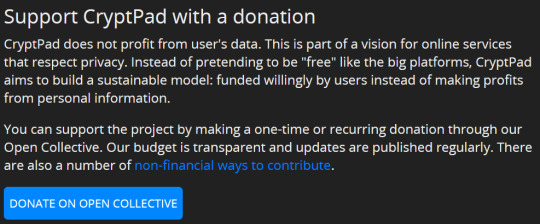
1GB for free, to start with? sir, i have 52 files in this drive (all rich text) and i have used 0.03 of that !! which, if i did my math correctly (debatable), that means i'll need over 5 thousand files to fill up that 1GB. AND it's upgradable, without the upgrade price being my soul? you can even donate just for funsies!

overall rating: 8/10
personally, i love cryptpad! i do wish you could change the document background color, and i wish that i had more formatting option like line spacing, but it's a good iteration of what i want in a writing program! i'd definitely recommend if you like supporting freelance guys doin their own thing while also not struggling to figure out how the fuck a writing software works.
56 notes
·
View notes
Text
Tech Person™️ titles explained for writers
Nobody would write a plumber who fixes people’s washing machine, or an architect who checks for termites. Just because a plumber works on pipes doesn’t mean they know about every machine that uses water, and just because an architect builds buildings doesn’t mean they know the intricacies of maintaining them. That’s not their job.
Yet often times, I see TV shows and books that portray anyone who works on computers as someone who knows everything there is to know about anything that has a circuit board. Sadly, as much as most of us wish that was the case (we tend to be naturally curious), techies are often highly specialized.
To remedy this, I’m going to make a brief, broad, and slightly over-generalized list of common tech positions you might encounter. This is not conclusive, it’s just to help loosely guide you to the type of tech person who can best fit your niche. This also should come in handy if you need tech help in real life too - rather than getting bounced around between “tech people”, you can ask for the specific person/role that handles your problem. To illustrate, I’m going to use the concept of saving a document and how each role would be involved.
IT Technician / Helpdesk
The front lines of tech. Often just starting to learn the ropes, these folks often don’t know much yet beyond a preset list of requests. Even if they’re more experienced and actually DO know the answer, they probably aren’t allowed to fix any unusual problems themselves, either due to regulations or their own access to systems being limited.
If you can’t even get to the save button, because you forgot your login password and need it reset, you should talk to an IT technician.
Network Engineer
These folks handle more than the title suggests. It has less to do with connecting you to the internet (IT technicians can probably help if you can’t get online) and more to do with securing the network you’re on. They regulate access control, making sure you can get to what you need, and others can’t snoop on your private stuff. These are the people TV shows put in rooms full of rack-mounted equipment with a monstrous amount of cables.
If you need to save a file to a folder you don’t have access to(in a business/corporate setting), you should probably submit a ticket to a network engineer.
Front-End Developer
Front-end devs are the ones who write the pretty user interfaces for the programs you use. They’re the ones who put the buttons where they need to go, make them colorful and pretty, and then wire them up to the code bits that do the things you want. They often also work with a graphic designer (possibly called a front-end designer) who does the actual artistic things that then get wired up.
If you can’t click the save button because it disappeared, or because it’s half-way hanging off the screen, or you can’t tell what button is the save button because the buttons lost their icons, that’s a front-end developer thing.
Back-end Developer
These guys write all the weird, esoteric code spells that make stuff Just Work ™️. When you see people in movies with screens full of green text and they’re typing furiously, then they walk out 2 days later with a Monster in one hand and declare that they just created sentient software, that’s a back-end dev.
If you clicked the save button and nothing happened, or the file you saved yesterday opened as garbage today, that’s a back-end dev’s problem.
(Do be aware, you probably won’t interact with developers directly very often - usually the help desk people direct your issue to whomever they think can solve the problem. But, if you wonder why your back-end dev gets annoyed when people call him asking to change the color of a button…this is why)
BONUS 1: Hacker (derogatory)
This is what Hollywood loves to portray all techies as - guys wearing fedoras sitting in dark rooms with 14 monitors being asked to hack the CIA, typing furiously and then ominously declaring “I’m in” after about 5 minutes of screen time.
These people exist, sort of, but the term “hacker” is a stupid name for them. That term within tech circles, is usually reserved for something else. A better term would be “cybersecurity specialist” if they’re a good guy, or “cyber criminal” if they’re a bad guy.
Also, it doesn’t take 5 minutes. It NEVER takes 5 minutes. 5 days, maybe. 5 weeks more likely. The only thing a “hacker” is gonna do in 5 minutes is fetch data from a system they were already sitting in.
These guys, when they occasionally actually exist, are the ones who will steal your data as soon as you click the save button and then sell it online, causing you to get endless spam calls and ruining your credit score.
BONUS 2: Hacker (complimentary)
Real “hackers” are what in a fantasy setting might be known as an tinker, or maybe an artificer - someone who likes to fiddle with things, break them and put them together into something new, someone who loves the craft in all its forms. These folks are often interdisciplinary and defy the specializations I just listed above - they probably know a little bit about everything. Not necessarily enough to fix your problem, but enough to get curious about why the save button gets so many complaints, disappear for a month, and come back with an overblown solution that fixes the problem you listed, the three problems they found other people talking about online, and the dozen or so issues they found on their own as they were working.
Hope this helps!
#tech education#Hollywood should know better#I’m not mad I’m just disappointed#unless you ruined a good movie with dumb tech writing#then I’m mad
2 notes
·
View notes
Text
Enable System Integrity Protection mac Instances in AWS

AWS Programmatically Manages EC2 Mac Instances' macOS System Integrity Protection
A key improvement from Amazon Web Services allows developers utilising Amazon EC2 Mac instances to programmatically manage Apple's System Integrity Protection (SIP). This new feature eliminates physical access and recovery mode reboots to modify SIP status, simplifying development and testing.
Allow mac system integrity protection
In 2015, Apple added rootless System Integrity Protection to OS X El Capitan 10.11. SIP is enabled by default on macOS to reduce root user account protection against dangerous apps. It secures the system by restricting access to system-owned files and directories, preventing unauthorised software from choosing a starting disc, and blocking changes to protected files and folders.
SIP quickly solved the security issue of unconstrained root access, which might allow malware to take control of a device with a single password or weakness. Apple added SIP to macOS to improve security, especially since many users use administrator accounts with weak or no passwords.
SIP provides effective malware protection for daily use, but developers may need to temporarily disable it for development and testing. Disabling SIP allows installing and testing new device driver or system extension code. SIP may also block system configurations needed by some apps.
When SIP is temporarily disabled, macOS development program optimisation permissions are given. Warning: This temporarily disables the vault door for approved maintenance, not permanently leaving it open. Disabling Spotlight indexing, driver development, and outdated software compatibility require offsetting SIP. To conserve CPU and disc I/O, Spotlight can be turned off when indexing is not needed. Spotlight is beneficial on desktops but not on servers for fast item searching.
macOS shut down system integrity
Before, SIP could only be disabled by entering the Mac. Restarting in recovery mode, disabling SIP with csrutil, then restarting were the steps. SIP management integration with the EC2 API and Amazon EC2 control plane was problematic due to physical access and recovery mode booting. Before this revelation, developers used EC2 Mac instances with default SIP settings.
This is fixed by the new AWS API. Developers can now dynamically enable and disable SIP on Amazon EC2 Mac instances. The process begins with CreateMacSystemIntegrityProtectionModificationTask, a new EC2 API. This asynchronous API request changes the instance's SIP status. Developers can track task progress with another new EC2 API, DescribeMacModificationTasks. These tasks only require the target EC2 Mac instance ID.
Preconditions must be met before using the new API on contemporary machines and Apple silicon-based EC2 Mac instances. Developers must login to the instance, specify the password, and enable a secure token for the ec2-user user account on macOS to setup it. Set the password with sudo /usr/bin/dscl. -passwd /Users/ec2-user then enable the secure token with sysadminctl -new.Password [password] and -oldPassword [password] must be run in the instance terminal. If the GUI has never been used, a Keychain error may appear, but the command activates the secure token. To verify, run sysadminctl -secureTokenStatus ec2-user.
If the prerequisites are met (on applicable instances) and the instance ID is known, the AWS CLI or other supported methods can toggle the SIP status. The create-mac-system-integrity-protection-modification-task command specifies the instance ID, preferred SIP state (such as “disabled”), root volume username (ec2-user), and credentials file password.
The API returns the modification task's initial status (typically “pending”) and task ID after completion. By showing statuses like “in-progress” and SIP configuration details, the describe-mac-modification-tasks command can be used to track task progress.
The API initiated a reboot process that makes the instance inaccessible. A whole surgery can take 60–90 minutes. After the operation is complete and the instance status is back in the AWS console, developers can access to the computer via SSH or EC2 Instance access. Run csrutil –status to verify the instance's new SIP status.
SIP on Amazon EC2 Mac instances requires careful thought.
The AWS Management Console, CLI, API, and SDKs can disable SIP.
Apple silicon has volume-based SIP. If the root volume changes, SIP must be disabled again. Intel instance SIP status is unaffected by root volume replacement because the configuration is Mac host-based.
Stop and restart the instance to enable and disable SIP. Instance SIP status is unaffected by reboot.
SIP status cannot be transferred between EBS volumes. If you construct an Amazon Machine Image (AMI) from an instance with SIP enabled or restore an instance from an EBS snapshot, SIP will be switched off again.
Availability
These new APIs are available in all AWS regions with Amazon EC2 Mac instances. AWS says these new SIP setup options are free.
This new functionality streamlines workflows that previously needed manual intervention and significant downtime, giving EC2 Mac clients additional build and development flexibility and control.
#AmazonEC2Mac#SystemIntegrityProtection#macOS#EC2Mac#EC2API#EC2Macinstances#technology#technews#technologynews#news#govindhtech
0 notes
Text
How to activate TurboTax after installation?
TurboTax is one of the most trusted and widely used tax preparation software in the U.S., helping millions of individuals and businesses file their taxes with confidence. After you've completed installing TurboTax, whether via download, CD, or from the official link like www.installturbotax.com, the next crucial step is activating the software to unlock its full potential. Activation ensures your product is legitimate, enables access to premium features, and allows software updates that improve performance and compliance.
In this guide, we’ll walk you through everything you need to know about activating TurboTax after installation — step-by-step instructions, troubleshooting tips, system requirements, and more.
Why Activation Is Necessary
TurboTax requires activation to:
Verify the authenticity of your license.
Access federal and state tax forms.
Receive the latest IRS updates and security patches.
Enable e-filing and refund tracking.
Access your saved returns across devices (if using TurboTax Online).
Whether you're using the CD/DVD version or have downloaded TurboTax via www.installturbotax.com, activating your product is essential for a smooth tax-filing experience.
Step-by-Step Guide to Activate TurboTax After Installation
Step 1: Launch TurboTax
After successful installation, double-click the TurboTax icon on your desktop or find it through the Start Menu (on Windows) or Applications folder (on Mac). This will open the software and initiate the activation process.
Step 2: Sign in or Create an Intuit Account
TurboTax is powered by Intuit, so to activate your software, you’ll need to sign in with your Intuit account:
If you already have an account, simply enter your email/username and password.
If not, click on “Create Account”, and follow the instructions. You’ll need to provide:
A valid email address
A password
Your phone number for security verification
This step links your TurboTax license to your Intuit account, enabling cloud sync, multi-device access, and secure backup.
Step 3: Enter the License Code
Once logged in, TurboTax will prompt you to enter your 16-character license code. This is a unique code that verifies your purchase.
Where to find the license code:
If purchased via retail (CD/DVD), it's inside the packaging — on a slip of paper or the CD sleeve.
If downloaded via www.installturbotax.com, it was emailed to you or displayed on the order confirmation page.
If purchased from a third-party retailer (Amazon, Walmart, etc.), check your confirmation email or physical packaging.
Format: XXXX-XXXX-XXXX-XXXX
Type the code exactly as shown and click Continue.
Step 4: Verify Activation
After entering the license code, TurboTax will connect to Intuit's servers to verify your activation. This process may take a few seconds depending on your internet connection. Once validated, you will receive a confirmation message, and your software will be ready to use.
Troubleshooting TurboTax Activation Issues
Despite the straightforward process, users occasionally encounter activation issues. Here are common problems and their solutions:
1. Invalid License Code Error
Possible Causes:
Typing error (letter ‘O’ instead of zero)
Code already used on another device
Expired or incorrect version
Solution:
Double-check the code for typos.
Ensure you’re using the right version (Basic, Deluxe, Premier, or Home & Business).
Contact TurboTax Support if the code was lost or already used.
2. Activation Server Unavailable
Possible Causes:
Internet connectivity issues
Firewall or antivirus blocking TurboTax
Temporary server outages
Solution:
Restart your internet connection.
Temporarily disable firewalls or antivirus software.
Try again later.
3. Account Sign-In Issues
Possible Causes:
Incorrect login credentials
Browser-related issues (if launching a web-based version)
Solution:
Use the “Forgot Password” option.
Clear browser cache or use a different browser.
Use incognito/private browsing mode.
System Requirements for Activation
To activate TurboTax smoothly, your system should meet the following minimum requirements:
For Windows:
Operating System: Windows 10 or later
RAM: 2 GB or more
Hard Drive: 1 GB of free space
Internet: High-speed internet for activation and updates
Screen: 1024x768 resolution or higher
For Mac:
Operating System: macOS Catalina 10.15 or later
RAM: 2 GB or more
Hard Drive: 1 GB of free space
Internet: High-speed internet required
Screen: 1024x768 resolution or higher
If your device doesn’t meet these requirements, activation may fail or the software might not run optimally.
What to Do If You Lost Your TurboTax License Code
Losing your license code can be frustrating, but there are ways to retrieve it:
Check Your Email: Look for the confirmation email from Intuit or www.installturbotax.com.
Log into Your Intuit Account: Visit https://account.intuit.com and look under “Orders” or “Products.”
Contact TurboTax Support: Provide proof of purchase (invoice, receipt, or credit card statement).
It’s a good idea to store the code securely after activation for future reference or reinstallation.
Benefits of Activating TurboTax Promptly
Activating TurboTax after installing it via www.installturbotax.com unlocks several user benefits:
Free E-Filing for federal and some state returns
Access to live tax experts (with select versions)
Automatic updates for tax law changes
Error check and audit risk review
Cloud backup and multi-device sync for online users
Eligibility for refund advance offers
Early activation ensures you don’t miss out on features or early-bird e-filing deadlines.
Differences Between Online vs. Desktop Activation
Online Version (TurboTax Online):
No installation needed
Activation tied to Intuit login
Used directly in a web browser
Access from any device
Desktop Version:
Installation required
Manual entry of license code
Can be used offline after activation
Saves files locally unless synced
Both versions require an Intuit account, but the desktop version needs a license code for activation, while the online version does not.
Reinstalling TurboTax and Re-activating
If you uninstall TurboTax or switch to a new computer, you’ll need to reinstall and re-activate it. Here's how:
Download the installer again from www.installturbotax.com.
Run the setup file and follow installation prompts.
Sign in with your original Intuit account.
Enter the same license code you used during the first activation.
Note: You can usually install TurboTax on up to 5 devices per license. Check the license agreement for details.
Conclusion
Activating TurboTax after installation is a vital step to unlock the software’s full potential. Whether you’ve purchased the software via CD or downloaded it from www.installturbotax.com, following the right steps will ensure a hassle-free activation experience.
Keep your license code secure, maintain a stable internet connection, and use your Intuit account for authentication. With TurboTax activated, you're all set to prepare, file, and maximize your tax return with confidence.
1 note
·
View note
Text
Top Skills You Need to Succeed as a Virtual Assistant

In the fast-evolving world of remote work, Virtual Assistants (VAs) are in high demand. They support businesses and entrepreneurs by handling tasks that free up valuable time and increase efficiency. But being a VA isn't just about working from home, it requires a diverse skill set, discipline, and professionalism.
Whether you're just starting out or aiming to improve, mastering the right skills can set you apart in a competitive freelance market. This blog explores the top skills every Virtual Assistant must have to succeed in 2025 and beyond.
1. Communication Skills
Clear and effective communication is the foundation of any successful VA-client relationship.
Written Communication: You’ll often communicate via email, chat, or task management tools. Your writing must be clear, professional, and concise.
Verbal Communication: Video calls, client briefings, or training sessions demand confidence in speaking and active listening.
Language Proficiency: Fluency in English is essential for working with international clients.
Tip: Tools like Grammarly and Hemingway App can help polish your writing.
2. Time Management
Virtual Assistants often juggle multiple tasks or clients, making time management a critical skill.
Prioritization: Knowing which tasks are urgent and which can wait is key.
Scheduling Tools: Mastering calendars, reminders, and time trackers (like Google Calendar, Toggl, Clockify) helps maintain focus.
Meeting Deadlines: Consistency and punctuality build long-term client trust.
A VA who respects time is always respected in return.
3. Tech Savviness
VAs must navigate various tools and platforms depending on client needs.
Communication Tools: Slack, Zoom, Microsoft Teams
Project Management: Trello, Asana, ClickUp, Notion
Cloud Storage & Docs: Google Workspace, Dropbox
CRM Software: HubSpot, Zoho, Salesforce
Basic Troubleshooting: Understanding and resolving common tech issues saves time and frustration.
You don’t need to be an IT expert, but you must be comfortable with digital tools.
4. Organizational Skills
An organized VA is a productive VA. This means managing files, tasks, and schedules systematically.
Inbox Management: Organize emails, use filters, and respond promptly.
File Naming & Storage: Use clear naming conventions and cloud folders.
Documentation: Keep records of tasks, meetings, and deliverables.
When you’re organized, clients feel in control — and that’s a big win.
5. Attention to Detail
Small errors can lead to big problems. Whether you’re managing emails, posting on social media, or entering data, attention to detail ensures accuracy and professionalism.
Proofread your work.
Double-check deadlines, instructions, and names.
Test links, check attachments, and validate data before submission.
Your clients trust you with their brand — precision matters.

6. Adaptability and Problem-Solving
Every client is different. Their needs, systems, and preferences will vary — and you must adapt quickly.
Be open to learning new tools and workflows.
Stay calm under pressure.
Find solutions instead of just reporting problems.
A flexible VA is an invaluable asset to any team.
7. Self-Motivation and Discipline
Without a boss watching over your shoulder, it’s up to you to stay productive.
Create a dedicated workspace.
Set daily goals and work routines.
Avoid distractions and stick to your schedule.
Clients expect reliability, not excuses.
8. Basic Marketing Knowledge (Bonus Skill)
Many clients expect their VA to assist with content scheduling, social media, or email campaigns.
Understanding social media platforms (Facebook, Instagram, LinkedIn)
Familiarity with basic SEO and content writing
Knowledge of email tools like Mailchimp or ConvertKit
Even basic marketing knowledge adds great value to your profile.

9. Confidentiality and Ethics
As a VA, you may handle private data, passwords, finances, or customer information.
Always maintain client confidentiality.
Avoid discussing client projects publicly.
Use password managers like LastPass or 1Password to store sensitive credentials securely.
Trust is your most valuable currency as a virtual assistant.
10. Customer Service Mindset
You’re not just doing tasks — you’re helping clients succeed.
Be polite, patient, and solution-focused.
Go the extra mile when possible.
Build positive, long-term relationships with clients.
Your soft skills are just as important as your technical ones.
Final Thoughts
Becoming a successful Virtual Assistant isn’t about knowing everything — it’s about learning fast, being dependable, and delivering value with confidence. The most in-demand VAs are those who combine hard skills (tools, platforms, tasks) with soft skills (communication, organization, integrity).
The beauty of the VA journey is that you can start with what you know and grow as you go. With time, experience, and continuous learning, you can turn your VA career into a flexible, fulfilling, and financially rewarding path.
0 notes
Text
1. Changxun Solution
Factory Password: 8888
APK Installation and Upgrade:
Place the APK file on a USB stick.
On the main device interface, open the ESC browser or file manager, find the APK upgrade file, click to install. After installation, restart the device.
APK Upgrade Platforms: Landscape 4G version (3518C), WIFI version (8227/9218), Portrait 4G version (3518C). Choose the corresponding APK platform for the upgrade.
Steps:
Uninstall the previous version: Car Settings > Android Settings > Apps > Original Car Settings > Uninstall.
Extract the files to the root directory of the USB drive, insert the USB into the car's USB port, find the extracted files in the file manager, and click to install. After installation, select the model.
After model selection, go to Factory Settings, and click "Restart" to reboot.
For Portrait WIFI Version Upgrade: Extract the files to the root directory of the USB stick (no folder needed), then go to the main menu, Settings > General Settings > System Information, and click "Android Upgrade" (green button).
After the upgrade, press and hold the touchscreen for 3 seconds to bring up the touch calibration interface. Follow the instructions to calibrate.
2. Novida Solution
Factory Password: 666888/168 (Landscape), 1617 (Portrait)
APK Upgrade:
Create an "updateApk" folder, place the APK inside, and copy it to a USB drive. Then, in the main device interface, go to the toolbox and click “APK Upgrade.”
After the upgrade, you can check the version information in the CAN model settings.
APK Upgrade Method: The upgrade method is the same for both landscape and portrait versions, but make sure to choose the corresponding APK file.
System Upgrade:
Copy the compressed software package directly to the root of the USB drive (do not create a folder). Rename it to "update.zip."
In car settings, go to Factory Settings > System Upgrade.
3. Dingwei Solution
Factory Password: 8888
MCU Upgrade Method:
Extract the software package to the USB stick (no folder needed), then go to Settings > General Settings > MCU Upgrade/System Upgrade.
Online Upgrade:
For both landscape and portrait versions, connect the main device to the internet.
Go to General Settings > Advanced Settings, enter password 8888, choose the corresponding vehicle model, and click "Confirm." Follow the prompts for the upgrade process.
4. Fangyitong Solution
Factory Password: 3368
Software Upgrade:
Extract the software package to the root of the USB drive. The system will automatically recognize the USB and upgrade.
APK Installation:
Place the extracted APK files on the USB root directory. Open the File Manager on the main device, locate the APK files, and install them one by one.
5. Waterword Solution
Factory Password: 8888
Online Upgrade:
Connect the device to the internet, go to "About the Device" > "Software Online Upgrade" > "System Software Upgrade."
Local Upgrade:
Rename the upgrade file to "wwc_update.zip" (without extracting), place it in the USB root directory, then go to Settings > Software Local Upgrade > System Software Upgrade.
CANBUS-GO App: Download the latest version from the app store and select the vehicle model in K6G-Canbus.
6. Hengchen Solution
Factory Password: 000000
Software Upgrade:
Place the software package in the root directory of the USB drive. The system will automatically upgrade.
APK Installation:
Place the APK file in the root directory of the USB stick. Install directly from the device by selecting the file in the File Manager.
7. Feige Solution
APK Upgrade:
Place the APK file on the USB drive, go to the main device interface, open the File Manager, and click to install the APK.
8. Xunzu Solution
Factory Password: 8888
Upgrade Package:
Extract the upgrade package to the root directory of the USB stick. After inserting it into the device, the upgrade window will pop up. Confirm the upgrade to start.
Once the upgrade is complete, the system will prompt "Please remove the external upgrade device, and the device will restart."
Android Version:
Go to Settings > General Settings > Version Information, tap the Android version 5 times. A password box will pop up; enter password 8888.
9. Ingmote (Deanjer) Solution
Factory Password: 8317
Upgrade Process:
Extract the upgrade file to the root directory of the USB drive. Once the USB is inserted and the device is powered on, the upgrade process will begin automatically.
After completion, the device will prompt for you to remove the USB/SD card. The device will reboot.
System Upgrade Password: 888888
Go to Car Settings > System > System Update, and enter the system upgrade password (888888).
10. Tengshi Solution
Factory Password: 7772 (Car Settings > About Device > Enter the password at the top right)
Upgrade Process:
Format the USB drive, extract the upgrade files, and insert the USB stick. The system will detect the upgrade automatically.
11. Bodha Solution
Upgrade Process:
No need to extract the upgrade package. The system will automatically pop up an upgrade prompt in the radio interface, allowing you to select either MCU or SYSTEM upgrade.
Model Selection:
Go to Settings > About Version, click the kernel version and OS version 3 times each (total 6 times) to enter Factory Settings, where you can choose the CAN protocol company and vehicle model.
12. Aimi Solution
Factory Password: 1501
13. Qiding Solution
Factory Password: 13248756
System Upgrade:
Extract the upgrade package to the root directory of the USB stick. Insert the USB while the device is powered on, and the system will prompt for an upgrade. Click to upgrade, and during the upgrade process, the system will prompt you to remove the USB. Once removed, the upgrade will continue and complete.
APK Installation:
Place the APK file on the USB stick, go to the File Manager on the main device, locate the APK file, and install it.
This summary includes the steps for upgrading the software and APK on various car multimedia systems. Make sure to follow the specific instructions for each system to ensure the upgrade is successful. If you need additional details or encounter issues, feel free to ask!
1 note
·
View note
Text
My dream OS has the following features
Local accounts with three permission levels (admin, user, guest)
A simple "hierarchy" tool that allows a user to lock a folder and all it's contents behind a password OR behind your authority level- so a user can password protect a folder and a guest can't open it or copy or delete or whatever- or maybe even just lock it behind authority so only someone with user authority or higher can open it
Administrators have a button that let's them bypass locks because duh that's something you should have no matter what
Admins can change system settings, factory reset, regEdit, console commands etc, users can download and install stuff, guests can only run pre-installed and downloaded stuff
Customisation of OS appearance and layout should be local profile controlled
Files shouldn't be hidden from you just because it's on another user's profile, you should share the same %appsata% or same documents or same downloads folder, files and folders you create should be automatically locked with your local user password on other profiles if you created them but still visible
The only pre-bundled software you should have is OS software and tools for the admin, and an Internet browser that can be uninstalled (as well as an installer for that engine that can't be removed because no matter what you should have access to a browser in an emergency)
1 note
·
View note
Text
What Basic Computer Skills Are Essential in Today's World?

In our increasingly digital society, mastering basic computer skills is as vital as learning to read or write. Whether you're applying for a job, managing personal tasks, or staying connected, these skills empower you to navigate the modern world confidently. Let’s explore the essential computer skills everyone should have in 2024, along with practical tips to build them.
1. Hardware Fundamentals
What to Know:
Recognize core components: monitor, keyboard, mouse, CPU, and ports (USB, HDMI).
Use peripheral devices like printers and external drives.
Perform basic maintenance: restarting devices, cleaning hardware, and troubleshooting simple issues (e.g., unresponsive keyboard).
Why It Matters: Understanding hardware prevents frustration and helps you solve minor problems independently.
2. Operating System Mastery
Key Skills:
File Management: Create, organize, and delete files/folders. Learn to use search functions effectively.
System Settings: Adjust display, sound, Wi-Fi, and user accounts.
Software Installation: Safely download and install trusted applications.
Pro Tip: Use keyboard shortcuts (e.g., Ctrl+C/Cmd+C for copy, Ctrl+V/Cmd+V for paste) to save time.
3. Internet & Email Proficiency
Essentials:
Web Browsing: Navigate browsers like Chrome or Safari; bookmark frequently used sites.
Effective Searching: Use keywords and filters to find reliable information quickly.
Email Management: Compose, reply, attach files, and organize your inbox.
Cloud Basics: Store and share files via Google Drive, Dropbox, or iCloud.
Why It Matters: From online banking to remote work, internet skills are indispensable.
4. Cybersecurity Essentials
Critical Practices:
Strong Passwords: Use a mix of letters, numbers, and symbols. Consider a password manager.
Phishing Awareness: Avoid suspicious links or requests for personal information.
Software Updates: Regularly update OS and apps to patch security vulnerabilities.
Two-Factor Authentication (2FA): Add an extra layer of security to accounts.
Did You Know? 94% of malware is delivered via email—stay vigilant!
5. Productivity Software Basics
Must-Learn Tools:
Word Processing: Format documents in Microsoft Word or Google Docs.
Spreadsheets: Track budgets or data with Excel/Google Sheets (learn basic formulas like SUM and AVERAGE).
Presentations: Design slides in PowerPoint or Canva for school, work, or personal projects.
Example: Use spreadsheets to plan a monthly budget or analyze household expenses.
6. Digital Communication Tools
Key Platforms:
Video Conferencing: Join calls on Zoom or Teams; master muting, screen sharing, and virtual backgrounds.
Messaging Apps: Use Slack, WhatsApp, or Discord for quick communication.
Social Media Literacy: Share content responsibly, adjust privacy settings, and spot misinformation.
Why It Matters: Clear digital communication is crucial for collaboration and networking.
7. Basic Troubleshooting
DIY Fixes:
Restart Devices: Resolves many glitches instantly.
Check Connections: Ensure Wi-Fi, cables, or Bluetooth are active.
Use Online Resources: Search error messages or visit forums like Microsoft Support.
Pro Tip: Bookmark troubleshooting guides for common issues.
8. Data Management
Best Practices:
Organize Files: Use folders and clear naming conventions (e.g., “2024_Taxes”).
Backup Data: Regularly save copies to external drives or cloud storage.
Avoid Data Loss: Learn to recover files from the Recycle Bin/Trash.
Stat: 60% of companies that lose data shut down within 6 months—backups are lifesavers!
9. Adaptability & Continuous Learning
Stay Ahead:
Explore New Tools: Experiment with apps like ChatGPT or Canva.
Leverage Free Resources: Platforms like Khan Academy or LinkedIn Learning offer courses on emerging tech.
Join Communities: Engage with groups on Reddit (e.g., r/techsupport) or local workshops.
Growth Mindset: Tech evolves fast—embrace curiosity and lifelong learning.
How to Build These Skills
Start Small: Focus on one skill at a time (e.g., mastering email).
Practice Daily: Apply skills to real tasks (e.g., create a resume in Word).
Use Free Resources:
Google Digital Garage: Free courses on digital literacy.
YouTube Tutorials: Visual guides for hands-on learning.
Local Libraries: Often host free tech workshops.
The Bottom Line
Basic computer skills unlock opportunities in education, careers, and daily life. From safeguarding your data to collaborating globally, these competencies are non-negotiable in 2024. Remember, every expert started as a beginner—take it one step at a time, and soon you’ll navigate the digital world with ease.
Your Challenge: Pick one skill from this list and spend 15 minutes a day practicing it. Share your progress in the comments—we’re rooting for you! 💻✨
Need help with a specific skill? Ask below! Let’s build a community of tech-savvy learners.
0 notes
Text
The Ultimate Guide to Secure and Efficient Submissions
Submitting documents, applications, or data is a ubiquitous task in the modern world. From applying for jobs and university programs to filing taxes and submitting research papers, the ability to securely and efficiently transmit information is crucial. However, navigating the landscape of submission processes can be complex, demanding careful consideration of security protocols, format requirements, and efficient workflow management. This guide provides a comprehensive overview of best practices for secure and efficient submissions, ensuring your information reaches its intended destination accurately and without compromise.
Understanding the Security Landscape of Submissions
Before initiating any submission, it is paramount to understand the potential security risks involved. Data breaches, phishing scams, and malware attacks are constant threats, and submitting sensitive information without proper precautions can lead to identity theft, financial loss, and compromised privacy. Identify the sensitivity of the data you are submit. Does it contain personally identifiable information (PII), financial records, or proprietary business data? Knowing the value of the information helps determine the level of security measures required. Always verify the authenticity of the submission portal. Scrutinize the URL, looking for "https" to ensure encryption. Be wary of suspicious emails or websites asking for personal information, and avoid clicking on links from unknown sources. Implement strong passwords and enable two-factor authentication whenever possible to protect your accounts from unauthorized access.

Data Encryption and Secure Transmission Protocols
Encryption is the cornerstone of secure submissions, transforming readable data into an unreadable format that can only be deciphered with a decryption key. When submitting online, always ensure the website uses HTTPS protocol, indicated by a padlock icon in the address bar. This signifies that the data transmitted between your browser and the server is encrypted using Transport Layer Security (TLS) or Secure Sockets Layer (SSL). For sensitive documents, consider encrypting the files themselves before uploading them. Utilize encryption software like VeraCrypt or 7-Zip to create password-protected archives. When sending information via email, which is inherently less secure, consider using email encryption tools like ProtonMail or Virtru. These services encrypt the email message end-to-end, ensuring that only the intended recipient can read it.
File Format and Submission Requirements
Ignoring file format and submission requirements is a common cause of delays and rejections. Before starting the submission process, carefully review the guidelines provided by the recipient. Pay attention to accepted file types (e.g., PDF, DOCX, JPEG), file size limits, and naming conventions. Failing to adhere to these specifications can result in your submission being automatically rejected or requiring manual intervention, which can significantly slow down the process. Convert documents to PDF format whenever possible. PDF is a widely accepted standard that preserves formatting and ensures compatibility across different operating systems and devices. Optimize images and documents to reduce file size without compromising quality. This can be achieved using image compression tools or PDF optimizers.
Streamlining the Submission Workflow
Efficiency is just as important as security when it comes to submissions. A streamlined workflow can save time and reduce the likelihood of errors. Begin by gathering all the necessary information and documents before starting the submission process. Organize files into folders and name them clearly and consistently. Prepare a checklist to ensure you have completed all the required steps and provided all the necessary information. For online submissions, use autofill features to automatically populate forms with your information. However, double-check the accuracy of the information before submitting. Consider using a password manager to securely store and manage your usernames and passwords for different online accounts. This can save time and prevent you from forgetting important credentials.
Utilizing Submission Management Tools
Numerous submission management tools are available to help streamline the process and enhance security. These tools can automate tasks, track progress, and ensure compliance with submission requirements. Some tools offer features like version control, file sharing, and collaboration, making them particularly useful for teams working on complex submissions. Cloud storage services like Google Drive and Dropbox can be used to store and share files securely. However, be sure to enable two-factor authentication and configure appropriate permissions to control access to your files. Project management software like Trello or Asana can be used to track the progress of your submission and assign tasks to team members.

Post-Submission Verification and Follow-Up
The submission process doesn't end when you click "submit." It's crucial to verify that your submission was received successfully and to follow up if necessary. Check for confirmation emails or notifications to ensure your submission has been acknowledged. If you don't receive a confirmation within a reasonable timeframe, contact the recipient to inquire about the status of your submission. Keep a record of your submission, including the date, time, and any confirmation numbers. This will be helpful if you need to track down your submission or provide proof of submission. If you receive feedback or requests for additional information, respond promptly and professionally.
Staying Informed and Adapting to Changing Security Landscapes
The digital landscape is constantly evolving, and new security threats and submission requirements emerge regularly. It is essential to stay informed about the latest security best practices and to adapt your submission processes accordingly. Subscribe to security newsletters and follow reputable security blogs to stay up-to-date on the latest threats and vulnerabilities. Regularly review your security practices and update your passwords and software. Be aware of new submission requirements and guidelines, and adjust your workflow accordingly. By staying informed and proactive, you can ensure that your submissions remain secure and efficient in the face of evolving threats. By implementing these strategies, you can significantly enhance the security and efficiency of your submission processes, safeguarding your information and ensuring that it reaches its intended destination promptly and securely. Remember that a proactive approach to security and efficiency is paramount in the digital age.
0 notes
Text
Price: [price_with_discount] (as of [price_update_date] - Details) [ad_1] From the manufacturer SanDisk Ultra Fit USB 3.1 Flash Drive The simple way to add extra, high-speed storage to your device! The SanDisk Ultra Fit USB 3.1 Flash Drive delivers performance that lets you move a full-length movie up to 15x faster than with standard USB 2.0 drives.(1) Plus, thanks to its compact, streamlined design, you can plug it in and leave it in. At a Glance High-speed USB 3.1 flash drive ideal for adding storage to laptops, game consoles, car audio & more Simple, fast way to add up to 256GB* of storage to your device Read speeds up to 150MB/s(1) Write up to 15X faster than standard USB 2.0 drives(1) Move a full-length movie to the drive in less than 30 seconds(2) Keep private files private with included SanDisk SecureAccess software(3) Compact Plug-and-Stay Design This compact flash drive is designed as plug-and-stay storage for laptops, tablets, TVs, gaming consoles, car audio systems, and more. Plug it in, and you’ve got instant storage that’s always on board! High-speed USB 3.1 Performance With write speeds up to 15x faster than standard USB 2.0 drives,1you can move a full-length movie to the drive in less than 30 seconds.(2) SanDisk SecureAccess Software Helps Protect Your Privacy Create a private folder on your drive with SanDisk SecureAccess software.(3) This 128-bit AES encryption software makes it easy to password-protect critical files. Drag and drop files into the vault, and they'll be encrypted. Easy File Recovery with RescuePRO Deluxe Software The drive comes with a RescuePRO Deluxe data recovery software download offer.(4) This software makes it easy to recover files that have been accidentally deleted (download required). Compatible with USB 3.0 and 2.0 Ports The SanDisk Ultra Fit USB 3.1 Flash Drive is backward-compatible, so you can plug it into any USB 3.0 or 2.0 port. Legal Disclaimers * 1GB=1,000,000,000 bytes. Actual user storage less. 1 32GB, 64GB, 128GB, 256GB: Write up to 15X faster than standard USB 2.
0 drives (4MB/s), read speeds up to 130MB/s. 16GB: Write faster than standard USB 2.0 drives (4MB/s); read speeds up to 130MB/s. USB 3.1 Gen 1 or USB 3.0 port required. Based on internal testing; performance may be lower depending on host device. 1MB=1,000,000 bytes. 2 Based on 1.2GB MPEG-4 video transfer with USB 3.1 Gen 1 or USB 3.0 host device. Results may vary based on host device, file attributes and other factors. 3 Password protection uses 128-bit AES encryption and is supported by Windows Vista, Windows7, Windows 8, Windows 10 and Mac OS X v10.7+ (Software download required for Mac) 4 Registration required; terms and conditions apply. A high-speed, plug-and-stay USB 3.1 flash drive that’s ideal for laptops, game consoles, in-car audio and more Simple, fast way to add up to 512GB* of storage to your device Move files up to 15 times faster than standard USB 2.0 drives Move a full-length movie in less than 30 seconds Keep private files private with included SanDisk SecureAccess software [ad_2]
0 notes
Text
Types of OTP Delivery Methods: SMS, Email, Voice & Push Notifications
In today's digital world, securing online accounts and transactions is crucial. One of the most reliable ways to enhance security is through OTP (One-Time Password) authentication. Businesses leverage various OTP delivery methods to provide secure access and prevent unauthorized access. This article explores the four primary OTP authentication methods: SMS OTP, Email OTP, Voice OTP, and Push Notification OTP, along with their benefits and best practices.
1. SMS OTP
SMS OTP is the most widely used method for delivering one-time passwords. It involves sending a unique code via text message to the user’s registered mobile number.
Benefits of SMS OTP:
High reachability: Works on all mobile phones without requiring internet access.
Fast delivery: OTPs are sent almost instantly.
User-friendly: Easy to use without additional software or setup.
Drawbacks:
Network dependency: Delivery depends on mobile network availability.
Security risks: Vulnerable to SIM swap fraud and interception attacks.
2. Email OTP
Email OTP is another commonly used method where a unique code is sent to the user’s registered email address.
Benefits of Email OTP:
Added security: Emails require login authentication, making interception difficult.
Suitable for non-mobile users: Ideal for those without access to mobile networks.
Cost-effective: No additional costs for businesses.
Drawbacks:
Delayed delivery: OTPs might be delayed due to email server issues.
Spam filtering: Emails may land in spam/junk folders, affecting usability.
3. Voice OTP
Voice OTP involves delivering the one-time password via an automated voice call.
Benefits of Voice OTP:
Useful for visually impaired users: Enhances accessibility.
Effective in areas with poor SMS delivery rates: Calls are often more reliable.
Supports landline numbers: Useful for users without mobile phones.
Drawbacks:
Background noise interference: Users may struggle to hear OTPs in noisy environments.
Longer processing time: Users need to answer the call and listen to the code.
4. Push Notification OTP
Push Notification OTP is a modern method where an OTP is sent as a push notification via a mobile app.
Benefits of Push Notification OTP:
Highly secure: Less prone to interception compared to SMS OTP.
Faster authentication: No need to check SMS or email, as notifications appear instantly.
Cost-effective: Reduces costs associated with SMS and voice OTPs.
Drawbacks:
Requires internet access: Won’t work without an active internet connection.
Device dependency: Users need a compatible app installed on their smartphones.
OTP Authentication Methods & Security Considerations
Using OTPs enhances security, but combining them with other OTP authentication methods improves protection. Common approaches include:
Two-Factor Authentication (2FA): Requires OTP plus a password.
Multi-Factor Authentication (MFA): Uses OTP along with biometrics, security questions, or smart cards.
Secure OTP Delivery: Implement encryption and other security measures to protect OTPs from interception.
OTP Implementation Best Practices
To ensure secure OTP delivery, businesses should follow these best practices:
Encrypt OTP messages to prevent interception.
Set expiration times for OTPs to reduce the risk of misuse.
Use rate limiting to prevent brute-force attacks.
Offer multiple OTP delivery methods to enhance user accessibility.
Conclusion
Choosing the right OTP delivery method depends on the business’s security needs, user preferences, and technical feasibility. SMS OTP, Email OTP, Voice OTP, and Push Notification OTP each have their advantages and drawbacks. Implementing secure OTP delivery and following OTP implementation best practices can significantly enhance account security and prevent fraud.
Businesses can further strengthen user verification and create a secure digital environment by adopting a combination of Two-Factor Authentication (2FA) or Multi-Factor Authentication (MFA).
0 notes
Text
Kirsten Poon From Edmonton Shares Tech Hacks to Simplify Your Life

Technology is meant to make our lives easier, but sometimes it can feel overwhelming. With so many tools, apps, and updates, getting lost in the digital world is easy. Kirsten Poon, an IT specialist from Edmonton, has spent years helping people navigate technology efficiently. She believes that small tech changes can greatly impact productivity and daily life. Here, she shares some of her top tech hacks to help simplify your life and make technology work for you.
1. Automate Everyday Tasks with Smart Apps
One of the easiest ways to simplify life is by automating repetitive tasks. Kirsten recommends using productivity apps like IFTTT (If This Then That) and Zapier to connect different services and create automation workflows. For example, you can automatically save email attachments to Google Drive, receive weather updates before you leave home, or schedule social media posts in advance.
Another great tool is Google Assistant or Siri, which can help schedule meetings, send texts, or set reminders using just your voice. Kirsten emphasizes that automation saves time and mental energy, allowing you to focus on more important tasks.
2. Organize Digital Clutter for Efficiency
A cluttered digital space can be just as stressful as a messy physical one. Kirsten advises people to clean up their digital devices regularly. Start by decluttering your email inbox using tools like Unroll.Me to unsubscribe from unnecessary emails and use filters to sort messages. For files, Google Drive, OneDrive, and Dropbox can help keep documents organized and easily accessible.
For your smartphone, deleting unused apps and organizing icons into folders can make navigation quicker. Kirsten also recommends using password managers like LastPass or 1Password to securely store login details, avoiding the hassle of remembering multiple passwords.
3. Enhance Online Security with Simple Steps
Cybersecurity is a major concern, and Kirsten stresses the importance of taking a few precautions to stay safe online. One of her top tips is to enable two-factor authentication (2FA) on all important accounts, adding an extra layer of security. She also advises using unique passwords for different sites to prevent data breaches from compromising multiple accounts.
Additionally, Kirsten highlights the importance of keeping software and apps updated to protect against security vulnerabilities. A simple yet effective trick is to use a VPN (Virtual Private Network) when accessing public Wi-Fi to prevent hackers from intercepting personal data.
4. Use AI and Smart Features for Daily Convenience
Artificial intelligence (AI) is becoming more accessible, and Kirsten suggests taking advantage of its capabilities to simplify daily tasks. Smart home devices like Amazon Alexa and Google Nest can help manage household routines, from setting reminders to controlling smart lights.
For work, AI-powered tools like Grammarly for writing assistance and Notion for project management can improve efficiency. Kirsten believes embracing AI can make everyday activities smoother, allowing people to focus on things that truly matter.
Final Thoughts
Technology should be a tool that works for you, not something that causes stress. By automating tasks, decluttering digital spaces, improving security, and leveraging AI, Kirsten Poon’s tech hacks can make life easier and more efficient. Whether you’re a student, a professional, or just someone looking to simplify daily routines, these tips can help you take control of your tech and use it to your advantage.
0 notes
Text
How to Automate End-to-End Testing with TOSCA: A Practical Guide
Introduction
In today’s fast-paced software development environment, automated testing is essential for ensuring the quality and reliability of applications. One of the most powerful tools for end-to-end testing is TOSCA, a test automation framework designed for enterprises. Whether you’re a beginner or an experienced tester, mastering TOSCA software automation can significantly improve your testing efficiency and accuracy.
If you're looking for a TOSCA Automation Tool Course to enhance your skills, this guide will help you understand how to automate end-to-end testing using TOSCA. We will cover key concepts, provide step-by-step instructions, and explain real-world applications to make learning practical and effective.
By the end of this guide, you will have a solid understanding of how to use TOSCA for test automation and how to apply it in real-world scenarios. You’ll also find useful TOSCA Automation Tool Notes to help you grasp essential concepts.
youtube
Let’s dive in!
What is End-to-End Testing?
Before we discuss how to automate end-to-end testing using TOSCA, it’s essential to understand what end-to-end testing (E2E) means.
Definition and Importance
End-to-end testing ensures that an entire application workflow functions as expected, from start to finish. It simulates real-world user scenarios, verifying that the system behaves correctly in an integrated environment.
Why is end-to-end testing important?
Ensures system reliability: Detects issues in integrated modules.
Validates user experience: Ensures seamless user interaction across components.
Reduces risk: Catches defects before deployment, preventing costly failures.
Example of End-to-End Testing
Consider an e-commerce application where users:
Search for a product
Add it to the cart
Proceed to checkout
Make a payment
Receive an order confirmation
End-to-end testing ensures that every step in this workflow functions correctly under different scenarios, such as failed payments or adding multiple products to the cart.
Why Choose TOSCA for End-to-End Test Automation?
TOSCA, developed by Tricentis, is a robust test automation tool that simplifies software testing by providing scriptless automation, AI-driven testing, and continuous testing capabilities.
Key Benefits of TOSCA
✅ Scriptless Automation: No coding knowledge required. ✅ Model-Based Testing (MBT): Uses a business-friendly approach to testing. ✅ Seamless Integration: Works with DevOps, CI/CD, and Agile environments. ✅ Reusable Test Cases: Reduces redundancy and saves time. ✅ Supports Multiple Technologies: Web, mobile, desktop, API, and more.
Many companies use TOSCA for end-to-end testing because it offers a comprehensive, user-friendly approach to automation.
How to Automate End-to-End Testing with TOSCA: A Step-by-Step Guide
Step 1: Install and Set Up TOSCA
Before you start automating tests, you need to install TOSCA TestSuite.
System Requirements for TOSCA
Windows OS (Windows 10 or later)
Minimum 8GB RAM
At least 10GB free disk space
Microsoft SQL Server (for storing test data)
Installation Steps
Download TOSCA TestSuite from the official Tricentis website.
Run the installer and follow the setup wizard.
Install the necessary components, including TOSCA Commander, TOSCA Executor, and TOSCA Test Repository.
Launch TOSCA Commander to start automating tests.
Step 2: Create a Test Case in TOSCA
TOSCA uses model-based test automation, which means you don’t need to write scripts manually. Instead, you define a test case by scanning the application and modeling the test steps.
How to Create a Test Case?
Open TOSCA Commander.
Create a new test case folder.
Use the Test Case Wizard to scan the application.
Select the elements you want to test.
Define the test steps using a drag-and-drop interface.
For example, to automate the login process for a web application: ✅ Scan the login page using the XScan tool. ✅ Identify username and password fields. ✅ Drag test steps to enter credentials. ✅ Add a step to click the login button.
Once the test case is ready, TOSCA automatically generates the automation logic without writing a single line of code.
Step 3: Parameterization and Data-Driven Testing
One of the best features of TOSCA software automation is data-driven testing (DDT). This allows you to run the same test case with multiple sets of data.
Example: Login Test with Multiple Users
Instead of creating separate test cases for different users, you can:
Store user credentials in TOSCA Test Data Service (TDS).
Link the test case to a data source (Excel, database, or CSV file).
Execute the test multiple times with different credentials.
This approach makes test automation more efficient and scalable.
Step 4: Execute the Test Case
After creating test cases, the next step is execution.
How to Execute a Test Case in TOSCA?
✅ Open TOSCA Commander. ✅ Right-click on the test case and select "Run". ✅ Observe test execution in real-time. ✅ Review the test execution logs for pass/fail results.
TOSCA allows you to schedule tests and integrate with CI/CD pipelines for continuous testing in DevOps environments.
Step 5: Generate Test Reports and Analyze Results
After execution, you need to analyze test results to identify bugs or performance issues.
How to Generate Test Reports?
✅ Navigate to the Execution Results section. ✅ View detailed test execution logs. ✅ Export reports in PDF, Excel, or HTML format. ✅ Integrate with JIRA or Azure DevOps to log defects automatically.
Example: If a test case fails due to an incorrect login password, the report highlights the exact step where the failure occurred.
Best Practices for TOSCA Test Automation
To maximize the effectiveness of TOSCA software automation, follow these best practices:
✅ Modular Test Design
Break down test cases into reusable components.
Use templates to standardize test steps.
✅ Maintain Test Data Properly
Use TOSCA Test Data Service (TDS) for managing test data.
Ensure data-driven testing for scalability.
✅ Implement Continuous Testing
Integrate with Jenkins, GitLab, or Azure DevOps.
Run tests automatically after code changes.
✅ Regularly Update Test Cases
Update automation scripts when UI or functionality changes.
Perform test maintenance to keep automation up to date.
Conclusion
Automating end-to-end testing with TOSCA streamlines software quality assurance, ensuring applications work seamlessly in production. By following this step-by-step guide, you can easily create, execute, and analyze test cases without writing complex scripts.
If you’re looking to enhance your expertise, consider enrolling in a TOSCA Automation Tool Course to gain hands-on experience. Mastering TOSCA software automation will improve your testing efficiency and career prospects. Don’t forget to keep TOSCA Automation Tool Notes handy for reference!
🚀 Start automating today and take your testing skills to the next level!
1 note
·
View note
Text
Carbonite Login Account: For Quick Backup of Your Data
In today’s digital world, data is the most precious asset for individuals and businesses alike. Losing valuable information due to accidental deletion, hard drive crashes, or even cyberattacks can be devastating. That's where cloud-based backup services like Carbonite come in, offering a reliable and seamless way to ensure your data is safe, secure, and easily accessible whenever you need it. If you’ve been considering using Carbonite for your data backup, setting up a Carbonite login account is the first step toward safeguarding your digital life.
This article will guide you through the process of using Carbonite, explain its benefits, and how creating a Carbonite login account can help streamline the backup of your important data.
What is Carbonite?
Carbonite is an online backup service that provides users with a simple and secure way to protect their data. The service automatically backs up files, folders, and even system settings to the cloud, ensuring that your digital content is never lost due to hardware failures, cyber threats, or other unforeseen circumstances. Carbonite offers both personal and business solutions, allowing users to select the appropriate backup options based on their needs.
With an easy-to-use interface and comprehensive backup features, Carbonite is a trusted solution for users looking to preserve their documents, photos, videos, and other critical data. However, to make the most out of Carbonite’s offerings, you first need to create a Carbonite login account.
Creating Your Carbonite Login Account
The process of setting up a Carbonite account is simple and intuitive. Here’s a step-by-step guide on how to get started:
Step 1: Visit the Carbonite Website
To begin, open your web browser and go to the official Carbonite . Once there, you’ll find options for both individual and business users. Depending on your needs, you can choose the appropriate solution and click on the "Sign Up" button.
Step 2: Choose a Plan
Carbonite offers several subscription plans to cater to different levels of data protection needs. The plans include:
Basic Plan: Ideal for personal users who want to back up a small amount of data.
Plus Plan: Suitable for users who need more storage and include video files.
Prime Plan: Offers advanced features such as external hard drive backup, automatic video backup, and priority support.
Choose the plan that best suits your requirements and proceed to the next step.
Step 3: Set Up Your Account
After selecting a plan, you’ll be prompted to create a Carbonite login account by providing your email address and creating a secure password. Make sure to choose a strong password to ensure the safety of your data.
Step 4: Enter Payment Information
Next, enter your payment details. Carbonite offers a free trial for new users, but after the trial period, you’ll need to subscribe to a paid plan. Depending on the plan, you can choose monthly or annual billing options.
Step 5: Install the Carbonite Software
Once your account is created, you can download and install the Carbonite software on your computer or device. The installation process is quick and easy, and once installed, the program will begin scanning your system for files that need to be backed up.

Benefits of Carbonite Backup
1. Automatic Backup
One of the biggest advantages of Carbonite is its automatic backup feature. Once you’ve set up your Carbonite login account and installed the software, it will automatically back up your files in the background without requiring constant attention. This ensures that your files are always up to date and protected without manual intervention.
2. Cloud Storage
Carbonite offers cloud storage, which means your data is stored in secure, offsite servers rather than on your physical device. This protects your data from potential threats such as hardware failures, theft, fire, or natural disasters. With cloud storage, you can access your files from any device with an internet connection, providing you with convenient, remote access to your data.
3. Secure and Encrypted Backup
Data security is one of Carbonite’s top priorities. All data backed up to the cloud is encrypted using AES-256 bit encryption, ensuring that your files are safe from unauthorized access. Furthermore, Carbonite’s data centers adhere to strict security protocols, including multi-factor authentication, which further protects your sensitive information.
4. Version History
Carbonite allows you to recover previous versions of your files, which can be crucial in case you accidentally delete or modify a document. This version history feature lets you roll back to an earlier version, saving you from data loss or unintended changes.
5. Access Anywhere
Once your files are backed up to Carbonite’s cloud, you can access them from virtually any device—whether it’s a computer, tablet, or smartphone. The Carbonite app allows you to retrieve and restore your data wherever you are, offering a great deal of flexibility for users on the go.
6. File Restoration
In the event of data loss, Carbonite makes it easy to restore your files. You can either restore them directly from the Carbonite website or request a physical copy of your backup via hard drive (for larger backups). This ensures that you can quickly and efficiently recover your important files.
Why Choose Carbonite for Data Backup?
While there are numerous backup services available, Carbonite stands out for several reasons:
Ease of Use: Setting up and managing a Carbonite login account is straightforward, making it accessible for both tech-savvy users and beginners.
Affordable Plans: Carbonite offers competitive pricing, making it a great value for individuals and businesses looking to protect their data.
Reliable Customer Support: Carbonite provides excellent customer support to help you with any issues or questions you may have regarding your backup process or account management.
Conclusion
In today’s digital age, having a reliable backup solution for your data is essential, whether you are an individual or a business. By setting up a Carbonite account login , you can enjoy peace of mind knowing that your important files are automatically backed up to a secure, encrypted cloud storage platform. Carbonite’s automatic backups, secure data protection, and easy access to your files make it an invaluable tool for anyone looking to safeguard their data.
So, take the first step today—create your Carbonite account and start backing up your data for a safer, more secure future!
#Carbonite login#Carbonite sign in#Carbonite login account#Carbonite login my account#Carbonite home sign in
0 notes
Text
[ad_1] Within the digital period, the place information is the cornerstone of private and professional life, defending your information from loss or corruption is important. Whether or not as a result of hardware failure, unintentional deletion, or cyberattacks, the necessity for dependable backup software program has by no means been better. MiniTool ShadowMaker Free is the right answer to make sure your precious information stays protected and simply recoverable. What's MiniTool ShadowMaker Free? MiniTool ShadowMaker Free is a robust, user-friendly backup software program designed to safeguard your system, information, and folders. With its strong options, it ensures information safety and peace of thoughts, whether or not you’re an off-the-cuff person or an IT skilled. Why Select MiniTool ShadowMaker Free? Complete Backup ChoicesMiniTool ShadowMaker Free means that you can again up your total system, particular information, or chosen drives. Whether or not you need to safe your working system or your cherished private paperwork, this software program has you coated. Ease of UseIts intuitive interface makes it accessible even for customers with minimal technical experience. Making a backup takes only a few clicks. Scheduled BackupsWith the power to schedule computerized backups, you by no means have to fret about forgetting to guard your information. Set it up as soon as, and it takes care of the remaining. Cloning CapabilitiesMiniTool ShadowMaker Free helps disk cloning, making it straightforward emigrate your information to a brand new onerous drive or SSD with out shedding any data. Catastrophe RestorationThe software program lets you create bootable media for system restoration, making certain that you would be able to restore your system even when your pc fails besides. Key Options of MiniTool ShadowMaker Free System Backup: Defend your working system, together with system information and settings, to keep away from reinstalling every little thing in case of a crash. File/Folder Backup: Safeguard particular person information and folders essential to your work or private life. Incremental and Differential Backups: Save time and space for storing by solely backing up new or modified information because the final backup. Encrypted Backups: Safe your information with password safety to stop unauthorized entry. Seamless Syncing: Preserve your information synchronized throughout a number of areas for added comfort. How one can Use MiniTool ShadowMaker Free Obtain and Set upGo to MiniTool ShadowMaker Free to obtain the software program. The set up course of is simple and fast. Choose a Backup SortSelect from choices like system, file, or disk backup, relying in your wants. Set Your Backup PreferencesCustomise the backup schedule, vacation spot folder, and encryption settings. Carry out the BackupClick on the "Begin Backup" button, and MiniTool ShadowMaker Free will deal with the remaining. Restore When WantedWhen catastrophe strikes, use the backup to revive your information or system effortlessly. Why MiniTool ShadowMaker Stands Out Many backup instruments supply primary options, however few present the excellent performance and reliability of MiniTool ShadowMaker Free—particularly for free of charge. With its user-friendly design and professional-grade capabilities, it’s a standout selection for residence and enterprise customers alike. System Backup Made Simple A system backup is a essential function that ensures your working system, purposes, and settings are protected. MiniTool ShadowMaker simplifies this course of, letting you restore your system to its precise state earlier than any crash or problem. Be taught extra about system backup choices on MiniTool’s devoted web page. Conclusion Information loss can occur while you least count on it, however with MiniTool ShadowMaker, you'll be able to keep one step forward. This versatile
free backup software program offers all of the instruments it is advisable to defend your information, system, and drives with out breaking the financial institution. Obtain MiniTool ShadowMaker Free right now at MiniTool Backup and expertise seamless, worry-free information safety. Whether or not you’re safeguarding private recollections or essential enterprise information, MiniTool has you coated. [ad_2] Supply hyperlink
0 notes