#solar charge controller
Text
What is the difference between Solar Charge Controller & Solar Inverter?

Solar charge controllers and solar inverters are critical components in solar power systems, serving distinct roles.
What is a Solar Charge Controller?
It manages the flow of electricity from solar panels to batteries, preventing overcharging and optimizing charging rates. This safeguards battery life and is vital for off-grid and hybrid solar setups.
youtube
Benefits of Solar Charge Controller:
Cost-Efficiency: It enables the conversion of a standard inverter battery into a solar-compatible system at a lower cost.
Versatility: Users can harness 24V solar panels with a single 12V inverter battery, optimizing resource use.
Limitations of Solar Charge Controller:
Cost Proportion: The controller’s cost can be relatively high, impacting overall system expenses.
Technical Expertise: Installation may require technical knowledge, emphasizing the importance of professional setup.
What is Solar Inverter?
Solar inverter converts DC solar power into usable AC electricity for homes, businesses, and the grid, promoting efficient solar energy utilization.
Benefits of Solar Inverter:
Integrated Charge Control: Often includes built-in charge controllers, simplifying setup and reducing costs.
Voltage Options: Available in various voltages and capacities, catering to diverse energy needs.
Optimal Load Management: Efficiently powers up to 80% of connected loads, ensuring versatile energy usage.
Solar Capacity Utilization: Allows matching solar panel capacity to the inverter, optimizing energy use.
Compatibility: Supports various panel configurations and offers a flexible price range.
Limitations of Solar Inverter:
Limited Warranty: Off-grid solar inverters typically have shorter warranties than expected system lifespans.
Capacity Utilization: Operating near maximum capacity for prolonged periods can reduce lifespan and performance.
In conclusion, solar charge controller guarantee efficient battery charging and protection, whereas solar inverters transform DC solar energy into usable AC power. Together, these components facilitate the dependable and optimized use of solar energy, enhancing the efficiency, durability, and eco-friendliness of solar power systems.
0 notes
Text
https://amberroot.com/solar-mppt-chargers-rehubdc-solar-dc-mppt/

REhub ECO DC
Typical Array Size :
1. 100 – 500Wp for 12V batt
300 – 1000Wp for 24V batt
Rated DC Load Current : 15A
Rated SOLAR Output Current : 25A
for more info please visit :- https://amberroot.com/product/rehub-mppt-eco-dc-12-24v-25a-15a-lc/
#Solar MPPT charger#solar charge controller#solar charger#solar mppt charge controller#solar battery charger#charge controller#charge controller mppt#Solar panel charge controller#solar panel charger#12v solar battery charger#mppt solar charge controller#best solar charge controller#mppt solar charger#solar charging station#12v solar charge controller#20 amp solar charge controller#24v solar charge controller#30 amp mppt solar charge controller#40 amp solar charge controller#30a solar charge controller#best mppt charge controller#20a solar charge controller#best mppt solar charge controller#12 volt solar battery charger kit#12 volt solar charge controller#lithium battery solar charge controller
0 notes
Text
.
#making an automatic watering system w arduino#have it flashed to trigger the relays already for a variable amt of time#which at the end of the day is basically all it takes + scheduling#but now ofc its growing its own potential spinoffs...#i wanna add a BLE module to be able to control the scheduling from like a phone#which will then also require some minimal data storage...#then the big question is rly how to power it...#its probably gonna b within an extension cord length from the back door but dont wanna deal w unplugging it for rain etc#so maybe like a weatherproof case w solar & a battery? but then ive gotta figure out the best way of battery-izing it....#lithium seems like an overkill unless its like maybe lifepo#& generally prefer lifepo over cobalt etc for safety#but then ive gotta figure out how to add a charging circuit to it....#anyway then once i have the app controlling scheduling i can also start integrating it into my home organizing/etc app?#& ideally be able to like have a couple nodes like that?#ah fuck also gotta figure out a case#maybe just start w a nice n dirty project box til i eventually make a custom enclosure/PCB backplate for the assemblage#maybe just put it next to our sprinkler box & just make the tubes longer so i dont have to fuck around w batteries for this?#starting to convince myself of that idea tbh#rn the relayboard has 4 guys...might b better to just have this as the master instead of having nodes so just get more relays#centralize & dont have to deal w synching headaches#maybe get like a multiplexer? not like this would necessarily need multiple at a time 1 at a time wouldnt b the end of the world#& i have some cheap moisture sensors but dont rly trust em tbh#esp w plants i intend to eat#eventually tho maybe link some sensors into the system#tho weather alone is probably enough to figure out#oh! huh how would i do that....#dont wanna have a whole ass wifi connection on the arduino#or like parsing web results on there...#& i dont rly wanna only know when connecting to my phone...#so that seems to point towards some client that checks the weather prediction like once a day & sends that/consequences to arduino?
21 notes
·
View notes
Text
my crack theory on what my brother and i chose to do with our lives is that my dad being an electrical engineer (in name but not so much in practice lol) rubbed off on the two of us in exactly opposite directions.
like i got the "ooo science math stem!!" side and am now pursuing biochem and my brother got the "building shit making stuff!!" side and is doing welding at the trade school.
and i think that's fun and cool. also my brother doing welding is very cool to me and it's definitely a "i have a cool big brother" moment for me which is kind of beside the point but worth mentioning if you ask me
#also did y'all know that modern welding helmets have like digitally controlled darkness settings?#and are solar powered??#because i didn't#but then my brother had his helmet out on the counter the other day because he had to charge it by the window#so that's a fun fact for you today!#technically#stem major shenanigans#personal
3 notes
·
View notes
Text

Cricket my OC Cricket... admire her ^
#my art#my OCs#This is from April actually but I feel like posting it so. Cricket <3#She's trans genner because all robots are inherently ungendered and she decided she's a woman#AND she's autistic <3#she's autistic by human standards bc she has no volume control + special interests + a handful of other very human autistic traits#she's autistic by robot standards because she doesnt think in Literal Binary#she doesnt really have any lore or story or anything shes just a cute OC for me to give silly little traits and shenanigans#her human girlfriend (also transgender and autistic) does Robot Brain Surgery on her to make it so she can run pirated movies on her visor#Cricket's extremely extroverted and part of that is because shes solar powered (vs introverted robots who need to charge via cables)#her 'ponytail' is a magnet stuck to the back of her head
4 notes
·
View notes
Text
yall say tumblr doesnt sell your data but they 100000% do
#i uninstalled fishdom#tumblr ad for fishdom saying to come back#i buy a cheap laptop on walmart#ad for walmart laptops#i buy a solar pannel charge controller#ad for solar pannel charge controllers#they 1000000% do sell your data and idk who said they didnt but if you think even Tumblr wont exploit you for money#think again
3 notes
·
View notes
Text
Step-by-Step Guide to Install a Hybrid Inverters

Step 1: Planning and Preparation
1. Assess Your Energy Needs:
Calculate your energy consumption and determine the size and capacity of the hybrid inverter required.
Ensure compatibility with your existing solar panels, battery storage system, and grid connection.
2. Choose a Suitable Location:
Select a location that is cool, dry, and well-ventilated, ideally indoors or in a sheltered area.
Ensure the inverter is close to the battery bank, solar panels, and the main electrical panel to minimize power loss.
3. Gather Tools and Equipment:
Tools: Drill, screwdriver, wrenches, wire strippers, pliers, and multimeter.
Materials: Hybrid inverter, mounting bracket, DC and AC disconnects, circuit breakers, cables, conduits, connectors, and safety gear (gloves, safety goggles).
4. Review the Manufacturer’s Manual:
Carefully read the inverter’s installation manual for specific instructions and safety guidelines.
Step 2: Mount the Inverter
1. Turn Off All Power Sources:
Disconnect all power sources, including solar panels, batteries, and grid connection, to ensure safety during installation.
2. Mount the Inverter:
Secure the inverter on the wall using the provided mounting bracket and screws.
Make sure the inverter is mounted vertically and in a location where it can be easily accessed for maintenance.
Step 3: Electrical Connections
1. Connect the Battery Bank (DC Side):
Use appropriately rated cables to connect the positive and negative terminals of the battery to the corresponding DC input terminals on the inverter.
Ensure that the connections are tight and secure.
2. Connect the Solar Panels (DC Side):
Connect the positive and negative leads from the solar panels to the inverter’s solar input terminals.
Use a DC disconnect switch between the solar panels and the inverter for safety.
3. Connect the AC Load (AC Side):
Connect the inverter’s AC output to the main electrical panel or a dedicated sub-panel.
Install appropriate circuit breakers between the inverter and the AC load to protect the system.
4. Connect the Grid (AC Side):
If your system is grid-tied, connect the inverter’s grid input to the main electrical panel using a suitable circuit breaker.
Use an AC disconnect switch between the inverter and the grid connection for safety.
Step 4: Grounding
1. Ground the System:
Connect the inverter’s grounding terminal to the main grounding point of your electrical system.
Ensure that the solar panels, battery bank, and all other components are properly grounded to prevent electrical hazards.
Step 5: Configure the Inverter
1. Power On the Inverter:
Turn on the battery, solar, and grid inputs to the inverter in the correct sequence as per the manufacturer’s instructions.
2. Set Up the Inverter:
Use the inverter’s display or a connected device (like a laptop or smartphone) to configure the system settings.
Set up parameters such as battery type, charging settings, grid settings, and any backup modes.
Connect to the monitoring system if available.
Step 6: Testing and Commissioning
1. Test the System:
Verify that the inverter is functioning correctly by checking if it’s charging the battery from the solar panels and supplying power to the AC loads.
Test the backup mode by simulating a grid outage (if applicable).
Ensure that the inverter is properly feeding excess power back to the grid (for grid-tied systems).
2. Monitor the System:
Monitor the system’s performance over a few days to ensure everything is functioning as expected.
Adjust settings if necessary based on the inverter’s performance.
Step 7: Final Inspection and Documentation
1. Inspect the Installation:
Conduct a final inspection to ensure all electrical connections are secure and properly insulated.
Check that the inverter is securely mounted and that there are no signs of damage or loose components.
2. Document the Installation:
Record the details of the installation, including the model and serial number of the inverter, a wiring diagram, and any configuration settings.
Save this documentation for future reference and maintenance.
3. Obtain Necessary Approvals:
If required, have the installation inspected by a certified electrician or local authority to ensure it complies with all safety and regulatory standards.
Safety Tips:
Always follow the manufacturer’s guidelines and local electrical codes.
Use appropriate safety gear during installation.
If you’re not experienced with electrical work, consider hiring a professional installer.
By following these steps, you should be able to install a hybrid inverter safely and efficiently, ensuring a reliable and efficient energy system for your home or business.

#hybrid inverter#solar energy#Renewable Energy#Solar Power#Battery Storage#Energy Management#Grid Connection#Energy Independence#Cost Savings#Backup Power#Energy Efficiency#Charge Controller#Smart Features#Installation Guide
0 notes
Text
MPPT solar charge controllers are 🌞🔋 able to make the most out of the power it’s receiving from the panels thanks to their internals which are more in tune with each other than those of a PWM charge controller. 🚀✨
0 notes
Text
Solar charge controller market set for substantial growth due to government support for solar PV, but high installation costs pose challenges. Opportunities arise in rural electrification initiatives using solar energy.
0 notes
Text
How to charge a small 12v battery?
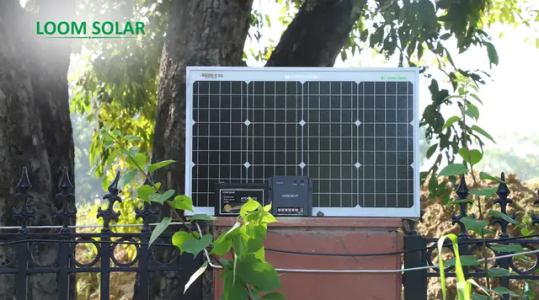
Utilizing solar panels to charge batteries is an eco-friendly choice, harnessing renewable energy. Yet, to initiate this, installing a charge controller becomes essential. This controller manages the voltage flow from the solar panel to the battery. Without it, during sunny spells, the solar panel might generate excess energy that can overwhelm and harm the battery. Fortunately, setting up a charge controller is a straightforward procedure, enabling you to efficiently charge your batteries.
youtube
Charging a small 12-volt battery requires a suitable charger and a few basic steps:
Safety Precautions: Always wear safety goggles and gloves when working with batteries. Ensure you are in a well-ventilated area, away from open flames or sparks.
Select the Right Charger: Choose a charger specifically designed for 12-volt batteries. The charger should match the type of battery you have (e.g., lead-acid, AGM, gel-cell) and its capacity in ampere-hours (Ah).
Prepare the Battery: Ensure the battery is clean and free of any corrosion on the terminals. If corrosion is present, clean it using a mixture of baking soda and water.
Connect the Charger: Connect the positive (red) clamp from the charger to the positive terminal of the battery (marked with a "+" sign) and the negative (black) clamp to the negative terminal (marked with a "-" sign).
Charging Time: The time it takes to charge the battery depends on its capacity and its current state of charge. A completely discharged battery will take longer to charge than one partially charged.
Charge Completion: Most modern chargers have features like float or maintenance mode, which keep the battery topped off without overcharging. When the charger indicates that the battery is fully charged, disconnect the charger.
Post-Charging Check: Measure the battery voltage with a multimeter to ensure it reaches the desired voltage level, typically around 12.6-12.8 volts for a fully charged 12-volt battery.
Regularly maintaining and charging your small 12v lithium-ion battery when it's not in use helps prolong its lifespan and ensures it's ready when needed. These are some basic steps for charging a small 12v battery. You have to also purchase a charge controller to charge a battery.
0 notes
Text
https://amberroot.com/solar-mppt-chargers-rehubdc-solar-dc-mppt/

REhub DC are Solar MPPT Chargers with Integrated DC Load Controllers:
The Loads are connected to the DC Load controllers – which provide functions like Dusk to Dawn, Low Voltage Disconnect and Short Circuit protection.
Solar Charge controllers with Load controllers are available for small Street Light applications. When the Current and Voltage requirement becomes higher (e.g 48V and 30A), Electro-Magnetic relays become expensive (DC relay) or unavailable. REhub DC’s have high efficiency Mosfet based switching to control the Loads.
for more info please visit :- https://amberroot.com/solar-mppt-chargers-rehubdc-solar-dc-mppt/
#Solar MPPT charger#solar charge controller#solar charger#solar mppt charge controller#solar battery charger#charge controller#charge controller mppt#Solar panel charge controller#solar panel charger#12v solar battery charger#mppt solar charge controller#best solar charge controller#mppt solar charger#solar charging station#12v solar charge controller#20 amp solar charge controller#24v solar charge controller#30a solar charge controller#40 amp solar charge controller#best mppt charge controller#30 amp mppt solar charge controller#20a solar charge controller#12 volt solar charge controller#12 volt solar battery charger kit#best mppt solar charge controller#lithium battery solar charge controller
0 notes
Text
MPPT Solar Inverter Price in India
Understanding MPPT Solar Inverters
Unraveling the Technology
MPPT, or Maximum Power Point Tracking, is a cutting-edge technology embedded in Solar PCU (Power Conditioning Unit) Inverters. It ensures optimal energy capture from solar panels, maximizing efficiency in converting sunlight into electricity.
Features that Set MPPT Solar Inverters Apart
Efficiency: Enjoy higher energy yields with advanced MPPT algorithms.
Adaptability: Suitable for various solar panel configurations and weather conditions.
Remote Monitoring: Many models offer remote monitoring capabilities for real-time performance tracking.
Pricing Overview
Factors Influencing MPPT Solar Inverter Prices
Capacity: Larger capacity inverters catering to higher energy needs may be priced higher.
Brand Reputation: Established brands with a track record of reliability might have a premium on their products.
Additional Features: Inverters with added functionalities, such as smart monitoring or grid connectivity, may be priced differently.
Price Range in India
While prices can vary based on the factors mentioned, a ballpark figure for solar inverter with MPPT charge controller in India ranges from INR 20,000 to INR 1,50,000. It's essential to consider your energy requirements and the specific features that align with your needs.
Why Invest in MPPT Solar PCU Inverters?
Long-Term Cost Savings
While the initial investment might seem significant, the enhanced efficiency of MPPT technology translates to more energy harvested over time, resulting in cost savings.
Environmental Impact
Reduce your carbon footprint by harnessing clean and sustainable solar energy, contributing to a greener planet.
Energy Independence
Enjoy a degree of energy independence by generating your electricity, providing resilience during power outages.
Conclusion
MPPT Solar Inverters represent a crucial step towards sustainable and cost-effective energy solutions. As you explore the market, weigh the features against the pricing to make an informed decision. Embrace the power of solar with MPPT technology for a brighter and greener future.
0 notes
Text
Enhancing Automotive Connectivity with SAE Extension Cables
Introduction: In the realm of automotive technology, connectivity is key. SAE (Society of Automotive Engineers) extension cables play a crucial role in facilitating seamless communication and power transfer within vehicles. This article explores the significance of SAE extension cables, their applications, and the ways in which they contribute to enhancing automotive connectivity.
Understanding SAE Extension Cables:
SAE extension cables are standardized cables designed to meet the specific requirements set by the Society of Automotive Engineers. These cables utilize a consistent connector design, ensuring compatibility across various automotive applications. The primary function of SAE extension cables is to extend the reach of power and signal connections within vehicles, enabling efficient communication between different components.
Key Features:
Versatile Connectivity: SAE extension cables are versatile, serving multiple purposes within the automotive environment. They can transmit power, signals, and data, making them integral to the functioning of various automotive systems.
Standardization: The SAE standards ensure uniformity in connector design and specifications. This standardization is crucial for compatibility and interchangeability of components in diverse automotive setups.
Durability and Reliability: Automotive environments can be challenging, with exposure to vibrations, temperature variations, and moisture. SAE extension cables are engineered for durability, providing reliable performance under demanding conditions.
Ease of Installation: The standardized design of SAE extension cables simplifies the installation process. Mechanics and technicians benefit from the consistent connector format, reducing the likelihood of errors during setup.
Applications of SAE Extension Cables:
Battery Charging Systems: SAE extension cables are commonly used in battery charging systems, allowing for efficient power transfer between the vehicle's battery and charging equipment.
Power Distribution: Within the vehicle, SAE extension cables facilitate power distribution to various components such as lights, sensors, and entertainment systems.
Diagnostic Tools: Automotive diagnostics often involve connecting tools and devices to the vehicle's onboard systems. SAE extension cables enable seamless communication between diagnostic equipment and the vehicle's electronic control units.
Accessory Connections: For additional accessories like GPS devices, dash cameras, or entertainment systems, SAE extension cables provide a standardized and reliable means of connection.
Benefits for Automotive Enthusiasts and Professionals:
Efficiency in Repairs: Mechanics and technicians appreciate the efficiency that SAE extension cables bring to repairs and maintenance tasks. The standardized connectors simplify the troubleshooting process.
Aftermarket Customization: Automotive enthusiasts engaging in aftermarket customization find SAE extension cables invaluable for integrating new components seamlessly into their vehicles.
Reduced Downtime: Standardized connectors and durable construction contribute to reduced downtime during repairs or upgrades, ensuring that vehicles spend more time on the road.
Conclusion:
SAE extension cables represent a vital link in the intricate web of automotive connectivity. Whether facilitating efficient power distribution, supporting diagnostic processes, or enabling aftermarket customization, these standardized cables play a pivotal role in ensuring the smooth operation of various automotive systems. As automotive technology continues to advance, SAE extension cables remain a reliable and standardized solution for enhancing connectivity within vehicles, contributing to the overall efficiency and performance of modern automobiles.
For more details, visit us :
XT60 connector extension cable
lifepo4 battery 12v 100ah
Lithium RV Batteries for home
0 notes
Text
How to Connect Solar Panel Inverter And Battery?
To connect a solar panel inverter and battery, you need to follow specific steps. In this guide, we will walk you through the process, ensuring a smooth connection that allows the battery to be charged using solar energy.
By understanding the correct wiring and connections, you can optimize your solar panel system’s efficiency and enjoy its benefits. So, let’s get started and learn how to…

View On WordPress
#How to Connect Solar Panel Inverter And Battery#how to connect solar panel to charge controller#Overview Of Solar Panel Inverters#solar panel with inverter and battery price for home
0 notes
Last Seen Blogs

theguywilly
🧚♂️

kat-reviews-fashion-and-art
Kat Reviews

oneworldonereligion-blog
LOVE GOD HE LOVES BACK

onetruekingofooo
The King of Ooo

customweedbags
Custom Weed Bags