#xcodebuild
Explore tagged Tumblr posts
Visit Tumblr Blog
Explore Tumblr blogs with no restrictions, modern design and the best experience.
Last Seen Tumblr Blogs


Fun Fact
Tumblr’s website traffic is steadily declining.
Text
Exploring Amazon AWS Services: A Comprehensive Guide

AWS CodeArtifact: Add Your Swift Packages
In this article related to Amazon, Seb explains how Swift developers who write code for Apple platforms (iOS, iPadOS, macOS, tvOS, watchOS, or visionOS) applications that run on the server side can utilize AWS CodeArtifact to safely store and retrieve their package dependencies.The fact that normal developer tools like Xcode, xcodebuild, and the Swift Package Manager (the swift package command) can still be used by developers to interface with AWS CodeArtifact and facilitate integration into the development workflow is one of the aspects of this service that he find most appealing.
Building Apple Silicon M2 Pro Mac Mini Computers with Amazon EC2 M2 Pro Instances
Built on Apple Silicon M2 Pro Mac Mini Computers, the Amazon EC2 M2 Pro Mac Instances are available for purchase here. Channy explained in her article how software developers may utilize Amazon EC2 M2 Pro Mac to speed product time to market, modernize their continuous integration and continuous delivery processes, and perform memory-intensive builds and test workloads. Apple engineers are now able to perform more tests in parallel using multiple Xcode simulators since EC2 M2 Mac instances have 2 times the RAM, 1.5 times the CPU cores, and more than 2 times the GPU cores of EC2 M1 Mac instances.
Version 2.0 of the Synthetics Python Runtime for Amazon Cloud Watch
You will be able to create canaries with Amazon CloudWatch Synthetics, which will allow you to regularly validate the experience that your customers get and find problems before your customers do. Canaries are scripts that can be configured to run on a schedule and serve the purpose of monitoring your APIs and endpoints. For the purpose of this announcement, you are able to generate canaries by utilizing the Synthetics Python runtime version syn-python-selenium-2.0.
Amazon QuickSight updates the KPI visual with a new layout and sparkline
With these new changes, creating visually pleasing KPIs on Amazon Quicksight can now be done with minimal effort. Quicksight presents a number of enhancements with a user-friendly experience, such as templated KPI layouts, support for sparklines, improvements in conditional formatting, and a redesigned format pane. Also included in this update is an improved format pane.
Amazon Location Services has announced that they will be lowering their prices for tracking and geofencing by up to 75 percent
Amazon Location Service just recently launched a four-tiered pricing model for tracking and geofencing, which will assist you in scaling your operations and business in a manner that is both cost-effective and efficient. If you employ geofencing, you might see a decrease in your cost of anywhere from 20 to 70 percent, and in your tracking of anywhere from 50 to 75 percent.
The present Amazon Corretto 21 is readily available
The good news for Java programmers is that Amazon Corretto 21 is now available to the entire public. Linux, Windows, and macOS are all supported versions of Amazon Coretto 21, which comes with long term support (LTS).
The management of Auto-Scaling settings has been enhanced by AWS App Runner
You may now utilize new APIs and parameters for the AWS App Runner service to manage your App Runner services. These updates were launched as part of AWS App Runner’s ongoing effort to improve its auto-scaling configuration management capabilities. For instance, creating the default ASC, updating the existing ASC, and listing all App Runner services that are utilizing an ASC resource are all examples of what are included in this task.
Redaction or masking of data for Amazon SNS messages
Amazon Simple Notification Service message content can be protected via redaction or masking. Discovering and protecting certain types of personally identifiable information (PII) and protected health information (PHI) is now possible with Amazon SNS. PII stands for personally identifiable information, and PHI stands for protected health information. You have the ability to create your own data protection policies, and SNS will check messages in real time in search of sensitive material.
0 notes
Text
Escape From Monkey Island Mac Download
This inconsistency winds through the whole game, from the puzzles to the interface. When it's good, Escape from Monkey Island is very, very good. But the game's missteps do detract from the overall experience. Monkey Island 3 for mac Paul The Tall. Unsubscribe from Paul The Tall? Secret of Monkey Island Special Edition) - Duration: 6:04. Title: Escape from Monkey Island 1.1.2 Update v1.1.1 of Escape from Monkey Island to v1.1.2: Publisher: Aspyr Media: Filesize: 218 K: Location: Escape from Monkey Island 1.1.1 Update (795K). Download Escape from Monkey Island for free on PC. Download torrent. Download WITHOUT torrent (dstudio) (max speed + fast connection) 📜 Instruction (How to Download). Then download the GOG.com setup file from Escape from Monkey Island from GOG (Remember to download the “offline backup setup files”) into your download folder. Then in Porting Kit search the game in the library – server tab and click install. After installation of the game, “exit” the GOG installer. Click “Play” to start. Download the best games on Windows & Mac. A vast selection of titles, DRM-free, with free goodies, and lots of pure customer love.

Getting Escape from Monkey Island to run under Residual on a Mac is an exercise in frustration I wish on nobody. Once upon a time, Wine -- the Windows emulator that apparently is not an actual emulator -- was an equal futile experience. These days, times have changed, and after the Rum_Rogers commented that the GOG version of Escape works just fine in Wine, I decided to give it a try. And you know… It worked! For me. Apparently not as much for everyone, but regardless, here are a few steps that might make your life a bit simpler if you want to get Escape running under macOS.
First open Terminal. Most everything here will be done through command line, so get ready for tears and to type in your password at regular intervals.
Type in: ruby -e '$(curl -fsSL https://raw.githubusercontent.com/Homebrew/install/master/install)'
That will install the package manager you need. Next type brew doctor to set everything up.
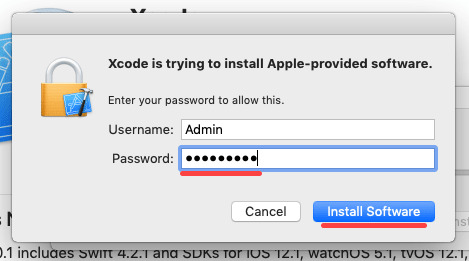
Type sudo xcodebuild -license -- you may get an error message, and all that means is you’ve already accepted the license.
Next you need XQuartz for window management. Type in: brew cask install xquartz
When ready, run a clean-up for good measure -- brew cleanup -- and then install Wine: brew install wine
Make sure you have the two backup installation files downloaded from GOG…
… in the Downloads folder. Type in cd ~/Downloads to get there in Terminal.
Here, type in wine setup_escape_from_monkey_islandtm_1.1_(20987).exe (triple check version number -- it might have changed by the time you read this) and wait. And wait. And wait.
You may get a 32-bit error. That’s fine, and it will happen only one time. Re-run the code above, and it’ll be fine.
And then the regular Windows style installation will start. Set the game up as usual, and boom -- the game should start!
Escape From Monkey Island Mac Download Torrent
To run it in the future, you’ll find it under ~/.wine/drive_c/GOG Games/Escape from Monkey Island/ and you can start it by typing in wine ~/.wine/drive_c/GOG Games/Escape from Monkey Island/Monkey.exe
And that’s it. The FSAA was disabled for me, so no guarantees what your result will be, but I’m pretty sure Rum_Rogers will field all your questions in the comments!
Escape From Monkey Island Download
A feature by Remi, who wishes you luck.
1 note
·
View note
Photo

React Native End-to-end Testing and Automation with Detox
Detox is an end-to-end testing and automation framework that runs on a device or a simulator, just like an actual end user.
Software development demands fast responses to user and/or market needs. This fast development cycle can result (sooner or later) in parts of a project being broken, especially when the project grows so large. Developers get overwhelmed with all the technical complexities of the project, and even the business people start to find it hard to keep track of all scenarios the product caters for.
In this scenario, there’s a need for software to keep on top of the project and allow us to deploy with confidence. But why end-to-end testing? Aren’t unit testing and integration testing enough? And why bother with the complexity that comes with end-to-end testing?
First of all, the complexity issue has been tackled by most of the end-to-end frameworks, to the extent that some tools (whether free, paid or limited) allow us to record the test as a user, then replay it and generate the necessary code. Of course, that doesn’t cover the full range of scenarios that you’d be able to address programmatically, but it’s still a very handy feature.
Want to learn React Native from the ground up? This article is an extract from our Premium library. Get an entire collection of React Native books covering fundamentals, projects, tips and tools & more with SitePoint Premium. Join now for just $9/month.
End-to-end Integration and Unit Testing
End-to-end testing versus integration testing versus unit testing: I always find the word “versus” drives people to take camps — as if it’s a war between good and evil. That drives us to take camps instead of learning from each other and understanding the why instead of the how. The examples are countless: Angular versus React, React versus Angular versus Vue, and even more, React versus Angular versus Vue versus Svelte. Each camp trash talks the other.
jQuery made me a better developer by taking advantage of the facade pattern $('') to tame the wild DOM beast and keep my mind on the task at hand. Angular made me a better developer by taking advantage of componentizing the reusable parts into directives that can be composed (v1). React made me a better developer by taking advantage of functional programming, immutability, identity reference comparison, and the level of composability that I don’t find in other frameworks. Vue made me a better developer by taking advantage of reactive programming and the push model. I could go on and on, but I’m just trying to demonstrate the point that we need to concentrate more on the why: why this tool was created in the first place, what problems it solves, and whether there are other ways of solving the same problems.
As You Go Up, You Gain More Confidence
As you go more on the spectrum of simulating the user journey, you have to do more work to simulate the user interaction with the product. But on the other hand, you get the most confidence because you’re testing the real product that the user interacts with. So, you catch all the issues—whether it’s a styling issue that could cause a whole section or a whole interaction process to be invisible or non interactive, a content issue, a UI issue, an API issue, a server issue, or a database issue. You get all of this covered, which gives you the most confidence.
Why Detox?
We discussed the benefit of end-to-end testing to begin with and its value in providing the most confidence when deploying new features or fixing issues. But why Detox in particular? At the time of writing, it’s the most popular library for end-to-end testing in React Native and the one that has the most active community. On top of that, it’s the one React Native recommends in its documentation.
The Detox testing philosophy is “gray-box testing”. Gray-box testing is testing where the framework knows about the internals of the product it’s testing.In other words, it knows it’s in React Native and knows how to start up the application as a child of the Detox process and how to reload it if needed after each test. So each test result is independent of the others.
Prerequisites
macOS High Sierra 10.13 or above
Xcode 10.1 or above
Homebrew:
/usr/bin/ruby -e "$(curl -fsSL https://raw.githubusercontent.com/Homebrew/install/master/install)"
Node 8.3.0 or above:
brew update && brew install node
Apple Simulator Utilities: brew tap wix/brew and brew install applesimutils
Detox CLI 10.0.7 or above:
npm install -g detox-cli
See the Result in Action
First, let’s clone a very interesting open-source React Native project for the sake of learning, then add Detox to it:
git clone https://github.com/ahmedam55/movie-swiper-detox-testing.git cd movie-swiper-detox-testing npm install react-native run-ios
Create an account on The Movie DB website to be able to test all the application scenarios. Then add your username and password in .env file with usernamePlaceholder and passwordPlaceholder respectively:
isTesting=true username=usernamePlaceholder password=passwordPlaceholder
After that, you can now run the tests:
detox test
Note that I had to fork this repo from the original one as there were a lot of breaking changes between detox-cli, detox, and the project libraries. Use the following steps as a basis for what to do:
Migrate it completely to latest React Native project.
Update all the libraries to fix issues faced by Detox when testing.
Toggle animations and infinite timers if the environment is testing.
Add the test suite package.
Setup for New Projects
Add Detox to Our Dependencies
Go to your project’s root directory and add Detox:
npm install detox --save-dev
Configure Detox
Open the package.json file and add the following right after the project name config. Be sure to replace movieSwiper in the iOS config with the name of your app. Here we’re telling Detox where to find the binary app and the command to build it. (This is optional. We can always execute react-native run-ios instead.) Also choose which type of simulator: ios.simulator, ios.none, android.emulator, or android.attached. And choose which device to test on:
{ "name": "movie-swiper-detox-testing", // add these: "detox": { "configurations": { "ios.sim.debug": { "binaryPath": "ios/build/movieSwiper/Build/Products/Debug-iphonesimulator/movieSwiper.app", "build": "xcodebuild -project ios/movieSwiper.xcodeproj -scheme movieSwiper -configuration Debug -sdk iphonesimulator -derivedDataPath ios/build", "type": "ios.simulator", "name": "iPhone 7 Plus" } } } }
Here’s a breakdown of what the config above does:
Execute react-native run-ios to create the binary app.
Search for the binary app at the root of the project: find . -name "*.app".
Put the result in the build directory.
Before firing up the test suite, make sure the device name you specified is available (for example, iPhone 7). You can do that from the terminal by executing the following:
xcrun simctl list
Here’s what it looks like:
Now that weve added Detox to our project and told it which simulator to start the application with, we need a test runner to manage the assertions and the reporting—whether it’s on the terminal or otherwise.
Detox supports both Jest and Mocha. We’ll go with Jest, as it has bigger community and bigger feature set. In addition to that, it supports parallel test execution, which could be handy to speed up the end-to-end tests as they grow in number.
Adding Jest to Dev Dependencies
Execute the following to install Jest:
npm install jest jest-cli --save-dev
The post React Native End-to-end Testing and Automation with Detox appeared first on SitePoint.
by Ahmed Mahmoud via SitePoint https://ift.tt/2JTJWxK
1 note
·
View note
Text
Week 287
Happy Thursday! We got a new beta of Xcode, and each day we get more and more articles about SwiftUI and Combine and all the new things that are iOS 13 only. While this period can be very motivating and inspiring, and many new projects are started these days, I'm sure not all iOS developers are able to jump on the SwiftUI bandwagon, and some may even feel bad or left behind if they're not familiar with the new tech already. Just because one didn't get to play with SwiftUI yet doesn't mean he's not a good developer; we each learn new technology at our own pace, and in the time we have available for that. In the meantime, it's completely fine to keep using UIKit, MVC, the old ways of doing things or even Objective-C :). Now on to the links!
Articles
Building forms with SwiftUI, by @mecid
My favorite WWDC 2019 sessions, by @onmyway133
WWDC session videos recap, by @Blackjacxxx
Rendering SwiftUI views to HTML, by @zhuowei
How to Integrate the New ‘Sign in with Apple’ Button in Your iOS App? , by @spaceotech
You don’t (always) need [weak self], by @BesherMaleh
iOS 13: Changes in the ViewController Presentation Style, by @j_zonneveld
Tools/Controls
XCLogParser - Tool to parse the SLF serialization format used by Xcode and xcodebuild to store its Build and Test logs (xcactivitylog), by @spotifyeng
Business/Career
Roadblocks vs. Speed bumps, by @robwalling
UI/UX
Marking Required Fields in Forms, by @rbudiu
Videos
UIKonf 2019 videos
Credits
pmusolino, uraimo, onmyway133, mecid
3 notes
·
View notes
Text
Macports el capitan

Macports el capitan install#
OS is highly recommended, except for Snow Leopard where the last free version, 3.2.6, is recommended. Using the latest available version that will run on your Site, on your Mac operating system installation CDs/DVD, or in the Mac App Store. Snow Leopard, or 3.1 or later for Leopard), found at the Apple Developer
Macports el capitan install#
Please note that in order to install and run MacPorts on macOS, your system must have installations of the followingĪpple's Xcode Developer Tools (version 13.1 or later for Monterey,Ĩ.0 or later for Sierra, 7.0 or later for El Capitan,Ħ.1 or later for Yosemite, 5.0.1 or later for Mavericks, 4.4 or later for Mountain Lion, The public key to verify the detached GPG signatures can be found under the attachments section on jmr's wiki page. MacPorts installed and wish to upgrade to a newer release.Ĭhecksums for our packaged downloads are contained in the corresponding checksums file. The selfupdate target of the port(1) command, for users who already have.Git clone of the unpackaged sources, if you wish to follow MacPorts development.Tar.gz one for manual compilation, if you intend to customize your installation In source form as either a tar.bz2 package or a.Procedure that most users should follow after meeting the requirements listed MacPorts version 2.7.2 is available in various formats for download and installation (note, if you are upgrading to a new major release of macOS, see the migration info page): Install MacPorts for your version of the Mac operating system:.Agree to Xcode license in Terminal: sudo xcodebuild -license.Install Xcode and the Xcode Command Line Tools.
0 notes
Text
Mac os snow leopard dmg

MAC OS SNOW LEOPARD DMG INSTALL
MAC OS SNOW LEOPARD DMG MANUAL
MAC OS SNOW LEOPARD DMG UPGRADE
Snow Leopard, Leopard or Tiger and running the system's Installer by double-clicking on the pkg contained therein,įollowing the on-screen instructions until completion.
MAC OS SNOW LEOPARD DMG INSTALL
The easiest way to install MacPorts on a Mac is by downloading the pkg or dmg for Is an optional installation on your system CDs/DVD with previous OS versions. Apple's X11.app is provided by the “X11 User” package on older OS versions.The XQuartz Project provides a complete X11 releaseįor macOS including server and client libraries and applications.Install the xorg-server port from MacPorts (recommended).(Optional) The X11 windowing environment, for ports that depend on the functionality it provides to run.Option(s) are selected at the time of Xcode's install ("UNIX Development", "System Tools", "Command Line Tools", or Users of Xcode 3 or earlier can install them by ensuring that the appropriate Or they can be installed from within Xcode back to version 4. Older versions are found at the Apple Developer site, With Xcode 4 and later, users need to accept the Xcode EULA by either launching Xcode or running: xcodebuild -licenseĪpple's Command Line Developer Tools, which can be installed on recent OS versions by running this command in the Terminal: xcode-select -install OS is highly recommended, except for Snow Leopard where the last free version, 3.2.6, is recommended. Using the latest available version that will run on your Site, on your Mac operating system installation CDs/DVD, or in the Mac App Store. Snow Leopard, or 3.1 or later for Leopard), found at the Apple Developer Please note that in order to install and run MacPorts on macOS, your system must have installations of the followingĪpple's Xcode Developer Tools (version 13.1 or later for Monterey,Ĩ.0 or later for Sierra, 7.0 or later for El Capitan,Ħ.1 or later for Yosemite, 5.0.1 or later for Mavericks, 4.4 or later for Mountain Lion, The public key to verify the detached GPG signatures can be found under the attachments section on jmr's wiki page.
MAC OS SNOW LEOPARD DMG UPGRADE
MacPorts installed and wish to upgrade to a newer release.Ĭhecksums for our packaged downloads are contained in the corresponding checksums file. The selfupdate target of the port(1) command, for users who already have.Git clone of the unpackaged sources, if you wish to follow MacPorts development.
MAC OS SNOW LEOPARD DMG MANUAL
Tar.gz one for manual compilation, if you intend to customize your installation
In source form as either a tar.bz2 package or a.
Procedure that most users should follow after meeting the requirements listed MacPorts version 2.7.1 is available in various formats for download and installation (note, if you are upgrading to a new major release of macOS, see the migration info page):
Install MacPorts for your version of the Mac operating system:.
Agree to Xcode license in Terminal: sudo xcodebuild -license.
Install Xcode and the Xcode Command Line Tools.
0 notes
Text
Skype for mac 10.10.5

#SKYPE FOR MAC 10.10.5 HOW TO#
#SKYPE FOR MAC 10.10.5 FOR MAC#
#SKYPE FOR MAC 10.10.5 FULL VERSION#
#SKYPE FOR MAC 10.10.5 MAC OS X#
#SKYPE FOR MAC 10.10.5 INSTALL#
It is always installed on Lion, and is an optional installation on your system CDs/DVD with previous OS versions.
Apple's X11.app is provided by the “X11 User” package on older OS versions.
It has however not been updated since 2016.
The XQuartz Project provides a complete X11 release for macOS including server and client libraries and applications. Skype is a cross-platform application that allows users to make telephone calls on the internet.
#SKYPE FOR MAC 10.10.5 INSTALL#
Install the xorg-server port from MacPorts (recommended).You have multiple choices for an X11 server: (Optional) The X11 windowing environment for ports that depend on the functionality it provides to run.Xcode 4 and later users need to first accept the Xcode EULA by either launching Xcode or running:.Users of Xcode 3 or earlier can install them by ensuring that the appropriate option(s) are selected at the time of Xcode's install ('UNIX Development', 'System Tools', 'Command Line Tools', or 'Command Line Support'). Go to Applications Folder in Finder and Right.
#SKYPE FOR MAC 10.10.5 HOW TO#
Older versions are found at the Apple Developer site, or they can be installed from within Xcode back to version 4. How to make Skype work on older Macs.Try this with skype 6.15 & Mac OS 10.5, 10.6, 10.7, 10.8: 1. Install MacPorts for your version of the Mac operating system:.Agree to Xcode license in Terminal: sudo xcodebuild -license.Install Xcode and the Xcode Command Line Tools.On your computer, go to or open Hangouts in Gmail.If you have the Hangouts Chrome extension, Hangouts will open in a new window. You can send and receive messages with one person or multiple people. Start and join video calls from your computer, smartphone or tablet. Available on mobile or on desktop, start making video or voice calls today. Use Google Hangouts to keep in touch with one person or a group. For example, you can use this web navigator while browsing the web to withhold some information about your computer's configuration.Hangouts Hangouts is cool and you can add a lot of people to chat with! But there is a just a teeny little problem, we can call each other but still chat in the call not go into the hangouts app just staying at the call and not leaving to go chat in the normal place. You need to use protocol-specific support software if you don't want the sites you visit to see your identifying information. It focuses only on protecting the transport of data. Download, Install or Update Tor Browser for Mac! Learn more about configuring hidden services and how the hidden service protocol works. Nobody would be able to determine who was offering the site, and nobody who offered the site would know who was posting to it. This hidden service functionality could allow Tor users to set up a website where people publish material without worrying about censorship. Using Tor 'rendezvous points,' other Tor users can connect to these hidden services, each without knowing the other's network identity. The app also makes it possible for users to hide their locations while offering various kinds of services, such as web publishing or an instant messaging server. For example, if you're travelling abroad and you connect to your employer's computers to check or send mail, you can inadvertently reveal your national origin and professional affiliation to anyone observing the network, even if the connection is encrypted. It can even threaten your job and physical safety by revealing who and where you are. This can impact your checkbook if, for example, an e-commerce site uses price discrimination based on your country or institution of origin. Knowing the source and destination of your Internet traffic allows others to track your behavior and interests. Using Tor protects you against a common form of Internet surveillance known as 'traffic analysis.' Traffic analysis can be used to infer who is talking to whom over a public network. Tor Browser for macOS enables you to securely browse the Web while hiding your identity! Download, Install or Update Tor Browser for Mac!
#SKYPE FOR MAC 10.10.5 FULL VERSION#
download full version through offline installer setup for.
#SKYPE FOR MAC 10.10.5 MAC OS X#
Overview of Mac OS X Yosemite Get mac os free. Get this operating system as your Mac Default and it is full bootable and multilingual file along with 32 x86 and 64 圆4 bit.
#SKYPE FOR MAC 10.10.5 FOR MAC#
The latest installation package that can be downloaded is 118.3 MB in size. Download Mac OS X Yosemite 10.10.5 DMG build 14A389 for Mac system. This free Mac app was originally produced by Skype Limited. Our antivirus check shows that this Mac download is virus free. The latest version of Skype is supported on Mac OS X 10.9 or later. Tor for Mac provides the foundation for a range of applications that allow organizations and individuals to share information over public networks without compromising their privacy. Skype 8.80.0 for Mac can be downloaded from our software library for free. It also enables software developers to create new communication tools with built-in privacy features. Tor Browser for Mac is a network of virtual tunnels that allows people and groups to improve their privacy and security on the Internet.
0 notes
Text
Install command line developer tools in os x

#Install command line developer tools in os x mac os#
#Install command line developer tools in os x install#
#Install command line developer tools in os x update#
#Install command line developer tools in os x manual#
#Install command line developer tools in os x upgrade#
#Install command line developer tools in os x install#
Users of Xcode 3 or earlier can install them by ensuring that the appropriate Or they can be installed from within Xcode back to version 4. Older versions are found at the Apple Developer site, With Xcode 4 and later, users need to accept the Xcode EULA by either launching Xcode or running: xcodebuild -licenseĪpple's Command Line Developer Tools, which can be installed on recent OS versions by running this command in the Terminal: xcode-select -install OS is highly recommended, except for Snow Leopard where the last free version, 3.2.6, is recommended. Using the latest available version that will run on your Site, on your Mac operating system installation CDs/DVD, or in the Mac App Store. Snow Leopard, or 3.1 or later for Leopard), found at the Apple Developer Please note that in order to install and run MacPorts on macOS, your system must have installations of the followingĪpple's Xcode Developer Tools (version 13.1 or later for Monterey,Ĩ.0 or later for Sierra, 7.0 or later for El Capitan,Ħ.1 or later for Yosemite, 5.0.1 or later for Mavericks, 4.4 or later for Mountain Lion, The public key to verify the detached GPG signatures can be found under the attachments section on jmr's wiki page.
#Install command line developer tools in os x upgrade#
MacPorts installed and wish to upgrade to a newer release.Ĭhecksums for our packaged downloads are contained in the corresponding checksums file.
The selfupdate target of the port(1) command, for users who already have.
Git clone of the unpackaged sources, if you wish to follow MacPorts development.
#Install command line developer tools in os x manual#
Tar.gz one for manual compilation, if you intend to customize your installation In source form as either a tar.bz2 package or a.Procedure that most users should follow after meeting the requirements listed MacPorts version 2.7.2 is available in various formats for download and installation (note, if you are upgrading to a new major release of macOS, see the migration info page): Install MacPorts for your version of the Mac operating system:.Agree to Xcode license in Terminal: sudo xcodebuild -license.Install Xcode and the Xcode Command Line Tools.Run the command line program by typing its name and pressing Enter.Use the “cd” command to change to the folder containing the program you wish to run.One option is to choose Run from the Windows Start menu, type cmd, and click OK. Once installed you can run tree and it’ll recursively print out the file structure for the current folder you are in.
#Install command line developer tools in os x mac os#
To install tree on Mac OS X, you could use hombrew and run brew install tree. You should now be able to tell if the program has launched or perhaps has quit itself already. Click the Install button next to Command Line Tools.įrom Finder – select the Go menu and select Utilities Open Activity Monitor Type Xcode in the search field.On the Downloads window, choose the Components tab.Choose Preferences from the Xcode menu.How do I install command line tools on a Mac? Alternatively, the return value will be 2 if they do NOT exist, and 0 if they do. How do I know if I have command line tools on my Mac?ġ0.10 Yosemite Update: Just enter in gcc or make on the command line! OSX will know that you do not have the command line tools and prompt you to install them! To check if they exist, xcode-select -p will print the directory.
#Install command line developer tools in os x update#
In the same way when you are downloading new software and apps, a popup update window will appear asking you: “The xcode-select command requires the command line developer tools. People ask also, where is Xcode command line tools installed on Mac? Go to Terminal in /Applications/Utilities/. To uninstall these tools, simply remove the “Developer” folder from the Macintosh HD > Library directory. You asked, where is command line developer tools Mac? When installed, the developer tools will be placed in the Macintosh HD > Library > Developer directory, which you can peruse to see what exactly has been installed. Similarly, what are Mac command line tools? The Command Line Tool package gives Mac terminal users many commonly used tools, utilities, and compilers, including make, GCC, clang, perl, svn, git, size, strip, strings, libtool, cpp, what, and many other useful commands that are usually found in default linux installations. … To check out command line tools in a particular category, click on a link below: Web Development.
9 How do I install tree commands on a Mac?Ĭommand line tools are scripts, programs, and libraries that have been created with a unique purpose, typically to solve a problem that the creator of that particular tool had himself.
7 How do I install command line tools on a Mac?.
6 How do I know if I have command line tools on my Mac?.
5 How do I find Developer Tools on Mac?.
0 notes
Text
Install Xcode For Mojave

Until you access your Mojave system via SSH and face a whole new raft of permission wrangling headaches. Mojave has been a real disappointment. Apple Server app lost DHS, DHCP, Mail, Webpretty much everything you’d use a server for, permissions/access are now so walled off it’s a constant game of access whack-a-mole.
After Sierra, High Sierra, Mojave, the next one is macOS Catalina. Now Catalina includes a huge deal of fresh green stuff. First off, starting off with iTunes, Apple’s Senior VP Craig Federighi nailed it with making fun of showing off some apps in iTunes.
On iOS, install the WireGuard app from the iOS App Store. Then, use the WireGuard app to scan the QR code or AirDrop the configuration file to the device. On macOS Mojave or later, install the WireGuard app from the Mac App Store. A default install only requires the user to sit patiently and, less than ten times, press enter when prompted by the script, without interacting with the virtual machine. Tested on bash and zsh on Cygwin. Works on macOS, CentOS 7, and Windows. Should work on most modern Linux distros. Can you clarify how you upgraded? I have a macpro5,1 running the latest mojave (10.14.6). Unclear to me how to upgrade to catalina (10.15.3), as the installer says “Install a new version of the OS” (or similar) as opposed to “upgrade or install new” from the normal installers.
Quickstart
Install Xcode and the Xcode Command Line Tools
Agree to Xcode license in Terminal: sudo xcodebuild -license
Install MacPorts for your version of the Mac operating system:
Installing MacPorts
MacPorts version 2.6.4 is available in various formats for download and installation (note, if you are upgrading to a new major release of macOS, see the migration info page):
“pkg” installers for Big Sur, Catalina, Mojave, and High Sierra, for use with the macOS Installer. This is the simplest installation procedure that most users should follow after meeting the requirements listed below. Installers for legacy platforms Sierra, El Capitan, Yosemite, Mavericks, Mountain Lion, Lion, Snow Leopard, Leopard and Tiger are also available.
In source form as either a tar.bz2 package or a tar.gz one for manual compilation, if you intend to customize your installation in any way.
Git clone of the unpackaged sources, if you wish to follow MacPorts development.
The selfupdate target of the port(1) command, for users who already have MacPorts installed and wish to upgrade to a newer release.
Checksums for our packaged downloads are contained in the corresponding checksums file.
The public key to verify the detached GPG signatures can be found under the attachments section on jmr's wiki page. (Direct Link).
Please note that in order to install and run MacPorts on macOS, your system must have installations of the following components:
Apple's Xcode Developer Tools (version 12.2 or later for Big Sur, 11.3 or later for Catalina, 10.0 or later for Mojave, 9.0 or later for High Sierra, 8.0 or later for Sierra, 7.0 or later for El Capitan, 6.1 or later for Yosemite, 5.0.1 or later for Mavericks, 4.4 or later for Mountain Lion, 4.1 or later for Lion, 3.2 or later for Snow Leopard, or 3.1 or later for Leopard), found at the Apple Developer site, on your Mac operating system installation CDs/DVD, or in the Mac App Store. Using the latest available version that will run on your OS is highly recommended, except for Snow Leopard where the last free version, 3.2.6, is recommended.
Apple's Command Line Developer Tools can be installed on recent OS versions by running this command in the Terminal:
Older versions are found at the Apple Developer site, or they can be installed from within Xcode back to version 4. Users of Xcode 3 or earlier can install them by ensuring that the appropriate option(s) are selected at the time of Xcode's install ('UNIX Development', 'System Tools', 'Command Line Tools', or 'Command Line Support').
Xcode 4 and later users need to first accept the Xcode EULA by either launching Xcode or running:
(Optional) The X11 windowing environment for ports that depend on the functionality it provides to run. You have multiple choices for an X11 server:
Install the xorg-server port from MacPorts (recommended).
The XQuartz Project provides a complete X11 release for macOS including server and client libraries and applications. It has however not been updated since 2016.
Apple's X11.app is provided by the “X11 User” package on older OS versions. It is always installed on Lion, and is an optional installation on your system CDs/DVD with previous OS versions.
macOS Package (.pkg) Installer
Microsoft office 2019 free. download full version for mac download. The easiest way to install MacPorts on a Mac is by downloading the pkg or dmg for Big Sur, Catalina, Mojave, High Sierra, Sierra, El Capitan, Yosemite, Mavericks, Mountain Lion, Lion, Snow Leopard, Leopard or Tiger and running the system's Installer by double-clicking on the pkg contained therein, following the on-screen instructions until completion.
This procedure will place a fully-functional and default MacPorts installation on your host system, ready for usage. If needed your shell configuration files will be adapted by the installer to include the necessary settings to run MacPorts and the programs it installs, but you may need to open a new shell for these changes to take effect.
The MacPorts “selfupdate” command will also be run for you by the installer to ensure you have our latest available release and the latest revisions to the “Portfiles” that contain the instructions employed in the building and installation of ports. After installation is done, it is recommended that you run this step manually on a regular basis to to keep your MacPorts system always current:
Download iMovie 9.0.9. What's New in Version 9.0.9. Addresses issues where iMovie does not recognize video cameras connected to your Mac. Imovie 9 download mac.
At this point you should be ready to enjoy MacPorts!
Type “man port” at the command line prompt and/or browse over to our Guide to find out more information about using MacPorts. Help is also available.
Source Installation
If on the other hand you decide to install MacPorts from source, there are still a couple of things you will need to do after downloading the tarball before you can start installing ports, namely compiling and installing MacPorts itself:
“cd” into the directory where you downloaded the package and run “tar xjvf MacPorts-2.6.4.tar.bz2” or “tar xzvf MacPorts-2.6.4.tar.gz”, depending on whether you downloaded the bz2 tarball or the gz one, respectively.
Build and install the recently unpacked sources:
cd MacPorts-2.6.4
./configure && make && sudo make install
Optionally:
cd ./
rm -rf MacPorts-2.6.4*
These steps need to be perfomed from an administrator account, for which “sudo” will ask the password upon installation. This procedure will install a pristine MacPorts system and, if the optional steps are taken, remove the as of now unnecessary MacPorts-2.6.4 source directory and corresponding tarball.
To customize your installation you should read the output of “./configure --help | more” and pass the appropriate options for the settings you wish to tweak to the configuration script in the steps detailed above.
You will need to manually adapt your shell's environment to work with MacPorts and your chosen installation prefix (the value passed to configure's --prefix flag, defaulting to /opt/local):
Add $(prefix)/bin and $(prefix)/sbin to the start of your PATH environment variable so that MacPorts-installed programs take precedence over system-provided programs of the same name.
If a standard MANPATH environment variable already exists (that is, one that doesn't contain any empty components), add the $(prefix)/share/man path to it so that MacPorts-installed man pages are found by your shell.
For Tiger and earlier only, add an appropriate X11 DISPLAY environment variable to run X11-dependent programs, as Leopard takes care of this requirement on its own.
Install Xcode For Mojave 10.14
Lastly, you need to synchronize your installation with the MacPorts rsync server:
Upon completion MacPorts will be ready to install ports!
It is recommended to run the above command on a regular basis to keep your installation current. Type “man port” at the command line prompt and/or browse over to our Guide to find out more information about using MacPorts. Help is also available.
Jw library download mac. Download JW Library - JW LIBRARY is an official app produced by Jehovah’s Witnesses. It includes multiple Bible translations, as well as books and brochures for Bible study. Download JW Library for PC – Windows 7, 8, 10, Mac: To start, you need to download BlueStacks on your PC & Mac. Run the installation wizard and follow the on-screen instructions.
Git Sources
If you are developer or a user with a taste for the bleeding edge and wish for the latest changes and feature additions, you may acquire the MacPorts sources through git. See the Guide section on installing from git.
Purpose-specific branches are also available at the https://github.com/macports/macports-base/branches url.
Alternatively, if you'd simply like to view the git repository without checking it out, you can do so via the GitHub web interface.
Selfupdate
If you already have MacPorts installed and have no restrictions to use the rsync networking protocol (tcp port 873 by default), the easiest way to upgrade to our latest available release, 2.6.4, is by using the selfupdate target of the port(1) command. This will both update your ports tree (by performing a sync operation) and rebuild your current installation if it's outdated, preserving your customizations, if any.
Other Platforms
Running on platforms other than macOS is not the main focus of The MacPorts Project, so remaining cross-platform is not an actively-pursued development goal. Nevertheless, it is not an actively-discouraged goal either and as a result some experimental support does exist for other POSIX-compliant platforms such as *BSD and GNU/Linux.
The full list of requirements to run MacPorts on these other platforms is as follows (we assume you have the basics such as GCC and X11):
Tcl (8.4 or 8.5), with threads.
mtree for directory hierarchy.
rsync for syncing the ports.
cURL for downloading distfiles.
SQLite for the port registry.
GNUstep (Base), for Foundation (optional, can be disabled via configure args).
OpenSSL for signature verification, and optionally for checksums. libmd may be used instead for checksums.
Normally you must install from source or from an git checkout to run MacPorts on any of these platforms.
Install Xcode For Mojave Installer
Help
Help on a wide variety of topics is also available in the project Guide and through our Trac portal should you run into any problems installing and/or using MacPorts. Of particular relevance are the installation & usage sections of the former and the FAQ section of the Wiki, where we keep track of questions frequently fielded on our mailing lists.
Install Xcode Mojave Command Line
If any of these resources do not answer your questions or if you need any kind of extended support, there are many ways to contact us!
0 notes
Text
Testing Pre-trained Models Part One: im2txt
Now that I had gained a reasonable amount of knowledge on how machine learning models are developed, through my experimentation with TensorFlow using Jupyter Notebook. I then moved onto testing pre-trained image captioning models so I could finalise which one I would be using for my project. However, this was more difficult than I thought as there was not many pre-trained open source image captioning models available. It seems that there was a surge of interest in image captioning around 2015 by researches due to the release of large-scale image captioning datasets such as MS C0CO and Flicker30k, also in 2015 the first image captioning competition was held called the MS C0CO Challenge, however the interest in captioning since then seems to have died down. This made it more difficult to find models however, in the end I found two well-known image captioning models that were open source. The first model is a TensorFlow implementation of a model called Show and Tell which was created by google in 2015. This model tied for first in place in the MS COCO challenge in 2015, the other model I found is called DenseCap which was created in 2016. This model takes a unique approach to image captioning as rather than trying to generate a one sentence caption for an image it instead generates captions for the different objects within the image.
The TensorFlow implementation of Show and Tell is called im2txt, it is trained on the same dataset and a similar architecture as the original Show and Tell model. To get the model working the following libraries are required, Bazel, Python, Tensorflow and Natural Language Toolkit (NLTK). Installing Bazel was rather straight forward as I used the package manager Homebrew however when testing that the library had installed correctly, I was receiving an error this was because I needed to accept the xcodebuild license to use Bazel. For Python the version needed was 2.7 therefore I created a conda virtual environment for this version of python.
As for TensorFlow I already had this installed however as TensorFlow was installed on another virtual environment this meant that I had to install TensorFlow again. Furthermore as this model was released in 2017 this meant that it was not compatible the latest version of TensorFlow which is version 2, instead it is only compatible with TensorFlow version 1. Therefore, inside the conda virtual environment for python 2.7 I installed TensorFlow version 1.0. As for Numpy I already had this installed this just left NLTK which was split into two parts. Firstly, I had to install NLTK itself then I had to install the package data for it which was a relatively simple process. However, I did have some trouble installing the package data as I tried using the NLTK GUI installer which caused my computer to crash, therefore instead I had to use the command line installation.
I now had all prerequisites for im2txt installed however the problem with this model is that is does not come with an official pre-trained model, instead you either have to train the model yourself or use existing pre-trained weights that were trained by someone else. As this model would take weeks to train and required a high spec GPU it was not logical to train this model myself therefore, I decided to use weights that other people had trained. Finding pre-trained weights for this model was quite easy however getting the weights to work on my machine was quite difficult. To get im2txt to work a checkpoint file that contains all the weights generated during training is required as well as a text file containing the vocabulary that was generated by the model during training. I downloaded a few different checkpoint and vocabulary files and tested them however none of them worked as I was getting a range of different errors.
The problem was that the pre-trained weights that I found were all trained on different versions of TensorFlow and Python. Therefore, when I tried to run them on my versions of Python and TensorFlow they did not work. To solve this problem, I created different virtual environments that had the same versions of Python and TensorFlow that the checkpoint file was trained on. In the end I created three different virtual environments each with a different versions of TensorFlow and Python.

For example, the first virtual environment was used to test an im2txt checkpoint which had been trained using TensorFlow 0.12 and python 3.5. By using a virtual environment which used these specific versions of TensorFlow and Python I was able to get the model to work. However, once I ran the model on one of my images the result were not what I was expecting instead the model just produced a single word for the image instead of a caption.

For example, for the image above the model would generate this instead of a complete caption.

I also tested the model on images that are part of the MS COCO dataset which is the dataset this model has been trained on and the results were still the same. I also tested all of the pre-trained im2txt checkpoint files that I had downloaded, and the results were the same. I am not sure as to why the model was behaving like, I thought it might be that the model does require some initial training however that was not the case. Instead I suspect that perhaps one the prerequisite libraries did not install correctly or perhaps the version of one of the library’s was causing the model to not work as intended. As the model was essentially performing just image recognition on the images instead of generating a caption, I think that the Natural Language Toolkit library may have been causing the problem.
Even though this model was not working I did not want discard it straight away therefore I tried to see if there was docker image implementation available, which there thankfully was. Using docker meant that I did not have to worry about installing the additional library as docker will take care of that. I firstly installed docker and then downloaded the im2txt docker image from the docker hub. Getting the model to work using docker was fairly straight forward as all that was required was the pre-trained weights and a vocabulary file which could both be downloaded using docker. I then run the script for generating a caption and passed in the same image that I had previously used. However now the model was working as it was now generating a complete caption instead of just a single word.
Caption generated using im2txt docker image:

0 notes
Text
Build project of Xcode8 in command line
UNITY_PROJECT_ROOT="/Users/hur0/Documents/project/hur0Project" PROJECT_DIR="$UNITY_PROJECT_ROOT/build/" EXPORT_DIR="/Library/WebServer/Documents/build/nightly/" EXPORT_OPTION_PLIST="$UNITY_PROJECT_ROOT/Assets/Plugins/iOS/exportOptions.plist"
sed -i '' 's/ProvisioningStyle = Automatic;/ProvisioningStyle = Manual;/' ${PROJECT_DIR}/Unity-iPhone.xcodeproj/project.pbxproj
xcodebuild -workspace ${PROJECT_DIR}/Unity-iPhone.xcworkspace \ -scheme Unity-iPhone \ -configuration Release archive \ -archivePath ${PROJECT_DIR}/build \ CODE_SIGN_IDENTITY="iPhone Distribution" \ PROVISIONING_PROFILE_SPECIFIER="iOS Distribution : build test"
xcodebuild -allowProvisioningUpdates -exportArchive -archivePath ${PROJECT_DIR}/build.xcarchive \ -exportOptionsPlist ${EXPORT_OPTION_PLIST} \ -exportPath ${EXPORT_DIR}
3 notes
·
View notes
Text
Dropbox與C++的“七年之癢”難跨越 跨平台真的是偽命題嗎?
“一次編寫,處處運行” —— 簡單來說就是跨平台。然而這個十分符合程序員思維,且承載著他們美好願望的方案,在實際操作中往往不能如其所願,甚至會適得其反。
Dropbox 工程師近日在其官方博客和大家分享了他們“棄暗投明”的經歷 —— 放棄在其 iOS 和 Android 客戶端之間共用同一套代碼的策略,轉而使用各自平台的原生語言進行開發。

工程師表示,Dropbox 在 2013 年開發 iOS 和 Android 平台的移動應用時,採用了通過 C++ 語言在兩個平台之間共享同一套代碼的策略。當時的想法十分簡單,開發團隊希望使用 C++ 編寫一次代碼即可,無需分別針對 iOS 和 Android 平台各使用 Objective-C 和 Java 編寫兩次代碼。另外,當時負責移動應用開發的團隊規模相對較小,為支持快速增長的移動應用,他們需要找到一種方法以通過這個小團隊在 iOS 和 Android 平台上快速部署大量代碼。
但現在 Dropbox 放棄了這個策略,轉而使用各自平台的原生語言(主要是 Swift 和 Kotlin)。之所以做出這個決定,是因為在兩個平台共用同一套代碼的隱藏開銷其實很高。他們從中總結到的經驗就是:如果遵循廣泛使用的平台默認標準,而不是以非標準方式編寫代碼,他們可以不用承擔本應不必考慮的開銷,這種開銷最終比編寫代碼兩次更昂貴。
Dropbox 工程師將這些隱藏開銷歸納為四類,在介紹這些隱藏開銷之前,工程師強調他們實際上從未達到大多數代碼庫均使用 C++ 開發的階段,因為正是採用 C++ 帶來的隱藏開銷阻止了他們完全朝這個方向發展。
維護自研框架和庫的開銷
使用 C++ 首先面臨的開銷是需要自己構建框架和庫,這大致分為 2 個子類別:
支持與主機環境交互以構建完整的移動應用程序的框架。例如:
Djinni:用於生成跨語言類型聲明和接口綁定的工具
用於在後台運行任務與主線程的框架(使用平台原生語言執行簡單任務)
用於替代本可以在平台原生語言中使用的默認或者開源標準庫。例如:
json11:用於 JSON 的 (反)序列化
nn:C++ 的非可空指針
Dropbox 工程師表示,如果採用平台原生語言,這些代碼都不是必需的,而且他們對開源項目的貢獻可能會使更多的開發者受益於平台原生語言。值得注意的是,上述的這些開銷在 C++ 中尤其高(與其他非原生語言如 Python 和 C# 相比),因為它缺少單一的全功能標準庫。話雖如此,C/C++ 是唯一包含受 Google 和 Apple 支持的編譯器的語言,如果使用不同的語言會產生許多其他需要處理的問題。
維護自研開發環境的開銷
移動生態系統有許多工具可幫助提升開發效率。其中用於移動開發的 IDE 也非常豐富,Google 和 Apple 為其投入了大量資源,讓開發者在相應的平台上擁有最佳的開發體驗。由於 Dropbox 沒有使用平台的默認方案,他們自然無法享用這些便利。其中最值得注意的是調試體驗,在平台的默認 IDE 中調試平台原生語言的體驗通常優於調試 C++ 代碼的體驗。
Dropbox 工程師舉了一個尤其令他們印象深刻的例子,在其後台線程框架中出現了導致應用程序隨機崩潰的錯誤。為此他們使用了簡單的標準堆棧,但是也難以定位這些類型的錯誤。因為這個問題涉及調試在 C++ 和 Java 之間來回運行的多線程代碼,最終他們花費了幾週的時間才定位了問題所在。
除了工具的缺失,工程師還需要花費時間構建支持共用同一套 C++ 代碼的工具。最重要的是,他們需要一個自定義構建系統,該系統用於創建包含 C++ 代碼以及封裝 Java 和 Objective-C 代碼的庫,並且可以生成 Xcodebuild 和 Gradle 都能理解的對象。正是這個系統對 Dropbox 的資源造成巨大的拖累,因為它需要不斷更新以支持兩個構建系統的變更。
可以看到,大量的時間被耗費在造輪子 -> 補輪子的重複中。
解決不同平台之間的差異的開銷
雖然 iOS 和 Android 應用程序都統稱為“移動應用程序”,並且兩者通常具有相同的特性和功能,但平臺本身存在一些影響功能實現的差異。例如,應用程序在每個平台上執行後台任務���方式是不同的。即使剛開始採用這種跨平台策略時具有一定的相似之處,但隨著時間的推移這些差異會大相徑庭(例如,與系統相冊的交互)。
因此,工程師甚至無法真正實現編寫一次代碼並讓它在不同平台上開箱即用地運行。他們必須花費大量時間將代碼集成到不同的平台,並編寫特定於平台的代碼。
所以這裡的“只編寫一次代碼”並不能如願以償,大大降低了這種方法的便利性。
招聘、培訓和留住開發者的開銷
當 Dropbox 在其移動應用產品上採用這種策略時,他們擁有一批經驗豐富的 C++ 開發者。這個團隊啟動了 C++ 項目,並對其他的開發者進行了培訓以為項目貢獻代碼。
但隨著時間的推移,這些有經驗的開發者逐漸去了其他團隊或者其他公司。剩下的開發者缺乏足夠的經驗來支撐和推進項目,而招聘具有相關 C++ 開發經驗的高級工程師也變得越來越困難。
最後團隊缺乏維護 C++ 代碼庫的關鍵專業知識,而要滿足這一需求團隊有以下兩種選擇:
找到並僱用具有這種特定技能的候選人(現實情況是招聘了一年仍未能找到合適的人選)
針對缺失的技能,在內部培訓移動(或 C++)工程師。但現實情況是缺少擁有所需技能的人員來進行培訓,所以這個目標也難以實現。甚至在培訓前,就有移動工程師透露出對學習 C++ 不感興趣。為此培訓所需的開發者也是一大問題。
在招聘問題上,Dropbox 工程師發現許多移動開發者根本不想在 C++ 項目中工作,這也導致他們許多優秀的工程師離開項目。畢竟移動開發技術的更新非常快,這些開發者希望自己的技術棧能時刻跟上潮流。
結論
Dropbox 表示隱藏開銷導致最終的成本超過了收益,還不如使用各自平台的 IDE 開發更為簡單和便宜。所以最後他們不再通過 C++(或任何其他非標準方式)共用同一套移動端代碼,而是使用各自平台的原生語言編寫代碼。
相關文章:
Dropbox工程師解釋為什麼放棄共享代碼而使用原生語言
.
from Dropbox與C++的“七年之癢”難跨越 跨平台真的是偽命題嗎? via KKNEWS
0 notes
Text
What’s new in Xcode 10

With time technology is moving fast too. This article will provide information about Xcode 10 tool and what is new in Xcode 10 compared to its earlier version. It is beneficial for the developers who like to add new features to their apps. Our experts use the latest tools & technologies to deliver the best to our clients. Xcode 10 is one of the tools we used after thorough testing. 9series always ensures to test all the tools before they use it for your solutions.
Below is the synopsis of the blog in case you just want an overview of the same ~ Xcode 10 was announced at WWDC 2018 on 4 June 2018. ~ Xcode 10 includes Swift 4.2 and SDKs for iOS 12, watchOS 5, tvOS 12, and macOS 10.14. ~ Xcode 10 requires a Mac running macOS 10.13.4 or later. ~ It is capable of running multiple simultaneous versions of the Xcode App and any associated tools. The interesting thing about Xcode 10 is that it can coexist with the previous version.
Here are the detailed of the new features.
Dark Mode ~ Xcode now supports the Dark Mode. You can adopt a dark mode instead of wide light as the appearance. It is a system-wide appearance that is already implemented and adopted by many apps. ~ Dark mode is now available in the Xcode 10. Xcode 10 also enables you to create your own dark apps for macOS. You can also move between the light and dark mode. You can also move your app in and out of Dark mode while debugging.
Better Editor Xcode 10 supports multi-line editing by selecting multiple lines. If we want to change all functions to private functions, then we can select all lines of func and replace them with private functions.
New Build System ~ The new build system has been activated by default in Xcode 10. We can go to Xcode-Files-Project/Workspace settings options. You will see that there is a Build System option that allows you to select a new build system.
Directly Upload App to AppStore ~ Through Xcode 10, we can directly upload an iOS app to the App Store from the Xcodebuild tool using the following command: ~ “ $ Xcodebuild -exportArchive -archivePath <xcarchivepath> [-exportPath <destinationpath>] -exportOptionsPlist <plistpath> “ ~ We need to pass the ExportOptions.plist file containing the key destination and value upload. Furthermore, we have to ensure that Xcode is configured with the right membership details to be able to connect to the Apple developer portal.
Parallel Testing Xcode 10 supports running tests in parallel, which reduces the time for takes to run the test. Test parallelization is supported for macOS, iOS and tvOS unit test in simulators.
Version Control Integration Xcode now supports working directly with a few source code collaboration platforms such as GitHub and GitHub Enterprise, Bitbucket Cloud and Bitbucket server and also GitLab.com and Gitlab self –hosted.
Asset Catalog Xcode 10 supports the CarPlay assets and ARKit 3D ARReferenceObject asset. It also supports unit varying image and color assets with light, dark and high contrast appearances on macOS 10.14 and above.
Code Snippets ~ We can also create snippets for other languages likes Ruby, php, Python, C++, Obj C, etc. ~ We have to define the shortcut keys for the snippets.
Closing Note
There are new great features included in this version of Xcode that we have discussed in the article above. So you can also go for it and experience the difference. 9series provides you with the best iOS App Development Services where they use the latest tools and technologies like Xcode 10 to develop the most dynamic and user-friendly apps for your business. Source : https://www.9spl.com/blog/new-in-xcode-10/
#best ios app development services#Xcode 10#Dark Mode#Better Editor#9series#India#USA#Australia#Africa
0 notes
Text
【最強】iOSアプリのデバイス毎の確認をiOSシミュレータを複数起動して最速で行う【最高】
from https://developers.eure.jp/tech/launching_app_on_multiple_simulators/
この記事は eureka Native Advent Calendar 2017 – Qiita の19日目の記事です。 Pairs Global事業部のiOSエンジニアのmuukiiです 🤠 Xcode9ではシミュレータの複数同時起動が可能になりました。 これにより、開発時にシミュレータを切り替えることなく、並行してデバイス毎の確認ができるようになったのは大きなアップデートですよね! しかし、修正を行った際にスキーム設定からシミュレータを選択して全てのデバイスに対して実行しなおすのは面倒ですね?

今回はこの面倒さを解消するTipsを紹介します

.appファイルはドラッグ&ドロップでインストールできる
実はシミュレータには.appファイルをドラッグ&ドロップするとアプリがインストールされるようになっています。 補足 .appファイルはシミュレータ用のアーキテクチャ(x86_64など)でビルドされている必要があります。 この仕組みを利用して次の動画のようなことができます。
youtube
まず、事前にシミュレータを複数起動しておきます。 Xcodeから実行するシミュレータは適当に選択しておき、ビルドが終わっ���タイミングでXcode上のProducts/MyApp.appを残りのシミュレータにドラッグ&ドロップでインストールします。
修正 → 確認のフロー
アプリの動作を確認したいシミュレータをすべて起動しておく
どれかのシミュレータを対象としてXcodeから実行
ビルドが終わったらProducts/MyApp.appを残りのシミュレータにドラッグ&ドロップでインストール
すべてのシミュレータで動作を確認
修正が必要であれば、修正を行い2から繰り返す
これからはシミュレータが活躍する時代
本記事ではGUIによる操作を行っていますが、xcrun simctlコマンドを利用することでターミナルやスクリプトからでもシミュレータの追加・起動・インストールなどの操作が行えます。 工夫次第では、「一気に全てのシミュレータで起動」とか実現できます。 .appファイルさえあればよいのでアプリのリリース毎にシミュレータ用の.appファイルを管理しておけば、あとで簡易的な確認をする際にとても便利です。 シミュレータをターゲットにしてアーカイブはできないので、次のようなスクリプトでビルドを行い、DerivedDataから.appファイルを取り出せます。 ビルドコマンド
$ xcodebuild -workspace <ワークスペース> -scheme <スキーム> -arch x86_64 -sdk iphonesimulator -configuration <Configuration>
.appファイルが存在するDerivedDataのパスを取得
$ xcodebuild -workspace <ワークスペース> -scheme <スキーム> -arch x86_64 -sdk iphonesimulator -configuration <Configuration> -showBuildSettings | grep -m 1 "CONFIGURATION_BUILD_DIR" | grep -oEi "\/.*"
まとめ
この方法でレイアウトの確認、OSごとの動作確認のサイクルがかなり早くなりました 🤩 外部ディスプレイを使ってシミュレータを表示しておくともっと快適になりそうです。 これ本当に今年一番嬉しかったことですね。 Androidエンジニアからは「そんなのAndroidなら最初からできたよ」と言われましたが

http://img.youtube.com/vi/irPeNEcQu60/0.jpg
0 notes