
I sculpt in ZBrush, draw in Procreate, model in Blender.
Don't wanna be here? Send us removal request.
Statistics
We looked inside some of the posts by the-mronetwo and here's what we found interesting.
Average Info
Notes Per Post
7
Likes Per Post
7
Reblog Per Post
0
Reply Per Post
0
Time Between Posts
2 months
Number of Posts By Type
Text
8
Video
2
Photo
7
Last Seen Tumblr Blogs


Fun Fact
Mobile Tumblr US users spend an average of 4.04 minutes per session on the app.
Text


Drawing from several weeks ago.
1 note
·
View note
Text

Seeing where I can take this one. Green with gold goes super well.
Btw Tumblr is a way better UX for artists than Instagram… shame it’s “dead”.
I was a bit stuck with this one. Problem was the perfect topology. I felt trapped. I couldn’t explore and make big changes. Making a Dynameshed body allowed me to ignore the topology and I was able to explore. Remember to first find the idea. The technical details and just that. Details. Broad strokes are the most important.
2 notes
·
View notes
Text

ZBrush sketch that might go places. Might not. Who knows? I don’t!
0 notes
Text


4h sketch. HB, B7, Procreate.

1 note
·
View note
Video
tumblr
This was an idea to improve my RFID article (https://ciesie.com/post/rfid_explained/) visually. Making this animation took most of one day (~10h?).
The pipeline of frames -> video can be found here: https://github.com/MrOneTwo/imagemagick-examples. Using make, bash and ffmpeg for that.
I did the first sketch in the Procreate. I then split it into parts and imported those textures in Blender. I’ve built a simple rig and animated this sequence. The problem was that the images were only the outlines. That means that the terminal was showing through the hand. I’ve rendered the image sequence and manually fixed that overlapping in Procreate - that took a bit of time and could have been avoided!
A cool step of the process was remapping colors of b&w frames. I used imagemagick to generate a LUT image. imagemagick can use that image to remap colors of an input image. This program seems crazy powerful. The goal was to remap the animation to colors used on my website. It worked but the result wasn’t readable. My website’s colors don’t map well on an animation like this one.
ffmpeg was used for converting sequence of images into a video. This step was difficult because the ffmpeg syntax is a bit confusing. It was difficult to control the quality of the output.
2 notes
·
View notes
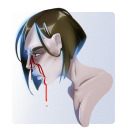
Photo
Thinking about going with a spooky oculty vibe. A lot of work needs to be put into the posing.
It's also an interesting lesson. When I start sculpting I start sculpting entire body. Trying to to be anatomically correct. Problem is that spending too much time on anatomy might be a waste of time... If you're working on an illustration that is. A lot of parts of the anatomy won't be seen. The lesson is to not spend time on the things that don't contribute to the final image. It's one thing to learn anatomy, it's another to work on an image you want to finish.
0 notes
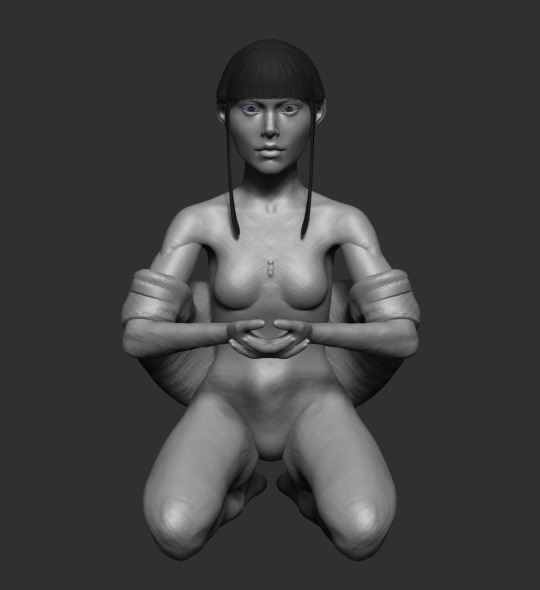
Text
Another CG project - wip 001

Sculpting another character. Some thoughts:
I like starting from scratch. Starting from a base mesh feels bad. It's difficult to modify already existing form. It's like making it from scratch allows you to search for what you're looking for.
Using palm of the hands from base meshes is very useful. I'm copying the hands from: https://flippednormals.com/downloads/female-basemesh-low-poly/. It doesn't cost much and I later use it as a new topology.
Sculpting elbows area is hard af... it's so subtle. Entire forearm is very... subtle and complex. Need to do some study about it.
0 notes
Text
Learning OpenGL - 1
So I’ve been learning OpenGL. I have to work on how it all fits together because it’s a bit confusing.
So OpenGL is a state machine. That means that you set things up and then fire up some functionallity. What’s important is that lines with the functionallity might not reference the object they operate on.
You can bind two buffers like so:
glBindBuffer(GL_ARRAY_BUFFER, vbo); glBufferData(GL_ARRAY_BUFFER, sizeof(vertices), vertices, GL_STATIC_DRAW); glBindBuffer(GL_ELEMENT_ARRAY_BUFFER, ebo); glBufferData(GL_ELEMENT_ARRAY_BUFFER, sizeof(indices), indices, GL_STATIC_DRAW);
Those two bindings use different targets. Imagine it's like parking two cars on different parking spots (spots are targets - GL_ARRAY_BUFFER, GL_ELEMENT_ARRAY_BUFFER - OpenGL defines those. Cars are the buffers.). You might now do something with the whole parking not caring what's on it (you don't reference those cars in the functions that are the functionallity).
Oh the cars themselves are just a block of memory on the GPU side. That also means you can park any car on any parking spot. Means you can do stupid stuff, nothing stops you from that.
Next up look up how everything gets plugged into VAOs.
0 notes
Photo

Messing around with Toolbag’s toon shader.
0 notes
Video
tumblr
Messing around with motion graphics. Made with Blender and ffmpeg
0 notes
Photo

Just a menu mockup in Raylib. Background is a shader
0 notes

Photo

Work in progress of baking this character (no she won’t be bald...). It’s an example of something I bake with the workflow I described in the previous post. **_Marmoset Toolbag 3_** is awesome!
0 notes
Text
On high poly to low poly baking
In making 3D assets for games it’s normal to bake high poly meshes to low poly ones. The process isn’t that straight forward.
The problems with the process:
Meshes intersect - means they don’t bake clean
To get good bakes some modifications to the low poly are needed - that might be me but I prepare high, low and the baking environment and then constantly iterate and improve (bake, fix low poly, export, bake)
Additional cage mesh is needed - sometimes you have to store the cage mesh as a separate object (baking in Blender even with amazing TexTools)
Often there are multiple texture sets - means you have to bake separately for every set and keep geometry which uses specific set in its file
Nowadays best solution seems to be to bake in Marmoset Toolbag 3. Why?
Mesh intersections are solved by using bake groups. Each bake group is baked separately. By following proper naming for your meshes you can force Marmoset Toolbag 3 to create those groups automatically (of course you can also control it manually). The properties of Baker object has the Quick Loader function - it allows you to pick a file and every time when it changes Toolbag 3 reloads the file and prepares bake groups based on the naming convention:
<group_name>_<high/low>_<object_name>
And example result:

This functionallity solves the problem of intersections and makes it easy to iterate thanks to auto reloading the file. Toolbag 3 has the idea of cages built-in. You don't have to import cage and the cage system in Toolbag 3 is pretty flexible.
The last problem - multiple texture sets - has been solved with the latest free update. Before that I saved geometry into fbx files based on texture sets. Every fbx file meant that there is a texture set for it. Now you can store the whole high poly and low poly in their separate, single files. Toolbag 3 can bake different texture sets based on low poly's materials. So the separate Baker objects from the image above? Gone. Now you can do everything with one Baker.
Combining all makes for a really well behaving and flexible baking process.
I like it ... :>
0 notes
Text
Big brush strokes
Creating things is hard. In the 3D graphics context it’s often a slog. It requires discipline. Help yourself succeed.
Give me six hours to chop down a tree and I will spend the first four sharpening the axe. - Abraham Lincoln (possibly...)
What I take from this quote is that you should properly prepare before swinging the axe. In cg that would be preparation: gathering references and concepting. More and more I belive that this stage is the most important one.
It’s still something I’m thinking about but for now lets tackle this idea, and that’s:
You should have a clear idea of what the final piece should look like.
Firstly I’m talking about 3D computer graphics. Secondly, I don’t mean that you can’t modify the idea while working.
I think that you should explore the concept. You should sketch the idea. Either in you favourite 3D app (for me that’s Blender and Zbrush). Sketch the character, sketch it’s final pose, Don’t think about the small stuff. Think about the shapes, mood, attitude, color palette, proportions. Test ideas but do it really roughly. Don’t get into detail. Do it while collecting references. Spend some time on this stage. When the objective is clear start the proper work.
0 notes
Photo

Working on a character...
0 notes
Photo

Old Nigh Stalker fan art.
1 note
·
View note