
This is where I post the things I make or draw. Sometimes I show how.
Don't wanna be here? Send us removal request.
Statistics
We looked inside some of the posts by weremakingthings and here's what we found interesting.
Average Info
Notes Per Post
6K
Likes Per Post
4K
Reblog Per Post
2K
Reply Per Post
11
Time Between Posts
3 months
Number of Posts By Type
Text
3
Photo
14
Last Seen Tumblr Blogs


Fun Fact
Forty percent of Tumblr users are between the ages of 18 to 25.
Text
Its been a while. But here is a thing I made for someone on Gaia.
5 notes
·
View notes
Photo

12 x 9 inch canvas board painting Spray paint and acrylic
5 notes
·
View notes
Photo

Wanted to find a wacky Draw The Squad base to draw the Pirates Campaign crew. Didnt find one that I wanted, so I made one.
The Crew of the Cheshire’s grin, Everybody.
Feel free to use the base to draw your own wacky squad
#Draw the Squad#Pathfinder#Skull and Shackles#Rico#Rajan#Boebob#Yoritaka#Minks#Base#Your Character Here
116 notes
·
View notes
Photo


It was never her goal to end up on a pirate ship, but at least shes having a good time with her new found freedom.
4 notes
·
View notes
Text
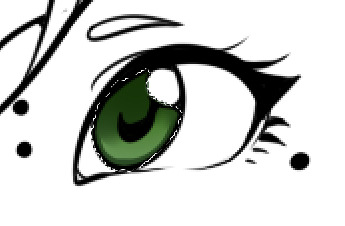
Okay folks, here we go
I’m here today to show you how I colour stuff with Paint Tool SAI. Lets start with this silly hippogriff
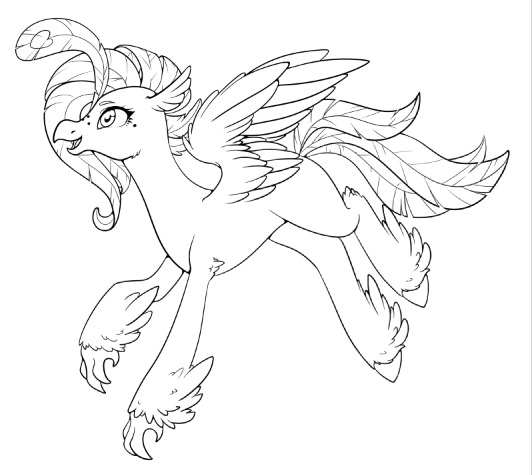
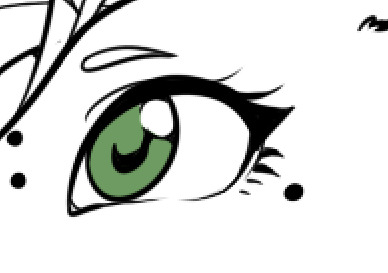
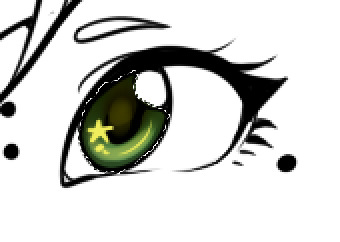
Specifically this one will focus on the eye. At the end of this tutorial we will have this:
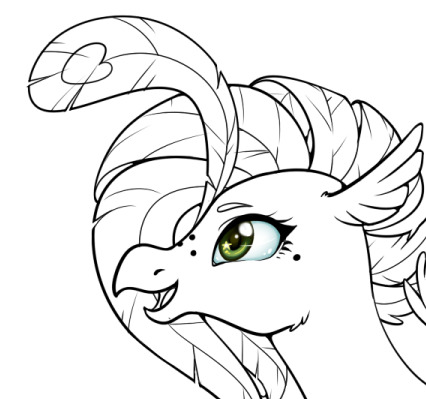
I will be posting the progress as I go along as to how I colour the whole image. Honestly. I’m posting each step before moving on to the next. So how the whole picture turns out will be as much as a surprise to me as it will be for you at this point.
SO LET’S GO (Image Heavy)
Line art with transparency background is necessary for my method of colouring
My first step is to pick your colour base
Next, select the base colour layer, and click on the “Preserve Opacity” box which sits above the list of layers

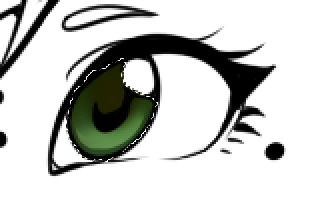
This handy feature is kind of acts like selecting everything on the layer at once. Now select a darker colour
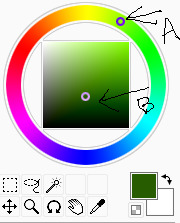
I moved A a little closer to the yellow zone and B both down and to the right. Select the air brush tool and add a darker gradient to the top
Use the magic wand selector to highlight the eye because we’re going to need another layer. So when you have your new layer over top of the last layer with the eye selected, choose a darker colour and use the pencil tool to fill in the pupil and outline the iris.
Above the layers list and Preserve Opacity, there is a drop down menu next to “Mode”. Select Multiply. Im not entirely sure of the specific effects of each layer effect, but from my experience, the Multiply mode makes colours darker or lighter and overlaps them with the layer underneath.
After selecting Multiply, grab the water colour tool and grab the corners of that lighter eye patch and lightly drag them in (This will require pressure sensitivity)
Go back to the colour wheel and select yet another darker colour. I nudged my colour more into the yellow zone again for an almost brown colour. Play around with hues a bit, it can add a nice effect.
Hit up that Air Brush tool again and do a little spritz around the pupil area
Time to go back into the lighter shades. For this step, I selected a pale yellow. Create a new layer above the line art layer and click that water colour tool again. Add a dollop of fairy dust to the eye there. Just a drop.
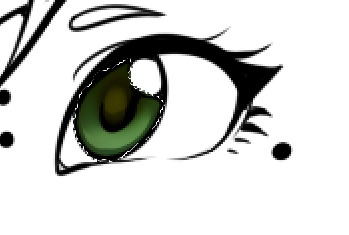
Just enough to give her that thirst for life. Next step is to go back to the eye layers, and create a layer on top on them. Still using the pale yellow and the water colour tool, I do a little high light swish
We’re almost through the main iris here. we’ve just got to add some little high lights. Again, you will need to create a layer above the line art. Because I am a space cadet, I will slap stars on anything you’ll let me.
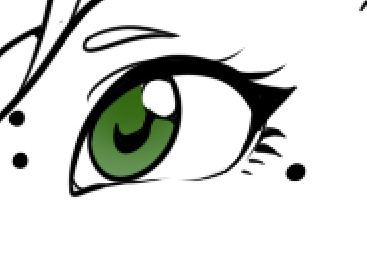
I add a little white dab in the star shine before going to colour the line art of the eye. Unselect the selected eye and go to the line art layer. Click the Preserve Opacity box and select a colour that is darker than the darkest part in the eye (Besides the black of the pupil)

Now that White shine there is looking a little choppy. So go back to the layers above the line art and get the small air brush and outline it with white to smooth it out. I added an extra white shine to add a little sparkle. Everything is better with more sparkle
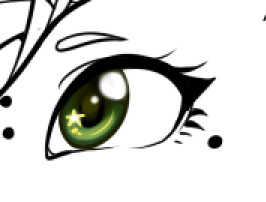
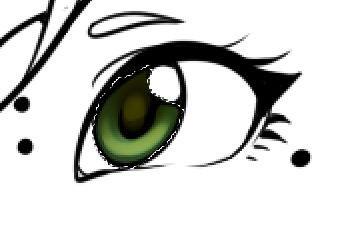
Time to move on to the whites of the eyes!
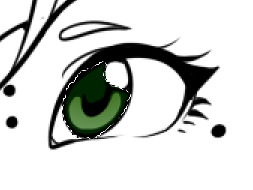
Create a new layer under all the colours so far. Select a vivid or dark colour and fill it all in
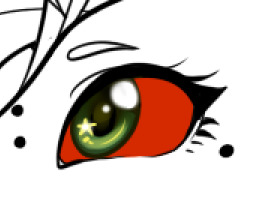
(My sister likes to call this the Crimson method) Especially when it comes to lighter colours, I colour it in dark first since it makes it easier for me to tell if I’ve missed a spot. Once it’s all coloured in, Select Image Opacity and colour it back to white and select a greyish blue
With a large air brush, do a little swish around the edges of the eye

Now with a much smaller air brush (But the same colour) Go around the edges again

Last but not least, go back to a layer that is above the line art and select a solid white. With a little highlight and couple little blips, you’re done!

And thus concludes the eye ball. Stay tuned for the next episode, which will probably be the body.
433 notes
·
View notes
Text
LISTEN UP TUMBLR
I’m here to revive the ancient craft of beaded lizards

If you wanna know how you too can bring back these endangered creatures, keep reading:
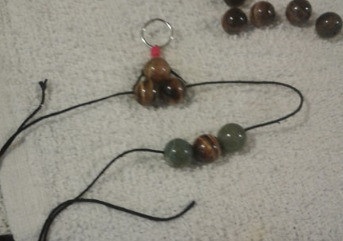
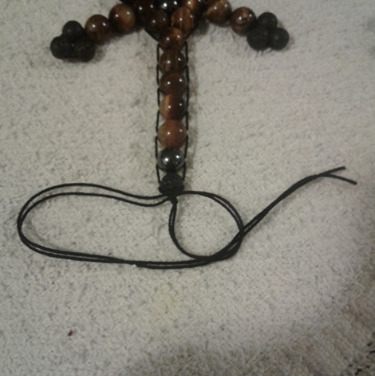
STEP ONE Gather your beads. They should all be the same size. 2 for the eyes, 20 for the main body (Give or take 1 or 2 on how long you want the tail) 6 for the belly, and lastly you’ll need 12 for the feets. So all in all this comes to 40 beads.
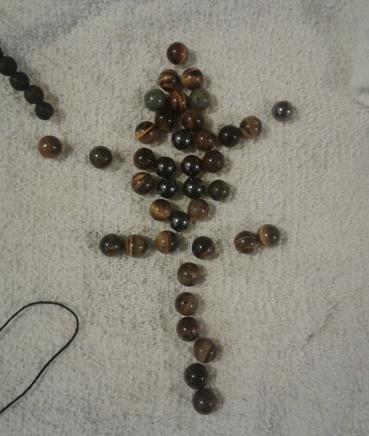
I’ve laid them out here to give my self an approximate look on how the colours will look together. Here, I am using gem stones because they are the only beads I have on hand. Lighter plastic beads may turn out better in the end.
You will also need some sort of string.
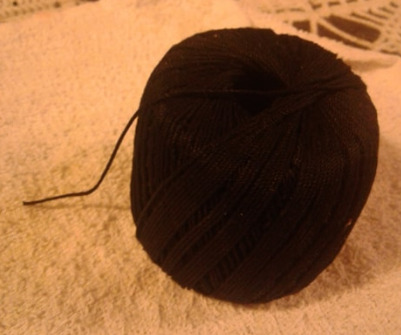
I ended up having this-... Crochet thread? Yarn? Anyway, you’ll need one very long piece of this. I ended up cutting mine way too long. 3-4 metres may have done the trick.
Now it begins
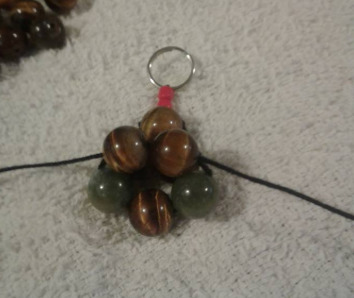
So. You find the centre of the thread, and put a hoop there if you so choose.
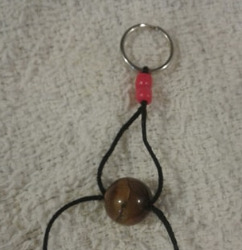
Thread both threads through the net two beads ( I used two little red beads to make it look kind of like a little tongue. ) Next, you will be starting on the snoot! Grab one bead and weave the threads through opposite sides of the bead.
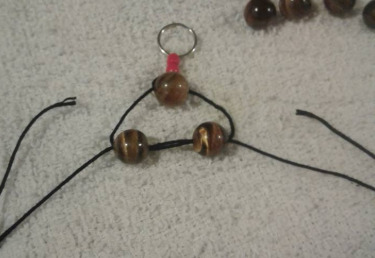
Pull that tight then add two beads for the next row. Rinse and repeat for the next row, only add three.
The Outter two beads are the eyes
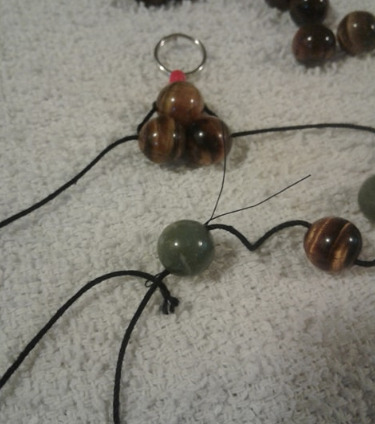
If you’re having a hard time getting the thread through the beads, I would recommend using those thing beading needles, but because I’m a dink and lost all of mine, I had to substitute with some the Thermally bonded thread I had kicking around. (Thin wire can work too)
oops. I threaded the last one the wrong way and got it tangled a little. Unthreaded it and kept going. It’s okay to make mistakes sometimes. You just have to patch that shit up and keep going.
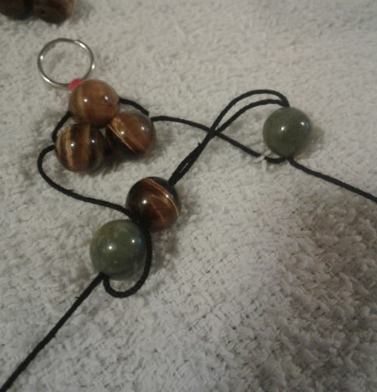
After it’s pulled together, it should look like something above. Next, add 2 more beads to the next row. Look at that snoot! When you add the fourth row, It will bunch up if you pull it too tightly. Like so:
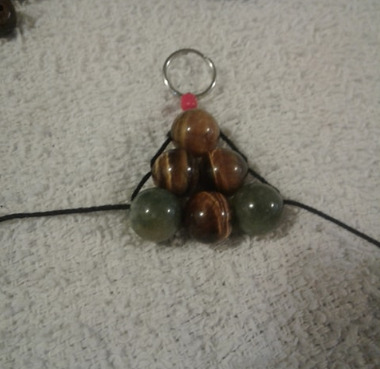
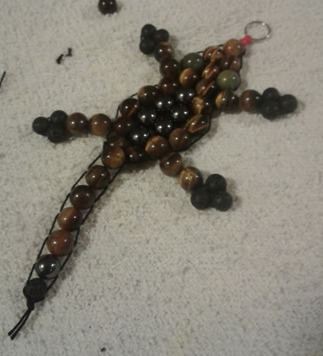
To prevent this, hold it flat while you tighten it. Resting my phone on it seemed to work. Now it’s time for some sweet little lava paws!
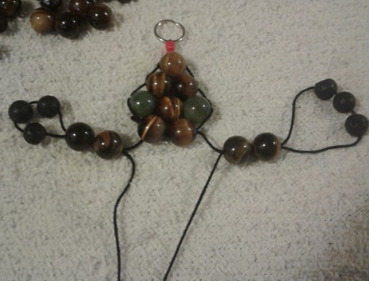
Jazz hands! I don’t know what words to use for this step so I sincerely hope the image above portrays the message. Now when you tighten the arms, it’s best to tighten the arms up to the body before you tighten the feets.
I wish I was as good at cursive as that random thread in the top left that decided to make that lovely “T” But moving on now...
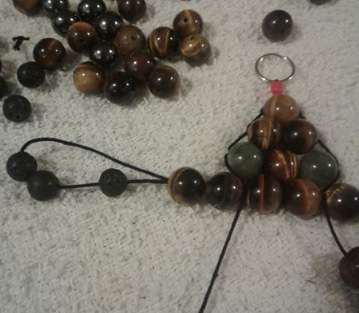
Once you have tightened the arms, move on to the next row which will have 3 beads. The middle bead will be another colour (Optional) for the belly
Keep going. The next row will have 4 beads. The 2 inside beads being the belly colour. The row after will have another 4 beads. After that, you will have 3 which will make up the rest of the body.
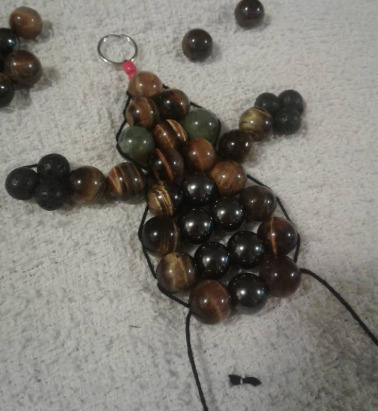
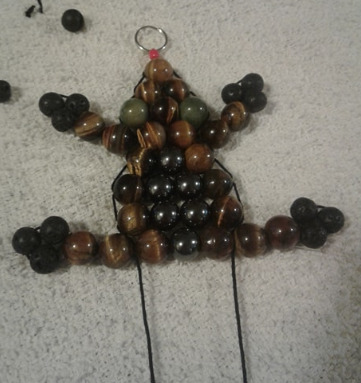
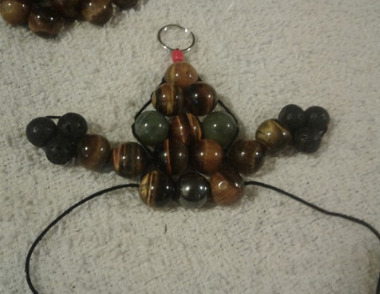
Kind of looks like a frog at this point. From here, we begin the tail. Or you can just finish it and call it a frog. Who am I to stop you from following your dreams?
If you wish to carry on to create a lizard, the next row will have two beads.
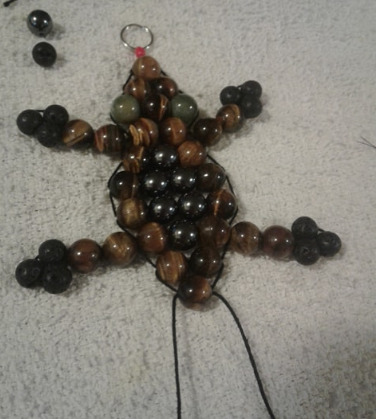
Still like a frog, I guess.
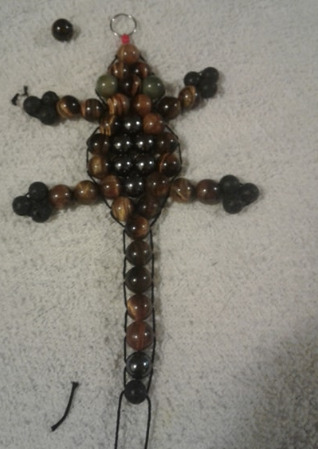
Once you finish the tail to your desired length, it’s time for the knotty part.
In the image above, I had already tied a knot and forgot to take a picture so I just made another one. I find it’s good to tie one more knot than what you think you need. Just for some extra security. We could all use some extra security once in a while.
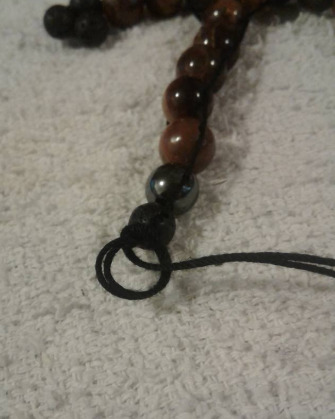
Now once you are completed, trim off the remaining cord (thread? yarn? string?)
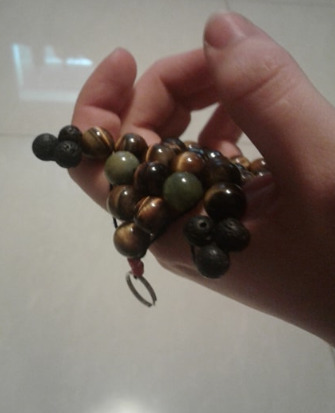
The final step
Caress the lizard and have fun with your new friend!
5K notes
·
View notes
Photo
Yes of course more Gaiaonline stuff
54 notes
·
View notes
Photo
Help me I become Gaiaonline trash once again
9 notes
·
View notes
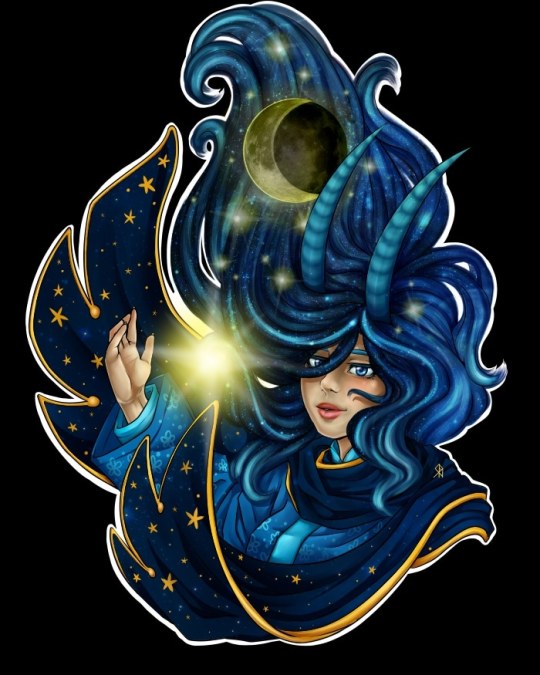
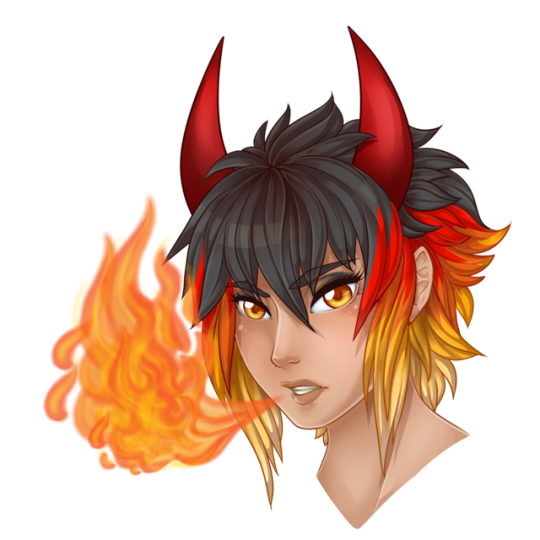
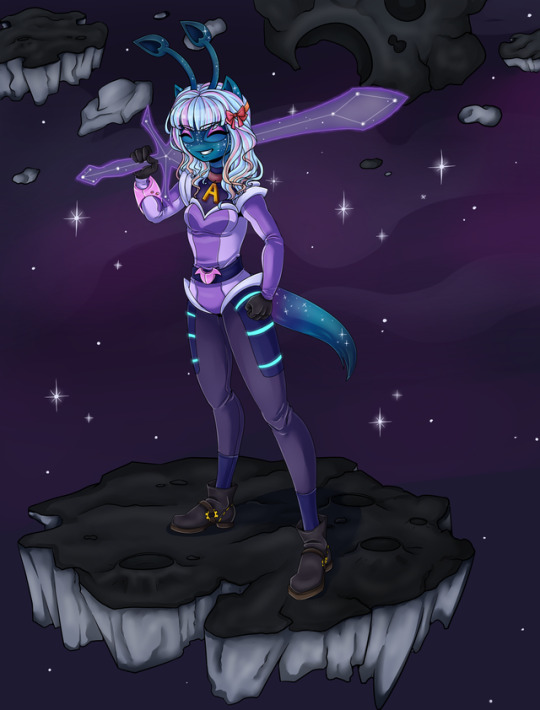
Photo
Round 2 for NNTM Outfit based on the Dagger of the Desert Decided to go for a rouge assassin look of sorts
32 notes
·
View notes
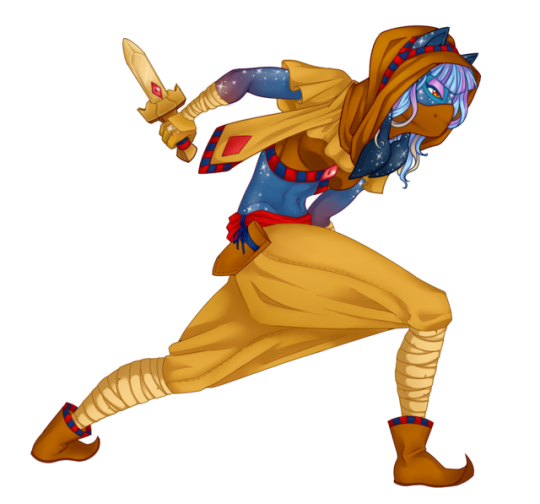
Photo
At last, a proper reference for Rajan. Next time I’ll have to draw her precious small wife.
#bara babe#Kind of cat girl?#Female Armor#Shame you can't see her GORGEOUS MUSCLES#She's here to kick your ass#Butch?
8 notes
·
View notes
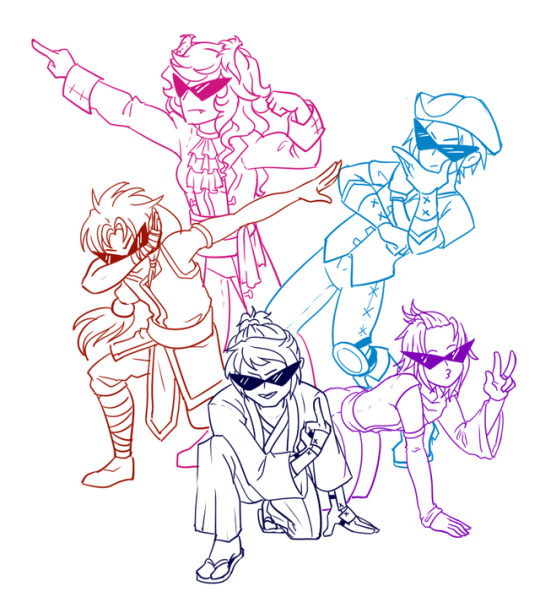
Photo
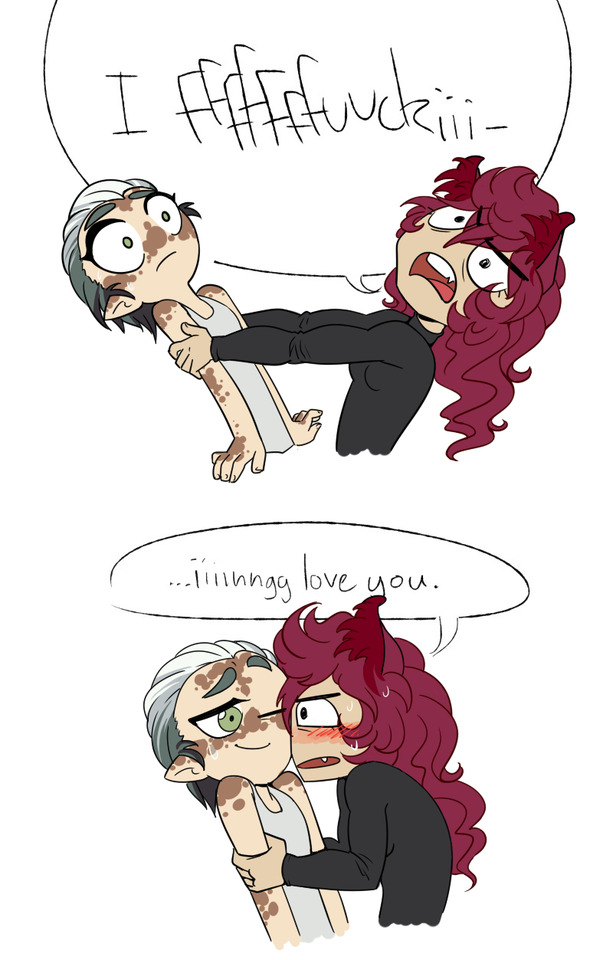
I was looking at those “Draw the squad” things for an hour and this one just screamed out to me and I had to.
http://snuffysbox.tumblr.com/post/166337510272/draw-your-otp-i-guess-idk-this-is-what-staying Here’s the original
67 notes
·
View notes
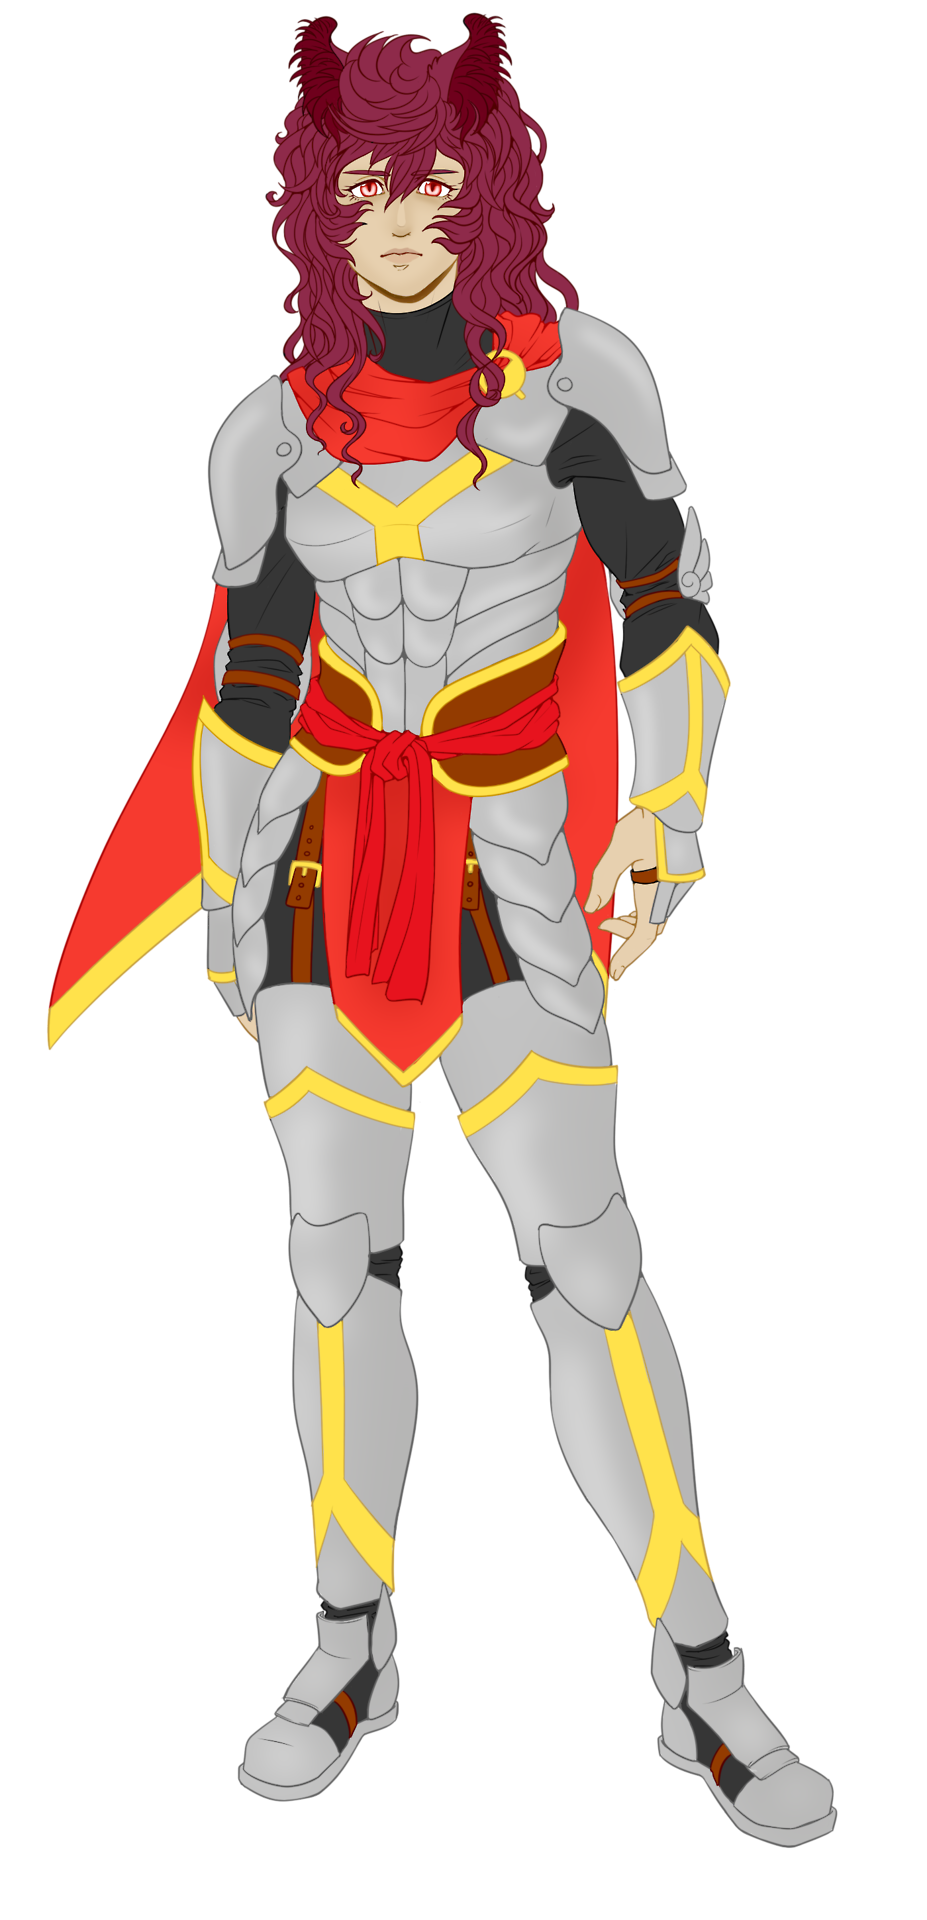
Photo
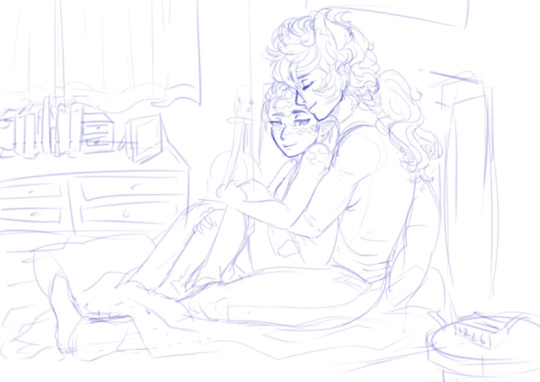
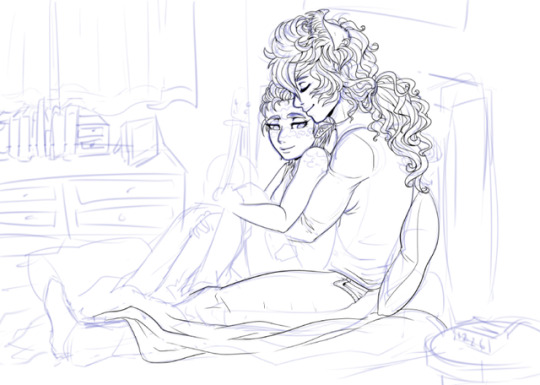
Work in progress. I hope I’ll actually manage to finish it. At least the line art.
29 notes
·
View notes
Photo


Parka Posy Meme/reaction image master post.
Wow, look at this dork.
5 notes
·
View notes
Photo
Ichamapen is back again for the BC this week!
17 notes
·
View notes
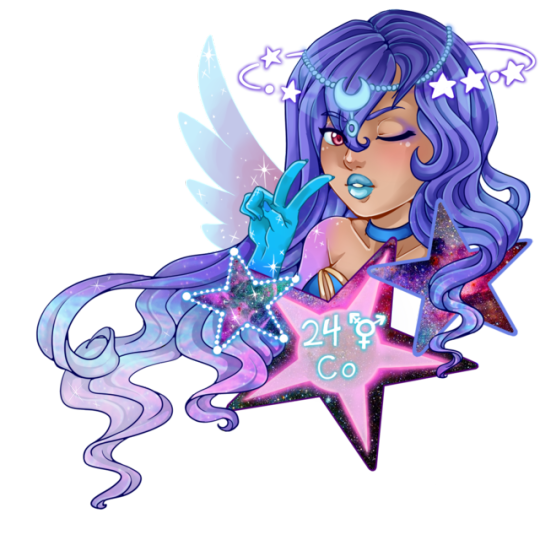
Photo

Hematite bead set I’m going to have to restring it, but I like how it turned out
#August 17 2017#hematite#gemstones#necklace#diy#homemade#rosary#Moon charm#beads#jewelry#sparkle goth
4 notes
·
View notes
Photo

September 2011 vs August 2017
6 years and many tool upgrades later, here I am. I wanted to redo an old favourite of mine and I’m pleased with the results.
9 notes
·
View notes
Photo
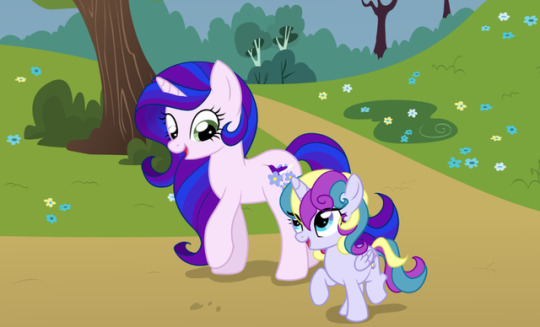
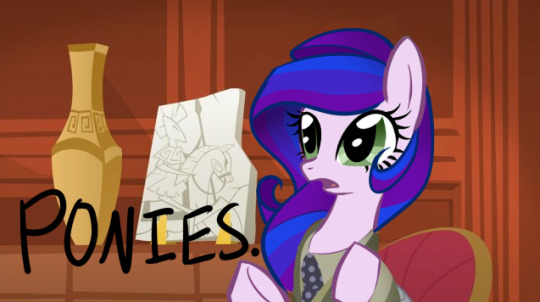
My little niece made a pony and I think she’s cute.
0 notes