
Don't wanna be here? Send us removal request.
Statistics
We looked inside some of the posts by modsgaming and here's what we found interesting.
Average Info
Notes Per Post
5
Likes Per Post
5
Reblog Per Post
0
Reply Per Post
0
Time Between Posts
6 days
Number of Posts By Type
Text
12
Last Seen Tumblr Blogs


Fun Fact
Women make up for the other 50% of Tumblr’s audience.
Text
🎮 GTA 5 Enhanced FIX: playGTAV.exe Missing & rune64.dll Not Loading | Mods Gamer77 🎮
Are you facing errors like “playGTAV.exe is missing” or “Could not load rune64.dll” while launching GTA 5 Enhanced? This video shows you the exact step-by-step method to fix these issues permanently, especially when they are caused by Windows Defender deleting or blocking important game files.
🎮 Common Errors Covered: ✔️ playGTAV.exe is missing ✔️ rune64.dll could not be loaded ✔️ Game not launching after mod installation ✔️ How to unblock files from Windows Defender
📌 Video tutorial
dailymotion
youtube
🧠 Tips: ⚠️ Always disable real-time protection before installing mods 🛡️ Add your GTA 5 folder to Windows Security’s exclusion list 🔁 Reinstall only the missing DLL or EXE files, not the whole game
📥 Download Links (if needed): 🔗 [Direct link to working playGTAV.exe & rune64.dll files] (Add your own link)
💬 Need Help? Comment below your issue and I’ll help you personally. Don't forget to LIKE, SHARE, and SUBSCRIBE for more GTA 5 modding & fix tutorials!
#GTA5Enhanced #GTAVFix #playGTAVmissing #rune64dllError #GTAModding #WindowsDefenderFix #GTA5Mods #FixGameError
0 notes
Text
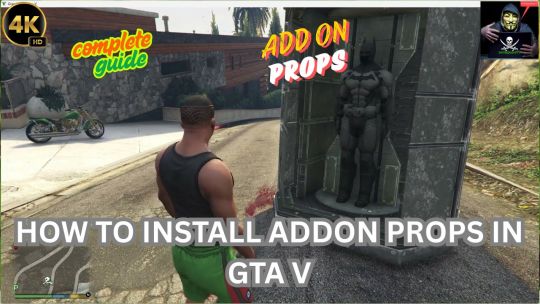
✅ HOW TO INSTALL ADD-ON PROPS IN GTA 5 [COMPLETE GUIDE]
Want to spice up your GTA 5 world with custom furniture, signs, anime statues, or modded props? Here's a super easy step-by-step guide to installing Add-On Props into your game!
✅ WHAT YOU'LL NEED:
🧰 OpenIV → https://openiv.com
📦 AddonProps mod by Meth0d → Download here
🛠️ Optional: Menyoo / CodeWalker / Map Editor to spawn or place your props.
🔽 STEP 1: Install AddonProps
Extract the AddonProps ZIP file.
Open OpenIV, navigate to: mods\update\x64\dlcpacks\
Create a new folder named addonprops.
Paste the contents of dlcpacks\addonprops from the ZIP inside this folder.
✏️ STEP 2: Edit dlclist.xml
Go to: mods\update\update.rpf\common\data\dlclist.xml
Enable Edit Mode (top right in OpenIV).
Add this line at the bottom (but inside the <Paths> tag):
xmlCopy
Edit
<Item>dlcpacks:/addonprops/</Item>
🧩 STEP 3: Add Your Custom Props
Open props_editor.exe (included in the AddonProps folder).
Click "New Prop" and select your .ydr file.
Give your prop a name (no spaces).
Click "Save Props & Rebuild" – this will update the props list.
📁 STEP 4: Copy Files to Game
Go to: mods\update\x64\dlcpacks\addonprops\dlc.rpf\x64\props.rpf\
Place the generated .ydr and .ytyp files here from the AddonProps folder.
🎮 STEP 5: Spawn In-Game
Use a map editor like:
🧭 Menyoo → Object Spooner > Search by name (prop_customname)
🏗️ CodeWalker → Load & place props in .ymap files
💡 PRO TIP:
✅ Great for building custom interiors ✅ Works in SP & RP maps ✅ You can make furniture, decoration, game-themed props — anything!
video tutorial
dailymotion
youtube
💬 Have questions? DM me or drop a reply! 🔁 Like & reblog if this helped!
#GTA5Mods #GTA5 #AddonProps #GTA5Tutorial #GTAVModding #RockstarEditor #OpenIV #GTAVCustomProps #Menyoo #MapEditor
0 notes
Text
🔨 How to Install THOR in GTA 5 – Full Installation Guide 2025 ⚡
urn into the God of Thunder in Grand Theft Auto V!
Hey GTA V modders! Want to bring Mjolnir, lightning strikes, and epic Norse powers into Los Santos? Here's a step-by-step Thor Mod Installation Guide to make it happen! Works for 2025 latest GTA V version (Epic/Steam).
✅ Requirements Before Installing
Make sure you’ve got these installed:
✅ ScriptHookV
✅ ScriptHookVDotNet
✅ OpenIV
✅ NativeUI
✅ Thor Mod Files (by JulioNIB) – [Get from Patreon or other trusted site]
📦 Installation Steps
🔹 Step 1: Install ScriptHookV
Extract ScriptHookV.dll and dinput8.dll into your GTA V main directory.
🔹 Step 2: Install ScriptHookVDotNet
Drop ScriptHookVDotNet.dll, .xml, and .asi files into the GTA V main folder.
🔹 Step 3: Install Thor Mod
Unzip the Thor Mod archive.
Copy the ThorMod.asi and ThorMod files folder into your GTA V directory.
🔹 Step 4: Use OpenIV for Weapon Models
Open path: mods\update\x64\dlcpacks\THOR\dlc.rpf\x64\models\cdimages\weapons.rpf\
Drag and drop Thor’s Mjolnir .ydr, .ytd, .meta files here.
🔹 Step 5: Activate Thor Mod
Launch GTA V
Press Ctrl + N to open JulioNIB mod menu
Select Thor Script → Choose Thor character + powers.
⚙️ Optional (For Realism):
Install HD Thor Skin using AddonPeds
Place Thor.ydd, .yft, .ymt, .ytd in mods\update\x64\dlcpacks\addonpeds\dlc.rpf\peds.rpf
🎮 Controls
Hold F12 to call Mjolnir
Q / E / R / Mouse Click for lightning attacks
Shift + Jump = Fly like a thunder god!
VIDEO TUTORIAL
dailymotion
youtube
📌 Tags
#GTA5Mods #ThorMod #GTA5Thor #GTA5ScriptMods #JulioNIB #GTAV2025 #ThorGTA5 #HowToModGTA5 #GTA5SuperheroMods #ModdingTutorial #GamingMods #GTA5PC #GTA5InstallationGuide
1 note
·
View note
Text
📌 🎮 How to Use Mods in Fluffy Mod Manager | Install Mods in Uncharted 4 🔥
Hey gamers! 👋 Want to mod Uncharted 4 and give Nathan Drake a whole new look or experience? Here's a quick guide on how to use Fluffy Mod Manager — the easiest tool to manage and install mods for PC games like Uncharted 4!
🎯 Step-by-Step Guide:
✅ 1. Download Fluffy Mod Manager Head over to FluffyQuack’s official page and download the latest version.
✅ 2. Extract and Set Up Unzip the files and run Modmanager.exe. Select the game directory for Uncharted 4.
✅ 3. Install Mods Just drag and drop your .pak or mod folders into the Mods folder inside the Fluffy Mod Manager directory.
✅ 4. Activate Mods Launch Fluffy Mod Manager, go to the Mod List, and toggle ON the mods you want. That’s it!
✅ 5. Play Uncharted 4 Launch the game and enjoy your new mods — custom outfits, visuals, tweaks, and more! 🔥
🎥 Watch the full tutorial on my YouTube channel: [MODSGAMER77]
dailymotion
youtube
#uncharted4mods #fluffymodmanager #moddingguide #gamingtips #moddingcommunity #uncharted4pc #nathandrake #gamersofinstagram #pcgaming #tumblrmods
0 notes
Text
💥 Resident Evil 4 Remake - Chapter 1 Gameplay | JOHN CENA MOD | No Commentary 🎮
Mission Underway… and John Cena enters the horror! In this Chapter 1 gameplay of Resident Evil 4 Remake, we replace Leon S. Kennedy with WWE superstar John Cena using a character mod for an action-packed experience!
🔥 What to Expect in This Video: ✔️ Chapter 1 Full Gameplay with John Cena ✔️ No Commentary – Pure cinematic gameplay ✔️ High-Quality Mod Performance ✔️ Atmospheric horror meets wrestling-level badassery ✔️ Real-time cutscenes and combat
🛠️ Mods Used:
John Cena Leon Mod
RE4 HD Project & Graphics Enhancers
No HUD & Custom Settings (optional)
🎮 Game: Resident Evil 4 Remake (2023) 🎥 Part: Chapter 1 – The Beginning 🎮 Platform: PC | Ultra Settings
📢 Watch till the end for boss fights, creepy villagers, and intense survival moments!
Video 👇
youtube
dailymotion
⚙️ Stay tuned for Chapter 2 with even more chaos and mod fun!
👇 Support the channel: 🔔 Subscribe for more modded RE4 content 💬 Drop a comment if you want the John Cena mod link 👍 Like & Share if you enjoyed the show!
#ResidentEvil4Remake #JohnCenaMod #RE4Chapter1 #MODSGAMER77 #RE4NoCommentary #WWEinRE4 #RE4ModGameplay
0 notes
Text
🚨 How to Install Add-On Peds in GTA V (Part 1) | Add-On Peds Selector Installation Guide 🕹️
In this video, I’ll show you step-by-step how to install Add-On Peds in GTA V using the Add-On Peds Selector mod. This is Part 1 of the complete guide for creating and using custom characters like superheroes, anime icons, and more in GTA 5!
🛠️ What You'll Learn in This Video: ✔️ How to download and install Add-On Peds Mod ✔️ Install Add-On Peds Selector tool ✔️ Setup OpenIV properly ✔️ Basic ped installation explained ✔️ Common error fixes for beginners
📥 Required Tools & Downloads: 🔹 Add-On Peds Mod 🔹 ScriptHookV & ScriptHookVDotNet 🔹 OpenIV 🔹 NativeUI (for Add-On Peds menu) 🔗 All download links provided in Part 2!
⚠️ Make sure you have the latest GTA V game version and updated mod tools for best results.
video tutorial
dailymotion
youtube
💡 Coming Up in Part 2: How to add Superman, Iron Man, and Parmanu peds using this method!
👇 Stay connected: 🔔 Subscribe for Part 2 & future mods 💬 Comment below for help 👍 Like & Share if this helped!
#GTAVMods #AddonPeds #GTAVSuperheroes #GTAVModding #MODSGAMER77 #GTAVHindiTutorial
0 notes
Text
🛠️ How to Fix Resident Evil 4 Remake Crash After Windows 11 24H2 Update (AMD_AGS_X64.dll Error)
If you're running Resident Evil 4 Remake on Windows 11 and recently updated to version 24H2, you may have encountered crashes caused by the amd_ags_x64.dll file. Don’t worry — here’s how to fix it!
🔍 What’s the Problem?
After installing the 24H2 update, many users reported that Resident Evil 4 Remake crashes instantly on launch. The error often points to the amd_ags_x64.dll file — a dynamic link library related to AMD’s GPU driver tools.
This can affect both AMD and NVIDIA users due to how the game handles GPU functions.
✅ Solution (100% Working Fix)
Follow these steps to resolve the crash:
🔧 Step-by-Step Guide:
Navigate to the Game Directory Find the Resident Evil 4 Remake install folder. Example: javaCopyEditC:\Program Files (x86)\Steam\steamapps\common\RESIDENT EVIL 4 BIOHAZARD RE4
Backup the Existing DLL Locate the file named amd_ags_x64.dll ➤ Right-click → Copy → Save it in a backup folder.
Replace the DLL with a Working Version 🔗 Download a working version of amd_ags_x64.dll from a trusted source (or link from video/pinned comment). ➤ Paste it into the game directory, replacing the existing one.
(Optional) Update GPU Drivers
AMD Users: Update via AMD Adrenalin
NVIDIA Users: Update via GeForce Experience
Restart Your PC and relaunch the game.
⚠️ Notes:
This is a temporary fix until Capcom or Microsoft provides a patch.
Always scan downloaded DLLs with antivirus software.
Works for both Steam and cracked versions (at your own risk).
📁 Download Link for Fixed DL
Video tutorial
dailymotion
youtube
💬 Still Not Working?
Let me know in the comments or message me directly. I’ll help you troubleshoot!
#ResidentEvil4Remake #Windows1124H2 #RE4CrashFix #AMDAGSX64DLL #DLLFix #GamingFix #PCGamingHelp #SteamGames #SurvivalHorror #TumblrGaming #ModsGamer77
0 notes
Text
🎮 How to Download & Install Fluffy Mod Manager – Step-by-Step Tutorial 💻
Want to start modding games like Resident Evil 4 Remake, DMC5, or RE Village? You need the Fluffy Mod Manager — and I’ll show you exactly how to get it working ✅
📥 Download Link (Official): 🔗 https://www.nexusmods.com (Search: Fluffy Mod Manager)
📺 Watch the Tutorial: ▶️ YouTube:
youtube
📽️ Dailymotion:
dailymotion
🛠️ What You’ll Learn:
Where to download Fluffy Mod Manager safely
How to extract and set it up
How to install and manage game mods
Common error fixes & tips
💬 Need help? Leave a comment — I got you! ✨ Follow [modsgamer77] for more modding tools, tutorials & gaming content!
#FluffyModManager #ModdingTools #GameMods #ResidentEvilMods #DMC5Mods #GamerTips #modsgamer77
0 notes
Text
🔧 Fix Resident Evil 8 Crash at Startup | Windows Defender Blocking Game File Issue
Hey survivors! 🧟♂️
If your Resident Evil 8: Village is crashing on launch or right after the Capcom logo, don’t panic — you're not alone! This issue is often caused by Windows Defender blocking the main game executable or other essential files.
Here’s a simple fix to get you back into the horror without interruption. 👇
✅ Step-by-Step Fix for RE8 Crash (Windows Defender Issue)
Open Windows Security:
Press Win + S and type Windows Security.
Open it.
Go to Virus & Threat Protection:
Click on Virus & threat protection.
Scroll down and click on Manage settings under Virus & threat protection settings.
Add an Exclusion for RE8:
Scroll down and click Add or remove exclusions.
Click on + Add an exclusion and choose Folder.
Navigate to your Resident Evil 8 game folder and select it.
Example path: C:\Program Files (x86)\Steam\steamapps\common\Resident Evil Village
Restart Your PC (Recommended):
After adding the exclusion, restart your computer to apply the changes.
🔄 Optional: Verify Game Files (Steam)
Just in case something got deleted:
Open Steam Library
Right-click Resident Evil Village
Go to Properties > Installed Files
Click Verify integrity of game files
Video tutorial
dailymotion
youtube
🧠 Why This Happens:
Windows Defender sometimes mistakenly detects certain .exe files or mod-related content as threats, especially with newer updates. Adding an exclusion ensures it doesn’t interfere with your gameplay.
💬 Still Having Issues?
Drop a comment below or contact me through the contact form! I’ll help you troubleshoot further. And don’t forget to share if this fix helped you!
Stay spooky, ~ modsgamer77
3 notes
·
View notes
Text
FIXED SOUND ISSUE IN GTA 5 | NO SOUND IN GTA 5 | TUTORIAL | COMPLETE GUDE TO FIX SOUND | MG77
🎧 How to Fix Sound Problem in GTA 5? 📅 Posted by modsgamer77 📍 April 20, 2025
🎮 Facing No Sound in GTA 5? No gunshots, no background music, no car engine? 😩 Don’t panic — here’s your ultimate fix!
🛠️ Solution 1: In-Game Audio Settings
Go to Settings → Audio
Set Output to Default
Max out Music Volume, SFX Volume, Dialogue Volume
🔄 Solution 2: Fix Windows Sound Settings
Right-click on the sound icon → open volume mixer
Go to app used system sound
some its muted
unmuted the gta 5 sound
🧹 Solution 3: Delete Settings File
Navigate to: Documents > Rockstar Games > GTA V
Delete the file: settings.xml
Start the game again (a fresh settings file will be created)
🧪 Bonus Tip: Verify Game Files (Steam Users)
Open Steam
Go to Library → Right-click GTA V → Properties
Click Local Files → Verify integrity of game files
📹 Watch My Video Tutorial:
youtube
dailymotion
📢 Follow Me for More Fixes & Mods! 👉 Subscribe my channel: modsgamer77 👉 Follow for daily modding content 🎮 Hashtags: #GTA5 #SoundFix #GamingTips #modsgamer77 #GameMods #Dailymotion
1 note
·
View note
Text
dailymotion
HOW TO INSTALL ADD ON PROPS | COMPLETE GUIDE | FASTEST TUTORIAL | GAT V MODS | MODS IN GTA 5 | MG77 #gta #gamingcommunity #mods #gtav #gaming #gtaonline #modsgta5 #completeguide #fastest #gamingvideos AddonProps is a mod/script that allows you to add new prop models to your game without replace any file. Props Editor it's the tool to modify the game files, it generates the .ytyp file to be imported to props.rpf when you add/modify props. Mod Installation: - Import addonprops folder to your dlcpacks folder (You GTA V Folder\mods\update\x64\dlcpacks\). - Using OpenIv, extract the file dlclist.xml from mods\update\update.rpf\common\data) - Add to your dlclist.xml the line: Supported props: - YDR, YFT props files - Props with collisions and props without collisions - Props with external textures (YTD) and props with embbed textures Adding props: - Using OpenIV, import the files (YDR,YFT, textures..) of the prop to dlcpacks/addonprops/dlc.rpf/props.rpf - Open Props Editor.exe and in "Props" tab click in the "Add Prop (Manual)" button or if you have the JSON code of the prop you can add using the "Add Prop (JSON)". - After adding the prop infos, click "Rebuild" - A file(def_props.ytyp) will be generated in "rel" folder. - Import this file to dlcpacks/addonprops/dlc.rpf/props.rpf - Done
Tools are used for installation
1 open iv
https://youtu.be/skE9TxL_9C0
2 menyoo trainer or map editer
https://youtu.be/KJqjWi-M4NE
https://youtu.be/aIlQ000p7CM
3 Script hook v
https://www.dev-c.com/gtav/scripthookv/
4 Script hook v .net
https://www.gta5-mods.com/tools/scripthookv-net
5 addon props
https://www.gta5-mods.com/tools/addonprops
youtube
0 notes
Text

This is a tool reminiscent of MTA:SA Map Editor days. You have a freecam to navigate around, and you can spawn objects (with preview!), move them around with your mouse or keys. Then you can save or load your map in various formats, currently supported are XML and Simple Trainer format (objects.ini).
Installation
1. Install ScriptHookV
https://www.dev-c.com/gtav/scripthookv/
2. Install latest ScriptHookVDotNet, read the requirements. https://www.gta5-mods.com/tools/scripthookv-net
3. Download last NativeUI https://github.com/Guad/NativeUI/releases
4.Download map editor
https://www.gta5-mods.com/scripts/map-editor-oldnapalm
5. Move all contents of the .zip into your /scripts/ directory. If it doesn't exist, create one.
Controls F7 or R3 + LB - Open main menu. WASD or Left Stick - Fly around while inside map editor, or when having an object selected, move/rotate the object. Q/E or LB/RB - While having an object selected, move up/down the object, or rotate it. F or Controller Y - Open the object spawning menu. P or Controller Pause - Open the ped spawning menu. V or Controller Back - Open the vehicle spawning menu. Arrow Up or DPAD Up - Spawn a marker. Shift or Controller A - Fly/Move/Rotate objects faster. Alt or DPAD Down - Fly/Move/Rotate objects slower. Control or L3 - While having an object selected, switch from moving to rotating. The arrow above the object will switch colors. Yellow for moving and red for rotating. Mouse Left Click or RT - Select an object while looking at it. Mouse Right Click or LT - Move an object with the mouse while looking at it. Mouse Wheel or RB/LB - Rotate an object while having it snapped to your cursor. C or R3 - Copy an object while looking at it or having it selected. Del or Controller X - Delete an object while looking at it. Saving and Loading Maps You can load and save your maps as XML files or as object.ini files. When selecting load or save from the main menu, you will be prompted to enter a filename. Note that when loading maps, they stack, so use New Map to clean any objects. You can automatically load maps by creating a directory in the scripts folder named "AutoloadMaps". Any file ending with the .xml or .ini extension will be loaded on gamestart. These maps will save with you when you save your current map, so before creating a map, use New Map
compete video
dailymotion
youtube
0 notes