
No screams, just love. If you can't get it, "sudo apt-get" it.
Don't wanna be here? Send us removal request.
Statistics
We looked inside some of the posts by proxyglider and here's what we found interesting.
Average Info
Notes Per Post
879K
Likes Per Post
452K
Reblog Per Post
427K
Reply Per Post
498
Time Between Posts
3 months
Number of Posts By Type
Text
11
Photo
2
Video
4
Last Seen Tumblr Blogs


Fun Fact
Tumblr.com rank in the US is 25.
Text

Ray Bradbury, The Martian Chronicles
4K notes
·
View notes
Photo


the end of The Big Short isn’t fucking around
253K notes
·
View notes
Text
The adage "Keep it simple, but not too simple" is important in software development because it strikes a balance between making the code easy to understand and maintain, while still providing the necessary functionality.
Simple code is easier to read, debug, and modify, which can lead to fewer bugs and faster development. However, if the code is too simple, it may not be able to handle all of the required functionality. This can lead to the need for additional code to be added later, which can make the overall system more complex and harder to understand.
Striking the right balance between simplicity and functionality can help ensure that the software is reliable, maintainable, and easy to understand.
12 notes
·
View notes


Text
Install Windows 11 on Unsupported Hardware
Although I understand the reason for the need to get better hardware, I don't agree with the Windows 11 initiative. It stinks of the predictable Microsoft schemes.
Mostly what I don't understand is releasing Windows 11 well in advance of the Windows 10 end of life. They promise to continue supporting Windows 10, but... really? I've already had several updates on Windows 10 that have compromised the speed of my computer. Microsoft is pulling the same crap it usually does. Release an upgrade, then force everyone else to accept it by sabotaging their software.
Anyway, I found a wild blog post that explains how to bypass all the hardware checks for Windows 11, install Windows 11 on unsupported hardware, and Windows Update still works!
I'm going to be upgrading my computer now.
Just for reference, my computer (although brand-new) does not meet the requirements for Windows 11

According to the PC Health app, it's my processor that is out-of-date.

But I'm going to upgrade anyway.
Creating a Windows 11 Boot Disk
The approach will be to use a Windows 10 installer USB, created with the Media Creation Tool and combine that with the Windows 11 installation files. That way the additional hardware checks are not done and Windows 11 can be installed without further issues.
The first thing you'll need is the Media Creation Tool. You can download that from https://www.microsoft.com/en-us/software-download/windows10

Next, we also need the ISO of Windows 11. That one can be downloaded over here: https://www.microsoft.com/en-us/software-download/windows11

Run the Windows 10 Media Creation Tool
Once we have these two files, we can insert the USB drive which we will use. It has to be at least 8 GB in size. Then start the Windows 10 Media Creation Tool.
After the initial “Getting a few things ready” wait and accepting the license, choose “Create installation media” and click Next:

In the next screen, select the language of choice and continue with Next again.
IMPORTANT!! The Windows 10 and Windows 11 choices must be the same. If you choose English for Windows 11, you must download a Windows 10 English version as well.
After some time, the media will download and create you a new Windows 10 USB installer
This and downloading the Windows 11 ISO will feel like it takes forever! But persevere and you will reap the rewards...
Copy the Windows 11 files to the USB drive
At this point we have a regular Windows 10 installation USB drive.

On the drive, the actual Windows 10 is contained in the file \sources\install.esd:

If we mount the Windows 11 ISO by double-clicking on it in explorer, we can see that here we have \sources\install.wim. This is the file that we will use to replace \sources\install.esd on the USB drive:

Delete install.esd from your Windows USB.
Now we're going to copy install.wim into the same folder. A problem though; Windows 10 formatted the drive as FAT32 and it only takes files that are 4GB or less, and install.wim is 4.45GB.
What we're going to do is split the wim file with Wimlib. This is a utility designed exactly with that purpose (work with .wim files). You can download the latest version from https://wimlib.net/:
Working with WimLib
Extract the contents of the downloaded file and open a command prompt. Take note of the drives letters for both the USB drive (D: in my case) and the mounted ISO (F: in my case):
Then navigate to the downloaded Wimlib folder and execute the following:
wimlib-imagex.exe split g:\sources\install.wim d:\sources\install.swm 4000
Now your flash drive is loaded with Windows 11 install files.
Once you reboot your computer you will be able to install Windows 11 with it, regardless of the hardware it is being installed on.
1 note
·
View note

Text
The human body is unexpectedly quiet for such a complex machine.
903 notes
·
View notes
Text
The sad truth of this world...
If you turn off the news, you will be uninformed. If you turn on the news, you will be misinformed.
#thoughts from the shower#water based introspection#is no news better than fake news?#is fake news better than no news?
707 notes
·
View notes
Text
How to install QEMU/KVM and create a Windows 10 virtual machine on Debian
If you’re using Linux, you don’t need VirtualBox or VMware to create virtual machines.
You can use KVM – the kernel-based virtual machine – to run both Windows and Linux in virtual machines.
You can use KVM directly or with other command-line tools, but the graphical Virtual Machine Manager (Virt-Manager) application will feel most familiar to people that have used other virtual machine programs.
Virtual machines are amazing for two reasons! They completely defuse the argument over having to choose which operating system to use, because you can use them all.
However, online tutorials are only cool as long as they stay up-to-date, and the reason for this blog entry is that I’ve noticed a lot of KVM tutorials online are around 2017, use old packages, old commands, or are just plain obsolete. This blog post attempts to remedy this by offering a solution that is current for Debian in 2021.
I wanted to install a Windows 10 virtual machine on my Debian build. To begin with, you’re going to need an up-to-date copy of Windows 10 in an ISO. You can download that directly from Microsoft at https://www.microsoft.com/en-us/software-download/windows10ISO
Now open your Terminal.
Can You Go Virtual?
KVM only works if your CPU has hardware virtualization support – either Intel VT-x or AMD-V. There are two commands that can be run to determine if you have hardware virtualization support.
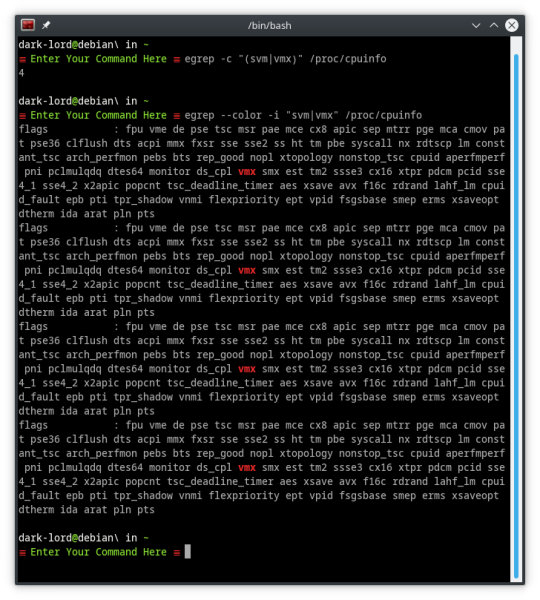
egrep -c "(svm|vmx)" /proc/cpuinfo
This command will count the number of processor cores that can run svm or vmx virtualization. The resulting answer MUST be higher than 0.
egrep --color -i "svm|vmx" /proc/cpuinfo
This command lists all the processor modes in /cpuinfo and highlights either svm or vmx. If you don’t see at least one of those modes highlighted, abort!
Let’s Install QEMU/KVM
Once you’ve confirmed that your computer supports virtualization, let’s move on to the actual install process.
QEMU/KVM needs libvirt installed to work correctly. Older tutorials advised installing the package libvirt-bin; this package, it seems, no longer exists in Debian repos.
Instead of trying to figure out by trial-and-error which libvirt package to install, we’re going to ignore the libvirt requirement for the moment, and let APT choose which package and version to install
sudo apt install qemu-kvm bridge-utils virt-manager
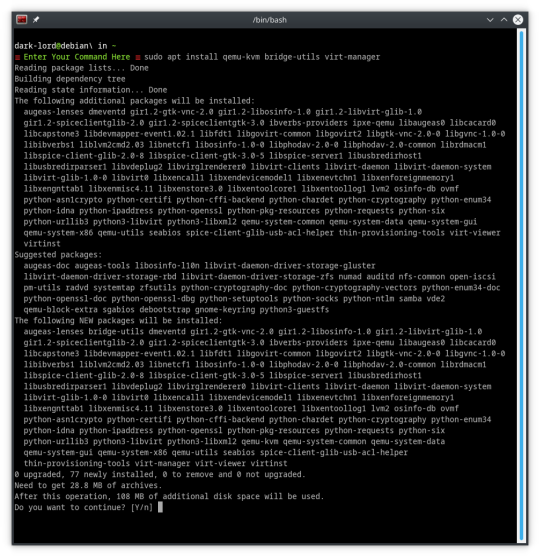
And it looks like that worked! APT traced the package tree and figured out that we need libvirt0 and will install it to satisfy the dependencies.
Don’t Get More Complicated
Other, older, tutorials I’ve seen advise adding the user to the libvirtd group. However, as we’ve already seen, libvirt packages moved on, and it seems libvirtd did too.
There is no need to add your user to the libvirtd group, because there is no libvirtd group, and you don’t need to be a member of this group to run virtual machines.
The only requirement at this point is that you must run any virtual-machine as root or sudo.

When you first run virt-manager, it will ask you to enter your root or sudo password to connect to QEMU/KVM
Installing Windows 10 in a Virtual Environment
Now, down to business!
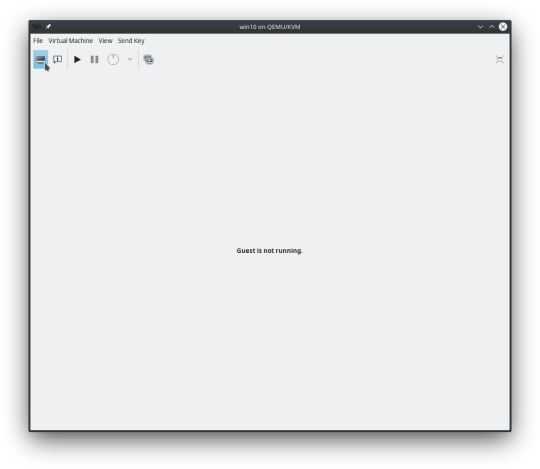
The Virtual Machine Manager window likely looks like this.
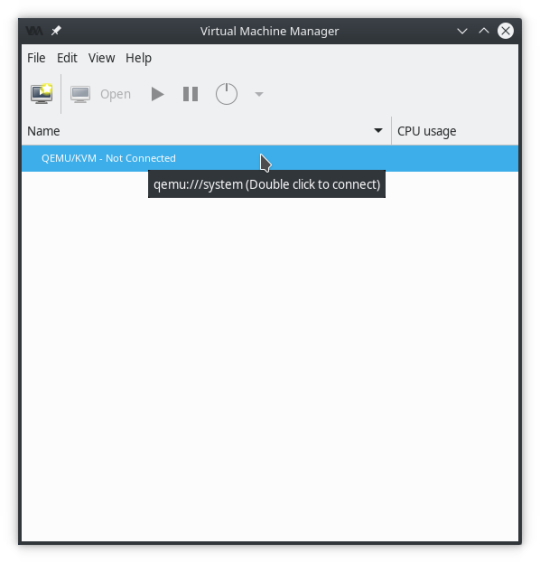
Do what it says. Double Click! Once the “Not Connected” message goes away, QEMU/KVM is ready to be built and virtualized on.
Right-click on QEMU/KVM and click “New”
This will create a New Virtual Machine, that will have QEMU/KVM as its hypervisor.

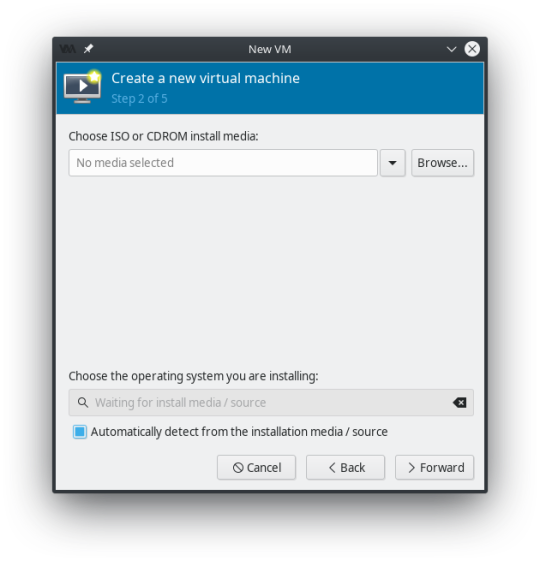
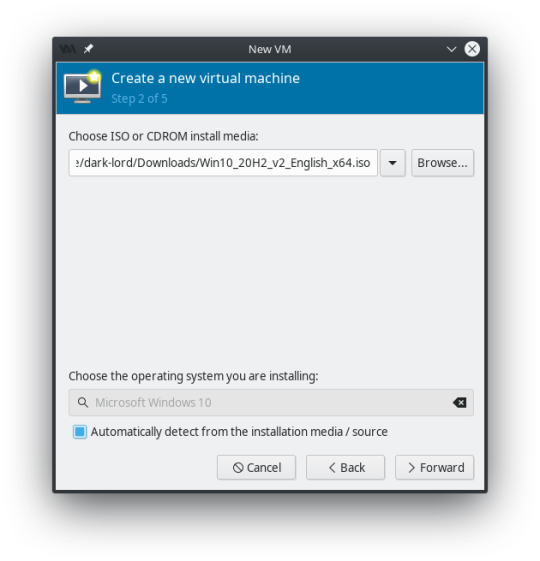
Remember that Windows 10 ISO we downloaded at the beginning of all this? We’re going to Browse to find it... and click “Choose Volume” when it’s selected.

This should automatically detect that it’s a Windows 10 ISO and select the operating system type below. However, if it doesn’t uncheck the box “Automatically detect from the installation media / source” and find the operating system you are installing.
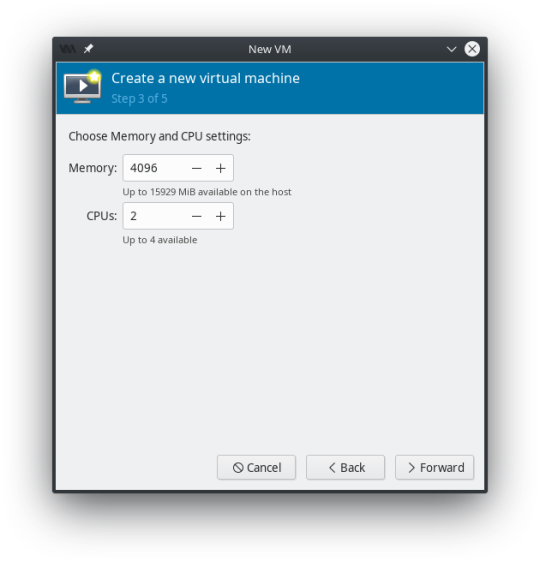
You can change your Memory and CPU settings to whatever you prefer at this point. Remember to keep a little in reserve for the host system. I changed mine to 8192 Memory, and 3 CPU’s

For Step 4 set up your storage! 40 GiB should be considered a minimum for Windows 10, as Microsoft loves their bloatware!

Step 5 summarizes all the details you entered on steps 1-4.
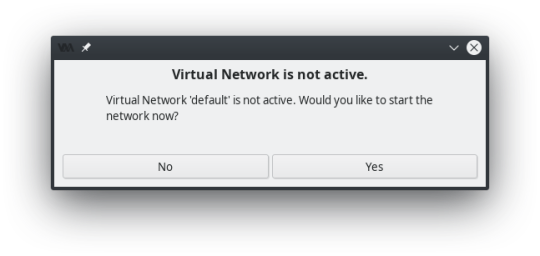
If this pops up when you hit finish, YES, you need the Virtual Network active...
This brings you to the main configuration screen. Click “Begin Installation” at the top of the window... Windows 10 will begin installing.
Now we wait...
And wait...
And wait...
Windows 10 takes a long time to install compared to Linux distros doesn’t it?
Making External Connections
So now that Windows 10 is installed, you’ll likely need more than just the barebones operating system to do your work.
Would you like to use Zoom? You’ll need a webcam for that, and that means you’ll need to connect a USB device into your virtual machine and set-up the webcam.
Need to move files quickly in and out of the virtual machine? Plug a USB stick into the computer, and set up a USB connection in the virtual machine so it can access the USB as a drive.
This all happens after Windows 10 is installed, and the virtual machine has been powered off and is inactive. Your hypervisor QEMU/KVM window should look like this.
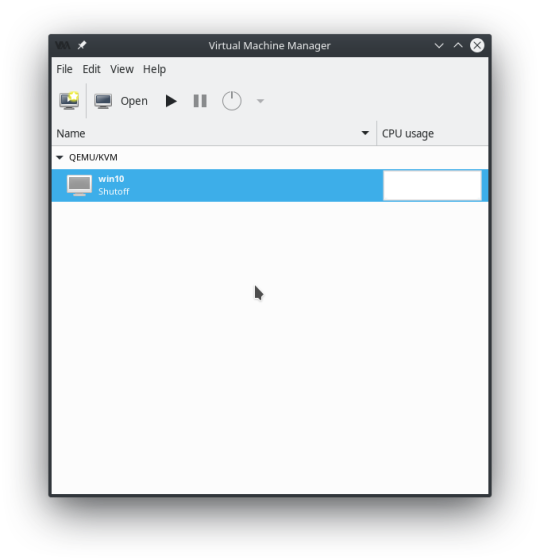
Double-click on the Virtual Machine to bring up the Overview / Launcher window.

Here you can change all the initial setup options you made, as well as add new options! On the left-side pane at the bottom of the screen, you will see “+ Add Hardware”. Click that to set up a new USB connection.
I’m going to add my existing webcam from Debian into this virtual machine.

Click USB Host Device on the left side, and find the existing USB device on the right side that you want to add to the virtual machine.
As you can see from the picture, I’m adding my webcam, but the entry right below the webcam is for a SanDisk Cruzer USB stick that I could also add (that would work as an external drive in Windows).

When the device is added, you’ll see a new hardware connection in the left-side pane of the virtual machine overview screen.
Switch over to the Graphical Console...
...then click the Play button to start booting your virtual machine and test to make sure the changes you made are working correctly.
1 note
·
View note

Video
this whole clip is gold, but the zoom-in after jacques’ comment makes me lose it every time
83K notes
·
View notes
Text
This is the greatest thing next to the Peasant Railgun!
Rather then being repelled, vampires are driven into a culinary rage by garlic, and spend the next 1d6 rounds punching the dish in question.
17K notes
·
View notes
Video
Revenge of the Hamster, Part Deux
i dont know what I was expecting but i was NOT expecting that squeaky hamster voice to come out of that mans mouth completely unedited
47K notes
·
View notes
Video
Operation Kevin is a go...
This made my inner child soooo happy.
67K notes
·
View notes
Video
I LOVE every bit of this video!!
How to make Dead Chicken With Old Milk. (via jackapollo)
204K notes
·
View notes
Text

Of all the issues I've had with the TSA, not a single one is about the dogs having pointy ears.
0 notes
Text
“There is no problem in computer science that can’t be solved using another level of indirection. But that usually will create another problem”
— David Wheeler
66 notes
·
View notes